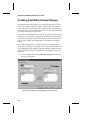
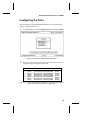
1
COVER FOR PREPRINTED SHELL 511589-00 REV D USER’S GUIDE DURALAN™ FAST ETHERNET NICS ANA™-69000/62000 FAMILY R Adaptec, Inc. 691 South Milpitas Boulevard Milpitas, CA 95035 © 1999 Adaptec, Inc. All rights reserved. Adaptec, and the Adaptec logo are trademarks of Adaptec, Inc. which may be registered in some jurisdictions. Printed in Singapore STOCK NO.: 512293-00, Rev. A DK 4/99 DuraLAN™ Fast Ethernet NICs Including Duralink64™ Software ANA-69000/62000 Family User’s Guide R Copyright © 1999 Adaptec, Inc. All rights reserved. No part of this publication may be reproduced, stored in a retrieval system, or transmitted in any form or by any means, electronic, mechanical, photocopying, recording or otherwise, without the prior written consent of Adaptec, Inc., 691 South Milpitas Blvd., Milpitas, CA 95035. Trademarks Adaptec, the Adaptec logo, ANA, Duralink, and DuraLAN are trademarks of Adaptec, Inc. which may be registered in some jurisdictions. Windows NT is a trademark, Windows, Windows 95, and Windows 98 are registered trademarks of Microsoft Corporation in the U.S. and other countries used under license. EtherChannel is a registered trademark of Cisco Systems, Inc. NetWare is a registered trademark of Novell, Inc. All other trademarks are owned by their respective owners. Changes The material in this document is for information only and is subject to change without notice. While reasonable efforts have been made in the preparation of this document to assure its accuracy, Adaptec, Inc. assumes no liability resulting from errors or omissions in this document, or from the use of the information contained herein. Adaptec reserves the right to make changes in the product design without reservation and without notification to its users. Adaptec Technical Support and Services If you have questions about installing or using your Adaptec product, check this user’s guide first—you will find answers to most of your questions here. If you need further assistance, please contact us. We offer the following support and information services: Electronic Support Technical information, including product literature, answers to commonly asked questions, information on software upgrades and other topics is available electronically through the following: ■ Adaptec World Wide Web (WWW) site at http://www.adaptec.com. ■ File Transfer Protocol (FTP) server at ftp.adaptec.com. ■ Adaptec USA Bulletin Board Service (BBS) at 408-945-7727; supports up to 28,800 bps (bits per second), 8 data bits, 1 stop bit, no parity. No product literature is available on the Adaptec BBS. ■ Interactive Fax System at 303-684-3400; available 24 hours a day, 7 days a week. ii Technical and Product Support ■ For technical support and information about many of Adaptec’s electronic support services, call 800-959-7274 or 408-945-2550, 24 hours a day, 7 days a week. The system prompts you with questions regarding your problem and then provides step-by-step troubleshooting instructions. ■ To submit your electronic mail message to Adaptec Technical Support use the product support information Webmail form at http://www.adaptec.com/support/webmail.html. ■ To speak with a product support representative, call 408-934-7274, M–F, 6:00 A.M. to 5:00 P.M., Pacific Time. After hours, on weekends, and on holidays, product support is also available for a fee at 800-416-8066. Sales and Ordering Information ■ For sales information, call 800-959-7274 or 408-945-2550, M–F, 6:00 A.M. to 5:00 P.M., Pacific Time. ■ To order Adaptec software and SCSI cables, call 800-442-7274 or 408-957-7274, M-F, 6:00 A.M. to 5:00 P.M., Pacific Time. ■ To request additional documentation for Adaptec products, call 800-934-2766 or 510-732-3829, M–F, 6:00 A.M. to 5:00 P.M., Pacific Time. Class B Device Certification Statements Federal Communications Commission Radio Frequency Interference Statement WARNING: Changes or modifications to this unit not expressly approved by the party responsible for compliance could void the user’s authority to operate the equipment. This equipment has been tested and found to comply with the limits for a Class B digital device, pursuant to Part 15 of the FCC rules. These limits are designed to provide reasonable protection against harmful interference in a residential installation. This equipment generates, uses, and can radiate radio frequency energy, and if not installed and used in accordance with the instruction manual, may cause harmful interference to radio communications. However, there is no guarantee that interference will not occur in a particular installation. However, if this equipment does cause interference to radio or television equipment reception, which can be determined by turning the equipment off and on, the user is encouraged to try to correct the interference by one or more of the following measures: ■ Reorient or relocate the receiving antenna. ■ Increase the separation between equipment and receiver. ■ Connect the equipment to an outlet on a circuit different from that to which the receiver is connected. ■ Consult the dealer or an experienced radio/television technician for help. ■ Use a shielded and properly grounded I/O cable and power cable to ensure compliance of this unit to the specified limits of the rules. iii This device complies with part 15 of the FCC rules. Operation is subject to the following two conditions: (1) this device may not cause harmful interference and (2) this device must accept any interference received, including interference that may cause undesired operation. Adaptec, Inc. ANA-62011 ANA-69011 ANA-62022 ANA-62044 Tested To Comply With FCC Standards FOR HOME OR OFFICE USE Canadian Compliance Statement This Class B digital apparatus meets all requirements of the Canadian Interference-Causing Equipment Regulations. Cet appareil numérique de la classe B respecte toutes les exigences du Règlement sur le matérial brouilleur du Canada European Compliance Statement WARNING: This is a Class B product. In domestic environments this product may cause radio interference in which case the user may be required to take adequate measures. Safety Standards These products meet the following national and international regulations: ■ UL 1950 Standard for Safety of Information Processing and Business Equipment ■ IEC 950 Safety of Information Technology Equipment in Electrical Business Equipment ■ CAN/CSA-C22.2 # 950 Safety of Information Technology Equipment including Electrical Business Equipment To ensure safe operating conditions, it is recommended that these products be installed in UL Listed computers. iv Limited Warranty SOFTWARE. Adaptec, Inc. warrants to you that for a period of ninety (90) days from the date you receive this software Product the magnetic media contains an accurate reproduction of the Software. This limited warranty covers only the original user of the Product. If the Product media should become defective within the warranty period, Adaptec at its option, will repair or replace the Product media, provided it is delivered at your expense to Adaptec as provided below. Adaptec does not warrant that the product will be free from error or will meet your specific requirements. Except for the warranties set forth above, the Product is licensed “AS IS”, and ADAPTEC DISCLAIMS ALL OTHER WARRANTIES, EITHER EXPRESS OR IMPLIED, INCLUDING BUT NOT LIMITED TO IMPLIED WARRANTIES OF MERCHANTABILITY AND FITNESS FOR A PARTICULAR PURPOSE. HARDWARE. Adaptec, Inc. warrants to the original purchaser of this hardware Product that it will be free from defects in workmanship and materials, under normal use and service, for the lifetime of the personal computer in which it is installed from the date of purchase from Adaptec or its authorized dealer. In order for this warranty to be valid, this Product must remain in its original personal computer and be registered with Adaptec within one year of purchase. Otherwise, Adaptec warrants to the original purchaser of this Product that it is to be free from defects in workmanship and materails, under normal use and service, for a period of five (5) years from the date of purchase from Adaptec or an authorized dealer. Should this Product, in Adaptec’s opinion, fail to meet this warranty during the applicable warranty period, Adaptec will, at its expense and option, repair the defective Product or part or replace the defective item with an equivalent product or part, or refund the purchase price. All returned Products will become the property of Adaptec. At Adaptec’s option, replacement Products or parts may be new or reconditioned. Any replaced Product or part has a ninety (90) day warranty or the remainder of the initial warranty period, whichever is longer. Such remedy is your sole and exclusive remedy for breach of the above warranty. LIMITED WARRANTY SERVICE. Products requiring limited warranty service during the applicable warranty period should be delivered to Adaptec’s U.S. headquarters with proof of purchase. Products returned to Adaptec must be pre-authorized with a Return Material Authorization (RMA) number marked on the outside of the package, and packaged in the original (or equivalent) packaging material. If the delivery is by mail, you agree to insure the Product or assume the risk of loss or damage in transit. You also agree to prepay shipping charges to Adaptec. The repaired or replaced item, or refund, will be shipped to the Customer, at Adaptec’s expense, not later than thirty (30) days after receipt by Adaptec. GENERAL. This limited warranty does not extend to any Product which has been damaged as a result of accident, misuse, abuse, or as a result of unauthorized service or parts. Incidental or consequential damages, including without limitation loss of data, arising from breach of any express or implied warranty are not the responsibility of Adaptec and, to the extent permitted by law, are hereby excluded both for property damage, and, to the extent not unconscionable, for personal injury damage. Some states do not allow the exclusion or limitation of incidental or consequential damages for consumer products, so the above limitation or exclusion may not apply to you. This warranty gives you specific legal rights, and you may also have other rights which vary from state to state. For more information on how to obtain warranty service, write or telephone Adaptec at 691 South Milpitas Boulevard, Milpitas, CA 95035, (800) 959-7274. v ▼ ▼ ▼ ▼ Contents Part 1 Introduction to DuraLAN 1 Getting Started System Requirements ..............................................................1-2 Hardware Requirements ...................................................1-2 Software Requirements .....................................................1-2 Fast Ethernet ............................................................................1-3 Adaptec DuraLAN NICs ..........................................................1-3 Duralink64 Failover .................................................................1-6 Duralink64 Port Aggregation ...................................................1-7 FEC (Fast EtherChannel) .........................................................1-8 Advisories ................................................................................1-9 2 Introduction to Duralink64 Port Aggregation Traditional Network Configurations ........................................2-2 Servers with Duralink64 Port Aggregation ..............................2-5 Duralink64 Port Aggregation Example ............................2-5 Part 2 Installing the DuraLAN NIC 3 DuraLAN NIC Installation Important Note for Windows 95 Users! ...................................3-2 Installing the Appropriate NIC ................................................3-3 Installing the DuraLAN NIC ...................................................3-4 vii DuraLAN Fast Ethernet NICs User’s Guide Connecting the Network Cable ................................................ 3-6 Installing the Appropriate NIC Driver ..................................... 3-7 4 Network Configuration Examples Network Without Duralink64 Failover Protection .................. 4-2 Single Hub or Switch on an Ethernet Segment ....................... 4-3 Dual Hubs ................................................................................ 4-4 Dual Hubs with an Ethernet Switch ......................................... 4-5 Dual Hubs with Routers ........................................................... 4-6 Dual Hubs with a Four-Port NIC ............................................. 4-7 Part 3 The DuraLink64 Driver for Windows 5 Duralink64 Driver Installation for Windows Before You Begin .................................................................... 5-2 Note on DuraLAN NIC Ports ........................................... 5-2 Installing the DuraLAN Driver ................................................ 5-3 Windows NT 4.0 .............................................................. 5-3 Windows NT 3.51 ............................................................ 5-6 Windows 98 ...................................................................... 5-8 Windows 95 ...................................................................... 5-9 Windows 95 OSR2 .................................................... 5-9 Windows 95 OSR1 .................................................. 5-10 Installation Tips ..................................................................... 5-11 Windows 95 .................................................................... 5-11 Windows 98 .................................................................... 5-12 Windows Clients Using Novell Client32 ....................... 5-12 Removing Previously Installed Drivers ................................. 5-13 Windows NT 4.0 ............................................................ 5-13 Windows NT 3.51 .......................................................... 5-14 Windows 98 and 95 OSR1/OSR2 .................................. 5-14 viii Contents 6 Duralink64 Standard Driver for Windows Configuring the Standard Driver Ports in Windows NT 4.0 and 3.51 ................................................6-2 Configuring the Ports in Windows 98/95 ................................6-4 7 Duralink64 Failover for Windows NT Configuring the Ports ...............................................................7-2 Creating the Failover Pair ........................................................7-3 Windows NT 4.0 ...............................................................7-3 Windows NT 3.51 .............................................................7-6 Monitoring Failover Pairs ........................................................7-8 Note on DuraLAN NIC Ports ..................................................7-8 8 Duralink64 Port Aggregation for Windows NT Configuring the Ports ...............................................................8-2 Creating Port Aggregation Groups ..........................................8-4 Creating Fast EtherChannel Groups ........................................8-8 Assigning the TCP/IP Address ..............................................8-11 Modifying Groups ..................................................................8-13 Renaming Groups ...........................................................8-13 Adding or Removing Ports .............................................8-14 Checking System Status .........................................................8-17 Understanding the Status Tab .........................................8-18 Field Descriptions ....................................................8-18 Viewing the Groups .................................................8-19 Windows NT Performance Monitor ......................................8-20 ix DuraLAN Fast Ethernet NICs User’s Guide Part 4 The Duralink64 Driver for NetWare 9 Duralink64 Standard Driver for NetWare Before you Begin ..................................................................... 9-2 Note on NetWare ..................................................................... 9-2 Install of Duralink64 Driver during NetWare 5.0 Operating System Installation ............................................................................ 9-3 Installing the NetWare Standard Driver .................................. 9-4 Configuring the Ports ............................................................... 9-5 Assigning the Protocols ........................................................... 9-7 Viewing the Configuration .................................................... 9-10 Restarting the Server .............................................................. 9-11 Troubleshooting Tip ....................................................... 9-11 Removing Drivers .................................................................. 9-12 Removing the DuraLAN Standard Driver ...................... 9-12 10 Duralink64 Failover for NetWare Before you Begin ................................................................... 10-2 Note on NetWare ................................................................... 10-2 Installing the NetWare Failover Driver ................................. 10-3 Configuring the Ports ............................................................. 10-4 Creating the Failover Pairs .................................................... 10-6 Assigning the Protocols ......................................................... 10-9 Viewing the Configuration .................................................. 10-12 Copying and Saving the Configuration ............................... 10-13 Viewing the System Status .................................................. 10-14 Element Descriptions .................................................... 10-15 F Keys ................................................................... 10-15 Modifying the Driver Configuration ................................... 10-16 Removing Drivers ................................................................ 10-17 Removing the Duralink64 Failover Driver ................... 10-17 x Contents 11 Duralink64 Port Aggregation for NetWare Before you Begin ...................................................................11-2 Note on NetWare ...................................................................11-2 Installing the NetWare Port Aggregation Driver ...................11-3 Configuring Ports ...................................................................11-4 Creating Port Aggregation Groups ........................................11-6 Creating Fast EtherChannel Groups ......................................11-9 Assigning Protocols .............................................................11-12 Verifying Configuration .......................................................11-15 Copying and Saving the Configuration ........................11-16 Viewing System Status ........................................................11-17 System Status Data .......................................................11-17 Setting Time Intervals ...................................................11-18 Modifying Driver Configurations ........................................11-18 Removing Drivers ................................................................11-19 Removing the Duralink64 Port Aggregation Driver ....11-19 12 Installing Duralink64 NetWare Client Installing Novell Client32 ......................................................12-2 DOS ................................................................................12-2 Selecting Options .....................................................12-3 Editing startnet.bat ...................................................12-4 Connecting Clients to the NetWare Server .............12-4 Windows .........................................................................12-5 Connecting Clients to the NetWare Server .............12-5 Connecting Clients to the NetWare Failover Server ..............12-6 Connecting Clients to the NetWare Port Aggregation Server .....................................................12-7 xi DuraLAN Fast Ethernet NICs User’s Guide Part 5 Appendices A Cables and LEDs Connection Types ................................................................... A-2 Full Duplex Support ........................................................ A-2 Cable Requirements ................................................................ A-3 Straight-through Cable ............................................................ A-4 Pinout and Color Requirements .............................................. A-5 Diagnostics Loop-Back Cable ......................................... A-5 Diagnostic LEDs ..................................................................... A-6 LED Functions ................................................................. A-7 B Troubleshooting Tips Isolating Faulty Hardware ...................................................... B-2 Troubleshooting ...................................................................... B-2 Configuring the BIOS ............................................................. B-4 Frequently Asked Questions ................................................... B-5 Duralink64 Software And DuraLAN NICs General Questions ........................................................ B-5 Duralink64 v4.2 Failover Software Questions ................ B-7 Duralink64 v4.2 Port Aggregation Software Questions .. B-8 Duralink64 v4.2 Windows NT - General Questions ..... B-10 Duralink64 v4.2 Windows 95 and Windows 98 General Questions ...................................................... B-11 Windows 95 ............................................................ B-11 Windows 98 ............................................................ B-12 Duralink64 v4.2 NetWare - General Questions ............ B-12 C Duralink SNMP Agents Monitoring the NICs by SNMP .............................................. C-2 SNMP Support ........................................................................ C-2 xii Contents D The Diagnostics Utility Running the Diagnostics ......................................................... D-2 From the Hard Drive ........................................................ D-2 From the Floppy Drive .................................................... D-2 Diagnostic Tests ...................................................................... D-3 Index xiii ▼ ▼ ▼ ▼ Part 1 Introduction to DuraLAN ▼ ▼ ▼ ▼ 1 Getting Started In This Chapter System Requirements 1-2 Fast Ethernet 1-3 Adaptec DuraLAN NICs 1-3 Duralink64 Failover 1-6 Duralink64 Port Aggregation 1-7 FEC (Fast EtherChannel) 1-8 Advisories 1-9 This user’s guide describes how to install and configure Adaptec DuraLAN™ Fast Ethernet network interface cards (NICs). Please review the system requirements before you begin. User’s guide summary: ■ Part 1, Introduction to DuraLAN, describes how to install your Adaptec DuraLAN NIC. ■ Part 2, Installing the DuraLAN NIC, describes how to install and configure the DuraLAN Standard NIC driver in NetWare and Windows environments. ■ Part 3, The DuraLink64 Driver for Windows, describes how Duralink64 Failover adds value to your network and provides installation instructions for Windows NT and NetWare-based servers. 1-1 DuraLAN Fast Ethernet NICs User’s Guide ■ Part 4, The Duralink64 Driver for NetWare, describes how to create a virtual port by grouping ports to maximize bandwidth for your mission-critical applications. ■ Part 5, Appendices, provides supplemental information that may be required for a proper installation. System Requirements Hardware Requirements The minimum hardware system requirements for using the Adaptec DuraLAN NIC are as follows: System Component NIC Two and Four Port NICs Requirements ■ Available bus mastering PCI slot. ■ The most recent PCI system BIOS is recommended. ■ Intel x86 platform with single or multiprocessor. ■ 16-MByte RAM. ■ System BIOS supporting PCI-to-PCI bridge chip. ■ Multiport NICs require PCI 2.1 compliant bus. Software Requirements The minimum software system requirements are as follows: ■ Windows—Windows NT 3.51 or 4.0 Workstation or Server, Windows 95, or Windows 98. ■ NetWare—NetWare 4.x or 5.0. 1-2 Getting Started Fast Ethernet Fast Ethernet is a networking standard defined by the Institute of Electrical and Electronic Engineers (IEEE) in the IEEE 802.3u Specification. Fast Ethernet runs at 100 Mbps, or at 200 Mbps in Full Duplex mode. Fast Ethernet uses the same Carrier Sense Multiple Access with Collision Detection (CSMA/CD) architecture used on 10BASE-T and 10BASE-2 10 Mbps network specifications, which allows for easy integration with existing networks. Adaptec DuraLAN NICs Note: 64-bit NICs will also work in 32-bit PCI slots. Adaptec provides the following PCI 10/100 DuraLAN Fast Ethernet NIC models: ■ ANA-69011/TX Single32™—a single-port 32-bit NIC supporting autosensing between 10 and 100-Mbps line speeds. Single RJ-45 Por t 32-bit PCI 2.1 Bus Figure 1-1. ANA-69011/TX Single32™ DuraLAN NIC 1-3 DuraLAN Fast Ethernet NICs User’s Guide ■ ANA-62011/TX Single64™—a single-port 64-bit/32-bit NIC supporting autosensing between 10 and 100-Mbps line speeds. Single RJ-45 Port 64-bit PCI 2.1 Bus Figure 1-2. ANA-62011/TX Single64 DuraLAN NIC ■ ANA-62022—a two-port NIC that offers two high-performance 10/100 Fast Ethernet ports on a single 64-bit/32-bit NIC. Each port runs at independent speeds for maximum flexibility. This NIC supports Full Duplex to deliver speeds up to 400-Mbps cumulative throughput. RJ-45 Port 1 RJ-45 Port 2 64-bit PCI 2.1 Bus Figure 1-3. ANA-62022 DuraLAN NIC 1-4 Getting Started ■ ANA-62044—a four-port NIC that offers four high performance 10/100 Fast Ethernet ports on a single 64-bit/32-bit NIC. Each port runs at independent speeds for maximum flexibility. This NIC supports Full Duplex to deliver speeds up to 800-Mbps cumulative throughput. RJ-45 Port 1 RJ-45 Port 2 RJ-45 Port 3 RJ-45 Port 4 Figure 1-4. ANA-62044 DuraLAN NIC 1-5 DuraLAN Fast Ethernet NICs User’s Guide Duralink64 Failover Duralink64 Failover software provides protection from network-link failures on Fast Ethernet servers running mission-critical applications. During a port failure, Duralink64 Failover keeps the connection to the server live by moving all traffic on the affected segment to a backup port. When a failure is detected on the primary port, that port is disabled and the backup port takes over to continue data transmission, keeping the connection running without interruption. Duralink64 Failover is often used in a troubled environment to provide failover capabilities when any of the following conditions exist: ■ An Ethernet link loss ■ A watchdog timer expires ■ An abnormal hardware interrupt occurs ■ Abnormal Send/Receive counters, such as too many collisions or errors occur on the segment Duralink64 Failover supports Windows NT 4.0 and 3.51, and Novell NetWare 4.x and 5.0 based servers. Duralink64 Failover is compatible with Adaptec ANA™-69011/TX and ANA-62011/TX single-port NICs, ANA-62022 two-port NICs, and ANA-62044 four-port NICs. 1-6 Getting Started Duralink64 Port Aggregation Duralink64 Port Aggregation is a software package that provides network path redundancy and increased bandwidth for Fast Ethernet servers running mission-critical applications. Duralink64 Port Aggregation works by load balancing the throughput over multiple ports. With Duralink64 Port Aggregation, you can create a virtual port by grouping multiple ports together. This grouping distributes the network load by sharing the resources of all ports in a group. In the Port Aggregation group, one port becomes the “primary” port and its MAC address is given to the protocol. Thus, the group behaves as a single interface, allowing the software to manage the combined resources of the group efficiently. In the event of a port failure, the remaining ports carry the load and keep the network running and uninterrupted. Duralink64 Port Aggregation supports Windows NT 4.0 and 3.51, and Novell NetWare 4.x and 5.0 -based servers. Duralink64 Port Aggregation is compatible with Adaptec ANA-69011/TX and ANA-62011/TX single-port NICs, ANA-62022 dual-port NICs, and ANA-62044 quad-port NICs. 1-7 DuraLAN Fast Ethernet NICs User’s Guide FEC (Fast EtherChannel) Fast EtherChannel® (FEC) is a technology developed by Cisco Systems based on standard Fast Ethernet used in parallel to provide the additional bandwidth network backbones required today. FEC combines two or four Fast Ethernet links to single logical connection capable of carrying 800 Mbits/sec of aggregate full-duplex throughput. In addition to scalable bandwidth, the technology also provides fault tolerance and resiliency, protecting the network from outages due to failed links. Fast EtherChannel allows grouping of DuraLAN ports or NICs allowing full utilization of available bandwidth (up to 800 Mbits/sec). Up to four single port NICs, 2 two port NICs, or 1 four port NIC can be grouped. This technology also provides load balancing and management of each link by distributing traffic across multiple links in the channel. In addition, FEC technology provides redundancy in the event of link failure. Duralink64 v4.2 software and all of Adaptec DuraLAN NICs support Fast EtherChannel technology, allowing redundancy and high-speed aggregation between switches and servers. Fast EtherChannel is available on select Cisco Catalyst switches and Cisco routers. For additional information on Cisco’s Fast EtherChannel technology, visit the Cisco Systems web site: http://www.cisco.com/warp/public/729/fec 1-8 Getting Started Advisories This document includes three kinds of advisories. Note: Notes are reminders, tips, or suggestions that might simplify the procedures included in this document. ! Caution: Cautions alert you to actions that might cause damage to your system or your data. WARNING: Warnings alert you to actions that might cause injury to you or someone else. To avoid injury to people or damage to equipment and data, be sure to follow the cautions and warnings in this document. Adaptec does not claim to have included in this document every condition or situation that might require a caution or warning notice. Be sure to consult the documentation for your computer and any connected equipment when you are installing the equipment or changing its configuration. WARNING: Always use caution when handling electrical equipment! ❒ 1-9 ▼ ▼ ▼ ▼ 2 Introduction to Duralink64 Port Aggregation In this Chapter Traditional Network Configurations 2-2 Servers with Duralink64 Port Aggregation 2-5 This chapter compares traditional Ethernet configurations to Ethernet servers using Duralink64 Port Aggregation. These examples show the impact Duralink64 Port Aggregation has on network performance and hardware investment. 2-1 DuraLAN Fast Ethernet NICs User’s Guide Traditional Network Configurations The following three examples show some typical configuration methods. The figure below illustrates a single segment server initialized at 100 Mbps with Full Duplex Ethernet (FDE). In this example, the segmented server is limited to 200 Mbps. In addition, if the connection to the server fails, the network may go down. Clients Central switching area with lines to workgroups Ethernet Switch Server Router Clients Ethernet Switch Figure 2-1. Single Segment Server 2-2 Introduction to Duralink64 Port Aggregation The next traditional method provides network Fault Tolerance through doubling the hardware and addition of a special version of NetWare (SFT3). Data is kept current between servers via a Mirrored Server Link (MSL). In the illustration below, one server is active while the other is ready to take over all duties if the other fails. Primary Server Clients Central switching area with lines to workgroups Ethernet Switch MSL Secondary Server Figure 2-2. Fault Tolerance Using NetWare 2-3 DuraLAN Fast Ethernet NICs User’s Guide The illustration below illustrates a configuration with Windows NT Server (Wolfpack). Primary Server Clients Central switching area with lines to workgroups Ethernet Switch Ethernet Link Storage Devices Secondary Server Figure 2-3. Fault Tolerance Using NT 2-4 Introduction to Duralink64 Port Aggregation Servers with Duralink64 Port Aggregation A server with Duralink64 Port Aggregation can use up to 12 Adaptec PCI Fast Ethernet ports in one aggregated group (at 1.2 Gbps per group). If any of the contributing members of a specific aggregated group should fail, that member is excluded from the group. The remaining ports balance the existing load. Duralink64 Port Aggregation Example The illustration below illustrates a server with 12 ports from three Adaptec ANA-62044 NICs. With this configuration, the server has a cumulative bandwidth of 1.2 Gbps on its single virtual segment (200 Mbps per port). Further, the network segment is fault tolerant, enabling the network to remain alive should any port fail. Clients Central switching area with lines to workgroups Ethernet Switch Server 3x ANA-62044 6 ports 6 ports Ethernet Switch Shared workgroup hub Ethernet Hub Figure 2-4. Port Aggregation ❒ 2-5 ▼ ▼ ▼ ▼ Part 2 Installing the DuraLAN NIC ▼ ▼ ▼ ▼ 3 DuraLAN NIC Installation In This Chapter Important Note for Windows 95 Users! 3-2 Installing the Appropriate NIC 3-3 Installing the DuraLAN NIC 3-4 Connecting the Network Cable 3-6 Installing the Appropriate NIC Driver 3-7 This chapter provides instructions on installing your Adaptec DuraLAN NIC. If you are a Windows 95 user, please read Important Note for Windows 95 Users! before proceeding with this installation. 3-1 DuraLAN Fast Ethernet NICs User’s Guide Important Note for Windows 95 Users! Before installing the DuraLAN NIC, verify which version of Windows 95 is installed. (You either have OSR1 or OSR2.) You will need to know which version you have if you install the DuraLAN Standard driver. Use the following instructions for help: 1 2 Start Windows 95. 3 Double-click the System icon. The General tab displays your version of Windows 95. Click the Start menu, point to Settings, and then click Control Panel. Windows 95 Versions 4 5 6 3-2 4.00.950 OSR1 4.00.950A OSR1 4.00.950B OSR2 4.00.950C OSR2 Click OK to exit the General tab. Shut down the system, and then turn OFF power. Continue with Installing the DuraLAN NIC on page 3-4. DuraLAN NIC Installation Installing the Appropriate NIC The following table describes which DuraLAN NIC to install for your operating system and Adaptec driver. DuraLAN Standard driver 1 2 Windows 95 OSR11 ANA-69011/TX ANA-62011/TX ANA-62022 ANA-62044 Windows 95 OSR21 ANA-69011/TX ANA-62011/TX ANA-62022 ANA-62044 Windows 98 ANA-69011/TX ANA-62011/TX ANA-62022 ANA-62044 Duralink64 Failover Duralink64 Port Aggregation/Cisco’s Fast Ethernet Channel Windows NT Workstation ANA-69011/TX ANA-62011/TX ANA-62022 ANA-62044 ANA-69011/TX2 ANA-62011/TX2 ANA-62022 ANA-62044 ANA-69011/TX2 ANA-62011/TX2 ANA-62022 ANA-62044 Windows NT Server 3.51/4.0 ANA-69011/TX ANA-62011/TX ANA-62022 ANA-62044 ANA-69011/TX2 ANA-62011/TX2 ANA-62022 ANA-62044 ANA-69011/TX2 ANA-62011/TX2 ANA-62022 ANA-62044 NetWare 4.x and 5.0 ANA-69011/TX ANA-62011/TX ANA-62022 ANA-62044 ANA-69011/TX2 ANA-62011/TX2 ANA-62022 ANA-62044 ANA-69011/TX2 ANA-62011/TX2 ANA-62022 ANA-62044 Windows 95 OSR1 and OSR2 use two different Adaptec drivers, see the appropriate installation instructions. Requires at least two DuraLAN NICs. 3-3 DuraLAN Fast Ethernet NICs User’s Guide Installing the DuraLAN NIC WARNING: Before you begin, turn OFF power to the PC, and disconnect the power cord! 1 Ground yourself by touching an unpainted surface of the PC case. 2 Remove the cover from your computer. Refer to the manufacturer’s documentation for help. 3 Locate an unused PCI expansion slot. – For best performance, install the 64-bit DuraLAN NIC in a 64-bit PCI expansion slot. (32-bit PCI expansion slots may be used also.) – Some noncompliant 32-bit PCI expansion slots do not support 64-bit NICs. This is because the slot’s outside notch is not deep enough to allow the bus contacts to fit around the slot. If the 64-bit DuraLAN NIC does not fit in the slot, please return to your purchase location for replacement with a 32-bit DuraLAN NIC. 4 Unscrew the bracket screw, and then remove the expansion slot bracket cover. Note: PCI slots and NICs come in two varieties: 3.3-volt, and the more common 5-volt. All Adaptec PCI NICs support 5-volt and 3.3-volt slots. 5 Carefully remove the DuraLAN NIC from its antistatic container. 6 Verify the model name on the NIC (such as, ANA-69011/TX, ANA-62011/TX, etc.). 7 Check the NIC for any visible signs of damage which may have occurred during shipment. If you find a problem, immediately notify your network supplier and the shipping service which delivered your NIC. 8 Insert the NIC into the expansion slot, pressing down firmly until the bus contacts are seated in the slot. 3-4 DuraLAN NIC Installation 9 Replace the screw that was removed in step 4, see the figure below. 64-bit PCI Expansion Slots Notch ISA Expansion Slot 32-bit PCI Expansion Slots Figure 3-1. Install the DuraLAN NIC in a 64-bit PCI expansion slot. 10 Replace the computer cover. 11 Continue with Connecting the Network Cable on page 3-6. 3-5 DuraLAN Fast Ethernet NICs User’s Guide Connecting the Network Cable Cable requirements for Adaptec DuraLAN NICs vary according to network speed, cabling standard, and the connector to be used. See Appendix A, Cables and LEDs for detailed information on cabling. 1 2 Determine the appropriate cabling for your network. 3 Connect the other end of the cable to your hub, switch, or client. 4 Continue with Installing the Appropriate NIC Driver. 3-6 Connect the cable to the NIC connector. (For multiport NICs, connect a cable to each port.) DuraLAN NIC Installation Installing the Appropriate NIC Driver After installing the DuraLAN NIC, you must install the appropriate DuraLAN NIC driver. You may install one of three drivers: the DuraLAN Standard driver, Duralink64 Failover, or Duralink64 Port Aggregation. Please note that you may install one type only. The Adaptec Duralink64 diskettes provide the following drivers: Disk 1 Disk 2 Windows NT 4.0 Standard Driver NetWare 4.x and 5.0 Standard Driver Windows NT 3.51 Standard Driver Client32 for DOS Windows 95 Standard Driver NetWare Failover Driver Windows 98 Standard Driver DOS Diagnostics Windows NT 4.0 Failover Driver NetWare Port Aggregation\Fast EtherChannel Driver Windows NT 3.51 Failover Driver Windows NT 4.0 Port Aggregation\Fast EtherChannel Driver Windows NT 3.51 Port Aggregation\ Fast EtherChannel Driver 3-7 DuraLAN Fast Ethernet NICs User’s Guide ■ DuraLAN Standard driver The Standard driver uses each DuraLAN port independently. Note: Windows 95, Windows 98, and Novell Client32 do not support Duralink64 Failover. Install the DuraLAN Standard driver for these operating systems. ■ Duralink64 Failover driver The Duralink64 Failover driver groups two ports in a failover combination, one as the primary port and the other as the backup port. The ports may be connected to a hub or switch. describes this software. ■ Duralink64 Port Aggregation\Fast EtherChannel driver The Duralink64 Port Aggregation driver groups up to twelve ports together and must be used with a switch. Fast EtherChannel can be grouped in groups of two or four. This grouping requires a switch that supports Fast EtherChannel. Always use the latest software version available for your DuraLAN NIC. Drivers are updated regularly on Adaptec’s World Wide Web, FTP, and BBS sites to provide enhanced performance and new features. See Technical and Product Support on page iii. ❒ 3-8 ▼ ▼ ▼ ▼ 4 Network Configuration Examples In This Chapter Network Without Duralink64 Failover Protection 4-2 Single Hub or Switch on an Ethernet Segment 4-3 Dual Hubs 4-4 Dual Hubs with an Ethernet Switch 4-5 Dual Hubs with Routers 4-6 Dual Hubs with a Four-Port NIC 4-7 This chapter describes the benefits of using Duralink64 Failover and some typical network configurations. The primary and backup Adaptec DuraLAN Fast Ethernet NICs or ports reside in the server. Duralink64 Failover operates on these NICs to provide redundancy on the server. The backup port does not operate until the primary port fails. 4-1 DuraLAN Fast Ethernet NICs User’s Guide Network Without Duralink64 Failover Protection This configuration uses one NIC connected to a hub or switch on an Ethernet segment. If the NIC fails, all network traffic is stopped. Ethernet Switch or Ethernet Hub Server Clients Figure 4-1. Network without Duralink64 Failover protection 4-2 Network Configuration Examples Single Hub or Switch on an Ethernet Segment This configuration uses two NICs connected to a hub or switch on an Ethernet segment. Duralink64 Failover provides failover capability if one NIC fails. Ethernet Switch or Ethernet Hub Primary Server Clients Backup Figure 4-2. Single hub or switch on an Ethernet segment 4-3 DuraLAN Fast Ethernet NICs User’s Guide Dual Hubs In this example, each NIC is connected to a separate hub to provide redundancy. If the hub port being used by the primary NIC fails, the backup NIC becomes active and all network traffic is immediately directed through it. Clients Ethernet Hub Primary Server Ethernet Hub Backup Clients Figure 4-3. Two NICs connected to separate hubs 4-4 Network Configuration Examples Dual Hubs with an Ethernet Switch This example shows how Duralink64 Failover provides network redundancy to a switched network. Ethernet switches provide network traffic segmentation. Clients Ethernet Hub Ethernet Switch Primary Server Ethernet Hub Backup Clients Figure 4-4. Duralink64 Failover on a network with dual hubs and an Ethernet switch 4-5 DuraLAN Fast Ethernet NICs User’s Guide Dual Hubs with Routers The following example shows how to set up Duralink64 Failover in a network configuration using routers. Routers provide WAN and LAN connectivity and allow physical network protocol redundancy. Router Ethernet Hub Primary Uplink Router Server Ethernet Hub Backup Figure 4-5. Duralink64 Failover in a network configuration using routers 4-6 Network Configuration Examples Dual Hubs with a Four-Port NIC This example shows port redundancy, using Duralink64 Failover, within a 4-port NIC. As shown in the illustration below, Ports 1 and 3 are used as the primary ports to each Ethernet hub. Ports 2 and 4 are backup ports connected to each hub. Clients Primary Port1 Ethernet Hub Port2 Server Port3 Ethernet Hub Port4 Backup Clients Figure 4-6. A 4-Port NIC provides port redundancy ❒ 4-7 ▼ ▼ ▼ ▼ Part 3 The DuraLink64 Driver for Windows ▼ ▼ ▼ ▼ 5 Duralink64 Driver Installation for Windows In This Chapter Before You Begin 5-2 Note on DuraLAN NIC Ports 5-2 Installing the DuraLAN Driver 5-3 Installation Tips 5-11 Removing Previously Installed Drivers 5-13 This chapter provides instructions for installing the DuraLink64® driver of your choice on a server running Windows NT versions 4.0 and 3.51. 5-1 DuraLAN Fast Ethernet NICs User’s Guide Before You Begin ■ Verify that all system, memory, and NIC requirements are met, see System Requirements on page 1-2. ■ Verify that the new Adaptec DuraLAN NIC is installed properly in the server, see Chapter 3, DuraLAN NIC Installation. ■ Check your system for installed DuraLAN NIC drivers. If a DuraLAN Standard driver, Duralink64 Failover driver, or Duralink64 Port Aggregation driver exists, remove it! See Removing Previously Installed Drivers on page 5-13. Caution: This procedure is critical. Only one DuraLAN driver may exist in a system! Note on DuraLAN NIC Ports When you are installing Adaptec DuraLAN NICs, it is a good idea to document where each port physically resides in the server, especially when two or more identical NICs exist. This is important because ports are identified by generic port names, such as Adptsf1, Adptsf2, Adptsf3, etc. Port names are assigned to ports in the order that the system scans these ports at boot time. Consequently, whenever you physically rearrange the network cards, the port names change as well. 5-2 Duralink64 Driver Installation for Windows Installing the DuraLAN Driver Windows NT 4.0 If you are installing Windows NT at this time, start with step 6 when prompted for the DuraLAN NIC. To install the DuraLAN driver on a Windows NT 4.0 platform follow these steps: 1 2 Start Windows NT. 3 4 5 6 In the Control Panel, double-click Network. From the Start menu, point to Settings, and then click Control Panel. In the Network window, click the Adapters tab. In the Adapters tab, click Add. In the Select Network Adapter window, click Have Disk. Figure 5-1. Select Network Adapter 5-3 DuraLAN Fast Ethernet NICs User’s Guide 7 At the Insert Disk window, insert the Duralink64 for Windows diskette, and then click OK. Figure 5-2. Insert Disk Window 8 In the Select OEM Option window, click the DuraLAN NIC model that is installed and then click OK. Figure 5-3. Select OEM Option Window 5-4 Duralink64 Driver Installation for Windows 9 In the Adaptec DuraLAN NIC Driver Installation window, select the driver and then click OK. Figure 5-4. Adaptec NIC Driver Installation Window 10 Continue to the appropriate configuration chapter: – Chapter 6, Duralink64 Standard Driver for Windows. – Chapter 7, Duralink64 Failover for Windows NT. – Chapter 8, Duralink64 Port Aggregation for Windows NT. 5-5 DuraLAN Fast Ethernet NICs User’s Guide Windows NT 3.51 If you are installing Windows NT at this time, start with step 6 when prompted for the DuraLAN NIC. To install the DuraLAN driver on a Windows NT 3.51 platform, follow these steps: 1 2 3 4 Start Windows NT. From the Main Group menu click Control Panel. In the Control Panel, double-click Network. In the Network Settings window, click Add Adapters. Figure 5-5. Network Settings Window 5 In the Add Network Adapter window, select (Other) Requires disk from manufacturer. Figure 5-6. Add Network Adapter 6 5-6 At the Insert Disk window, insert the Duralink64 for Windows diskette and then click OK. Duralink64 Driver Installation for Windows 7 In the Select OEM Option window, click the DuraLAN NIC model that is installed and then click OK. Figure 5-7. Select OEM Option Window 8 In the Adaptec DuraLAN NIC Driver Installation window, select the driver and then click OK. Figure 5-8. Adaptec DuraLAN Driver Installation 9 Continue to the appropriate configuration chapter: – Chapter 6, Duralink64 Standard Driver for Windows. – Chapter 7, Duralink64 Failover for Windows NT. – Chapter 8, Duralink64 Port Aggregation for Windows NT. 5-7 DuraLAN Fast Ethernet NICs User’s Guide Windows 98 To install the DuraLAN Driver on the Windows 98 platform, follow these steps: 1 2 3 Start Windows 98, and wait for the New Hardware window to open.1 4 5 In the next window, select Floppy Disk Drives. In the first screen, click Next. In the next window, click Search for the best driver for your device. (Recommended), and then click Next. Insert the Duralink64 for Windows Disk, and then click Next. Note: If you do not insert the floppy disk, this message appears: Windows was unable to locate a driver for this device. If you do not want to install a driver now, click Next. To search again, click Back. 6 The system indicates that the driver file was found. Insert the CD you used to install Windows 98, and then click Next. Note: You may receive the following Version Conflict message: A file being copied is older than the file currently on your computer. It is recommended that you keep your existing file. Do you want to keep the file? Click Yes. 7 Click Finish. 8 Remove the floppy disk. 9 If the System Settings Change window appears, click Yes to restart the system. 10 Continue to Chapter 6, Duralink64 Standard Driver for Windows. 1 If the wizard does not open, refer to the Installation Tips on page 5-12. 5-8 Duralink64 Driver Installation for Windows Windows 95 This section provides instructions for installing the DuraLAN Standard driver in Windows 95 OSR1 and OSR2. To verify which version of Windows 95 is installed, see Important Note for Windows 95 Users! on page 3-2. Windows 95 OSR2 To install the DuraLAN Standard driver on a Windows 95 OSR2 platform, follow these steps: 1 2 3 4 5 6 7 8 Start Windows 95. The Update Device Driver wizard opens. Insert the Duralink64 for Windows diskette. In the wizard, click Next. Click Finish. In the Insert Disk window, click OK. Type a:\ and then click OK. In the Insert Disk window, insert the Windows 95 CD, then click OK. Enter the path to the Windows 95 installation directory, and then click OK. (For example d:\win95.1 Consult your Microsoft Windows 95 documentation for help.) 9 Remove the floppy disk from the floppy drive. 10 At the System Settings Change window, restart the system. 11 Optional. To verify the driver installation, see Installation Tips starting on page 5-11. Note: As the system restarts, Windows 95 applies the driver files to each additional port detected. 12 Continue to Chapter 6, Duralink64 Standard Driver for Windows. 1 In this example, d:\ represents the CD-ROM drive letter. 5-9 DuraLAN Fast Ethernet NICs User’s Guide Windows 95 OSR1 To install the DuraLAN Standard Driver Windows 95 OSR1 platform, follow these steps: 1 2 Start Windows 95. The New Hardware Found wizard opens. 3 4 Insert the Duralink64 for Windows Disk. In the wizard, click Driver from disk provided by hardware manufacturer, and then click OK. In the Install from Disk window, type a:\win95a and then click OK. ! Caution: If you accept the default path, a:\, the system will copy the wrong files which will cause errors in Windows 95 OSR1 version. 5 In the Copying Files... window, insert the Windows 95 CD, and then click OK. 6 Enter the path to the Windows 95 directory, and then click OK. (For example, d:\win95.1 Consult your Microsoft Windows 95 documentation for help.) 7 8 Remove the floppy disk from the floppy disk drive. If the System Setting Change window appears, click Yes to restart the system. Note: As the system restarts, Windows 95 applies the driver files to each additional port detected. 9 Optional. To verify the driver installation, see Installation Tips starting on page 5-11. 10 Continue to Chapter 6, Duralink64 Standard Driver for Windows. 1 In this example, d:\ represents the CD-ROM drive letter. 5-10 Duralink64 Driver Installation for Windows Installation Tips This section provides tips to assist you in the DuraLAN driver installation. Windows 95 How do I verify that the DuraLAN Standard driver is installed properly? 1 2 3 From the Start menu, point to Settings, then click Control Panel. In the Control Panel, double-click System. In the Device Manager tab, look under Network adapters. Figure 5-9. The DuraLAN NIC appears under Network adapters 4 The DuraLAN NIC appears under Network Adapters. Click OK. 5-11 DuraLAN Fast Ethernet NICs User’s Guide A yellow exclamation ! appears beside the DuraLAN NIC. What should I do? Remove the current DuraLAN Standard driver and then reinstall it. See Windows 98 and 95 OSR1/OSR2 on page 5-14. In the Device Manager, the new NICs replace the older NICs, but the Network window lists both. What should I do? Remove the older NIC(s). 1 In the Network window, click the old NIC and then click Remove. Repeat this step for each appropriate NIC. 2 Click OK when you are done. Windows 98 How do I access the Add New Hardware wizard if it does not open? 1 Click the Start menu, point to Settings, and then click the Control Panel. 2 In the Control Panel, double-click Add New Hardware. Windows Clients Using Novell Client32 Connecting clients to the NetWare Duralink64 server requires the NDIS driver. Do not use an ODI driver! See Installing Duralink64 NetWare Client on page 12-1. 5-12 Duralink64 Driver Installation for Windows Removing Previously Installed Drivers This section provides instructions for removing the previously installed DuraLAN Standard driver which is necessary if you are installing the new Duralink64 driver included with your DuraLAN NIC. Windows NT 4.0 To remove the previously installed DuraLAN driver from a Windows NT 4.0 platform, follow these steps: 1 2 3 4 5 6 7 8 9 10 Double-click My Computer. Double-click Control Panel. Double-click Network. In the Network window, click the Adapters tab. In the Network Adapters list, click the Adaptec DuraLAN NIC you want to remove, and then click Remove. When asked if you wish to continue, click Yes. Repeat step 5 until all Adaptec DuraLAN drivers are removed. When you are done, click OK. Click Close to close the Network window. Click Yes to restart your computer. Note: When you restart Windows NT, a message may indicate that at least one service failed to start. This message will not appear after you add the new driver. Click OK. 5-13 DuraLAN Fast Ethernet NICs User’s Guide Windows NT 3.51 To remove the previously installed Duralink64 driver from the Windows NT 3.51 platform, follow these steps: 1 2 In the Main window, double-click Control Panel. 3 In the Installed Adapters Cards box, click the DuraLAN NIC, and then click Remove. 4 5 6 Repeat step 3 until all DuraLAN NICs have been removed. In the Control Panel, double-click Network to enter the Network Settings window. Click OK when you are done. Restart the system. Windows 98 and 95 OSR1/OSR2 To remove the previously installed DuraLAN driver from the Windows 98 and Windows 95 OSR1/OSR2 platform, follow these steps: 1 From the Start menu, point to Settings, and then click Control Panel. 2 3 4 5 6 In the Control Panel, double-click System. ❒ 5-14 Select the Device Manager tab, then click Network Adapters. Select Adaptec DuraLAN NIC to remove, then click Remove. Repeat steps 3 and 4 for each existing DuraLAN NIC. Restart the system. ▼ ▼ ▼ ▼ 6 Duralink64 Standard Driver for Windows In This Chapter Configuring the Standard Driver Ports in Windows NT 4.0 and 3.51 6-2 Configuring the Ports in Windows 98/95 6-4 This chapter describes how to configure the DuraLAN Standard driver for Windows. 6-1 DuraLAN Fast Ethernet NICs User’s Guide Configuring the Standard Driver Ports in Windows NT 4.0 and 3.51 In the Adaptec New Hardware Found window, each port is assigned to Autodetect, the default connection type that will always detect port connection and negotiate a compatible speed and transmission mode. Note: If you are required to insert the Windows NT CD, you must re-install the latest version of the Microsoft Windows NT Service Pack, and then restart the system. 1 In the Adaptec New Hardware Found window, make sure all the DuraLAN NIC ports appear. Figure 6-1. This window identifies each port’s PCI bus and PCI slot 2 In the New Adaptec NIC Port(s) Available for DuraLAN NIC box, click the appropriate port. 3 In the Connection Types list, click the connection type for your network or use Autodetect Default Connection. For descriptions, see Connection Types on page A-2. 6-2 Duralink64 Standard Driver for Windows 4 5 6 7 8 Click Apply. Repeat steps 1 through 4 for each existing port. When you are done, click OK. When you are done, click Close in the Network window. Restart the system. 6-3 DuraLAN Fast Ethernet NICs User’s Guide Configuring the Ports in Windows 98/95 To configure ports in Window 98 and Windows 95 OSR2 or OSR1, follow these steps: 1 From the Start menu, point to Settings, and then click Control Panel. 2 3 In the Control Panel, double-click Network. In the Network window, click the appropriate DuraLAN NIC, and then click Properties. Figure 6-2. Windows 95 Configuration Tab 4 5 6-4 In the Properties window, click the Advanced tab. In the Property box, click Connection Type. Duralink64 Standard Driver for Windows 6 In the Value list, click the appropriate connection type. (Connection Types on page A-2 provides descriptions.) Figure 6-3. Advanced Tab 7 8 9 Click OK. In the Configuration tab, click OK. Restart your system. ❒ 6-5 ▼ ▼ ▼ ▼ 7 Duralink64 Failover for Windows NT In This Chapter Configuring the Ports 7-2 Creating the Failover Pair 7-3 Monitoring Failover Pairs 7-8 Note on DuraLAN NIC Ports 7-8 This chapter provides instructions for installing Duralink64 Failover on a server running Windows NT versions 4.0 and 3.51. 7-1 DuraLAN Fast Ethernet NICs User’s Guide Configuring the Ports In the Adaptec New Hardware Found window, each port is assigned to Autodetect, the default connection type that will always detect port connection and negotiate a compatible speed and transmission mode. 1 In the Adaptec New Hardware Found window, make sure all the DuraLAN NIC ports appear. Figure 7-1. This window identifies each port’s PCI bus and PCI slot Note: Generally, PCI Bus 0 is the PCI Bus on the motherboard. PCI Bus 1 or above is an ANA-62022 or ANA-62044 NIC. The PCI Slot represents the port on the NIC starting from the top. The top port starts at PCI Slot 4. 2 In the New Adaptec NIC Ports Available box, click the appropriate port. 3 In the Connection Types list, click the connection type for your network or use Autodetect Default Connection. For descriptions, see Connection Types on page A-2. 4 Click Apply. 7-2 Duralink64 Failover for Windows NT 5 6 7 Repeat steps 1 through 4 for each existing port. When you are done, click OK. Continue with Creating the Failover Pair. Creating the Failover Pair You can create Failover pairs in the Configuration tab. A Failover pair consists of two ports only—the primary port and the backup port. Windows NT 4.0 To create Failover pairs, follow these steps: 1 From the Available Adaptec Ports box, click a port to be designated as a primary port. Figure 7-2. Failover Configuration Tab 2 Click Add. The port is added under Primary Port in the Failover Pair list. 3 To assign a backup to the primary port, click the appropriate port from the Available Adaptec Ports box, and then click Add. The port is added in the Backup Port field. 7-3 DuraLAN Fast Ethernet NICs User’s Guide 4 5 6 Click Apply. OPTIONAL. Repeat steps 1 through 5 to create another Failover pair. OPTIONAL. To remove a Failover pair: a Click the port from the Primary Ports list, and then click Remove. Both ports return to the Available Adaptec Ports box. b Click Apply. 7 When you are done, click OK. you will return to the Adapters tab. Figure 7-3. <Backup NIC1> indicates that Port 2 is the backup port for Port 1 Note: The Adapters tab identifies one model only, even when several DuraLAN NIC models are installed. The DuraLAN NIC model displayed is the same as the first model you chose in step 8 during the driver installation. 7-4 Duralink64 Failover for Windows NT 8 If SNMP is not set up, you will receive the Setup Message below. Click OK. Figure 7-4. This message may be ignored during this installation. 9 Enter the protocol information. Consult your Microsoft Windows NT 4.0 documentation for help configuring the protocol. 10 When you are done, remove the floppy disk from the floppy drive. 11 Restart the system. Note: If you were required to insert the Windows NT CD, you must re-install the latest version of Microsoft Windows NT Service Pack, and then restart the system. 7-5 DuraLAN Fast Ethernet NICs User’s Guide Windows NT 3.51 To create Failover pairs, follow these steps: 1 From the Available Adaptec Ports box, click the port you want as the primary port. Figure 7-5. Configuration Tab 2 Click Add. The port is added under Primary Port in the Failover Pair list. 3 To assign a backup to the primary port, click the appropriate port from the Available Adaptec Ports box, and then click Add. The port is added in the Backup Port field. 4 5 6 Click Apply. OPTIONAL. Repeat steps 1 through 5 to create another Failover pair. OPTIONAL. To remove a Failover pair a Click the port from the Primary Ports list, and then click Remove. Both ports return to the Available Adaptec Ports box. b Click Apply. 7-6 Duralink64 Failover for Windows NT 7 When you are done, click OK. you will return to the Network Settings Window. Figure 7-6. Network Setting Window 8 Click OK. Note: The Adapters tab identifies one model only, even when several DuraLAN NIC models are installed. The DuraLAN NIC model displayed is the same as the first model you chose in step 8 during the driver installation. 9 If SNMP is not set up, you will receive the Setup Message below. Click OK. Figure 7-7. This message may be ignored during this installation. 7-7 DuraLAN Fast Ethernet NICs User’s Guide 10 Consult your Microsoft Windows NT 3.51 documentation for help configuring the protocol (such as entering values for TCP/IP). 11 When you are done, remove the floppy disk from the floppy disk drive. 12 In the Network Setting Change window, click Restart Now. Note: If you were required to insert the Windows NT CD, you must re-install the latest Microsoft Windows NT Service Pack, and then restart the system again. Monitoring Failover Pairs There are three ways to monitor the status of the Failover Pairs: ■ SNMP Manager—when failover occurs SNMP traps are sent to network management stations and error logs are updated through the operating system event log. In order to manage SNMP agents, compile the following MIB file on the SNMP management station: a:\snmpmibs\duralink.mib ■ Event Viewer Dialog Box—the local Event Viewer dialog box will log port failures in Windows NT. ■ Duralink64 Failover window —the Status tab monitors the traffic and health of the failover pairs. Note on DuraLAN NIC Ports When you are installing Adaptec DuraLAN NICs, it’s a good idea to document where each port physically resides in the server, especially when two or more identical NICs exist. This is important because ports are identified by generic port names, such as Adptsf1, Adptsf2, Adptsf3, etc. Port names are assigned to ports in the order that the system scans these ports at boot time. Consequently, whenever you physically rearrange the network cards, the port names change as well. ❒ 7-8 ▼ ▼ ▼ ▼ 8 Duralink64 Port Aggregation for Windows NT In This Chapter Configuring the Ports 8-2 Creating Port Aggregation Groups 8-4 Creating Fast EtherChannel Groups 8-8 Assigning the TCP/IP Address 8-11 Modifying Groups 8-13 Checking System Status 8-17 Windows NT Performance Monitor 8-20 This chapter provides instructions for configuring Duralink64 Port Aggregation on a server running Windows NT. 8-1 DuraLAN Fast Ethernet NICs User’s Guide Configuring the Ports In the Adaptec New Hardware Found window, each port is assigned to Autodetect, the default connection type that will always detect port connection and negotiate a compatible speed and transmission mode. 1 In the Adaptec New Hardware Found window, make sure all the DuraLAN NIC ports appear. Figure 8-1. This window identifies each port’s PCI bus and PCI slot Note: Generally, PCI Bus 0 is the PCI Bus on the motherboard. PCI Bus 1 or above is an ANA-62022 or ANA-62044 NIC. The PCI Slot represents the port on the NIC starting from the top. The top port starts at PCI Slot 4. 2 8-2 In the New Available NIC Ports Available box, click the appropriate port. Duralink64 Port Aggregation for Windows NT 3 In the Connection Types list, click the connection type for your network or use Autodetect Default Connection. For descriptions, see Connection Types on page A-2. 4 5 6 7 Click Apply. Repeat steps 1 through 4 for each existing port. When you are done, click OK. Continue to Creating Port Aggregation Groups. 8-3 DuraLAN Fast Ethernet NICs User’s Guide Creating Port Aggregation Groups This section explains how to assign ports to a group, thus, creating a virtual port. If you have installed Duralink64 Port Aggregation already and wish to add or modify existing group or stand-alone port configurations, see Modifying Groups on page 8-13. 1 In the Group(s) field, click Create New Group, and then type the new group name. Note: The group name may be up to 20 characters. If you skip this step, the system assigns a default group name (GroupX). Figure 8-2. Duralink64 Port Aggregation Configuration Tab 2 In the Link Aggregation Type field, click the appropriate link type. For a description of Adaptec’s Port Aggregation, see Chapter 2, Introduction to Duralink64 Port Aggregation. Note on Cisco’s Fast EtherChannel. This option allows you to fully aggregate two or four ports over transmit and receive under all protocols. The ports that are configured as the Fast EtherChannel group must be physically connected to the Fast EtherChannel ports on the Cisco switch. See your 8-4 Duralink64 Port Aggregation for Windows NT Cisco switch documentation to configure the ports in Fast EtherChannel mode. If you select Fast EtherChannel on the server, the connection type for each port is automatically configured to 100 Mbps TX/Full Duplex. You must also configure the ports on the Cisco switch (used by the Fast EtherChannel group) to either Auto Negotiation or 100 Mbps/Full Duplex mode. Figure 8-3. The Link Aggregation Type Options 8-5 DuraLAN Fast Ethernet NICs User’s Guide 3 In the Available Adaptec Ports box, click the available port to add to the group, and then click Add. 4 Repeat step 3 for each additional port. Note: You must assign the same connection type to each port in the same group. OPTIONAL. To remove a port from the group, click the appropriate port from the Group Ports box, and then click Remove. 5 6 7 When you are finished configuring the group, click Apply. To create another group, repeat steps 1 through 5. If you want to rename a group: a Select the default group name in the Group(s) list box. b Type the new name. c Click Apply. 8 9 When you are finished configuring all groups, click OK. If SNMP is not set up on the computer, you will receive the message below. Click OK. Figure 8-4. This message may be ignored during this installation. 8-6 Duralink64 Port Aggregation for Windows NT 10 In the Network window, click Close. Figure 8-5. Ports and Groups Listed in Adapters Tab 11 Continue to Assigning the TCP/IP Address on page 8-11. 8-7 DuraLAN Fast Ethernet NICs User’s Guide Creating Fast EtherChannel Groups Fast EtherChannel (FEC) allows you to fully aggregate two or four ports over transmit and receive under all protocols. The ports that are configured as the FEC group must be physically connected to the FEC ports on the Cisco switch. See your Cisco switch documentation to configure the ports in FEC mode. If you select Fast EtherChannel on the server, the connection type for each port is automatically configured to 100 Mbps TX/Full Duplex. You must also configure the ports on the Cisco switch (used by the FEC group) to either Auto Negotiation or 100 Mbps/Full Duplex mode This section explains how to assign ports to a Fast EtherChannel group, thus, creating a virtual port. If you have installed Duralink64 Port Aggregation/FEC already and wish to add or modify existing group or stand-alone port configurations, see Modifying Groups on page 8-13. 1 In the Group(s) field, click Create New Group, and then type the new group name. Figure 8-6. Duralink64 Port Aggregation Configuration Tab 8-8 Duralink64 Port Aggregation for Windows NT Note: The group name may be up to 20 characters. If you skip this step, the system assigns a default group name (GroupX). 2 In the Link Aggregation Type field, click the appropriate link type. For a description of Adaptec’s Port Aggregation, see Chapter 2, Introduction to Duralink64 Port Aggregation. 3 In the Available Adaptec Ports box, click the available port to add to the group, and then click Add. 4 Repeat step 3 for each additional port. Note: You must assign the same connection type to each port in the same group. OPTIONAL. To remove a port from the group, click the appropriate port from the Group Ports box, then click Remove. 5 6 7 When you are finished configuring the group, click Apply. To create another group, repeat steps 1 through 5. If you want to rename a group: a Select the default group name in the Group(s) list box. b Type the new name. c Click Apply. 8 9 When you are finished configuring all groups, click OK. If SNMP is not set up, you will receive the Setup Message below. Click OK. Figure 8-7. This message may be ignored during this installation 8-9 DuraLAN Fast Ethernet NICs User’s Guide 10 In the Network window, click Close. Figure 8-8. Ports and Groups Listed in Adapters Tab. 11 Continue to Assigning the TCP/IP Address on page 8-11. 8-10 Duralink64 Port Aggregation for Windows NT Assigning the TCP/IP Address Note: If you are an Windows NT 3.51 user, please refer to the Windows NT 3.51 documentation for help configuring protocols. Once you have configured Duralink64 Port Aggregation, Windows NT prompts you to configure the protocol. IP addresses to groups and stand-alone ports are assigned in the IP Address tab, such as shown in the following figure. Ports assigned to a group use the same IP address; therefore, it must be entered only once. To assign a TCP/IP Address follow these steps. Figure 8-9. IP Address Tab 1 In the IP Address tab, click the DuraLAN NIC port from the Adapter list. 2 In the IP Address field, type the IP address. 8-11 DuraLAN Fast Ethernet NICs User’s Guide 3 4 5 6 7 8 9 In the Subnet Mask field, type the subnet mask number. Click Apply. Repeat steps 1 through 4 for any other port or group. Click OK when you are finished configuring all groups. Restart your computer to complete the changes. Click Yes at the message prompt to restart your computer. Continue to Checking System Status on page 8-17. Once Duralink64 Port Aggregation is installed, you may update group and port configurations using the instructions in the Modifying Groups section. 8-12 Duralink64 Port Aggregation for Windows NT Modifying Groups This section provides instructions for modifying the group or port configurations. You may rename groups, as well as add or remove ports from existing groups. Renaming Groups 1 In the Duralink64 Port Aggregation window, go to the Configuration tab. Figure 8-10. Modified groups in the Configuration tab 2 From the Group(s) field, select the appropriate group, and then type the new name. 3 Click Apply. 8-13 DuraLAN Fast Ethernet NICs User’s Guide Adding or Removing Ports Note: If you add or remove a port to or from a group, any existing group or port IP address is removed automatically. Keep track of any IP addresses you plan to use again. 1 In the Duralink64 Port Aggregation window, go to the Configuration tab. 2 In the Group(s) field, click Create New Group, and then type the new group name, or select the appropriate group you want to modify. – To add ports to the group, click the appropriate port from the Available Adaptec Ports box, and then click Add. – To remove ports from the group, click the appropriate port from the Group Ports box, and then click Remove. 3 4 5 6 Repeat step 2 for each appropriate port. To save changes, click Apply. When you are finished, click OK. If SNMP is not set up on the computer, you will receive the message below. Click OK. Figure 8-11. This message may be ignored during this installation. 8-14 Duralink64 Port Aggregation for Windows NT 7 When adding or deleting a group or port, you will receive a message such as shown below. Click OK. Figure 8-12. This message appears when you add ports with IP Addresses to a new group. Figure 8-13. This message appears when you add ports with IP Addresses to Group2 with an existing IP Address. 8-15 DuraLAN Fast Ethernet NICs User’s Guide 8 In the Network window, click Close. Figure 8-14. Ports and Groups Listed in Adapters Tab 8-16 Duralink64 Port Aggregation for Windows NT Checking System Status You can view group and independent port status. See Field Descriptions on page 8-18 for details. 1 From the Start menu, point to Settings, and then click Control Panel. 2 3 4 In the Control Panel, double-click Network. 5 6 Click Properties. In the Network window, click the Adapters tab. In the Adapters tab, select the Adaptec DuraLAN NIC. The Duralink64 Port Aggregation window appears. Click the Status tab to view the group and independent port information, such as shown in below. Figure 8-15. Status Tab 7 Click OK to exit. 8-17 DuraLAN Fast Ethernet NICs User’s Guide Understanding the Status Tab a c b d e h f g Figure 8-16. Status Tab Fields Field Descriptions a Model Adaptec DuraLAN NIC model number. b Port No. Port identification assigned by the system. c Trans Kbps Total Kilobits per second (Kbps) transmitted per port (stand-alone and group). The Kbps sum of aggregated ports in a group equals the total Kbps transmitted by their group. d Load The percentage of transmit load carried by each port in a group. The percentage of a stand-alone port is always 100%. The percentage for a group is calculated as a percentage of bytes transmitted by the port over bytes transmitted by the group during the last screen refresh interval. e Status If the link is up and has transmitted data within the last screen refresh interval, ACTIVE is displayed. If the link is up but the port has not transmitted any data within the time interval, IDLE is displayed. If the link is down, DOWN is displayed. 8-18 Duralink64 Port Aggregation for Windows NT f Speed Speed is either 10 or 100. This value depends on the connection type you chose in Configuring the Ports on page 8-2. g Duplexity Duplexity is either half or full. This value depends on the connection type you chose in Configuring the Ports on page 8-2. h Group Transmit Total This field appears only when a group is selected. Viewing the Groups You can view the groups list in two ways: ■ To view ports in a specific group, click the PLUS SIGN [+]. ■ To hide ports in a specific group, click the MINUS SIGN [-]. ■ Disabled ports are marked with an [x], such as ADPTSF5 shown below. Figure 8-17. Example of disabled ports 8-19 DuraLAN Fast Ethernet NICs User’s Guide Windows NT Performance Monitor You can view system traffic for selected groups and stand-alone ports in the Performance Monitor, as shown in Figure 8-18. In this window, each line represents the performance of the group or port listed at the bottom of the screen. When a group/port’s activity drops, its line drops. Use the following instructions to select ports and groups you wish to view. 1 From the Start menu, point to Programs, point to Administrative Tools, and then click Performance Monitor. Add Counter Figure 8-18. Performance Monitor 2 8-20 In the Performance Monitor, click the Add counter button to enter the Add to Chart window, shown in Figure 8-19. Duralink64 Port Aggregation for Windows NT Figure 8-19. Add to Chart Window 3 4 From the Object list box, select ADPTSF. 5 To distinguish ports and groups in the Performance Monitor, adjust the following parameters: In the Instance box, click the port or group, and then click the appropriate setting from the Counter box. Color— is preset by the program for each selected group or port. You can set a specific color from the Color list box. Scale—you can set the scale of the plot for better viewing. Width—This allows you to set the width of the plot line. Style—allows you to set the type of line that will be plotted for the selected group. 6 7 Repeat steps 4 and 5 for each appropriate port or group. When you are done, click Done. ❒ 8-21 ▼ ▼ ▼ ▼ Part 4 The Duralink64 Driver for NetWare ▼ ▼ ▼ ▼ 9 Duralink64 Standard Driver for NetWare In This Chapter Before you Begin 9-2 Note on NetWare 9-2 Install of Duralink64 Driver during NetWare 5.0 Operating System Installation 9-3 Installing the NetWare Standard Driver 9-4 Configuring the Ports 9-5 Assigning the Protocols 9-7 Viewing the Configuration 9-10 Restarting the Server 9-11 Removing Drivers 9-12 This chapter provides instructions for installing and configuring the DuraLAN Standard driver for NetWare 4.x or NetWare 5.0. 9-1 DuraLAN Fast Ethernet NICs User’s Guide Before you Begin ■ Verify that all system, memory, and NIC requirements are met, see System Requirements on page 1-2. ■ Verify that the new Adaptec DuraLAN NIC(s) have been installed properly in the server, see Chapter 3, DuraLAN NIC Installation. ■ Check your system for installed DuraLAN NIC drivers. If a DuraLAN Standard driver, Duralink64 Failover driver, or Duralink64 Port Aggregation driver exists, it must be removed. For information about driver removal see Removing Drivers on page 9-12. ■ Verify that IntraNetWare Service Pack 6 or later is installed for NetWare 4.11. This pack may be downloaded from: http://suport.novell.com Note on NetWare When you are installing Adaptec DuraLAN NICs, it is a good idea to document where each port physically resides in the server, especially when two or more identical NICs exist. This is important because ports are identified by generic port names, such as Adptsf1, Adptsf2, Adptsf3, etc. Port names are assigned to ports in the order that the system scans these ports at boot time. Consequently, whenever you physically rearrange the network cards, the port names change as well. 9-2 Duralink64 Standard Driver for NetWare Install of Duralink64 Driver during NetWare 5.0 Operating System Installation Follow this procedure when installing the Duralink driver during the installation of the NetWare 5.0 Operating System. 1 Install the NetWare 5.0 Operating System following the NetWare instructions until you reach the Network Boards screen, as shown below. Figure 9-1. Network Boards Screen 2 3 4 5 Select Modify and press Enter. Select the Network Boards field and press Enter. Press Insert twice. Press F3. The Specify Directory Path Window appears. Figure 9-2. Device Types Screen 6 7 8 Insert the drivers diskette, press Enter. 9 Continue with the NetWare installation process. When drivers finish loading return to Driver Summary. Return to the NetWare installation process. Review the Network Boards screen. Verify that the correct drivers were installed. Note that one driver will be installed for each port. 9-3 DuraLAN Fast Ethernet NICs User’s Guide Installing the NetWare Standard Driver If you are installing NetWare on a new server, do not add the DuraLAN NIC at this time. When prompted to add the NIC, select No, and then continue with the NetWare installation. Note: This driver uses 32 receive buffers for each port. Therefore, if you are using multiple ports, the number of receive buffers must be increased. Type load edit c:\nwserver\startup.ncf, and then insert the following commands at the end of the file: SET MINIMUM PACKET RECEIVE BUFFERS = 512 SET MAXIMUM PACKET RECEIVE BUFFERS = 1024 If you are installing NetWare 5.0 on a new server, please see Install of Duralink64 Driver during NetWare 5.0 Operating System Installation on page 9-3. To install the standard driver for NetWare follow these steps: 1 2 Insert the Duralink64 NetWare 4.x and 5.0 diskette. At the system prompt type: a:\NWSERVER\setupsf and press Enter. The Select Driver window appears. Figure 9-3. The Standard driver is selected in this illustration. 3 4 Select Standard and press Enter. 5 Press Enter to continue through the messages that appear until the Board Configuration screen appears. 6 Continue to Configuring the Ports on page 9-5. 9-4 In the message indicating the New Adaptec NICs have been detected, press Enter. Duralink64 Standard Driver for NetWare Configuring the Ports After installing the Duralink64 Standard driver, use the following steps to configure the ports. 1 In the Main Menu, select Configure Ports, and then press Enter. Figure 9-4. Duralink64 Standard Setup Main Menu 2 In the Ports screen, make sure you know which port names are assigned to the actual ports on the NIC. No. Port Name NIC 1 2 3 4 5 6 7 8 Adptsf1 Adptsf2 Adptsf3 Adptsf4 Adptsf5 Adptsf6 Adptsf7 Adptsf8 ANA-62044/TX:[1] ANA-62044/TX:[2] ANA-62044/TX:[3] ANA-62044/TX:[4] ANA-62044/TX:[1] ANA-62044/TX:[2] ANA-62044/TX:[3] ANA-62044/TX:[4] Connection Type Status Autodetect (default) Autodetect (default) Autodetect (default) Autodetect (default) Autodetect (default) Autodetect (default) Autodetect (default) Autodetect (default) Enabled Enabled Enabled Enabled Enabled Enabled Enabled Enabled Figure 9-5. The port names (Adptsf1, Adptsf2, etc.) do not correspond to the physical PCI slot numbers on the motherboard. 9-5 DuraLAN Fast Ethernet NICs User’s Guide 3 OPTIONAL. The Autodetect (default) detects which device the port is connected to and negotiates the port speed and transmission mode accordingly. Autodetect is recommended; however, to change the connection type(s): a Select the port, and then press Enter. (To select multiple ports, select the port, and then press F5 one at a time.) b In the Type of Connection menu, select the type, and then press Enter. (Connection Types on page A-2 provides descriptions.) Type of Connection No. Port Name NIC 1 2 3 4 5 6 7 8 Adptsf1 Adptsf2 Adptsf3 Adptsf4 Adptsf5 Adptsf6 Adptsf7 Adptsf8 ANA-62044/TX:[1] ANA-62044/TX:[2] ANA-62044/TX:[3] ANA-62044/TX:[4] ANA-62044/TX:[1] ANA-62044/TX:[2] ANA-62044/TX:[3] ANA-62044/TX:[4] Connection Type Status Autodetect (default) Autodetect 10(default) Mbps/Half Duplex Enabled Autodetect 10(default) Mbps/Full Duplex Enabled Autodetect (default) 100 Mbps/HalfEnabled Duplex Autodetect (default) 100 Mbps/Full Enabled Duplex Autodetect (default) Enabled Autodetect (default) Enabled Autodetect (default) Enabled Autodetect (default) Enabled Figure 9-6. Type of Connection Menu 4 OPTIONAL. Enabled is the default status. To disable a port, select the port, and then press Tab. 5 Press Esc when you are done. 9-6 Duralink64 Standard Driver for NetWare Assigning the Protocols You can assign IP or IPX protocols to Failover pairs and stand-alone ports. Note: The IPX protocol supports all four frame types and multiple frame types simultaneously. IP supports either Ethernet_II or Ethernet_SNAP, but never both at the same time. 1 In the Main Menu, select Configure Protocols, and then press Enter. 2 In the List of Ports box, select the port, and then press Enter. P = Stand-alone Port Figure 9-7. List of Ports/Failover Pairs Box 3 In the List of Protocols box, select the protocol for the selected Failover pair or port, and then press Enter. List of Protocols IPX IP Figure 9-8. List of Protocols Box 9-7 DuraLAN Fast Ethernet NICs User’s Guide Configuring IPX a In the List of Frame Types box, select the frame type, and then press Enter. List of Frame Types ETHERNET_802.2 ETHERNET_802.3 ETHERNET_II ETHERNET_SNAP Figure 9-9. List of Frame Types Box b In the IPX Network Number box, type the network number, and then press Enter. IPX Network Number 00000001 Figure 9-10. IPX Network Number Box c Repeat steps a and b for each frame type you wish to use. List of Frame Types ETHERNET_802.2 ETHERNET_802.3 ETHERNET_II ETHERNET_SNAP Figure 9-11. List of Frame Types d Press Esc to return to the List of Protocols box. 9-8 Duralink64 Standard Driver for NetWare Configuring IP a In the List of Frame Types box, select the frame type, and then press Enter. b In the IP Parameters box, select Enter IP Address, and then press Enter. IP Parameters Enter IP Address Enter Subnet Mask Figure 9-12. IP Parameters Box c In the IP Address box, type the address number, and then press Enter. IP Address 1.1.1.2 Figure 9-13. IP Address Box d In the IP Parameters box, select Enter Subnet Mask, and then press Enter. e In the Subnet Mask box, type the corresponding subnet mask, and then press Enter. Subnet Mask ff.ff.ff.0 Figure 9-14. Subnet Mask Box f Press Esc. g Repeat Steps a through f for each appropriate port or pair. h Press Esc until you return to the List of Ports/Failover Pairs box. 4 Repeat Steps 1 through 3 for any other ports you wish to configure. 5 6 Press Esc until you return to the Main Menu. Continue to Viewing the Configuration. 9-9 Viewing the Configuration It is important to verify the current port configurations before saving them to the server. 1 From the Main Menu, select View Configuration, and press Enter. Netware Loadable Module Duralink64 Failover Setup Protocol Interfaces Frame Network IP Address Adptsf3 P Adptsf4 P Adptsf5 P Adptsf6 P Adptsf7 P Adptsf8 P Marcom F Adptsf1 (Primary) Adptsf2 IPX E_802.2 00000001 <ESC> to go back to the previous menu. © Copyright 1998, Adaptec Inc. < F1> Help Figure 9-15. View Configuration Screen 2 Press Esc to return to the Main Menu. < F10> Abort Install Duralink64 Standard Driver for NetWare Restarting the Server After installing the Standard driver and configuring the ports, you must restart the server. 1 2 3 In the Internetworking Configuration menu, press Esc. 4 The next screen indicates that the configuration will be activated. Press Enter. 5 6 7 At the server console type down and then press Enter. In the Exit INETCFG box, select Yes, and then press Enter. In the Add Initialize Commands to autoexec.ncf box, select Yes, and then press Enter. Type restart server and then press Enter. OPTIONAL. After the server is restarted you can review the current settings. Type config at the console prompt, and then press Enter. Troubleshooting Tip At system reboot, I receive a message that the NIC configuration contains invalid settings. What should I do? 1 2 3 4 Follow the instructions at the server prompt. Document each of your selections. Return to inetcfg. Use the Internetworking Configuring menu to access those screens you must modify. 9-11 DuraLAN Fast Ethernet NICs User’s Guide Removing Drivers The following procedures are to be used if a new driver needs to be installed to replace an existing driver. Removing the DuraLAN Standard Driver To remove the DuraLAN Standard Driver installed from Duralink 4.10, using inetcfg, use the following steps: 1 2 3 Insert the Duralink64 for NetWare Disk. 4 In the Configured Boards screen, delete all existing Adaptec NICs drivers by selecting the NIC(s) and pressing Del. 5 6 When you are finished, press Esc. 7 8 9 10 11 At the server prompt, type load inetcfg and press Enter. In the Internetworking Configuration menu, select Boards, and then press Enter. A list of NICs appears. In the Internetworking Configuration menu, select Manage Configurations, and press Enter. To save changes, select Yes. Press Esc twice. To exit inetcfg, select Yes. At the server console, type down and then press Enter. Type restart server and then press Enter. To remove the DuraLAN Standard Driver installed from Duralink 4.2, use the following steps: 1 2 Insert the Duralink64 for NetWare Disk. 3 4 5 Select Standard from the Adaptec Select Driver Window. ❒ 9-12 At the server prompt, type: load a:\Newserver\setupsf and press Enter. In the main menu select Uninstall software and press Enter. In the Uninstall the Software box, select Yes end press Enter. ▼ ▼ ▼ ▼ 10 Duralink64 Failover for NetWare In This Chapter Before you Begin 10-2 Note on NetWare 10-2 Installing the NetWare Failover Driver 10-3 Configuring the Ports 10-4 Creating the Failover Pairs 10-6 Assigning the Protocols 10-9 Viewing the Configuration 10-12 Copying and Saving the Configuration 10-13 Viewing the System Status 10-14 Modifying the Driver Configuration 10-16 Removing Drivers 10-17 This chapter provides instructions for installing Duralink64 Failover on a server running NetWare 4.x or NetWare 5.0. 10-1 DuraLAN Fast Ethernet NICs User’s Guide Before you Begin ■ Verify that all system, memory, and NIC requirements are met, see System Requirements, page 1-2. ■ Verify that the new Adaptec DuraLAN NIC(s) have been installed properly in the server, see Chapter 3, DuraLAN NIC Installation. ■ Check your system for installed DuraLAN NIC drivers. If a DuraLAN Standard driver, Duralink64 Failover driver, or Duralink64 Port Aggregation driver exists, it must be removed. For information about driver removal see Removing Drivers, page 9-12. ■ Verify that IntraNetWare Service Pack 6 or later is installed for NetWare 4.11. This pack may be downloaded from: http://suport.novell.com Note on NetWare When you are installing Adaptec DuraLAN NICs, it is a good idea to document where each port physically resides in the server, especially when two or more identical NICs exist. This is important because ports are identified by generic port names, such as Adptsf1, Adptsf2, Adptsf3, etc. Port names are assigned to ports in the order that the system scans these ports at boot time. Consequently, whenever you physically rearrange the network cards, the port names change as well. After you have installed Duralink64 Failover use configsf to reconfigure the driver when necessary. (See Modifying the Driver Configuration, page 10-16.) 10-2 Duralink64 Failover for NetWare Installing the NetWare Failover Driver If you are installing NetWare 4.x on a new server, do not add the DuraLAN NIC at this time. When prompted to add the NIC, select No, and then continue with the NetWare installation. If you are installing NetWare 5.0 on a new server, please see Install of Duralink64 Driver during NetWare 5.0 Operating System Installation, page 9-3. Note: This driver uses 32 receive buffers for each port. Therefore, if you are using multiple ports, the number of receive buffers must be increased. Type load edit c:\nwserver\startup.ncf, and then insert the following commands at the end of the file: SET MINIMUM PACKET RECEIVE BUFFERS = 512 SET MAXIMUM PACKET RECEIVE BUFFERS = 1024 To install the Failover driver for NetWare follow these steps: 1 2 3 Insert the Duralink64 Driver for NetWare diskette. At the system console prompt, type: a:\nwserver\setupsf Press Enter. The Select Driver window appears. Figure 10-1. The Select Driver Window 4 5 Select Failover and press Enter. 6 Continue to Configuring the Ports, page 10-4. In the message indicating that New Adaptec NICs have been detected, press Enter. 10-3 DuraLAN Fast Ethernet NICs User’s Guide Configuring the Ports 1 In the Main Menu, select Configure Ports, and then press Enter. Adaptec DuraLAN NIC Installation 4.2 Netware Loadable Module Main Menu Configure Ports Set Failover Pairs Configure Protocols View Configuration Install Software Uninstall Software Use arrow keys to move, <Enter> to Select, <ESC> to Exit. © Copyright 1998, Adaptec Inc. < F1> Help < F10> Abort Setup Figure 10-2. Duralink64 Failover Setup Main Menu 2 In the Ports screen, make sure you know which port names are assigned to the actual ports on the NIC. The port names (Adptsf1, Adptsf2, etc) do not correspond to the physical PCI slot numbers on the motherboard. No. Port Name NIC 1 2 3 4 5 6 7 8 Adptsf1 Adptsf2 Adptsf3 Adptsf4 Adptsf5 Adptsf6 Adptsf7 Adptsf8 ANA-62044/TX:[1] ANA-62044/TX:[2] ANA-62044/TX:[3] ANA-62044/TX:[4] ANA-62044/TX:[1] ANA-62044/TX:[2] ANA-62044/TX:[3] ANA-62044/TX:[4] Connection Type Status Autodetect (default) Autodetect (default) Autodetect (default) Autodetect (default) Autodetect (default) Autodetect (default) Autodetect (default) Autodetect (default) Enabled Enabled Enabled Enabled Enabled Enabled Enabled Enabled Figure 10-3. Ports Screen 10-4 Duralink64 Failover for NetWare 3 OPTIONAL. The Autodetect default detects which device the port is connected to and negotiates the port speed and transmission mode accordingly. Autodetect is recommended; however, to change the connection type(s): a Select the port, and then press Enter. (To select multiple ports, select the port, and then press F5 one at a time.) b In the Type of Connection menu, select the type, and then press Enter. (Connection Types, page A-2 provides descriptions.) Type of Connection No. Port Name NIC 1 2 3 4 5 6 7 8 Adptsf1 Adptsf2 Adptsf3 Adptsf4 Adptsf5 Adptsf6 Adptsf7 Adptsf8 ANA-62044/TX:[1] ANA-62044/TX:[2] ANA-62044/TX:[3] ANA-62044/TX:[4] ANA-62044/TX:[1] ANA-62044/TX:[2] ANA-62044/TX:[3] ANA-62044/TX:[4] Connection Type Status Autodetect (default) Autodetect 10(default) Mbps/Half Duplex Enabled Autodetect 10(default) Mbps/Full Duplex Enabled Autodetect (default) 100 Mbps/HalfEnabled Duplex Autodetect (default) 100 Mbps/Full Enabled Duplex Autodetect (default) Enabled Autodetect (default) Enabled Autodetect (default) Enabled Autodetect (default) Enabled Figure 10-4. Type of Connection Menu 4 OPTIONAL. Enabled is the default status. To disable a port, select the port, and then press Tab. 5 6 Press Esc when you are done. Continue to Creating the Failover Pairs. 10-5 DuraLAN Fast Ethernet NICs User’s Guide Creating the Failover Pairs The Failover pair consists of two ports only: the primary port and the backup port. 1 In the Main Menu, select Set Failover Pairs, and then press Enter. 2 In the List of Existing Pairs box, press Ins. List of Existing Pairs No Failover Pairs currently exist Figure 10-5. List of Existing Pairs Box 3 Select the pair, and then press Enter. A default pair name uses the naming convention: first pair= Pair1, second pair=Pair2, third pair=Pair3, etc. List of Existin Existing Pairs 1. Pair1 Figure 10-6. List of Existing Pairs 4 In the Failover Pair Configuration menu, select Add/Remove Ports, and then press Enter. List of Existi Existing Pairs Failover Pair Name Pair1 1. Pair1 Failover Pair Configuration Add/Remove Ports Set Failover Pair Name Display Existing Ports Figure 10-7. Failover Pair Configuration Menu 10-6 Duralink64 Failover for NetWare 5 In the Existing Ports box, press Ins. The message No Ports Present appears the first time you add a new pair. Existing Ports No Ports Present Figure 10-8. Existing Ports Box 6 In the Available Ports box, select the primary port, and then press Enter. Available Ports 1. Adptsf1 2. Adptsf2 3. Adptsf3 4. Adptsf4 5. Adptsf5 6. Adptsf6 7. Adptsf7 8. Adptsf8 Figure 10-9. Available Ports Box 7 8 9 Press Ins to return to the Available Ports box. Select the secondary port, and then press Enter. Optional. In the Existing Ports box, the check mark indicates the primary port. To change the primary port, select the second port, and then press Enter. 10 Press Esc to apply the ports. The selected ports appear in the Existing Ports box. Existing Ports 1. Adptsf1 2. Adptsf2 Figure 10-10. Existing Ports Box 10-7 DuraLAN Fast Ethernet NICs User’s Guide 11 OPTIONAL. To rename the default Failover pair name: a From the Failover Pair Configuration menu, select Set Failover Pair Name, and press Enter. b In the Failover Pair Name box, type the pair name, and then press Enter. Pair Name pair1 List of Existing Pairs pair1 1 Failover Pair Name Figure 10-11. Failover Pair Box Pair Name Marcom List of Existing Pairs Marcom 1 Figure 10-12. Pair Name Box 12 To review the ports assigned to the pair, select Display Existing Ports from the Set Failover Pairs menu, and then press Enter. When you select Display Existing Ports, this box is displayed as read-only. Existing Ports 1. Adptsf1 2. Adptsf2 Figure 10-13. Existing Ports Box 13 Press Esc until you return to the Main Menu. 14 To create more pairs, repeat Steps 1 through 13. 15 Continue to Assigning the Protocols. 10-8 Duralink64 Failover for NetWare Assigning the Protocols You can assign IP or IPX protocols to Failover pairs and stand-alone ports. Note: The IPX protocol supports all four frame types and multiple frame types simultaneously. IP supports either Ethernet_II or Ethernet_SNAP, but never both at the same time. 1 In the Main Menu, select Configure Protocols, and then press Enter. 2 In the List of Ports/Failover Pairs box, select the Failover pair or port, and then press Enter. List of Ports / Failover Pairs P = Stand-alone Port F = Failover Pair 1 2 3 4 5 6 P P P P P F Adptsf4 Adptsf5 Adptsf6 Adptsf7 Adptsf8 Marcom Figure 10-14. List of Ports/Failover Pairs Box 3 In the List of Protocols box, select the protocol for the selected Failover pair or port, and then press Enter. List of Protocols IPX IP Figure 10-15. List of Protocols Box 10-9 DuraLAN Fast Ethernet NICs User’s Guide Configuring IPX a In the List of Frame Types box, select the frame type, and then press Enter. List of Frame Types ETHERNET_802.2 ETHERNET_802.3 ETHERNET_II ETHERNET_SNAP Figure 10-16. List of Frame Types Box b In the IPX Network Number box, type the network number, and then press Enter. IPX Network Number 00000001 Figure 10-17. IPX Network Number Box c Repeat steps a and b for each frame type you wish to use. List of Frame Types ETHERNET_802.2 ETHERNET_802.3 ETHERNET_II ETHERNET_SNAP Figure 10-18. List of Frame Types d Press Esc to return to the List of Protocols box. 10-10 Duralink64 Failover for NetWare Configuring IP a In the List of Frame Types box, select the frame type, and then press Enter. b In the IP Parameters box, select Enter IP Address, and then press Enter. IP Parameters Enter IP Address Enter Subnet Mask Figure 10-19. IP Parameters Box c In the IP Address box, type the address number, and then press Enter. IP Address 1.1.1.2 Figure 10-20. IP Address Box d In the IP Parameters box, select Enter Subnet Mask, and then press Enter. e In the Subnet Mask box, type the corresponding subnet mask, and then press Enter. Subnet Mask ff.ff.ff.0 Figure 10-21. Subnet Mask Box f Press Esc. g Repeat Steps a through f for each appropriate port or pair. h Press Esc until you return to the List of Ports/Failover Pairs box. 4 Repeat Steps 1 through 3 for any other port or pair you wish to configure. 5 6 Press Esc until you return to the Main Menu. Continue to Viewing the Configuration. 10-11 DuraLAN Fast Ethernet NICs User’s Guide Viewing the Configuration It is important to verify the current port configurations before saving them to the server. 1 From the Main Menu, select View Configuration, and press Enter. The View Configuration screen appears. Netware Loadable Module Duralink64 Failover Setup Protocol Interfaces Frame Network IP Address Adptsf3 P Adptsf4 P Adptsf5 P Adptsf6 P Adptsf7 P Adptsf8 P Marcom F Adptsf1 (Primary) Adptsf2 IPX E_802.2 00000001 <ESC> to go back to the previous menu. © Copyright 1998, Adaptec Inc. < F1> Help < F10> Abort Install Figure 10-22. View Configuration Screen 2 3 10-12 Press Esc to return to the Main Menu. Continue to Copying and Saving the Configuration. Duralink64 Failover for NetWare Copying and Saving the Configuration After verifying all port and group configurations, you can install the program and configuration-related files to the server. 1 From the Main Menu, select Install Software, and then press Enter. 2 When the Copy New Files box appears, select Yes, and then press Enter. Copy New Files? No Yes Figure 10-23. Copy New Files Box 3 4 From the Main Menu, press Esc to exit the program. In the Save Configuration box, select Save and Quit. The configuration data is saved in sys:\etc\configsf.ncf. – If you do not want to not save the changes, select Quit Without Saving, and then press Enter. – To return to the Main Menu, select Return to Previous Menu, and then press Enter. 5 At the system console prompt, type Down and then press Enter. 6 Type Restart Server, and then press Enter. The server restarts and opens the Failover Status screen, which must appear before logging on clients or using the server console. 7 Continue to Viewing the System Status. 10-13 DuraLAN Fast Ethernet NICs User’s Guide Viewing the System Status After installing Duralink64 Failover through fosetsf, you can view the system status. This program automatically opens whenever you restart the server. To manually enter status, at the system console prompt, type: load status. TheDuralink64 Failover status screen appears. Netware Loadable Module Duralink64 Failover/Stand alone Status Failover Pairs/Ports NIC Transmit Kbps Receive Kbps Status Adptsf3 ANA-62044 10234 5250 Adptsf4 ANA-62044 0 0 Adptsf5 ANA-62044 ANA-62044 12367 6150 ANA-62044 ANA-62044 0 10151 8305 0 5045 4055 ACTIVE ACTIVE ANA-62044 ANA-62044 5798 0 2708 0 ACTIVE STANDBY Adptsf6 Adptsf7 Adptsf8 Marcom >Adptsf1 > Adptsf2 < F1> Help © Copyright 1998, Adaptec Inc. <F8> Refresh Interval ACTIVE DOWN ACTIVE IDLE <ESC> to Exit. Server Name --> [NAME] Figure 10-24. Duralink64 Failover Status Screen Note: This requires that the Failover software be loaded or an error will occur. If you have not rebooted since you installed the software, reboot and the above screen will appear automatically. This module can be used to identify the physical ports by determining the status when unplugging network connections. 10-14 Duralink64 Failover for NetWare Element Descriptions A status screen is provided, showing the following information: ■ NIC model number. ■ Transmit Kbps (Kilobits per second) per port. ■ Receive Kbps per port. ■ The present status of all ports and Failover Pairs. – ACTIVE: This port is currently used for data transfer, and is connected with data being sent and/or received. – IDLE: This port is currently used for data transfer, and is connected with no data being sent or received. – STANDBY: This port currently not used for data transfer, and is connected with no data being sent or received. – DOWN: Port is not connected, or the link is down. F Keys F1— provides on-line help for each screen. F8— Changes the refresh interval. Refresh interval is a userselectable refresh cycle in seconds (default is 1 second). This is the interval by which the utility will refresh the status. 10-15 DuraLAN Fast Ethernet NICs User’s Guide Modifying the Driver Configuration After installing Duralink64 Failover for NetWare, use configsf to add, remove, or change a configuration for Adaptec NIC drivers. You will be familiar with the screens in this program since they are similar to the ones in fosetsf. 1 At the system console prompt, type load configsf and then press Enter. 2 In the message screen indicating that ports were added/removed, press Esc. 3 Refer to Installing the NetWare Failover Driver, page 10-3 for instructions. 10-16 Duralink64 Failover for NetWare Removing Drivers The following procedures are to be used if a new driver needs to be installed to replace an existing driver. Removing the Duralink64 Failover Driver To remove the Duralink64 Failover Driver use the following steps: 1 2 Insert the Duralink64 Drivers For Netware diskette. 3 4 5 6 Select Failover from the Adaptec window. At the system console prompt, type load a:\nwserver\setupsf and press Enter. In the Main Menu, select Uninstall Software, and press Enter. In the Uninstall the Software box, select Yes and press Enter. In the Main Menu, Press Esc to exit setupsf. ❒ 10-17 ▼ ▼ ▼ ▼ 11 Duralink64 Port Aggregation for NetWare In this Chapter Before you Begin 11-2 Note on NetWare 11-2 Installing the NetWare Port Aggregation Driver 11-3 Configuring Ports 11-4 Creating Port Aggregation Groups 11-6 Creating Fast EtherChannel Groups 11-9 Assigning Protocols 11-12 Verifying Configuration 11-15 Viewing System Status 11-17 Modifying Driver Configurations 11-18 Removing Drivers 11-19 This chapter provides instructions for configuring Duralink64 Port Aggregation on a server running NetWare 4.x or NetWare 5.0. 11-1 DuraLAN Fast Ethernet NICs User’s Guide Before you Begin ■ Verify that all system, memory, and NIC requirements are met, see System Requirements on page 1-2. ■ Verify that the new Adaptec DuraLAN NIC(s) have been installed properly in the server, see Chapter 3, DuraLAN NIC Installation. ■ Check your system for installed DuraLAN NIC drivers. If a DuraLAN Standard driver, Duralink64 Failover driver, or Duralink64 Port Aggregation driver exists, it must be removed. For information about driver removal see Removing Drivers on page 9-12. ■ Verify that IntraNetWare Service Pack 6 or later is installed for NetWare 4.11. This pack may be downloaded from: http://suport.novell.com Note on NetWare When you are installing Adaptec DuraLAN NICs, it is a good idea to document where each port physically resides in the server, especially when two or more identical NICs exist. This is important because ports are identified by generic port names, such as Adptsf1, Adptsf2, Adptsf3, etc. Port names are assigned to ports in the order that the system scans these ports at boot time. Consequently, whenever you physically rearrange the network cards, the port names change as well. After you install Duralink64 Port Aggregation, use configsf to reconfigure the drivers when necessary. (See Modifying Driver Configurations on page 11-18.) 11-2 Duralink64 Port Aggregation for NetWare Installing the NetWare Port Aggregation Driver If you are installing NetWare 4.x on a new server, do not add the DuraLAN NIC at this time. When prompted to add the NIC, select No, and then continue with the NetWare installation. If you are installing NetWare 5.0 on a new server, please see Install of Duralink64 Driver during NetWare 5.0 Operating System Installation on page 9-3. Note: This driver uses 32 receive buffers for each port. Therefore, if you are using multiple ports, the number of receive buffers must be increased. Type load edit c:\nwserver\startup.ncf, and then insert the following commands at the end of the file: SET MINIMUM PACKET RECEIVE BUFFERS = 512 SET MAXIMUM PACKET RECEIVE BUFFERS = 1024 To install the Port Aggregation driver for NetWare follow these steps: 1 2 3 Insert the Duralink64 Driver for NetWare 4.x/5.0 diskette. At the system prompt, type: a:\nwserver\setupsf Press Enter. The Select Driver window appears. Figure 11-1. The Select Driver Window 4 5 Select Port Aggregation/FEC and press Enter. 6 Continue to Configuring Ports on page 11-4. In the message indicating the New Adaptec NICs have been detected, press Enter. 11-3 DuraLAN Fast Ethernet NICs User’s Guide Configuring Ports 1 In the Main Menu, select Configure Ports, and then press Enter. Adaptec DuraLAN NIC Installation 4.2 Netware Loadable Module Main Menu Configure Ports Set Groups Configure Protocols View Configuration Install Software Uninstall Software Use arrow keys to move, <Enter> to Select, <ESC> to Exit. © Copyright 1997, Adaptec Inc. < F1> Help < F10> Abort Install Figure 11-2. Duralink64 Port Aggregation Setup Main Menu 2 In the Configuration Ports screen, make sure you know which port names correspond to the actual ports in the server. No. Port Name 1 2 3 4 5 6 7 8 Adptsf1 Adptsf2 Adptsf3 Adptsf4 Adptsf5 Adptsf6 Adptsf7 Adptsf8 NIC ANA-62044/TX:[1] ANA-62044/TX:[2] ANA-62044/TX:[3] ANA-62044/TX:[4] ANA-62044/TX:[1] ANA-62044/TX:[2] ANA-62044/TX:[3] ANA-62044/TX:[4] Connection Type Status Autodetect (default) Autodetect (default) Autodetect (default) Autodetect (default) Autodetect (default) Autodetect (default) Autodetect (default) Autodetect (default) Enabled Enabled Enabled Enabled Enabled Enabled Enabled Enabled Figure 11-3. In this scenario, 2 quad port NICs exist; thus, eight ports are found. [1] is always the top port of a NIC. 11-4 Duralink64 Port Aggregation for NetWare 3 OPTIONAL. The Autodetect default detects which device the port is connected to and adjusts the port speed and transmission mode accordingly. Autodetect is recommended; however, to change the connection type(s): a Select the port, and then press Enter. (To select multiple ports, select the port, and then press F5 one at a time.) b In the Type of Connection menu, select the type, and then press Enter. (Connection Types on page A-2 provides descriptions.) Type of Connection No. Port Name NIC 1 2 3 4 5 6 7 8 Adptsf1 Adptsf2 Adptsf3 Adptsf4 Adptsf5 Adptsf6 Adptsf7 Adptsf8 ANA-62044/TX:[1] ANA-62044/TX:[2] ANA-62044/TX:[3] ANA-62044/TX:[4] ANA-62044/TX:[1] ANA-62044/TX:[2] ANA-62044/TX:[3] ANA-62044/TX:[4] Connection Type Status Autodetect (default) Autodetect (default) Enabled 10 Mbps/Half Duplex Autodetect (default) Enabled 10 Mbps/Full Duplex Autodetect (default) Enabled 100 Mbps/Half Duplex Autodetect (default) Enabled 100 Mbps/Full Duplex Autodetect (default) Enabled Autodetect (default) Enabled Autodetect (default) Enabled Autodetect (default) Enabled Figure 11-4. Type of Connection Menu 4 OPTIONAL. Enabled is the status default. To disable a port, select the port and then press Tab. 5 6 When you are finished, press Esc to return to the Main Menu. Continue to Creating Port Aggregation Groups on page 11-6. 11-5 DuraLAN Fast Ethernet NICs User’s Guide Creating Port Aggregation Groups After configuring ports, you may create Port Aggregation groups using the following steps: 1 2 In the Main Menu, select Set Groups, and then press Enter. In the List of Existing Groups box, press Ins to add a new group. List of Existing Grou Groups No groups currently exist Figure 11-5. This message appears the first time you add a new group.1 3 Select the group, and then press Enter. List of Existing Grou Groups 1. Group1 Figure 11-6. Group1 is the new group’s default name. 4 In the Group Configuration menu, select Add/Remove Ports, and then press Enter. List of Existing Grou Groups Group Name Group1 1. Group1 Group Configuration Add/Remove ports Set group name Set group type Display existing ports Figure 11-7. Group Configuration Menu 1 If you are in configsf, this message appears only when no groups are found. 11-6 Duralink64 Port Aggregation for NetWare 5 In the Existing Ports box, press Ins. The message No Ports Present appears the first time you add a new group. Existing Ports No Ports Present Figure 11-8. This message appears the first time you add a new group. 6 In the Available Ports box, use F5 to select the ports for the new group, and then press Enter. Figure 11-9. For this scenario, three ports are selected for the new group. 7 Press Esc to return to the Group Configuration menu. Existing Ports 1. Adptsf1 2. Adptsf2 3. Adptsf3 Figure 11-10. The selected ports are transferred to the Existing Ports box. 8 In the Group Configuration menu, select Group Type and press Enter. The Group Type menu appears. Figure 11-11. Group Type menu 11-7 DuraLAN Fast Ethernet NICs User’s Guide 9 In the Group Type menu select, Adaptec Duralink Port Aggregation and press Enter. 10 Press the Esc key to return to the Group Configuration menu. 11 OPTIONAL. setupsf automatically assigns a name to each new group. For example, the first group=Group1. To assign a unique name to a group: a From the Group Configuration menu, select Set Group Name, and then press Enter. b In the Group Name box, type the group name, and then press Enter.(This field allows up to 20 characters.) Group Name Marcom List of Existing Grou Groups 1 Marcom Figure 11-12. This group will be called Marcom for the Marketing Department’s network. 12 To create another group, repeat steps 2 through 11. 13 Press Esc until you return to the Main Menu. 14 Continue to Assigning Protocols on page 11-12. 11-8 Duralink64 Port Aggregation for NetWare Creating Fast EtherChannel Groups Fast EtherChannel supports either two or four ports. One, three, or more than four ports are not acceptable. After configuring ports, you may create Fast EtherChannel groups using the following steps: 1 2 In the Main Menu, select Set Groups, and then press Enter. In the List of Existing Groups box, press Ins to add a new group. The message No Ports Present appears the first time you add a new group. List of Existing Grou Groups No groups currently exist Figure 11-13. This message appears the first time you add a new group.1 3 Select the group, and then press Enter. List of Existing Grou Groups 1. Group1 Figure 11-14. Group1 is the new group’s default name. 4 In the Group Configuration menu, select Add/Remove ports, and then press Enter. The Group Type menu appears. Figure 11-15. Group Configuration Menu 1 If you are in configsf, this message appears only when no groups are found. 11-9 DuraLAN Fast Ethernet NICs User’s Guide 5 In the Existing Ports box, press Ins. The message No Ports Present appears the first time you add a new group. Existing Ports No Ports Present Figure 11-16. This message appears the first time you add a new group. 6 In the Available Ports box, use F5 to select the ports for the new group, and then press Enter. Figure 11-17. For this scenario, four ports are selected for the new group. 7 Press Esc to return to the Group Configuration menu. Figure 11-18. The selected ports are transferred to the Existing Ports box. 11-10 Duralink64 Port Aggregation for NetWare 8 In the Group Configuration menu, select Group Type and press Enter. The Group Type menu appears. Figure 11-19. Group Type menu 9 In the Group Type menu select, Cisco Fast EtherChannel and press Enter. 10 Press the Esc key to return to the Group Configuration menu. 11 OPTIONAL. setupsf automatically assigns a name to each new group. For example, the first group=Group1. To assign a unique name to a group: a From the Group Configuration menu, select Set Group Name, and then press Enter. b In the Group Name box, type the group name, and then press Enter.(This field allows up to 20 characters.) Group Name Marcom List of Existing Grou Groups 1 Marcom Figure 11-20. This group will be called Marcom for the Marketing Department’s network. 12 To create another group, repeat steps 2 through 11. 13 Press Esc until you return to the Main Menu. 14 Continue to Assigning Protocols on page 11-12. 11-11 DuraLAN Fast Ethernet NICs User’s Guide Assigning Protocols You can assign the IP or IPX protocols to groups and stand-alone ports. The IPX protocol supports the following frame types simultaneously: ■ ETHERNET_802.2 ■ ETHERNET_802.3 ■ ETHERNET_II ■ ETHERNET_SNAP IP supports either ETHERNET_II or ETHERNET_SNAP, but never both at the same time. 1 In the Main Menu, select Configure Protocols, and then press Enter. 2 In the List of Ports/Groups box, select the group or port, and then press Enter. The virtual port— Marcom—requires one protocol only.1 List of Ports / Groups P=Port 1 2 3 4 5 6 P P P P P G Adptsf4 Adptsf5 Adptsf6 Adptsf7 Adptsf 8 Marcom (FEC) G=Group Figure 11-21. List of Ports/Groups Box 1 Refer to the List of Existing Groups box to verify which ports are assigned to a particular group. 11-12 Duralink64 Port Aggregation for NetWare 3 In the List of Protocols box, select the protocol for the current group/port, and then press Enter. List of Protocols IPX IP Figure 11-22. List of Protocols Box – If you are configuring IPX: a In the List of Frame Types box, select the frame type, and then press Enter. List of Frame Types ETHERNET 802.2 ETHERNET 802.3 ETHERNET II ETHERNET SNAP Figure 11-23. Marcom will be bound with ETHERNET 802.2. b In the IPX Network Number box, type a unique IPX network number, and then press Enter. IPX Network Number 121212121 Figure 11-24. Example of an IPX network number. c Repeat steps a and b for each frame type you wish to use. A check indicates enabled frame types. List of Frame Types ETHERNET 802.2 ETHERNET 802.3 ETHERNET II ETHERNET SNAP Figure 11-25. Marcom and ETHERNET_802.2 are bound. d Press Esc to return to the List of Protocols box. 11-13 DuraLAN Fast Ethernet NICs User’s Guide – If you are configuring IP: a In the List of Frame Types box, select the frame type, and then press Enter. List of Frame Types ETHERNET II ETHERNET SNAP Figure 11-26. List of Frame Types Box b In the IP Parameters box, select Enter IP Address, and then press Enter. IP Parameters Enter IP Address Enter Subnet Mask Figure 11-27. IP Parameters Box c In the IP Address box, type the address number, and then press Enter. d In the IP Parameters box, select Enter Subnet Mask, and then press Enter. e In the IP Subnet Mask Number box, type the subnet mask, and then press Enter. f Repeat steps a through e for each appropriate port or group. g Press Esc twice to return to the List of Protocols box. 4 Repeat steps 2 and 3 for any other group or port you wish to configure. 5 6 Press Esc to return to the Main Menu. 11-14 Continue to Verifying Configuration. Duralink64 Port Aggregation for NetWare Verifying Configuration You should verify the current port configurations before saving them to the server. 1 From the Main Menu, select View Configuration, and then press Enter. The View Configuration screen appears. Netware Loadable Module Duralink Port Aggregation Setup Interfaces Adptsf4 P Protocol Frame Adptsf5 P No Protocols Configured Adptsf6 P No Protocols Configured Adptsf7 P No Protocols Configured Adptsf8 P No Protocols Configured Marcom G Adptsf1 Adptsf2 Adptsf3 Network IP Address No Protocols Configured IPX E_802.2 121212121 <ESC> to go back to the previous menu. © Copyright 1998, Adaptec Inc. < F1> Help < F10> Abort Setup Figure 11-28. View Configuration Screen Figure 11-28 summarizes that currently five stand-alone ports without configurations and one group named Marcom are enabled.1 Marcom is made up of three ports: Adptsf1, Adaptsf2, and Adapts3. The IPX protocol is assigned to Marcom using ETHERNET_802.2 as the frame type and 121212121 as the IPX Network Number. 2 3 1 Press Esc to return to the Main Menu. Continue to Copying and Saving the Configuration. If the ports or group were disabled, [Disabled] would appear next to the port/group name. 11-15 DuraLAN Fast Ethernet NICs User’s Guide Copying and Saving the Configuration Once you have established and verified all port and group configurations in lbsetsf, you are ready to install program and configuration related files to the server. 1 From the Main Menu, select Install Software, and then press Enter. 2 In the Copy New Files box, select Yes, and then press Enter. Copy New Files? No Yes Figure 11-29. Copy New Files Box 3 4 From the Main Menu, press Esc to exit the program. In the Save box, select Save and Quit to save the configuration in sys:\etc\configsf.ncf and quit the program. – If you do not want to save the changes, select Quit without Saving, and then press Enter. – If you wish to return to the Main Menu, select Return to Previous Menu, and then press Enter. 5 Restart the server. – In NetWare 4.x: a At the system console prompt, type Down, and then press Enter. b Type Restart Server. – In NetWare 5.0: a At the system console prompt, type restart server, and then press Enter. 6 11-16 Continue to Viewing System Status on page 11-17. Duralink64 Port Aggregation for NetWare Viewing System Status Once you have installed Duralink64 Port Aggregation using lbsetsf, you can view the system status in the System Status screen. This program opens automatically whenever you restart the server. ■ To manually enter the Status screen, at the system console prompt type: load status Netware Loadable Module Duralink64 Port Aggregation Status 4.2 Groups/Ports NIC Transmit Kbps Load Perc. Status Adptsf4 ANA-62044 10234 100 ACTIVE Adptsf5 Adptsf6 Adptsf7 Adptsf8 ANA-62044 ANA-62044 ANA-62044 ANA-62044 0 12367 10151 8305 0 100 100 100 DOWN ACTIVE ACTIVE ACTIVE Marcom G Adptsf1 Adptsf2 Adptsf3 ANA-62044 ANA-62044 ANA-62044 5798 5798 0 0 100 100 0 0 ACTIVE IDLE DOWN < F1> Help <F8> Refresh Interval © Copyright 1998, Adaptec Inc. <ESC> to Exit. Server Name --> [NAME] Figure 11-30. Data sample provided in the System Status screen. System Status Data ■ Adaptec NIC model number ■ Total Kilobits/second (Kbps) transmitted per port (stand-alone and group). Total Kbps transmitted per group. The Kbps sum of aggregated ports in a group equals the total Kbps transmitted by their group. 11-17 DuraLAN Fast Ethernet NICs User’s Guide ■ Percentage of transmit load carried by each port in a load balancing group. The percentage for a stand-alone port is always 100%. The percentage for a group is calculated as a percentage of bytes transmitted by the port over bytes transmitted by the group for a fixed period of time. (Use F8 to adjust time intervals.) ■ The present status of all ports and groups. – DOWN is displayed, f a link is down. – ACTIVE is displayed, if the link is up and has transmitted data within a time interval. – IDLE is displayed, if the link is up but the port has not transmitted any data within the time interval. Setting Time Intervals By default, the System Status screen refreshes every second. You may change the time interval using F8. Modifying Driver Configurations Once Duralink64 Port Aggregation is installed, use configsf to add, remove, or change a driver configuration for an Adaptec DuraLAN NIC.You will be familiar with the screens in this program since they are similar to the ones in lbsetsf. 1 2 At the system console prompt, type load configsf. 3 Once you have opened configsf, refer to Configuring Ports for more instructions. 11-18 In the message screen indicating that ports were added/removed, press Esc. Duralink64 Port Aggregation for NetWare Removing Drivers The following procedures are to be used if a new driver needs to be installed to replace an existing driver. Removing the Duralink64 Port Aggregation Driver To remove the Duralink64 Port Aggregation Driver use the following steps: 1 2 Insert the Duralink64 Drivers For Netware disk. 3 4 5 6 Select Port Aggregation from the Adaptec window. At the system console prompt, type load a:\nwserver\setupsf and press Enter. In the Main Menu, select Uninstall Software, and press Enter. In the Uninstall the Software box, select Yes and press Enter. In the Main Menu, Press Esc to exit setupsf. ❒ 11-19 ▼ ▼ ▼ ▼ 12 Installing Duralink64 NetWare Client In This Chapter Installing Novell Client32 12-2 Connecting Clients to the NetWare Failover Server 12-6 Connecting Clients to the NetWare Port Aggregation Server 12-7 This chapter provides instructions for installing Duralink64 on a NetWare client. 12-1 DuraLAN Fast Ethernet NICs User’s Guide Installing Novell Client32 DOS This section provides instructions on installing the ADPTSF 32-bit driver for Novell Client32 using the ODI driver. Please note that DuraLAN products do not support 16-bit drivers. 1 Download the latest version of Novell NetWare Client32 via the Novell web site, www.novell.com. 2 3 4 5 Start DOS. 6 When you are done, you may confirm settings in startnet.bat. Insert your Novell NetWare Client32 package. Type install and then press Enter. Follow the instructions on your screen. Please refer to Selecting Options if you are not sure which option to select. Note: This installation setup assigns settings to one port only. To assign settings to multiple ports, you must edit startnet.bat. See Editing startnet.bat on page 12-4. 12-2 Installing Duralink64 NetWare Client Selecting Options This section provides the option you must choose in a given screen. These screens vary depending on which NetWare Client32 package you are using. Screen Name/Message Option Client Installation Choose either NetWare Client32 for DOS and Windows 3.1x or IntranetWare DOS/Windows for DOS/Windows. Driver Type Choose 32-Bit. 32-Bit Network Board Drivers Choose User Specified 32 Bit Driver. Do not choose Adaptec PCI Ethernet Driver Failover! When asked to insert the NetWare Client32 for DOS/Windows 3.1x 32-bit disk Insert the Duralan Driver for NetWare 4.X (disk 2 of 2), and then type a:\nwserver. 32-Bit Network Board Drivers Choose Adaptec DuraLAN Network Adapters. Settings for Adaptec DuraLAN Network Adapter Set IOMAP to 1. Set Connection Type to Autodetect Default or None. 12-3 DuraLAN Fast Ethernet NICs User’s Guide Editing startnet.bat To assign multiple ports, follow these steps: 1 2 Load c:\novell\client32\adptsf.lan. In startnet.bat, type slot=[port slot number] at the end of each line. The following example shows the setting assigned to port 1: iomap=1 Frame=ETHERNET_802.2 slot=1 3 For the next port, enter iomap=1 Frame=[frame type] slot=[port slot number] To assign multiple frame types, repeat this step changing the frame type setting. 4 5 6 Repeat step 3 for each additional port. Save your changes. Exit startnet.bat. Connecting Clients to the NetWare Server Connecting clients to the NetWare Duralink64 server requires the NDIS driver. Do not use an ODI driver! See the appropriate section: ■ Connecting Clients to the NetWare Failover Server on page 12-6. ■ Installing the NetWare Port Aggregation Driver on page 11-3. 12-4 Installing Duralink64 NetWare Client Windows This section describes how to install the ADPTSF 32-bit driver for Novell Client32. Please note that Adaptec does not support 16-bit drivers. Note: This procedure requires the NDIS driver with Client32. Do not use an ODI driver! 1 If you are using Windows NT 4.0, install the Microsoft Windows NT Service Pack 3 or later and then restart the system. 2 Install the DuraLAN Standard driver. Instructions are provided in Installing the NetWare Standard Driver on page 9-4. 3 Install the Client32 software, see your Novell documentation for instructions. Connecting Clients to the NetWare Server Connecting clients to the NetWare Duralink64 server requires the NDIS driver. Do not use an ODI driver! See the appropriate section: ■ Installing the NetWare Failover Driver on page 10-3. ■ Installing the NetWare Port Aggregation Driver on page 11-3. 12-5 DuraLAN Fast Ethernet NICs User’s Guide Connecting Clients to the NetWare Failover Server For optimum performance of NetWare Duralink64 Failover, all clients (any brand) should increase their IPX retry count. ■ For DOS clients using VLM or Novell Client32 Type the following lines in net.cfg (indent the second line): protocol ipx ipx retry count = 255 ■ For Windows 95 Clients using Novell Client32 From the Control Panel, locate NetWare Clients, and then enter 255 under the IPX retry count in the IPX 32-bit Protocol tab. ■ For Windows NT Clients using Novell Client32 Set the IPX retry count in the registry in NetWareWorkstation Parameters. Use the following steps: a From the DOS prompt, type regedit to enter the Registry Editor. b c d e f g h i j k l 12-6 Double-click hkey_local_machine. Double-click System. Double-click CurrentControlSet. Double-click Services. Double-click NetWare Workstation. Double-click Parameters. Double-click Retry Count to enter the Edit DWORD Value menu. Change base to decimal, and then change value data to 255. Click OK. Close the Registry Editor. Restart the system. Installing Duralink64 NetWare Client Connecting Clients to the NetWare Port Aggregation Server For optimum performance of NetWare Duralink64 Port Aggregation, all clients (any brand) should increase their IPX retry count. ■ For DOS clients using VLM or Novell Client32 Type the following lines in net.cfg (indent the second line): protocol ipx ipx retry count = 255 ■ For Windows 95 Clients using Novell Client32 From the Control Panel, locate NetWare Clients, and then enter 255 under the IPX retry count in the IPX 32-bit Protocol tab. ■ For Windows NT Clients using Novell Client32 Set the IPX retry count in the registry in NetWare Workstation Parameters. Use the following steps: a From the DOS prompt, type regedit to enter the Registry Editor. b c d e f g h i j k l Double-click hkey_local_machine. Double-click System. Double-click CurrentControlSet. Double-click Services. Double-click NetWare Workstation. Double-click Parameters. Double-click Retry Count to enter the Edit DWORD Value menu. Change base to decimal, and then change value data to 255. Click OK. Close the Registry Editor. Restart the system. ❒ 12-7 ▼ ▼ ▼ ▼ Part 5 Appendices ▼ ▼ ▼ ▼ A Cables and LEDs This section is not intended to be an exhaustive explanation of connecting Ethernet networks but will provide some useful information on cabling suitable for Adaptec DuraLAN NICs. The following table outlines the two cable specifications of IEEE 802.3u: 100BASE-TX and 100BASE-FX. 100BASE-TX 100BASE-FX Cable supported CAT 5 UTP 62.5/125 multimode fiber Number of cable pairs 2 1 Node-torepeater cabling distance 100 meters 137 meters Node-to-switch to full duplex 100 meters 2000 meters A-1 DuraLAN Fast Ethernet NICs User’s Guide Connection Types Here are some of the possible connection type options given when configuring NICs. The options vary depending which operating system the NIC is being configured on. ■ Autodetect Default Connection Detects the cable type, optimal line speed, and duplexity for the specific Adaptec PCI NIC model in use. This is the default and recommended connection type. ■ 10 Mbps UTP/Half Duplex Forces the connection to 10 Mbps in Half Duplex mode. ■ 100 Mbps TX/Half Duplex Forces the connection to 100 Mbps in Half Duplex mode. ■ 10 Mbps UTP/Full Duplex Forces the connection to 10 Mbps in Full Duplex mode. ■ 100 MbpsTX/Full Duplex Forces the connection to 100 Mbps in Full Duplex mode. Full Duplex Support To implement Full Duplex on your network, you need both a NIC and a switch that supports Full Duplex. Full Duplex support allows a NIC to send and receive data at the same time, doubling available bandwidth. Note: Full Duplex can also be enabled point-to-point with a crossover cable instead of a switch. Installation instructions in this user’s guide describe how to enable Full Duplex. Additional information can be found in the readme.txt files. Adaptec PCI TX NICs support Full Duplex at both 10 Mbps and 100 Mbps. A-2 Cables and LEDs Cable Requirements Cable requirements for Adaptec DuraLAN NICs vary according to network speed, cabling standard, and the connector to be used. The table below identifies appropriate cabling, based on these variables. The table applies to both Half Duplex and Full Duplex (for selected models) environments. NIC Connector 10 Mbps 100 Mbps Cable Pins Used TX Adapters RJ-45 CAT 3,4,5 UTP CAT 5 UTP, 1,2,3, 6 FX Adapters ST N/A 62.5/125 micron multimode fiber N/A SC N/A 62.5/125 micron multimode fiber N/A A-3 DuraLAN Fast Ethernet NICs User’s Guide Straight-through Cable The majority of twisted-pair environments use twisted-pair cables that are wired straight-through. This means that each pin of the modular plug connector is wired to the same pin on the opposite end of the cable (i.e., pin 1 is wired to pin 1). Straight-through cables connect workstations and servers to repeaters and switches. Cables for 100BASE-TX use two pairs (pins 1, 2, 3, and 6). 1 23 4 5 6 7 8 1 23 4 5 6 7 8 Pins used for TX Figure A-1. Straight-through Cable A-4 Cables and LEDs Pinout and Color Requirements Straight-through Cable - 10BASE-T or 100BASE-TX Pin Colors - Both Ends 1 Orange White 2 Orange 3 Green White 4 Blue 5 Blue White 6 Green 7 Brown White 8 Brown Diagnostics Loop-Back Cable The following pin-outs are used for Diagnostics external and autonegotiation tests. Refer to the Diagnostic Tests on page D-3. 1 23 4 5 6 7 8 Figure A-2. Loop-back Cable A-5 DuraLAN Fast Ethernet NICs User’s Guide Diagnostic LEDs Diagnostic Light Emitting Diodes (LEDs) provide information about link status (ls) and network activity (act). The figure below shows the locations of LEDs for each board. See the descriptions on the following page for details on each LED display. Speed100 Speed100 act act Speed10 Speed10 ANA-62011 ANA-69011 Speed100, p1 act, p1 Speed10, p1 act, p1 act, p2 Speed100, p2 act, p2 Speed10, p2 act, p3 ls, p1 ls, p2 ls, p3 ls, p4 act, p4 ANA-62022 ANA-62044 Figure A-3. act = network activity, p = port, ls = link status A-6 Cables and LEDs LED Functions For ANA-69011, ANA-62011, and ANA-62022: ■ Speed100 The Speed100 LED is green. When ON, it indicates that a valid 100 Mbps link has been made. ■ Speed10 The Speed10 LED is green. When ON, it indicates that a valid 10 Mbps link has been made. When OFF, no 10 Mbps link has been made. ■ ACT The ACT LED is amber. The ACT LED lights up to signal the presence of incoming or outgoing traffic. For ANA-62044: ■ LS When ON and green, it indicates that a valid 100 Mbps link has been made. When ON and amber, it indicates that a valid 10 Mbps link has been made. When OFF, no valid link has been made. ■ ACT The ACT LED is amber. The ACT LED lights up to signal the presence of incoming or outgoing traffic. ❒ A-7 ▼ ▼ ▼ ▼ B Troubleshooting Tips This appendix explains how to troubleshoot problems with your DuraLAN NIC. If your NIC is not functioning properly, first make sure that it was set up according to instructions in this User’s Guide. 1 Verify that your NIC is installed properly and configured correctly, see Chapter 3, DuraLAN NIC Installation. 2 Verify that your network is properly cabled and the NIC is properly connected (see Connecting the Network Cable on page 3-6 and Appendix A, Cables and LEDs). 3 Verify that the DuraLAN driver is installed correctly (see Part 2, Installing the DuraLAN NIC, or Part 3, The DuraLink64 Driver for Windows). 4 Verify that you are using the latest BIOS for your computer, and the latest DuraLAN driver. 5 Verify that your cable, terminators, and connectors are functioning properly, or install the NIC in a different slot. 6 See Adaptec Technical Support and Services on page ii if you still have trouble. B-1 DuraLAN Fast Ethernet NICs User’s Guide Isolating Faulty Hardware If the problem persists, try the following: ■ Replace the NIC with the same type of Adaptec NIC which is known to work. If the new NIC functions properly, the problem is related to the original NIC. ■ Install the NIC in another functioning computer and run the tests again. If the NIC works in this machine, the problem is related to one of three areas: – The computer is faulty – There is a hardware conflict – There are problems with the cables or connectors Troubleshooting Use the following table to help answer common questions. For more information on FAQs, see the www.adaptec.com support site. Symptom Solution Adaptec NIC is conflicting with an installed PCI SCSI Adapter. Configure the NIC and SCSI adapters to use different interrupts via BIOS, System Configuration Utility (SCU), or EISA Configuration Utility (ECU) provided by the system vendor. Workstations cannot connect to the NetWare server. ■ ■ Make sure the workstation and server are using the same frame type. Add the following two lines to the NetWare Server startup.ncf file: set minimum packet receive buffers=512 set maximum packet receive buffers=1024 ■ Error messages during NetWare Driver installation. B-2 For Failover and Port Aggregation NetWare servers, verify that IPX retry count= 255 is on each workstation. See Connecting Clients to the NetWare Failover Server on page 12-6. Install NetWare service pack 6(iwsp6) or later, select ODI 3.31 specification, and then install the DuraLAN NIC driver. Troubleshooting Tips Symptom Solution Driver fails to load or fails to recognize the DuraLAN NIC Check the BIOS settings. Sometimes the bus master is disabled by default; therefore, enable the bus master. Persistent problems with an adapter card set to IRQ 15. This occurs in Novell NetWare. Either disable IRQ 15 or change the Adaptec DuraLAN NIC to another interrupt. Please refer to your Novell documentation. System hangs at boot up. Make sure the DuraLAN NIC is seated properly in the PCI slot. Check your system vendor for the latest BIOS. LED does not light when running autonegotiation in the Diagnostics utility. Use a loop-back cable, see Diagnostics LoopBack Cable on page A-5. B-3 DuraLAN Fast Ethernet NICs User’s Guide Configuring the BIOS Your system BIOS may determine available NIC resources and configure the Adaptec PCI NICs automatically. However, depending on your system, you may need to configure the PCI BIOS. To do this, enter your computer BIOS Setup and select Advanced Settings from the Main Menu. Make sure the following settings are made (your BIOS may not match the following options exactly): Option Setting PCI Slot Enabled Enable all PCI slots in your system. Bus Mastering Enable PCI bus mastering for the slot(s) to be used by the NICs. PCI INTA For the 6x011, assign an interrupt (10, 11, 12, etc.) to PCI Interrupt Vector A. PCI INTA-B For the 6x022, assign an interrupt (10,11, 12, etc.) to PCI Interrupt Vector A or B. PCI INTA-D For the 6x044, assign an interrupt (10,11, 12, etc.) to PCI Interrupt Vector A - D. PCI Bus Latency Set to a value between 40 and 80. Two-and-four port NICs use a PCI-to-PCI bridge chip. If your system’s BIOS does not support the PCI-to-PCI bridge chip these NICs will not be configured properly. Contact your computer manufacturer to obtain a new BIOS version that supports the PCI-toPCI bridge chip. B-4 Troubleshooting Tips Frequently Asked Questions Duralink64 Software And DuraLAN NICs General Questions 1 What is Duralink64 v4.2 software? Adaptec's innovative Duralink64 software includes Duralink64 standalone drivers, Port Aggregation, Failover, and Server Manager software and is supported by Adaptec's DuraLAN 32 and 64-bit NICs. Duralink Port Aggregation software makes it possible to aggregate the outbound bandwidth of 2 to 12 Fast Ethernet ports into one virtual network interface for up to 1.2 Gbps of total throughput per workgroup. Duralink64 Failover Software offers FDDI-like port resiliency for optimum availability, and safe, fault-tolerant Fast Ethernet networks. Duralink Server Manager is a robust utility that uses standard protocols, and graphically displays the status of each Adaptec NIC attached to the server. 2 How do the standalone, Port Aggregation, and Failover drivers differ? The Duralink64 standalone driver is the minimum software required for DuraLAN NICs. Duralink64 Port Aggregation software groups up to 12 Fast Ethernet ports onto a single aggregated connection operating up to 1.2 Gbps per workgroup. Duralink Failover software is an application that automatically reacts to preserve a network connection if an Ethernet link fails. 3 Which Adaptec NICs support the Duralink64 v4.2 software suite? Adaptec's Duralink64 standalone drivers, Port Aggregation, Failover and Server Manager is supported by the ANA-69011/TX, ANA-62011/TX, ANA-62022, and ANA-62044. B-5 DuraLAN Fast Ethernet NICs User’s Guide 4 Can I use the Adaptec Duralink64 v4.2 software with NICS from other vendors? Duralink64 v4.2 software only works with Adaptec PCI 10/100 DuraLAN NICs but is fully interoperable with other products from other vendors. 5 Which protocols work with Duralink64 v4.2 software and my DuraLAN NICs? TCP/IP and NetBEUI under Windows NT and TCP/IP and IPX/SPX under NetWare. 6 Does Duralink64 v4.2 software or the DuraLAN NICs support AppleTalk? No 7 Does Duralink64 v4.2 or my DuraLAN NIC support routing? Routing functionality is provided by network operating systems, and not by NICs themselves. The NIC can be used with server operating systems (like Novell NetWare and Windows NT) that support routing. 8 What is the difference between the Duralink64 v4.2 and Duralink v3.0 software? Duralink64 v4.2 is the software written for Adaptec's DuraLAN ASIC (used on the ANA-69011/TX, ANA-62011/TX, ANA-62022, and ANA-62044). Duralink v3.0 is the software written for Adaptec's legacy NICs based on the DEC/Intel ASICs (used on the ANA-6911A/XX, ANA-6922A/XX, and ANA-6944A &B/XX. 9 Can I use the Duralink64 v4.2 software with the legacy Adaptec DEC-based NICs? No. The Duralink64 v4.2 software is written only for the new Adaptec DuraLAN NICs and will not support the legacy Adaptec DEC-based NICs. You can use both cards in one system if you load both the Duralink64 v4.2 and Duralink v3.0 software. However, you can not mix and match Adaptec legacy DEC-based cards and Adaptec DuraLAN cards in a single port aggregation or failover group. B-6 Troubleshooting Tips Duralink64 v4.2 Failover Software Questions 1 What is Duralink64 Failover software? Duralink64 Failover software is a network device application that automatically reacts to preserve a network connection when an Ethernet link fails. Duralink64 Failover supports mission-critical applications by activating a standby link in the event of failure, providing increased uptime and maintaining server availability. The driver establishes an active and a hotstandby link. Once the active link goes down, the standby one becomes active. The standby link is activated when the following conditions occur on the primary link: link loss, the driver loses contact with the NIC's “keep alive” mechanism, abnormal hardware interrupt occurs, the port becomes unable to transmit for a specified time, or abnormal send and receive counters occur, such as too many collisions or errors on the segment. 2 Which protocols work with Duralin64 Failover? TCP/IP and NetBEUI under Windows NT and TCP/IP and IPX/SPX under NetWare. 3 Is Duralink64 software interoperable/compatible with other vendors' NICs and network devices? Duralink software only works with Adaptec DuraLAN NICs but is fully interoperable with network devices (such as switches and hubs) from other vendors. 4 Does Duralink64 Failover work with a switch or a hub? Duralink64 Failover works with any switch or any hub. 5 How many ports can I configure for the failover group? Two ports per failover group. Within each group, only one port can be used as the primary or active port and only one port can be used as the backup or standby port. 6 What happens during failover? The driver momentarily halts data transmission, does error checking, transfers the MAC address of the primary port to the backup port, enables the backup port for data transmissions, and continues to transmit data on the backup port. B-7 DuraLAN Fast Ethernet NICs User’s Guide 7 If I have the Duralin64 standalone drivers installed and want to install the Failover drivers, what do I need to do? You must uninstall or remove the Duralink64 standalone drivers and reboot the system. Then you can install the Duralink64 Failover drivers. Duralink64 v4.2 Port Aggregation Software Questions 1 What is Duralink64 Port Aggregation software? Adaptec's Duralink64 Port Aggregation technology builds upon standards-based Fast Ethernet to provide network managers a reliable high-speed solution for the network backbone. Duralink64 Port Aggregation software groups up to 12 Fast Ethernet ports onto a single aggregated connection operating up to 1.2 Gbps per workgroup. See the Port Aggregation white paper on the Adaptec web site (http://www.adaptec.com). 2 What are the key benefits of Duralink64 Port Aggregation software? – Network scalability – Increases bandwidth by adding ports – Allows segmentation of the network as needed by grouping ports – Adds fault tolerance by design 3 What applications or environments call for Duralink64 Port Aggregation? Applications or environments that require Duralink64 Port Aggregation include servers that have large numbers of clients or download large amounts of data, such as application and video servers. B-8 Troubleshooting Tips 4 How does Duralink64 Port Aggregation work? For all protocols, Duralink64 Port Aggregation effectively balances transmit traffic among all ports of an aggregation group. The Port Aggregation driver assigns a primary port to the aggregation group and the protocol binds to that port. To the protocol, the primary port is the only port. However, the driver uses all the ports in the group to transmit packets to the clients. Packets are generally received by the server via the primary port, but in the case of NetBEUI, all ports receive and transmit. Duralink64 Port Aggregation requires connection to a switch in order for the ports to be aggregated as one logical link 5 How does the failover portion of Duralink64 Port Aggregation work? Network fault tolerance means that a specific portion of the network is able to tolerate a failure. Fault tolerance is a built-in feature of the Duralink64 Port Aggregation product because there are at least two contributing members of each aggregation group. It is highly improbable that the server connection will fail in this context. If one port fails, the duties associated with the failed port are redistributed to other members of the aggregation group. If the primary port fails, another member of the group is assigned the primary port's MAC address, minimizing impact to routers and their routing tables. If the primary port comes back online, the primary port's address is reassigned back to the primary port. 6 What NICs support Duralink64 Port Aggregation? Adaptec's ANA-69011/TX, ANA-62011/TX, ANA-62022, and ANA-62044 NICs support Duralink64 Port Aggregation. 7 Which network switches support Duralink64 Port Aggregation? Duralink64 Port Aggregation has been tested with all the leading vendors' switches. Duralink64 Port Aggregation requires connection to a switch in order for the ports to be aggregated as one logical link. B-9 DuraLAN Fast Ethernet NICs User’s Guide 8 Which protocols and operating systems work with Duralink64 Port Aggregation? Adaptec's Port Aggregation driver works with TCP/IP and NetBEUI under Windows NT and TCP/IP and IPX/SPX under NetWare. 9 Does Duralink64 Port Aggregation support multiple VLANs? Only one VLAN is supported per aggregated group or per port. 10 How does Duralink64 Port Aggregation compare to Cisco's Fast EtherChannel? Both Duralink64 Port Aggregation and Cisco's Fast EtherChannel are proprietary. Cisco's Fast EtherChannel focuses on increasing bandwidth between Cisco switches while Adaptec's Port Aggregation focuses on increasing bandwidth between server and switch connections, to increase server availability to clients. Each port on Cisco's Fast EtherChannel module can be configured to Fast EtherChannel mode or Fast Ethernet mode. (Fast EtherChannel mode allows you to group up to four ports from one Fast EtherChannel module to another Fast EtherChannel module in different Cisco switches.) 11 Does Duralink64 Port Aggregation support Cisco's Fast EtherChannel? Yes. 12 Where can I learn more about Duralink64 Port Aggregation? Go to the Adaptec web site at: http://www.adaptec.com. Duralink64 v4.2 Windows NT - General Questions 1 Which service pack has been tested with DuraLAN and Duralink Failover 4.0 drivers? Windows NT Service Pack 3 (SP3). Microsoft generally recommends installing SP3 on all NT systems. Before installing duralink64 v4.2 software, be sure to install SP3. B-10 Troubleshooting Tips Note: Duralink64 software may not work properly with SP1 or SP2. 2 Where are the NT drivers on the diskette? The standalone drivers are at the root directory (a:\). The Failover drivers are in the a:\NtFailover\i386 directory. 3 Does Duralink64 v4.2 support Novell's 32-bit client for Windows NT? Yes. However, connecting clients to the NetWare Duralink64 server requires the NDIS driver. Do not use an ADI driver. See the User's Guide Windows NT Installation section for details. 4 How can I determine the status of a failover group under Windows NT? You can view the status of any failover group using the status screen (Control Panel, Network Adapters, Status tab). 5 Do the Duralink64 v4.2 Failover drivers support Appletalk under Windows NT? No. Duralink64 v4.2 Windows 95 and Windows 98 General Questions Windows 95 1 How do I install Duralink64 v4.2 software on my Windows 95 system? First, you must determine which version of Windows 95 is installed on your system, OSR1 or OSR2. Right Click on My Computer and select Properties. You should see Windows 95 on the screen and 00.950 x under it. The A represents OSR1. The B represents OSR2. 2 Which Duralink64 software should I use with Windows 95 OSR1? Use the software on the disk in the directory labeled Win95a (a:\win95a). B-11 DuraLAN Fast Ethernet NICs User’s Guide 3 Which Duralink64 software should I use with Windows 95 OSR2? Use the software at the root directory on the disk (a:\). 4 Does Duralink64 v4.2 support Novell's 32-bit client for Windows 95? Yes. However, connecting clients to the NetWare Duralink64 server requires the NDIS driver. Do not use an ADI driver. See the User's Guide Windows 95 Installation section for details. Windows 98 1 How do I install Duralink64 v4.2 software on my Windows 98 system? Follow the standard Windows 98 Hardware Installation procedure using the Have Disk option. Duralink64 v4.2 NetWare - General Questions 1 I used Load Install to try to load my NIC and it's not working. What do I do? For standalone, Failover, or Port Aggregation drivers, use Setupsf from the Duralink64 v4.2 NetWare diskette. 2 What version of the service pack do I need for Duralink64 v4.2 software? Use service pack 6 and ODI 3.31 patches for NetWare 4.11 for all DuraLAN drivers. If these patches are not applied to NetWare before installing DuraLAN drivers, the drivers will not work. 3 What do I do when upgrading from Duralink64 v4.2 standalone drivers to Duralink64 v4.2 Failover drivers? Use setupsf to remove existing standalone drivers from the system. Use Setupsf from the Duralink64 v4.2 NetWare diskette to install the new Failover drivers. B-12 Troubleshooting Tips 4 It's not clear what should be done from the Failover Setup Menu. How do I configure the ports? To install the Duralink64 v4.2 Failover software on NetWare v4.11 or v4.2, use Setupsf from the Duralink64 v4.2 NetWare diskette. At the main menu, select Failover, then, Configure Ports, Set Failover Pairs, Configure Protocols, Install Software and then Save and Exit. Make sure you follow this sequence and end with Save and Exit. The Save and Exit function modifies the autoexec.ncf file so that the Failover software is loaded each time you boot the server. 5 How do I install Duralink64 v4.2 Failover or Port Aggregation if I currently have the Duralink64 v4.2 standalone drivers installed? The setupsf file is used only when installing and uninstalling Duralink64 v4.2 Failover or Port Aggregation software. The Configsf file is also used after installation for changing the failover configuration. 6 Does Duralink64 v4.2 support Novell's 32-bit client for Windows 95, Windows 98, or Windows NT? Yes. However, connecting clients to the NetWare Duralink64 server requires the NDIS driver. Do not use an ODI driver. See the User's Guide Windows 95, Windows 98, or Windows NT Installation sections for details. ❒ B-13 DuraLAN Fast Ethernet NICs User’s Guide B-14 ▼ ▼ ▼ ▼ C Duralink SNMP Agents Windows NT and NetWare SNMP agents are provided to support failover and port aggregation capabilities. These agents handle standard port configurations, Failover pairs, and Port Aggregation. Use of the agents allow remote monitoring from any standard network management station with SNMP (version 1) support. The following information is provided: ■ Information group—containing card, port, and interface counts. ■ Interface statistics table—listing characteristics and summary statistics for individual port interfaces, failover groups, and multiple port load balancing groups. ■ Port statistics table—listing all ports grouped by interface and providing characteristics and statistics for each individual port. Port 1 in any multiple group is always the port that is available to be bound to protocol stacks. ■ Card information table—describing each Adaptec network card on the system. ■ Card port information table—sorted by network card listing all ports and the interface to which they are assigned. ■ Trap definition—for traps that are generated when the status of any port changes. C-1 DuraLAN Fast EtherNet NICs User’s Guide Monitoring the NICs by SNMP The duralink.mib file must be compiled on the SNMP Management station to manage the NICs. This file is located on the Duralink64 for Windows diskette, in the snmpmibs directory. Please refer to the Duralink Manager Server User’s Guide. SNMP Support The message !SNMP service is not installed will appear during the installation and configuration of NT if SNMP service is not installed. If SNMP functionality is not desired, ignore this message. If SNMP is desired, install SNMP Service using the Windows NT CD, and then reinstall service pack 3. The driver installation enables an SNMP agent to provide management information to the SNMP management station. The agent supports both the DuraLAN and older EMPCI NICs. However, if you install your EMPCI drivers after the DuraLAN installation, management information is restricted to the EMPCI configuration. The MIB file used for your SNMP management console or when using the Duralink Server Manager is located in the following directory: a:\snmpmibs\duralink.mib. After compiling this file on an SNMP management station you will then receive traps or events relative to the DuraLAN network adapter. ❒ C-2 ▼ ▼ ▼ ▼ D The Diagnostics Utility Your Adaptec DuraLAN NIC is supplied with a DOS diagnostics utility which is found on the LAN and Duralink64 Failover Drivers NetWare disk. Use the diagnostics utility to check the functionality of your DuraLAN NICs. D-1 DuraLAN Fast Ethernet NICs User’s Guide Running the Diagnostics From the Hard Drive Use the following steps to run the Diagnostics utility from your hard drive: 1 Make sure himem.sys and emm386.exe are currently in config.sys and that files=30 is present. If they are not, add the following lines to the top of the config.sys file: device=c:\dos\himem.sys device=c:\dos\emm386.exe /noems files=30 Type the path to the DOS programs if it is not found in c:\dos. 2 3 Create a directory for the diagnostics on your hard drive. 4 At the DOS prompt, type go_diags and then press Enter. Copy all files in this directory to the new diagnostics directory of the hard drive. Note: The easiest way of testing a DuraLAN NIC is running the Selftest. From the Floppy Drive To prepare a DOS diagnostics boot diskette, use the following steps: 1 2 3 Create a bootable DOS diskette. 4 5 Start the system from the floppy diskette. D-2 Copy the DOS files himem.sys and emm386.exe to the diskette. Copy all the files in this directory to the root directory of the DOS boot diskette. At the DOS prompt, type go_diags and then press Enter. The Diagnostics Utility Tip: The easiest way of testing a DuraLAN NIC is running the Selftest. Diagnostic Tests The following table lists the tests which can be run on the Adaptec DuraLAN Fast Ethernet NIC(s). The diagnostics commands are case sensitive, please type these commands as they appear in the table. Command Test selftest Verifies a variety of card functions. You should run this test first to isolate common errors. port X Specifies the port you want to test. If more than one DuraLAN NIC is installed, remove all cards and then test one card at a time. display Displays values of all chip registers. loop Performs multiple tests consecutively. At the last line before you run the tests, type end. For example: Loop>port 1 Loop>selftest Loop>port 2 Loop>selftest Loop>end eeprom Tests contents of serial eeprom and displays it on screen. exit Exits the diagnostics utility. hbi_slave Tests slave accesses, checks serial eeprom, and checks register accesses to the chip. hbi_dma Checks dma transfers to and from the board. mac Tests registers and various functions of Ethernet controller. address_filter Tests ethernet packet filtering capabilities. internal_10_mac Tests internal loop-back at 10 Mbps within the chip. D-3 DuraLAN Fast Ethernet NICs User’s Guide Command Test internal_100_mac Test internal loop-back at 100 Mbps within the chip. internal_10_phy Tests loop-back from the physical device at 10 Mbps. internal_100_phy Tests loop-back from the physical device at 100 Mbps. external_10 This test requires a loop-back cable. It tests the loop-back from the cable at 10 Mbps. external_100 This test requires a loop-back cable. It tests the loop-back from the cable at 100 Mbps. autonegotiate <speed> (speed is one of five options) Tests the speed the card negotiates. This test has five options: 0 — Tests for full autonegotiation (highest speed) 10 — Forces test at 10 Mbps half duplex 20 — Forces test at 10 Mbps full duplex 100 — Forces test at 100 Mbps half duplex 200 — Forces test at 100 Mbps full duplex Note: Requires a hub, switch, or loop-back cable. Also, autonegotiate defaults to 10MBytes if the cable is not connected. checksum Tests the abilitiy to calculate TCP/IP checksum. statistics Verifies statistics gathering features of the chip. echoer #/sender # (where # is the number of packets to send) This test requires two computers on a private network: one as the sender, and the other as the echoer. This test is useful for testing the network and verifying that data is being passed between the echoer and the sender. Enter the echoer command first, and then enter the sender command in the sender system. (This command sequence is critical!) The two commands work in tandem. The echoer system displays the number of packets received and then exits. The sender system displays a summary of packets transmitted and received, corrupted packets, number of collisions, and lost packets. pause Tests the flow controller features of the chip. mem (default) Slave access set to memory mode. io Slave access set to io mode. D-4 The Diagnostics Utility Command Test timer Tests the interrupt delay time feature of the Ethernet controller. power-management Tests the power down features of the Ethernet controller. mod (mac offset data) Allows the modification of the Ethernet controller registers. help or ? Displays all diagnostics commands. ❒ D-5 ▼ ▼ ▼ ▼ 100BASE-FX A-1 A Adding or Removing Ports 8-14 ANA-62011 1-6, 1-7 ANA-62022 1-6, 1-7 ANA-62044 1-6, 1-7 ANA-69011 1-6, 1-7 B Bios Setup B-4 C Cables Pinout and Color Requirements A-5 Requirements A-3 Twisted Pair Straight-through A-4 clients connecting to the Failover server 12-6 connecting to the Port Aggregation server 12-7 Configuring Failover Pairs NetWare 10-6 Windows NT 4.0 7-3 Configuring Ports NetWare with Duralink 9-5, 10-4 Windows 95 6-4 Windows NT 3.51/4.0 7-2 Windows NT with Duralink 6-2, 7-2 Configuring ports Index Windows NT 8-2 Configuring Protocols NetWare with Duralink 10-9 Connection Types A-2 creating groups Fast EtherChannel 8-8 Port Aggregation 8-4 Port Aggregation for NetWare 11-6 creating groupsFast EtherChannel for NetWare 11-9 creating Port Aggregation groups creating groups 8-4 creating the Failover Pair 7-3 D Diagnostic LEDs Details A-6 driver configuration standard for Windows 6-2 Drivers removing 5-13 Duo NICs 1-4, 1-9 DuraLAN driver installation Windows 95 5-9 Windows 98 5-8 Windows NT 3.51 5-6 Windows NT 4.0 5-3 DuraLAN NIC about 3-3 installation 3-4 Duralink GUI Windows NT 6-2, 7-2, 8-2 Duralink Port Aggregation description of 1-7 Index-1 DuraLAN64 Fast Ethernet NICs User’s Guide Duralink Software Installation NetWare 10-1 NetWare Client 12-1 Windows NT 5-1, 7-1 E Event Viewer Dialog Box 7-8 F F Keys NetWare 10-15 Failover driver installaion NetWare 10-3 Failover pair creating 7-3 Fast EtherChannel creating groups 8-8 Fast Ethernet 1-3 FEC 8-8 network cofigurations 2-2 FEC for NetWare 11-9 H hardware requirements 1-2 I IEEE 1-3 Installation 3-1 NICs, Installing 3-1 Installation Tips 5-11 IPX address 11-12 L LEDs see Diagnostic LEDs M modifying drivers Index-2 NetWare 10-16 monitoring Failover pairs 7-8 N NetWare connecting clients to Failover 126 connecting clients to Port Aggregation 12-7 driver configuration modification 10-16 Duralink Software Installation 10-1 Duralink software installation 11-1 Failover driver installation 10-3 LAN Driver Installation 9-1 Port Aggregation driver 11-3 removing drivers 9-12, 10-17, 1119 standard driver configuration 94 NetWare 5.0 9-3 NetWare Client Duralink Software Installation 12-1 network cable connection 3-6 network cofigurations 2-2 Network Configuration Description 4-1 Dual Hubs 4-4 Dual Hubs with Four Port NIC 47 Dual Hubs with Routers 4-6 Dual Hubs with Switch 4-5 Single Hub 4-3 Network configuration Port Aggregation described 2-5 Windows NT utility 8-13 NIC Drivers,DuraLAN Standard Driver 3-8 NIC Drivers,Duralink64 Failover 38 Index NIC Drivers,Duralink64 Port Aggregation 3-8 NICs Duo Port 1-4, 1-9 Quad Port 1-5 Single Port, 32 bit 1-3 Single Port, 64 bit 1-4 Novell 1-6, 1-7 Novell Client32 installation 12-2 P Performance monitor Windows NT only 8-20 Port Aggregation creating groups 8-4 NetWare 11-3 network configurations 2-2 port configuration NT 3.51/4.0 7-2 Q SNMP Manager 7-8 Software installation NetWare 11-1 Windows NT 8-1 software requirements 1-2 standard driver configuration NetWare 9-4 NT 4.0/3.51 6-2 status 10-14 System Requirements 1-9 system requirements 1-2 System status Windows NT 8-17 T TCP/IP address setting in NetWare 11-12 setting in Windows NT 8-11 Troubleshooting B-2 Isolating Faulty Hardware B-2 Troubleshooting B-2 Typographic Conventions 1-9 Quartet NICs 1-4, 1-9 V R View configuration 11-15 Viewing Configuration NetWare 9-10, 10-12 Viewing System Status NetWare 10-14 Removing drivers NetWare 9-12, 10-17, 11-19 Windows NT 3.51 5-14 Windows NT 4.0 5-13 Windows NT 95/98 5-14 Removing NICs Windows 95 5-10 renaming groups 8-13 requirements,hardware 1-2 requirements,software 1-2 W Windows NT 1-6, 1-7 Duralink Software Installation 51, 7-1 performance monitor 8-20 software installation 8-1 S Saving Configurations NetWare 9-11, 10-13 Index-3