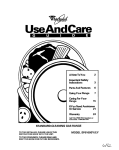
1
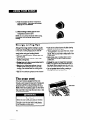
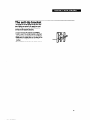
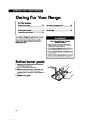
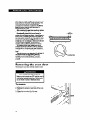
A Note To You
2
Important Safety
Instructions
3
PartsAnd Features
6
Using Your Range
7
giai
For Your
16
IfYou Need
$$-?~
25
Warranty
28
1-800-253-1301
Cell us with questions or comments.
CONTINUOUS
AND STANDARD-CLEANING
TO THE INSTALLER: PLEASE LEAVE THIS
INSTRUCTION BOOK WITH THE UNIT.
TO THE CONSUMER: PLEASE READ AND
KEEP THIS BOOK FOR FUTURE REFERENCE.
GAS RANGES
MODELS SF337PEY
SF317PEY
SF317PCY
ta-52
A Note To You
Thank
you for buying
a Whirlpool
appliance.
You have purchased a quality, worldclass home appliance. Years of engineering experience have gone
into its manufacturing. To ensure that you will enjoy many years of trouble-free operation, we have
developed this Use and Care Guide. lt is full of valuable information on how to operate and maintain
your appliance properly and safely. Please read it carefully. Also, please complete and mail the Ownership Registration Card provided with your appliance. This will help us notify you about any new information on your appliance.
Your
safety
is important
to us.
This guide contains safety symbols and statements. Please pay special attention to these symbols and
follow any instructions given. Here is a brief explanation of the use of each symbol.
This symbol will help alert you to such dangers as
personal injury, burns, fire and electrical shock.
This symbol will help you avoid actions which
could cause product damage (scratches, dents,
etc.) and damage to your personal property.
l
l
l
l
ALL RANGES CAN TIP.
INJURY TO PERSONS
COULD RESULT.
INSTALL ANTI-TIP
DEVICES PACKED
WITH RANGE.
SEE INSTALLATION
INSTRUCTIONS.
For more information, see the “The anti-tip bracket”
on page 15.
Our Consumer
Assistance
Center
is toll-free,
24 hours a day.
number,
l-800-253-1301,
If you ever have a question concerning your appliance’s operation, or if you need service, first see “If
You Need Assistance Or Service” on page 25. If you need further help, feel free to call our Consumer
Assistance Center. When calling, you will need to know your appliance’s complete model number and
serial number. You can find this information on the model and serial number plate (see diagram on
page 6). For your convenience, we have included a handy place below for you to record these numbers,
the purchase date from the sales slip and your dealer’s name and telephone number. Keep this book
and the sales slip together in a safe place for future reference.
Model Number
Deder Name
Serial Number
Dealer Phone
Purchase
Date
Important
Safety Instructions
Gas ranges have been thoroughly tested for safe and efficient operation. However, as with any
appliance, there are specific installation and safety precautions which must be followed to ensure safe
and satisfactory operation.
To reduce the risk of fire, electrical shock, injury to persons, or
damage when using the range, follow basic precautions,
including
WARNING: If the information in this manual is not followed exactly,
a fire or explosion may result causing property damage, personal
injury or death.
Do not store or use gasoline or other flammable vapors and liquids
in the vicinity of this or any other appliance.
WHAT TO DO IF YOU SMELL GAS:
l
Do not try to light any appliance.
l
Do not touch any electrical switch; do not use any phone
in your building.
l
Immediately call your gas supplier from a neighbor’s phone.
Follow the gas supplier’s instructions.
l
If you cannot reach your gas supplier, call the fire department.
Installation and service must be performed by a qualified installer,
service agency or the gas supplier.
General
l
l
Install or locate the range only in accordance
with the provided Installation Instructions.
The range must be installed by a qualified
installer. The range must be properly
connected to the proper gas supply and
checked for leaks. The range must also be
properly connected to electrical supply and
grounded.
Gas fuels and their use in appliances can
cause minor exposures to benzene, formaldehyde, carbon monoxide and soot, primarily
from incomplete combustion. Significant
exposure to these substances can cause
cancer or reproductive harm. Properly
l
l
l
adjusted burners with a blue, rather than a
yellow, flame will minimize incomplete
combustion. Venting with a hood or an open
window will further minimize exposure.
Do not store things children might want
above the range. Children could be burned or
injured while climbing on it.
Do not leave children alone or unattended in
area where the range is in use. They should
never be allowed to sit or stand on any part of
the range. They could be burned or injured.
Do not operate the range if it is damaged or
not working properly.
continued
on next page
3
l
l
l
Do not use the range for warming or heating
the room. Persons could be burned or
injured, or a fire could start.
Do not attempt to light the oven burner during
a power failure. Personal injury could result.
Reset oven controls to the off position in the
event of a power failure.
Use the range only for its intended use as
described in this manual.
l
l
l
l
When using the cooktop
l
l
l
DO NOT TOUCH SURFACE BURNERS,
AREAS NEAR SURFACE BURNERS OR
INTERIOR SURFACES OF OVEN.
Areas near surface burners and interior
surfaces of an oven become hot enough to
cause burns. During and after use, do not
touch, or let clothing or other flammable
materials contact surface burners, areas near
surface burners or interior surfaces of oven
until they have had sufficient time to cool.
Other surfaces of the range may become hot
enough to cause burns: such as, the oven
vent opening, the surface near the vent
opening, the cooktop, the oven door and
window.
l
l
l
Do not wear loose or hanging garments when
using the range. They could ignite if they
touch a hot surface burner and you could be
burned.
. Use only dry potholders. Moist or damp
potholders on surface burners may result in
burns from steam. Do not let potholder touch
surface burners. Do not use a towel or bulky
cloth for a potholder. It could catch on fire.
l Keep range vents unobstructed.
l Do not heat unopened containers. They
could explode. The hot contents could cause
burns and container particles could cause
injury.
l
4
Do not store flammable materials on or near
the range. The fumes can create an explosion andlor fire hazard.
Do not use the oven for storage.
Never use a match or other flame to look for
a gas leak. Explosion and injury could result.
Know where your main gas shutoff valve is
located.
Make sure the utensils you use are large
enough to contain food and avoid boilovers
and spillovers. Heavy splattering or spillovers
left on a range can ignite and bum you. Pan
size is especially important in deep fat frying.
Check to be sure glass cooking utensils are
safe for use on the range. Only certain types
of glass, glass-ceramic, ceramic, earthenware or other glazed utensils are suitable for
cooktops without breakfng due to the sudden
change in temperature.
Never leave surface burners unattended at
high heat settings. A boilover could result and
cause smoking and greasy spillovers that
may ignite.
Turn pan handles inward, but not over other
surface burners. This will help reduce the
chance of bums, igniting of flammable
materials, and spills due to bumping of the
pan.
Do not use decorative covers or trivets over
the surface burners.
When using the oven
l
l
Always position the oven rack(s) in desired
location while oven is cool.
Use care when opening oven door. Let hot air
or steam escape before removing or replacing food.
Grease
l
Care and cleaning
Grease is flammable. Do not allow grease to
collect around cooktop or in vents. Wipe
spillovers immediately.
l
l
Do not use water on grease fires. Never pick
up a flaming pan. Smother flaming pan by
covering with a well-f&ted lid, cookie sheet or
flat tray. Flaming grease outside of pan can
be extinguished with baking soda or, if
available, a multipurpose dry chemical or
foam-type extinguisher.
l
l
l
l
Do not use oven cleaners in continuouscleaning oven model. No commercial oven
cleaner or oven liner protective coating of
any kind should be used in or around any
part of the oven.
Do not clean door heat seal. It is essential for
a good seal. Care should be taken not to rub,
damage or move the seal. Clean only parts
recommended in this Use and Care Guide.
Do not repair or replace any part of the range
unless specifically recommended in this
manual. All other servicing should be
referred to a qualified technician.
Any addiiions, changes or conversions
required in order for this appliance to
satisfactorily meet the application needs
must be made by a Whirlpool Distributor or
Qualified Agency.
Disconnect the electrical supply and the gas
supply at the shutoff valve near the range
before servicing the range.
- SAVE THESE INSTRUCTIONS -
Parts And Features
This section contains captioned illustrations of your range. Use them to become familiar with the
location and appearance of all parts and features.
Antctip bracket
(on wall behind backguuud)
I
Mmual oven
light switch
\
Clock/Minute
and grates
Model md aerial
Broiler drawer -
Control
Left front
control. knob
panel
L8ft rm
control knob
Right rear
conk01 knob
-I
surfue
burner
markers
6
I
bmpotalure
control
Right front
control knob
Using Your Range
In This
Section
PWP
Paw
Using the l urfaca burners ................................. 7
Adudlng
Pooitioning r8cb and pana ............................... 9
For best air circulation ..................................... 10
Broiling .............................................................. 13
Energy saving tips ............................................ 14
Setting the clock ............................................... 11
The oven vent ................................................... 14
U0lng the Minute Timer .................................... 11
The anti-tip bracket .......................................... 15
Bakinglroding
the oven bmperature
control ....... .13
................................................ 12
To obtain the best cooking results possible, you must operate your range properly. This section gives
you important information for efficient and safe use of your range.
Using
the surface
burners
Your range is equipped with electric ignitors.
Electric igniters automatically light the burners
each time they are used.
Push In control knobr and turn them to the
LITE position. The clicking sound is the ignltor
sparking. Visually check that burner has Ht.
To stop the clicking sound after the burner
lights, turn the control knob to the desired
setting. The control knob has stops for HI, MED
and LOW. However, you can set the control knob
anywhere between HI and OFF.
Surface
burner
markers
The solid dot in the surface burner marker shows
which surface burner is turned on by that knob.
Burner
heat
settings
Use correct burner heat settings (see next page).
If the heat setting is too high, it can:
l Char bacon and cause curling.
l Make eggs tough and crisp at the edges.
l Toughen
liver, fish and seafood.
l Scorch delicate sauces and custards.
l Cause a boilover.
Until you get used to the settings, use the
followlng as a guide. For best results, start
cooking at the high setting: then turn the control
knob down to continue cooking.
RECOMMENDED USE
SElTING
LlTE
l
HI
l
l
MED
l
l
l
l
LOW
l
To light the burner. After the
burner lights, turn control back
to a desired setting to stop the
clicking of the ignitor.
To start foods cooking.
To bring liquids to a boil.
To hold a rapid boil.
To fry chicken or pancakes.
For gravy, pudding and icing.
To cook large amounts of
vegetables.
To keep food warm until ready
to serve.
NOTE: Do not cook with the control in the LITE
position.
In case of a prolonged
failure
power
Surface burners can be manually lighted. Hold a
lit match near a burner and turn the control knob
to the LITE position. After the burner lights,
turn the control knob to the desired setting.
l
l
l
l
6
Burn, Fire, Explosion and
Product Damage Hazard
Burner flame should not extend beyond the
edge of the cooking utensil. The flame can
burn you and cause poor cooking results.
Be sure all control knobs are turned to OFF
when you are not cooking. Someone could
be burned or a fire could start if a burner is
accidentally left ON.
If the flame should go out while cooking, or
if there is a strong gas odor, turn the
burners OFF. Wait five minutes for the gas
odor to disappear before relighting burner.
lf gas odor is still present, see safety note
on page 3. Failure to follow these precautions could result in explosion or fire.
Do not leave an empty utensil, or one which
has boiled dry, on a hot surface burner. The
utensil can overheat and may damage the
utensil or cooking product.
Cookware
tips
There is no one brand of cooking utensil that is
best for all people. Knowing something about pan
materials and construction will help you select the
correct cooking utensils for your needs.
l NOTE: For best resukr
and greater fuel
efficiency, use only flat-bottomed utensils that
make good contact with the surface burners.
Utensils with rounded, warped, ridged (porcelain enamel-ware) or dented bottoms could
cause severe overheating, which damages the
utensil andlor surface burner.
Woks, canners and teakettles with flat
bottoms suitable for use on your cooktop are
now available in most stores that sell
housewares.
l The pan should have straight sides and a tightfifing lid.
l Choose medium to heavy gauge (thickness)
pans that are fairly lightweight.
l The pan material (metal or glass) affects how
fast heat transfers from the surface burner
through the pan material and how evenly heat
spreads over the pan bottom. Choose pans that
provide the best cooking results.
l Handles should be made of a sturdy, heatresistant material and be securely attached to
the pan.
l Pans should be easy to clean. Check to be
sure there are no crevices, rough edges or
areas where food migM collect.
l Be sure pans do not tip, whether they are full
or empty.
l Uee utensils
only as they were intended to be
used. Follow pan instructions. This is very
important for glass cookware because some
should be used only in the oven. Other pans
are marked as flameware and may be used on
the surface burners.
Home
canning
information
The large diameter of most water-bath or
pressure canners combined with high heat
settings for long periods of time can cause
damage to the cooktop.
To protect your range:
l For beet results, UM a canner which can be
centered over the surface burner.
l Do not place canner on two surface burners at
the same time. Too much heat will build up and
will damage the cooktop.
l Start with hot water. This reduces the time the
control is set on high. Reduce heat setting to
lowest position needed to keep water boiling.
Positioning
racks
and pans
For baking/roasting with one reck, place the
rack so the top of the food will be centered in the
oven.
Rack placement for specific foods:
FOOD
RACK POSlTlON [
Frozen pies, large roasts,
turkeys
1st or 2nd rack
guide from bottom I
2nd rack guide
Angel and bundt cakes,
most quick breads, yeast from bottom
breads, casseroles, meats
Cookies, biscuits, muffins, 2nd or 3rd rack
cakes, nonfrozen pies
When baking on two racks, arrange racks on
first and third rack guides from bottom.
6th oven
(roasting
Personal Injury Hem-d
l Always position oven rack(s) in desired
location before turning oven on. Be sure
the rack(s) is level.
l If rack(s) must be moved while oven is
hot, use potholders or oven mitts to
protect hands.
l Do not place items on the open oven door.
l Be careful when installing and removing
large food items from sixth rack position.
Food will be close to hot surfaces,
including oven bottom and sides.
Failure to follow the above precautions
may result in personal injury.
rack position
rack)
When roasting food too large to be placed in
oven with rack in lowest position, place rack on
bottom of oven.
For proper roesting, follow these guidelines:
l The rack must be level.
l Use adequate amount of liquid (meat juices or
water) so food does not get overdone.
l Do not tty to pull rack out over door. Rack will
be at the same level as door when door is
opened.
6th oveniack
position
For best air circulation
Hot air must circulate around the pans in the oven
for even heat to reach all parts of the oven. This
results in better baking.
l Place the pans so that one is not directly over
the other.
l For beat results, allow 1 I/Z-2 inches (4-5 cm)
ofspacearoundeachpanandbetweenpans
and oven walls. There must be a minimum
space of 1 inch (2.5 cm).
l Use only one cookie sheet in the oven at one
time.
Use the following as a guide to determine where
to place the pans.
One pan
Place in the center of the oven rack.
Two pans
Place in opposite corners of the oven rack
Three or four pans
Place in opposite comers on each oven rack.
Stagger pans so no pan is directly over another.
10
Setting
the clock
Push in and turn the Minute Timer Knob to set
the clock.
Push in Minute Timer Knob and turn
clockwise until clock shows the correct time
of day.
Let the Minute Timer Knob pop out. Turn
clockwise until Minute Timer hand points to
OFF. The clock setting will change if you
push in the knob when turning.
Using
the Minute
Timer
The Minute Timer does not start or stop the oven.
It works like a kitchen timer. Set it in minutes up
to an hour. You will hear a buzzer when the set
time is up.
NOTE: Do not push in the knob when setting
the Minute Trrnsr or when stopping the buzzer.
Pushing in and turning the Minute Timer Knob
changes the clock setting.
1. Without pushing it in, turn the Minute Timer
Knob counterclockwise until the timer hand
passes the setting you want.
2. Without pushing it in, turn the knob back to
the setting you want.
When the time is up, a buzzer will sound.
To stop the buzzer, turn the Minute Timer
hand to OFF.
11
Baking/roasting
1. Positiin the rack(s) properly before turning
on the oven. To change rack position, lift
rack at front and pull out. For further information, see “Positioning racks and pans” on
page 9.
.
2. Push in and turn the Oven Temperature
Control to the baking/roasting temperature you
want. The oven burner will automatically light
in 50-60 seconds.
3. When baking, preheat the oven for 10 minutes. Put food in the oven.
NOTE: Do not preheat when roasting or
cooking items such as casseroles.
Do not place food directly on the oven
bottom.
4. During baking/roasting, the oven burner will
turn on and off to maintain the temperature
setting.
5. When baking/roasting is done, turn the
Oven Temperature Control to OFF.
12
Adjusting
the oven temperature
control
Oven temperature controls will gradually shift
after years of use. So, even though your new
oven is properly adjusted to provide accurate
temperatures, it may cook faster or slower than
your old oven.
If, after using the oven for a period of time, you
are not satisfied with the temperature settings,
you can adjust them by following these steps:
1. Push in and turn the Oven Temperature
Control Knob to the off position. Pull knob
straight off and flip it over.
Locking
8omwS
2. Loosen the locking screws inside the control
knob. Note the position of the notches.
3. To lower the temperature, hold knob handle
firmly and mOve the tooth a notch clockwise.
Each notch equals about 10°F (5°C).
4. To raise the temperature, hold knob handle
firmly and move the tooth a notch counterclockwise. Each notch equals about 1O’F
(5°C).
Tighten the locking screws and replace the
control knob.
Broiling
The broiler drawer is located below the oven
door. Always broil with the oven door closed.
1. Pull the broiler drawer open and tilt the door
panel down.
2. Place broiler pan grid so grease can drain
down ribbing and through slots into lower part
of the broiler pan. See picture.
3. Before the broiler is turned on, place food
on broiler pan and position the broiler pan at
one of the three levels. Refer to a reliable
cookbook for broiling chart.
Drain
Rib
Front
Side view
13
4. Push In and turn the Oven Temperature
Control to BROIL. The broiler will automatically light in 50-60 seconds.
5. When broiling is done, turn the Oven
Temperature Control to OFF.
NOTE: Do not preheat the broiler before using.
Completely close the broiler drawer during
broiling.
Energy
saving
tips
Although the energy used for cooking is usually
a very small percentage of the total energy used
in the home, cooking energy can be used eff iciently. Here are some tips to help you save
energy when using your cooking product.
l Use pans with flat bottoms, straight sides and
tight-fitting lids.
l Cook with a minimum of liquid or fat to help
shorten cooking time.
l Preheat pans only when recommended and for
the shortest time possible.
l Start food on higher heat settings, then set
surface burner control on low or off to finish
cooking. Use retained heat for cooking when
possible.
l Use the more efficient surface burners instead
of the oven when possible.
The oven vent
Hot air and moisture escape from the oven
through a vent located in lower part of backguard.
The vent is needed for air circulation. Do not
block the vent. Poor baking/roasting will result.
NOTE: Never store plastics, paper or other items
that could melt or bum near the oven vent, or any
of the surface burners.
Burn Hazard
When the oven is ON, pans and pan handles
left near the oven vent can become hot
enough to burn the user and to melt plastics.
Use potholders to move pans.
14
l
l
l
l
l
l
Turn on the surface burner only after placing
filled pan on the burner grate.
“Oven peeking” may cause heat loss, longer
cooking times and unsatisfactory baking
results. Rely on your timer to keep track of the
cooking time.
Bake cakes, pies or cookies when oven is
warm. Best time is after a meal has been
cooked in it.
Preheat the oven no longer than necessary.
Plan your meals for the most efficient use of
the range. When using the oven to cook one
food, try to cook the rest of the meal in it also.
Do not preheat when broiling, roasting or
cooking items such as casseroles.
The anti-tip
bracket
The range will not tip during normal use. However, tipping can occur if you apply too much
force or weight to the open door without the
anti-tip bracket properly secured.
To verify the anti-tip bracket is engaged:
l Look to see if the anti-tip bracket is attached
with screws to the wall behind the backguard.
l Make sure the cable tether on the back of the
range is secured by the two hooks on the
bracket.
l See Installation Instructions for further details.
15
Caring For Your Range
I
In This Section
Plrgs
Surface burner grates ...................................... 16
Surface burner8 and cooktop .......................... 17
Removing the oven door ................................. 16
PllgbI
oven ....................... .20
Cleaning chvt ................................................... 22
The oven light ................................................... 24
The continuou8-cleAng
Removing the oven bottom ............................. 19
Your range is designed for ease of care. You can
do most cleaning with items found around your
home. Cleaning your range whenever spills or
soiling occurs will help to keep it looking and
operating like new.
Surface
burner
grates
1. Make sure all surface burners are off and the
surrounding parts are cool.
2. Lift off the surface burner grates.
3. Wash the grates with warm, soapy water or in
a dishwasher. Use a nonabrasive, plastic
scrubbing pad for cooked-on foods. Rinse and
dry well.
4. Replace burner grates.
16
Burn, Electrical Shock, Fire and
Explosion Hazard
l Make sure all controls are OFF and the
1 range is cool before cleaning.
l For continuous-cleaning
ovens, do not use
oven cleaners, bleach or rust removers.
l Do not obstruct the flow of combustion and
ventilation air.
Failure to follow these guidelines could result
in burns, electrical shock, fire or explosion.
Surface
burners
and cooktop
The range and burner box areas are specially
designed to make cleaning easier. Because the
four burners are sealed, cleanups are easy and
convenient.
To clean the cooktop, wipe with a damp
sponge and dry.
Product Damage Hazard
Do not remove the cooktop.
Doing so could result in product damage.
Cleaning
areas
the contoured
well
The contoured well is a recessed area located
around each burner. If spills occur in the contoured well section, blot up spill with a paper
towel. Wipe with a clean, damp sponge and dry.
When cleaning the cooktop area or around
the burner base, use care to prevent damage to
the ignitor. If a cleaning utensil should catch the
ignitor, it could damage or break the ignitor. If the
ignitor is damaged or broken, the surface burner
will not light. When cleaning the cooktop, leave
the burner cap in place to protect the ignitor from
possible damage.
Cleaning
the burners
The burner caps should be routinely removed and
cleaned. Always clean the burner caps after a
spillover. Keeping the burner caps clean will
prevent improper ignition and an uneven flame.
To clean, pull the burner cap straight up from
the burner base. Remove the burner pan.
(Burner pan must be replaced over burner base
before replacing burner cap. Do not operate
burners without burner pan in place.) Clean
burner cap and burner pan with warm, soapy
water and a sponge. You can also clean with a
nonabrasive scrubbing pad or cleanser. Do not
clean burner cap or burner pan in a dishwasher
or self-cleaning oven.
For proper flow of gas and ignition of the
burner, DO NOT ALLOW SPILLS, FOOD,
CLEANING AGENTS OR ANY OTHER MATERIAL TO ENTER THE GAS TUBE OPENING. If
the opening or the orifice, located inside the
opening, becomes soiled or clogged, use a cotton
swab or a paper towel to clean the area.
area
tgnitor /
17
Gas must flow freely through the small hole in the
brass orifice for the burner to light properly. This
area must be free of any soil and be kept
protected from boilovers or spillovers. ALWAYS
keep the burner caps in place whenever a
surface burner is in use.
After cleaning the gao tube opening, replace
the burner cap and burner pan.
Occasionally check the burner flames for
proper size and shape as shown. A good flame is
blue in color. If flames lii off ports, are yellow, or
are noisy when turned off. you may need to clean
the burners. If port8 are clogged, clean with a
straight pin. Do not enlarge or distort port. Do not
use a wooden toothpick. lf adjustment is
needed, call a qualified technician for service.
To replace burner cap, make sure cap is
properly aligned and leveled. Find the recessed
locating tabs on the burner cap (see illustration)
and place cap over the white ignitor in the burner
base.
Turn the burner on to determine if it will light. If
the burner does not light after cleaning,
contact an authorized WhirlpooP service
technician. Do not service the sealed burner
yoursetf.
Removing
u”uu
I
Typical surface burner flame
the oven door
Removing the oven door will help make it easier
to clean the oven.
Burn and Electrical Shock Hazard
Make sure all controls are OFF and the oven is
cool before removing oven door. Failure to do
so can resutt in burns or electrical shock.
To remove:
1. Open the door as far as it will go.
2. Remove the screws on each side of the oven
door.
3. Close the door about % of the way.
4. Lift the door up and off the hinges.
16
---A _ _/’
.
4
/ ..i
/ .:::
0 o screw
...
/ .....................-:::;
.......
.p;&.
:.Y
‘h
+7
&
To replace:
1. Be sure the hinge arms are in the open
position. Be careful if pulling the hinges open
by hand. Hinges may snap back against the
oven frame and could pinch fingers.
2. Hold the door at the sides near the top. Insert
hinge arms into slots at the bottom of the door.
Insert arms evenly, as far as they will go.
3. If the door is not in line with the oven
frame, remove it and repeat the above steps.
4. Replace the screws on the oven door.
Removing
arm
the oven bottom
The panel in the oven bottom can be removed for
cleaning.
To remove:
1. Remove oven racks.
2. Remove the two hold-down screws at the rear
of the oven. If screws are too tight to
remove by hand, use a screwdriver.
3. Place fingers in slots in bottom panel and lift
rear of panel up and back until lip at the front
of panel is clear of front frame of oven cavity.
4. Lii bottom up and out.
To replace:
1. Place oven bottom panel in oven with the
back raised about 6 inches or until you can
insert the hold-down lip at front of panel under
the front frame of oven cavity.
2. Push back of oven bottom panel down fully
into place on metal flanges on rear wall and
insert the hold-down screws.
19
The continuous-cleaning
oven
(model SF337PEY)
Standard-cleaning oven walls are coated with
smooth porcelain. Your continuous-cleaning oven
walls are coated with a special, rougher porcelain. A fat spatter beads up on the smooth
surface, but spreads out on the rougher surface.
The bead of fat on the smooth surface chars and
turns black The spread-out fat on the rough
surface gradually bums away at medium to
high baking temperatures
so the oven can
return to a presentably clean condition.
Cleaning
l
l
tips
racks, oven bottom and
inside surface of door are not coated. Clean
them by hand.
If you do more broiling than baking, handcleaning may be needed.
The oven window,
20
Fat spatter boa&
up. Turn. black
Standard
porcelain
Fat l pattar spreada
out. Burns away.
Continuouscleaning porcelain
Hand-cleaning
the
continuous-cleaning
oven
Pemonal Injury Hazard
Do not use oven cleaning products in a
continuous-cleaning oven. Some can
become trapped in the porcelain surface
and give off harmful fumes.
WlNDOW4eep clean with warm, soapy water.
Use a plastic scrubbing pad for heavily soiled
areas. Rinse well. Do not use steel wool or
abrasive cleansers.
RACKS-Use a soapy steel-wool pad for best
cleaning results. Rin8e well.
OVEN BOlTOM AND INSIDE SURFACE OF
DOOR-Wash with warm, soapy water. Use a
steel-wool pad or plastic scrubbing pad for
heavily soiled areas. Rlnw well.
Once removed from oven, both oven bottom
and inside surface of door can be cleaned with a
commercial oven cleaner. (See pages 18 and 19
for removal instructions.)
WALLS-Apply ammonia with sponge. Allow to
soak for 15-20 minutes and rinse thoroughly. Do
not scrub or use abrasive or harsh cleansers.
21
Cleaning
chart
Use the following table to help you clean your range.
PART
WHAT TO USE
HOW TO CLEAN
Control knobs
Sponge warm, soapy
water
Turn knobs to OFF and pull straight away
from control panel.
l Wash, rinse and dry thoroughly. Do not soak.
l Replace knobs. Make sure all knobs point to
OFF.
DO NOT USE steel wool or abrasive cleaners.
They may damage the finish of the knobs.
Control panels
Sponge and warm,
soapy water
OR
Paper towel and spray
glass cleaner
. Wash, rinse and dry thoroughly.
DO NOT USE steel wool or abrasive cleaners.
They may damage the finish.
DO NOT SPRAY cleaner directly on panel.
Apply cleaner to paper towel.
Exterior surfacer,
(other than control
panels)
Sponge and warm,
soapy water
Wash, rinse and dry thoroughly.
USE nonabrasive, plastic scrubbing pad on
heavily soiled areas.
l Do not use abrasive or harsh cleansers.
They may damage the finish.
NOTE: Do not allow foods containing acids
(such as vinegar, tomato or lemon juice) to
remain on surface. Acids may remove the
glossy finish. Also wipe up milk or egg spills
when cooktop is cool.
Surface burners,
grates, caps and
burner pans
Warm, soapy water and
sponge or nonabrasive
plastic scrubbing pad
OR
Dishwasher (for grates)
Broiler drawer, pan
and grid (clean after
each use)
Steel-wool pad and
warm, soapy water
Oven racks
Steel-wool pad and
warm, soapy water
Oven door glass
Paper towel and spray
glass cleaner
OR
Warm, soapy water and
a nonabrasive. plastic
scrubbing pad
22
l
l
l
l
l
l
l
l
l
l
See pages 16-l 6 for cleaning instructions.
Clean after each use.
Wash, rinse and dry thoroughly.
After broiler is cool, wipe interior with
warm, damp sponge. For heavily soiled
areas, use a soapy steel-wool pad.
Wash, rinse and dry thoroughly.
Make sure oven is cool.
Follow directions provided with the
cleaner.
Wash, rinse and dry thoroughly.
1
PART
Oven cavity
(models
SF31 7PEY
and
SF31 7PCY)
1
HOW TO CLEAN
WHAT TO USE
Sponge and warm, soapy
water
l
l
l
Soapy steel-wool pad for
heavily soiled areas
OR
Commercial oven cleaner
for heavily soiled areas
l
l
l
l
l
l
l
l
Oven cavity
(model
SF337PEY)
Sponge and warm, soapy
water
l
l
l
l
l
Make sure oven is cool.
Remove door and oven bottom for easier access.
(See pages 16 and 19.)
Wash, rinse and dry well.
Remove door for easier access.
Rinse well with water.
Remove door and oven bottom for easier access.
Place newspaper on floor to protect floor surface.
Follow directions provided with the oven cleaner.
Rinse well with clear water.
Use in well-ventilated room.
Do not allow commercial oven cleaners to
contact the heat seal, thermostat or exterior
surfaces of the range. Damage will occur.
Make sure oven is cool.
Remove door for easier access.
Clean heavily soiled areas or stains. Rinse well with
water.
Do not use commercial oven cleaners.
Moat fat spatters on oven walls and floor will
gradually reduce to a presentably clean condition during baking.
23
The oven light
The oven light will come on when you use the
Oven Light Switch on the control panel.
Electrical Shock and Burn Hazard
Make sure oven and light bulb are cool and
power to the range has been turned OFF
before replacing the light bulb.
Failure to do so could resutt in electrical
shock or burns.
To replace
the oven
light:
1. Unplug appliance or disconnect at main
power supply.
2. Remove the light bulb from its socket.
Replace the bulb with a 40-watt appliance
bulb.
3. Plug in appliance or reconnect at the main
power supply.
24
If You Need Assistance
Or Service
This section is designed to help you save the cost of a service call. Part 1 of this section outlines
possible problems, their causes, and actions you can take to solve each problem. Parts 2 and 3 tell you
what to do if you still need assistance or service. When calling our Consumer Assistance Center for help
or calling for service, please provide a detailed description of the problem, your appliance’s complete
model and serial numbers and the purchase date. (See page 2.) This information will help us respond
properly to your request.
1. Before
calling
for assistance
...
Performance problems often result from little things you can find and fix without tools of any kind. Please
check the chart below for problems you can fix. lt could save you the cost of a service call.
PROBLEM
Nothlng will
operate
POSSIBLE CAUSE
SOLUTlON
The power cord is not plugged
into a live circuit with proper
voltage.
Range is not properly connected
to gas supply.
Plug the power cord into a live circuit
with proper voltage. (See Installation
Instructions.)
Contact an authorized Whirlpools”
service technician to reconnect range
to gas supply. (See Installation
Instructions.)
Replace household fuse or reset circuit
breaker.
Reset controls, if needed.
Remove blockage to airflow to and
around range.
A household fuse has blown or
a circuit breaker has tripped.
Controls are not set correctly.
The flow of combustion andlor
ventilation air to the range is
blocked.
The oven will not
operate
The Oven Temperature Control
is not turned to a temperature
setting.
Push in and turn the Oven Temperature
Control to a temperature setting.
Burner fails to
light
The power cord is not plugged
into a live circuit with proper
voltage.
A household fuse has blown or
a circuit breaker has tripped.
Plug the power cord into a live circuit
with proper voltage. (See Installation
Instructions.)
Replace household fuse or reset circuit
breaker. In case of prolonged power
failure, manually light burners (see
page 6).
Clean with a straight pin (see page 16).
Burner ports are clogged.
Burner flames
are uneven
Burner ports are clogged.
Contact an authorized WhirlpoolSM
sewice technician to check air/gas
mixture.
Burner flames lift
off ports, are
yellow, or are
noisy when
turned off
Burner makes
rht:ii;
noi
Clean with a straight pin (see page 18). If
this fails, call an authorized WhirlpoolSM
service technician for service.
Burner is wet from washing.
Let dry.
continued on next page
25
PROBLEM
SOLUTION
POSSIBLE CAUSE
mtrol
oh(a) will
t turn
You are not pushing in before
turning.
Push control knob(s) in before turning to
a setting.
il is visible on
ntinuouauning oven
iah
You broil often.
The special finish is designed to
gredually reduce oven soil during
normal baking or roasting. It is not
designed to keep your oven spotless,
only presentably clean. If you broil often,
you may see oven soil. Follow handcleaning tips on page 21.
The door is cooler than the oven walls.
Soil will be more visible on the door than
other areas in the oven. See handcleaning tips on page 21.
Sugar and starchy spills may leave
stains. See page 21 for hand-cleaning
tips.
Soil is on door.
Soil is caused by sugar and
starchy spills.
loking reads
c not what you
The range is not level.
pSCtd
The oven temperature seems
too low or too high.
Level range. (See Installation Instructions.)
The oven was not preheated as
the recipe calls for.
The recipe has never been
tested or is not from a reliable
source.
The pans are not the type or
size recommended in the recipe.
There is not proper air circulation around pan when baking.
Adjust the oven temperature control.
(See “Adjusting the oven temperature
control” on page 13.)
Preheat oven if called for in recipe.
Use only tested recipes from a reliable
source.
Refer to a reliable cookbook for recommended pan type and size.
Allow 1% to 2 inches (4-5 cm) on all
sides of the pans for air circulation.
There must be a minimum space of
1 inch (2.5 cm).
Flame size does not fit the
cooking utensil being used.
When broiling, you have not
completely closed the broiler
drawer.
26
Adjust flame size to fit cooking utensil.
Completely close broiler drawer.
2. If you need
assistance
...
Call Whirlpool Consumer As&stance Center
telephone number. Diil free from anywhere in
the U.S.:
l-800-253-1 301
and talk with one of our trained consultants. The
consultant can instruct you in how to obtain
satisfactory operation from your appliance or, if
service is necessary, recommend a qualified
sewice company in your area.
lf you prefer, write to:
Mr. William Clark
Consumer Assistance Representative
Whirlpool Corporation
2000 M-63
Benton Harbor, MI 49022
Please include a daytime phone number in your
correspondence.
3. If you need
service
4. If you need FSP
ment parts . . .
FSP is a registered trademark of Whirlpool
Corporation for quality parts. Look for this symbol
of quality whenever you need a replacement part
for your Whirlpool appliance. FSP replacement
parts will fit right and work right, because they
are made to the same exacting specifications
used to build every new Whirlpool appliance.
To locate FSP replacement parts in your area,
refer to Step 3 above or call the Whirlpool
Consumer Assistance Center number in Step 2.
5. lf you are not satisfied
how the problem
was
solved . . .
l
...
Whirlpool has a nationwide
a network of authorized
1 WhirlpoolSMservice compaOEswcE
nies. Whirlpool service
Tit@
technicians are trained to
fulfill the product warranty and provide afterwarranty service, anywhere in the United States.
To locate the authorized Whirlpool service
company in your area, call our Consumer
Assistance Center telephone number (see
Step 2) or look in your telephone directory Yellow
Pages under:
replace-
l
l
with
Contact the Major Appliance Consumer Action
Panel (MACAP). MACAP is a group of independent consumer experts that voices consumer views at the highest levels of the major
appliance industry.
Contact MACAP onfy when the dealer,
authorized sewicer and Whirlpool have failed
to resofve your problem.
Major Appliance Consumer Action Panel
20 North Wacker Drive
Chicago, IL 60606
MACAP will in turn inform us of your action.
27
WHIRLPOOL@
GasCooking Product
Warranty
1 LENGTH OF WARRANTY
FULL ONE-YEAR
WARRANTY
From Date of Purchase
I WHIRLPOOL
t WHIRLPOOL
I
WILL PAY FOR
FSV replacement parts and repair labor to correct defects in materials
or workmanship. Sewice must be provided by an authorized
WhiripoolsM sewice cornoanv.
WlLL NOT PAY FOR
_____ ________~~
-1
A. Service calls to:
1. Correct the installation of the cooking product.
2. Instruct you how to use the cooking product.
3. Replace house fuses or correct house wiring or plumbing.
4. Replace owner accessible light bulbs.
B. Repairs when the cooking product is used in other than normal, single-family household use.
C. Pickup and delivery. This product is designed to be repaired in the home.
D. Damage to the cooking product caused by accident, misuse, fire, flood, acts of God or use of
products not approved by Whirlpool.
E. Repairs to parts or systems caused by unauthorized modifications made to the appliance.
WHIRLPOOL CORPORATION SHALL NOT BE LIABLE FOR INCIDENTAL OR CONSEQUENTIAL
DAMAGES. Some states do not allow the exclusion or limitation of incidental or consequential damages, so this limitation or exclusion may not apply to you. This warranty gives you specific legal rights,
and you may also have other rights which vary from state to state.
Outside the United States, a different warranty may apply. For details, please contact your authorized
Whirlpool distributor or military exchange.
If you need service, first see the “Assistance or Service” section of this book. After checking
“Assistance or Service,” additional help can be found by calling our Consumer Assistance Center
telephone number, l-600-253-1301, from anywhere in the U.S.
PART NO. 316000706/616996
0 1883 Whhlpool
Corporalbn
Rev. A
e R+slrod
TmdmurWSM
-
Mm!x ol Wht@ool
Capontbn.
Palied
In USA