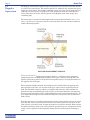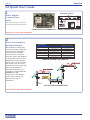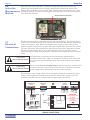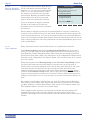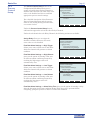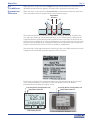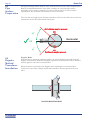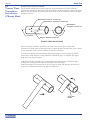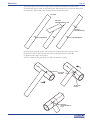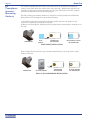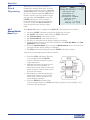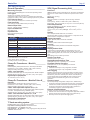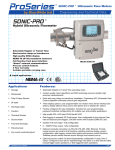
1
SONIC-PRO
Series S1, S2, S3
Hybrid Ultrasonic Flowmeter
Installation and Operating Manual
ProSeries
2
TWO-YEAR
WARRANTY
ProSeries
TM
by Blue-White
Industries,
Ltd.
Industries,Ind.
Ltd.
Sonic-Pro
Page 2
Table of Contents
Safety precautions. . . . . . . . . . . . . . . . . . . . . . . . . . . . . . . . . . . . . . . . . . . . . . . . . . . . . 4
1
Product overview . . . . . . . . . . . . . . . . . . . . . . . . . . . . . . . . . . . . . . . . . . . . . . 5
1.1
Operating principles . . . . . . . . . . . . . . . . . . . . . . . . . . . . . . . . . . . . . . . 5
1.2
Transit Time operation . . . . . . . . . . . . . . . . . . . . . . . . . . . . . . . . . . . . . 5
1.3
Doppler operation . . . . . . . . . . . . . . . . . . . . . . . . . . . . . . . . . . . . . . . . . 6
1.4
Fluid requirements . . . . . . . . . . . . . . . . . . . . . . . . . . . . . . . . . . . . . . . . 7
1.5
Pipe requirements . . . . . . . . . . . . . . . . . . . . . . . . . . . . . . . . . . . . . . . . . 7
1.5
Straight pipe length requirements . . . . . . . . . . . . . . . . . . . . . . . . . . . . 7
1.7
Standard model features and options . . . . . . . . . . . . . . . . . . . . . . . . . . 8
1.8
Wiring compartment . . . . . . . . . . . . . . . . . . . . . . . . . . . . . . . . . . . . . . . 9
2
Quick Start Guide . . . . . . . . . . . . . . . . . . . . . . . . . . . . . . . . . . . . . . . . . . . . . . 10
3
Flowmeter SPU installation . . . . . . . . . . . . . . . . . . . . . . . . . . . . . . . . . . . . . 16
3.1
Unpacking . . . . . . . . . . . . . . . . . . . . . . . . . . . . . . . . . . . . . . . . . . . . . . . 16
3.2
Select a mounting location . . . . . . . . . . . . . . . . . . . . . . . . . . . . . . . . . . 16
3.3
Wall mounting . . . . . . . . . . . . . . . . . . . . . . . . . . . . . . . . . . . . . . . . . . . 16
3.4
Panel mounting. . . . . . . . . . . . . . . . . . . . . . . . . . . . . . . . . . . . . . . . . . . 17
3.5
Pipe mounting. . . . . . . . . . . . . . . . . . . . . . . . . . . . . . . . . . . . . . . . . . . . 17
3.6
Select a measurement method . . . . . . . . . . . . . . . . . . . . . . . . . . . . . . . 18
3.7
Electrical connections . . . . . . . . . . . . . . . . . . . . . . . . . . . . . . . . . . . . . . 18
3.8
Cable gland liquid tight connections . . . . . . . . . . . . . . . . . . . . . . . . . . 19
4
Overview of Flowmeter Operation. . . . . . . . . . . . . . . . . . . . . . . . . . . . . . . . 20
4.1
Power on and self test . . . . . . . . . . . . . . . . . . . . . . . . . . . . . . . . . . . . . . 21
4.2
Description of operating states and controls . . . . . . . . . . . . . . . . . . . . 21
4.3
Startup state . . . . . . . . . . . . . . . . . . . . . . . . . . . . . . . . . . . . . . . . . . . . . 22
4.4
Setup (configuration) mode . . . . . . . . . . . . . . . . . . . . . . . . . . . . . . . . . . 22
4.5
Transducer positioning state . . . . . . . . . . . . . . . . . . . . . . . . . . . . . . . . 23
4.6
Zero calibration state . . . . . . . . . . . . . . . . . . . . . . . . . . . . . . . . . . . . . . 24
4.7
Run mode . . . . . . . . . . . . . . . . . . . . . . . . . . . . . . . . . . . . . . . . . . . . . . . 25
4.8
Fault and warning codes . . . . . . . . . . . . . . . . . . . . . . . . . . . . . . . . . . . 25
5
Setup mode . . . . . . . . . . . . . . . . . . . . . . . . . . . . . . . . . . . . . . . . . . . . . . . . . . . . 27
5.1
Menu Navigation. . . . . . . . . . . . . . . . . . . . . . . . . . . . . . . . . . . . . . . . . . 27
5.1.1
Setup root menu . . . . . . . . . . . . . . . . . . . . . . . . . . . . . . . . . . . 27
5.1.2
Escaping from setup . . . . . . . . . . . . . . . . . . . . . . . . . . . . . . . . 27
5.2
Global configurations . . . . . . . . . . . . . . . . . . . . . . . . . . . . . . . . . . . . . . 28
5.2.1
Communication settings . . . . . . . . . . . . . . . . . . . . . . . . . . . . . 28
5.2.2
Master password . . . . . . . . . . . . . . . . . . . . . . . . . . . . . . . . . . . 29
5.2.3
Setting the date and time . . . . . . . . . . . . . . . . . . . . . . . . . . . . 29
5.2.4
Saving changes . . . . . . . . . . . . . . . . . . . . . . . . . . . . . . . . . . . . 29
5.3
Manage configuration sets . . . . . . . . . . . . . . . . . . . . . . . . . . . . . . . . . . 30
5.3.1
Activate a configuration set . . . . . . . . . . . . . . . . . . . . . . . . . . 30
5.3.2
Open a saved configuration set . . . . . . . . . . . . . . . . . . . . . . . 30
5.3.3
Create a new configuration set . . . . . . . . . . . . . . . . . . . . . . . 30
5.3.4
Delete a saved configuration set. . . . . . . . . . . . . . . . . . . . . . . 30
5.4
Configuration edit menu. . . . . . . . . . . . . . . . . . . . . . . . . . . . . . . . . . . . 31
5.4.1
Editing data items. . . . . . . . . . . . . . . . . . . . . . . . . . . . . . . . . . 31
5.4.1.1 . Editing numerical values . . . . . . . . . . . . . . . . . . . . . 31
5.4.1.2 . Entering passwords using the soft buttons . . . . . . . 32
5.4.1.3 . Units of measure . . . . . . . . . . . . . . . . . . . . . . . . . . . . 32
5.4.2
Transducer setup . . . . . . . . . . . . . . . . . . . . . . . . . . . . . . . . . . 33
5.4.3
Metering setup . . . . . . . . . . . . . . . . . . . . . . . . . . . . . . . . . . . . 34
5.4.4
Process control setup. . . . . . . . . . . . . . . . . . . . . . . . . . . . . . . . 37
5.4.5
Set password (for a single configuration set) . . . . . . . . . . . . . 39
5.4.6
Saving changes . . . . . . . . . . . . . . . . . . . . . . . . . . . . . . . . . . . . 39
5.4.7
Escape without saving . . . . . . . . . . . . . . . . . . . . . . . . . . . . . . 39
6
Transducer installation . . . . . . . . . . . . . . . . . . . . . . . . . . . . . . . . . . . . . . . . . 40
6.1
Transducer piping system location . . . . . . . . . . . . . . . . . . . . . . . . . . . . 40
6.2
Transducer mounting mode for Doppler measurement . . . . . . . . . . . . 40
6.3
Transducer mounting mode for Transit Time measurement. . . . . . . . 40
6.4
Transducer separation distance . . . . . . . . . . . . . . . . . . . . . . . . . . . . . . 41
6.5
Pipe surface preparation. . . . . . . . . . . . . . . . . . . . . . . . . . . . . . . . . . . . 42
6.6
Doppler method transducer installation . . . . . . . . . . . . . . . . . . . . . . . 42
6.7
Transit Time transducer installation - V and W mount mode . . . . . . . 43
6.8
Transit Time transducer installation - Z mount mode . . . . . . . . . . . . . 44
ProSeries
TM
by Blue-White
Industries,
Ltd.
Industries,Ind.
Ltd.
Sonic-Pro
7
8
9
10
6.9
Transducer acoustic mounting gaskets . . . . . . . . . . . . . . . . .
6.10
Transducer pipe mounting clamps . . . . . . . . . . . . . . . . . . . . .
Run mode
....... ....... ....... ....... ....... .......
7.1
Primary and secondary display areas . . . . . . . . . . . . . . . . . .
7.1.1
Flow rate measurement . . . . . . . . . . . . . . . . . . . . . .
7.1.2
Total flow measurement . . . . . . . . . . . . . . . . . . . . .
7.2
Measurement status areas . . . . . . . . . . . . . . . . . . . . . . . . . . .
7.2.1
Configuration and mode . . . . . . . . . . . . . . . . . . . . .
7.2.2
Goodness of measurement . . . . . . . . . . . . . . . . . . . .
7.2.3
Sound speed display . . . . . . . . . . . . . . . . . . . . . . . . .
7.2.4
Measuring the fluid sound speed . . . . . . . . . . . . . . .
7.3
Process control status areas . . . . . . . . . . . . . . . . . . . . . . . . . .
7.4
Soft buttons . . . . . . . . . . . . . . . . . . . . . . . . . . . . . . . . . . . . . . .
7.5
Output signals . . . . . . . . . . . . . . . . . . . . . . . . . . . . . . . . . . . .
7.5.1
Analog signal output . . . . . . . . . . . . . . . . . . . . . . . . .
7.5.2
Digital pulse output . . . . . . . . . . . . . . . . . . . . . . . . .
7.6
Data logging . . . . . . . . . . . . . . . . . . . . . . . . . . . . . . . . . . . . . .
7.6.1
Periodic logging. . . . . . . . . . . . . . . . . . . . . . . . . . . . .
7.6.2
Logging rate setpoints . . . . . . . . . . . . . . . . . . . . . . .
7.6.3
Logging totalizer setpoints . . . . . . . . . . . . . . . . . . . .
7.6.4
Local log data storage (SD flash memory card) . . . .
7.6.4.1 . Inserting and removing the memory card .
7.6.4.2 . Format of data on the memory card . . . . . .
7.6.4.3 . Rotation and purging of log files. . . . . . . . .
7.6.4.4 . Power loss . . . . . . . . . . . . . . . . . . . . . . . . . .
7.6.5
Remote access to log data . . . . . . . . . . . . . . . . . . . . .
Process control. . . . . . . . . . . . . . . . . . . . . . . . . . . . . . . . . . . . . . . . . .
8.1
Process controlsScreen . . . . . . . . . . . . . . . . . . . . . . . . . . . . . .
8.2
Batch dispensing . . . . . . . . . . . . . . . . . . . . . . . . . . . . . . . . . . .
8.2.1
Manual batch start type . . . . . . . . . . . . . . . . . . . . . .
8.2.2
Auto batch start type . . . . . . . . . . . . . . . . . . . . . . . .
8.2.3
Batch clear . . . . . . . . . . . . . . . . . . . . . . . . . . . . . . . .
8.2.4
Batch edit . . . . . . . . . . . . . . . . . . . . . . . . . . . . . . . . .
8.3
Flow rate alarms . . . . . . . . . . . . . . . . . . . . . . . . . . . . . . . . . . .
8.3.1
Basic operation . . . . . . . . . . . . . . . . . . . . . . . . . . . . .
8.3.2
Clearing alarms . . . . . . . . . . . . . . . . . . . . . . . . . . . .
8.3.3
Editing alarms . . . . . . . . . . . . . . . . . . . . . . . . . . . . .
8.3.4
More on clearing alarm conditions . . . . . . . . . . . . . .
Sonic-Pro User PC Software . . . . . . . . . . . . . . . . . . . . . . . . . . . . . .
9.1
Software installation. . . . . . . . . . . . . . . . . . . . . . . . . . . . . . . .
9.2
Making connections. . . . . . . . . . . . . . . . . . . . . . . . . . . . . . . . .
9.2.1
Ethernet Connection . . . . . . . . . . . . . . . . . . . . . . . . .
9.2.2
Serial and USB connections . . . . . . . . . . . . . . . . . . .
9.3
Retrieving log data . . . . . . . . . . . . . . . . . . . . . . . . . . . . . . . . .
Indexes. . . . . . . . . . . . . . . . . . . . . . . . . . . . . . . . . . . . . . . . . . . . . . . . .
10.1
Complete flowmeter model number system . . . . . . . . . . . . . .
10.2
Specifications . . . . . . . . . . . . . . . . . . . . . . . . . . . . . . . . . . . . .
10.3
Pipe dimensional data . . . . . . . . . . . . . . . . . . . . . . . . . . . . . .
10.4
Sound speed data . . . . . . . . . . . . . . . . . . . . . . . . . . . . . . . . . .
10.5
Troubleshooting guide . . . . . . . . . . . . . . . . . . . . . . . . . . . . . .
Page 3
. . . . . . . 46
. . . . . . . 47
. . . . . . . 48
. . . . . . . 48
. . . . . . . 49
. . . . . . . 50
. . . . . . . 50
. . . . . . . 50
. . . . . . . 50
. . . . . . . 51
. . . . . . . 51
. . . . . . . 52
. . . . . . . 52
. . . . . . . 52
. . . . . . . 52
. . . . . . . 53
. . . . . . . 53
. . . . . . . 53
. . . . . . . 53
. . . . . . . 53
. . . . . . . 54
. . . . . . . 54
. . . . . . . 54
. . . . . . . 54
. . . . . . . 55
. . . . . . . 55
. . . . . . . 56
. . . . . . . 56
. . . . . . . 57
. . . . . . . 57
. . . . . . . 58
. . . . . . . 59
. . . . . . . 59
. . . . . . . 60
. . . . . . . 60
. . . . . . . 61
. . . . . . . 61
. . . . . . . 62
. . . . . . . 63
. . . . . . . 63
. . . . . . . 63
. . . . . . . 63
. . . . . . . 64
. . . . . . . 64
. . . . . . . 66
. . . . . . . 66
. . . . . . . 67
. . . . . . . 68
. . . . . . . 70
. . . . . . . 71
ProSeries
TM
by Blue-White
Industries,
Ltd.
Industries,Ind.
Ltd.
Sonic-Pro
Page 4
Safety Precautions
Thank you for purchasing the Sonic-Pro ultrasonic flowmeter.
This instruction manual provides important information regarding the safe installation,
operation and maintenance of the flowmeter. Please read it carefully before attempting
to install or operate the meter. A copy of this manual should be kept by the operator.
Extra copies of this manual are available from your supplier or directly from the
manufacturer.
The following important symbols are used throughout this manual and on labeling
affixed to the flowmeter:
CAUTION
risk of electric shock
!
CAUTION
risk of danger
!
!
CAUTION
risk of danger
This symbol identifies a risk of electric shock where the possibility of injury
or death is present.
This symbol identifies a risk of injury or death is present.
In all cases, when this symbol is used on labeling affixed to the flowmeter,
the documentation needs to be consulted to find out the nature of the
potential HAZARD and any actions which have to be taken.
If the equipment is used in a manner not specified by this instruction
manual, the protection provided by the equipment may be impaired.
QUESTIONS REGARDING THE SAFE USE OF THIS PRODUCT, THE LINUX
OPERATING SYSTEM SOURCE CODE AND OTHER TECHNICAL ASSISTANCE
MAY BE DIRECTED TO:
Blue-White Industries
714-893-8529
techsupport @blue-white.com
LABELING
ProSeries
TM
by Blue-White
Industries,
Ltd.
Industries,Ind.
Ltd.
Sonic-Pro
Page 5
1.0 Product Overview
1.1
Operating
Principles
The Sonic-Pro Hybrid Ultrasonic Flow Meter can measure fluid flow in virtually any
fluid in which sound waves can travel. The Sonic-Pro meter is considered “hybrid”
because it can measure fluid flow using either the Doppler or Transit Time methods. The
system includes a set of ultrasonic sound Transducers and a Signal Processing Unit
(SPU). The transducers are clamped to the outside of the pipe wall and include no
moving parts. The SPU controls and processes the transducer signals into useful flow
measurement data. This method of flow measurement is safe, non-intrusive and very
easy to service.
1.2
Transit Time
Operation
The Transit Time measuring method requires relatively “clean” fluid to enable the sound
waves to complete their circuit. The meter may be operated in the Transit-Time mode
when the fluid contains 0% to 10% (0 to 100,000 ppm) of particles. To allow for changes
in the fluid’s particle count, the Sonic-Pro monitors the signal gain and employs an
Automatic Gain Control (AGC) algorithm that automatically adjusts the gain to maintain
the optimum power level.
The speed at which sound travels in the fluid must be known. The factory will configure
the meter for a known fluid during the initial configuration. The Sonic-Pro model S3
includes a 5-button user interface that can be used to configure the meter. Many common
fluids are listed in the software and can be selected directly from the menu. Provided the
speed of sound in the fluid is known, custom “unknown” fluids can be input manually by
the user. A list of various fluids and their sound speeds are provided in the index of this
user manual.
TRANSIT TIME MEASUREMENT PRINCIPLE
When operated in the Transit Time measurement method, a short ultrasonic signal burst
passes first in one direction and then in the other between two transducers separated
along the length of the pipe. When traveling in the same direction as fluid flow, the burst
is carried along by the fluid and arrives earlier as a result. When traveling against fluid
flow, the burst is held back by the fluid and arrives later. The SPU (Signal Processing
Unit) measures this difference in time-of-flight in the two directions. From this, the
actual time-of-flights, the distance traveled in the fluid and the angle of the ultrasonic
signal path, it calculates the fluid velocity.
As well as the V mounting method shown, the transducers could be on opposite sides of
the pipe with no reflections in the path (Z mount).
ProSeries
TM
by Blue-White
Industries,
Ltd.
Industries,Ind.
Ltd.
Sonic-Pro
Page 6
1.3
Doppler
Operation
The Doppler measurement method requires that particles be present in the flow stream
to “reflect” the sound waves. The particles must be of sufficient size, volume and type to
reflect the sound waves. For example; although orange juice may contain pulp that is of
sufficient size and volume, the properties of the pulp do not allow the sound waves to
reflect. Therefore, the meter will not operate in the Doppler mode with orange juice
containing pulp.
The meter may be operated in the Doppler mode when the fluid contains 0.02% to 15%
(200 to 150,000 ppm) of particles that are at least 50 micron in size and have sufficient
sound reflection properties.
DOPPLER MEASUREMENT PRINCIPLE
When operated in the Doppler measurement method, a continuous-wave ultrasonic
signal passes from a transmitting transducer into a pipe carrying a moving fluid. The
signal is reflected by particles in the fluid and is picked up by a receiving transducer on
the opposite side of the pipe.
When using the Doppler method, the transducers are installed directly opposite each
other along the pipe axis, one each side of the pipe, either with or against the flow of
fluid. The ultrasonic signal is subject to a Doppler shift when it is reflected from the
particles moving at (nominally) the same velocity as the fluid. Therefore, the frequency
at the receiving transducer will be slightly different from the transmitted frequency. The
SPU (Signal Processing Unit) measures this difference in frequency and calculates the
fluid velocity.
Note that the meter is actually measuring the velocity of the particles and not the actual
fluid. For this reason, measurement error will occur if the particles do not move at the
same velocity as the fluid, such as when the particles are heavier than the fluid or when
the fluid is moving at such a low velocity that the particles drop out of suspension. Large
“gulps” of air or particles will temporarily disrupt the flow measurement resulting in
error.
ProSeries
TM
by Blue-White
Industries,
Ltd.
Industries,Ind.
Ltd.
Sonic-Pro
1.4
Fluid
Requirements
Page 7
Doppler Operation
Transit Time Operation
! Must conduct sound
! Must conduct sound
! Must contain sound reflecting particles such ! Must be relatively clean fluid
as air bubbles, sand, etc.
Doppler measurement requires 0.02% to
15% (200 to 150,000 ppm) particles be
present in the flow stream to “reflect” the
sound waves.
Transit Time measurement requires relatively
“clean” fluid. Fluids containing from 0% to
10% (0 to 100,000 ppm) of particles are
acceptable.
Note: Do not attempt to measure very low flow velocities in the Doppler mode, the particles can fall out of
suspension resulting in error or failure.
1.5
Pipe
Requirements
Pipe Size Ranges and Maximum Wall Thickness
Pipe Material
Transducer Models I, J, K
Transducer Models A, D, E, F, G, H
Doppler or Transit Time Mode
Doppler Mode
Transit Time Mode
Max Wall
3/4” to 2” (20 to 63mm)
2“ to 100” (63 to 2500mm)
2“ to 100” (63 to 2500mm)
.500” (13mm)
Copper
3/4” to 2” (20 to 63mm)
2“ to 100” (63 to 2500mm)
2“ to 100” (63 to 2500mm)
.500” (13mm)
FRP (fiberglass Reinforced Plastic)
1/2” to 2” (20 to 63mm)
2“ to 100” (63 to 2500mm)
2“ to 100” (63 to 2500mm)
.500” (13mm)
Iron (cast)
3/4” to 2” (20 to 63mm)
2“ to 100” (63 to 2500mm)
2“ to 100” (63 to 2500mm)
.500” (13mm)
Iron (ductile)
3/4” to 2” (20 to 63mm)
2“ to 100” (63 to 2500mm)
2“ to 100” (63 to 2500mm)
.500” (13mm)
Nylon
Brass (Naval)
1/2” to 2” (20 to 63mm)
1“ to 100” (25 to 2500mm)
1-1/2“ to 100” (40 to 2500mm) 2.00” (50mm)
Polyethylene (HDPE)
1/2” to 2” (20 to 63mm)
1“ to 100” (25 to 2500mm)
1-1/2“ to 100” (40 to 2500mm) 2.00” (50mm)
Polyethylene (LDPE)
1/2” to 2” (20 to 63mm)
1“ to 100” (25 to 2500mm)
1-1/2“ to 100” (40 to 2500mm) 1.00” (25mm)
Polypropylene
1/2” to 2” (20 to 63mm)
1“ to 100” (25 to 2500mm)
1-1/2“ to 100” (40 to 2500mm) .500” (13mm)
PVC / CPVC
1/2” to 2” (20 to 63mm)
1“ to 100” (25 to 2500mm)
1-1/2“ to 100” (40 to 2500mm) 2.00” (50mm)
304 Stainless Steel
3/4” to 2” (20 to 63mm)
2“ to 100” (63 to 2500mm)
2“ to 100” (63 to 2500mm)
.500” (13mm)
304L Stainless Steel
3/4” to 2” (20 to 63mm)
2“ to 100” (63 to 2500mm)
2“ to 100” (63 to 2500mm)
.500” (13mm)
316 Stainless Steel
3/4” to 2” (20 to 63mm)
2“ to 100” (63 to 2500mm)
2“ to 100” (63 to 2500mm)
.500” (13mm)
Steel (1% carbon hard)
3/4” to 2” (20 to 63mm)
2“ to 100” (63 to 2500mm)
2“ to 100” (63 to 2500mm)
.500” (13mm)
Steel (carbon)
3/4” to 2” (20 to 63mm)
2“ to 100” (63 to 2500mm)
2“ to 100” (63 to 2500mm)
.500” (13mm)
Titanium
3/4” to 2” (20 to 63mm)
2“ to 100” (63 to 2500mm)
2“ to 100” (63 to 2500mm)
.500” (13mm)
Note: The outside surface of the pipe must be clean and smooth. Insulation, coatings, rust and other surface
imperfections should be removed before installing the transducers. The inside surface of the pipe must be smooth to
properly reflect the sound wave.
1.6
Straight Pipe
Length
Requirements
Type of Disturbance
Straight Lengths of Pipe Required
Upstream from Transducers
Downstream from Transducers
Flange
5 x Nominal Pipe Size
5 x Nominal Pipe Size
Reducer
7 x Nominal Pipe Size
5 x Nominal Pipe Size
90 Elbow
10 x Nominal Pipe Size
5 x Nominal Pipe Size
Two 90o Elbows - 1 Direction
15 x Nominal Pipe Size
5 x Nominal Pipe Size
o
o
Two 90 Elbows - 2 Directions
20 x Nominal Pipe Size
5 x Nominal Pipe Size
Gate valve
25 x Nominal Pipe Size
5 x Nominal Pipe Size
Pump
25 x Nominal Pipe Size
5 x Nominal Pipe Size
Note: The Sonic-Pro’s sound wave beam is only affected by fluid that actually passes through the beam and
therefore, the meter will not measure with high accuracy if the fluid velocity is not consistent across the entire pipe
diameter. Flow disturbances such as pumps, elbows, tees, and valves in the flow stream can cause swirl patterns
and vortices that will affect the measurement. Install the transducers on a straight run of pipe as far as possible
from any disturbances. The distance required for high accuracy will depend on the type of disturbance.
ProSeries
TM
by Blue-White
Industries,
Ltd.
Industries,Ind.
Ltd.
Sonic-Pro
Page 8
1.7
Standard
Model
Features
and Options
STANDARD MODEL FEATURES
! Data logging to a standard SD Card.
! 4-20 mA output signal
! 0-1000 Hz digital frequency output signal
! LED status indicator lights
DISPLAY AND USER ACCESS MODEL DISTINCTIONS
Sonic-Pro Model S3 includes a full featured
display with a 5 button touch pad. The start-up
process and the zero calibration can be performed
by pressing the proper buttons on the touch pad.
Note that the start-up process, the zero calibration,
and all other functions can also be performed by the
optional remote PC software application.
Sonic-Pro Model S2 includes a basic display with
a 2 button touch pad. The start-up process and the
zero calibration can be performed by removing the
front cover plate and pressing the setup button
located on the circuit board.
Note that the start-up process, the zero calibration,
and all other functions can also be performed by the
optional remote PC software application.
Sonic-Pro Model S1 has no display or touch pad.
The start-up process and the zero calibration can be
performed by removing the front cover plate and
pressing the setup button located on the circuit
board.
Note that the start-up process, the zero calibration,
and all other functions can also be performed by the
optional remote PC software application.
OPTIONAL COMMUNICATIONS PACKAGE WITH CUSTOM PC SOFTWARE
Any Sonic-Pro model can be equipped with a Communications Package that includes
circuitry, connector panel and custom PC software. When connected to a computer
running the Sonic-Pro software, any model can perform the Model S3 functions
described in this manual including program editing and data logging downloads directly
into the PC.
OPTIONAL PROCESS CONTROL RELAY BOARD
Any Sonic-Pro model can be equipped with a Process Control Relay Package that
includes three independently programmable 10 amp relays. However, relay programming
requires the Model S3 programming features or the Communications Software package
to function. Models S1 and S2 cannot access the relay functions unless connected to the
communications Software.
ProSeries
TM
by Blue-White
Industries,
Ltd.
Industries,Ind.
Ltd.
Page 9
WIRING COMPARTMENT
The wiring access door on the front of the flowmeter enclosure only must be
removed to access the wiring terminal blocks, motherboard controls (a setup button and
the measurement mode switch) and to view the status LEDs.
The meter is factory set for transit time operation.
There are no user serviceable items inside the rear enclosure.
FRONT COVER PLATE REMOVED
DOPPLER / TRANSIT TIME
MODE SELECT SWITCH
(factory set for transit time mode)
SETUP BUTTON (white)
FUSE
INDICATOR LIGHTS
FUSE
SETUP BUTTON
INDICATOR
LIGHTS
TRANSDUCER
INPUTS
Tx 1
SIGNAL
OUTPUTS
T
Tx 2
D
mA
1A 250V (5x20mm)
slow blow
littlefuse 239001.XP
POWER INPUT
Hz
DC
AC
POS (+)
NEG (-)
GRN
NEG (-)
POS (+)
GRN
BLK (-)
RED (+)
SD CARD
DATA LOG
(REMOVE)
WARNING
USB
GRN
BLK (-)
RED (+)
RS485
RS232
ETHERNET
DC (+)
DC (-)
GRN
AC LINE
AC NTRL
MODE SWITCH
RED (+)
BLK (-)
GRN
Sonic-Pro
1.8
Wiring
Compartment
INPUT POWER LIMITS
COM
NC
NO
R1
COM
12-30 NC
AWG NO
R2
COM
NC
NO
R3
COMMUNICATIONS
CONNECTOR PANEL
AC INPUT
110~240Vac 50/60Hz-40W
DC INPUT
15~30 Vdc-40W
CAUTION
risk of electric shock
PROCESS CONTROL RELAYS
(THREE EACH) 10A 250V AC
WIRING COMPARTMENT LAYOUT
INPUT POWER (green)
FAULT CONDITION (red)
METER STATUS (yellow)
INDICATOR LIGHTS
ProSeries
TM
by Blue-White
Industries,
Ltd.
Industries,Ind.
Ltd.
Sonic-Pro
Page 10
2.0 Quick Start Guide
1
MODE SELECT SWITCH
Select doppler
or transit time
mode
FUSE
1A 250V (5 x 20)
SETUP BUTTON
INDICATOR
LIGHTS
TRANSDUCER
INPUTS
Tx 1
SIGNAL
OUTPUTS
T
Tx 2
D
mA
Hz
POWER INPUT
DC
AC
WARNING
BLK (-)
RED (+)
RS232
USB
GRN
RS485
Note that the meter is factory
set for Transit-Time operation.
ETHERNET
COM
NC
NO
R1
INPUT POWER
LIMITS
COM
NC
NO
R2
AC INPUT
110VAC - 240VAC
50/60 Hz
COM
NC
NO
COMMUNICATIONS
CONNECTOR PANEL
FRONT COVER PLATE REMOVED
DC (+)
DC (-)
GRN
AC LINE
AC NTRL
POS (+)
NEG (-)
GRN
NEG (-)
POS (+)
GRN
BLK (-)
RED (+)
RED (+)
BLK (-)
GRN
MODE SWITCH
SD CARD
DATA LOG
(REMOVE)
DC INPUT
15 to 30 VDC
R3
CAUTION
risk of electric shock
PROCESS CONTROL RELAYS
(THREE EACH) 10A 250V AC
WIRING COMPARTMENT LAYOUT
See section 3.6 for more information
2
Select the transducer
mounting location
The flowmeter’s sound wave
beam only measures fluid that
actually passes through the
beam, therefore, the fluid
velocity must be consistent
across the entire pipe diameter
to ensure high accuracy. Flow
disturbances such as pumps,
elbows, tees, and valves in the
flow stream can cause swirl
patterns and vortices that will
affect the measurement.
Install the transducers on a
straight run of pipe as far as
possible from any
disturbances. The distance
required for accuracy will
depend on the type of
disturbance.
Type of Disturbance
Straight Lengths of Pipe Required
Upstream from Transducers
Downstream from Transducers
Flange
5 x Nominal Pipe Size
5 x Nominal Pipe Size
Reducer
7 x Nominal Pipe Size
5 x Nominal Pipe Size
90 Elbow
10 x Nominal Pipe Size
5 x Nominal Pipe Size
Two 90o Elbows - 1 Direction
15 x Nominal Pipe Size
5 x Nominal Pipe Size
Two 90o Elbows - 2 Directions
20 x Nominal Pipe Size
5 x Nominal Pipe Size
Gate valve
25 x Nominal Pipe Size
5 x Nominal Pipe Size
Pump
25 x Nominal Pipe Size
5 x Nominal Pipe Size
o
MINIMUM STRAIGHT PIPE LENGTHS
NO
Air could be trapped
NO
OK
Down flows
must have
back pressure
Flow
Direction
OK
!
OK
10 x D
5xD
PIPE SYSTEM CONSIDERATIONS
See section 6.1 for more information
ProSeries
TM
by Blue-White
Industries,
Ltd.
Industries,Ind.
Ltd.
Pipe must be full
Sonic-Pro
Page 11
3
All pipe types and sizes
Determine the
transducer mounting mode
When operated in the Doppler mode, the transducers
are always mounted directly opposite each other, 180
degrees around the pipe.
Flow
or
Flow
When operated in the Transit-Time mode, the front
faces of the transducers must face each other and be
positioned the correct distance apart. In V-mode, the
transducers are on the same side of the pipe. In Zmode, the transducers are on the opposite side of the
pipe, 180 degrees apart.
DOPPLER
When factory configured, the appropriate TransitTime mounting mode is pre-configured and printed on
the serial label.
“V” Mount Mode
“Z” Mount Mode
Typically smaller pipe
sizes from 2” to 6”
Typically larger pipe
sizes from 4” to 100”
Separation
Distance
Separation
Distance
Flow
or
Flow
Flow
or
Flow
See section 6.2 for more information
TRANSIT TIME
4
Determine the 1st
transducer location
The mounting surface must be
clean, smooth and free of
surface imperfections. Remove
all insulation material, loose
paint, etc. Clean the pipe
thoroughly. Use sandpaper if
necessary to remove surface
imperfections. Be sure to locate
the transducers on the side of
horizontal runs of pipe. Do not
mount the transducers over
weld seams. Place a mark
where the first transducer will
be located.
Air bubbles may be present
O
45
NO
Horizontal
OK
45O
NO
Sediment may be present
TRANSDUCER MOUNTING LOCATION
See section 6.5 for more information
ProSeries
TM
by Blue-White
Industries,
Ltd.
Industries,Ind.
Ltd.
Sonic-Pro
Page 12
5
Determine the 2nd
transducer location
When operated in the
Doppler mode, the
transducers are always
mounted directly opposite each
other, 180 degrees around the
pipe.
All pipe types and sizes
“V” Mount Mode
“Z” Mount Mode
Typically smaller pipe
sizes from 2” to 6”
Typically larger pipe
sizes from 4” to 100”
Separation
Distance
When operated in the
Transit-Time mode, the
factory configured separation
distance and mounting mode
is printed on the serial label.
The currently active
separation distance is also
displayed on the run mode
screen, the fault indicator
screen, and when activating a
new configuration.
Separation
Distance
DOPPLER
TRANSIT TIME
Separation Distance
1 T 0.88 in.
[¢¢¢£]
1490
U.S. Gallons / min
625.38
U.S. Gallons
4345625.38
SERIAL LABEL
If the meter has not been
factory configured, or if a new
configuration is required, the
pipe outside diameter, pipe
wall thickness, pipe material,
fluid type and transducer
mounting mode data must be
input before proceeding.
SETUP
SWAP
CLEAR
RUN MODE SCREEN
1 T 0.88 in.
[£ £ £ £]
FAULT
Attempting Correction...
F81
Information Screen
81
Firmware Version, A01.00.00
Transducer Positioning …
Position the transducers
at a separation distance of:
0.884416 inches (”V” Mount)
Once activated, the new
separation distance will be
displayed.
Press DONE when this is complete
DONE
NEW CONFIGURATION
ACTIVATION SCREEN
FAULT INDICATOR SCREEN
See section 6.6 for more information
6
Configure the meter if it has not been factory configured
Apply power to the meter. note that only the most basic configuration requirements are shown here.
1 T 0.88 in.
[¢¢¢£]
1490
U.S. Gallons / min
625.38
Setup Root Menu
Setup Root Menu
Setup Root Menu
Manage Configuration Sets
ÊOpen a Saved Configuration Set
Ê Configuration Set #1
Manage Configuration Sets
ÊActivate a Configuration Set
Open a Saved Configuration Set
Create a New Configuration Set
Delete a Saved Configuration Set
Manage Configuration Sets
Global Configuration
U.S. Gallons
4345625.38
SETUP
SWAP
CLEAR
1. Press Setup.
ENTER
Ç
See section 5.0 for more information
ProSeries
TM
by Blue-White
Industries,
Ltd.
Industries,Ind.
Ltd.
È
ESC
2. Highlight Manage
Configuration Sets and
press enter.
ENTER
Ç
È
ESC
3. Highlight Open a
saved Configuration
set and press enter.
ENTER
Ç
È
ESC
4. Highlight the
Configuration set to be
edited and press enter.
Sonic-Pro
Page 13
6
Configure the meter (continued)
Configuration Set #1
ENTER
Ç
È
ESC
ENTER
Ç
È
ESC
ENTER
Configuration Set #1
Ç
È
ESC
È
ENTER
Ç
ENTER
ESC
Ç
ENTER
È
ESC
È
ENTER
Ç
È
È
ESC
ENTER
Ç
È
ESC
12. Input the actual
outside diameter and
press enter.
Configuration Set #3
ESC
Transducer Setup
ÊPipe
ÊPipe Material
Ê PVC/CPVC
PVDF
Stainless Steel 302/303
Stainless Steel 304
Stainless Steel 304L
Stainless Steel 316
ENTER
Ç
È
È
È
ESC
16. Highlight the actual
Pipe Material and press
enter.
Configuration Set #1
Transducer Setup
ÊFluid
Ê Fluid type
Ê Water (Waste, Distilled)
Custom
1, 1, 1, Trichloroethane
1-Propanal
Acetone (Dimethyl ketone, 2-Propanone)
Alcohol (Ethyl alcohol, Ethanol)
ESC
ENTER
Ç
È
È
È
ESC
19. Highlight Fluid Type 20. Highlight the actual
Fluid Type and press
and press enter.
enter.
Information Screen
Transducer Setup
Metering Setup
Process Control Setup
Reset Working Set to Fact. Defaults
Set Password...
Save
Save As ...
Save and Activate
Transducer Setup
ÊFluid
Ê Fluid type
Speed of Sound in Fluid Type
ESC
15. Highlight Pipe
Material and press
enter.
Configuration Set #1
Configuration Set #1
Ç
Ç
Transducer Setup
ÊPipe
ÊOutside Diameter
Ê2.625
Configuration Set #1
18. Highlight Fluid and
press enter.
17. Press escape.
È
Transducer Setup
ÊFluid
Ê Fluid type
Speed of Sound in Fluid Type
Transducer Setup
ÊMeasurement Units
Transducer
Pipe
Liner
Fluid
ENTER
Ç
Transducer Setup
ÊPipe
Ê Outside Diameter
Wall Thickness
Pipe Material
Speed of Sound in Custom Material
È
ENTER
8. Highlight a Mount
Method and press enter.
Configuration Set #1
11. Highlight Outside
Diameter and press
enter.
Configuration Set #1
ESC
ESC
Configuration Set #1
Transducer Setup
ÊPipe
ÊWall Thickness
Ê0.218
Configuration Set #1
Transducer Setup
ÊPipe
Ê Outside Diameter
Wall Thickness
Pipe Material
Speed of Sound in Custom Material
ENTER
Ç
14. Input the actual wall
thickness and press
enter.
13. Highlight Wall
Thickness and press
enter.
È
Configuration Set #1
Configuration Set #1
ESC
Ç
Transducer Setup
ÊPipe
ÊOutside Diameter
Wall Thickness
Pipe Material
Speed of Sound in Custom Material
10. Highlight Pipe and
press enter.
È
ENTER
Configuration Set #1
Transducer Setup
ÊPipe
Outside Diameter
Wall Thickness
Pipe Material
Speed of Sound in Custom Material
Ç
ESC
Transducer Setup
ÊMeasurement Units
Transducer
Pipe
Liner
Fluid
9. Press escape.
ENTER
È
6. Highlight Transducer 7. Highlight Mount
and press enter.
Method and press enter.
Configuration Set #1
Transducer Setup
ÊTransducer
ÊModel Number
ÊMount Method
Cable Length (Feet)
ENTER
Ç
Transducer Setup
ÊTransducer
ÊMount Method
V
W
Z
N
Transducer Setup
ÊTransducer
ÊModel Number
ÊMount Method
Cable Length (Feet)
Transducer Setup
ÊTransducer
ÊMeasurement Units
ÊTransducer
Pipe
Liner
Fluid
5. Highlight Transducer
Setup and press enter.
Configuration Set #1
Configuration Set #1
Configuration Set #1
Transducer Setup
Metering Setup
Process Control Setup
Reset Working Set to Fact. Defaults
Set Password...
Save
Save As ...
Save and Activate
Firmware Version, A01.00.00
Transducer Positioning …
Position the transducers
at a separation distance of:
0.884416 inches (”V” Mount)
Press DONE when this is complete
ENTER
Ç
È
ESC
21. Press escape twice.
ENTER
Ç
È
ESC
DONE
22. Highlight Save and
23. Position the
Activate and press enter. Transducers on the pipe
and press Done.
ProSeries
TM
by Blue-White
Industries,
Ltd.
Industries,Ind.
Ltd.
Sonic-Pro
Page 14
Setup Root Menu
Manage Configuration Sets
ÊCreate a New Configuration Set
ÊDelete a Saved Configuration Set
ÊActivate a Configuration Set
ÊOpen a Saved Configuration Set
ÊConfiguration Set #1
ÊConfiguration Set #2
ÊConfiguration Set #3
ÊConfiguration Set #4
ÊConfiguration Set #5
Ê Transducer Setup
Ê Measurement Units
ÊEnglish (U.S. units)
ÊMetric (SI units)
Ê Transducer
ÊModel Number
ÊMount Method
ÊCable Length (Feet)
Ê Pipe
ÊOutside Diameter
Ê Wall Thickness
Ê Pipe Material
Ê Speed of Sound in Custom material
Ê Liner
Ê Liner Wall Thickness
Ê Speed of Sound in Liner material
Ê Fluid
Ê Fluid Type
Ê Speed of Sound in Custom Fluid
Ê Metering Setup
Ê Flow Rate
Ê Volume Units
Ê Custom Unit Volume per U.S. Gallon
Ê Time Units
Ê Digits After Decimal Point
Ê Totalizer
Ê Volume Units
Ê Custom Unit Volume per U.S. Gallon
Ê Digits After Decimal Point
Ê Total Display Function
Ê Display
Ê Display Language
Ê Flow Rate Averaging
Ê Display Update
Ê Low Flow Cutoff
Ê High Flow Cutoff
Ê Scaling Offset
Signal
Output
Ê
Ê Analog Output
Ê Pulse Output
Ê Data Logging
Ê Log Interval
Ê Log Rate Setpoint
Ê Log Totalizer Setpoint
Ê SOS Alarm
Ê Error Window
Ê Error Type
Global Configuration
ÊCommunications Settings
ÊMaster Password
ÊDate and Time
ÊSave Changes
ProSeries
TM
by Blue-White
Industries,
Ltd.
Industries,Ind.
Ltd.
Ê Process Control Setup
Ê Relay Channel #1
Ê Assign Relay
Ê Monitor Flow Rate
Ê Monitor Flow Total
Ê Disabled
Ê Flow Rate Alarm Settings
Ê High Trigger
Ê High Release
Ê Low Trigger
Ê Low Release
Ê Alarm Delay Time
Ê Batch Dispense Settings
Ê Default Batch Amount
Ê Batch Start Mode
Ê Manual Batch Start
Ê Auto (Proportional)
Ê Relay Timer
Ê Error Trigger
Ê Relay Channel #2
Ê Assign Relay
Ê Monitor Flow Rate
Ê Monitor Flow Total
Ê Disabled
Ê Flow Rate Alarm Settings
Ê High Trigger
Ê High Release
Ê Low Trigger
Ê Low Release
Ê Alarm Delay Time
Ê Batch Dispense Settings
Ê Default Batch Amount
Ê Batch Start Mode
Ê Manual Batch Start
Ê Auto (Proportional)
Ê Relay Timer
Ê Error Trigger
Ê Relay Channel #3
Ê Assign Relay
Ê Monitor Flow Rate
Ê Monitor Flow Total
Ê Disabled
Ê Flow Rate Alarm Settings
Ê High Trigger
Ê High Release
Ê Low Trigger
Ê Low Release
Ê Alarm Delay Time
Ê Batch Dispense Settings
Ê Default Batch Amount
Ê Batch Start Mode
Ê Manual Batch Start
Ê Auto (Proportional)
Ê Relay Timer
Ê Error Trigger
Sonic-Pro
Page 15
7
DOW 111
SILICONE GREASE
Install the
transducers
An acoustic coupling material
must be placed between the
transducer and the pipe
surface at the point where the
sound waves enter the pipe.
or
TRANSDUCER
BOTTOM VIEW
BLUE GASKET - Permenant
installations. Recommended
for metal pipes.
TRANSDUCER
ACOUSTIC COUPLING MATERIAL INSTALLATION
Draw a centerline on the pipe
parallel to the pipe center.
Place the first transducer onto
the pipe. Locate the front
arrow exactly over the first
separation distance mark (A).
Place the transducer straight
and parallel to the centerline.
A
CENTERLINE
B
CENTERLINE
CENTERLINE
CENTERLINE
Secure the first transducer to
the pipe using the pipe clamps.
The arrows on the front and
rear of the transducers must
point toward the centerline.
FRONT VIEW
ARROW ON CENTERLINE
A
Locate the second transducer
separation mark (B). Place the
second transducer so that the
front arrow is located exactly
over the mark (B). Place the
transducer straight and
parallel to the centerline. Be
sure that both transducers are
facing each other and parallel
to the pipe centerline.
REAR VIEW
ARROW ON CENTERLINE
B
A
B
Separation
Distance
ACOUSTIC
COUPLING
Check that the separation
distance is correct. Tighten the
clamps equally.
See section 6.9 for more information
MOUNTING CLAMPS
8
Restart the
meter
Press the SETUP button. The
meter will enter the SETUP
ROOT MENU. Creation and
modification of the five
available Configuration Sets
and the Global Configuration
settings can be made from this
menu. If no changes are to be
made, press ESC. The meter
will re-start.
1 T 0.88 in.
[¢¢¢£]
1490
U.S. Gallons / min
625.38
Setup Root Menu
Manage Configuration Sets
Global Configuration
U.S. Gallons
4345625.38
SETUP
SWAP
CLEAR
ENTER
Ç
È
ESC
ProSeries
TM
by Blue-White
Industries,
Ltd.
Industries,Ind.
Ltd.
Sonic-Pro
Page 16
3.0 Flowmeter SPU Installation
3.1
Unpacking
The Sonic-Pro Flowmeter is shipped in a carrying case. Inside the carrying case you will
find the following items:
!
!
!
Sonic-Pro Flowmeter SPU (Signal Processing Unit)
Sonic-Pro Transducer Set
Enclosure Mounting Hardware
2 mounting plates
4 mounting plate screws (10-32 x .50”)
4 panel mount screws (8-32 x 3.00”)
2 wall mounting screws (#10 x 1.00”)
1 panel mounting gasket
1 pipe mounting clamp (maximum pipe diameter 10”)
! Transducer Mounting Kit
6 blue gaskets (single use), part number 76001-417 (6 piece kit)
3 packets Dow 111 silicone grease, part number 90008-394 (each)
4 transducer mounting clamps (maximum pipe diameter 10”)
! Paper Instruction Manual
! CD Instruction Manual
Note: 1) additional clamps can be purchased and connected for larger pipe diameters. 2)
T-track mounting system uses different clamps. 3) Large pipe T-Track does not ship
inside the carrying case.
3.2
Select a
Mounting
Location
!
The Sonic-Pro was designed to be installed and operated by qualified personnel only. Do
not attempt to install or operate the meter if you are unsure. Seek qualified assistance.
Please note that warranty coverage does not include damage due to misuse or
improper installation.
Select a mounting location for the SPU that is within reach of the transducer cables and
power supply. The standard transducer cable length is 10 feet and must not be cut or
modified. Note that the Sonic-Pro can accurately measure flow from either direction.
CAUTION
risk of danger
Do not position the equipment so that it is difficult to disconnect the power
supply cord.
The SPU can be mounted on a wall, on a horizontal or vertical run of pipe or in panel.
Although the Sonic-Pro is designed to withstand outdoor conditions. A cool, dry location,
where the unit can be easily monitored is recommended. Special ventilation is not
required.
3.3
Wall
Mounting
1) The SPU must be installed on a
solid, secure surface such as a solid
wall, panel, wall studs, etc. DO NOT
install the meter on drywall with anchor
bolts.
2) Measure and mark the distance between
the keyhole slot centers as shown.
3) Drill two 5/32” diameter pilot holes.
Install the enclosed #10 x 1.00” screws
into the wall. Leave the screw heads
away from the panel surface
approximately 1/4”.
4) Hang the SPU enclosure on the screws.
ProSeries
TM
by Blue-White
Industries,
Ltd.
Industries,Ind.
Ltd.
4.68 (119mm)
Sonic-Pro
3.4
Panel
Mounting
Page 17
1) The SPU can be panel mounted.
Measure and cut an opening in the
panel as shown.
7.90” (200mm)
10.40”
(264mm)
2) Remove the two mounting plates from
the rear of the enclosure.
3) Install the gasket onto the rear of the
front panel of the SPU enclosure.
4) Place the enclosure into the panel.
5) Re-install the two mounting plates as
shown.
6) Thread the four 8-32 x 3.00” machine
screws through each of the two outer
tapped holes in the mounting plates.
Tighten the screws to secure the
enclosure to the panel.
3.5
Pipe
Mounting
Mounting
Plates
Gasket
8-32 x 3.00”
Panel Screws
Panel
1) The SPU can be mounted on horizontal
or vertical pipe. The pipe must be secure
and of sufficient strength to support the
weight of the SPU.
2) Install the two mounting plates onto the
rear of the enclosure. For horizontal
pipe mounting, install the mounting
plates on the top and bottom plate cutouts. For vertical pipe mounting, install
the mounting plates on the side plate
cut-outs.
3) Thread the long mounting clamp
through the square cut-outs in the
mounting plates as shown.
4) Wrap the clamp around the pipe and
tighten loosely. Be sure the pipe is
seated in the pipe groove, then tighten
securely.
ProSeries
TM
by Blue-White
Industries,
Ltd.
Industries,Ind.
Ltd.
Sonic-Pro
Page 18
3.6
Select the
Measurement
Method
Open the front cover of the SPU. Position the Doppler/Transit-Time switch to the
preferred operating mode (factory setting is transit time). Operate the meter in the
Transit Time mode (best accuracy) if the fluid contains little or no particles (up to 10%
maximum). Operate the meter in the Doppler mode if the fluid to be measured contains
more than 10% particles.
Doppler/Transti-Time Switch
3.7
Electrical
Connections
The Sonic-Pro transducer connections are pre-wired at the factory. If a main AC input
power cord selection was made when ordering, the power cord and main AC power input
connection is factory wired. When powering the meter by DC, a power cable for this
purpose should be installed in one of the cable gland liquid-tight connectors. See section
3.8 below. The meter will automatically adjust for any main power input that is within
the power requirements range of 110 to 240 volts AC or 15 to 30 volts DC. See the
diagram below for wiring of output signals, communications signals and process control
relays.
CAUTION
risk of electric shock
All high voltage connections in the front wiring compartment are
considered “finger safe”. However, disconnect electricity to the meter and
use care when connecting high voltage wires to the plug-in type terminal
blocks.
CAUTION
risk of electric shock
There are no user serviceable items inside the rear meter enclosure. If it
becomes necessary to open the back cover, be sure to disconnect the main
power supply before opening the back cover of the enclosure.
The transducer cable length is fixed. Do not attempt to modify the length of the cables.
Various cable lengths are available from the factory. Contact the factory if you need
assistance. Shielded cable is recommended for signal output connections.
FUSE
SETUP BUTTON
INDICATOR
LIGHTS
TRANSDUCER
INPUTS
Tx 1
SIGNAL
OUTPUTS
T
Tx 2
D
mA
1A 250V (5x20mm)
slow blow
littlefuse 239001.XP
POWER INPUT
Hz
DC
AC
WARNING
GRN
BLK (-)
RED (+)
RS485
12-30
AWG
RS232
USB
ETHERNET
COMMUNICATIONS
CONNECTOR PANEL
INPUT POWER LIMITS
COM
NC
NO
R1
COM
NC
NO
R2
COM
NC
NO
R3
PROCESS CONTROL RELAYS
(THREE EACH) 10A 250V AC
WIRING CONNECTIONS
ProSeries
TM
by Blue-White
Industries,
Ltd.
Industries,Ind.
Ltd.
DC (+)
DC (-)
GRN
AC LINE
AC NTRL
POS (+)
NEG (-)
GRN
NEG (-)
POS (+)
GRN
BLK (-)
RED (+)
RED (+)
BLK (-)
GRN
MODE SWITCH
SD CARD
DATA LOG
(REMOVE)
AC INPUT
110~240Vac 50/60Hz-40W
DC INPUT
15~30 Vdc-40W
CAUTION
risk of electric shock
Sonic-Pro
Page 19
Sonic-Pro Meter
Power Input
Plug type
Terminal Block
12-30 AWG wire
1
2
Positive
(+)
3
Negative
(-)
4
5
Line
intput
Neutral
input
110 to 240 VAC 50/60Hz
40 WATTS MAX
15 to 30 VDC
40 WATTS MAX
POWER INPUT CONNECTIONS
Sonic-Pro Meter
Sonic-Pro Meter
Frequency output (0-1000 Hz)
Open Collector output, 50% duty cycle
Current output (4-20 mA)
Maximum load 1000 ohms
Signal Output
Plug type
Terminal Block
14-30 AWG wire
1
2
Current
input
Current
output
4-20mA receiver
3
4
Ground
5
(Open Collector output
50% duty cycle)
5k
5-30 VDC
Frequency
input
Digital Pulse Receiver
SIGNAL OUTPUT CONNECTIONS
3.8
Cable Gland
Liquid-Tight
Connections
The Sonic-Pro SPU wiring compartment is equipped with:
six large liquid-tight cable gland connectors,
two small liquid-tight cable gland connectors, and
a communications cable liquid-tight cable gland grommet and plug.
To ensure that the SPU enclosure remains water-tight, the following cable glands should
be used:
The six large liquid-tight connectors can be used with any cable diameter from .200
to .394 inches (5.1 to 10.0 mm). They are provided for:
1 each for the power input cable
2 each for the transducer cables
3 each for the process control relay connection cables
The two small liquid-tight connectors can be used with any cable diameter from .118
to .255 inches (3.0 to 6.5 mm). They are provided for:
1 each for the 4-20 mA output signal cable
1 each for the pulse output signal cable
The communications cable grommet can be used with any cable diameter from .190
to .205 inches. It is provided for any one of the following cable types:
USB cable
Ethernet Cable
RS-232 serial cable
RS-485 serial cable
The blank grommet plug should be used when the communications cable grommet is
not required.
ProSeries
TM
by Blue-White
Industries,
Ltd.
Industries,Ind.
Ltd.
Sonic-Pro
Page 20
4.0 Overview of Flowmeter Operation
4.1
Power On
and
Self-Test
On application of power, the power LED (green) on the motherboard comes on and the
flowmeter performs self-test functions. The approximate duration of self-test is 10
seconds. The flowmeter indicates that it is in the Self-Test State as follows:
Model S1: the red and all four yellew LED
indicator lights flash at 1 Hz.
INDICATOR LIGHTS IN
SELF-TEST STATE
Information Screen
Model S2: as for Model S1, plus the LCD
shows the firmware version number and the
text “Self-Test ...”.
Blue-White Industries, Sonic-Pro
Firmware Version, A01.00.00
Self-test …
Model S3: as for Model S2.
LCD DISPLAY
4.2
Description of
Operating
States and
Controls
Below is a diagram of the Sonic-Pro’s major operating states. The condition of the
motherboard LEDs is pictured under the name of each state. Transitions are annotated
with their causes, which may be user actions via the motherboard controls and timeouts
(uppercase text), user actions using a display optionally fitted to the flowmeter, (italic
text) or automatic transitions when a step is complete (in parentheses).
In the Self-Test state, the flowmeter checks the operation of internal circuitry, such as
communication between the processor and its peripheral functions, Verify that all LEDs
and the LCD display, if fitted, are working properly. Do not press any buttons during
self-test.
If an error condition is detected during self-test, the flowmeter enters the Faulted State.
Failure of the LEDs, LCD display, and the display touch-pad are not internally
detectable.
If self-test completes without error, the flowmeter enters the Startup State. Note that
completion of self-test does not guarantee that the flowmeter is properly configured and
able to make accurate measurements.
Power ON
(pass)
SELF-TEST
STARTUP STATE
(fail)
(complete)
FAULTED STATE
HOLD SETUP
FOR
3 SECONDS
TAP SETUP BUTTON or
TIME OUT (5 minutes) or
press “ESC” button
TAP SETUP
BUTTON or
press
“DONE” button
TAP SETUP
BUTTON or
Activate a
configuration
TRANSDUCER POSITIONING
(fail)
TAP SETUP BUTTON or
FLIP DOPPLER / TT
MODE SWITCH
RUN MODE
(fail)
SONIC-PRO OPERATING STATES
ProSeries
TM
by Blue-White
Industries,
Ltd.
Industries,Ind.
Ltd.
7 SECOND
TIME OUT
SETUP MODE
ZERO CALIBRATION
(fail)
TAP SETUP
BUTTON
Page 21
When power is applied, the flowmeter enters the Startup state. In the Startup State, the
flowmeter waits for up to 7 seconds for the Setup button to be pressed at which time the
Setup mode is entered and changes to the configuration can be made. If the setup button
is not pressed, the flowmeter will enter the Run Mode and attempt to start flow
measurement. If the transducers are not installed on the pipe, a fault will occur. The
location of the Setup button is as follows:
SETUP BUTTON (white)
Model S1: a push-button switch on the
controller motherboard.
FUSE
1A 250V (5 x 20)
SETUP BUTTON
INDICATOR
LIGHTS
TRANSDUCER
INPUTS
Tx 1
SIGNAL
OUTPUTS
T
Tx 2
D
mA
Hz
DC
AC
RS232
WARNING
GRN
BLK (-)
USB
DC (+)
DC (-)
GRN
AC LINE
AC NTRL
POS (+)
NEG (-)
GRN
NEG (-)
POS (+)
GRN
BLK (-)
RED (+)
SD CARD
DATA LOG
(REMOVE)
RS485
Model S3: as for Model S2, plus a SETUP
soft button appears on the display.
POWER INPUT
MODE SWITCH
RED (+)
BLK (-)
GRN
Model S2: as for Model S1.
RED (+)
Sonic-Pro
4.3
Startup
State
ETHERNET
COMMUNICATIONS
CONNECTOR PANEL
COM
NC
NO
R1
INPUT POWER
LIMITS
COM
NC
NO
R2
AC INPUT
96VAC - 264VAC
50/60 Hz
COM
NC
NO
R3
DC INPUT
15 to 30 VDC
CAUTION
risk of electric shock
PROCESS CONTROL RELAYS
(THREE EACH) 10A 250V AC
CIRCUIT BOARD LAYOUT
The flowmeter indicates that it is in the Startup State as follows:
Model S1: the Fault (red) LED is OFF and
all yellow LEDs are at first ON and then
turn OFF one by one, starting at LED1, at
intervals of 1.5 seconds, so as to count down
the 7 second pause.
MODEL S1
Model S2: as for Model S1, plus the display
screen indicates:
Startup ...
Tap Setup to enter Setup Mode
Hold Setup for Zero Calibration
Configuration set #
(Searching for SD Card)
Below this, a “progress bar” counts off the 7
second delay.
Information Screen
Blue-White Industries, Sonic-Pro
Firmware Version, A01.00.00
Startup …
Tap Setup to enter Setup
Hold Setup for Zero Calibration
Configuration Set #1
(Searching for SD Card)
[££££¢¢¢]
MODEL S2
Model S3: as for Model S2, plus the SETUP
soft button is available.
Information Screen
Blue-White Industries, Sonic-Pro
Firmware Version, A01.00.00
Startup …
Tap Setup to enter Setup
Hold Setup for Zero Calibration
Configuration Set #1
(Searching for SD Card)
[££££¢¢¢]
SETUP
MODEL S3
ProSeries
TM
by Blue-White
Industries,
Ltd.
Industries,Ind.
Ltd.
Sonic-Pro
Page 22
4.4
Setup
(Configuration)
Mode
From the Setup mode, a zero calibration can be performed or, if equipped with either the
full function display (Model S3) or the optional Communications software, the Setup
Root Menu system can be entered and the meter can be configured. The operations that
can be performed in the Setup Root Menu are fully described in section 5.0.
The Setup Mode can be entered in two ways:
1) Tap the SETUP button on the motherboard, the display touch-pad, or on the user PC
Communications Software.
2) Flip the Doppler/Transit Time switch.
Note: the meter must be in the Startup State or in the Run Mode to enter the Setup Mode.
The flowmeter indicates that it is in the Setup Mode as follows:
Model S1: two outer yellow LEDs flash at 1
Hz.
SETUP MODE
Information Screen
Model S2: as for Model S1, plus the display
screen indicates:
Setup Mode...
Blue-White Industries, Sonic-Pro
Firmware Version, A01.00.00
Setup …
MODEL S2
Setup Root Menu
Model S3: as for Model S2, plus the Setup
Root Menu appears.
Manage Configuration Sets
Global Configuration
ENTER
Ç
È
ESC
MODEL S3
The flowmeter will remain in the Setup Mode until one of the following actions occur:
1) A Configuration Set is activated from the Setup Root Menu.
Either the full function display (Model S3) or the optional Communications software
is required for this action.
2) The user “escapes” from this state.
The user can escape to the Startup state by:
a) Hold the SETUP button on the motherboard for three seconds.
b) Tap the SETUP button on the motherboard once (resulting in entering the
Transducer Positioning state) and tap again (resulting in entering the Startup
state).
c) Press the ESC button on the full function display (Model S3) or on the optional
Communications software.
Note that if the user escapes, the currently active configuration set will re-activate.
3) Five minutes passes without user action.
ProSeries
TM
by Blue-White
Industries,
Ltd.
Industries,Ind.
Ltd.
Sonic-Pro
4.5
Transducer
Positioning
State
Page 23
In the Transducer Positioning State, the flowmeter waits for the transducers to be
correctly positioned on the pipe.
When operated in the Transit Time measurement mode, the separation distance of the
transducers is computed by the flowmeter from the information in the Transducer
Setup branch of the Configuration Menu. The correct separation distance is
dependent on the pipe OD, pipe wall thickness, pipe type and chosen mounting mode. If
the Doppler measurement mode is selected (by the motherboard switch), the separation
of the transducers (along the pipe axis) is always zero.
When factory configured, the separation distance and mounting mode is printed on the
serial label. The separation distance will also be displayed on the LCD display or on the
optional communications PC software, in either inches or millimeters depending on the
Measurement Units chosen in Transducer Setup. If the meter has not been factory
configured, or if a new configuration is required, the pipe OD, pipe wall thickness, pipe
type, fluid type and chosen mounting mode configuration data must be input before
proceeding. See section 5.3 for instructions on how to create or modify a configuration.
If the flowmeter has neither an LCD display nor a connected user PC Software
application, then the Configuration information cannot be changed by the user so the
separation of the transducers will not change from the factory setting.
The flowmeter indicates that it is in the Transducer Positioning State as follows:
Model S1: two center yellow LEDs flash at
1 Hz.
TRANSDUCER
POSITIONING STATE
Model S2: as for Model S1, plus the screen
presents instructions to the user as shown.
Information Screen
Blue-White Industries, Sonic-Pro
Firmware Version, A01.00.00
Transducer Positioning …
Position the transducers
at a separation distance of:
2.489416 inches (”V” Mount)
Model S3: as for Model S2.
Press DONE when this is complete
DONE
You must acknowledge that the transducers are correctly positioned by either pressing
the SETUP button on the motherboard or the DONE soft button on the display, if fitted.
The flowmeter will then return to the Startup state, see section 4.3 above, from
which you can again enter Setup Mode or perform Zero Calibration or, by allowing
the 7 second timeout to elapse, let the flowmeter enter Run Mode and begin flow
measurement.
ProSeries
TM
by Blue-White
Industries,
Ltd.
Industries,Ind.
Ltd.
Sonic-Pro
Page 24
4.6
Zero
Calibration
State
If the Transit Time measurement mode is selected, a zero calibration should be
performed if possible. There must be no movement of fluid in the pipe during the
calibration. It is not necessary to perform zero calibration if Doppler measurement mode
is selected, however it is harmless and will have no effect on the measurement.
In the Zero Calibration State, the flowmeter measures and records the apparent rate of
fluid flow to offset measurements in Run Mode and compensate for any zero flow error.
This information is associated and stored with the active Configuration Set and survives
power loss and restarts. If a new Configuration Set is made activate, it will have its own
zero calibration information. Therefore, the calibration must be performed after the
configuration is created and saved. Although the zero calibration is not required, positive
or negative zero offset reading error may result if the calibration is not performed.
The approximate duration of zero calibration is 15 to 20 seconds. There must be no
movement of fluid in the pipe. Do not perform zero calibration if it is not possible to
establish zero fluid flow in the pipe. If there is flow during zero calibration, then flow
measurement in Run Mode will be inaccurate. The only means provided to cancel zero
calibration or to undo its effect is to perform another zero calibration.
Zero calibration must be started while in the Startup State by holding down the SETUP
button for at least 3 seconds. The Startup State may be entered by power cycling the
flowmeter or upon exit from the Setup Mode or Transducer Positioning state. With either
the Model S3 display or the optional Communications Board and a connected Host PC,
the Setup Mode can be activated directly from the Run Mode by pressing the SETUP
button and then the pressing the ESC button.
On completion of zero calibration, the flowmeter returns to the Startup State and will
again wait for up to 7 seconds for the Setup button to be pressed.
The flowmeter indicates that it is in the Zero Calibration State as follows:
Model S1: one yellow LED flashes at 1 Hz
INDICATOR LIGHTS DURING
ZERO FLOW CALIBRATION
Model S2: as for Model S1, plus the display
screen indicates:
Zero Calibration ...
Below this, a “progress bar” counts off the
15 to 20 second delay.
Information Screen
Blue-White Industries, Sonic-Pro
Firmware Version, A01.00.00
Zero Calibration …
[£££ ££££¢¢¢¢¢¢ ]
Model S3: as for Model S2.
MODEL S2 and MODEL S3
ProSeries
TM
by Blue-White
Industries,
Ltd.
Industries,Ind.
Ltd.
Sonic-Pro
4.7
Run
Mode
Page 25
In the Run Mode, the flowmeter performs flow measurement, updates the 4 to 20 mA
and pulse signal outputs, displays and logs data and performs process control actions
according to the active configuration.
The flowmeter indicates that it is in the Run Mode as follows:
Model S1: Yellow LEDs indicate the
present “Goodness of Measurement”.
one light = poor quality
four lights = best quality
Model S2: as for Model S1, plus the Run
Mode screen appears, including an
indication of “Goodness of Measurement” on
the top line and the calculated speed of
sound in the fluid if in Transit Time
measurement mode.
Model S3: as for Model S2 (see section 1.7
for some minor differences between Model
S2 and S3 displays).
INDICATOR LIGHTS DISPLAYING
GOODNESS OF MEASUREMENT
1 T 2.46 in.
[¢¢¢£]
1480
U.S. Gallons / min
625.38
U.S. Gallons
4345625.38
Relay #1
Relay #2
Active
off
SETUP
SWAP
Relay #3
Alarm
CLEAR
RELAY
MODEL S2 and MODEL S3
The flowmeter remains in the Run Mode until it is powered down, the user takes an
action to go to Setup Mode or, exceptionally, an error occurs and the flowmeter goes to
the Faulted State. The user can command the flowmeter to Setup Mode by pressing
the motherboard setup button or changing the position of the measurement mode switch
between Transit Time and Doppler. If the Model S3 Display or the Communications
PC Software is connected, the user can additionally press the SETUP soft button.
For a complete description of Run Mode operation, see section 7 below.
4.8
Fault and
Warning
Error Codes
The flowmeter enters the Faulted or Warning State if:
1) The flowmeter self-test fails.
2) A configuration error is detected on exit from Setup Mode.
3) An error condition occurs during flow measurement in Run Mode or Zero
Calibration.
Faults and Warnings will be identified by two-digit error codes.
A Fault will cause the meter to discontinue flow measurement. Note that the 4-20mA
analog output signal and 0-1000 Hz pulse output signal sets to the minimum values (fail
safe low), and all relays will respond as if in a zero flow condition.
! A Warning will not interrupt flow measurement, output signals, or relay functions.
!
The fault LED will flash at a rate of 2 pulses per second (ON for 250 ms and OFF for 250
ms) to count out the first digit of the error code, will then stay OFF for 1.25 second, will
then flash again at a rate of 2 pulses per second to count out the second digit and then
stay OFF for 5 seconds. The code will repeat.The digit 0 will not be used, so that 81 codes
are available. The errors that can occur and their assigned codes are listed below.
Example: 8 flashes >>> 1.25 second pause >>> 1 flash >>> 5 second pause = Fault 81
ProSeries
TM
by Blue-White
Industries,
Ltd.
Industries,Ind.
Ltd.
Sonic-Pro
Page 26
4.8
Fault and
Warning Error
Codes (cont.)
The flowmeter indicates that it is in the Faulted State as follows:
Model S1: The Fault LED (red) flashes to
identify the error (note that this LED is on
the motherboard and the wiring access door
must be opened to see it) . All yellow LEDs
are off.
INDICATOR LIGHTS IN
SELF-TEST STATE
1 T 2.46 in.
Model S2: as for Model S1, plus the error
code appears in the upper right hand corner
of the Run Mode display screen.
[£ £ £ £]
FAULT
Attempting Correction.....
F15
15
Model S3: as for Model S2.
MODEL S2 and MODEL S3
The Faulted state will attempt to self correct, however, if the error is due to a
configuration problem such as impossible pipe geometries, the configuration error must
be corrected before the fault condition will clear. Repositioning the transducers may be
required before the fault can correct itself. A fault that is caused by an empty pipe
condition, excessive air or particles in the fluid, or other such flow stream disturbances
will self correct when the flow stream returns to an acceptable condition.
The Fault and Warning codes and their respective numbers are listed below. See the
troubleshooting guide in the index of this manual for more information about correcting
for errors.
Fault Codes
F15
F33
F81
F91
Transit Time: Burst onset not detected
Averaged flow rate is greater than the user configured High Flow Cut-Off value
and the “reset” action has been enabled.
Receive signal too weak or absent during burst accusation
Impossible pipe geometries
Warning Codes
W11
W12
W13
W16
W19
W31
W37
Receive signal near lower limit of operation
Receive signal too strong
Transit Time: Measured sound speed exceeded the configured allowable limit
Transit Time: Burst onset not detected
Improbable flow rate over 30 feet per second (9 meters per second)
Improbable pipe geometries
Improbable scaling offset (e.g. less than 0.5 or greater than 2.0)
The user can configure a fluid sound speed limit value. This feature can be used to
monitor the fluid and alert the user to changes in fluid density. Should the measured
sound speed be greater than the acceptable percentage of error, error code 13 will be
recorded. See section 5.4.3 for more information on this feature.
ProSeries
TM
by Blue-White
Industries,
Ltd.
Industries,Ind.
Ltd.
Sonic-Pro
Page 27
5.0 Setup (Configuration) Mode
The Setup (configuration) Mode screens are available on the Model S3 only. However, if
the communications option is included, any of the models S1, S2 or S3 can access the
setup mode by using the PC Software Application.
5.1
Menu
Navigation
The function of the soft buttons for menu
navigation is as follows:
Perform an appropriate action on
the highlighted item:
! Select the item.
! If an editable value, edit the value.
! If the item has options, show the
options.
! If the item is a selectable option, choose
it and move one place back up the menu
tree.
ENTER
New Configuration Set
Metering Setup
ÊFlow Rate
ÊVolume Units
ÊÇ Ounces Ç
U.S. Barrels Liquid
U.S. Barrels Oil
Pounds
Kilograms
È As Many Characters As Will Fit È
ENTER
Ç
Ç
Move the highlight up in the list of menu items or options.
È
Move the highlight down in the list of menu items or options.
È
ESC
Move one place back up the menu tree, abandoning any change at the current
position. If this soft button is pressed at the top level of a menu, leave the menu entirely,
abandoning all unsaved changes.
ESC
The function of the soft buttons and their labels will change when editing values, such as
numbers and passwords, and this is described in the following sections.
If the flowmeter enters Setup Mode and no input of any sort is received for a period of 5
minutes, then it will return to the Startup State, from which the user can re-enter the
Setup Mode, if desired.
5.1.1
Setup Root
Menu
The Setup Root Menu is shown at right.
From this screen, the user can Manage
Configuration Sets and edit certain
Global Configuration items.
Setup Root Menu
Manage Configuration Sets
Global Configuration
The flowmeter stores up to five sets of
configuration item values, called
“Configuration Sets”, which are numbered
from 1 to 5.
ENTER
5.1.2
Escaping From
Setup
Ç
È
ESC
If the ESC soft button is pressed repeatedly to go back up in a menu until the top level is
reached and is then pressed one time more, the flowmeter “escapes” from the Setup
Mode directly to the Startup State and from there to the Run Mode, as described in
section 4.4 above. The Configuration Set used is the same as was previously selected. If
no changes were made to this Set, for example if a different Configuration Set was
changed, the flowmeter will operate exactly as before. However, if the active Set has been
opened, edited and saved, then the changes will take effect without the re-calculation of
internal parameters and therefore the flowmeter may not operate correctly.
ProSeries
TM
by Blue-White
Industries,
Ltd.
Industries,Ind.
Ltd.
Sonic-Pro
Page 28
5.2
Global
Configuration
Setup Root Menu
Setup Root Menu
Global Configuration
ÊCommunications Settings
Master Password
Date and Time
Save Changes
Manage Configuration Sets
Global Configuration
ENTER
Ç
È
ESC
ENTER
Ç
È
ESC
Under the Global Configuration menu item, you can change communications settings,
enter and/or change the Master Password, set the date and time, and saving the changes.
The Global Configuration settings apply to the flowmeter as a whole and are not
associated with numbered Configuration Sets. Changes take effect when you highlight
Save Changes and press the ENTER soft button. The Setup Root Menu then reappears. This may disrupt communication, depending on what changes have been made.
Any changes are lost if the flowmeter loses power before the changes are saved or the
user presses the ESC soft button until the Setup Root Menu returns to the top level
and then one more press.
The following sub-sections explain further what happens when you highlight a choice
and acts on it by pressing the ENTER soft button.
5.2.1
Communication
Settings
Selecting the Communications Settings menu allows you to:
!
!
!
Set the RS-232 bit rate
Set the RS-485 bit rate and slave node
address
Set the Ethernet IP address, subnet
mask, default router and UDP port
number of the flowmeter
RS-232 and RS-485 will always use 8 data
bits, 1 stop bit, no parity and no flow
control. These settings are not configurable.
Selecting the Ethernet menu allows you to:
!
!
!
!
ProSeries
TM
by Blue-White
Industries,
Ltd.
Industries,Ind.
Ltd.
Set the Ethernet IP address (note that
the default static IP Address is
192.100.100.023)
Set the subnet mask
Set the default router
Set UDP (Universal Data Port) port
number of the flowmeter (typically set
at 26000)
Setup Root Menu
Global Configuration
Ê Communications Settings
ÊRS-232
RS-485
Ethernet
ENTER
Ç
È
ESC
Setup Root Menu
Global Configuration
Ê Communications Settings
ÊEthernet
IP Address
Subnet Mask
Default Router
UDP Port Number
ENTER
Ç
Ç
È
ESC
Sonic-Pro
5.2.2
Master
Password
Page 29
On selecting this action, you are prompted to supply a Master Password. The master
password is “empty” when shipped from the factory. The first time user may
enter any master password. Once entered, this master password can be used to enter
ANY configuration, as if no other passwords are present.
Ç
Ç
Once a Master Password has been
Setup Root Menu
entered, upon selecting this action, you will
Global Configuration
be prompted to supply the Master
ÊMaster Password
Password. If this is done incorrectly, the
Ê 12345
flowmeter returns to the Setup Root
Menu. If it is done correctly, you are given
the choices of changing the Master
Password or returning to the Setup Root
Menu. If you elect to change the Master
Password, you must enter it twice. You will
receive confirmation of the change or, if the
ENTER
Ç
ESC
two entries were not the same, the password
will not change and, in either case you are
returned to the Setup Root Menu. Whether the Master Password is changed or not,
on return to the Setup Root Menu, you will not need to enter passwords for the
duration of the current Setup Mode session.
Wherever a password is required, the Master Password will be accepted. Therefore,
knowing the Master Password lets you do anything. In particular, you can overwrite
“forgotten” passwords. Knowing just the password of a single Configuration Set lets
you edit, activate or delete only that set.
5.2.3
Setting the Date
and Time
On selecting this action, you are able to
change date and time settings. Each digit
can be set in the same way as for numerical
data, see section 6.3.1.1 below.
Setup Root Menu
Global Configuration
ÊDate and Time
Ê 2008/01/01 00:18:03
Ç
Ç
The flowmeter uses date and time
information to time stamp log entries, see
section 7.6 below. There is no explicit means
to set the time zone or daylight savings
time. The clock must be manually set
forwards or backwards as appropriate.
ENTER
Ç
ESC
The meter includes a coin cell battery
to maintain the date and time settings in the event of a power failure (Type
CR1632, 3V 16mm 126mAh). The battery should last for years of operation. The
battery is located on the main circuit board. Contact the factory if the battery
must be replaced.
Save changes before escaping from the
5.2.4
Global Configuration menu. If the ESC soft
Saving Changes button is pressed repeatedly to go back up in
a menu until the top level is reached and is
then pressed one time more without saving
the changes, the flowmeter “escapes” from
the Setup Mode directly to the Startup
State and from there to the Run Mode.
Setup Root Menu
Global Configuration
ÊCommunications Settings
Master Password
Date and Time
Save Changes
ENTER
Ç
È
ESC
ProSeries
TM
by Blue-White
Industries,
Ltd.
Industries,Ind.
Ltd.
Sonic-Pro
Page 30
5.3
Manage
Configuration
Sets
Under the Manage Configuration Sets
menu item, the user is offered actions to
manage these Sets in much the same way as
files on a computer.
Activate a Configuration Set allows the
user to apply a Configuration Set to the
flowmeter, which will then enter Run Mode
and operate according to the configuration
information in that Set plus the setting of
the motherboard measurement mode switch.
Setup Root Menu
Manage Configuration Sets
ÊActivate a Configuration Set
Open a Saved Configuration Set
Create a New Configuration Set
Delete a Saved Configuration Set
ENTER
Ç
È
ESC
Open a Saved Configuration Set allows the user to inspect and edit a Configuration
Set, reset it to the Factory Configuration, save changes to it, save it to a different Set,
etc.
Create a New Configuration Set begins a fresh Configuration Set, starting from the
pre-set Factory Configuration.
Delete a Saved Configuration Set removes a Configuration Set from the flowmeter.
Similar to operating on files in a computer, the editing of a Configuration Set takes
place in a temporary location called the “Working” Set. This must be saved by the user,
either back to where it came from or to a different numbered Set, otherwise it will be lost
if the flowmeter loses power or the user escapes from Setup Mode.
5.3.1
Activate a
Configuration
Set
On selecting this action, a list of the pre-saved Configuration Sets will be shown. The
user can select a Configuration Set using the
and
soft buttons and
È
Ç
ENTER soft button to activate that Set. The flowmeter then exits the Setup
press the ENTER
Mode to the Transducer Positioning
Setup Root Menu
State and eventually the Startup State
Manage Configuration Sets
and then to the Run Mode where it will
ÊActivate a Configuration Set
perform flow measurement using the
ÊConfiguration Set #1
configuration data of that Set.
Configuration Set #3
Configuration Set #4
The Setup Root Menu will return to the
screen without the activation of a
Configuration Set if the user fails to
supply a password (if required), or presses
the ESC soft button twice.
ENTER
Ç
È
ESC
5.3.2
Open a
Configuration
Set
This action is similar to Activate a Saved Configuration Set in that the user is able to
select and open a valid Configuration Set. On pressing the ENTER soft button and
supplying a password if necessary, the selected Configuration Set will be loaded into
the Working Set and the Configuration Edit Menu will appear. From this screen, the
user can navigate to and edit configuration items.
5.3.3
Create a New
Configuration
Set
5.3.4
Delete a
Configuration
Set
On selecting this action, the pre-set Factory Configuration data will be loaded into the
Working Set and the Configuration Edit Menu will appear. The banner will read
New Configuration Set. From this screen, you can navigate to and edit configuration
items and save the configuration to a numbered Set.
ProSeries
TM
by Blue-White
Industries,
Ltd.
Industries,Ind.
Ltd.
Deleting a Configuration Set starts out the same as Activate a Saved
Configuration Set. On pressing the ENTER soft button and supplying a password if
necessary, the Configuration Set number and data will be deleted. Note that new
configuration data can now be saved to that numbered set). If all Configuration Sets
are deleted, the flowmeter will operate according to the Factory Configuration.
Sonic-Pro
5.4
Configuration
Edit
Menu
Page 31
The Configuration Edit Menu appears if a new Configuration Set is created or if an
existing Configuration Set is successfully opened. The banner on the top line identifies
the configuration as New Configuration Set or Configuration Set #1, etc. Note that
any changes made are held in a temporary “working” Configuration Set and are not
stored to a numbered Set until the user explicitly selects this operation.
From here, the user can:
! Inspect and Edit the Working
Configuration Set
! Reset everything to the Factory
Configuration
! Create, change or delete the
Configuration Set Password
! Save the Working Configuration Set
to a numbered Configuration Set
! Activate the Set after saving it to a
numbered Configuration Set
! Abandon edits and return to the Setup
Root Menu
Configuration Set #3
Transducer Setup
Metering Setup
Process Control Setup
Reset Working Set to Fact. Defaults
Set Password...
Save
Save As ...
Save and Activate
ENTER
Ç
È
ESC
The Working Configuration set cannot be directly activated. It must first be saved (to
a numbered Set). Actions do not appear in the menu if they are inappropriate (for
example, Save and Save and Activate do not appear for a new Set until it is saved to a
Numbered Set).
5.4.1
Editing Data
Items
There are two possible ways to change editable data in the flowmeter. From the user PC
software, decimal digits can be typed directly. From the flowmeter, the user is limited to
the five soft buttons. Data is not available for editing in Model S1 and Models S2 without
the user PC Software application.
5.4.1.1
Editing Numerical
Values
If you press the ENTER soft button when the highlight is on a leaf item that has a
editable value (rather than a list of choices), you can then edit the value, one digit at a
time. The current value is displayed to an appropriate precision and the leftmost digit is
highlighted (see example below).
È
Ç
È
È
New Configuration Set
Using the
soft button, the value of
Ç
the highlighted digit can be increased by one
Metering Setup
for each press. Upon reaching 9, it wraps to
ÊSignal Output
Ê Pulse Output
0. Using the
and
soft
Ê Flow Rate at High Point
Buttons, the highlight can be moved to the
Ê 75000.00
left or right one digit at a time. The
highlight skips non-editable positions, such
as the decimal point. If the highlight is
moved beyond the leftmost digit, a new digit
will appear with the value 0. If this digit is
Ç
ENTER
ESC
not changed before the highlight is moved
back to the right, it will be removed. A
similar procedure can be used to add zeros to the right of the number, but only if the
number is a real number (contains a decimal point).
When the ENTER soft button is pressed, the currently displayed value becomes the new
value of the item being edited and the menu system moves one place back, appearing as
it did before the edit began. If the ESC soft button is pressed, then the menu system also
moves one place back but the value of the item is not changed and remains as it was
before the edit.
ProSeries
TM
by Blue-White
Industries,
Ltd.
Industries,Ind.
Ltd.
Sonic-Pro
Page 32
5.4.1.2
All passwords must contain 5 digits. Each of
Entering Passwords the five soft buttons represent 2 digits. The
using the Soft Buttons numbers 5, 6, 7, 8 and 9 are interchangeable
with 0, 1, 2, 3 and 4 (respectively), so only
five choices are needed to enter any digit
from 0 thru 9. Entering the number 00000
(55555) effectively cancels the password
input or deletes an existing the password.
If you are prompted to supply a password
and fail to do so within 30 seconds, the
flowmeter reacts as if an incorrect password
was entered.
Setup Root Menu
Manage Configuration Sets
Ê Open a Saved Configuration Set
Ê Configuration Set #1
Configuration Set #2
Configuration Set #3
Configuration Set #4
Configuration Set #5
Enter Password [ ¢¢¢ £ £ ]
0/5
1/6
2/7
3/8
4/9
When setting or changing a password, the password must be entered a second time to
avoid entry errors. If the two entries to not match, the password will not be changed. To
remove password protection, you can take the normal action to set a password and then
delete it by entering the number 00000 (55555) effectively deleting the password. You are
then no longer prompted to enter the password but are instead immediately given access
to the protected data.
5.4.1.3
Units of Measure
Many data items must be entered with reference to a specific unit of measure.
In the Metering Setup branch of the Configuration Edit Menu (see section 5.4.3
below), you are able to specify three different units of measure; two relating to rate of
flow (Flow Rate Volume Units & Flow Rate Time Units) and one relating to total flow
(Flow Total Volume Units). Thus, rate of flow units can be configured for GPM and total
flow units can be configured for U.S. Barrels Liquid. Note that total units do not include
time as a variable.
When entering data in the Metering Setup and the Process Control Setup screens,
any value associated with rate of flow must be entered in the rate of flow units of
measure that is currently configured at the time the data entry takes place. Any value
associated with the total flow must be entered in the total flow units of measure
configured at the time the data entry takes place. This requirement does not apply to
values in the Transducer Setup branch, (such as pipe sizes) which are governed by a
separate selection of units of measure (see section 5.4.2 below). When entering data by
making a selection from a list, it is not necessary to be aware of the units of measure in
force.
For example, if in Flow Rate Volume Units you chose U.S. Gallons and in Flow Rate
Time Units you chose Hours, then Log Rate Setpoints must be entered in U.S. Gallons
per Hour. Similarly, if in Flow Total Volume Units you chose U.S. Barrels Liquid, Log
Total Setpoints must be entered in U.S. barrels liquid.
If the configured units of measure are changed, all editable data item displays will
automatically change to the new units, but they will represent the same actual
quantities. This happens because the flowmeter converts and stores these data values in
SI units.
ProSeries
TM
by Blue-White
Industries,
Ltd.
Industries,Ind.
Ltd.
Sonic-Pro
5.4.2
Transducer
Setup
Page 33
The Transducer Setup branch of the
Configuration Edit Menu allows you to
establish the fundamental parameters of the
flow meter, including the ultrasonic
transducers, the pipe to which they are
mounted, the liner inside the pipe, if any,
and the fluid flowing in the pipe.
Configuration Set #3
Transducer Setup
ÊMeasurement Units
Transducer
Pipe
Liner
Fluid
Using information entered here, the
flowmeter calculates many “engineering”
parameters that are critical to accurate
ENTER
Ç
È
ESC
measurement. This is done when a
Configuration Set is “activated”, but not when a user exits Setup Mode by “escaping”
(for example, after the five minute timeout). Note that changes in this area of
configuration followed by an escape from Setup Mode may cause the flowmeter to
display incorrect flow information.
Under the Transducer Setup branch, the following actions are available:
Measurement Units allows you to specify
whether dimensions will be entered in
inches (English) or dimensions will be
entered in millimeters (Metric). This choice
and all entered numbers must be consistent
when a Set is activated. If, for example, the
pipe diameter is entered as 2.00 when
English units are selected but the choice is
then changed to Metric, it is necessary to go
back and enter 50.8 as the pipe diameter or
the flowmeter will attempt to configure
itself for a pipe which is only 2 millimeters
across (and will fault).
Transducer --> Model Number allows you to
specify the model number of the transducer
type used (fifth letter in the model number).
You should not change this setting unless
you use a different transducer pair from
that originally supplied. The model number
(A thru K) is printed on the transducer.
New Configuration Set
Transducer Setup
ÊMeasurement Units
ÊEnglish (U.S. units)
Metric (SI units)
ENTER
Ç
È
ESC
New Configuration Set
Transducer Setup
ÊTransducer
ÊModel Number
Mount Method
Transducer --> Mount Method allows you to
specify the transducer mount method used
when the meter is set for Transit Time
ENTER
Ç
È
ESC
measurement mode. The options are “Z”
mount (transducers on opposite sides of the pipe, no reflections of the sound wave on the
pipe wall), “N” mount (transducers on opposite sides of the pipe, two reflections of the
sound wave on the pipe wall), “V” mount (transducers on the same side of the pipe, one
reflection from the far wall), “W” mount (transducers on the same side of the pipe, two
reflections from the far wall). See section 6.0.
Pipe Outside Diameter allows you to specify the outside diameter of the pipe.
Pipe --> Wall Thickness allows you to specify the thickness of the pipe wall. From this
and the outside diameter, the flowmeter calculates the inside diameter and hence the
cross-sectional area of the pipe. This is critical to converting the measured velocity of the
fluid to a volumetric flow.
ProSeries
TM
by Blue-White
Industries,
Ltd.
Industries,Ind.
Ltd.
Sonic-Pro
Page 34
5.4.2
Transducer
Setup
(continued)
Pipe --> Pipe material allows you to select
from a list the material from which the pipe
is made. This tells the flowmeter the speedof-sound in the pipe wall. The user can also
select Custom Pipe Material in the list and
use the Pipe --> Speed of Sound in Custom
Material to enter the speed-of-sound directly.
This alternative should be used if the correct
pipe material is not in the list offered.
Liner --> Wall Thickness allows you to
specify the thickness of any liner inside the
pipe. If there is no liner in the pipe, it
should be set to zero.
Configuration Set #3
Transducer Setup
ÊPipe
ÊPipe Material
Ê PVC/CPVC
PVDF
Stainless Steel 302/303
Stainless Steel 304
Stainless Steel 304L
È Stainless Steel 316 È
ENTER
Ç
È
ESC
Liner --> Speed of Sound allows you to specify the speed-of-sound in the liner material.
If there is no liner in the pipe, it is not necessary to set this as it will be ignored. Note
that the sound speed of concrete is 2500 m/sec.
Fluid --> Fluid Type allows you to select the type of fluid in the pipe from a list. This tells
the flowmeter the speed-of-sound in the fluid. The user can also select Custom Fluid
Type in the list and use the Fluid --> Speed of Sound in Custom Fluid to enter the
speed-of-sound directly. This alternative should be used if the correct fluid or
fluid/temperature combination is not in the list offered.
5.4.3
Metering
Setup
The Metering Setup branch of the
Configuration Edit Menu allows you to
select how the flowmeter will display, record
and otherwise process flow measurements,
including the units of measure, averaging,
frequency of update, scaling at signal
outputs and logging.
Configuration Set #3
Metering Setup
ÊFlow Rate
Totalizer
Display
Signal Output
Data Logging
SOS Alarm
Changes in this area of configuration affect
only the way in which the flowmeter
ENTER
presents flow information on the display, at
output signals and in logging. This will not
cause the flowmeter to make incorrect flow measurements.
Ç
È
ESC
Under the Metering Setup branch, the following actions are available:
Flow Rate --> Volume Units allows you to
specify the units of measure in which flow
rates are displayed and written to log
entries. You can also select Custom Volume
Units in the list and use the Flow Rate -->
Custom Volume Unit per U.S. Gallon to
enter the equivalent of one U.S. Gallon in
that unit. This alternative should be used if
the desired unit of measure is not in the list
offered.
Configuration Set #3
Metering Setup
ÊFlow Rate
ÊVolume Units
Ê U.S. Gallons
Ounces
U.S. Barrels Liquid
U.S. Barrels Oil
Cubic Feet
Acre Feet
ENTER
Ç
È
ESC
Flow Rate --> Time Units allows you to
select the time part of the units of measure for flow rates. The options available are
seconds, minutes, hours and days.
Flow Rate --> Digits After Decimal Point allows you to specify how many digits appear
after the decimal point when flow rate is displayed on the Run Mode screen.
ProSeries
TM
by Blue-White
Industries,
Ltd.
Industries,Ind.
Ltd.
Sonic-Pro
5.4.3
Metering
Setup
(continued)
Page 35
Flow Total --> Volume Units allows you to
specify the units of measure in which flow
totals are displayed and written to log
entries. This is independent of the units of
measure for flow rates, so that the flow rate
units of measure mey be different than the
flow total units. As for Flow Rate, a custom
unit of measure can be specified.
Flow Total --> Digits After Decimal Point
allows you to specify how many digits
appear after the decimal point when flow
total is displayed on the Run Mode screen.
Configuration Set #3
Metering Setup
ÊTotalizer
Ê Volume Units
Digits After Decimal Point
Total Display Function
ENTER
Ç
È
ESC
Flow Total --> Total Display Function allows you to enable or disable the clearing of the
recorded total flow using the CLEAR soft button on the display in Run Mode and also
the clearing of batch counts and totals on Process Control Screens.
Display --> Display Language allows you to
select the natural language of display text.
The choices offered are English, Spanish,
German and French.
Display --> Flow Rate Averaging allows you
to select the time interval over which flow
rate measurements are averaged before
presentation to the display, signal outputs,
process control, logging, etc. The choices
offered are 0.25, 0.50, 1.00, 2.50, 5.00 and
10.00 seconds. Longer values result in
Configuration Set #3
Metering Setup
ÊDisplay
Ê Display Language
Flow Rate Averaging
Display Update
Low Flow Cutoff
High Flow Cutoff
Scaling Offset
ENTER
Ç
È
ESC
higher accuracy and a more stable display but a slower response to changes in flow rate.
The Flow total value is not affected by flow rate averaging setting.
Display --> Display Update allows you to select the time interval between the
presentation of new flow information to the display, signal outputs, process control,
logging, etc. The choices offered are 0.25, 0.50, 1.00, 2.50 and 5.00 seconds. Both flow rate
and flow total are affected.
Display --> Low Flow Cutoff allows you to specify a flow rate below which the actual
measured value is replaced by zero. When factory configured, a flow rate equal to
approximately .25 feet per second is set.
Display --> High Flow Cutoff allows you to specify a high rate above which the actual
measured value is replaced by the cutoff value.
Display --> Scaling Offset allows you to specify a scaling factor, which would generally
be close to one, by which measured flow is multiplied. If required, this value can be used
to quickly adjust for errors in the flow rate reading after a field calibration has been
performed.
ProSeries
TM
by Blue-White
Industries,
Ltd.
Industries,Ind.
Ltd.
Sonic-Pro
Page 36
5.4.3
Metering
Setup
(continued)
Signal Output --> Analog Output allows you
to specify the mapping of flow rate to the
current value at the 4 to 20 mA analog
output signal. The mapping is specified by
two points on a straight line.
Signal Output --> Pulse Output allows you
to specify the mapping of flow rate to the
frequency of pulses at the digital output
signal. The mapping is specified by two
points on a straight line.
Data Logging --> Log Interval allows you to
specify a regular periodic interval in
seconds, at which flow rate and flow total
will be recorded in a log entry. The factory
default setting is 180 seconds. (see section
7.6 below for more on data logging).
Data Logging --> Log Rate Setpoint allows
you to specify upper and lower flow rates
which, when crossed, will result in log
entries being generated.
Configuration Set #3
Metering Setup
ÊSignal Output
Ê Analog Output
Pulse Output
ENTER
È
ESC
Configuration Set #3
Metering Setup
ÊData Logging
Ê Log Interval
Ê 180
ENTER
Data Logging --> Log Total Setpoint allows
you to specify five total flow values at which
log entries will be generated.
SOS Alarm --> Percent Error Window
allows you to define the percentage of fluid
sound speed change that is acceptable before
an error alarm is triggered. The default
value is 10%. See the index at the back of
this manual for fluid sound speed data.
Ç
Ç
Ç
È
ESC
Configuration Set #3
Metering Setup
ÊSOS Alarm
Ê Percent Error Window
ENTER
Ç
È
ESC
Configuration Set #3
Metering Setup
ÊSOS Alarm
Ê Percent Error Window
Ê 10
ENTER
ProSeries
TM
by Blue-White
Industries,
Ltd.
Industries,Ind.
Ltd.
Ç
È
ESC
Sonic-Pro
5.4.4
Process
Control
Setup
Page 37
The Process Control Setup branch of the
Configuration Edit Menu allows you to
assign each of the three Relay Channels to
monitor either the flow rate, flow total, error
codes, or be disabled and also to establish
appropriate process control settings.
For a detailed description of the flowmeter
Process Control functions and the precise
effect of each setting briefly presented here,
see section 8 below.
Configuration Set #3
Process Control Setup
ÊRelay Channel #2
Ê Assign Relay
Ê Monitor Flow Rate
Monitor Flow Total
Monitor Error Codes
Disabled
ENTER
Ç
È
ESC
Under the Process Control Setup branch,
sub-branches appear for each of the three Relay Channels.
Under the sub-branch for each Relay Channel, the following actions are available:
Assign Relay allows you to assign the
channel to monitor flow rate, flow total,
error codes or to be disabled.
Flow Rate Alarm Settings --> High Trigger
allows you to enter a flow rate at and above
which the channel will generate an alarm
condition.
Flow Rate Alarm Settings --> High Release
gives you the option of entering a flow rate
at which an alarm condition generated by
reaching the high trigger value will
automatically clear.
Flow Rate Alarm Settings --> Low Trigger
allows you to enter a flow rate at and below
which the channel will generate an alarm
condition.
Flow Rate Alarm Settings --> Low Release
gives you the option of entering a flow rate
at which an alarm condition generated by
reaching the low trigger value will
automatically clear.
Configuration Set #3
Process Control Setup
ÊRelay Channel #2
Ê Assign Relay
Ê Flow Rate Alarm Settings
Batch Dispensing Settings
Error Trigger Settings
ENTER
Ç
È
ESC
Configuration Set #3
Process Control Setup
ÊRelay Channel #2
ÊFlow rate Alarm Settings
Ê High Trigger
High Release
Low Trigger
Low Release
Alarm Delay Time
ENTER
Ç
È
ESC
Flow Rate Alarm Settings --> Alarm Delay Time gives you the option of entering a delay
after the detection of an alarm condition during which the relay is prevented from
energizing, giving the operator a chance to correct the condition.
ProSeries
TM
by Blue-White
Industries,
Ltd.
Industries,Ind.
Ltd.
Sonic-Pro
Page 38
5.4.4
Process Control
Setup
(continued)
Batch Dispensing Settings --> Default
Batch Amount allows you to set a default
batch volume for the relay channel. On the
Process Control run screen for this
channel, the user is able to change the batch
volume. Values edited on that screen are not
saved in the Configuration Set and the
default will be restored if the flowmeter
restarts.
Configuration Set #3
Process Control Setup
ÊRelay Channel #2
Ê Batch Dispensing Settings
Ê Default Batch Amount
Batch Start Mode
Relay Timer
ENTER
Ç
È
ESC
Batch Dispensing Settings --> Batch Start
Mode allows you to select the batch start
mode to be manual (the relay is manually
energized by pressing the front panel soft button, remains energized until the batch
amount has passed through the flowmeter and then de-energizes) or automatic (every
time the batch amount is observed to pass through the flowmeter, the relay energizes for
a configured time and then de-energizes).
Batch Dispensing Settings --> Relay Timer allows you to specify the time for which the
relay energizes for each batch in automatic batch start mode.
Error Trigger Settings --> Type of Trigger
allows you to specify the type or error that
will trigger an alarm and energize the relay.
Faults and warnings are described in
section 4.8.
Configuration Set #3
Process Control Setup
ÊRelay Channel #2
Ê Error Trigger Settings
Ê Type of Trigger
Ê Fault
Warning
Fault or Warning
ENTER
ProSeries
TM
by Blue-White
Industries,
Ltd.
Industries,Ind.
Ltd.
Ç
È
ESC
Sonic-Pro
5.4.5
Set Password
(for a single
configuration
set)
Page 39
If you select Set Password from the Configuration Edit Menu, then a password can be
set or cleared for the Working Configuration Set. The prompt Enter five-digit password,
appears. Once five soft buttons have been pressed, you will be asked to repeat the
password to guard against entry errors. To escape from setting a password, it is sufficient
to deliberately enter two different sequences.
When this is completed, the Configuration Edit Menu returns. If you have created a
new configuration and attempt to save the Working Set to a previously numbered
Configuration Set, then you will be prompted for the password of that Set, if one exists,
before it is overwritten. If you opened an existing Set, then you must have supplied the
password at that time and no further security measures are taken.
5.4.6
Saving
Changes
If you select Save from the Configuration Edit Menu, the Working Set is saved to the
currently opened numbered Set. If you created a new configuration and has not
previously saved it to a numbered Set, this selection is not available. You must use Save
As …, see below.
If you select Save As … you are offered the
five numbered Configuration Sets as choices
Ç
as shown at right. You should use
the
and soft buttons, to select the
È
desired Set and press the ENTER soft
button to save the Working Set to that Set.
The Configuration Edit Menu returns.
The ESC soft button returns to the
Configuration Edit Menu without saving
the Working Set.
New Configuration Set
Save As...
Ê Configuration Set #1
Configuration Set #2
Configuration Set #3
Configuration Set #4
Configuration Set #5
ENTER
Ç
È
ESC
If you select Save and Activate, what happens is as for Save above, but after the
Working Set is saved it is activated and the flowmeter exits the Setup Mode towards
Run Mode.
When you attempt to save the Working Set to a numbered Set that is not the one
originally opened for editing, then if the destination Set has a password, you will be
required to supply it before the Set is overwritten.
If the ESC soft button is pressed repeatedly until all Configuration Edit Menu
5.4.7
Escape Without branches are closed and is then pressed one further time, the flowmeter takes the
“escape” path out of Setup Mode directly to Startup. Any changes made that have not
Saving
been saved are lost.
ProSeries
TM
by Blue-White
Industries,
Ltd.
Industries,Ind.
Ltd.
Sonic-Pro
Page 40
6.0 Transducer Installation
The optional T-Track mounting system may be used for transducer installation. T-Track
installation is described in a separate manual.
V-MOUNT
T-TRACK MOUNTING SYSTEM
Z-MOUNT
T-TRACK MOUNTING SYSTEM
Select a pipe location that provides a minimum straight length of pipe of at least 10
6.1
times the pipe’s nominal pipe size and mark a point that is at least 5 times the pipe
Transducer
diameter downstream from the nearest pipe fitting. See section 1.6 for the minimum
Piping System straight pipe length requirements.
Pipe must be full
Location
NO
Air could be trapped
NO
OK
Air bubble
NO
OK
Down flows
must have
back pressure
Flow
Direction
!
OK
10 x D
OK
5xD
NO
Sediment
TRANSDUCER MOUNTING LOCATION
6.2
Transducer
Mounting
Mode for
Doppler
Measurement
If the fluid to be measured contains
particles, the meter should be operated
using the Doppler measurement method.
For Doppler operation, the transducers will
be mounted directly opposite each other as
shown below.
All pipe types and sizes
DOPPLER MOUNTING MODE
6.3
Transducer
Mounting
Mode for
Transit Time
Measurement
If the fluid contains little or no particles (up
to 10% maximum), operate the meter using
the Transit Time method to obtain the best
accuracy. Select “V” mounting mode when
possible. The “V” mounting mode allows the
greatest sound travel distance while
permitting good signal strength. Basic pipe
material and size general guidelines are
shown below.
“V” Mount Mode
“Z” Mount Mode
Typically smaller pipe
sizes from 2” to 6”
diameter.
Typically larger pipe
sizes from 4” to 100”
diameter.
TRANSIT TIME MOUNTING MODES
ProSeries
TM
by Blue-White
Industries,
Ltd.
Industries,Ind.
Ltd.
Sonic-Pro
6.4
Transducer
Separation
Distance
Page 41
When the meter is operated in the Doppler measurement method, the transducers are
ALWAYS mounted directly opposite each other. The separation is therefore zero.
When the meter is operated in the Transit-Time measurement method, the front faces
of the transducers must be positioned the correct distance apart.
Separation
Distance
A
B
The separation distance is calculated by the meter using the following variables: pipe
size, pipe type, fluid type and mounting mode (V, Z, etc). When factory configured, the
separation distance and mounting mode is printed on the serial label. If the meter has
not been factory configured, or if a new configuration is required, the pipe size, pipe type,
fluid type and mounting mode configuration data must be input before proceeding. See
section 5 for instructions on how to create or modify a configuration.
Note that if the actual pipe dimensions or fluid type values are different from the values
configured, the calculated separation distance will be incorrect.
For meters so equipped, the separation distance (as calculated based on the currently
active configuration set) is also shown on the LCD display and on the Remote
Communications PC Software display screen.
Currently Active Configuration set
Separation Distance
5 T 2.32 in.
[¢¢¢£]
Currently Active Configuration set
Separation Distance
1480
U.S. Gallons / min
625.38
U.S. Gallons
4345625.38
Relay #1
Relay #2
Active
off
SETUP
SWAP
Relay #3
off
CLEAR
RELAY
LCD Display Screen
Communications PC Software Screen
ProSeries
TM
by Blue-White
Industries,
Ltd.
Industries,Ind.
Ltd.
Sonic-Pro
Page 42
6.5
Pipe
Surface
Preparation
The pipe mounting surface must be clean, smooth and free of any surface imperfections.
Remove all insulation material, loose paint, coatings, etc. Clean the pipe surface
thoroughly. Use a grinder, sandpaper, or other tool if necessary to remove surface
imperfections. Do not mount the transducers over weld seams.
Place a mark on the pipe where the first transducer will be located. Be sure to locate the
transducers on the side of horizontal runs of pipe.
Air bubbles may be present
O
45
NO
Horizontal
OK
O
45
NO
Sediment may be present
6.6
Doppler
Method
Transducer
Installation
Doppler Mode:
If the fluid to be measured contains particles, the meter should be operated using the
Doppler measurement method. For Doppler operation, the transducers will be mounted
directly opposite each other as shown below.
When the meter is operated in the Doppler mode, marking the second transducer
location is not necessary. Simply install both transducer directly opposite from each
other.
DOPPLER MOUNTING MODE
ProSeries
TM
by Blue-White
Industries,
Ltd.
Industries,Ind.
Ltd.
Page 43
Sonic-Pro
6.7
Transit Time V mounting method:
Transit Time If the fluid contains little or no particles (up to 10% maximum), operate the meter using
the Transit Time method to obtain the best accuracy.
Transducer
When the meter is operated in the Transit Time method, marking the second transducer
Installation
V Mount Mode location is required.
The V Mount mode requires careful separation distance measurements. Inaccurate
placement of the transducers may result in insufficient signal strength and poor
measurement accuracy.
Draw a straight centerline, parallel to the center line of the pipe, from the first
transducer location mark (A) through to the second transducer location (B). Place a mark
on the centerline at the correct transducer separation distance.
Mark First Transducer Location (A)
Centerline
Mark Second Transducer Location (B)
Measure Separation Distance
TRANSIT TIME V-MOUNT MODE
V-MOUNT MODE
ProSeries
TM
by Blue-White
Industries,
Ltd.
Industries,Ind.
Ltd.
Sonic-Pro
6.8
Transit Time Z-mount method:
Transit Time The Z-mount configuration requires that the second transducer be located directly
opposite the V-mount location (point B). The Z-Mount method requires careful separation
Transducer
distance measurements. Inaccurate placement may result in insufficient signal strength
and poor accuracy.
Installation
Z Mount Mode
Page 44
Mark FIRST Transducer Location (A)
Mark V Mount Transducer Location (B)
Mark Z Mount
Transducer Location (C )
A
B
C
Centerline
Measure Separation Distance
TRANSIT TIME Z-MOUNT MODE
Draw a straight centerline, parallel to the center line of the pipe, from the first
transducer location mark (A) through to the second transducer location (B). Place a mark
on the centerline at the correct transducer separation distance.
To locate the opposite mounting point, gift wrapping paper, butcher paper or similar
paper that is long enough to wrap completely around the pipe, is required. The paper
used must have squared edges.
1) Measure the pipe circumference by wrapping the length of paper around the pipe.
2) Align the overlapping side edges of the paper with each other.
3) Mark the paper at the point where the top edges overlap. The distance from the top
edge to the overlap mark will be the pipe circumference.
A
A
B
B
ALIGN SIDE
EDGES
ProSeries
TM
by Blue-White
Industries,
Ltd.
Industries,Ind.
Ltd.
Sonic-Pro
Page 45
4) Fold the paper so that the top edge and the marked circumference point touch.
5) Unfold and place a mark on the folded edge. This mark will be exactly one half of the
circumference. This mark is the location for the second transducer.
TOP EDGE
ONE HALF
CIRCUMFERENCE FOLD
C
ONE HALF
CIRCUMFERENCE
CIRCUMFERENCE
FULL CIRCUMFERENCE
6) Once again, wrap the paper around the pipe starting with the top edge corner
positioned at the second transducer location (separation distance point B).
7) Align the side edges of the paper.
8) Place a mark on the pipe at the one half circumference mark.
A
A
TOP EDGE
CORNER
B
B
ALIGN SIDE
EDGES
C
ONE HALF
CIRCUMFERENCE
FOLD
ProSeries
TM
by Blue-White
Industries,
Ltd.
Industries,Ind.
Ltd.
Sonic-Pro
Page 46
6.9
Transducer
Acoustic
Mounting
Gaskets
An acoustic coupling material must be placed between the transducer and the pipe
surface at the point where the sound waves enter the pipe.. Without this material, the
ultrasonic sound waves will not penetrate into the pipe. The Sonic-Pro meter package
includes two different materials for this purpose.
The blue gasket (part number 76001-417) should be used for permanent installations.
This gasket will be damaged be repeated installations.
1) Peel off the thin paper backing from the blue gasket and place the gasket on the
transducer completely covering the waveguide.
2) Remove the thick plastic backing from the gasket before positioning the transducer on
the pipe.
TRANSDUCER
BLUE
GASKET
TRANSDUCER
BOTTOM VIEW
BLUE GASKET PLACED
ON TRANSDUCER
BLUE GASKET INSTALLATION
Dow Corning Silicone Seal #111 (part number 90008-394) may be used in place of the
gaskets if desired.
TRANSDUCER
DOW 111
SILICONE GREASE
TRANSDUCER
BOTTOM VIEW
DOW 111 SILICONE GREASE INSTALLATION
ProSeries
TM
by Blue-White
Industries,
Ltd.
Industries,Ind.
Ltd.
SILICONE GREASE
ON TRANSDUCER
Sonic-Pro
6.10
Transducer
Mounting
Clamps
Page 47
The meter is provided with five pipe clamps, four to be used for transducer mounting and
a fifth for mounting the SPU. A single clamp can be used on a pipe diameter of up to 10
inches. The clamps can be chained together if required for larger pipe diameters.
Additional clamps can be purchased from the factory.
Carefully place the first transducer onto the pipe so that the front arrow on the
transducer is located exactly over the first separation distance mark (A). Be sure the
transducer is placed straight and parallel to the pipe centerline.
A
CENTERLINE
B
CENTERLINE
Secure the first transducer to the pipe using the enclosed pipe clamps. The arrows on the
front and rear of the transducers must point toward the pipe centerline mark.
CENTERLINE
CENTERLINE
REAR VIEW
ARROW ON CENTERLINE
FRONT VIEW
ARROW ON CENTERLINE
Locate the second transducer separation mark (B). Carefully place the second transducer
onto the pipe so that the front arrow on the transducer is located exactly over the mark
(B). Be sure the transducer is placed straight and parallel to the pipe centerline. Be sure
that both transducers are facing each other and parallel to the pipe centerline.
A
B
Check that the separation distance is correct. Tighten the clamps equally.
A
B
Separation
Distance
BLUE
GASKET
MOUNTING CLAMPS
ProSeries
TM
by Blue-White
Industries,
Ltd.
Industries,Ind.
Ltd.
Sonic-Pro
Page 48
7.0 Run Mode
This section describes the flowmeter
operation in the Run Mode. A mock-up of
the Run Mode screen is shown at right.
This is how it appears for Model S2 and S3
Displays or if it is viewed from the User PC
Software application . For Model S2, the
only difference is that the SETUP and
RELAY soft buttons are absent (blank) on
the flowmeter display (but they are still
present at the PC).
1 T 2.46 in.
[¢¢¢£]
1480
U.S. Gallons / min
625.38
U.S. Gallons
4345625.38
Relay #1
Relay #2
Active
off
SETUP
SWAP
Relay #3
Alarm
CLEAR
RELAY
In the Run Mode, the flowmeter measures the velocity of fluid movement in the pipe
and from this, and the user-specified dimensions of the pipe, determines the volumetric
flow rate and accumulates the total volume of fluid flow. The flowmeter is not sensitive to
the direction of fluid movement and flow in either direction is treated as positive for both
flow rate display and accumulation of the total volume of fluid that has passed
(totalization). Should fluid flow first in one direction and then return in the other
direction, the flowmeter will register a total of twice the amount of fluid, even though the
net actual flow is zero.
7.1
Primary and
Secondary
Display Areas
Two display areas are provided to show the current flow rate and the total accumulated
flow. Both areas can display ten digits and the decimal point.
You may configure the number of digits that appear after the decimal point in each
display area (see section 5.4.3 above). Digits remaining (from the maximum of ten) are
available for digits to the left of the decimal point. Leading zeros are not shown. If it is
not possible to display the value as configured, for example if only five digits are
available to the left of the decimal point and the value reaches 100,000, then the display
automatically switches to engineering notation. Seven significant digits are displayed
followed by “E” a two digit exponent value. Example: 2.09E12
Above the primary and secondary display areas are the primary and secondary display
labels. These show whether the area is displaying flow rate or total accumulated flow and
the units of measure (which are configured by the user in Setup Mode, see section 5.4.3
above).
Pressing the SWAP soft button exchanges the flow rate and total accumulated flow
readings between the primary and secondary display areas. The labels are also
exchanged. This soft button is present on Model S2 and Model S3 displays.
Pressing and holding the SWAP soft button exchanges the flow rate display to velocity
units. If the Measurement Units set in Transducer Setup above (section 5.4.2) are in
English U.S units, the velocity will be displayed as feet per second. If the Units of
Measure are set as Metric SI units, the velocity will display in meters per second.
Pressing and holding the SWAP soft button a again changes the flow rate display back to
the units of measure as specified in section 6.3.3. This soft button is present on Model S2
and Model S3 displays.
Pressing the CLEAR soft button zeros the total accumulated flow reading, in whichever
display area it is showing. The previous total is lost and flow now accumulates in a new
total. This soft button is present on Model S2 and Model S3 displays. This feature can be
disabled by configuration, in which case the CLEAR soft button will not appear.
ProSeries
TM
by Blue-White
Industries,
Ltd.
Industries,Ind.
Ltd.
Sonic-Pro
7.1.1
Flow Rate
Measurement
Page 49
The rate of fluid flow in the pipe is measured by the flowmeter many times per second.
To improve accuracy and the stability of the display, these measurements are averaged
over a configurable time and new values are presented to the display at a configurable
rate.
The averaging algorithm used is the Simple Moving Average (SMA), which is “the unweighted mean of the previous n data points”. Rather than selecting n, you can configure
Flow Rate Averaging to be performed over some number of seconds. All measurements
taken during that period are averaged to form each displayed flow reading. The
averaging time can be configured by selecting a value of 0.25, 0.5, 1, 2.5, 5 or 10 seconds
from the list.
The time period at which the flowmeter display updates is configurable in Setup Mode
to 0.25, 0.5, 1, 2.5 or 5 seconds. Each time the display is updated, the SMA of the flow
measurements is computed and written to the display as described above. Setting the
display update period to be much greater than the averaging time may not make sense.
For example, averaging over one second and updating the display every five seconds will
mean that 80% of the measurements taken will never contribute to a displayed flow
value. The flowmeter does not prohibit or warn against such inconsistent settings.
The units of measure for flow rate can be configured in Setup Mode. The units in which
both volume and time are expressed can be selected from appropriate options. A custom
unit of measure for volume can be selected by specifying the size of one U.S. Gallon in
that unit.
You may wish to suppress the display of very small flow values. The you can configure a
Low Flow Cutoff value so that if the flowmeter would display a value smaller than this,
it displays zero instead. By symmetry, the user can configure a High Flow Cutoff value.
If the flowmeter would display a value larger than this, it displays the cutoff value
instead. Note that these values are entered in the Setup Mode as numbers and must be
given in the units of measure configured for flow rate display. If at some later time you
change the units of measure, the cutoff values will upon inspection appear to have
changed, but will represent the same flow rate, just in different units of measure.
Should you observe that the flowmeter’s readings are consistently in error by a
measurable amount, it is possible to correct this situation by configuring a Scaling
Offset. The Factory Default for this is 1.00. The flowmeter will accept values from 0.00
to 9.99. Every measurement taken by the flowmeter is multiplied by this number before
further processing. Flow rate and flow total will therefore be affected. The Scaling
Offset is part of a Configuration Set, so it does not apply to the flowmeter as a whole
and should be set as required in each numbered Set.
If flow measurement is restarted (by passing through the Startup State, for whatever
reason), then all prior measurements previously stored for the purpose of averaging are
discarded. A new average is computed using only new flow measurements and they begin
to arrive after the restart. The display area in which the flow rate appears is blanked
(made empty) until the first measurement is made and the first average is computed.
ProSeries
TM
by Blue-White
Industries,
Ltd.
Industries,Ind.
Ltd.
Sonic-Pro
Page 50
7.1.2
Total Flow
Measurement
As well as averaging measurements to display flow rate, the flowmeter totals all
measurements divided by the measurement period to compute a totalized flow. This is
written to the display at the same configured intervals as for flow readings.
The units of measure for total flow can be configured independently of flow rate.
Pressing the CLEAR soft button zeros the total accumulated flow if this option has been
enabled by the configuration.
Should the flowmeter experience a power loss or be restarted by entry into Setup Mode,
it will preserve a recent value of the total flow and restore this when next entering Run
Mode. In Run Mode, the Total Flow will be saved to non-volatile memory every ten
seconds. Any fluid that flows while the flowmeter is not in Run Mode is not included in
the total.
7.2
Measurement
Status Areas
The top line of the Run Mode screen shows the status of the measurement process. On
the far left is shown the active Configuration Number, active Measurement Mode
and the Transducer Separation Distance. In the center is shown the Goodness of
Measurement index. On the right is shown the Speed of Sound in the fluid (if in
transit time mode).
7.2.1
Configuration
and Mode
The field on the top left displays the active
Configuration Set , the measurement
method in effect (T for Transit Time or D for
Doppler) and the transducer separation
distance. The display shown to the right
indicates: 1 T 2.46 in.
! Configuration Set #1
! Transit Time measure method
! 2.46 inches separation distance.
1 T 2.46 in.
[¢¢¢£]
1480
U.S. Gallons / min
625.38
U.S. Gallons
4345625.38
Relay #1
Relay #2
Relay #3
Active
off
Alarm
SETUP SWAP
CLEAR RELAY
The measurement method can be changed
by the two-position switch on the controller
motherboard (the wiring access door must be removed to get at this switch) whereupon
the flowmeter will automatically enter Setup Mode.
In Transit Time mode, the transducer separation distance shown is the distance used in
Transducer Positioning, see section 2.8 above. In Doppler mode, this display value
will always be zero. In both modes, the units of measure will be for the distance selected
in the Transducer Setup menu, see section 5.4.2 above. If English (U.S. units) is
selected, then the units displayed will be in. for inches. If Metric (SI units) is selected,
then the units displayed will be mm for millimeters.
7.2.2
Goodness of
Measurement
The field in the top center of the display status line displays the “Goodness of
Measurement” index [¢¢¢£] which indicates the reliability of ultrasonic flow
measurement under the present working conditions. This is computed based on a
number of variables including fluid velocity, signal strength, consistency of
measurements, and sound speed accuracy. The average samples computed during each
display update interval is taken and then displayed as a reliability index of 0 to 4 solid
boxes. Zero solid boxes indicates an unreliable measurement and four boxes indicate high
reliability. Acceptable measurements are indicated by a minimum of two solid boxes.
The same goodness of measurement indication appears on the four amber LEDs on the
controller motherboard, which can be viewed if the wiring access door is removed.
If flow measurement is restarted (by passing through the Startup State), then prior
goodness of measurement information is discarded and the display will show zero until
new information is computed.
ProSeries
TM
by Blue-White
Industries,
Ltd.
Industries,Ind.
Ltd.
Sonic-Pro
7.2.3
Sound Speed
Display
Page 51
The field on the top right displays either a speed of sound measurement value (if in
Transit Time mode) or a zero (if in Doppler mode).
When operated in the transit time mode, the flowmeter periodically calculates the speed
that sound is traveling through the fluid and displays the resulting value in meters per
second. This value is useful for determining the reliability of the measurement and also
for configuring the meter for unknown Custom Fluids. A list of the Fluid Types that
are available for selection in the meter and their sound speed is shown in the index at
the end of this manual. The displayed value should closely match the fluid’s sound speed.
Should the displayed value not match, one or more of the following conditions may exist:
!
!
!
!
!
The transducers are not positioned correctly
The pipe material type does not exactly match the Pipe Material Type specified in
the Transducer Setup configuration menu
The pipe wall thickness does not exactly match the value specified in the
Transducer Setup configuration menu
The fluid type does not exactly match the Fluid Type specified in the Transducer
Setup configuration menu.
The fluid’s temperature is different than the temperature of the index values
See section 7.2.4 below for information on configuring the meter for unknown or Custom
Fluids.
7.2.4
Measuring the
Fluid Sound
Speed
The following outlines how to use the flowmeter to determine the speed of sound in a
fluid. For the flowmeter to function, the precise speed of sound does not need to be known
in advance. However, to place the transducers in the optimal location, knowing the speed
of sound in the fluid is important. The following outlines a procedure that you can follow
in determining the fluid speed of sound.
This test can be performed with or without flow. It is recommended that the test be
performed with zero flow.
! The pipe outer diameter and wall thickness should be known precisely. It is
recommended to use a small section of pipe so that the exact dimensions can be
measured.
! The speed of sound calculation is also affected by transducer placement. Any error in
the spacing of the transducers will translate to an error in the calculated speed of
sound.
!
1) Enter all the appropriate information for pipe material and dimensions.
2) Select “custom” as the fluid type and enter a custom speed of sound for the fluid in
meters/second. Use a best first guess – if it's a water based fluid, start with
something close to the speed of sound for water. If it's an oil based fluid, use
something close to the speed of sound for oil. See the index for sample fluid sound
speeds.
3) Save and activate your configuration. Place the transducers at the spacing specified
by the meter. Press DONE. The meter will now calculate and display a speed of
sound in the upper right hand corner. If the displayed speed of sound matches that
which was entered, then that value should be used. If the displayed speed of sound is
different, or a fault occurs, change the fluid speed of sound to the displayed value or
try a new estimate and repeat step 3.
When estimating the sound speed, use a systematic approach by increasing or decreasing
your estimate by a fixed value, such as 100 meters per second.
During the run mode, the displayed speed of sound should closely match the entered
speed of sound (provided proper transducer placement and no change in temperature or
properties of the fluid such as density).
ProSeries
TM
by Blue-White
Industries,
Ltd.
Industries,Ind.
Ltd.
Sonic-Pro
Page 52
7.3
Process
Control
Status Areas
If the flowmeter is fitted with the Process Control Board, three Process Control Status
Areas appear on the display under the secondary display area and above the soft button
labels. The Model S2, Model S3 and the User PC Software display is the same. Each area
is labeled with the relay number to which it refers and shows the status of that relay
channel. If a relay channel is disabled in configuration, the corresponding status area
will be blank.
For channels configured to monitor flow total, the Process Control Status Area shows
IDLE, ACTIVE or PAUSE, corresponding to the state of the channel. ACTIVE is
displayed in white-on-black. For detailed information on the operation of relay channels
monitoring total, see section 8.2 below.
For channels configured to monitor flow rate, the Process Control Status Area shows
ALARM or CLEAR. ALARM is displayed in white-on-black and corresponds to the
channel states ALARMING, ALARMED and CLEARING (that is, when the flow rate
is outside the set limits or an alarm condition has been latched, whether the relay itself
is energized or not). CLEAR is displayed in normal black-on-white and corresponds to
the CLEAR state of the channel, when the flow is within the limits and no alarm is
latched. For more information about channel states, see section 8.3 below.
7.4
Soft
Buttons
In addition to the SWAP and CLEAR soft buttons, discussed above, two other soft
buttons will be present under certain circumstances. Buttons that are not present appear
blank.
The SETUP soft button will be present on Model S3 and also at a User PC Software
connection if fitted. Pressing the SETUP soft button causes the flowmeter to enter
Setup Mode and the Setup Mode Screen replaces the Run Mode Screen, see section
6 above for details. Operation of the flowmeter is immediately disrupted as flow
measurement does not take place in Setup Mode.
The RELAY soft button will also be present if the conditions above for the SETUP soft
button are met and the Process Control board is fitted but not if all relay channels are
disabled in configuration. Pressing the RELAY soft button causes the Process Control
Screen to replace the Run Mode Screen, see section 8.1 below for details. The
flowmeter at first continues to operate normally, although the user can no longer see the
information displayed on the Run Mode Screen, but some actions that the user can
take on the Process Control Screen will disrupt measurement.
7.5
Output
Signals
The flowmeter provides two output signals that represent the flow rate. An analog output
represents the flow rate as a current amplitude. A digital pulse output represents the
flow rate as a pulse frequency. These signals will have their values (current and
frequency) changed to the same values and at the same period as the flow display. In
other words, they are affected in the same way by the configured averaging time, display
update period and cutoffs.
7.5.1
Analog
Signal
Output
The analog signal output has a current range of 4 to 20 mA. The correspondence of
current to flow rate can be configured by specifying two (flow rate, current) points. Low
and high flow rates, which must not be the same, are specified and the currents
corresponding to each are given. Other flow rates are mapped to currents using a
straight line through the points specified. The current for the high flow rate may be
smaller than the current for the low flow rate, in which case the current will decrease
with increasing flow rate. Flow rates mapping to currents outside the available range
will cause the signal to saturate at the closest limit.
ProSeries
TM
by Blue-White
Industries,
Ltd.
Industries,Ind.
Ltd.
Sonic-Pro
Page 53
7.5.2
Digital
Pulse
Output
The digital pulse output has a frequency range of 0 to 1000 Hz. The correspondence of
pulse frequency to flow rate can be configured by specifying two (flow rate, frequency)
points. Low and high flow rates, which must not be the same, are specified and the
frequencies corresponding to each are given. Other flow rates are mapped to pulse
frequencies using a straight line through the points specified. The frequency for the high
flow rate may be smaller than the frequency for the low flow rate, in which case the
frequency will decrease with increasing flow rate. Flow rates mapping to frequencies
outside the available range will cause the signal to saturate at the closest limit.
7.6
Data
Logging
The flowmeter is able to log flow data internally to a memory buffer and to a removable
SD Card. If the Communication Board is fitted and connected to a PC running the SonicPro software application, the internal buffer data will automatically download to the
user’s PC hard drive. The generation of a log entry can be triggered periodically, by the
flow rate passing configurable setpoints and by the total flow passing configurable
setpoints. All log entries are identical and do not indicate which of the forgoing
mechanisms caused their generation. All log entries look like this:
2006/12/15 13:10:43 Rate: 2396.25 Total: 4345625.38 Code:
The date is ordered year/month/day. The time is military or European time, so no
a.m./p.m. field is needed. The flow rate and total flow are recorded as they would appear
on the display, units of measure are not included. Up to two error codes will be recorded
if present.
The internal memory buffer can hold approximately 2,000 log entries. The 32 Mbyte SD
card (included) will accommodate about 500,000 entries. At one entry per minute, it will
fill up in a little less than a year. If the SD Card is not present, data logging still takes
place but only entries in the memory buffer can be retrieved, and only by using the User
PC Software application, see section 7.6.5 below.
7.6.1
Periodic
Logging
The interval between periodic log entries can be configured from 1 to 999999 seconds. If
this number is set to zero, periodic logging will not occur. Log entries can only be
generated when flow information is produced for display.
7.6.2
Logging
Rate
Setpoints
Maximum and Minimum Flow Rate Setpoints can be configured in Setup Mode so that
the flowmeter records the time at which the flow rate crosses these values. A log entry is
generated when the flow rate crosses the Maximum Flow Rate Setpoint value while
increasing. A log entry is also generated when the flow rate crosses the Minimum Flow
Rate Setpoint value while decreasing. These log entries are not distinguished from
other entries and consist, as always, of the timestamp, the flow rate immediately after
the setpoint was crossed and also the total flow at that time.
When a log entry has been generated due to the crossing of a Log Rate Setpoint, as
described here, no further log entries are generated due to the crossing of the same Log
Rate Setpoint for a period of one minute. The intent is to suppress “flicker”, i.e. many
log entries due to the flow rate hovering around the setpoint and crossing it repeatedly.
Log Rate Setpoints must be specified in the units of measure configured for flow rate.
7.6.3
Logging
Totalizer
Setpoints
Five Flow Total Setpoint values can be configured in Setup Mode so that the
flowmeter records the time at which the total flow crosses each of these values. When
this occurs, a single log entry is generated. It is not distinguished from other entries and
consists, as always, of the timestamp, flow rate and the actual total flow value that
exceeded the setpoint. Flow Total Setpoint values do not have to be in ascending order.
They must be specified in the units of measure configured for flow total.
ProSeries
TM
by Blue-White
Industries,
Ltd.
Industries,Ind.
Ltd.
Sonic-Pro
Page 54
7.6.4
Local Log
Data Storage
(SD Data
Card Storage)
Log entries will be written to the flowmeter’s Flash memory card if one is installed. The
flowmeter supports Secure Digital (SD) and MultiMediaCard (MMC) flash memory cards
of most common brands and capacities. If a correctly formatted card is not installed
appropriately (see below), log entries will not be written but in all other respects the
flowmeter will operate normally. The flowmeter is shipped with a 32MB card installed.
To insert or remove a memory card, it is necessary to open the wiring access door of the
flowmeter. The card slot is on the bottom of the main PCB, and therefore hard to see, but
its position is marked on the top silkscreen.
7.6.4.1
Inserting and
Removing the
Memory Card
The first time a memory card is installed, the meter must be power cycled while the card
is in place. After the initial installation, to avoid corrupting the data, the
memory card should only be inserted or removed when the flowmeter is in the
Setup Mode or when the meter is powered off. Before inserting or removing the
card, use any of the methods described in section 4 above to enter Setup Mode. Flow
measurement will be disrupted. After inserting or removing the card, the flowmeter can
be returned to Startup and then to Run Mode, see section 4.3 above for details. If a
card is inserted when the flowmeter is not in Setup Mode or powered off, no harm will
be done but log entries will not be written to it and files may become corrupted. To
remedy this situation, enter and then leave Setup Mode. If the card is removed when
the flowmeter is not in Setup Mode, data on the card may be corrupt. After retrieving
undamaged log files, the card should be reformatted. Additionally, the flowmeter should
be power-cycled.
To insert a card, hold it with the label side away from you, slide the end with the gold
contacts under the PCB into the slot and push gently until it clicks into place. To remove
a card, push it inwards until it clicks again and then release the pressure. A spring will
push it out slightly. From this position, slide the card fully out.
SD/MMC cards for use in the flowmeter should be formatted according to the FAT32
standard. Files can then be written to and read from the card by any computer that
understands this file system (when fitted with the appropriate adapter) including PCs
TM
running WindowsTM or Linux .
7.6.4.2
Format of
Data on the
Memory Card
Log entries are stored in files with names of the format lognnnnn.txt, where nnnnn is
a decimal number from 00000 to 99999. Each log entry is written to a separate line in
the file and is terminated with the newline character. Some older Windows-based text
editors may not recognize newline as a line break (without a carriage return following it),
but most modern software is compatible with this format. Log files are placed in the sub
directory logs of the root directory of the memory card. Any files on the memory card
that are not in the logs sub-directory or do not have names in the above format will be
ignored by the flowmeter. Although they will reduce the space available for log files, they
will not be deleted. Any files in the logs sub-directory with names that do look like log file
names are at risk of being deleted to free up space on the card.
The log file currently in use is closed and a new one is opened in these situations:
7.6.4.3
Rotation and
Purging of
Log Files
!
!
The flowmeter enters Setup Mode and then subsequently passes to Run Mode
The log file reaches a size of approximately 1 MB (about 16,000 entries)
The five-digit number in the names of log files progresses by one each time this happens,
so it is trivial to reconstruct the sequence of log entries over different files. In this
sequence, 00000 follows 99999.
If the memory card has less than 1 MB of free space when a new file is opened, the oldest
log files are deleted until this much free space exists. Thus, if log files are not moved off
of the card before it fills up, new entries are preserved at the expense of old entries.
ProSeries
TM
by Blue-White
Industries,
Ltd.
Industries,Ind.
Ltd.
Sonic-Pro
7.6.4.3
Rotation and
Purging of
Log Files
(continued)
Page 55
The five-digit numbers of the next log file and the oldest log file on the card are held in a
file in the logs sub-directory with the name logindex.txt. If this file does not exist, the
flowmeter will create it and start both numbers at 00001. Thus, the first log file will be
log00001.txt and as further files (log00002.txt etc.) are created and filled the
flowmeter will remember that log00001.txt is the oldest. If the space on the card is
reduced below 1 MB, then log00001.txt will be deleted. The next file to be deleted to
make space will be log00002.txt and so on.
When reading a card that has been removed from a flowmeter, care should be taken
when deleting files before re-inserting it into the same or a different flowmeter. It is safe
to delete all files on the card, in which case new log files will start with log00001.txt
as described above. It is also safe to delete any or all log files if the file logindex.txt is
left on the card. If the flowmeter tries to delete a file that does not exist, it will simply
keep increasing the five-digit number in the filename until it finds enough files to delete
that free up the space it is looking for. However, if the logindex.txt file is deleted
but log files are left on the card, the flowmeter may overwrite them if and when
it counts up again to their numbers.
7.6.4.4
Power
Loss
In the event of a power loss, the flowmeter will not be able to properly close the open log
file and it may as a result be corrupt. When power is restored and the flowmeter resumes
operation, it will open a new log file with the next sequential number. Should the power
loss have occurred when the flowmeter was updating file system management
information on the memory card, it may not be able to mount the card when power
resumes. In this case, no further log entries will be written to the card. As a result, care
should be taken that the flowmeter is placed in Setup Mode before disconnecting it from
a power source.
7.6.5
Remote
Access to
Log Data
A user PC that is running the Sonic-Pro Software and that is connected via the
Communications Board will automatically acquire and store log entries from the
flowmeter.
The flowmeter records in a buffer the most recently generated 2,000 log entries. If the
buffer fills, entries are replaced in a first-in, first-out manner. At ten second intervals,
the PC will request that the flowmeter send to it the latest 100 available entries, also in
a first-in, first-out manner, until all entries are downloaded. The entries sent are
removed from the flowmeter buffer and transferred to a file folder that the Sonic-Pro
Software Application will create and place on the C: drive. Since all meters must have
a unique IP Address to connect to the user PC Software, the Software will automatically
use the IP Address as the name of this file folder.
Simply by making this request every ten seconds, the PC obtains a complete record of the
data being logged in the flowmeter. There is no configuration item to turn on or off
remote logging or to set up what is logged differently from internal logging to the SD
card. The flowmeter is passive other than buffering and supplying on request its recent
log entries. The user PC can do whatever it sees fit with the log entries, including, but
not limited to, displaying them graphically, saving them to disk, comparing them to
information from other flowmeters, etc. Remote logging is not influenced by the presence
or absence of the SD Card.
To facilitate faster downloading, a button labeled “GATHER COMPLETE LOG
BUFFER” on the user PC software application may be pressed to immediately begin
downloading all available logs in the buffer.
ProSeries
TM
by Blue-White
Industries,
Ltd.
Industries,Ind.
Ltd.
Sonic-Pro
Page 56
8.0 Process Control
Process Control functions are configured from the Setup Mode as described in section
5.4.4 above. In addition, you can interact with Process Control functions in Run Mode
using Process Control Screens for each of the three relay channels. On these screens,
you can inspect alarm status, clear alarms, dispense fluid batches, etc. Use of the Setup
Mode has been discussed above. This section covers the use of the Process Control
Screens.
To access Process Control Screens from the Run Mode Screen, press the RELAY
soft button. This button does not appear (the soft button label is blank) if the Process
Control option is not fitted to the flowmeter. None of the functions discussed in this
section are available without the Process Control option. Additionally, either the
Model S3 display option or the Communications Board and a connected User PC
Software Application are necessary to perform the operations described. You must
have at least one of these if they have a Process Control Board, otherwise it will be
useless.
In Run Mode, Process Control functions are accessible in from the Process Control
Screens. Pressing the RELAY soft button moves in a circular fashion from relay to relay
and then back to the Run Mode Screen. Only those relay channels are visited that are
configured to monitor Rate or Total in the active configuration. Relay channels that are
disabled are skipped. If all relays are disabled, the RELAY soft button does not appear
on the Run Mode Screen. This soft button is in the same location on the Run Mode
Screen and the Process Control Screens.
8.1
Process
Control
Screen
The Process Control Screen displays:
!
!
!
!
!
the selected relay number and whether the relay channel is monitoring Rate or
Total
if monitoring Rate, the current Flow Rate as it would appear on the Run Mode
screen
either the alarm trigger, release and delay time settings, if it is monitoring Flow
Rate
or the batch settings, count and totals, if it is monitoring Flow Total
the state of the relay channel (described below)
For relay channels monitoring Flow Rate, a CLEAR soft button allows you to de-activate
a relay that has been energized due to the rate reaching the trigger settings (see section
8.3.2 below for details).
For relay channels monitoring Flow Total, a START soft button allows you to start the
dispensing of a batch (see section 8.2.1 below for details). Also for channels configured for
Flow Total,
and
soft buttons allow you to select certain of the
È
Ç
settings and status values. According to which is selected, a CLEAR or EDIT soft button
appears.
Pressing the CLEAR soft button zeros the selected total. Pressing the EDIT soft button
allows the Batch Amount to be changed. (See section 8.2 below for details and
restrictions.) When the Process Control Screens are displayed, the flowmeter
continues to operate normally in Run Mode. Flow is measured and totalized and all
logging, monitoring and output signal functions continue uninterrupted. The SETUP
soft button is not available. To leave Run Mode, first return to the Run Mode Screen
using the RELAY soft button.
ProSeries
TM
by Blue-White
Industries,
Ltd.
Industries,Ind.
Ltd.
Sonic-Pro
8.2
Batch
Dispensing
8.2.1
Manual Batch
Start Type
Page 57
When a process control relay channel is
configured to monitor Flow Total, it can be
used to dispense fluid in batches. A Process
Control Screen for a channel configured in
this way is shown at right. The RELAY soft
button is used to visit each channel in turn
and go back to the Run Mode screen. The
START soft button is used to initiate a
batch. The left-most three soft button may
be used to change the Batch Amount or
clear the batch counter and the volume
totals.
2 T 3.25 in.
[ ¢¢¢£]
1480
Relay #3 Monitor: TOTAL
Batch Amount:
Current Batch #:
Total this Batch:
Total all Batches:
Batch Start:
Relay Timer:
5000
32
3296
156824526
AUTO
3
Status: ACTIVE
EDIT
Ç
È
START
RELAY
If the Batch Start type is configured as MANUAL, then operation is as follows:
!
!
!
!
!
!
!
!
Press the START soft button to begin the dispensing of a batch.
The START soft button is replaced by the STOP soft button.
The Total this Batch: value clears to zero.
The Current Batch #: value increases by one.
The relay is energized and the display changes accordingly.
As the flowmeter measures and totals up fluid flow, the Total this Batch: and Total
all Batches: values advance.
When the Total this Batch: value reaches the Batch Amount: value, the relay is deenergized and the display changes accordingly.
The STOP soft button disappears and the START soft button returns.
A batch can be interrupted and resumed as follows:
!
!
!
!
Press the STOP soft button. The relay
is de-energized and the RESUM
(resume) soft button appears in place
of this soft button.
Although the display changes to show
that the relay is de-energized, it
alternates between black-on white and
white-on-black to indicate that a batch
has been interrupted.
The flowmeter is still measuring flow,
although the intent is clearly for the
flow to stop, and the operation of all
status displays continues.
Press the RESUM soft button. The
relay is energized again, the STOP soft button reappears and everything is as it
was before the interruption.
ProSeries
TM
by Blue-White
Industries,
Ltd.
Industries,Ind.
Ltd.
Sonic-Pro
Page 58
A batch can be canceled (aborted) as follows:
!
!
!
!
!
!
Interrupt the batch as described above.
While the batch is stopped (the relay is de-energized), use the
or
Ç
È
soft buttons to navigate to and highlight the Total this Batch: status line. The
CLEAR soft button replaces the RESUM soft button.
Press the CLEAR soft button.
The value of Total this Batch: is cleared to zero.
All lines are de-selected and the START soft button returns.
When the START soft button is next pressed, the next batch will dispense and the
Current Batch #: value increases by one. The cancelled batch is not re-dispensed.
The flow measured before it was cancelled is not backed out of Total all Batches:.
Because flow information is only computed by the flowmeter at the configured display
update interval, the volume dispensed in a batch will typically overshoot the configured
Batch Amount. The relay is de-energized when the measured total equals or exceeds the
batch volume. The degree of overshoot depends on the batch size, the flow rate and the
update interval. You should not configure long update intervals when dispensing small
batches from a high flow rate, as in this situation the overshoot could be a significant
fraction of the batch size.
8.2.2
Auto Batch
Start Type
If the Batch Start type is configured as AUTO, then operation is as follows:
Immediately upon entering Run Mode, the flowmeter accumulates the volume of fluid
flowing in two totalizers associated with the specific Relay Channel. If the relay
channel is brought onto the display (using the RELAY soft button), the totals are
displayed to the right of the labels Total this Batch: and Total all Batches: and the
values will be seen to advance. However, the channel will operate in the manner described
here whether it is on the display or not.
!
!
!
The relay channel Status: is indicated
as ACTIVE.
When the Total this Batch: value
reaches the Batch Amount: value, the
Current Batch #: value increases by
one, the Total this Batch: value clears
to zero and the relay is energized. Flow
is expected to continue (in this mode,
flow is not controlled by the relay), so
Total this Batch: immediately starts
increasing again and Total all Batches:
continues to increase without a break.
After the relay has been energized for
the number of seconds shown in the
Relay Timer: field, it de-energizes
(again, this is not expected to influence
the fluid flow).
2 T 3.25 in.
[ ¢¢¢£]
1480
Relay #1 Monitor: TOTAL
Batch Amount:
Current Batch #:
Total this Batch:
Total all Batches:
Batch Start:
Relay Timer:
5000
32
3296
156824526
AUTO
3
Status: ACTIVE
EDIT
Ç
È
STOP
RELAY
This continues indefinitely (unless the STOP soft button is pressed). Each time the Total
this Batch: totalizer reaches Batch Amount:, it is cleared, Current Batch #: advances and
the relay is energized for the time Relay Timer:.
In this mode of Process Control, the flowmeter is partitioning the flow in the pipe into
batches of a defined amount. Within each batch, it displays the total flow so far for that
batch. It counts the batches. At the end of each batch, the relay energizes for a defined
time period and then de-energizes. An example of what the energized relay might do is to
switch power to a pump or open a valve that results in some other fluid being injected
into the measured fluid stream.
ProSeries
TM
by Blue-White
Industries,
Ltd.
Industries,Ind.
Ltd.
Sonic-Pro
Page 59
Ensure that the flow rate, batch amount and relay timer are set up so that the relay will
de-energize before the end of each batch. Should the relay still be energized when the
end of a batch is detected, then the time at which the relay will de-energize will be
extended to the Relay Timer time from the new batch ending. If this repeats, the relay
could remain continuously energized.
If the STOP soft button is pressed:
!
!
!
!
!
The relay channel Status: is indicated
as PAUSED.
If the relay is energized, it will
immediately de-energize.
The RESUM (resume) soft button
appears, replacing the STOP soft
button.
The flowmeter will no longer advance
Total this Batch: nor energize the relay
and increment Current Batch #: as
batches of fluid pass by in the pipe.
Total all Batches: continues to advance
if there is flow in the pipe.
If the RESUM soft button is pressed:
!
!
!
!
!
The relay channel Status: returns to ACTIVE.
The RESUM soft button is replaced by the STOP soft button.
The Total this Batch: value clears to zero.
The Current Batch #: value increases by one, indicating a new batch in progress.
Operation is as before STOP was pressed (Total this Batch: advances and, at the
end of each batch, clears, energizing the relay for a specified time and advancing
Current Batch #:).
To start counting batches from zero again or clear the value of Total all Batches:, use the
and
and CLEAR soft buttons.
È
Ç
8.2.3
Batch
Clear
The Current Batch #, Total this Batch and Total all Batches values can be cleared.
È
Ç
To do this, press the
and
soft buttons until the desired value is
highlighted. The CLEAR soft button then appears in the left-most position. Pressing this
soft button zeros the value.
The clearing of counts and totals can be blocked by configuring the Total Display
Function to Clear Total Disabled. If this is done, the CLEAR soft button does not
appear. Note that this configuration item is in the Metering Setup branch, but even so
affects Process Control functions.
8.2.4
Batch
Edit
If the relay channel is configured for Batch Start type MANUAL, the Batch Amount:
value can be changed. To do this, press the
and
soft buttons until
È
Ç
the present value is highlighted. The EDIT soft button then appears in the left-most
position. Pressing this soft button allows the value to be edited.
It is not possible to change the Batch Start: type or the Relay Timer: value. It is also not
possible to change the Batch Amount: value if the Batch Start type is AUTO.
ProSeries
TM
by Blue-White
Industries,
Ltd.
Industries,Ind.
Ltd.
Sonic-Pro
Page 60
8.3
Flow Rate
Alarms
When a process control relay channel is configured to monitor Flow Rate, it can be used
to indicate that the rate of fluid flow has reached or passed configured trigger values. A
Process Control Screen for a channel configured in this way is shown at right. The
RELAY soft button is used to visit each relay channel in turn and go back to the Run
Mode screen. The CLEAR soft button can be used to clear an alarm condition while the
problem causing the alarm is being rectified.
8.3.1
Basic
operation
Operation of Flow Rate Alarms will be described with reference to the state diagram
below.
The relay channel starts in the CLEAR
state. It will remain in this state so long as
the displayed flow rate remains both less
than the High Trigger value and greater
than the Low Trigger value. Note that the
displayed flow rate is subject to the
configured averaging, high and low flow
cutoff and any scaling offset value.
If the flow rate rises to or above the High
Trigger value or falls to or below the Low
Trigger value, then the relay channel
changes to the ALARMING state (arrow a
in the diagram at right). If the Alarm
Delay Time has not been configured or it
has been configured to zero, the relay
channel immediately changes to the
ALARMED state (arrow b). Otherwise, it
remains in the ALARMING state while the
Alarm Delay Time is counted down. In
this state, the relay is not energized. The status displays as Status: ALARMING in
alternating black-on white and white-on-black and the CLEAR soft button is present. If
the CLEAR soft button is pressed, counting down the Alarm Delay Time restarts. This
state gives an operator time to correct the condition causing the alarm or for the
condition to correct itself if it is transient.
When the Alarm Delay Time expires in the ALARMING state (which may be
immediate, see above) the relay channel changes to the ALARMED state (arrow b). The
relay is energized. The status displays as Status: ALARMED in white-on-black. The
CLEAR soft button is present. If the CLEAR soft button is pressed in the ALARMED
state and a non-zero Alarm Delay Time is configured, the relay channel changes to the
CLEARING state (arrow c). The relay is now de-energized. The status displays as
Status: CLEARING in white-on-black and the CLEAR soft button is not present. The
purpose of this state is similar to the ALARMING state, but it is available after the
alarm has occurred if the operator did not act early enough. The flowmeter counts down
the Alarm Delay Time. If this time expires and the condition causing the alarm has not
been removed (arrow e, see below), the relay channel returns to the ALARMED state
(arrow d). If the CLEAR soft button is pressed in the ALARMED state but Alarm
Delay Time is zero or has not been configured, then nothing will happen unless a
Release value has not been configured and the flow rate has returned to normal (more
on this below). In this case, the relay channel changes to the CLEAR state (arrow e).
In the ALARMING, ALARMED and CLEARING states, the relay channel may change
to the CLEAR state (arrow e) without user action if a Release value has been
configured for the Trigger value that has been passed to cause the alarm and the flow
changes to be equal to or inside that release value. For example, if the alarm occurred
because the flow rose above the High Trigger value and a High Release value has
ProSeries
TM
by Blue-White
Industries,
Ltd.
Industries,Ind.
Ltd.
Sonic-Pro
Page 61
been configured, then at any time the flow falls to or below that value the alarm is
automatically cleared and the relay channel returns to the CLEAR state. (This is what
the operator is going to be striving for in the ALARMING and CLEARING states.) If a
Release value has not been configured for the Trigger value that caused the alarm,
then the relay channel will only follow arrow e back to the CLEAR state if the flow falls
back inside the Trigger value and the operator presses the CLEAR soft button (as first
stated above). A Release value that is identical to its corresponding Trigger value has
the same effect as if it were not configured (it prevents automatic recovery from that
direction).
The Alarm Delay Time cannot be configured to a value greater than 3600 (one hour). If
the Alarm Delay Time is configured to zero, it is effectively disabled and displays as
NONE.
Any Trigger or Release value that is set to zero is effectively disabled and displays as
NONE. This includes the Low Trigger, so if the user wishes to alarm on zero flow, he
must set the Low Trigger to a very small, but non-zero, flow value. Disabling a Trigger
value causes the corresponding release value to be also disabled. If a Release value is
disabled, or set to the same value as the corresponding Trigger, then the flowmeter will
not automatically release an alarm caused by that trigger (the CLEAR soft button must
be pressed to release the alarm).
8.3.2
Clearing
Alarms
The CLEAR soft button appears on the screen in the ALARMING state and also in the
ALARMED state if an Alarm Delay Time has been set or if no Release value has been
set for the Trigger that caused the alarm.
If the CLEAR soft button is pressed when in the ALARMING state, the countdown of
the Alarm Delay Time will re-start, providing extra time to correct the problem.
If the CLEAR soft button is pressed when in the ALARMED state and when an Alarm
Delay Time has been set, then the relay will de-activate, the Status: display will read
CLEARING in white-on-black and the CLEAR soft button will disappear. The intent is
that the operator now goes and fixes whatever caused the flow to go out of bounds. If the
flow falls within the Release limits before the alarm delay time expires, then the
Status: display will read CLEAR and the relay will remain de-activated. If the number
of seconds set in the Alarm Delay Time: field passes after the CLEAR soft button is
pressed and the flow rate is still outside of the Release limits, then the relay reactivates, the Status: display will read ALARMED and everything will be as it was
before the soft button was pressed.
If the CLEAR soft button is pressed when in the ALARMED state and when no Alarm
Delay Time has been set and no Release value has been set for the Trigger that
caused the alarm, then what happens depends on whether the flow has fallen back inside
the Trigger value. If it has, the alarm will be cleared. If it hasn’t then nothing will
happen.
8.3.3
Editing
Alarms
None of the settings of a relay channel configured to monitor Flow Rate can be changed
È
Ç
from the Process Control screen. The
,
and EDIT soft buttons do
not appear.
ProSeries
TM
by Blue-White
Industries,
Ltd.
Industries,Ind.
Ltd.
Sonic-Pro
Page 62
8.3.4
More on
Alarm
Conditions
This section contains additional explanation of the conditions under which an alarm
condition is cleared.
The flowmeter will clear an alarm condition automatically if and only if a Release value
has been set for the Trigger value that caused the alarm. For example, if the alarm was
caused by the flow rate falling below the Low Trigger, then the alarm will be
automatically cleared if a Low Release has been set. Whether or not a High Release is
set in this case is of no consequence. If a Release value has not been set, the alarm is
said to be “latched”. A latched alarm can only be cleared if the user presses the CLEAR
soft button and the flow rate has fallen back inside the Trigger values.
The effect of setting an Alarm Delay Time is to add states in which an alarm condition
exists but the relay is temporarily not energized. During these states, the alarm
condition may clear and the relay will then remain de-energized. These states end when
the Alarm Delay Time elapses and if at that time the alarm condition has not cleared
then the relay will energize.
The four combinations of a set Release value (for the alarming Trigger value) and an
Alarm Delay Time are as follows:
Ÿ No Release value, no Alarm Delay Time - the alarm is latched and can only be
cleared by the user pressing the CLEAR soft button when the flow rate has fallen
inside the Trigger value.
! Release value, but no Alarm Delay Time - alarm clears automatically as soon as
the flow rate falls inside the Trigger value (the CLEAR soft button serves no
purpose).
! No Release value, an Alarm Delay Time is set - the alarm is latched (will never
clear automatically) and must be cleared by the user pressing the CLEAR soft
button, however, as well as clearing on the press if the flow is inside the Trigger
value, it will also clear if the flow falls inside the Trigger value while the Alarm
Delay Time is being counted down (the channel is in the CLEARING state).
! Release value and an Alarm Delay Time - the alarm clears whenever the flow
rate falls inside the Trigger value and the purpose of the CLEAR soft button is
only to temporarily de-energize the relay.
ProSeries
TM
by Blue-White
Industries,
Ltd.
Industries,Ind.
Ltd.
Sonic-Pro
Page 63
9.0 Sonic-Pro User PC Software
This section describes the Sonic-Pro User PC Software application.
Any Sonic-Pro model can be equipped with a Communications Package that includes
circuitry, connector panel and custom Sonic-Pro User PC Software. When connected to a
computer running the Sonic-Pro software, any model can perform the Model S3
functions described in this manual including
program editing and data logging downloads
directly into the PC.
The Sonic-Pro Software user interface
mimics the S3 model 5-button touch pad so
learning to use the software application is
simple. Simply clicking on the buttons is the
same as pressing the buttons on the SonicPro SPU touch pad. Pressing and holding
shift while clicking on a button simulates
pressing and holding a button on the touch
pad.
9.1
Software
Installation
The Sonic-Pro Software installation files are located on the CD that was shipped in the
Sonic-Pro. Open the CD and double click SETUP. Follow the instructions to install the
Sonic-Pro software onto your PC.
9.2
Making
connections
When opening the software, a connection
type must be selected. Chose ETHERNET,
RS-232 or USB.
9.2.1
Ethernet
Connection
If connecting via ETHERNET, select a
meter from the pull-down menu and press
DONE to activate the selected meter. If the
display does not activate of if some of the
data is not displayed, disconnect the meter
by clicking on OPERATION in the upper left
corner pull down menu and click
DISCONNECT. Re-select the meter and
press DONE.
To ADD a new meter to the pull-down
menu, press ADD, input a name for the new
meter, input the meter IP ADDRESS and IP
PORT number (usually 26000). Note that
the Sonic-Pro default IP Address is
192.100.100.023. Press SAVE EDITS. The IP ADDRESS must match the IP address
configured in the meter SPU. See section 5.2.1 of this manual. If the meter is installed
ProSeries
TM
by Blue-White
Industries,
Ltd.
Industries,Ind.
Ltd.
Sonic-Pro
Page 64
9.2.2
Serial & USB
Connection
If connecting via RS-232, you must select a
SERIAL COM PORT number.
If connecting via USB, you must select also
select a COM PORT number. This is
because the USB connection utilizes a
USB/SERIAL conversion method.
First connect the USB cable to the SPU.
Once connected, the new COM PORT
number should automatically appear in the
pull-down menu and can now be selected. (It
will most likely be the largest number port shown.)
NOTE: On some computers, an adjustment will be need to be made to the “latency timer”
setting on the USB COM port to enable proper communications. Go to Control Panel /
Systems and maintenance / Device Manager. Select PORTS. Double click USB
CONVERTER. Select the PORT SETTINGS tab. Click ADVANCED. Set LATENCY
TIMER to a value of 1. Save the settings.
9.3
Retrieving Log
Data
When the Sonic-Pro software is connected to the SPU and activated, ALL log data that is
stored in the SPU buffer is automatically downloaded to a folder named “Ultrasonic
Flowmeter” and placed on the computer’s C: drive. Log data is stored in a .TXT file.
The Sonic-Pro SPU can store approximately 2,000 logs. New logs will replace old logs on
a first in - first out protocol.
Each individual log file consists of Date, Time, Flow Rate value, and Flow Total value.
2008/07/15 07:18:27 Rate: 3.241483 Total: 147.137275 Code:
Note that log files stored on the SD memory card are not affected by the SPU buffer.
ProSeries
TM
by Blue-White
Industries,
Ltd.
Industries,Ind.
Ltd.
Sonic-Pro
Page 65
User Notes
ProSeries
TM
by Blue-White
Industries,
Ltd.
Industries,Ind.
Ltd.
Sonic-Pro
Page 66
10.0 Indexes
10.1
Model Number System
Sonic-Pro Part Number Matrix
Signal Processing Unit (SPU) and Display Options
S1 Model S1 - Factory configured - without display - no configuration menu access 1
S2 Model S2 - Factory configured - with display - no configuration menu access 1
S3 Model S3 - Factory configured - with display and with user configurable menu access
Smart Communications and Control Options 2
A Communications Includes Ethernet, USB, RS-232, RS-485 connections and user configuration and monitoring PC software.
B Process Control Includes three 10 amp, Form C relays. Note: requires S3 configurable display or the communications option “A” above.
C Both communications and Process Control options.
X None
Power Supply Cord
0 Ships without power cord or AC/DC transformer
1 U.S. 125V with NEMA 5/15 plug
2 European 250V with CEE 7/VII plug
3 U.S. 250V with NEMA 6/15 plug
8 Australia/New Zealand 250V with AS 3112 plug
X Power cord without attachment plug
Transducer Model
A 2” to 100” Pipe Size Range - Metal Housing Clamp-on Transducer - non-removable liquid tight cable gland connector only
D 2” to 100” Pipe Size Range - Plastic Housing Clamp-on Transducer - without T-Track mounting fixture
E 2” to 100” Pipe Size Range - Plastic Housing Clamp-on Transducer - single, V-mount T-Track (½”- 4” pipes sizes only)
2” to 100” Pipe Size Range - Plastic Housing Clamp-on Transducer - dual, Z-mount T-Track (½”- 4” pipes sizes only)
F
G 2” to 100” Pipe Size Range - Plastic Housing Clamp-on Transducer - single, V-mount T-Track (2”- 24” pipes sizes only)
H 2” to 100” Pipe Size Range - Plastic Housing Clamp-on Transducer - dual, Z-mount T-Track (2”- 24” pipes sizes only)
½” to 2” Pipe Size Range - Plastic Housing Clamp-on Transducer - without T-Track mounting fixture
I
½” to 2” Pipe Size Range - Plastic Housing Clamp-on Transducer - single, V-mount T-Track (½”- 4” pipes sizes only)
J
K ½” to 2” Pipe Size Range - Plastic Housing Clamp-on Transducer - dual, Z-mount T-Track (½”- 4” pipes sizes only)
X No Transducers
Transducer Cable Length and Connection Type
10 ft cable length - non-removable liquid-tight cable gland - not field replaceable - Metal Transducers only
1
25 ft cable length - non-removable liquid-tight cable gland - not field replaceable - Metal Transducers only
2
50 ft cable length - non-removable liquid-tight cable gland - not field replaceable - Metal Transducers only
3
100 ft cable length - non-removable liquid-tight cable gland - not field replaceable - Metal Transducers only
4
10 ft cable length - with removable liquid-tight cable plug and socket - field replaceable - Plastic Transducers only
A
25 ft cable length - with removable liquid-tight cable plug and socket - field replaceable - Plastic Transducers only
B
50 ft cable length - with removable liquid-tight cable plug and socket - field replaceable - Plastic Transducers only
C
100 ft cable length - with removable liquid-tight cable plug and socket - field replaceable - Plastic Transducers only
D
10 ft cable length - non-removable liquid-tight cable gland - not field replaceable - Plastic Transducers only
E
25 ft cable length - non-removable liquid-tight cable gland - not field replaceable - Plastic Transducers only
F
50 ft cable length - non-removable liquid-tight cable gland - not field replaceable - Plastic Transducers only
G
100 ft cable length - non-removable liquid-tight cable gland - not field replaceable - Plastic Transducers only
H
No Cable - (use for transducers with field replaceable cable plug shipped without cable)
Z
Nominal Pipe Size 4
IPS Pipe Size
Metric Pipe Size
181 18”
005 1/2” (plastic pipe only) 060 6”
300 30”
125 125mm 250 250mm 500 500mm
021 20mm (plastic pipe only)
007 3/4”
020 2”
080 8”
201 20”
320 32”
026 25mm
051 50mm
140 140mm 280 280mm 560 560mm
010 1”
025 2-1/2”
100 10” 220 22”
340 34”
032 32mm
063 63mm
160 160mm 315 315mm 630 630mm
030 3”
120 12” 240 24”
360 36”
075 75mm
180 180mm 355 355mm 710 710mm
012 1-1/4”
041 40mm
040 4”
141 14” 260 26”
420 42”
090 90mm
200 200mm 400 400mm 800 800mm
015 1-1/2”
050 5”
161 16” 281 28”
480 48”
110 110mm 225 225mm 450 450mm 101 1000mm
4
Pipe Pressure Rating
DA SDR 41 (ASTM D 2241)
CA Class 50 (ANSI C151) TA Sanitary Tubing 0.065” wall
PA PN 4 metric (DIN 8062)
SK Sch 5 (ASTM D 1785)
DB SDR 26 (ASTM D 2241)
CB Class 51 (ANSI C151) TB Sanitary Tubing 0.083” wall
PB PN 6 metric (DIN 8062)
SA Sch 10 (ASTM D 1785)
DC SDR 21 (ASTM D 2241)
CC Class 52 (ANSI C151) TC Sanitary Tubing 0.109” wall
PC PN 10 metric (DIN 8062)
SB Sch 20 (ASTM D 1785)
SC Sch 30 (ASTM D 1785)
DD SDR 19 (ASTM D 2241)
CD Class 53 (ANSI C151) TK Type K copper (ASTM B 88) PD PN 16 metric (DIN 8062)
CE Class 54 (ANSI C151) TL Type L copper (ASTM B 88)
PE PN 20 metric (DIN 8062)
SD Sch 40 (ASTM D 1785)
DL SDR 18 (ASTM D 2241)
SE Sch 60 (ASTM D 1785)
CF Class 55 (ANSI C151) TM Type M copper (ASTM B 88) BB Class B British (BS 3506)
DE SDR 17 (ASTM D 2241)
BC Class C British (BS 3506)
SF Sch 80 (ASTM D 1785)
DF SDR 15.5 (ASTM D 2241) CG Class 56 (ANSI C151)
DP DR14 (AWWA C900 PVC PIPE) BD Class D British (BS 3506)
SH Sch 120 (ASTM D 1785) DG SDR 13.5 (ASTM D 2241)
DN DR18 (AWWA C900 PVC PIPE) BE Class E British (BS 3506)
SI Sch 140 (ASTM D 1785) DH SDR 11 (ASTM D 2241)
DM DR25 (AWWA C900 PVC PIPE) B7 Class 7 British (BS 3506)
SJ Sch 160 (ASTM D 1785) DI SDR 9 (ASTM D 2241)
4
Pipe Material
A Brass (naval)
K PVDF
O Steel (1% Carbon, hardened)
E Iron (ductile)
B Copper
G Polyethylene (HDPE)
L Stainless Steel 304
P Steel (Carbon)
C FRP (fiberglass reinforced plastic) I Polypropylene
M Stainless Steel 304L
D Iron (cast)
N Stainless Steel 316
J PVC / CPVC
Display Volume Units 3
G U.S. Gallons
F Cubic Feet
M Cubic Meters
B U.S. Barrels Liquid (31.5 Gal) O Ounces
Imperial Gallons
L Liters
A Acre Feet
I
P U.S. Barrels Oil (42.0 Gal)
K Milliliters
Display Time Units
M Minutes
H Hours
D Days
Fluid 4
AA Alcohol (Ethyl alcohol; Ethanol)
AL Water (distilled; waste)
AJ Oil (diesel)
AN Water (sea; brine)
AE Gasoline
AD Ethylene Glycol / water (50%)
AI Milk
AP Wine
Display Language (S4 models available in English only)
E English
S Spanish
G German
F French
S3
C
1
B
F
ProSeries
TM
by Blue-White
Industries,
Ltd.
Industries,Ind.
Ltd.
120 SD
P
G
M
AL
E
Sample Sonic-Pro Part Number
Sonic-Pro
Page 67
10.2 Specifications
General Operation______________________
SPU (Signal Processing Unit)___________
Measuring Principle
Enclosure
Hybrid. User-selectable Doppler or Transit Time operating modes.
NEMA 4X (IP66), Powder coated aluminum, SS clamps and hardware.
Dimensions: 11.00H x 8.60W x 5.00D inches (279H x 218W x 127D
mm)
Weight 9.5 lb. (4.3 Kg.)
Fluid Types
Virtually any acoustically conductive fluid.
Transit time mode from 0% to 10% (0 to 100,000 ppm) particulate.
Doppler from 0.02% to 15% (200 to 150,000 ppm) 50 micron particles.
Fluid Velocity Range
0.25 to 30 feet per second (0.07 to 9 meters per second)
Flow Sensitivity
0.001 feet per second (0.0003 meters per second)
Nominal Pipe Sizes
14OF to 140OF (-10OC to 60OC) Storage: -40OF to 158OF (-40OC to
70OC)
Most plastic liners
Pipe Materials
Display
Most metal and plastic pipes.
Accuracy
Transit Time Accuracy at at Nominal Pipe Sizes
+/-0.01 ft/sec < 1 ft/sec
1.0 Seconds
+/-1% of rate > 5 ft/sec
+/-0.05 ft/sec < 5 ft/sec
0.5 Seconds
+/-2% of rate > 12 ft/sec
+/-0.25 ft/sec < 12 ft/sec
Doppler Accuracy at Nominal Pipe Sizes
5.0 Seconds
(default setting)
1.0 Seconds
0.5 Seconds
+/-2% of rate > 5 ft/sec
+/-0.10 ft/sec < 5 ft/sec
+/-2% of rate > 8 ft/sec
+/-0.20 ft/sec < 8 ft/sec
+/-2% of rate > 12 ft/sec
+/-0.25 ft/sec < 12 ft/sec
Shipping Specifications
Carton Dimensions: 21” x 17” x 9-1/2”
Carton Weight: 24 lbs. (10.9 Kg.)
(excluding T-Track mounting fixtures)
Clamp-On Transducers - Model A__________
Housing
NEMA 6P (IP67), Nickel plated aluminum, SS clamps & hardware.
Dimensions: 3.12H x 2.95W x 1.60D in. (79H x 75W x 41D mm)
Weight (excluding cable): 0.8 lb. (0.4 kg.) each
Cable - non-removable
Shielded coaxial RG/U Type: 59. PVC jacket, black. RoHS Compliant
Available lengths: 10ft (3m), 25 ft. (7m), 50 ft. (15m), 100 ft. (30m)
Pipe Surface Temperature
O
O
320 x 240 pixel QVGA backlit LCD, UV resistant.
Simultaneous Rate and Total: 10 digit maximum + exponent to E+32
Decimal location configurable to 10 places.
Display Languages
English, Spanish, French or German selectable.
+/-1% of rate > 1 ft/sec
(default setting)
Power Requirements
Operating Temperature
Pipe Liner Materials
5.0 Seconds
Wall, pipe (vertical or horizontal) or panel mounting. Hardware
included.
Panel opening: 10.63H x 8.10W inches ( 270H x 206W mm)
Panel Depth. Rear: 2.78 inches (71 mm), Front : 2.18 inches (55 mm)
95-264 VAC 50/60Hz or 15-30 VDC; 30 watts maximum
0.5 inch - 100 inch (20mm to 2500mm)
Flow Rate
Averaging Time
Mounting
O
O
-20 F to 250 F (-34 C to 121 C)
Clamp-On Transducers - Models D thru K___
Housing
NEMA 6P (IP67), PVDF base with Polypropylene cover.
Dimensions: 3.12H x 2.95W x 1.60D in. (79H x 75W x 41D mm)
Weight (excluding cable): 0.8 lb. (0.4 kg.) each
Cable - field replaceable options A, B, C, D
Shielded coaxial RG/U Type: 59. FEP jacket, black. RoHS Compliant
Connector: thermoplastic locking. NEMA 6P (IP67)
Available lengths: 10ft (3m), 25 ft. (7m), 50 ft. (15m), 100 ft. (30m)
Cable - non-removable options E, F, G, H
Shielded coaxial RG/U Type: 59. FEP jacket, black. RoHS Compliant
Available lengths: 10ft (3m), 25 ft. (7m), 50 ft. (15m), 100 ft. (30m)
Keypad
Five-button positive action tactile switch keypad.
Security
Programmable master password and individual configuration
passwords.
Display Volume Units
Independently configurable Rate and Total display units in: U.S.
Gallons, ounces, barrels (US liquid), barrels (US oil), cubic ft, acre ft,
Imperial (British) gallons, liter, cubic meter, or user defined “custom”
units.
Rate display in feet or meters per second.
Display Time Units
Seconds, minutes, hours, days.
Display/Output Response Time
Selectable: 0.25, 0.50, 1.0 (default), 2.5, 5.0 seconds.
Flow Rate Display Averaging
Selectable: 0.50, 1.0, 2.5, 5.0 (default), 10.0 seconds.
Data Outputs
! Isolated 4-20 mA output - fully configurable, invertible
! 0-1000 Hz Pulse output - fully configurable, invertible
Data Logging
Date/time stamped flow rate and flow total data in FAT32 file format,
easily imported into Excel. Configurable to trigger on time interval (1999,999 sec), rate and/or total set-point values. Over 500,000 log
events possible with included 32MB SD Card. 2,000 logs held in
memory buffer downloadable using Sonic-Pro user software
application.
Process Control
Three independently configurable 10 amp Form C, NO/NC relays.
! Configure to flow rate for high/low/range rate alarm. Programmable
release values enable auto release or manual latching operation.
! Configure to flow total for manual trigger batch operations or
automatically triggered, timed batch operations.
External Communications
Computer connection via RS-232, RS485, USB, Ethernet.
! Includes user communication and configuration application software
! Permits remote internet access through local network set-up
! Remotely access and upload data logging files.
Pipe Surface Temperature
-20OF to 250OF (-34OC to 121OC)
T-Track mounting system - _______________
Housing cover: Heavy gauge 304 stainless steel
Pipe surface mounting V-blocks: Anodized aluminum
Pipe Clamps (1/2” - 4” models): Nylon 6/6
Pipe Clamps (2” - 24” models): 1” x 96” polypropylene strap, SS ratchet
Hardware: stainless steel
ProSeries
TM
by Blue-White
Industries,
Ltd.
Industries,Ind.
Ltd.
Sonic-Pro
Page 68
10.3 Pipe dimensional data
ASTM D 2241
Pressure rated pipe
Wall (inches)
ASTM D 1785
I.P.S. Pipe Size Schedules
Wall (inches)
Pipe Size
5s
5
10
20
30
40s &
Std.
80s &
XH
XXH SDR SDR SDR Class Class Class Class
41
26
21
B
C
D
E
Dn
O.D.
1/2
3/4
1
1½
2
2½
3
3½
4
5
6
8
10
12
14
16
18
20
22
24
26
28
30
32
34
36
42
48
0.840
.065 .065 .083 .083
.109 .109
.147 .147
.188 .294
.032
.040
.082
1.050
.065 .065 .083 .083
.113 .113
.154 .154
.219 .308
.040
.050
.098
1.315
.065 .065 .109 .109
.133 .133
.179 .179
.250 .358
.050
.062
1.900
.065 .065 .109 .109
.145 .145
.200 .200
.281 .400
.073
.090
2.375
.065 .065 .109 .109
.154 .154
.218 .218
.344 .436
.091
.113
.118
.145 .177
2.875
.083 .083 .120 .120
.203 .203
.276 .276
.375 .522
.110
.137
.141
.220
3.500
.083 .083 .120 .120
.216 .216
.300 .300
.438 .600
.135
.167 .122 .161 .208 .255
4.000
.083 .083 .120 .120
.226 .226
.154
.190
.083 .083 .120 .120
.237 .237
.318 .318
.281 .337 .337
.636
4.500
.438
.531 .674
.173
.214 .141 .204 .267 .326
5.563
.109 .109 .134 .134 .203
.258 .258
.375 .375
.500
.625 .750
.214
.265 .157 .248 .326 .397
6.625
.109 .109 .134 .134 .203
.280 .280
.316 .189 .295 .389 .480
.109 .109 .148 .148 .250 .277
.322 .322
.332
.410 .220 .346 .456 .555
10.750 .134 .134 .165 .165 .250 .307
.365 .365
.413
.275 .429 .563 .688
12.750 .156 .165 .180 .180 .250 .330
.375 .406
.490
.322 .507 .669 .818
.188 .250 .312 .375
.375 .438
.719 .864
.432 .432
.562
.406 .500 .500 .594 .719 .812 .906 .875
.500 .500 .594 .719 .844 1.000 1.125 1.000
.562 .500 .688 .844 1.000 1.125 1.312 1.000
.594 .500 .750 .938 1.094 1.250 1.406
.255
8.625
.538
.354 .555 .732 .897
.615
.401 .637 .830 1.023
14.000 .156
10s
BS 3505
PVC-U Pressure Pipe
Wall (inches)
40
20.000 .188
.219 .250 .375 .500
.375 .594
26.000
.312 .500
.375
28.000
.312 .500 .625
.375
.312 .312 .500 .625
30.000 .250
.375
.500
.312 .500 .625
.375 .688
.500
34.000
.312 .500 .625
.375 .688
.500
36.000
.312 .500 .625
.375 .750
42.000
.375
.375
.500
48.000
.375
.375
.500
ProSeries
TM
by Blue-White
Industries,
Ltd.
Industries,Ind.
Ltd.
Dn
O.D.
4
6
8
10
12
14
16
18
20
24
30
36
42
48
54
4.80
.468 .716 .937
.488 .769
.519 .795
.585 .923
.618 .948
AWWA C900 / C905
ANSI/AWWA C151/A21.51
PVC Water pipe
Ductile Iron Pipe Pressure Class
Wall (inches)
Wall (inches)
51
52
53
54
55
56
150
200
250
300
.106
.118
.439 .692
.500
ANSI/AWWA C151/A21.51
Ductile Iron Pipe Thickness Class
Wall (inches)
50
160
.500
32.000
Pipe Size
140
.969 .500 1.219 1.531 1.812 2.062 2.344
.375 .562
.250 .250 .375 .562
120
.375 .688
.375 .500
.188 .250 .312 .438
24.000 .219
100
.375
.188 .250 .312 .375
18.000 .165
.250 .375 .500
80
.656 .500 .844 1.031 1.219 1.438 1.594
.750 .500 .938 1.156 1.375 1.562 1.781
.812 .500 1.031 1.281 1.500 1.750 1.969
.875 .500 1.125 1.375 1.625 1.875 2.125
16.000 .165
22.000
60
350
DR
25
DR
18
DR
14
.26
.29
.32
.35
.38
.41
.25
.192
.267
.343
6.90
.25
.28
.31
.34
.37
.40
.43
.25
.276
.383
.493
9.05
.27
.30
.33
.36
.39
.42
.45
.25
.362
.503
.646
11.10
.29
.32
.35
.38
.41
.44
.47
.26
.444
.617
.793
13.20
.31
.34
.37
.40
.43
.46
.49
.28
.528
.733
.943
15.30
.33
.36
.39
.42
.45
.48
.51
.28
.30
.31
.612
.850
17.40
.34
.37
.40
.43
.46
.49
.52
.30
.32
.34
.696
.967
19.50
.35
.38
.41
.44
.47
.50
.53
.31
.34
.36
.780 1.083
21.60
.36
.39
.42
.45
.48
.51
.54
.33
.36
.38
.864 1.200
25.80
.38
.41
.44
.47
.50
.53
.56
32.00
.39
.43
.47
.51
.55
.59
.63
.34
38.30
.43
.48
.53
.58
.63
.68
.73
44.50
.47
.53
.59
.65
.71
.77
50.80
.51
.58
.65
.72
.79
.86
57.56
.57
.65
.73
.81
.89
.97
.33
.37
.40
.43 1.032
.38
.42
.45
.49
.38
.42
.47
.51
.56
.83
.41
.47
.52
.57
.63
.93
.46
.52
.58
.64
.70
1.05
.51
.58
.65
.72
.79
.145
Sonic-Pro
Page 69
10.3 Pipe dimensional data
DIN 8062
PVC-U Pipe
Wall (millimeters)
Pipe Size
Dn
O.D.
20
25
32
40
50
63
75
90
110
125
140
160
180
200
225
250
280
315
355
400
450
500
560
630
20
PN 4 PN 6 PN 10 PN 16 PN 20
25
1.5
2.3
1.5
1.9
2.8
1.8
2.4
3.6
40
1.8
1.9
3.0
4.5
50
1.8
2.4
3.7
5.6
63
1.9
3.0
4.7
7.0
32
75
1.8
2.2
3.6
5.6
8.4
90
1.8
2.7
4.3
6.7
10.0
110
2.2
3.2
5.3
8.2
12.3
125
2.5
3.7
6.0
9.3
140
2.8
4.1
6.7
10.4
160
3.2
4.7
7.7
11.9
180
3.6
5.3
8.6
13.4
200
4.0
5.9
9.6
14.9
225
4.5
6.6
10.8 16.7
250
4.9
7.3
11.9
8.2
13.4 20.8
9.2
15.0 23.4
11.7
19.1 29.7
280
315
6.2
18.0
ASTM B 88
Copper Tube Type Sizes
Wall (inches)
Tube Size
Tube Size
Dn
O.D.
1/2 0.625
5/8 0.750
3/4 0.875
1 1.125
1 1/4 1.375
1 1/2 1.625
2 2.125
2 1/2 2.625
3 3.125
3 1/2 3.625
4 4.125
5 5.125
6 6.125
8 8.125
10 10.125
12 12.125
ASTM A269/A270
SS Tube Gauge Sizes
Wall (inches)
K
L
M
Dn
O.D.
16
14
12
.049
.040
.028
.065
.083
.109
.042
0.625
.065
.083
.109
.065
.045
.032
0.750
.065
.083
.065
.050
.035
1.000
.065
.083
.065
.055
.042
1.250
.065
.083
.072
.060
.049
1.500
.065
.083
.083
.070
.058
2.000
.065
.083
.095
.080
.065
2.500
.065
.083
.109
.090
.072
3.000
.065
.083
.120
.100
.083
4.000
.065
.083
.134
.110
.095
1/2
5/8
3/4
1
1 1/4
1 1/2
2
2 1/2
3
4
6
0.500
.049
6.000
.065
.083
.160
.125
.109
.192
.140
.122
.271
.200
.170
.338
.250
.212
.405
.280
.254
1/2
5/8
.109
3/4
.109
1
.109
1 1/4
.109
1 1/2
.109
2
.109
2 1/2
.109
3
.109
4
.109
6
8
10
12
355
400
450
500
14.6 23.9
560
630
18.4
Pipe Size Ranges and Maximum Wall Thickness
Pipe Material
Transducer Models I, J, K
Doppler or Transit Time Mode
Transducer Models A, D, E, F, G, H
Transit Time Mode
Max Wall
Brass (Naval)
3/4” to 2” (20 to 63mm)
2“ to 100” (63 to 2500mm)
Doppler Mode
2“ to 100” (63 to 2500mm)
.500” (13mm)
Copper
3/4” to 2” (20 to 63mm)
2“ to 100” (63 to 2500mm)
2“ to 100” (63 to 2500mm)
.500” (13mm)
FRP (fiberglass Reinforced Plastic)
1/2” to 2” (20 to 63mm)
2“ to 100” (63 to 2500mm)
2“ to 100” (63 to 2500mm)
.500” (13mm)
Iron (cast)
3/4” to 2” (20 to 63mm)
2“ to 100” (63 to 2500mm)
2“ to 100” (63 to 2500mm)
.500” (13mm)
Iron (ductile)
3/4” to 2” (20 to 63mm)
2“ to 100” (63 to 2500mm)
2“ to 100” (63 to 2500mm)
.500” (13mm)
Nylon
1/2” to 2” (20 to 63mm)
1“ to 100” (25 to 2500mm)
1-1/2“ to 100” (40 to 2500mm)
2.00” (50mm)
Polyethylene (HDPE)
1/2” to 2” (20 to 63mm)
1“ to 100” (25 to 2500mm)
1-1/2“ to 100” (40 to 2500mm)
2.00” (50mm)
Polyethylene (LDPE)
1/2” to 2” (20 to 63mm)
1“ to 100” (25 to 2500mm)
1-1/2“ to 100” (40 to 2500mm)
1.00” (25mm)
Polypropylene
1/2” to 2” (20 to 63mm)
1“ to 100” (25 to 2500mm)
1-1/2“ to 100” (40 to 2500mm)
.500” (13mm)
PVC / CPVC
1/2” to 2” (20 to 63mm)
1“ to 100” (25 to 2500mm)
1-1/2“ to 100” (40 to 2500mm)
2.00” (50mm)
304 Stainless Steel
3/4” to 2” (20 to 63mm)
2“ to 100” (63 to 2500mm)
2“ to 100” (63 to 2500mm)
.500” (13mm)
304L Stainless Steel
3/4” to 2” (20 to 63mm)
2“ to 100” (63 to 2500mm)
2“ to 100” (63 to 2500mm)
.500” (13mm)
316 Stainless Steel
3/4” to 2” (20 to 63mm)
2“ to 100” (63 to 2500mm)
2“ to 100” (63 to 2500mm)
.500” (13mm)
Steel (1% carbon hard)
3/4” to 2” (20 to 63mm)
2“ to 100” (63 to 2500mm)
2“ to 100” (63 to 2500mm)
.500” (13mm)
Steel (carbon)
3/4” to 2” (20 to 63mm)
2“ to 100” (63 to 2500mm)
2“ to 100” (63 to 2500mm)
.500” (13mm)
Titanium
3/4” to 2” (20 to 63mm)
2“ to 100” (63 to 2500mm)
2“ to 100” (63 to 2500mm)
.500” (13mm)
Note: The outside surface of the pipe must be clean and smooth. Insulation, coatings, rust and other surface imperfections should be
removed before installing the transducers. The inside surface of the pipe must be smooth to properly reflect the sound wave.
ProSeries
TM
by Blue-White
Industries,
Ltd.
Industries,Ind.
Ltd.
Sonic-Pro
Page 70
10.4 Sound speed data
Fluid Sound Speeds
Pipe Sound Speeds
Temp. (°C)
Sound Speed (m/s)
1, 1, 1-trichloroethane
25
985
1-propanol
Acetone (Dimethyl ketone; 2-propanone)
20
20
Alcohol (Ethyl alcohol; Ethanol)
25
Aluminum Sulfate 10% (Alum)
Fluid
Sound Speed (m/s)
Pipe Material
Acrylic
2730
1222
Aluminum
3080
1190
Brass (Naval)
2050
1207
Copper
2260
25
1900
Copper (annealed)
2325
Benzene
25
1306
2540
Bromine
889
Butyl acetate
25
20
CuNi (70%Cu 30%Ni)
CuNi (90%Cu 10%Ni)
FRP (fiberglass reinforced plastic)
Carbon dioxide
-37
1270
839
2505
3280
Carbon tetrachloride
20
938
Chlorobenzene
20
1289
Chloroform
Diethyl ether
20
25
Diethyl Ketone
20
25
Diethylene glycol
Ether
Ethyl acetate
Ethylene glycol
Ethylene glycol / water (50%)
Gasoline
Glycerol
931
2060
Glass, Pyrex
Inconel
3020
Iron (cast)
2460
Iron (ductile)
3000
985
1310
Monel
Nickel
2720
2960
1586
1006
Nylon
Polyethylene (HDPE)
2400
20
25
25
1164
Polyethylene(LDPE)
1940
1658
1578
Polypropylene
2400
2400
25
25
1250
25
1904
Hydrochloric Acid 32%
Hydrogen Peroxide
25
2600
PVC/CPVC
PVDF
2299
3120
1581
Stainless Steel 302/303
Stainless Steel 304
25
1530
Stainless Steel 304L
3070
Iso-butane
25
1220
Stainless Steel 316
3175
Isobutanol
25
1212
Stainless Steel 347
3100
Isopropyl alcohol
20
Kerosene
25
20
1170
1324
Stainless Steel 410
Stainless Steel 430
2990
3360
3206
1400
Steel (1% carbon)
3220
20
25
1770
Steel (1% carbon, hardened)
3150
1181
Steel (carbon)
3206
Methyl alcohol (Methanol)
Methyl ethyl ketone (MEK)
25
1076
1210
Steel (mild)
PTFE
3235
2200
Methylene chloride
25
25
1070
Tin (rolled)
1670
Milk, homogenized
1548
Titanium
3125
Mineral Oil
25
1431
Tungsten (annealed)
2890
m-xylene
20
1343
Zinc (rolled)
2440
n-butane
-5
25
1085
1172
Linalool
Linseed Oil
Methyl acetate
Octane
Oil, Lubricating x200
20
25
1530
Oil, castor
25
1477
Oil, diesel
25
1250
Oil, motor (SAE 20/30)
20
25
1487
1431
25
20
1458
Oil, Transformer
Pentane
25
1020
Petroleum
20
1290
Potassium Hydroxide 50%
25
2800
Refrigerant 11
0
828
Refrigerant 113
Refrigerant 114
0
-10
784
665
Refrigerant 115
-50
656
Refrigerant 12
Refrigerant 14
-40
774
20
875
Refrigerant 21
0
Refrigerant 22
50
891
894
Refrigerant C318
-10
25
990
25
20
1370
1170
20
1328
1050
Turpentine
20
25
Water (distilled; waste)
20
Water, sea
Wine
20
1481
1520
25
1630
Wood alcohol
25
1076
Oil, olive
Oil, peanut
Silicone (30cp)
Sulfuric Acid 96%
Tetrachloroethane
Toluene
Trichloroethylene
ProSeries
TM
by Blue-White
Industries,
Ltd.
Industries,Ind.
Ltd.
Liner Sound Speeds
Material
2500
PTFE
2200
Water Sound Speeds
1390
574
1255
Sound Speed (meters/sec)
Concrete (Mortar)
O
Temp C
O
Temp F
Sound Speed (meters/sec)
0
32
1403
5
41
1427
10
50
1447
20
68
1481
30
86
1507
40
104
1526
50
122
1541
60
140
1552
70
158
1555
80
176
1555
90
194
1550
100
212
1543
Sonic-Pro
Page 71
10.5 Troubleshooting guide
ProSeries
TM
by Blue-White
Industries,
Ltd.
Industries,Ind.
Ltd.
Sonic-Pro
Page 72
10.5 Troubleshooting guide
ProSeries
TM
by Blue-White
Industries,
Ltd.
Industries,Ind.
Ltd.
Sonic-Pro
Page 73
F15
10.5 Troubleshooting guide
ProSeries
TM
by Blue-White
Industries,
Ltd.
Industries,Ind.
Ltd.
Limited Warranty
! Blue-White Sonic-Pro flowmeters are warranted to be free from defects in material and workmanship for 24
months from date of factory shipment. WARRANTY COVERAGE IS LIMITED TO REPAIR OR REPLACEMENT
OF THE DEFECTIVE FLOWMETER ONLY. UNDER NO CIRCUMSTANCES SHALL BLUE-WHITE BE LIABLE
FOR ANY CONSEQUENTIAL OR INCIDENTAL LOSES OR DAMAGES THAT SHOULD ARISE FROM THE USE
OF THE FLOWMETER AND IN NO EVENT SHALL THE COMPANIES LIABILITY EXCEED THE PURCHASE
PRICE PAID BY THE PURCHASER FOR THE PRODUCT.
! This warranty does not cover damage to the flowmeter that results from misuse or alterations, nor damage that
occurs as a result of improper installation.
! Blue-White assumes no liability for the acceptability of the flowmeter in a specific application. THE USER MUST
DETERMINE THE ACCEPTABILITY OF THE PRODUCT AND ITS FITNESS FOR USE IN THE SPECIFIC
APPLICATION.
! Flowmeters are repaired at the factory only. Call or write the factory to receive a RMA (return materials authorization) number. Carefully pack the flowmeter to be returned and write the RMA number on the outside of the shipping
carton. Include a brief description of the problem and the application.
! Prepay all shipping costs. The factory does not accept C.O.D. Shipments. Damage that occurs during shipping is
the responsibility of the sender.
Users of electrical and electronic equipment (EEE) with the WEEE marking per Annex IV of the
WEEE Directive must not dispose of end of life EEE as unsorted municipal waste, but use the
collection framework available to them for the return, recycle, recovery of WEEE and minimize
any potential effects of EEE on the environment and human health due to the presence of
hazardous substances. The WEEE marking applies only to countries within the European Union
(EU) and Norway. Appliances are labeled in accordance with European Directive 2002/96/EC.
Contact your local waste recovery agency for a Designated Collection Facility in your area.
ProSeries
2
TWO-YEAR
WARRANTY
ProSeries
TM
by Blue-White Ind.
5300 Business Drive, Huntington Beach, CA 92649 USA
Phone: 714-893-8529 FAX: 714-894-9492
E mail: [email protected] or [email protected] URL: www.blue-white.com
P.N. 80000-430
Rev. 11152012