1
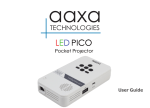
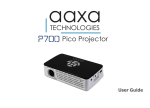
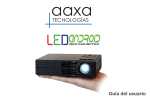
aaxa
TECHNOLOGIES
User Guide
Quick Start Guide
Step 4: Settings Button
Step 1: Power Adapter Port
Step 2: Power Button
Step 3: Adjust Focus
Step 1: Connect the power adapter
Step 2: Press the Power button once, the fan should start
spinning and the projector engine shoud light up
Step 3: Adjust the focus as needed
Step 4: Enter the “OSD” Menu to change brightness or to
select inputs. The OSD Menu can be accessed via the “Settings” button on the projector or the “Menu” button on the
remote control
Caution!
WARNING: Please use this product as instructed. Misuse may cause
injury or death.
DO NOT expose to water or wet
surfaces. Electric shock may occur.
DO NOT expose the projected LED
image to your eyes or the eyes of
others
DO NOT block or restrict airflow
from ventilation holes as this may
cause the projector to overheat
Keep the projector charger away
from any heat sources
Caution for Headphone Use
•
Prolonged use at high volume may
impair your hearing.
Table of Contents
Chapter 1: Projector at a glance
Main Unit Front/Back
Remote & Keypad
Accessories
Chapter 2: Getting Started
Powering On / Off
Focus Adjustment / Throw
Distance
Accessing OSD Menu
Adjusting the Brightness
Picture Settings & Mode
Connecting to Projector
Enabling Video Output
(on a laptop)
Connecting to Composite Video
1
2
3
4
5
6
7
8
10
13
17
Connecting to VGA
Connecting to HDMI
Connecting to USB
Connecting to Speakers &
Headphones
Chapter 3: File Playback
Playing Videos
Viewing Pictures
Music Playback
Video Playback FAQ
Chapter 4: Android System
Connecting to Wireless
Quick Launch Buttons
Apps Menu
Office Files
15
16
17
18
20
22
24
26
28
30
31
33
Table of Contents (Cont)
Wireless Display (Screen Mirror)
Connecting to Bluetooth
Display Settings
Chapter 5: Settings
Picture Configuration
Keystone Adjustment
34
38
39
40
44
Chapter 6: Technical Details
Trouble Shooting
Specifications
47
49
LED Android at a Glance
Chapter 1
Settings Button
Navigation Pad
Power Adapter Receptacle
Back Button
Power Button
Focus Wheel
Lens
3.5 mm Composite Jack
3.5 mm Audio Jack
VGA Input
HDMI Input
USB Port
Mini USB Port
1
Remote & Keypad
Both the keypad and remote can be used to control the projector. The Main Menu Navigation on the
remote functions similarly to the keypad on the projector but with additional features that include:
1. Mouse Pointer - The Mouse icon opens a mouse pointer on the screen. To enter “mouse mode” press
the mouse icon on the remote control and press the left or right arrow key. The mouse pointer should
begin to move. To exit “mouse mode” double-click the mouse icon. (Press Right / Left if it does not work immediately)
2. Volume Control - Use the volume keys to adjust the speaker volume
3. Keystone - Adjust the keystone manually with the remote control (vertical only)
2
Accessories
A/V Cable
Power Adapter
Remote
*Under various circumstances, the actual accessories may be different from
those shown in the pictures above.
3
Getting Started
Chapter 2
Powering ON the projector
1.
2.
3.
Connect the power cord to the Projector
Connect the opposite end of the power cord into a wall outlet.
Press the POWER button on the top of the projector to start the projector or press
the POWER button on the remote control to start the projector.
* The POWER button’s blue LED light will turn on when the projector is on.
Powering OFF the projector
1.
Press the button on the keypad or remote twice to turn the projector off. The optical
engine should power off and the fan should stop spinning. The projector can be
turned on using the remote control.
Power Socket
4
Focus Adjusment / Throw Distance
Focus Adjustment
Located on top of the projector, turn the
focus ring to the left or right until the image
becomes clear.
Throw Distance Chart
Diagonal inch (“)
Min
Max
19
28
38
47
56
66
75
150
Distance from
Lens to Screen (“)
20
30
40
50
60
70
80
157
DIA
GO
NA
LS
CR
EE
NS
IZE
16:9 Aspect Ratio
Throw Ratio 1.22
*minimum throw distance: 20 inches
5
Accessing the OSD Menu
The OSD Menu
The OSD Menu allows the user to
control 3 primary functions of the projector. (1) Input Selection (2) Brightness Settings (3) Picture Settings
To Access the OSD Menu
Simply press the “settings” button ( )
on the projector or the “menu” button
on the remote control. The OSD
Menu will pop up.
6
Brightness Settings
Standard Mode
The Projector operates at 450Lm in
standard mode. Standard brightness is designed for a wide range of
altitudes and ambient temperatures
and preserves light-source life
Boost Mode
Boost Mode delivers 550Lm of brightness. The Projector is designed to run in boost mode for 60 minutes
each time. Excessive use of Boost Mode will decrease
light-source lifespan. To toggle “on” boost mode, simply
select “Boost Mode” in the OSD menu. The fan will spin
faster and the projected image become brighter.
7
Picture Settings
Picture Mode
The picture mode allows the user to select between different picture
modes Dynamic, Standard, Mild, and Custom. The differences in
each mode is a combination of changes in Contrast, Brightness, Color,
Sharpness, and Tint. A fifth mode, “User” allows the user to manually
adjust these settings.
Color Mode
The color mode allows the user to pick between Warm, Medium, and
Cool color temperatures. The differences in each mode is changes to
the Red, Green, Blue color-mix. A forth mode “user” allows the user to
manually adjust the color-mix.
8
Picture Settings (Cont)
Aspect Ratio
The Aspect ratio can be set to 6 different settings. The first is an “auto”
setting. The next few settings forces between 4:3 or 16:9 (native) aspect
ratio, while Zoom 1 and Zoom 2 will zoom the image. “Just Scan” can
switch the image to wide screen / cinema mode.
Display Mode
The Projector allows 4 different display modes which accomodate for
rear-projection and reverse (up-side down) mounting and is accomplished
through vertical or horizontal flip.
Keystone
Keystone allows vertical keystone adjustment. Please see
Keystone Adjustments page for more information. Horizontal
Keystone is not supported.
9
Connecting to the Projector
HDMI - VGA - AV
The Projector offers 6 different input
sources.
This section will focus on HDMI,
VGA, and AV (Composite) input.
Selecting Inputs
The Input Selection menu can be found
by accessing the OSD menu. The
OSD menu is accessed by pressing the
“Settings” ( ) button on the projector or
the remote control.
10
Connecting to the Projector (Cont)
To connect a device to the Projector first connect the appropriate source cable. HDMI is
a full sized HDMI cable. VGA is a standard 25 pin VGA cable. Composite Video is the
included 3.5mm AV cable. After connecting the cable open the OSD menu and select
the appropriate format. For example to enable an HDMI connection first connect the
HDMI cable then select “HDMI” in the OSD menu.
11
Connecting to the Projector (Cont)
HDMI Connection
When connecting to HDMI remember to set the output resolution to match the projector. The native resolution of the projector is 1280x800. Not all resolutions will match,
please try a few different resolution settings to obtain the desired display. On systems
like the Playstation 4, a safe-mode boot (on the PS4) may be needed to change the
output resolution to match.
VGA Connection
VGA connections are analog connections without “autodetection”. To connect a laptop
to the LED Projector first set the resolution. We recommend resolutions at or near
1280x800. Depending on your device, sometimes toggling the VGA output to “ON” is
needed. Each laptop configuration is different, for example Function+F5 is sometimes
used to toggle the VGA output On / Off on laptops. Please check your device owners
manual for more detailed instructions.
RCA Connection
To connect Composite Video (RCA) connections simply connect the red, white, and yellow RCA cables to the included 3.5mm RCA cable. The 3.5mm port should then plug
into the 3.5mm AV port of the LED Android Projector.
12
Tips: Enabling Video Output
Step 1:
To enable VGA or HDMI output on your computer most computers require “turning on” the video
output feature. Each computer is different. Please consult your owner’s manual for instructions to
enable VGA or HDMI output. Below are standard instructions for a Windows XP computer – not all
systems are the same.
Step 2:
Press function & “F5” to instruct
the computer to enable multiple
displays.
You can also press Windows+P to
toggle through display settings.
*NOTE: different operating systems may differ
Step 3:
1.Right click on computer desktop and select “Properties”
2.Display Properties window
will pop up
3.Click on the “Settings” Tab
4.If a secondary monitor is
grayed out, click on it and
check “Extend my Windows
Desktop onto this monitor”
5.If the image is blurry or the
text is not legible, adjust
the screen resolution. We
recommend 1280x800.
13
Tips: Connecting to Composite
Step 1:
Connect the 3.5mm A/V Cable to the
back of the Projector.
Step 2:
Connect the composite end of
the AV Cable (Red, White,Yellow)
to your device.
14
Connecting to VGA
Step 1:
Connect one end of the VGA Cable to the back fo the
projector and the other end to the source device
Step 2:
Select “VGA Input” in the OSD Menu of the Projector
Step 3:
Enable the video output of your source device. Frequently this is done with
the function F5 key or by enabling “video output” in the “display settings”.
Please see your device’s owners manual
15
Connecting to HDMI
Step 1:
Connect one end of the HDMI to
your projectors HDMI Adapter
Step 2:
Select “HDMI Input” in the OSD Menu
of the Projector
Step 3:
Connect the opposite end of
the HDMI cable to your device.
Note: Apple devices require a specialized
HDMI adapter (Sold separately by
Apple)
14
14
16
Connecting to USB
The Projector features two (2) USB ports. One full-sized
USB port and one mini-USB port. Both USB ports are full
function USB ports and can either connect to a peripheral
device such as a mouse or a USB memory stick. USB
Memory sticks of up to 32GB can be connected.
Note: To Enable the USB Host function on the mini-USB port,
please go to Android Settings and uncheck “Connect to PC” (under
Device->USB) and then check “USB Debugging” (in the Developer
Options submenu.)
17
Connecting Speakers/Headphones
Step 1: Connect your speakers/headphones
to the projector’s speaker adapter.
3.5 mm cord
Speaker Adapter
Step 2: Ensure the power and volume on your
speaker or headphones is turned on
Step 3: Place the headphones on and enjoy!
*CAUTION for Headphone Use
•
Prolonged use at high volume may impair
hearing
18
File Playback Options
Chapter 3
The Projector has 3 playback modes. These modes include
Video playback, Picture Slideshow playback, and Music playback
To connect content to the Projector use the USB port found on the
back of the projector. The Projector can support USB sticks up to
32GB.
Audio file formats supported: MP2, MP3, WAV, AAC, WMA
Video file formats supported: AVI(H.264,DIVX,DIVX,XVID), rm,rmvb, MKV(
H.264,DIVX,DIVX,XVID),WMV,MOV,MP4(.H.264,MPEG,DIVX,XVID),DAT(VCD),
VOB(DVD),PMP,MPEG,.MPG,, FLV(H.263,H.264),ASF ,TS, TP,3GP,MPG
Photo file formats support: JPG, JPEG, BMP, and PNG.
19
Playing Videos
Video Player Selection
•
To Access the Video playback menu, in
the main menu select the “Videos” icon.
•
In the Video Submenu you will see a
preview of available videos.
•
Select the video you wish to play
20
Playing Videos (Cont)
The Video Player
•
As your video begins to play you will find a playback control menu at the bottom of
the screen which can be brought up by pressing the “UP” arrow
•
If you don’t see the control menu, press “UP” arrow on the projector or the remote
control to bring up this menu
•
Volume Adjustment can be achieved with the remote control or in the menu
•
FFWD and RWD can be achieved by highlighting the progress bar
Decrease
Volume
Bookmark Rewind
Increase
Volume
Pause Fast Forward Full
Screen
Repeat
21
Viewing Pictures
Picture Viewer Selection
•
To access the Pictures menu in the
main menu, select the “Pictures” icon.
•
In the Picture Submenu you will see a
preview of available pictures.
•
Select the picture you wish to view
22
Viewing Pictures (Cont)
Picture Viewer
There are several options for viewing pictures. These options include:
•
•
•
•
Picture Slideshow - Bring up the settings menu and select SlideShow mode to
begin the slideshow
E-mail the picture - Bring down the options menu to be able to e-mail the picture
Edit the picture - Bring up the photo editor (3 rings) to be able to edit the picture
Rotate the picture - Bring up the settings menu to be able to rotate the picture
Options Menu
Photo Editor
Settings Menu
23
Music Playback
Music Player Selection
•
•
•
To listen to music select the Music
Player option in the main menu
In the Music Submenu you will see a
preview of available Music.
Select the video you wish to play
24
Music Playback (Cont)
Decrease Volume
Rewind
Pause/Play Fast Forward Increase Volume
25
Video Playback FAQ
How do I get rid of the bottom
navigation bar?
•
The navigation bar will disappear
automatically after 4 seconds
My video refuses to play what do I
do?
•
How does the “bookmark” function work?
•
Book-marking a segment of the
video allows the user to return to
that specific section of the video
at a later time. Upon re-opening
the file the user will be prompted if
they want to return to the bookmark
Not all file formats are compatible with
the video player. Try encoding the
video in another format. There are
free converters such as “Format Factory” that can convert video files
Stuck in the selection menu help!
•
Use the back button or the mouse
to navigate outside of the selection
menu.
26
Android System
Chapter 4
The Projector features an Android Operating
system based on a dual-core ARM chipset.
The Android Operating system allows the
user to download apps, surf the internet,
stream movies, and a whole host of other
features normally found on an Android device.
27
Connecting to Wireless
STEP 1
Connecting to a Wireless Router
•
•
•
To Connect to a Wireless Router first
access the settings menu
Select the WIFI settings submenu
Ensure WIFI is turned “ON”
STEP 2
Connecting to a Wireless Router
•
Select the appropriate router
•
Enter your passphrase to connect to
the router
Note: The WIFI connection works best with WPA
connections. If you are using a WEP connection we
recommend switching
28
Connecting to Wireless (cont)
Settings Menu
An alternative method to configure the wireless connection is to directly access
the settings menu. The settings menu can be found by clicking in the “settings”
Application in the Apps menu.
In the settings menu turn on
WIFI and select the correct
router. After entering the
password you should be connected automatically to your
router.
Note: Router and WIFI connection issue trouble
shooting is beyond the scope of this manual.
For problems connecting to a router we suggest contacting your router manufacturer or
searching the internet for “Troubeshooting WIFI
for Android”
29
Quick Launch Short-Cuts
Depending on the region the Projector includes
some quick-launch short-cuts. For the United States
region these short-cuts include:
Youtube - Youtube Link, Netflix - Netflix Link, HULU - Hulu Link, Google Google Link, Facebook - Facebook Link
Note: For better performance we recommend downloading the respective Apps through the
Google App store
30
Apps Menu
The Projector allows accessing Android Apps via the Apps
menu. Android Apps are different application software created
by 3rd party vendors for various different uses and functions.
Popular apps include streaming video clients, productivity apps
(such as spreadsheets), and games.
Access the Apps menu
from the main menu. To
launch an app simply click
on the desired app.
31
Apps (cont)
DOWNLOAD APPS
There are two ways to download and install new applications.
1. The easiest is using the Google Play Store. Simply sign onto the
Google Play store, search for your application and click “install”. The application will automatically install on the projector.
2. Another method is to download application and use the APK installer.
You can also download your non-google sponsored applications directly
from a variety of internet sources. After downloading the .apk file use the
APK installer to install the app
32
Viewing Office Files
The LED Android has the ability to view Microsoft Office files
including Word, Excel, Powerpoint, as well as Adobe PDF files.
There are a variety of free viewers and editors available through
the Google Play Store such as Kingsoft Office.
Note: Download a free viewer before attempting to view these files
Download a viewer /
editor through the Google
Play store.
We highly recommend a
keyboard or mouse to edit
MS Office or PDF files
33
Wireless Display
SCREEN MIRRORING
The LED Android allows wireless mirroring of Android Phones to the Projector. While wireless mirroring is not the most efficient connection for
high bandwidth screen-sharing and is thus not recommended for videos
and gaming it is a great option for most types of presentations.
The WIFI display app is preloaded in your LED Android projector. You
can find the App in the Apps section.
34
Wireless Display (Cont)
Projector
Smartphone
Step 1: Projector - Open the WIFI Display app found in the
apps section. Configure the name as needed
Step 2: Projector - Click on the Search Feature
Step 3: Smartphone - In the “Settings” section of the
smartphone locate the “Display” settings and then turn on
“Wireless Display”. On some phones this may be named
differently such as “Screen Sharing”. Typically it is nested
Settings > Display > Wireless Display
35
Wireless Display (Cont)
Step 4: Smartphone - Turn on the wireless
display feature
Step 5: Smartphone - Click “Search for Displays”.
After a few seconds the projector name should
appear
Step 6: Smartphone - Click on the Projector.
Wait until connected
Step 7: Projector - The Smartphone should appear on the bottom left hand corner of the WIFI
Display App
Notes: If connection fails try rebooting your
phone and/or projector. To exit press the
“back” button on the projector
36
Connecting to Bluetooth
The Projector has a built in bluetooth chipset. This allows the
connection of wireless controllers or wireless speakers and
other bluetooth enabled devices. To connect to bluetooth device access the Bluetooth setup menu under the settings menu.
Ensure Bluetooth is
turned on. Once turned
on Bluetooth is discoverable. All devices must be
“paired” before using.
37
Bluetooth (cont)
PAIRING DEVICES
An alternative method to connect and pair a bluetooth device is to use the main
settings menu. Under the bluetooth settings menu you will have a few options.
1. Make your device searchable - Click on “Only Visible to paired devices”. The
projector will then be searchable to all bluetooth devices for two minutes.
2. Search for Devices - Click on “search for devices to identify new available
devices
Note: Bluetooth devices often pair differently. Please read your device
owner’s manual to identify the best method to pair your device
38
Display Setting
The Display Setting allows the adjustment of the
size (stretch) of the screen both vertically and
horizontally
Vertical Stretch
Use the up and down arrows to vertically expand or compress the
image.
Horizontal Stretch
Use the right and left arrows to horizontally expand or compress the
39
Picture Configuration
Chapter 5
The Picture Configuration can be accessed through the OSD
menu. Click the “menu” button to enter the OSD menu. Under
the OSD Menu select “Picture Adjust”
Picture Mode
•
Changes the pre-selected picture
mode
Color Temperature
•
Adjusts the color temperature from
hot to cool (red to blue).
Aspect Ratio
•
Changes the aspect ratio of the
picture - 4:3, 16:9*
Display Mode
•
Allows the user to flip the image both
vertically and horizontally
Keystone
•
Allows the user to change the Keystone settings
40
Picture Configuration (cont)
Picture Mode
Picture mode can be toggled between
User, Dynamic, Standard, and Mild. In
User mode Contrast, Brightness,Color,
and Sharpness can be set by the user
projector, which affects the sound
signature.
Color Temperature
Color Temperature can be toggled between Cool, Medium, Warm, and User.
In User mode Red, Green, and Blue
saturation can be selected individually.
41
Picture Configuration (Cont)
Aspect Ratio
The aspect ratio of the image can be
adjusted. The native aspect ratio is
16:9.
Auto - Automatic aspect ratio
16:9 - Native Aspect Ratio
4:3 - Traditional Aspect Ratio
Zoom 1 - Zoom in
Zoom 2 - Zoom in
Just Scan - 1:1 Pixel Ratio
Panaromic - Panaromic Aspect ratio
42
Picture Configuration (Cont)
Display Mode
The display mode allows the user to flip
the image both vertically and horizontally.
This allows for ceiling mounting and rear
projection.
For example to achieve rear projection
select “horizontal flip” and the image will
be flipped 180 degrees on the Y-Axis.
To achieve ceiling mount select “vertical flip” and the image will be flipped 180
degrees on the X-Axis.
The display mode is “remembered” upon
power-off.
43
Keystone Adjustments
What is Keystoning?
“Keystoning” occurs when a projector is aligned non-perpendicularly to a screen,
or when the projection screen has an angled surface. The image that results
from one of these misalignments will look trapezoidal rather than square.
Digital Keystone Adjustments
By adding a special, selectable, algorithm to the scaling, some new projectors
are able to alter the image before it reaches the projection lens. The result is a
squared image, even at an angle.
44
Keystone Adjustments
Automatic Keystone Adjustment
Automatic Keystone adjustment is enabled through a levelsensor on the projector. As the projector is tilted the image is
automatically scaled to match the angle / degree of tilt. This
feature is turned “on” from the factory.
Manual Keystone Adjustment
Users can choose to adjust the keystone themselves to match
circumstances where the automatic keystone adjustment is
ill-suited. This can be achieved by selecting “manual” in the
Keystone adjustment submenu found in the OSD menu.
No Keystone Adjustment
Keystone adjustment can be turned off through the Keystone
submenu.
Note: Only vertical Keystone Adjustment is available (horizontal is not)
45
Keystone Adjustments FAQ
How to Correct Keystone
•
If the image looks trapezoidal with
the base larger (as pictured right),
press the bottom button on the
directional pad on the top of the
LED Showtime until the keystone
effect corrects and the picture
turns into a square projection.
•
If the image looks trapezoidal with
the top larger (as pictured right),
press the top button on the directional pad on the top of the LED
Showtime until the keystone effect
corrects and the picture turns into
a square projection.
46
Chapter 6
Technical Details
Troubleshooting
IMAGE IS BLURRED
Possible Causes
Solution
The Projector is not in focus
Adjust the focus with the focus adjustment dial
until the image comes into focus
The Projector is offset from plane / angle of
operation
Move the projector so that it is both 180 degrees
and on an evern plane with the screen.
No Sync, No Signal
Be sure to setup the computer to enable a video signal output. On some
laptops this is done by pressing and holding Function F5 key. If using the LED
Showtime as an external monitor on Windows based systems, this can be done
by selecting “extend my desktop to this monitor”. The native resolution of the
LED Showtime projector is 1280x800. Depending on the video driver different
resolutions may need to be selected for proper output.
47
Technical Details
Troubleshooting
THE PROJECTOR DOES NOT TURN ON
Possible Causes
Solution
There is no power
Check to ensure the power outlet source is good.
check the power adapter to ensure a proper
connection with the wall outlet as well as the
proejctor.
The power button was not held long enough
To power on the projector, the power button
needs to be depressed for a full 3 seconds. try
holding the power button until the optical engine
turns on
NO PICTURE / FILE NOT SUPPORTED
Possible Causes
Solution
The video source is not properly connected or
selected
Check the video source signal to ensure that it
is properly connected. Select the current input
source by choosing the input desired from the
main menu
Incorrect file extension / Video is encoded with
incorrect codec
Please refer to “Specifications” page to see which
file types and codex are supported. Verify that
the file was encoded properly.
48
Specifications
Brightness:
Native Resolution:
Maximum Resolution:
Aspect Ratio:
Contrast Ratio:
Projectoin Lens:
Image Size:
Lamp:
550 Lumens
1280x720 (720P)
1920x1080 (1080P)
16:9
2000:1
Manual Focus
10~160 inches
Triple RGB LEDs with Vibrant Color Technology
Life 20,000 hours
Android OS:
Processor (CPU):
Internal Memory:
Video in:
Android 4.2
Dual Core Android 4.2 Processor
1GB DDR RAM
Composite A/V
VGA
HDMI
Audio Output:
2.0 W stereo speakers
3.5 mm audio jack
Onboard Memory:
USB:
4GB Internal Storage
USB Host
(Memory Sticks)
Dimensions:
Weight:
Supported File Formats
5.9” x 5.2” x 1.4”
1.5 lbs
AVI, MPG, MP4, MP3, FLV, RMVB, RM, JPG
49
Notes
50
Please direct all customer service inquiries to:
AAXA Technologies, Inc.
1541 Parkway Loop
Tustin, CA 92780
(714) 957-1999
[email protected]