1
USER & PARTS MANUAL
)'.-%
'&'
*,''*
"+%*!*('!(-'.
"+%*!*('!*),*
&
Table of contents
Warranty and Owner Reference 3 - 6
General Safety and symbols
7 - 15
Tire Safety
16 - 18
Specifications
19
1993 Diesel placard placement
19 - 20
General operation
20 - 23
Parts
24 - 28
Optional DL (Deluxe Model)
Safety and General information
29 - 44
Warranty
The undersigned dealer, by signing this manufacture’s Limited Warranty, states that he/she has informed
and explained to the purchaser all limited warranty and claim procedures and will perform all
responsibilities of the dealer under this Limited Warranty.
IF THIS WARRANTY IS NOT SIGNED, POSTMARKED AND MAILED TO CENTRAL
PLAINS INDUSTRIES,LLC BY THE FIFTEENTH DAY AFTER YOUR PURCHASE OF THE
TRAILER, ALL EXPRESS WARRANTIES SHALL BE NULL AND VOID.
By signing this manufacturer’s Limited Warranty, THE PURCHASER ACKNOWLEDGES THAT HE OR
SHE HAS READ THE BELOW LIMITED WARRANTY AND AGREES THAT, SHOULD ANY WARRANTY
CLAIMS BE MADE BY PURCHASER, PURCHASER WILL FOLLOW THE PROCEDURES AS SET
FORTH BELOW.
_______________________________________________________________
Dealership
Purchaser Signature
Date
_______________________________________________________________
Dealer Signature
Date
Purchaser (Print Name)
_______________________________________________________________
Model Purchased
Purchaser Mailing Address
_____________________________________________________________(______)_____________
V.I.N. #
City
State
Zip
Telephone Number
MANUFACTURERS WARRANTY
CENTRAL PLAINS INDUSTRIES, LLC HERE WARRANTS THAT EACH HILLCREST Trailer operated
by the original purchaser under normal use in the Continental United States or Canada will be free from
defects in materials and workmanship for one year following the original purchase, subject to the
requirements, exclusions and limitations stated below which will be strictly applied. If the trailer is rented
or used for commercial transporting, this Limited Warranty is null and void.
YOU MUST SEND COPY OF WARRANTY
In order to validate this Limited Warranty, the original copy of this form, signed by the dealer and the
purchaser, must be postmarked and mailed to CENTRAL PLAINS INDUSTRIES,LLC; no later than fifteen (15) days following the purchase of your HILLCREST Trailer. IF THIS SIGNED
WARRANTY IS NOT POSTMARKED BY THE FIFTEENTH DAY AFTER PURCHASE OF THE TRAILER,
ALL EXPRESS WARRANTIES CONTAINED IN THIS LIMITED WARRANTY SHALL BE NULL AND
VOID.
ONE YEAR LIMITED WARRANTY
Subject to the requirements, exclusions and limitations stated below, the structure of your HILLCREST
Trailer is warranted to the original retail purchaser against defects in materials and workmanship by
HILLCREST Manufacturing LLC, arising from normal use for one (1) year from the date of purchase.
LIMITED PAINT WARRANTY
CENTRAL PLAINS INDUSTRIES,LLC warrants its paint finish to be consistent with industry standards
for one year after the date of original retail purchase, with the exceptions of "normal use” limitations set
forth below and of
deterioration due to use or exposure, such as chipping, scratching, fading, cracks in caulk seams, road
salt or tar, damage by animals or pressure washing. Warrantable paint repairs are limited to spot repairs
and blending consistent with standards in the trailer industry.
EXCLUSION OF COMPONENTS WARRANTED BY OTHER MANUFACTURERS
All components that are not manufactured by CENTRAL PLAINS INDUSTRIES,LLC , including but not
limited to: tires, wheels, axles, brake components, springs and suspension components, couplers, jacks,
castors, mats, batteries, sealants, that are purchased and installed by CENTRAL PLAINS
INDUSTRIES,LLC are warranted by their
manufacturers and are excluded from this Limited Warranty.
This Limited Warranty extends only to materials used or workmanship performed byCENTRAL PLAINS
INDUSTRIES,LLC.or its employees in the construction of the original trailer, subject to all limitations and
exclusions set forth herein. CENTRAL PLAINS INDUSTRIES,LLC EXPRESSLY DISCLAIMS AND
EXCLUDES ANY RESPONSIBILITY OR LIABILITY FOR ANY MATERIALS OR WORKMANSHIP IN
ANY ITEMS INSTALLED OR FOR STRUCTURAL FAILURE DUE TO ANY MODIFICATIONS MADE TO
CENTRAL PLAINS INDUSTRIES,LLC PRODUCTS BY ANY OTHER PERSON OR COMPANY,
INCLUDING ANY INCIDENTAL,OR CONTINGENT LIABILITIES ARISING THERE FROM.
NORMAL USE, NO REPAIRS OR ALTERATIONS
This Limited Warranty covers only defects in original components which arise from normal use and does
not apply if the trailer has been subject to accident, abuse, misuse, corrosion, neglect or overload or has
been repaired or altered without the prior written consent of CENTRAL PLAINS INDUSTRIES,LLC
Normal wear items, including but not limited to doors, rubber matting, lights, bearings, brakes, brake
linings, tires and batteries, will not be replaced due to wear. Loading in excess of gross vehicle load
ratings stated on the identification plate will invalidate any and all warranties.
TRANSPORTATION COSTS EXCLUDED
Transportation of any trailer to and/or from your dealer or any approved repair facility shall be the
responsibility of the trailer owner. CENTRAL PLAINS INDUSTRIES,LLC shall not be liable for any such
costs.
PRIOR WRITTEN CONSENT REQUIRED AND RETURN OF DEFECTIVE PARTS
REQUIRED
No reimbursement will be made to any dealer or owner for repairs made without the prior written consent
of CENTRAL PLAINS INDUSTRIES,LLC Any defective part(s) must be sent by prepaid freight to
CENTRAL PLAINS INDUSTRIES,LLC, in order to be considered for replacement or reimbursement under
this Limited Warranty.
OTHER PRODUCTS EXCLUDED
This Limited Warranty applies exclusively to CENTRAL PLAINS INDUSTRIES,LLC trailers manufactured
by CENTRAL PLAINS INDUSTRIES,LLC. Any other products manufactured by CENTRAL PLAINS
INDUSTRIES,LLC are specifically excluded from this warranty. Authorized repairs do not extend the term
of this Limited Warranty.
LIMITATIONS
THE SOLE RESPONSIBILITY OF CENTRAL PLAINS INDUSTRIES,LLC UNDER THIS LIMITED
WARRANTY SHALL BE TO REPAIR AND OR REPLACE PARTS AT THE CENTRAL PLAINS
INDUSTRIES,LLC FACTORY OR, FOR A REASONABLE ALLOWANCE AT ANOTHER PLACE AND
PREPARED IN WRITING BY CENTRAL PLAINS INDUSTRIES,LLC . ALL OTHER OBLIGATIONS OR
LIABILITIES, INCLUDING INCIDENTAL OR CONSEQUENTIAL DAMAGES OR CONTINGENT
LIABILITIES ARISING OUT OF THE FAILURE OF ANY PARTS TO OPERATE PROPERLY, ARE
HEREBY EXCLUDED, INCLUDING BUT NOT LIMITED TO ANY DAMAGES RESULTING FROM LOSS
OF USE, INCONVENIENCE, LOSS OF TIME, COMMERCIAL LOSS OR ANY OTHER TYPE OF
DAMAGES, GENERAL OR SPECIFIC, FORESEEN OR UNFORESEEN, UNLESS APPLICABLE STATE
LAW PROVIDES OTHERWISE. ANY DAMAGES CAUSED BY OR ATTRIBUTED TO ANY ACT OF GOD
WHATSOEVER IS NOT COVERED BY THIS LIMITED WARRANTY.
DISCLAIMERS
THIS WARRANTY IS EXPRESSLY IN LIEU OF ALL OTHER EXPRESSED WARRANTIES AND
REPRESENTATIONS. CENTRAL PLAINS INDUSTRIES,LLC MAKES NO REPRESENTATION OR
WARRANTY OF ANY KIND, EXPRESSED OR IMPLIED, WITH RESPECT TO CENTRAL PLAINS
INDUSTRIES,LLC WHETHER AS TO MERCHANTABILITY,FITNESS FOR A PARTICULAR PURPOSE
OR ANY OTHER MATTER. NO ONE, INCLUDING AN AUTHORIZED CENTRAL PLAINS INDUSTRIES
INC. DEALER IS AUTHORIZED TO MAKE FURTHER OR ADDITIONAL WARRANTIES ON BEHALF OF
CENTRAL PLAINS INDUSTRIES,LLC .
ALL IMPLIED WARRANTIES OF MERCHANTABILITY AND FITNESS FOR INTENDED USE ARE
LIMITED TO WARRANTY PERIODS STATED ABOVE, UNLESS ANY APPLICABLE STATE LAW
PROVIDES OTHERWISE.
DEALER RESPONSIBILITIES
CENTRAL PLAINS INDUSTRIES,LLC Dealers are responsible for “dealer prep” which includes checking
all cosmetic features, safety equipment, and repairing all minor problems without charge to you. Your
Dealer is also responsible for submitting to the manufacturer any claim you wish to make under the terms
of this Limited Warranty.
REQUIRED WARRANTY CLAIM PROCEDURE
In order to validate this Limited Warranty, the original copy of this form, signed by the dealer and the
purchaser, must be postmarked to CENTRAL PLAINS INDUSTRIES,LLC no later than fifteen (15) days
following the purchase of your CENTRAL PLAINS INDUSTRIES,LLC Trailer. IF THIS SIGNED
WARRANTY IS NOT POSTMARKED BY THE FIFTEENTH DAY AFTER PURCHASE OF THE TRAILER,
ALL EXPRESS WARRANTIES SHALL BE NULL AND VOID.
Within five (5) days after discovering a problem with your CENTRAL PLAINS INDUSTRIES,LLC
TRAILER, notify your CENTRAL PLAINS INDUSTRIES,LLC dealer, or any other authorized CENTRAL
PLAINS INDUSTRIES,LLC dealer. Dealers are responsible for fixing minor problems without charge to
you.
If the dealer cannot repair the problem free of charge and you want to file a claim under this Warranty, the
dealer must send to CENTRAL PLAINS INDUSTRIES,LLC , a limited warranty claim form, together with
all required information, within ten (10) days of your discovery of the defect.
CENTRAL PLAINS INDUSTRIES,LLC will acknowledge such receipt of claim to the dealer. CENTRAL
PLAINS INDUSTRIES,LLC will respond as soon as possible, but no later than thirty (30) days after
receipt of the claim.
Any defective part(s) must be sent by prepaid freight to CENTRAL PLAINS INDUSTRIES,LLC in order to
qualify the claimant for replacement or reimbursement consideration under this Limited Warranty. ANY
DEFECTIVE PARTS MUST BE RETURNED TO CENTRAL PLAINS INDUSTRIES,LLC WITHIN 30
DAYS FROM DATE OF CLAIM TO QUALIFY FOR REIMBURSEMENT. CENTRAL PLAINS
INDUSTRIES,LLC will not reimburse any claimant for any adjustment or repair of your CENTRAL
PLAINS INDUSTRIES,LLC TRAILER without prior written approval from CENTRAL PLAINS
INDUSTRIES,LLC .
If you return your trailer for repair to the factory, we will warrant the repair or replacement parts for ninety
(90) days or the remainder of the Limited Warranty, whichever is longer, from the date of the repair. If
authorized repair must be done other than at the factory, CENTRAL PLAINS INDUSTRIES,LLC will not
warranty such repair work or replacement parts.
CENTRAL PLAINS INDUSTRIES,LLC reserves the right to not pay unreasonable costs for replacement
or repair of defects in HILLCREST trailers and may, at its discretion, establish a reasonable
reimbursement for any authorized work performed under the terms of this Limited Warranty.
CENTRAL PLAINS INDUSTRIES,LLC HERE MAKES NO OTHER EXPRESSED OR IMPLIED
WARRANTIES AND THERE ARE NO OTHER WARRANTIES, WHICH EXTEND BEYOND THE
DESCRIPTION ON THE FACE OF THIS LIMITED WARRANTY.
OWNER REFERENCE INFORMATION
Owner Name: ____________________________________________
Owner Address: __________________________________________
Owner Phone Number: ____________________________________
Dealer Purchased from: ___________________________________
Dealer Phone Number: ____________________________________
Sales Person: ___________________________________________
Model: ________________________________________________
VIN Number: __________________________________________
Purchase Date: _________________________________________
Tire Brand & Size: _______________________________________
This User’s Manual contains safety
information and instructions for your
.
You must read this manual before
loading fuel or towing your trailer.
You must follow all safety precautions
and instructions.
CENTRAL PLAINS ,LLC
.,32*,+,
$/1,,/
'0*/&/-,&-2,3
#'0*/&/-,&/.1/
"""%! %
2
GENERAL SAFETY
INFORMATION
SAFETY ALERT SYMBOLS AND SIGNAL
WORDS
This manual provides instructions for the operation and care of your CENTRAL PLAINS
INDUSTRIES,LLC Trailer. The instructions in this manual must be adhered to in order to ensure the
safety of persons and satisfactory lifespan of the trailer. Safety
precautions to protect against injury and property damage must be followed at all times.
An Owner’s Manual that provides general trailer information cannot cover all of the specific details
necessary for the proper combination of every trailer, tow vehicle and hitch. Therefore, you must read,
understand and follow the instructions given by the tow vehicle and trailer hitch manufacturers, as well as
the instructions in this manual.
Our trailers are built with components produced by various manufacturers. Some of these items have
separate instruction manuals. Where this manual indicates that you should read another manual, and you
do not have that manual, call 605-532-3829 for a free copy.
The safety information in this manual is denoted by the safety alert symbol: ^
The level of risk is indicated by the following signal words.
^ Danger
DANGER – Immediate hazards which WILL result in severe personal injury or death if the
warning is ignored.
^WARNING
^WARNING – Hazards or unsafe practices which COULD result in severe personal
injury or death if the warning is ignored.
^ Caution
CAUTION – Hazards or unsafe practices which could result in minor or moderate
injury if the warning is ignored.
^ Notice
NOTICE – Practices that could result in damage to the trailer or other property.
MAJOR HAZARDS
Loss of control of the trailer or trailer/tow vehicle combination can result in death or serious injury.
The most common causes for loss of control of the trailer are: Improper sizing the trailer for the tow
vehicle, or vice versa.
Excessive Speed: Driving too fast for the conditions. Failure to adjust driving behavior when towing a
trailer.
Overloading and/or improper weight distribution. Improper or miss-coupling of the trailer to the hitch.
Improper braking and steering under sway conditions. Not maintaining proper tire pressure.
Not keeping lug nuts tight.
Improper Sizing of the Trailer to the Tow Vehicle.
Trailers that weigh too much for the towing vehicle can cause stability problems, which can lead to death
or serious injury. Furthermore, the additional strain put on the engine and drive-train may lead to serious
tow vehicle maintenance problems. For these reasons the maximum towing capacity of your towing
vehicle should not be exceeded. The towing capacity of your tow vehicle, in terms of maximum Gross
Trailer Weight (GTW) and maximum Gross Combined Weight Rating (GCWR) can be found in the tow
vehicles Owner’s Manual.
^ Danger
Use of a tow vehicle with a towing capacity less than the Gross Vehicle Weight Rating of
the trailer can result in loss of control, and may lead to death or serious injury. Be sure your hitch and tow
vehicle are rated for the Gross Vehicle Weight Rating of your trailer.
DRIVING TOO FAST
With ideal road conditions, the maximum recommended speed for safely towing a trailer is
60 mph. If you drive too fast, the trailer is more likely to sway, thus increasing the possibility for
loss of control. Also your tires may overheat, thus increasing the possibility of a blowout.
^WARNING
Driving too fast for conditions can result inloss of control and cause death or serious
injury. Decrease your speed when going downhill or as road, weather, and lighting conditions deteriorate.
BEHAVIOR WHEN TOWING A TRAILER
When towing a trailer, you will have decreased acceleration, increased stopping distance, and
increased turning radius (which means you must make wider turns to keep from hitting curbs,
vehicles, and anything else that is on the inside corner). Furthermore the trailer will change the
handling characteristics of your towing vehicle, making it more sensitive to steering inputs and
more likely to be pushed around in windy conditions or when being passed by large vehicles.
In addition, you will need a longer distance to pass, due to slower acceleration and increased length.
With these caveats in mind:
• Be alert for slippery conditions. You are more likely to be affected by slippery road
surfaces when driving a tow vehicle with a trailer, than driving a tow vehicle without a
trailer.
• Anticipate the trailer “swaying.” Swaying can be caused by excessive steering, wind
gusts, roadway edges, or by the trailer reaction to the pressure wave created by passing trucks and
busses.
• When encountering trailer sway take your foot off the gas, and steer as little as possible in order to stay
on the road. Use small “trim-like” steering adjustments. Do not attempt to steer out of the sway; you’ll only
make it worse. Also do not apply the tow vehicle brakes to correct trailer swaying. On the other hand,
application of the trailer brakes alone will tend to straighten out the combination, especially when going
downhill.
• Check rearview mirrors frequently to observe the trailer and traffic.
• Use lower gear when driving down steep or long grades. Use the engine and transmission as a brake.
Do not ride the brakes, as they can overheat and become ineffective.
• Be aware of your trailer height, especially when approaching bridges, roofed areas and around trees.
TRAILER NOT PROPERLY COUPLED TO THE HITCH
It is critical that the trailer be securely coupled to the hitch ball, and that the safety chains and
emergency break-away brake cable are correctly attached. Uncoupling may result in death or serious
injury to you and to others.
^WARNINGWARNING
Improper rigging of the safety chains can result in loss of control of the trailer and tow
vehicle, leading to death or serious injury, if the trailer uncouples from the tow vehicle.
• Fasten chains to frame of tow vehicle. Do not fasten chains to any part of the hitch
unless the hitch has holes or loops specifically for that purpose.
• Cross chains underneath hitch and coupler with enough slack to permit turning and to
hold tongue up, if the trailer comes loose.
^WARNING
Proper selection and condition of the coupler and hitch are essential to safely towing your
trailer. A loss of coupling may result in death or serious injury.
• Be sure the maximum load rating of the hitch on the tow vehicle is equal to or
greater than the maximum load rating of the coupler on the trailer.
• Be sure the hitch ball size matches the coupler size
.
• Observe the hitch for wear, corrosion and cracks before coupling. Replace worn,
corroded or cracked hitch components before coupling the trailer to the tow
vehicle.
• Be sure the hitch components are tight before coupling the trailer to the tow vehicle.An
improperly coupled trailer can result in death or serious injury.
Do not move the trailer until:
• The coupler is secured and locked to hitch ball;
• The safety chains are secured to the tow vehicle; and
• The trailer jack(s) are fully retracted. Do not tow the trailer on the road until:
• Tires and wheels are checked;
• The trailer brakes are checked;
• The breakaway switch is connected to the tow vehicle;
• The load is secured to the trailer; and
• The trailer lights are connected and checked.
PROPER USE OF SAFETY CHAINS
If your trailer comes loose from the hitch for any reason, we have provided safety chains so that
control of the trailer can still be maintained.
PROPER CONNECTION OF BREAKAWAY BRAKE
If equipped with brakes your trailer will be equipped with a breakaway brake system that can
apply the brakes on your trailer if your trailer comes loose from the hitch ball for any reason.
You will have a separate set of instructions for the breakaway brake if your trailer is so equipped.
The breakaway brake system, including battery, must be in good condition and properly rigged to
be effective.
^WARNING
Lug nuts are prone to loosen after initial installation, which can lead to death or serious injury.
Check lug nuts for tightness on a new trailer or when wheel(s) have been remounted after the first
10, 25 and 50 miles of driving.
^WARNING
Improper lug nut torque can cause a wheel separating from the trailer, leading to death or serious
injury. Be sure lug nuts are tight before each tow.
IMPROPER LOADING
The total weight of the load you put in or on the trailer, plus the empty weight of the trailer itself,
must not exceed the trailer's Gross Vehicle Weight
Rating (GVWR). If you do not know the empty weight of the trailer plus the cargo weight, you
must weigh the loaded trailer at a commercial scale. In addition, you must distribute the load in
the trailer such that the load on any axle does not
exceed the Gross Axle Weight Rating (GAWR). If your trailer is equipped with a Tire & Loading
Information Placard, mounted next to the Certification / VIN label, the cargo capacity weight
stated on that placard is only a close estimate.
The GVWR and GAWR’s are listed on the Certification / VIN label mounted on the front left side
of the trailer.
^WARNINg
An overloaded trailer can result in loss of control of the trailer, leading to death or serious injury.
Do not exceed the trailer Gross Vehicle Weight Rating (GVWR) or an axle Gross
Axle Weight Rating (GAWR). Do not load a trailer so that the weight on any tire exceeds its
rating.
1.2.10. UNSAFE LOAD DISTRIBUTION
Improper front / rear load distribution can lead to poor trailer sway stability or poor tow vehicle
handling. Poor trailer sway stability results from tongue weights that are too low, and poor tow
vehicle stability results from tongue weights that are too high..
After loading, be sure to check that none of the axles are overloaded.
Tongue Weight as a Percentage of LoadedTrailer Weight:
Ball Hitch (or Bumper Hitch) 10–15% This is a general guideline and should be tailored to the
vehicle towing the trailer.
Uneven left / right load distribution can cause tire, wheel, axle or structural failure. Be sure your
trailer is evenly loaded left / right. Towing stability also depends on keeping the center of gravity
as low as possible.
^WARNING
Improper tongue weight (load distribution) can result in loss of control of the trailer, leading to
death or serious injury.
Make certain that tongue weight is within the allowable range.
Be sure to:
• Distribute the load front-to-rear to provide proper tongue weight.
• Distribute the load evenly, right and left.
• Keep the center of gravity low.
SHIFTING CARGO
If the door latch is equipped with a lock that will keep the door latch from opening.
^WARNING
If the side doors open, your cargo may be ejected onto the road, resulting in death or serious
injury to other drivers.
Always secure the door latch after closing.
. INAPPROPRIATE CARGO
Your trailer is designed for specific cargo and should only carry the cargo it is designed for.
^WARNING
Do not allow people to ride on top of the trailer,
The transport of people puts their lives at risk and may be illegal.
^WARNING
Do not transport flammable, explosive, poisonous or other dangerous materials in your trailer.
Exceptions:
• Fuel in the tanks of pump or generator that are being towed.
• Fuel stored in the tank of an on-board Generator or pump.
INOPERABLE BRAKES, LIGHTS OR MIRRORS:
Be sure that the electric brakes and all of the lights on your trailer are functioning properly before
towing your trailer. Electric brakes and lights on a trailer are controlled via a connection to the tow
vehicle, generally a multi-pin electrical connector.
Check the trailer tail lights by turning on your tow vehicle headlights. Check the trailer brake lights
by having someone step on the tow vehicle brake pedal while you look at trailer lights. Do the
same thing to check the turn signal lights.
If your trailer has electric brakes, your tow vehicle will have an electric brake controller that sends
power to the trailer brakes. Before towing the trailer on the road, you must operate the brake
controller while trying to pull the trailer in order to confirm that the electric brakes operate.
While towing the trailer at less than 5 mph, manually operate the electric brake controller in the
tow vehicle cab. You should feel the operation of the trailer brakes.
.
^WARNING
Improper electrical connection between the tow vehicle and the trailer will result in inoperable
lights and electric brakes, and can lead to collision.
Before each tow:
• Check that the taillights, brake lights and turn signals work.
• Check that the electric brakes work by operating the brake controller inside the tow vehicle.
Standard mirrors usually do not provide adequate visibility for viewing traffic to the sides and rear
a towed trailer. You must provide mirrors that allow you to safely observe approaching traffic.
HAZARDS FROM MODIFYING YOUR TRAILER
Essential safety items can be damaged by altering your trailer. Even simply driving a nail or screw
to hang something can damage an electrical circuit,
Before making any alteration to your trailer, contact your dealer and describe the alteration you
are contemplating.
Alteration of the trailer structure or modification of mechanical, electrical, plumbing or other
systems on your trailer must be performed only by qualified technicians who are familiar with the
system as installed on your trailer
TRAILER TOWING GUIDE
Driving a vehicle with a trailer in tow is vastly different from driving the same vehicle without a
trailer in tow. Acceleration, maneuverability and braking are all diminished with a trailer in tow. It
takes longer to get up to speed; you need more room to turn and pass, and more distance to stop
when towing a trailer. You will need to spend time adjusting to the different feel and
maneuverability of the tow vehicle with a loaded trailer. Because of the significant differences in
all aspects of maneuverability when towing a trailer, the hazards and risks of injury are also much
greater than when driving without a trailer. You are responsible for keeping your vehicle and
trailer in control, and for all the damage that is caused if you lose control of your vehicle and
trailer.
As you did when learning to drive an automobile, find an open area with little or no traffic for your
first practice tailoring. Of course, before you start towing the trailer, you must follow all of the
instructions for inspection, testing, loading and coupling. Also, before you start towing, adjust the
mirrors so you can see the trailer as well as the area to the rear of it.
Drive slowly at first, 5 mph or so, and turn the wheel to get the feel of how the tow vehicle and
trailer combination responds. Next, make some right and left hand turns. Watch in your side
mirrors to see how the trailer follows the tow vehicle. Turning with a trailer attached requires more
room.
Stop the rig a few times from speeds no greater than 10 mph. If your trailer is equipped with
brakes, try using different combinations of trailer/electric brake and tow vehicle brake. Note the
effect that the trailer brakes have when they are the only brakes used. When properly adjusted,
The trailer brakes will come on just before the tow vehicle brakes.
It will take practice to learn how to back up a tow vehicle with a trailer attached. Take it slow.
Before backing up, get out of the tow vehicle and look behind the trailer to make sure that there
are no obstacles. Some drivers place their hands at the bottom of the steering wheel, and while
the tow vehicle is in reverse, “think” of the hands as being on the top of the wheel. When the
hands move to the right (counter-clockwise, as you would do to turn the tow vehicle to the left
when moving forward), the rear of the trailer moves to the right.
Conversely, rotating the steering wheel clockwise with your hands at the bottom of the wheel will
move the rear of the trailer to the left, while backing up. If you are towing a bumper hitch rig, be
careful not to allow the trailer to turn too much, because it will hit the rear of the tow vehicle. To
straighten the rig, either pull forward, or turn the steering wheel in the opposite direction
REPORTING SAFETY DEFECTS
If you believe that your vehicle has a defect that could cause a crash or could cause injury or
death, you should immediately contact Hillcrest Manufacturing,LLC.
SAFE TRAILER TOWING GUIDELINES
• Before towing, check coupling, safety chain, safety brake, tires, wheels and lights.
• Check the lug nuts or bolts for tightness.
• Check coupler tightness after towing 50 miles.
• Adjust the brake controller to engage the trailer brakes before the tow vehicle brakes. Follow the
instructions given with the brake controller manufacturer’s literature.
• Use your mirrors to verify that you have room to change lanes or pull into traffic.
• Use your turn signals well in advance.
• Allow plenty of stopping space for your trailer and tow vehicle.
• Do not drive so fast that the trailer begins to sway due to speed. Generally never drive faster
than 60 m.p.h.
• Allow plenty of room for passing. A rule of thumb is that the passing distance with a trailer is 4
times the passing distance without a trailer.
• Shift your automatic transmission into a lower gear for city driving.
• Use lower gears for climbing and descending grades.
• Do not ride the brakes while descending grades, they may get so hot that they stop working.
Then you will potentially have a runaway tow vehicle and trailer.
• To conserve fuel, don't use full throttle to climb a hill. Instead, build speed on the approach.
• Slow down for bumps in the road. Take your foot off the brake when crossing the bump.
• Do not brake while in a curve unless absolutely necessary. Instead, slow down before you enter
the curve.
• Do not apply the tow vehicle brakes to correct extreme trailer swaying. Instead, lightly apply the
trailer brakes with the hand controller.
• Make regular stops, about once each hour.
Confirm that the coupler is secure to the hitch and is locked,
Electrical connectors are made,
There is appropriate slack in the safety chains,
There is appropriate slack in the breakaway switch pull pin cable, The tires are not visibly low on
pressure, and The cargo is secure and in good condition
TIRE SAFETY INFORMATION
This portion of the User’s Manual contains tire safety information as required by 49 CFR 575.6.;
• Tire labeling, including a description and explanation of each marking on the tires,and
information about the DOT Tire Identification Number (TIN).
• Recommended tire inflation pressure, including a description and explanation of:
!
" • Tire Care, including maintenance and safety practices.
• Vehicle load limits, including a description and explanation of the following items:
#$
STEPS FOR DETERMINING CORRECT LOAD LIMIT – TRAILER
TRAILERS 10,000 POUNDS GVWR OR LESS
1. Locate the statement, “The weight of cargo should never exceed XXX kg or XXX lbs.,” on your
vehicle’s placard..
2. This figure equals the available amount of cargo and accessory load capacity.
3. Determine the weight of cargo being loaded on the vehicle. That weight may not safely exceed
the available cargo load capacity.
STEPS FOR DETERMINING CORRECT LOAD LIMIT – TOW VEHICLE
1. Locate the statement, “The combined weight of occupants and cargo should never exceed XXX lbs.,”
on your vehicle’s placard.
2. Determine the combined weight of the driver and passengers who will be riding in your vehicle.
3. Subtract the combined weight of the driver and passengers from XXX kilograms or XXX pounds.
4. The resulting figure equals the available amount of cargo and luggage capacity. For example, if the
“XXX” amount equals 1400 lbs. and there will be five 150 lb. passengers in your vehicle, the amount of
available cargo and luggage capacity is 650 lbs. (1400-750 (5 x 150) = 650 lbs.).
5. Determine the combined weight of luggage and cargo being loaded on the vehicle. That weight may
not safely exceed the available cargo and luggage capacity calculated in Step # 4.
6. If your vehicle will be towing a trailer, load from your trailer will be transferred to your vehicle. Consult
the tow vehicle’s manual to determine how this weight transfer reduces the available cargo and luggage
capacity of your vehicle.
2.4. TIRE SAFETY - EVERYTHING RIDES ON IT
The National Traffic Safety Administration
(NHTSA) has published a brochure (DOT HS 809 361) that discusses all aspects of Tire Safety, as
required by CFR 575.6. This brochure is reproduced in part below. It can be obtained and downloaded
from NHTSA, free of charge
Vehicle Identification Number (VIN)
Refer to the identification decal on your unit. Important information, such as the unit Vehicle
Identification Number (V.I.N.), gross vehicle
weight, tire size and tire pressure for your trailer will be found on this decal. Record the
information from this decal in the manual, so it is available if the decal is lost or damaged. When
ordering parts or requesting technical service information, you may be asked to specify this
information.
CENTRAL PLAINS INDUSTRIES, LLC cannot anticipate every possible circumstance that
might involve a potential hazard. The warnings in this manual and on the product are,
therefore, not all-inclusive. If a method of operation not specifically recommended by us
is used, you must satisfy yourself that it is safe for you and for others. You should also
ensure that the fuel trailer will not be damaged or be made unsafe by the methods that
you choose.
The information, specifications, and illustrations in this manual are based on the information that
was available at the time this material was written and can change at any time.
General Operating Safety
To prevent personal injury or even death, be sure you read and understand all of the
instructions in this manual and other related OEM equipment manuals! This diesel fuel trailer was
designed for a specific application; DO NOT modify or use this fuel
trailer for any application other than which it was designed. Fuel trailers operated improperly or
by untrained personnel can be dangerous! Read the manuals and familiarize yourself with the
location and proper use of all meters, pumps, and controls. Inexperienced operators should
receive instruction from someone familiar with the equipment before being allowed to operate or
set up the diesel fuel trailer. Do not transport or pump flammable or explosive fluids such as
gasoline or kerosene. Do not use in explosive atmospheres. The fuel trailer’s pump should be
used only with liquids that are compatible with the pump. Failure to follow this warning can result
in personal injury and/or property damage and will void the product warranty.
Replace any missing or hard-to-read decals and use care when washing or cleaning the fuel
trailer. Decal placement and part numbers can be found in the parts manual.
Keep open flames away from the fuel trailer and do not smoke around the fuel trailer.
SPECIFICTIONS:
Fuel Hose and Nozzle
Hose length (without reel) . . . . . . . . . . . .20’
Hose length (with optional reel) . . .35’ or 50’
Optional Hose Reel . . . . . . Auto Retracting
Fuel Nozzle* . . . . . . . . . .Auto Trip (shutoff)
*Lockable on models without tool box.
Digital Fuel Pump Meter
Inline Meter with Fuel Nozzle
TTL1 displays fuel pumped during refueling
TTL2 Displays total fuel pumped since last reset
Torsion Axles
Lubrication . . . EZ Lube Hubs
Load rating . . 3,500 lbs Per Axle (500)
Load rating . . .6,000 lbs Per Axle (750)
Load rating . . 7,000 lbs Per Axle (1000)
Brakes . . . . . .Electric
Emergency braking . . . Breakaway System
Wheels and Rims..Six-Bolt, Steel Wheels (Standard)
Engine Oil Change
Initial oil change . . . . . . . . . . . . . . .20 hours
Scheduled oil change . . . . .every 100 hours
Other Specifications
. One Fuel Level Sight Glass
.1/2” drain plug
. 4” Vented Fill Cap & Tank Air Relief Vent
. Heavy-Duty Tow Chains and Hooks
.Adjustable Five-Position Vertical Hitch
.2-5/16” Ball Hitch
.Four Safety Placards
Specifications are subject to change without notice.
Installing 1993 Diesel Fuel Placards
Before transporting fuel, make sure Diesel Fuel Placards are properly displayed on all
four sides of the trailer (Federal Regulation # 49 CFR 172.516). It is the responsibility of the end
user (owner) to properly install and display all required placards.
All diesel fuel trailers are shipped with 1993 Diesel Fuel Placards, however they are not installed
at the factory. Federal regulation #49 CFR 172.516 requires that Diesel Fuel Placards be
installed. It is the responsibility of the end user (owner) to properly install and display all required
placards.
Before transporting fuel for the first time make sure the decals are installed.
The placement (location) of the placards is the same on all models.
NOTE: Do not install the placards prior to filling the fuel tank with diesel fuel. A new trailer,
never filled with fuel, does not require the placards in order to be transported.
Front — Center the decal and place it under the “Refueler” decal.
Rear — Center the decal and place it on top of the reflective decal.
Right-side — Locate the decal 1 inch from the rear of the trailer and 13 inches down from the
top of the trailer.
Left-side — Locate the decal 1 inch from the rear of the trailer and 13 inches down from the top
of the trailer.
Fire Extinguisher
It is recommended that the end user install a suitable fire extinguisher on the diesel fuel trailer.
The extinguisher bracket should be mounted in an accessible location, such as the front step
plate on trailers without optional tool boxes, or if equipped with the optional tool box, on the
inside of the tool box door. Drill holes and use rust resistant bolts, lock washers, and nuts (do
not use screws) to install the mounting bracket. DO NOT install the bracket and extinguisher on
the diesel fuel trailer tank. Follow the manufacturer’s instructions to check and maintain the fire
extinguisher charge on a regular basis.
OPERATION
Make sure the fuel valve on the bottom of the tank (under the front of the trailer) is in the OFF
position (vertical to the hose).
Remove the trailer's fill cap and fill the trailer with diesel fuel.
NOTE: To fill the trailer to maximum capacity, make sure the trailer is on level ground before
filling with fuel.
Replace and securely tighten the trailer fuel cap.
Install the 1943 Diesel Fuel Placards if the trailer will be towed with Diesel fuel.
Position the fuel trailer next to the equipment being filled.
Start the pump and let it idle in 1/3 throttle position to allow proper engine warm up for a couple
minutes and then open to full throttle position.
For a 12 Volt system with an integrated battery, simply turn the pump's ON/OFF handle to the
ON position.
Remove the fuel nozzle from its holder. Pull out enough hose to easily reach the fill opening on
the equipment.
IMPORTANT NOTICE
To avoid fuel contamination and possible nozzle malfunction, keep the fuel nozzle clean. Always
store the nozzle in the nozzle holder when not in use.
NOTE: When the pump is running, the fuel hose is pressurized and squeezing the handle on the
fuel nozzle will begin pumping diesel fuel.
If using the optional electronic fuel meter, press the DISPLAY button on the face of the meter.
NOTE: The fuel meter will turn on automatically when it senses fuel flow. It can be manually
turned on by pressing the DISPLAY button (“DISPLAY”).
The meter will show the total from its last use. The meter turns off automatically if not used for
approximately one minute.
IMPORTANT NOTICE
To avoid over filling the receiving tank, always keep the fuel nozzle clean and do not leave the
fuel nozzle unattended during fueling. Be prepared to manually shut off fuel flow at the nozzle, if
necessary.
Place the fuel nozzle into the receiving tank and squeeze the handle to start fuel flow. When the
tank is full, the nozzle will automatically shut off the flow. If an electronic fuel meter is attached
to the hose, a specific amount of fuel can be added.
NOTE: When filling equipment from the fuel trailer never allow the pump to run dry. If all the fuel
in the trailer is used, the priming chamber of the pump will require fuel to be added before using
the pump again.
When fueling is complete, rewind the fuel hose on the fuel reel or on the fuel hook.
Place the nozzle back into the nozzle holder.
Turn the pump OFF.
If equipped with optional tool box, close and latch the doors.
Make sure the fuel valve on the bottom of the tank (under the front of the trailer) is in the OFF
position (vertical to the hose).
Towing Speed
Under most circumstances the fuel trailer is capable of being towed at the posted legal speed
limit (not to exceed 70 mph). However, the following towing speeds are recommended:
With the tank empty, improved road: 55 mph
With the tank full, improved road: 45 mph
With the tank 1/2 full, improved road: 45 mph
Any towing on unimproved roads: 20 mph or less.
Diesel Fuel Filter Maintenance
IMPORTANT NOTICE
If equipped, shut off fuel valve on the bottom of the tank, and release line pressure prior to
making any repairs or adjustments to the reel. To prevent fuel spills, units without optional tool
box must be empty before replacing the diesel fuel filter.
Replace the inline diesel fuel filters based on gallons of diesel fuel pumped.
• Replace the factory filter after the first 2,000 Gallons are pumped or at six months, whichever
comes first.
• After the first filter change, then replace the fuel filters after every 10,000 Gallons are pumped
or every six months, whichever comes first.
1. Shut off fuel valve on the bottom of the tank
(if equipped), open the nozzle to release line pressure, and drain the delivery hose into a
suitable container.
IMPORTANT NOTICE
If the trailer is not equipped with a shut off valve, make sure the diesel fuel trailer is empty
before changing the diesel fuel filter.
2. If not equipped with a shut off valve, make sure the diesel fuel trailer is empty, open the
nozzle to release line pressure and drain the delivery hose into a suitable container.
3. Place a suitable drain pan under the fuel filter to catch any fuel.
4. Use a filter wrench to loosen the fuel filter in a counterclockwise direction. Remove the old
fuel filter and drain it into the catch pan.
5. Lubricate the new filter gasket with clean diesel fuel and install the filter (turn clockwise) hand
tight.
6. Dispose of the old fuel filter according to all local, state, and Federal mandates and
regulations.
7. The first time fuel is dispensed, check for leaks at the fuel filter.
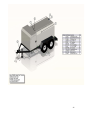
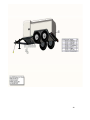
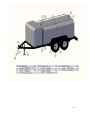
PARTS
MANUAL
OPTIONAL DL PACKAGE
Options include:
9hp air compressor
13hp air compressor/generator combination, 15.7 CFM
Generator upgrade to 110V and 220V
Electric start
3/8 X 50’ or 100’ air hose reel
Air hose/electric reel combination
100 gallon DEF tank
Refer to the OEM owner manuals for all information regarding the components not
manufactured by CENTRAL PLAINS INDUSTRIES.LLC
FOLLOWING IS A QUICK REFERENCE ONLY TO SAFETY AND OPERATION OF OPTIONAL DL
MODEL.
THE OEM OWNERS MANUAL SHOULD BE REFERRED TO FOR ALL INFORMATION REGARDING
COMPONENTS NOT MANUFACTURED BY CENTRAL PLAINS INDUSTRIES, LLC
""#"#'!#"'*'$"#""'
'$! ! #" $) !# # # ##!
!"$!'*
& ! !$#" " !#
!#"*
"&!+)!+"$"&##
"#'+!# "'* #" # "# "!$"
(!"*
!"#'""!#!"
(!"*!!$#"!"#"#'
""*""####"#'"""#"
$*
!$' ! "#'
""" #" $ "#' "" '$! *
"#' "" #* "" !
"#' ""* "$!
& $##"
!! !#" $ # $!!#
"#' ""* #
"#' "" ! % !
'$!!*
-,
-
$& %!&%!!#$+(*#!!" ( !($+' %$+!#!!#$,
%)&$%! % $#! ! !)-"!$! !&$$%% *!&,!&
$!#$%$$,
'#&$%&% $ #!#%*. $$!$-&%!# &'$ # )'#*"&*-
* &&$%$&%,##%%* & %$ #$# )-'* &0%$)&$%&$,
* &*$%)! $% # )-
* &$%#%% $,++*, #((&$%&%,%% #$#-
-# )
# %&%#!*% &!%% %-
* &)!#$# &$$*!% $,%%%% %*- #$%%%# )
! $ $$&$!%-* &)!#$*!% $( #$,'$ %#!#%%% %#
(%$$% #.%#%&-
!#%%&%)! $'% $!#,# &$%%#$ #(#'%% $ %$&%
% ##*(*)&$%&$-)&$%&$ &$$#!&$ &#*!#%,
&$ % &% #$, & $, #$, $%$,#($!$, %# $ #!#%*.
$#$,'(%'%% -! #$( ($ #&$$( %!#'%# )&.
&!% -
(%$%#&% $%% (%* &#&%- %%&% &% #$(*# #$,( ($,'%$%%
& (%# )$% #$-
#&&% &% #$(*# #%$-
#& &% $ $, #$, $$, # %# $. $ $!$- $ $!$ %#! ! $ &$ $$
* &#& # ! #$( ($-
* &$%#%% $,++*, #((&$%&%,$&% %#$#- % #- &*
'# )! $ -
$%%%#*. !#%# )#$ #!&.# )#$(%%%#*.&!* &# ,
# % % &%&##0$ $%% $%#&% $- # ) #$ $ & #% % %
#"&#%$ %%$%$%*$%#$ ## )#$-/3245,6.76, #2,13,01.,
$%* &## )##"&%*#!%%#$-
44
# ' "'# ! !#" #)"!%#")
%'! #!%'"$"!!"'!#%'#! ! )
!!&" '"!$ !&")
! $!"' #"! "!#)#!"'" !)"" !"$!#"(#!#)
"$ "#"($ "#"&)
""' #)#""("(! !%')
#'#'!# !" ")
%'!#" %""'$"""$ #!#!)
!" # '# #"")!( ( !(" #!!#
!" #"!$ ! '*(*!!!"'" !)"!" " #*
# (!#!"# !%" " )"#!! "" !"
! '($!$ ! "#" $" #"'"
+!"" ' ! " !%"!")
,-
! #" #!" #) " !# #" %( # $! " !"
!!" " # "" #" !" !)
!#"!#%" #" '# "")%'!"" #" "
#""&" #!# !!" #""!"- #!" #"!-" "
!""!#)
#"!""!# " !"" ')"#" '"#! %"
"!) "" !"# ( " " ' !# # ( '* !" #"# ) '
'# !%" "#"#")
#! "'""#") (#!$'#"'(#" * "&"! ""! "+%""!
!,"!"#""!#""!)"""" ! #"! " !"""#!" !(!' #)
" ' " % " #! % ' # " #" " % #""( " % ! -
-) ! ! &" ' #! " "" !"! " #" ! " #""' % ! ! ! $ ' " ! #""' " ! ) " ! '!!! ! " #"* #! #"
""$!)
'##!"""#"""#!% "% !($#" !""
"#" %"" !) (%"'# #""''"!
"!" "% " ! !%")
% #"!( "'!"!"" '#"! "" !#" $#% ""
) $ ' " " #" $ ) ! ' !#" $ " !" !!"#""!(!!'"#"# )
./
! !% % ! % $! )!(#% ! # " "' ! ! '
! (
% ( ! 0. #% % ( * % !(+
" ! # ! (
# #! !( !
%" (
! ( ! " #% ( " % ! " (
! %! !
"' !' # ' ( # ! & "(
! ! ! % "' ! " "
!"( ! "#
% (
!!%%!% ! ," ' ! ! " ( " ! ( ! /0
#%%# ! #! " (
12
""!
"$"
$
# "$
# $ " " $ " $
""!
"#
$!!
$
!#
$
# "$
%&
"
$
"
!#!
$
" $
"
"
!
$
$
$ " % & $ !
$ "
#
!
$
" # # # #
#$
$
"
$ " "
"$
" $
"!
$
$
"
" " " !
$
" " " #
$
#
#
! #
#
#
#
#
# #
"
!#
#
#
$##
$#
%&
- "% $ "# %"), " $# "$"3# % $)
"%#.%#$# "%$,$'# "%$##%
')#'-
1. #"
-#%")"$%#.
&"
'""#$#$ "$$#%$+$)"$0
'$'$)%".$ "$$%$'$%
"%"$%""%#.''$#$ $
%$.$"%)"'$$"#.
2. #$-#"" ".$ "$$
%$'$%$"$".$ "$$%$""#&
&"$.')# "$$%$#$,#%"
#$$ "&$$%$".'$
#$"%$##$$#%.
3. #$"$$%$,%#"#$"$"" ,#%"$$
$# #$$$)$ "$"3#"".
#%"$#'$$" '"$##$44 #$
" %$$$%$.
4. $ "$$%$")$"$)"'"
'$""#"$"##$$%$$"*"$$
"$".$ "$'$#%"#,""#'.
5. ')##%"$$$%$##%"$#$$$$
#"#$"%,"'""#.
6. &$$$$(%#$,%""
)"1#2.
7. ""$$ "$#.
8. ##$$" #%#%$,$%#$
"%$"% " ")"%" $.#
#'&7 " %#%#$ %$
($#"#$"" $#'$7#."
"$)$"$,#%"$#" ".
9. '"%#$#!% $# #.
# #,'$%$#%$"#"&$$,$
"%###.%###%&"$#
$)( ##/"# )($.
65. #($"%$'$$#%$.#%$#&)
# " "$$!%##%%#.
85
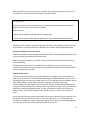
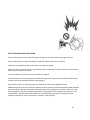
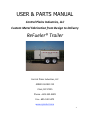
WEAR PROTECTIVE CLOTHING
Wear close fitting clothing and safety equipment
appropriate to the job.
Wear a suitable hearing protective device such as
earmuffs or earplugs to protect against objectionable or
uncomfortable loud noises.
Operating equipment safely requires the full attention of
the operator. Do not wear radio or music headphones while
operating machine.
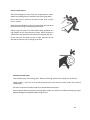
PREPARE FOR EMERGENCIES
Keep a first aid kit and fire extinguisher handy.
Keep emergency numbers for doctors, ambulance service, hospital and fire department near your telephone.
Be prepared if a fire starts.
INSPECT UNIT
Be sure all covers, guards and shields are tight and in place.
Locate all operating controls and safety labels.
Inspect power cord for damage before using. There is a hazard of electrical shock from crushing, cutting or heat damage.
SERVICE UNIT SAFELY
Before servicing the unit, disconnect all equipment and battery (if equipped) and allow unit to cool down.
Service unit in a clean dry flat area.
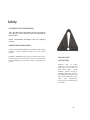
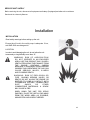
Installation
INSTALLATION
Read safety warnings before setting-up the unit.
Ensure the oil level in the unit's pump is adequate. If low,
add SAE-30W non-detergent oil.
LOCATION:
In order to avoid damaging the unit, do not incline the unit
transverselyor longitudinally more than 10°.
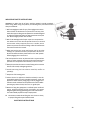
WARNING: RISK OF ASPHYXIATION!
DO NOT OPERATE IN AN ENCLOSED
AREA. USE THIS PRODUCT ONLY IN WELL
VENTILATED AREAS! THE EXHAUST FROM
THE
ENGINE
CONTAINS
CARBON
MONOXIDE, A POISONOUS, ODORLESS AND
INVISIBLE GAS. BREATHING THE GAS CAN
CAUSE SERIOUS INJURY, ILLNESS
AND POSSIBLE DEATH.
WARNING: RISK OF EXPLOSION OR
F I R E CAUSING SERIOUS INJURY OR
DEATH! DO NOT ALLOW THE ENGINE OR
MUFFLER TO COME IN CONTACT WITH
FLAMMABLE VAPORS, COMBUSTIBLE
DUST,
GASES
OR
OTHER
COMBUSTIBLE MATERIALS. A SPARK
MAY CAUSE A FIRE.
WHEN USING THE UNIT FOR SPRAY
PAINTING, PLACE THE UNIT AS FAR AWAY
FROM THE WORK AREA AS POSSIBLE,
USING EXTRA AIR HOSES IF NEEDED.
Place unit at least 12 inches away from obstacles that may prevent proper ventilation. Do not place unit
in an area:
- where there is evidence of oil or gas leaks.
- where flammable gas vapors or materials may be
present.
- where air temperatures fall below 32°F or exceed 104°F.
- where extremely dirty air or water could be drawn into the unit.
! #"#!" #+"!##" %) # $!"!" !!" " # ""
#" !" !+
! % #" " #!"%'!#!"""#""!#" #!# + #
"!#%"08!(% +""" " #% "%"!" %! !! %""""
! %#'+""" "% !# '"!#" #!# +
"" "!!$ "%'!%"!"! #!# +&!$%#!" "%"
%'!% #!# '!"!+
"# #%" """%"" " "!"32"#!! #!# +!
#$)8"" '#!!" #!# +!#5,6" !( "#" !# #!" !$+!" !#!"!#"!"7,8" #! !#!"!#
"!"3,4" !"!" #+ $" ""8"+ ""!#" !!"6"%)# '" " +" "!! " "!#")#!" ' #
'#!" % /#!#"/+
"! "*
1.
2.
!" $!%"5 % !+
!&"! %"5 "5 #""!"!"!# "#"'" #
"" "#""+
--
!" ' "" )!"" #"! "" #!"!
%+
*
"!#"!#! !"'! $)"#!"$" ! !%""%"#""'% ! $"#"+" ! !%""
' $"!"#""'% ""#")#"! $"!"#" #"""#""''.!!+!
!"" """! $%'% +
65
!
THIS PAGE
INTENTIONALLY LEFT
BLANK