Download User manual
Transcript
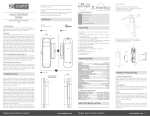
User manual Plugin switch 2000 W ZWavereceiver. Control lighting and other electronic equipment up to 2000 W (resistive load). The device is designed with very thin edges, making it possible to use two devices in most electical outlets. The device acts as a repeater for the ZWave network. Specification Maximum load: Range: Operating temperature: Frequency: 10A / 2000 W (resistive load) Up to 30 meters indoor 0 40°C 868.42 MHz (EU) Terminology Add Remove The process of including a node into the ZWave network. The process of excluding a node from the ZWave network. Installation Insert the device into the electrical outlet where it’s supposed to operate. Make sure that the product you are connecting does not draw more than 2000 Watts. Test that it’s possible to control the device manually by pressing the button. Add device This device can be included and operated in any ZWave network with other ZWave certified devices from other manufacturers and/or other applications. All nonbattery operated nodes within the network will act as repeaters regardless of vendor to increase reliability of the network. When the device is not added to any ZWave network, the LED will flash red slowly. If the device already is added to a ZWave network, follow the remove device process before adding it to your network. Otherwise adding this device will fail. Automatically add device to network When the device is inserted into an electrical outlet it’s in automatical add mode for four minutes (Network Wide Inclusion, NWI). This means that the device is added automatically when the ZWave controller enters add mode. Manually add device to network Start the add mode on the ZWave controller. Press the button on the device three times fast. The device will now be added into the ZWave network. Remove device Start the exclusion mode on the ZWave controller. Press the button on the device three times fast. The device will now be removed from the ZWave network. Reset the device Method 1 Remove the device from the ZWave network. This will reset the device to factory defaults. Method 2: Reset the device by: 1. Press and hold the button until the LED starts flashing white (approx. 6 seconds). 2. Press the button once more, short. The device will now reset to factory defaults. The LED will now flash red, indicating that it’s no longer added in any ZWave network. This procedure is called ‘Device Reset Locally’ and it should only be used when the primary controller is missing or inoperable. Operating the device The plugin switch can be operated by the button on the product or wireless through the ZWave network. A click on the button toggles the switch on or off. Operation by the button can be disabled using ‘Local protection’, described later in this manual. LED-indicator Please note that the configuration parameter 3, ‘LED Indicator’ might has been set to 0 or a very low value, making the LED light up very weak or not at all. Not in network Flashing red On Steady green Off Steady purple On (count down timer active) Flashing green Protected by sequence Flashing yellow (when button is pressed) No local operation possible Flashing red (when button is pressed) No RF control Flashing red (when controlled from ZWave network) Associations Association group 1 - Lifeline - Plug status - Max 1 node The plug will send it's status to the node in this group whenever the status of the plug changes. Lifeline is normally used to send the plug status to the main controller / gateway. Association group 2 - Control other devices - Max 10 nodes The plug will send Basic Set control signals to the nodes in this group whenever the status of the plug changes. This will work like a master/slave solution. Local protection It’s possible to change the behaviour of the button by changing local protection. It’s only possible to use local protection if it’s supported by the gateway/controller. Possible settings: Unprotected toggle the state by pressing the button once. Protected by sequence toggle the state by pressing the button three times. No local operation possible not possible to control the device using the button. RF protection It’s possible to disable the possibility to control the device from the ZWave network by changing RF protection. It’s only possible to use RF protection if it’s supported by the gateway/controller. Possible settings: Unprotected Possible to control the device from the ZWave network No RF control All commands sent to the device is ignored No RF response at all The device will not even reply to status requests. Configurations By changing configurations, you are able to change various settings in the device. This can be done from the ZWave gateway/controller, if supported. These settings are available in this device: Parameter no 1 - Countdown timer Number of minutes before it autoshuts down. Default value: 0 (disabled) Size: 1 byte Possible values: 0254 Unit: minutes Parameter no 2 - Remember device status after power failure. Define how the plug will react after the power supply is back on. Default value: 1 (remember status) Size: 1 byte Possible values: 0: Always off, 1: Remember status, 2: Always on. Parameter no 3 - LED indicator Set the intensity of the LED indicator Default value: 100 Size: 1 byte Possible values: 0100 Node Information Frame The ‘Node Information Frame’ contains information about the device type and the technical capabilities. The inclusion and exclusion of the device is confirmed by sending out a Node Information Frame. Beside this it may be needed for certain network operations to send out a Node Information Frame. Tripple click the button on the device to send a Node Information Frame.


