1
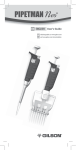
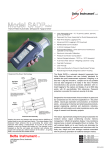
Premium Pipetting Comfort! IMPORTANT NOTICE! This pipette can be only lubricated with a high quality lubricant selected and approved by Gilson. This lubricant is available under the reference: 5440011070. The use of other type of lubricant cancels the warranty of this pipette. Contents Page 1 - INTRODUCTION 2 2 - 3 Parts Check List 3 - DESCRIPTION 3 4 - SETTING THE VOLUME 4 5 - Pipetting 4 6 - general guidelineS for good pipetting 7 7 - accessories 8 8 - GLP features 9 9 - troubleshooting 9 10 - Leak test 11 11 - Maintenance 12 12 - Cleaning anD decontamination 15 13 - specifications 18 14 -SPARE PARTS 20 EC DECLARATION OF CONFORMITY 22 1 - Introduction PIPETMAN G is a fully adjustable air displacement pipette and is used with disposable tips. To answer the current needs of our loyal users of ours pipettes, and still being conform to Gilson brand qualities, three improvements have been added to our mechanical series: pipetting and purge forces dramatically decreased*, large volumes, 5 mL and 10 mL very comfortable, you have the choice for an ejector plastic or a stainless steel ejector. * Implementation of new features to improve dramatically pipetting comfort has no impact on the legendary robustness, accuracy and precision of Pipetman. Eight single channel models cover a volume range from 0.2 µL to 10 mL. 2 Decreased pipetting forces are due to the new designed piston assembly including the use of a very high quality of lubricant. The use of other lubricant cancels the warranty of this pipette. This lubricant is available under the reference: 5440011070. Please contact your Gilson distributor. 2 - Parts Check List Just take a moment to verify that the following items are present: Pipetman G, User's Guide, Safety bag, Certificate of conformity (including bar-code sticker). 3 - Description Color-coded push-button Please refer to the following chapters for a full description of the different parts and functions of the pipette. Tip-ejector button Thumbwheel Blue ring Handle Connecting nut Tip-holder Tip-ejector PIPETMAN Diamond® tip 3 4 - Setting the Volume The volume of liquid to be aspirated is set using the volumeter. The dials are colored either black or red to indicate the position of the decimal point, depending on the model (see examples). Model Color of volumeter numbers Black Red Increment P2G µL 0.01 µL P10G to P20G µL 0.1 µL P100G-P200G µL - P1000G 0.01 mL mL P5000G 0.01 mL mL P10mlG mL 0.01 mL 0.002 µL 0.02 µL 0.2 µL 0.002 mL 0.002 mL 0.02 mL The volume is set by turning the thumbwheel or the push-button. The push-button makes it easier and quicker to set volumes, especially when wearing gloves. The thumbwheel may be turned using only one hand to slowly reach the required setting. P2G P10G P20G 1 2 5 0 7 5 1 2 5 1.25 µL 7.5 µL 12.5 µL P100G P200G P1000G 0 7 5 1 2 5 75 µL 0 7 5 125 µL 0.75 mL P5000G P10mlG 1 2 5 0 7 5 1.25 mL 7.5 mL Push-button Thumbwheeel To obtain maximum accuracy when setting the volume, proceed as follows: when decreasing the volume setting, slowly reach the required setting, making sure not to overshoot the mark. when increasing the volume setting, pass the required value by 1/3 of a turn and then slowly decrease to reach the volume, making sure not to overshoot the mark. 5 - Pipetting For optimum performance, use of PIPETMAN DIAMOND Tips with your PIPETMAN G is strongly recommended. These tips, made from pure polypropylene have the 4 Gilson logo engraved on their collar, ensuring that you have a genuine Gilson product. Plastic tips are for a single application – they must not be cleaned for reuse. PIPETMAN G can also be used with the main tip brands. Fitting the tips To fit a new PIPETMAN DIAMOND Tip, push the tip-holder into the tip using a slight twisting motion to ensure a firm, airtight seal. For the P2G and P10G models equipped with stainless steel tip-ejector, A dual-position adapter (plastic) is required to fit DL10 tips (long tips) or D10 tips (short tips). P2G and P10G models are delivered with the adapter in place, ready to use DL10 tips. If D10 tips are used, the adapter must be repositioned in the shorter slot as follows: Pull the adapter down from the metallic rod. Turn the adapter through 180°C. Refit the adapter so that the end of the metallic rod engages the shorter slot of the adapter. Short tips Long tips For the P2G and P10G models equipped with plastic tip-ejector, A tip-ejector extension is supplied to fit with D10 tips (short tips). To fit a tip-ejector extension: Slide the extension over the tip-holder. Push the extension firmly onto the end of the tip-ejector until it clicks into place. To remove a tip-ejector extension: Gently twist the extension. Pull it away from the pipette. Both dual-position adapter and tip-ejector extension are autoclavable . 5 Pre-rinse the tips Some liquids (e.g. protein-containing solutions and organic solvents) can leave a film of liquid on the inside wall of the tip ; pre-rinse the tip to minimize any errors that may be related to this phenomenon. Pre-rinsing consists of aspirating the first volume of liquid and then dispensing it back into the same vessel (or to waste). Subsequent volumes that you pipette will have levels of accuracy and precision within specifications. Aspirate Press the push-button to the first stop (this corresponds to the set volume of liquid). Hold the pipette vertically and immerse the tip in the liquid (see immersion depth table, page 10). Release the push-button slowly and smoothly (to top position) to aspirate the set volume of liquid. Wait one second (time depends on model, see table) ; then withdraw the pipette-tip from the liquid. You may wipe any droplets away from the outside of the tip using a medical wipe, however if you do so take care to avoid touching the tip’s orifice. First stop Second stop 6 Dispense Place the end of the tip against the inside wall of the recipient vessel (at an angle of 10° to 40°). Press the push-button slowly and smoothly to the first stop. Wait for at least a second, then press the push-button to the second stop to expel any residual liquid from the tip. Keep the push-button pressed fully down and (while removing the pipette) draw the tip along the inside surface of the vessel. Release the push-button, smoothly. Eject the tip by pressing firmly on the tip-ejector button. 6 - General Guidelines for Good Pipetting Make sure that you operate Table - Immersion Depth the push-button slowly and and Wait Time Model Immersion Wait Time smoothly. When aspirating, keep the tip at a constant depth below the surface of the liquid (refer to the table). Change the tip before aspirating a different liquid, sample, or reagent. Depth (mm) (seconds) P2G 1 1 P10G 1 1 P20G 2-3 1 P100G 2-4 1 P200G 2-4 1 P1000G 2-4 2-3 P5000G 3-6 4-5 P10mlG 5-7 4-5 Change the tip if a droplet remains at the end of the tip from the previous pipetting operation. Each new tip should be pre-rinsed with the liquid to be pipetted. Liquid should never enter the tip-holder; to prevent this: - press and release the push-button slowly and smoothly, - never turn the pipette upside down, - never lay the pipette on its side when there is liquid in the tip. If you use the same tip with a higher volume, prerinse the tip. 7 For volatile solvents you should saturate the aircushion of your pipette by aspirating and dispensing the solvent repeatedly before aspirating the sample. When pipetting liquids with temperatures different to the ambient temperature, pre-rinse the tip several times before use. You may remove the tip-ejector (see Chapter 11 Maintenance) to aspirate from very narrow tubes. After pipetting acids or other corrosive liquids that emit vapors, remove the tip-ejector, the tip-holder, rinse, dry and lubricate the piston (see Chapter 11 - Maintenance). For the model P1000G, by using a specific tip holder equipped with a filter, you can increase the lifetime of the piston (see Chapter 7 Accessories). Do not pipette liquids having temperatures above 70 °C or below 4 °C. The pipette can be used between + 4 °C and + 40 °C but the specifications may vary according to the temperature (refer to the ISO 8655-2 standard for conditions of use). 7 - ACCESSORIES To make pipetting more comfortable and more secure, Gilson has developed several accessories: To avoid the possibility of liquid running back into the pipette, store the pipette vertically. Carrousel™ Pipette stand (7 pipettes)F161401 Trio™ stand (3 pipettes)F161405 Single™ pipette holderF161406 To identify or personalize your pipette, Coloris™ clips are available: Coloris™ clips Coloris™ clips Coloris™ clips Coloris™ clips Coloris™ clips Coloris™ clips 8 (mixed colors set of 10) F161301 (red, set of 10) F161302 (yellow, set of 10) F161303 (green, set of 10) F161304 (blue, set of 10) F161305 (white, set of 10) F161306 With The JIMMY™, hands free microtube opener, you can open both snap-cap and screw-cap microtubes. The Jimmy™ (set of 3)F144983 To protect the piston when pipetting corrosive liquids, you can use a specific tip holder and filter for the model P1000G: Corrosion protection kit (tip holder + a bag of 10 filters)F144570 8 - GLP FEATURES The Serial Number is engraved on the body of the pipette. It provides unique identification of your pipette and the date of manufacture. Ex : AA10369 The Bar Code on the box and the certificate of conformity provide traceability of your pipette. 9 - Troubleshooting A quick inspection of the pipette may help you to detect a problem. You may download from the Gilson website (www.gilson.com) the “2 minute inspection”, which shows how to perform a quick diagnosis of your pipette. Before returning any pipette to your local Gilson Service Center, ensure that it is completely free of chemical, biological, or radioactive contamination. Refer to Chapter 12 - Cleaning and Decontamination. Please use the included safety bag to return the pipette to your local Gilson Service Center. 9 The following table may help you to identify and correct the problem you might encounter. Symptom Possible Cause Pipette is Damaged tip-holder leaking sample Worn O-ring or seal Action Replace the tip-holder Replace both parts and lubricate Pipette won’t aspirate Worn O-ring Replace both parts and lubricate Damaged tip-holder Replace the tip-holder Connecting nut is loose Tighten connecting nut Damaged or corroded piston Return pipette to supplier Improper repair or assemblySee Chapter 11 - Maintenance Pipette is inaccurate Improper repair or assemblySee Chapter 11 - Maintenance Unscrewed tip-holder Tighten connecting nut Connecting nut is loose Tighten connecting nut Pipette is not precise Tip-holder is loose Tighten connecting nut Connecting nut is loose Tighten connecting nut Incorrect operator technique Operator training Damaged or corroded piston(s) Return pipette to supplier Damaged tip-holder(s) Replace the tip-holder Worn O-ring or seal Replace both parts and lubricate Tips fall off or Low quality tips Use PIPETMAN DIAMOND tips do not fit Dirty tip-holder Clean the tip-holder with alcohol correctly Damaged tip-holder(s) Replace the tip-holder Damaged tip-ejector Replace tip-ejector Ejector spacer is missing Mount the spacer on the tip-ejector The ejector spacer is damaged Replace the ejector spacer The tip-ejector is looseAssemble the tip-ejector p roperly The ejector lock is misaligned Align the ejector lock Pipetting seize up Piston need lubricant Lubricate piston assembly However, if you can’t solve the problem, contact your Gilson distributor. 10 10 - LEAK TEST This test may be performed at any time to check that the pipette does not leak, especially after performing a maintenance or decontamination procedure. If a pipette fails this test, replace the O-ring and seal. After making sure that the pipette is correctly reassembled, repeat this test. For the P2G to P200G models: Fit a PIPETMAN Diamond Tip. Set the pipette to the maximum volume given in the specifications, and pre-rinse. Aspirate the set volume from a beaker of distilled water. Maintain the pipette in the vertical position and wait for 20 seconds. If a water droplet appears at the end of the tip there is a leak. If you see no droplet, re-immerse the tip below the surface of water. The water level inside the tip should remain constant; if the level goes down there is a leak. For the P1000G, P5000G and P10mlG models: Fit a PIPETMAN Diamond tip. Set the pipette to the maximum volume given in the specifications. Aspirate the set volume from a beaker of distilled water. Maintain the pipette in the vertical position and wait for 20 seconds. If a water droplet appears at the end of the tip, there is a leak. 11 11 - MAINTENANCE Routine maintenance will help keep your pipette in good condition, ensuring a continued high level of performance. Maintenance is limited to: Cleaning or decontamination (see Chapter 12 - Cleaning and Decontamination) Replacing spare parts Greasing the piston assembly. Pipetman P2G and P10G should not be disassembled, so you may only replace the push-button, tip-ejector, dual position tip-ejector and its adapter. With these pipettes if the tip-holder is damaged, the piston may also be damaged. After replacing any parts you should verify the performance of your pipette following the verification procedure available on the Gilson website (www.gilson.com). If the pipette needs to be readjusted, please contact your local Gilson authorized Service Center. Changing the Tip-ejector To remove Push the ejection button. Push laterally the tip-ejector. Slide and remove the tip-ejector. To refit Push the ejection button. Slide the tip-ejector along the tip-holder. Clip the tip-ejector on the body of the pipette. 12 Color coded push-button Blue ring Connecting nut P10G, P20G P100G, P200G P5000G P10mlG P1000G Piston assembly Tip-holder Tip-ejector stainless steel plastic 13 Changing the Tip-holder – no tools required Remove the tip-ejector (see above). Unscrew the connecting nut by turning it counterclockwise. Carefully separate the lower and upper parts. Remove the piston assembly and the seals. Clean, autoclave, or replace the tip-holder. If necessary, lubricate lightly the piston and its seals (see below). Reassemble the pipette (refer to the figure, p 16). Tighten the connecting nut (turn clockwise). Refit the tip-ejector (see above). Servicing the Piston Assembly You may remove the piston assembly for cleaning purposes only. If the piston assembly is changed, the pipette must be adjusted and calibrated in a Gilson authorized Service Center. As the models P2G and P10G contain miniaturized parts, it is best not to disassemble these pipettes yourself. The piston assembly must not be autoclaved. Remove the tip-ejector (see above). Unscrew the connecting nut by turning it counter-clockwise. Carefully separate the lower and upper parts. Remove the piston assembly and the seals. Leave exposed the piston, clean it with methyl alcohol and lubricate lightly. For P100G, P200G and P1000G models, lubricate only the useful part of the piston and the seals. For P5000G and P10mlG, lubricate the tip of the piston, disassemble the seals and lubricate their internal part. 14 The use of other lubricant cancels the warranty of this pipette. Reassemble the pipette (refer to the figure, page 13). Tighten the connecting nut (turn clockwise). Refit the tip-ejector (see above). Changing the seals The O-ring and seal are on the piston; they must not be autoclaved, if worn or damaged in any way (chemical or mechanical), they must be replaced. As the models P2G and P10G contain miniaturized parts, it is best not to disassemble these pipettes yourself, please contact your local Gilson authorized Service Center. The dimensions of the O-ring vary depending on the model of pipette. Remove the tip-ejector (see above). Unscrew the connecting nut by turning it counterclockwise. Carefully separate the lower and upper parts. Remove the piston assembly, O-ring and seal. If necessary clean the piston and replace the seal; lubricate them lightly. Please place them in the correct order. Reassemble the pipette (refer to the figure, page 13). Tighten the connecting nut (turn clockwise). Refit the tip-ejector (see above). 12 - CLEANING AND DECONTAMINATION Pipetman G is designed so that the parts normally in contact with liquid contaminants, can easily be cleaned and decontaminated. However, because the models P2G and P10G contain miniaturized parts, it is best not to disassemble these pipettes yourself; please contact your local Gilson authorized Service Center. 15 You may refer to the decontamination procedure available on the Gilson website (www. gilson.com). Liquid must never enter the upper part (handle) of any pipette. Cleaning The pipette must be cleaned, as described below, before it is decontaminated. Soap solution is recommended for cleaning Pipetman G. External Remove the tip-ejector. Wipe the tip-ejector with a soft-cloth or lint-free tissue impregnated with soap solution. Wipe the entire pipette with a soft-cloth or lint- free tissue impregnated with soap solution, to remove all dirty marks. If the pipette is very dirty, a brush with soft plastic bristles may be used. Wipe the entire pipette and the tip-ejector with a soft cloth or lint-free tissue soaked with distilled water. Refit the tip-ejector and allow the pipette to dry. Internal The following components only can be immersed in a cleaning solution: connecting nut, tip-ejector, tip-holder, piston assembly, seal and O-ring. Disassemble the pipette as described in the Chapter 11 - Maintenance. Set aside the upper part in a clean, dry place. Clean the individual components of the lower part of the pipette using an ultrasonic bath (20 minutes at 50°C) or with a soft-cloth and brushes. Note that the piston assembly and seals must be degreased with methyl alcohol before being immersed in the ultra sonic bath. Small round brushes with soft plastic bristles may be used to clean the interior of the tip-holder. Rinse the individual components with distilled water. Leave the parts to dry by evaporation or wipe them with a clean soft-cloth or lint-free tissue. 16 Reassemble the pipette as described in the Chapter 11 - Maintenance. Autoclaving The upper part (body) and the piston assembly of the pipette are not autoclavable. Only the following parts may be autoclaved: tip-ejector, tip-holder and connecting nut. The O-ring and seal are not autoclavable; they may be cleaned or replaced with the one specified in Chapter 14 - Spare Parts. Clean the parts to be autoclaved, especially the tip-holder. Put the parts in an autoclaving sack. Autoclave for 20 minutes at 121°C, 0.1 MPa. Check that the parts are dry before re-assembling the pipette. Set the pipette aside to stabilize at room temperature. Chemical Decontamination You may choose to decontaminate your pipette chemically, in accordance with your own procedures. Whatever decontaminant you use, check with the supplier of the decontaminant that it is compatible with stainless steel and the plastics used in the construction of the pipette: PA (Polyamide), PBT (Polybutylene Terephtalate), PC (Polycarbonate), PC/PBT (Polycarbonate/ Polybutylene Terephtalate), POM (Polyoxymethylene), or PVDF (Polyvinylidene Fluoride). Upper Part (handle) Wipe the upper part (handle) of the pipette with a soft-cloth or lint-free tissue impregnated with the chosen decontaminant. Wipe the upper part of the pipette with a soft- cloth or lint-free tissue soaked with distilled water or sterile water. Lower Part (Volumetric module) The following components only can be immersed in a decontaminant solution: connecting nut, tip-ejector, tip-holder. 17 Piston assembly and seals must be degreased with methyl alcohol before being immersed in decontamination solution in separate vessel. Remove the tip-ejector, the tip-holder and the connecting nut. Immerse them in the cleaning solution. Degrease the piston assembly, the seals and immerse them in another vessel. Rinse each component with distilled water. Leave the parts to dry by evaporation (or wipe with a soft cloth the tip-ejector, the tip-holder and connecting nut). Lubricate the piston assembly and the seals. Reassemble the piston assembly, the tip-holder and the tip-ejector. 13 -Specifications Pipetman G is a high quality pipette that offers excellent accuracy and precision. The figures given in the “Gilson Maximum Permissible Errors” table (page 19) were obtained using PIPETMAN Diamond Tips. These figures are guaranteed only when genuine PIPETMAN DIAMOND Tips are used. Each pipette is inspected and validated by qualified technicians in accordance with the Gilson Quality System. Gilson declares that its manufactured pipettes comply with the requirements of the ISO 8655 standard, by type testing. The adjustment is carried out under strictly defined and monitored conditions (ISO 8655-6). The data given in the tables conform to the ISO 8655-2 Standard. With a precise pipetting technique (see Chapter 6 - General guidelines for good pipetting) the P2G model may be used to aspirate volumes as low as 0.1 µL and the P10G model as low as 0.5 µL. 18 Gilson Maximum Permissible Errors Maximum Permissible Errors Model Volume Gilson ISO 8655 (Reference) (µL)Systematic RandomSystematic Random error (µL) error (µL) error (µL) error (µL) P2G Min (F144054P) (F144054M) Max. 0.2 0.5 2 ± 0.024 ± 0.025 ± 0.030 0.012 0.012 0.014 ± 0.08 ± 0.08 ± 0.08 0.04 0.04 0.04 P10G Min. (F144055P) (F144055M) Max 1 5 10 ± 0.025 ± 0.075 ± 0.100 0.012 0.030 0.040 ± 0.12 ± 0.12 ± 0.12 0.08 0.08 0.08 P20G Min. (F144056P) (F144056M) Max. 2 10 20 ± 0.10 ± 0.10 ± 0.20 0.03 0.05 0.06 ± 0.20 ± 0.20 ± 0.20 0.10 0.10 0.10 P100G Min. (F144057P) (F144057M) Max. 10 50 100 ± 0.35 ± 0.40 ± 0.80 0.10 0.12 0.15 ± 0.80 ± 0.80 ± 0.80 0.30 0.30 0.30 P200G Min. (F144058P) (F144058M) Max. 20 100 200 ± 0.50 ± 0.80 ± 1.60 0.20 0.25 0.30 ± 1.60 ± 1.60 ± 1.60 0.60 0.60 0.60 P1000G Min. (F144059P) (F144059M) Max. 100 500 1000 ± 3 ± 4 ± 8 0.6 1.0 1.5 ± 8 ± 8 ± 8 3.0 3.0 3.0 P5000G Min. (F144066) Max. 500 2500 5000 ± 12 ± 15 ± 30 3 5 8 ± 40 ± 40 ± 40 15 15 15 P10mlG Min. 1000 (F144067) 5000 Max. 10000 ± 30 ± 40 ± 60 6 10 16 ± 60 ± 60 ± 60 30 30 30 Each pipette model (except P5000G and P10mlG) has two different ordering references to identify the kind of tip-ejector required. For a pipette with a plastic tip-ejector, the ordering reference is ended by the letter P, for a pipette with a stainless steel tip-ejector, the ordering reference is ended by the letter M. Ex: For a P10G model with the plastic tip-ejector the ordering reference is F144055P. For the same pipette with a stainless steel tip-ejector, the ordering reference is F044055M. 19 14 - Spare Parts Service Kit 1st level includes: A - 3 piston seals or seal guides C - 3 O-rings D - 1 tip-holder E Service Kit 2nd level includes: - 1 push-button A - 1 connecting nut B - 2 tip-ejectors F1 F2 B for the P2G and P10G models only: - 1 adapter for stainless steel tip-ejector F3 - 1 extension for plastic tip-ejector F4 C D F1 F2 F4 F3 F1 20 E F2 P2G (F144054P or M) and P10G (F144055P or M) Description P2G P10G Service Kit 1st level Service Kit 2nd level Seal + O-ring (5 sets) Tip-ejector adapter Tip-ejector extension FA07001 F1619712 FA07012 F144879 F2070903 C+D+E A+B+F1 to F4 C+D F3 F4 F144501 F1619702 F144861 F144879 F2070903 P20G (F144056 P or M) and P100G (F144057 P or M) Description P20G Service Kit 1st level FA07002 Service Kit 2nd level F1619722 Seal guide + O-ring (5 sets) FA07013 C+D+E A+B+F C+D P100G FA07003 F1619732 FA07014 P200G (F144058 P or M) and P1000G (F144059 P or M) Description P200G Service Kit 1st level FA07004 Service Kit 2nd level F1619742 Seal guide + O-ring (5 sets) FA07015 C+D+E A+B+F C+D P1000G FA07005 F1619752 FA07016 P5000G (F144066) and P10mlG (F144067) Description C+D+E A C+D E Service Kit 1st level Push-button assembly Seal + O-ring (5 sets) Tip-holder P5000G P10mlG FA07021 FA07019 FA07017 F123608 FA07022 FA07020 FA07018 F161263 Each pipette model (except P5000G and P10mlG) has two different ordering references to identify the kind of tip-ejector required. For a pipette with a plastic tip-ejector, the ordering reference is ended by the letter P, for a pipette with a stainless steel tip-ejector, the ordering reference is ended by the letter M. Ex: For a P10G model with the plastic tip-ejector the ordering reference is F144055P. For the same pipette with a stainless steel tip-ejector, the ordering reference is F044055M. ALL MODELS Description Ordering reference Lubricant 5440011070 21 EC declaration of conformity The company, GILSON S.A.S. 19, avenue des Entrepreneurs BP. 145 - 95400 Villiers-le-Bel (France) Tel.: +33(0) 1 34 29 50 00 Fax: +33(0) 1 34 29 50 20 www.gilson.com Hereby certifies on its sole responsibility that the products listed below: PIPETMAN® G P2G, P10G, P20G, P100G, P200G, P1000G, P5000G and P10mlG comply with the requirements of the following European Directives: 98/79/EC* on In Vitro Diagnostic Medical Devices * Annex III, self-declared Villiers-le-Bel, March 1st, 2011 22 A. El SayedH. Ledorze General Manager Quality Manager NOTES LT801122/A - ©2011 Gilson SAS All rights reserved March 2011 English Printed in France Specifications subject to change without notifications - errors omitted. www.gilson.com [email protected] [email protected] [email protected] Gilson, Inc. World Headquarters 3000 Parmenter Street I P.O. Box 620027 I Middleton, WI 53562-0027, USA Tel: (1) 800-445-7661 or (1) 608-836-1551 I Fax: (1) 608-831-4451 Gilson S.A.S. 19, avenue des Entrepreneurs I BP 145, F-95400 Villiers-le-Bel, France Tel: +33 (0) 1 34 29 50 00 I Fax: +33 (0) 1 34 29 50 20