1
INSTALLATION, COMMISSIONING AND SERVICING
INSTRUCTIONS
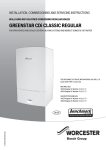
WALL HUNG RSF GAS-FIRED CONDENSING COMBINATION BOILER
GREENSTAR 25Si/30Si
FOR SEALED CENTRAL HEATING SYSTEMS AND MAINS FED DOMESTIC HOT WATER
The appliance is for use with Natural Gas or
L.P.G. (Cat II 2H3P type C13, C33 & C53)
Natural Gas
67
20
64
38
95
-0
0.
1W
o
Liquid Petroleum Gas
6 720 643 895a (2010/10)
UK/IE
Model
GC Number
25 Si
47-311-84
30 Si
47-311-85
25 Si
47-311-88
30 Si
47-311-89
CONTENTS
CONTENTS
1
KEY TO SYMBOLS AND SAFETY PRECAUTIONS 3
1.1
Explanation of symbols . . . . . . . . . . . . . . 3
1.2
Safety precautions . . . . . . . . . . . . . . . . . 4
2
APPLIANCE INFORMATION . . . . . . . . . . . . . . . .
2.1
Appliance . . . . . . . . . . . . . . . . . . . . . . . .
2.2
Technical data . . . . . . . . . . . . . . . . . . . . .
2.3
Layout . . . . . . . . . . . . . . . . . . . . . . . . . . .
3
PRE-INSTALLATION . . . . . . . . . . . . . . . . . . . . . 11
3.1
Cleaning primary systems . . . . . . . . . . . 11
3.2
Mains supply . . . . . . . . . . . . . . . . . . . . . 12
3.2.1 Electrical supply . . . . . . . . . . . . . . . . . . 12
3.2.2 Equipotential (earth) bonding . . . . . . . . 12
3.2.3 Gas supply . . . . . . . . . . . . . . . . . . . . . . 12
3.2.4 Water supply . . . . . . . . . . . . . . . . . . . . . 12
3.3
Water systems and pipe work . . . . . . . . 13
3.4
Condensate pipe work . . . . . . . . . . . . . . 14
3.4.1 Internal connections . . . . . . . . . . . . . . . 14
3.4.2 External connections . . . . . . . . . . . . . . . 15
3.5
Pressure relief pipe work . . . . . . . . . . . 17
3.6
Boiler location and clearances . . . . . . . 18
3.6.1 Installation . . . . . . . . . . . . . . . . . . . . . . 18
3.6.2 Service clearances Ventilated compartments . . . . . . . . . . . . 18
3.6.3 Compartments: . . . . . . . . . . . . . . . . . . . 18
3.6.4 Bathrooms . . . . . . . . . . . . . . . . . . . . . . . 18
3.6.5 Boiler clearances Unventilated compartments: . . . . . . . . . 19
3.6.6 Unventilated compartments Installation clearances . . . . . . . . . . . . . . 19
3.7
Plumbing manifold . . . . . . . . . . . . . . . . 20
3.7.1 Connections . . . . . . . . . . . . . . . . . . . . . 20
3.8
Flue options . . . . . . . . . . . . . . . . . . . . . 21
3.9
Flue terminal positions . . . . . . . . . . . . . 23
3.10
Plume management terminal positions . 24
4
INSTALLATION . . . . . . . . . . . . . . . . . . . . . . . . .
4.1
Unpacking wall frame & ancillary items
4.2
Wall mounting template & flue opening
4.3
Unpacking the appliance . . . . . . . . . . . .
4.4
Boiler connections . . . . . . . . . . . . . . . .
4.5
Flue installation . . . . . . . . . . . . . . . . . . .
4.5.1 Measuring the flue (standard flue): . . .
4.5.2 Reducing the telescopic flue length: . . .
4.5.3 Installing the telescopic flue: . . . . . . . .
4.5.4 Flue terminal plume re-direction: . . . . .
4.6
Condensate connection . . . . . . . . . . . .
4.7
Electrical . . . . . . . . . . . . . . . . . . . . . . . .
25
25
26
27
28
30
30
30
31
32
33
34
5
COMMISSIONING . . . . . . . . . . . . . . . . . . . . . . .
5.1
Converting to low nox . . . . . . . . . . . . . .
5.2
Pre-Commissioning checks . . . . . . . . . .
5.3
Filling the system . . . . . . . . . . . . . . . . .
5.4
Water treatment . . . . . . . . . . . . . . . . . .
5.5
Starting the appliance . . . . . . . . . . . . . .
5.6
Commissioning . . . . . . . . . . . . . . . . . . .
36
36
37
38
38
39
40
2
5.6.1
5.6.2
5.6.3
5.7
5.7.1
5.7.2
5.7.3
5.7.4
6
6
7
8
Checking the gas inlet pressure . . . . . .
Checking the gas rate . . . . . . . . . . . . . .
Domestic hot water: . . . . . . . . . . . . . . .
Finishing commissioning . . . . . . . . . . . .
Replace outer casing: . . . . . . . . . . . . . .
Fitting fascia flap . . . . . . . . . . . . . . . . . .
Installing bottom panel . . . . . . . . . . . . .
Handover . . . . . . . . . . . . . . . . . . . . . . . .
40
41
41
42
42
42
42
42
6
SERVICE AND SPARES . . . . . . . . . . . . . . . . . . . 43
6.1
Inspection and service . . . . . . . . . . . . . . 43
6.2
Check the gas inlet pressure . . . . . . . . . 44
6.3
Checking flue integrity . . . . . . . . . . . . . . 44
6.4
Fan pressure test . . . . . . . . . . . . . . . . . . 45
6.5
Flue gas analysis . . . . . . . . . . . . . . . . . . 46
6.6
Setting the air/gas ratio . . . . . . . . . . . . . 47
6.6.1 Setting the CO/CO2 . . . . . . . . . . . . . . . 47
6.7
Cleaning the heat exchanger . . . . . . . . . 48
6.8
Replacement of parts . . . . . . . . . . . . . . . 51
6.8.1 Removing outer case . . . . . . . . . . . . . . . 51
6.8.2 Primary sensor (CH NTC) . . . . . . . . . . . 51
6.8.3 Overheat thermostat . . . . . . . . . . . . . . . 51
6.8.4 Flue overheat thermostat (w/ grommet) 52
6.8.5 Moving controls to service position . . . . 52
6.8.6 Gas valve . . . . . . . . . . . . . . . . . . . . . . . . 53
6.8.7 Air/gas manifold and fan assembly. . . . . 53
6.8.8 Fan . . . . . . . . . . . . . . . . . . . . . . . . . . . . . 54
6.8.9 Electrode assembly and burner . . . . . . . 55
6.8.10 Heat exchanger. . . . . . . . . . . . . . . . . . . . 55
6.8.11 Access to boiler controls components . 57
6.8.12 PCB fuse . . . . . . . . . . . . . . . . . . . . . . . . 57
6.8.13 Transformer/PCB . . . . . . . . . . . . . . . . . . 57
6.8.14 Replacing controls . . . . . . . . . . . . . . . . . 58
6.8.15 Syphon removal . . . . . . . . . . . . . . . . . . . 59
6.8.16 Diverter valve motor . . . . . . . . . . . . . . . . 59
6.8.17 Diverter valve . . . . . . . . . . . . . . . . . . . . . 59
6.8.18 Auto air vent . . . . . . . . . . . . . . . . . . . . . . 60
6.8.19 DHW Temperature sensor (NTC) . . . . . . 60
6.8.20 Pump head . . . . . . . . . . . . . . . . . . . . . . . 60
6.8.21 Flow sensor, flow restrictor housing and
filter . . . . . . . . . . . . . . . . . . . . . . . . . . . . .61
6.8.22 Flow regulator . . . . . . . . . . . . . . . . . . . . 61
6.8.23 Drain tap . . . . . . . . . . . . . . . . . . . . . . . . 61
6.8.24 Pressure gauge . . . . . . . . . . . . . . . . . . . 61
6.8.25 Hydraulic block removal . . . . . . . . . . . . . 62
6.8.26 CH Pressure relief valve . . . . . . . . . . . . . 62
6.8.27 DHW Pressure relief valve . . . . . . . . . . . 63
6.8.28 DHW Plate heat exchanger . . . . . . . . . . 63
6.8.29 Bypass valve . . . . . . . . . . . . . . . . . . . . . . 63
6.8.30 Expansion vessel . . . . . . . . . . . . . . . . . . 64
6.9
Short parts list . . . . . . . . . . . . . . . . . . . . 65
7
FAULT FINDING AND DIAGNOSIS . . . . . . . . . .
7.1
Fault finding . . . . . . . . . . . . . . . . . . . . . .
7.1.1 Circuit diagram . . . . . . . . . . . . . . . . . . .
7.2
Central heating function . . . . . . . . . . . .
7.3
Preheat and DHW function . . . . . . . . . .
7.4
Protection function . . . . . . . . . . . . . . . .
6 720 643 895a (2010/10)
67
67
69
70
71
72
KEY TO SYMBOLS AND SAFETY INSTRUCTIONS
1
KEY TO SYMBOLS AND SAFETY INSTRUCTIONS
1.1
EXPLANATION OF SYMBOLS
WARNING SYMBOLS
PLEASE READ THESE INSTRUCTIONS CAREFULLY
BEFORE STARTING INSTALLATION.
Safety instructions in this document are
framed and identified by a warning triangle
which is printed on a grey background.
THESE INSTRUCTIONS ARE APPLICABLE TO THE
WORCESTER APPLIANCE MODEL(S) STATED ON THE
FRONT COVER OF THIS MANUAL ONLY AND MUST NOT
BE USED WITH ANY OTHER MAKE OR MODEL OF
APPLIANCE.
Electrical hazards are identified by a
lightning symbol surrounded by a warning
triangle.
THE INSTRUCTIONS APPLY IN THE UK AND IRELAND
ONLY AND MUST BE FOLLOWED EXCEPT FOR ANY
STATUTORY OBLIGATION.
Signal words indicate the seriousness of the hazard in
terms of the consequences of not following the safety
instructions.
THIS APPLIANCE MUST BE INSTALLED BY A GAS SAFE
REGISTERED, COMPETENT PERSON. FAILURE TO
INSTALL CORRECTLY COULD LEAD TO PROSECUTION.
• NOTICE indicates possible damage to property or
equipment, but where there is no risk of injury.
IF YOU ARE IN ANY DOUBT CONTACT THE WORCESTER
TECHNICAL HELPLINE (0844 892 3366).
• CAUTION indicates possible injury.
• WARNING indicates possible severe injury.
• DANGER indicates possible risk to life.
IMPORTANT INFORMATION
Notes contain important information in
cases where there is no risk of personal
injury or material losses and are identified
by the symbol shown on the left. They are
bordered by horizontal lines above and
below the text.
ADDITIONAL SYMBOLS
Symbol
Meaning
B
a step in an action sequence
Æ
a reference to a related part in the
document or to other related documents
a list entry
•
–
Tab. 1
a list entry (second level)
Symbols
SYMBOLS USED IN THIS MANUAL
Domestic Hot Water
Central Heating
Hot Water Storage Cylinder
Domestic Cold Water Supply
Electrical Supply
PLEASE LEAVE THESE INSTRUCTIONS WITH THE
COMPLETED BENCHMARK CHECKLIST, (OR A
CERTIFICATE CONFIRMING COMPLIANCE WITH IS 813,
EIRE ONLY) AND THE USER MANUAL WITH THE OWNER
OR AT THE GAS METER AFTER INSTALLATION OR
SERVICING.
THE BENCHMARK CHECKLIST CAN BE FOUND IN THE
BACK PAGES OF THE INSTALLATION MANUAL.
ABBREVIATIONS USED IN THIS MANUAL:
Ø
Diameter
NG
Natural Gas
LPG
Liquid Petroleum Gas
CH
Central Heating
DHW
Domestic Hot Water
PRV
Pressure Relief Valve
NTC
Negative Temperature Coefficient (sensor)
IP
Ingress Protection
RCD
Residual Current Device
TRV
Thermostatic Radiator Valve
WRAS
Water Regulations Advisory Scheme
SEDBUK
Seasonal Efficiency of Domestic Boilers in
the United Kingdom
Tab. 3
Gas Supply
Tab. 2
DISTANCE LEARNING AND TRAINING COURSES ARE
AVAILABLE FROM WORCESTER.
Abbreviations
Commonly used symbols
6 720 643 895a (2010/10)
3
KEY TO SYMBOLS AND SAFETY INSTRUCTIONS
1.2
SAFETY PRECAUTIONS
IF YOU SMELL GAS:
B CALL NATIONAL GAS EMERGENCY SERVICE ON
0800 111 999
B LPG BOILERS CALL THE SUPPLIER‘S NUMBER ON
THE SIDE OF THE LPG TANK
B TURN OFF THE ECV (EMERGENCY CONTROL VALVE)
AT THE METER/REGULATOR
B DO NOT TURN ELECTRICAL SWITCHES ON OR OFF
B DO NOT STRIKE MATCHES OR SMOKE
B PUT OUT NAKED FLAMES
B OPEN DOORS AND WINDOWS
B KEEP PEOPLE AWAY FROM THE AFFECTED AREA
BOILER OPERATION:
This boiler must only be operated by a responsible
adult who has been instructed in, understands, and is
aware of the boiler's operating conditions and effects.
FITTING AND MODIFICATIONS
Fitting the appliance and any controls to the appliance
may only be carried out by a competent engineer in
accordance with the current Gas Safety (Installation and
Use) Regulations.
Flue systems must not be modified in any way other than
as described in the fitting instructions. Any misuse or
unauthorised modifications to the appliance, flue or
associated components and systems could invalidate
the warranty. The manufacturer accepts no liability
arising from any such actions, excluding statutory rights.
SERVICING
Advise the user to have the system serviced annually by
a competent, qualified Gas Safe registered engineer.
Approved spares must be used to help maintain the
economy, safety and reliability of the appliance.
IMPORTANT
The service engineer must complete the Service Record
on the Benchmark Checklist after each service.
INSTALLATION REGULATIONS
Current Gas Safety (Installation & Use) Regulations:
Benchmark places responsibilities on both
manufacturers and installers. The purpose is to ensure
that customers are provided with the correct equipment
for their needs, that it is installed, commissioned and
serviced in accordance with the manufacturer's
instructions by competent persons and that it meets the
requirements of the appropriate Building Regulations.
The Benchmark Checklist can be used to demonstrate
compliance with Building Regulations and should be
provided to the customer for future reference.
All gas appliances must be installed by a competent
person in accordance with the above regulations.
Failure to install appliances correctly could lead to
prosecution.
The appliance must be installed in accordance with, and
comply to, the current: Gas Safety Regulations, IEE
Regulations, Building Regulations, Building Standards
(Scotland) (Consolidation), Building Regulations
(Northern Ireland), local water by-laws, Health & Safety
Document 635 (The Electricity at Work Regulations
1989) and any other local requirements.
Installers are required to carry out installation,
commissioning and servicing work in accordance with
the Benchmark Code of Practice which is available from
the Heating and Hotwater Industry Council who manage
and promote the scheme.
Visit centralheating.co.uk for more information.
HEALTH AND SAFETY
The appliance contains no asbestos and no substances
have been used in the construction process that
contravene the COSHH Regulations (Control of
Substances Hazardous to Health Regulations 1988).
COMBUSTION AND CORROSIVE MATERIALS
Do not store or use any combustible materials (paper,
thinners, paints etc.) inside or within the vicinity of the
appliance.
Chemically aggressive substances can corrode the
appliance and invalidate any warranty.
4
6 720 643 895a (2010/10)
KEY TO SYMBOLS AND SAFETY INSTRUCTIONS
British Standards:
BOILER FEATURES AND CHECKLIST
Where no specific instruction is given, reference should
be made to the relevant British Standard codes of
Practice.
• Pre-wired and pre-plumbed
• Galvanised steel inner frame
• Digital control system
BS7074:1 Code of practice for domestic and hot water
supply
• FX Intelligent controls
BS6891
Installation of low pressure gas pipe work up
to 28mm (R1)
• Automatic ignition
BS5546
Installation of gas hot water supplies for
domestic purposes
• Built-in frost protection
• Low NOx option
• Direct burner ignition electrodes
• Built-in fault finding diagnostics
EN12828 Central heating for domestic premises
• Modulating automatic gas valve
BS5440:1 Flues and ventilation for gas appliances of
rated heating not exceeding 70kW (net) :
Flues
• CH temperature sensor & control
• Combustion air fan with speed regulator
• Pump anti-seizure protection
BS5440:2 Flues and ventilation for gas appliances of
rated heating not exceeding 70kW (net) : Air
Supply
• Flue gas temperature sensor
BS7593
Treatment of water in domestic hot water
central heating systems
• Plate type DHW heat exchanger
BS6798
Installation of gas fired boilers of rated input
up to 70kW (net)
Irish Standards
• Condensate syphonic trap
• DHW flow sensor & temperature control
CHECK LIST
- HARDWARE LITERATURE PACK:
Qty.
Greenstar 25Si/30Si Installation,
Commissioning and Servicing Instructions
1
Users Instructions
1
Consumer Guarantee Card
1
Sealing Pack:
1
- Compression Nut 22mm
3
- Compression Ring 22mm
3
- Compression Nut 15mm
3
Timber framed building:
- Compression Ring 15mm
3
Where the boiler is to be fitted to a timber framed
building the guidelines laid down in BS5440: Part 1 and
IGE "Gas Installations in Timber Frame Buildings” should
be adhered to.
- Fibre Washer 18.6 x 13.5 x 1.5
2
- Fibre Washer 23.9 x 17.2 x 1.5
2
- Bonded Washer 3/4
1
Potable water:
Syphon assembly
1
All seals, joints and compounds (including flux and
solder) and components used as part of the secondary
domestic water system must be approved by WRAS.
- Installation instructions
1
Warranty Return Envelope
1
The relevant Irish standards should be followed,
including:
• ECTI National rules for electrical installations
• IS 813:2002 for Domestic Gas Installations.
LPG Installations
An appliance using L.P.G. must not be installed in a room
or internal space below ground level unless one side of
the building is open to the ground.
CH Water:
Tab. 4
Hardware lit pack - checklist
Artificially softened water must not be used to fill the
central heating system.
6 720 643 895a (2010/10)
5
APPLIANCE INFORMATION
2
APPLIANCE INFORMATION
2.1
APPLIANCE
330mm
Depth to wall
(When fitted to wall frame)
2
700mm*
1
400mm
* 710mm to top of case front
3
4
5
6
6720643895-01.1Wo
STANDARD PACKAGE:
1
Wall hung gas fired condensing combi boiler for
central heating and domestic hot water
2
Wall mounting frame
3
Hardware literature pack (see checklist)
4
Bottom Panel
5
Fascia panel
6
Syphon assembly
Tab. 5
6
6 720 643 895a (2010/10)
APPLIANCE INFORMATION
2.2
TECHNICAL DATA
DESCRIPTION
NATURAL GAS
UNIT
25Si
Minimum heat input
kW
Maximum rated heat output
kW
Maximum rated heat input
Low NOx
25 & 30Si
LPG
30Si
25Si
30Si
7.00
7.00
9.64
9.64
25
30
25
30
kW
25.51
30.61
25.51
30.61
Natural Gas G20
m³/h
2.7
Propane Gas (LPG)
kg/h
-
Maximum mains inlet pressure
bar
10
Minimum mains inlet pressure (working) for max. flow
bar
1.3
Minimum mains inlet pressure (working) for operation
bar
0.2
0.2
0.2
0.2
°C
40 - 60
40 - 60
40 - 60
40 - 60
Domestic Hot Water specific rate - 30 °C rise
l/min.
12
14.3
12
14.3
Max. Domestic Hot Water flow rate - 40 °C rise ± 15%
l/min.
9
10.8
9
10.8
Maximum rated heat input (net)
kW
24.62
13.4
24.62
24.62
24.62
Maximum rated heat output 40/30 °C
kW
25.67
13.97
25.67
25.67
25.67
Maximum rated heat output 50/30 °C
kW
25.45
13.85
25.45
25.45
25.45
Maximum rated heat output 80/60 °C
kW
24
13
24
24
24
°C
82
82
82
82
82
bar
2.5
2.5
2.5
2.5
2.5
m
2.0
2.0
2.0
2.0
2.0
°C
78/65
66/57
78/66
79/66
79/67
Flue gas temperature 40/30 °C, rated/min. load
°C
54/37
43/35
54/38
55/40
55/41
CO2 level at max. rated heat output (after 30 minutes)
%
9.8
9.8
9.8
11.0
11.0
CO2 level at min. rated heat output (after 30 minutes)
%
8.8
8.8
8.8
10.5
10.5
5
5
5
5
5
mg/kWh
66
38
66
69
69
l/h
2.0
1.02
2.0
2.0
2.0
4.8
4.8
4.8
4.8
4.8
230
230
230
230
230
Domestic Hot Water
Gas flow rate - Max. 10 minutes from lighting
Domestic Hot Water temperature range
Low NOx
only
applies to
Central
Heating
3.24
-
-
-
1.98
2.38
10
10
10
2
1.3
2
Central Heating
Maximum flow temperature
Maximum permissible operating pressure
Available pump head at 21 °C system temperature rise
Flue
Flue gas temperature 80/60 °C, rated/min. load
NOx class
NOx rating
Condensate
Maximum condensate rate
pH value, approx.
Electrical
Electrical power supply voltage
a.c. V
Frequency
Hz
50
50
50
50
50
Maximum power consumption
W
140
140
140
140
140
band
A
A
A
A
A
Appliance protection rating
IP
X4D
X4D
X4D
X4D
X4D
Appliance protection rating with mechanical or RF
mechanical timer fitted
IP
20
20
20
20
20
Permissible ambient temperatures
°C
0 - 50
0 - 50
0 - 50
0 - 50
0 - 50
Nominal capacity of appliance
litre
3.9
3.9
3.9
3.9
3.9
Noise output level (Max central heating)
dBA
42
42
42
42
42
Total boiler weight
kg
37.5
37.5
37.5
37.5
37.5
Lift weight
kg
27.1
27.1
27.1
27.1
27.1
SEDBUK
%
90.1
90.1
90.1
91.8
91.8
General data
SEDBUK
Tab. 6
Technical data Si
6 720 643 895a (2010/10)
7
APPLIANCE INFORMATION
2.3
LAYOUT
1
2
3
4
34
5
33
6
32
31
7
30
8
29
9
10
28
11
12
27
13
14
26
15
25
17
24
18
23
22
Fig. 1
8
21
20
19
Main boiler components
6 720 643 895a (2010/10)
6720643895-02.1Wo
16
APPLIANCE INFORMATION
1
Expansion Vessel
26
Left side hand-hold for lifting boiler
2
Flow temperature sensor (NTC)
27
Plate to Plate heat exchanger
3
Removable panel - for servicing
28
Gas valve
4
Electrode assembly
29
Flue air pressure switch connection (not used)
5
Overheat thermostat
30
Fan
6
Securing nut - Air/Gas manifold clamp
31
Fan guard
7
Silicon tube - heat exchanger air vent
32
Manual vent point
8
Heat exchanger
33
Fan pressure test point
9
Flue over heat thermostat
34
Air/Gas manifold
10
Access panel - Heat exchanger/sump cleaning
35
Compact hydraulic - left mounting point
11
Right side hand-hold for lifting boiler
36
Flow connector from heat exchanger
12
Pump
37
Expansion vessel hose connection point
13
Diverter valve assembly (body)
38
Auto air vent
14
Diverter valve actuator (stepper motor)
39
Return connection to heat exchanger
15
Diverter valve protective cover
40
Flow turbine
16
Drain point
41
Unused port
17
Central Heating (CH) return isolator
42
Compact hydraulic - right mounting point
18
Domestic Cold Water mains (DCW) isolator
43
Pressure relief valve
19
System pressure gauge
44
CH return connection to service valve
20
Control panel (in service position)
45
DCW in connection to service valve
21
Cover - external wiring connections
46
Internal by-pass
22
Cover - transformer and PCB
47
DHW out connection
23
Gas inlet connection 22 mm
48
CH flow connection to service valve
24
Domestic Hot Water (DHW) connection
49
Pressure gauge connection point
25
Central Heating (CH) flow isolator
50
DHW temperature sensor (NTC)
Tab. 7
Boiler components
35
36
27
37
38
39
40
41
42
49
43
6720643895-03.1Wo
50
48
47
12
Fig. 2
46
45
16
44
14
13
Hydraulic block components
6 720 643 895a (2010/10)
9
APPLIANCE INFORMATION
1
2
3
4
5
17
6
16
7
6720643895-15.1Wo
8
15
Fig. 3
14
13
12
11
10
9
Additional components
1
Burner ON indicator light (green)
10
CH return isolator
2
Power ON/OFF indicator/fault diagnostic light (blue)
11
DCW mains in isolator
3
Position for optional programmer
12
Gas inlet connection 22 mm & isolator
4
Reset button
13
DHW connection
5
System pressure gauge
14
CH flow isolator
6
ECO button
15
Condensate connection
7
DHW temperature control
16
CH temperature control
8
Boiler identification label
17
Service mode button
9
PRV pipe connection point
Tab. 8
10
Additional boiler components
6 720 643 895a (2010/10)
PRE-INSTALLATION
3
PRE-INSTALLATION
3.1
CLEANING PRIMARY SYSTEMS
NOTICE:
B All the following Pre-Installation sections
must be read and requirements met
before starting boiler or flue installations.
B It may be necessary to use a power flushing machine
to aid the cleansing procedure in some
circumstances.
B Close the drain cocks and refill with fresh water and
a suitable inhibitor.
B Vent any air from the boiler and system.
CAUTION:
B ISOLATE THE MAINS SUPPLIES BEFORE
STARTING ANY WORK AND OBSERVE ALL
RELEVANT SAFETY PRECAUTIONS.
NOTICE:
Debris from the system can damage the
boiler and reduce efficiency.
Failure to comply with the guidelines for the
use of water treatment with the appliance
will invalidate the appliance warranty.
INHIBITOR
Add a suitable inhibitor or combined inhibitor/antifreeze, if the system is exposed to freezing conditions, to
the heating system in accordance with the DWTA code of
practice and manufacturer‘s guidelines.
WARNING: Sealing agents
B The addition of sealing agents to the
system water is not permitted as this can
cause problems with deposits left in the
heat exchanger.
BEFORE CLEANING THE SYSTEM:
B Ensure that the system and pipe work is in good
working order.
B Where possible keep the existing boiler/circulating
pump in place when flushing the system.
FOLLOW THE GUIDANCE OF BS7593:
Treatment of water in domestic hot water central
heating and also the flushing guidelines below.
NOTICE: ARTIFICALLY SOFTENED WATER
MUST NOT BE USED TO FILL THE CENTRAL
HEATING SYSTEM.
FLUSHING THE SYSTEM
B Fill the system with cold water and check for leaks.
B Open all drain cocks and drain the system.
B Close drain cocks and add a suitable flushing agent
compatible with aluminium at the correct strength
for the system conditions in accordance with the
manufacturer‘s instructions.
The pH value of the system water must be less than
8 or the appliance guarantee will be invalidated.
B Circulate the flushing agent before the boiler is fired
up.
B Run the boiler/system at normal operating
temperature as directed by the manufacturer of the
flushing agent.
B Drain and thoroughly flush the system to remove the
flushing agent and debris.
6 720 643 895a (2010/10)
11
PRE-INSTALLATION
3.2
MAINS SUPPLY
3.2.1 ELECTRICAL SUPPLY
• Supply: 230V - 50 Hz, 140 Watts
• Cable: PVC insulated 0.75 mm2 (24 x 0.2 mm)
temperature rated to 90 °C.
• External 3A fuse to BS1362.
• The appliance must be earthed.
• This appliance must not be connected to a three
phase supply.
• IPX4D.
3.2.4
WATER MAINS PRESSURE:
• Minimum mains water pressure: 1.3 bar for 25 Si and
2.0 bar for the 30 Si, for maximum performance.
• Maximum mains fed water pressure 10 bar.
If necessary fit a pressure reducing valve.
NOTICE: Non return, flow back prevention
devices (including those associated with
water meters) fitted to the mains water
supply can cause a pressure build up which
could damage the boiler and other
household appliances.
NOTICE: This is reduced to IP20 if the
following mechanical timers are fitted;
7 716 192 036 or 7 716 192 037
• Wiring must comply with the latest IEE wiring
regulations.
3.2.2
EQUIPOTENTIAL BONDING
MAIN EQUIPOTENTIAL BONDING
Main equipotential bonding is carried at the origin of the
electrical installation and connected to the main
electrical earthing terminal.
WATER SUPPLY
• Where the mains water supply has a non-return,
flow back prevention valve fitted, a mini expansion
vessel (1) should be connected to the mains water
inlet pipe (2) between the non-return valve (3) and
the boiler (4) as shown below.
Metal pipes can be used as bonding conductors if joints
are metal to metal and electrically continuous.
4
1
The IEE Wiring Regulations (BS 7671:2008) require that
extraneous conductive parts must be connected to the
main electrical earth.
2
The main bonding of incoming metallic services must be
as close as practical to their entry point, before any
branch pipe work and a maximum of 600mm from an
internal meter.
3
6720643895-04.1Wo
Bonding conductors must be copper and the same size
as other bonding conductors and not less than 10mm2.
The bonding conductors must be permanently fixed to
the metal pipes with clamps and labels (to BS 951) in a
visible position to allow for inspection.
SUPPLEMENTARY BONDING
Supplementary bonding is normally carried out in an
area of increased shock risk e.g. bathrooms.
Consult a qualified electrician for them to determine if
the installation requires supplementary bonding as
specified in the 17th edition of the IEE Wiring
regulations (BS 7671:2008).
3.2.3 GAS SUPPLY
• Boilers using Natural Gas (NG) must be connected to
a governed meter.
• Liquid Petroleum Gas (LPG) must be connected to a
regulator.
• Installation and connection of the gas supply to the
boiler must be in accordance with BS6891.
• Under no circumstance should be size of the gas
supply pipe be less than 22 mm.
• The meter or regulator and pipe work to the meter
must be checked, preferably by the gas supplier.
This is to ensure that the equipment is in good
working order and can meet the gas flow and
pressure requirements, in addition to the demand
from any other appliance being served.
12
1
Mini expansion vessel - part no. 7 716 102 105
2
Mains water inlet pipe
3
Non return valve
4
Boiler
USE IN HARD WATER AREAS:
Normally there is no need for water treatment to prevent
scale formation as the maximum temperature of the HW
heat exchanger is limited by the electronic control.
In areas where temporary water hardness exceeds
200 ppm, consideration may need to be given to the
fitting of a scale prevention device. In such
circumstances, the advice of the local water authority
should be sought.
6 720 643 895a (2010/10)
PRE-INSTALLATION
3.3
WATER SYSTEMS AND PIPE WORK
PLASTIC PIPE WORK:
SEALED PRIMARY SYSTEM:
• Any plastic pipe work must have a polymeric barrier
with 600mm (minimum) length of copper pipe
connected to the boiler.
• Plastic pipe work used for underfloor heating must be
correctly controlled with a thermostatic blending
valve limiting the temperature of the circuits to
approximately 50 °C.
PRIMARY SYSTEMS CONNECTIONS/VALVES:
• All system connections, taps and mixing valves must
be capable of sustaining a pressure up to 3 bar.
• Radiator valves should conform to BS2767:10.
• All other valves should conform to BS1010.
• Thermostatic radiator valves (TRV’s) must be used on
all radiators within the sleeping accommodation but
not the radiator where the room thermostat is sited.
This must be fitted with lock-shield valves and left
open.
• A drain cock is required at the lowest point in the
system.
NOTICE: ARTIFICALLY SOFTENED WATER
MUST NOT BE USED TO FILL THE CENTRAL
HEATING SYSTEM
• The CH sealed system must be filled using a WRAS
approved filling loop or comply with figure 4 for
system fill.
• Where the system volume is more than 100 litres or
exceeds 2.65 bar at maximum heating temperature,
an extra expansion vessel (2) must be fitted as close
as possible to the appliance in the central heating
return.
• Pressurise the extra expansion vessel (2) to the same
figure as the expansion vessel built into the appliance.
• Do not use galvanised pipes or radiators.
SYSTEM FILL
Mains
supply
Heating
return
Hose union
CV
SV
• An air vent is required at all the high points in the
system.
SV
Test point
The boiler is equipped with an automatic
internal by-pass.
CV
Temporary hose
CV = Check Valve
SV = Stop Valve
6720643895-05.1Wo
SHOWERS/BIDETS:
• If a shower head can be immersed in water or comes
closer than 25mm from the top edge of a bath or
shower tray spill over level then an anti-syphon device
must be fitted to the shower hose.
Fig. 4
System fill
TYPICAL SEALED SYSTEM
• Bidets with direct hot and cold mains water can be
used (with the approval of the local water authority)
and must be the over rim flushing type with shrouded
outlets to prevent the fitting of hand held sprays.
5
5
5
5
1
2
3
4
4
6720643895-06.1Wo
Fig. 5
Sealed system
1
Appliance expansion vessel - CH
2
Extra expansion vessel - CH return
3
Pressure relief discharge
4
Drain cock
5
Radiators
Tab. 9
6 720 643 895a (2010/10)
Key to fig. 5
13
PRE-INSTALLATION
CONDENSATE PIPE WORK
NOTICE:
B Where a new or replacement boiler is
being installed, access to an internal
“gravity discharge” point should be one
of the factors considered in determining
boiler location.
Alternatively if the first option is not possible an internal
kitchen or bathroom waste pipe, washing machine
waste pipe etc. can be used.
B The condensate pipe must be a minimum
of 22 mm Ø plastic pipe.
B Ensure there are no blockages in the pipe
run.
4
1
B The condensate pipe work must fall at
least 50 mm per metre towards the outlet
and should take the shortest practicable
route.
100mm
5
22mm Ø
75mm
min.
Key to condensate illustrations
6
1
Condensate discharge from boiler
2
Soil and vent stack
3
Minimum 450mm and up to three storeys
4
Visible air break at plug hole
5
Sink or basin with integrated overflow
6
75 mm sink waste trap
7
Condensate pump
3.4.1
6720644744-07.2Wo
3.4
Fig. 7
Disposal to a waste pipe
CONDENSATE PUMP
Where “gravity discharge” to an internal termination is
not physically possible, or where very long internal runs
would be required to reach a suitable discharge point,
condensate should be removed using a proprietary
condensate pump, of a specification recommended by
the boiler or condensate pump manufacturer.
INTERNAL CONNECTIONS
In order to minimise risk of freezing during prolonged
cold spells, the following methods of installing
condensate drainage pipe should be adopted, in order of
priority.
Wherever possible, the condensate drainage pipe should
be routed and terminated so that the condensate drains
away from the boiler under gravity to a suitable internal
foul water discharge point such as an internal soil and
vent stack. A suitable permanent connection to the foul
waste pipe should be used.
The pump outlet pipe should discharge to a suitable
internal foul water discharge point such as an internal
soil and vent stack, internal kitchen or bathroom waste
pipe, washing machine waste pipe etc. A suitable
permanent connection to the foul waste pipe should be
used.
4
5
75mm
min.
1
6
2
22mm Ø
22mm Ø
Fig. 6
14
3
6720644744-06.2Wo
1
7
6720644744-08.2Wo
Fig. 8
Condensate pump disposal
Disposal to soil vent stack
6 720 643 895a (2010/10)
PRE-INSTALLATION
3.4.2
EXTERNAL CONNECTIONS
NOTICE: Freezing conditions
B Pipe work length should be kept to a
minimum and the route as vertical as
possible.
B Where pipe work is subjected to extreme
cold or wind chill, a weather proof
insulation should be used.
FITTING AN EXTERNAL AIR BREAK
• Refer to figure 9. When a rain water down pipe, that
goes directly into a sewer that carries both rainwater
and foul water, is used to dispose of condensate.
• An air break must be installed in the 43 mm pipe work,
between the boiler condensate outlet and the
drainpipe, outside the property, to avoid flooding
during adverse weather conditions.
NOTICE: Condensate waste
B Care should be taken when siting a soakaway to avoid obstructing existing
services.
17
1
13
Continued - Key to condensate illustrations
9
100 mm Ø minimum plastic pipe
10
Drainage holes
11
Limestone chippings
12
Bottom of sealed tube
13
Insulate and increase pipe size
14
Pipe work transition
15
External air break
16
Air gap
17
External rain water pipe into foul water
18
43mm 90° male/female bend
If no other discharge method is possible then the use of
an externally run condensate drainage pipe terminating
at a suitable foul water discharge point, or purposedesigned soak away, may be considered.
If this method is chosen then the following measures
should be adopted:
B The external run be kept as short as possible and not
exceed three metres.
16
18
Fig. 9
B The use of fittings, elbows etc. should be kept to a
minimum and any internal “burrs” on cut pipe work
should be removed so that the internal pipe section is
as smooth as possible.
6 720 643 895a (2010/10)
8
Disposal into a rainwater down pipe
Condensate drainage pipe can be run above
or below ground.
Where the pipe terminates over an open drain or gully,
the pipe should terminate below the grating level, but
above water level, in order to minimise “wind chill” at
the open end.
The use of a drain cover (such as those used to prevent
blockage by leaves) may offer further protection from
wind chill.
Pipe drainage will be improved if the end is cut at 45°
angle as opposed to a straight cut.
B The pipe should be run internally as far as possible
before going externally and the pipe diameter should
be increased to 32mm before it passes through the
wall to the exterior. The pipe should be insulated
using suitable waterproof and weather resistant
insulation.
B The external pipe should take the shortest and least
exposed route to the discharge point, and should
"fall" as steeply as possible away from the boiler, with
no horizontal runs in which condensate might stand.
15
14
6720644744-09.2Wo
68mm Ø PVCu strap on fitting
1
13
14
25mm min.
6720644744-10.2Wo
8
Fig. 10 External disposal
15
PRE-INSTALLATION
3.5
CONDENSATE SOAK AWAY
• The condensate drainage pipe may be run above or
below the ground to the soak away.
• The examples shown on this page run above ground.
• The soak away must use a 100mm Ø plastic tube with
two rows of three 12 mm holes on 25 mm centres and
50 mm from the bottom of the tube. The holes must
face away from the house.
• The tube must be surrounded by at least 100 mm of
limestone chippings to a depth of 400 mm.
NOTICE:
B The pressure relief valve is a safety device
for the boiler and if activated may
discharge boiling water or steam through
the relief valve drain pipe.
B Care should be taken when siting the
outlet pipe so that it does not cause an
obstruction or discharge above a
window, entrance or other public access
where it could cause a hazard.
Minimum hole size for the condensate soak
away must be 400mm deep by 300mmØ .
In situations where there are likely to be extremes of
temperature or exposure, the use of a proprietary traceheating system for external pipe work, incorporating an
external frost thermostat, should be considered. If such
a system is used, the requirement to use 32mm pipe
does not apply, however all other guidance above, and
the instructions for the trace heating system, should be
closely followed.
PRESSURE RELIEF PIPE WORK
• The pressure relief drain pipe (1) from the boiler
should be at least 15mm diameter copper pipe and
run downwards, away from any electrical equipment
or other hazard, preferably to an external drain or
soak away.
• Pipe (1) should be finished with a partial bend, near
the outlet to face the external wall (as shown) to help
prevent freezing.
NOTICE: Unheated internal areas.
B Internal pipe runs in unheated areas such
as lofts, basements and garages should
be treated as external runs.
1
9
10
1
2
500mm min.
13
3
14
25mm min.
11
10
400mm
min.
12
6720644744-11.2Wo
9
4
Fig. 11 Soak away
14
13
6720643895-08.1Wo
Fig. 13 Pressure relief pipe work
2
Outside wall
1,3
Drain pipe
4
External drain
Tab. 10 Key to fig 7
1
25mm min.
7
6720644744-12.2Wo
Fig. 12 Condensate pump to external disposal
16
6 720 643 895a (2010/10)
PRE-INSTALLATION
3.6
BOILER LOCATION AND CLEARANCES
3.6.1
INSTALLATION
3.6.3
This boiler is only suitable for installing internally within
a property at a suitable location onto a fixed, rigid
surface at least the same size as the boiler and capable
of supporting the boiler weight.
NOTICE:
No surface protection is required against
heat transfer from the boiler
3.6.2
Figure 14 shows the minimum space required to install
and service the boiler in a ventilated compartment.
• If a boiler is installed in a compartment with
clearances less than shown in the tables 13, 14,
or 15 ventilation is required. Refer to table 11 for
ventilation requirements.
High level
Low level
To room or
internal space
Direct to
outside
Minimum free
area 122 cm2
Minimum free
area 61 cm2
Minimum free
area 122 cm2
Minimum free
area 61 cm2
Follow the requirements of BS6798 and BS5440 Part 2
and note:
• Minimum clearances must be maintained.
• An access door is required to install, service and
maintain the boiler and any ancillary equipment.
• If fitting the boiler into an airing cupboard use a noncombustible material to separate the boiler from the
airing space.
The material can be perforated up to a maximum hole
size of 13mm.
SERVICING CLEARANCES VENTILATED COMPARTMENT
Vent position
COMPARTMENTS:
3.6.4
BATHROOMS
A boiler fitted with a non-mechanical timer or with no
timer can be installed in zone 2 or outside the shaded
area .
A boiler with a mechanical timer or RF mechanical timer
with room thermostat must only be installed outside the
shaded area.
Additional RCD (Residual Current Device) protection
may be required.
Refer to the latest IEE wiring regulations.
600 mm
600 mm
Tab. 11 Compartment ventilation
930 mm
750 mm
410 mm
2
+ 30 mm
above elbow
1
1
2
2250 mm
2250 mm
Using 100 mm
flue kit
5 mm
1080 mm
600mm radius
Using 125 mm
flue kit
1100 mm
5 mm
6720643895-121.1Wo
600 mm
25 mm*
600 mm**
750 mm
2
1
1
2
2250 mm
2250mm
200 mm
Fig. 14 Ventilated compartment
*
**
Minimum clearance to removable door
Minimum clearance required for servicing
Tab. 12 Minimum clearances
6 720 643 895a (2010/10)
600mm radius
6720643895-10.1Wo
Fig. 15 Bathroom installations
17
PRE-INSTALLATION
3.6.5
BOILER CLEARANCES - UNVENTILATED COMPARTMENTS:
The tables below show the options for the minimum space required to install and service the boiler inside an
unventilated compartment.
3.6.6
UNVENTILATED COMPARTMENTS - INSTALLATION CLEARANCES
CAUTION: CLEARANCES
B Top and bottom clearances must not be reduced below the values shown in table 13 as they are the
minimum clearances required for servicing.
Unventilated Compartment Installation Clearances (millimetres)
The suggested total unventilated compartment minimum clearances are:
Side
Above
Below
Front (to removable door)
400
170 approx. (30 above the elbow)
200
100
Tab. 13 Minimum unventilated compartment clearances
If Side Clearances are Reduced (millimetres)
If total side clearance is reduced to:
(Combined left and right clearances
excluding the appliance)
Increase height clearances to (approx):
(Combined top and bottom clearances
excluding the appliance)
OR
Front clearance (to
removable door) must
be increased to:
350
441
129
300
523
161
250
617
200
200
717
243
150
856
295
100
1012
358
50
1202
434
Tab. 14 Reduced side clearances
If Front Clearance is Reduced (millimetres)
If front clearance (to
removable door) is
reduced to:
Increase overall height clearances to approx:
(Combined top and bottom clearances
excluding the appliance)
OR
Increase total side clearance to:
(Combined left and right
clearances excluding the
appliance)
50
511
505
25
596
569
Tab. 15 Reduced front clearances
18
6 720 643 895a (2010/10)
PRE-INSTALLATION
3.7
PLUMBING MANIFOLD
3.7.1
CONNECTIONS
1 2 3
Heating System
22mm compression fittings
DHW
15mm compression fittings
Gas
22mm compression fittings
4 5
Tab. 16
Use the fittings supplied in the Hardware literature pack.
• If the boiler pipes are to be run behind the appliance
ensure that the pipes pass through the slot in the
white cardboard guide (A). This is fitted to the boiler
frame.
Further guidance on pipe routing can be
found printed on the boiler template
(supplied with the boiler).
• For further ease of fitting, an optional Vertical Prepiping Assembly kit is available, comprising five
pre-formed copper pipes and an earth bonding strip.
Part number: 7 716 192 570.
• To cover the pipe work under the boiler, down to the
counter top, an optional “Below boiler pipe cover”
can be used.
Part number: 7 716 192 608
6
7
1
6720643895-11.1W
2
3
4
5
Fig. 17 Plumbing manifold
2
3
4
5 7
6720643895-107.1Wo
6 1
Fig. 16 Pipe dimensions
6 720 643 895a (2010/10)
#
Function
From left Diameter
case edge of pipe
1
CH Flow
70 mm
22 mm
2
DHW Outlet
135 mm
15 mm
3
Gas
200 mm
22 mm
4
Domestic Cold Mains In
267 mm
15 mm
5
CH Return
330 mm
22 mm
6
Condensate
35 mm
22 mm
7
Pressure Relief Valve
367 mm
15 mm
Tab. 17 Key to figures 16 & 17
19
PRE-INSTALLATION
3.8
FLUE OPTIONS
CAUTION: Non accessible flue systems:
Plume management kits are available for the
60/100 horizontal flue system.
Refer to the manual supplied with the plume
management kits for complete installation
instructions
B Where a flue system is not going to be
accessible, provision must be made for
service and inspection.
B Voids containing concealed flues must
have at least one inspection hatch no less
than 300mm square.
FLUE LENGTHS
The flue systems have different maximum flue lengths
B Flue joints within the void must not be
more than 1.5M from the edge of the
inspection hatch.
The Greenstar series has the option of two horizontal
60/100 RSF (telescopic and extended telescopic) and
two horizontal 80/125 RSF (telescopic and extended
telescopic) flue systems and two vertical RSF (60/100 or
80/125) flue systems:
B Inspection hatches should be located at
changes of direction.
B If this is not possible, bends should be
viewable from both directions.
The next page shows various fluing options.
NOTICE: Effective flue lengths:
Refer to the Flue options in table 18 for the straight flue
lengths required to achieve the maximum flue length.
B each 90° bend used is equivalent to
2 metres of straight flue
B each 45° bend used is equivalent to
1 metre of straight flue
25Si and 30Si boilers
Maximum total
flue length (mm)
FLUE TYPE
60/100
80/125
1
Telescopic horizontal flue assembly
570
1,070
2
Horizontal flue extension
4,600
13,000
3
Horizontal flue with 1 x 90° bend
2,600
11,000
4
Horizontal flue with 2 x 90° bends
N/A
9,000
5
High level horizontal flue
4,600
13,000
6
High level horizontal flue with 2 x 90° bends
2,600
11,000
7
High level horizontal flue with 3 x 90° bends
N/A
9,000
8
Vertical balanced flue assembly
6,400
15,000
9
Vertical balanced flue with 2 x 90° bends
2,400
11,000
10
Vertical balanced flue with 2 x 45° bends
4,400
13,000
Tab. 18 Flue options
20
6 720 643 895a (2010/10)
PRE-INSTALLATION
350 mm - 570 mm
1
130 mm Min
7
2
Pitc
h
roo ed 500 mm
f
300 mm
Flat roof
8
3
4
9
5
10
6
6720643895-12.1Wo
6 720 643 895a (2010/10)
21
PRE-INSTALLATION
3.9
FLUE TERMINAL POSITIONS
All measurements in millimetres
300
6
Dormer
Window
500
25
5
7
14
25
1,500
Velux Window
400
8
10
9
11
200
Drainpipe
4
3
500
600
500
300
1,200
300
25
12
13
1,500
300
2
Boundary
Window
300
15
600
1 300
6720643895-13.2Wo
Fig. 18 Flue terminal positions
NOTICE:
B All measurements are the minimum clearances required.
B Terminals must be positioned so to avoid combustion products entering the building.
B Support the flue at approximately one metre intervals and at a change of direction, use suitable
brackets and fittings (Flue bracket part numbers.: 100mm - 7 716 191 092, 125mm - 8 716 110 272).
Key to illustration
1. Flue clearance must be at least 300mm from the
ground. Terminal guards must be fitted if the flue is
less than 2 metres from the ground or if a person
could come into contact with the flue terminal.
9. The flue cannot be lower than 1,000mm from the top
of a light well due to the build up of combustion
products.
10. 2,000mm below a Velux window, 600mm above or to
either side of the Velux window.
2. 600mm distance to a boundary, unless it will cause a
nuisance. BS 5440: Part 1 recommends that care is
taken when siting terminals in relation to boundaries.
11.200mm below eaves and 75 mm below gutters, pipes
and drains.
3. 600mm minimum clearance from a skylight to a
vertical flue.
13.300mm to an internal or external corner.
4. Vertical flue clearance, 500mm to non-combustible
building material, and 1,500mm clearance to
combustible building material.
5. The dimension below eaves, gutters, pipes and drains
can be reduced to 25mm, as long as the flue terminal
is extended to clear any overhang. Any external flue
joints must be sealed with a suitable silicon sealant.
6. 500mm clearance to any vertical structure on a roof,
600mm to room sealed flue or 1,500mm to an open
flue.
12.1,200mm between terminals facing each other.
Installations in car ports are not
recommended.
14.The dimension below eaves, balconies and car ports
can be reduced to 25 mm, as long as the flue terminal
is extended to clear any overhang.
Any external flue joints must be sealed with suitable
silicon sealant.
15.300mm above, below and either side of an opening
door, air vent or opening window.
7. 1,500mm between a vertical flue terminal and a
window or dormer window.
8. 400mm from a pitched roof or in regions with heavy
snow fall 500mm.
22
6 720 643 895a (2010/10)
PRE-INSTALLATION
3.10 PLUME MANAGEMENT TERMINAL POSITIONS
All measurements in millimetres
±45°
Plume management deflector:
Flue Exhaust
Outlet
8
180°
Air Intake
7
±80°
3
200
300
2
1,200
Balcony
4
150
100
200
600
200
200
1
25
300
150
Window
300
Window
300
200 5
Window
Door
Boundary
25
150
150
150
6
6720643895-14.1Wo
Drainpipe
Fig. 19 Plume terminal positions
NOTICE:
B All measurements are the minimum clearances required.
B Refer to figure 18 for all concentric flue terminal positions unless the flue position is specified on the
figure above “Plume terminal positions”.
B Terminals must be positioned so to avoid combustion products entering the building.
B Support the flue at approximately one metre intervals and at a change of direction, use suitable
brackets and fittings.
Key to illustration
1. 600 mm distance to a boundary or surface facing a
boundary, unless it will cause a nuisance. BS 5440:
Part 1 recommends that care is taken when siting
terminals in relation to boundaries.
2. Internal/external corners. The air intake clearance can
be reduced to 150 mm providing the flue exhaust
outlet has a 300 mm clearance.
3. The flue cannot be lower than 1,000 mm from the top
of the light well due to the build up of combustion
products.
4. 1,200 mm between air intake and facing terminal.
5. Clearance no less than 200 mm from the lowest point
of the balcony or overhang.
Installations in car ports are not
recommended.
7. Using a Plume Management Kit the air intake
measurement can be reduced to 150 mm providing
the flue exhaust outlet has a 300 mm clearance.
Plume kits running horizontally must have a 10° fall
back to the boiler for proper disposal of condensate.
For details on specific lengths see relevant boiler
Technical & Specification information.
8. This feature allows some basic plume re-direction
options on a standard telescopic horizontal flue
terminal.
300 mm minimum clearances to a opening e.g.
window.
However the minimum clearance to an opening in
direction that the plume management is facing, must
be increased to 1,500 mm.
Where the flue is less than 150 mm to a drain pipe and
plume re-direction is used the deflector should not be
directed towards the drainpipe.
6. 1,200 mm from an opening in a car port on the same
wall i.e. door or window leading into dwelling.
6 720 643 895a (2010/10)
23
INSTALLATION
4
INSTALLATION
WARNING: All the previous “PreInstallation” sections must be read and the
requirements met before starting boiler or
flue installation.
4.1
UNPACKING WALL FRAME &
ANCILLARY ITEMS
CAUTION: LIFTING AND CARRYING
IMPORTANT HANDLING INSTRUCTIONS:
• It is advised that two people are used to carry the
carton from the van to the point of delivery.
• Once the carton has been delivered, the outer carton
is removed first. Care should be taken when releasing
the straps. If a sharp implement is used make sure the
outer carton is not pierced and that the implement is
used in such a way so that it may not cause personal
injury.
B Bend the knees and keep the back
straight with feet apart, when lifting or
putting down heavy objects.
• All sharp objects must be covered or the blade
retracted after use and put away in a safe place.
Care should be taken when lifting the boiler from the
base and the proper technique for safe lifting of any
heavy object should be strictly observed.
B DO NOT lift and twist at the same time.
Additional requirements for roof space installation:
B Only lift a manageable weight, or ask for
help.
B Lift and carry object close to the body.
1. Wall mounting frame
• The boiler should be first unpacked before ascending
ladder to loft space.
• Two sets of steps should be used.
2. Wall mounting template
• Two people should share the lifting of the boiler up to
the loft hatch, where the boiler is entered into the loft
space tilted and slid on its back into the loft.
3. Inner packaging
4. Hardware literature pack
5. Bottom panel
• Once the appliance is removed from its packaging
check the contents against the packing list.
6. Front fascia
7. Syphon assembly
NOTICE:
B Before installing the appliance, ensure
that the system has been cleaned as
explained on page 11.
1
1. Remove straps and open the top of the boiler
packaging.
2. Remove the wall mounting frame (1) and wall
mounting template (2) and from the packaging.
4
3
5
3. Remove the boiler bottom panel (5), front fascia (6),
hardware literature pack (4) and syphon assembly (7)
from the carton.
2
6
6720643895-16.1Wo
7
Fig. 20 Unpacking
24
6 720 643 895a (2010/10)
INSTALLATION
4.2
WALL MOUNTING TEMPLATE & FLUE OPENING
WARNING: BEFORE DRILLING
ENSURE THAT THERE ARE NO PIPES,
ELECTRICAL CABLES, DAMP PROOF
COURSES OR OTHER HAZARDS .
4.
3.
1.
189 mm
SAFETY:
All relevant safety precautions must be undertaken.
Protective clothing, footwear, gloves and safety goggles
must be worn as appropriate.
FIXING THE WALL MOUNTING FRAME:
B The boiler wall mounting template shows the relative
positions of the flue and the top and bottom fixing of
the wall mounting frame.
2.
1. Fix the wall mounting template to the wall in the
desired position.
The wall mounting template has been sized
to allow for minimum clearances of 5mm
sides, 200mm base and 30mm above a
100mm diameter flue elbow.
6720643895-17.1Wo
2. Drill 4 holes for the wall mounting frame through the
template.
Fig. 21 Marking the flue position
REAR FLUE OUTLET
B The drawing opposite shows the boiler wall mounting
template with the flue centre lines of both the
100 mm and 125 mm flue systems.
3. Mark centre line of flue to be used (3); the external
diameter of the hole can also be marked if required.
B If a 100 mm diameter flue is to be used, a 125 mm
diameter hole is required. However, if using the
weather sealing collar by pushing it through from
inside the property, then a 150 mm diameter hole is
required to accommodate this.
B The flue turret of the 100 mm flue has an in-built 3°
angle.
B If extensions are to be added then the complete flue
must rise at an angle of 3°.
B Drill hole using a core drill or similar.
SIDE OUTLET:
4. Mark from the centre line of the wall mounting
template to the wall that the flue will pass through
(4).
B Allow for a rise of 52mm per metre length of flue, to
give a 3° angle.
B Clear any debris from the site.
An optional filling loop: 7 716 192 281 is
available to fill the system (not supplied
with the boiler).
6 720 643 895a (2010/10)
25
INSTALLATION
4.3
UNPACKING THE APPLIANCE
1. Outer carton
2. Inner sleeve (unwrap from front)
3. Packing base
4. Protective wrapping
5. Appliance outer case
B Remove outer carton (1) and place safely away from
the working area.
2
B With the outer packaging removed and the inner
sleeve (2) still in place gently lay the boiler on its
back.
B The boiler will lie at an angle to the floor to allow the
boiler outer casing (5) to be removed.
3
B The inner sleeve (2) opens as shown in figure 24.
B Remove the protective wrapping (4).
1. Undo but do not remove the two screws at the bottom
of the boiler
2. Undo the two screws at the top (see fig. 25).
3. Remove the outer case (5).
6720643895-19.1Wo
Fig. 23 Lay boiler down
3
B Remove any packaging within the boiler and the
packaging base (3).
CAUTION: Hanging the boiler
B Remove the plastic strip fitted to pipes
before hanging the boiler.
4
2
6720643895-20.1Wo
Fig. 24 Remove packaging
1.
1
3.
5
2.
2
3
6720643895-18.1Wo
6720643895-21.1Wo
Fig. 22 Remove outer carton
Fig. 25 Outer case screw removal
26
6 720 643 895a (2010/10)
INSTALLATION
4.4
BOILER CONNECTIONS
CAUTION: ISOLATE THE MAINS GAS
SUPPLY BEFORE STARTING ANY WORK
AND OBSERVE ALL RELEVANT SAFETY
PRECAUTIONS.
1. Pull the extended lever forward and down until there
is no further travel.
GAS AND WATER CONNECTIONS:
B Remove wall mounting template and secure the wall
mounting frame to the wall with the appropriate
fixings for the boiler weight and wall type.
B System pipes may be run vertically upwards behind
the boiler or below it. See Plumbing Manifold Section
on page 19.
1. CH flow (22mm),
6720643895-116.1Wo
2. CH return (22mm),
3. Gas inlet (22mm),
4. Domestic Cold Water inlet (15mm),
5. DHW outlet (15mm)
If using the optional filling loop: 7 716 192 281 (not
supplied with the boiler) fit it before hanging the boiler
on the wall frame.
1.
Fig. 27 PRV connection in the down position
CAUTION: Hanging the boiler
The bonded washer supplied is for the Gas
connection only.
B Fit sealing washers to service valves before hanging
boiler.
1.
2.
3.
4.
B Remove the plastic strip fitted to pipes
before hanging the boiler.
B Hang the boiler on to the wall mounting frame by the
two brackets positioned left and right at the top rear
of the appliance.
Do not lift the appliance by the air gas manifold. There
are two handling holes incorporated into the inner
casing left and right in the lower section of the
appliance.
5.
6720643895-24.1Wo
Fig. 26 Sealing washers
NOTICE: Before hanging the boiler onto the
wall mounting frame ensure that the
pressure relief valve connection is in the
DOWN position.
This is located on the right hand side of the
wall frame at the rear.
Apply a smear of silicone lubricant to the
seal to ease connection later.
6 720 643 895a (2010/10)
6720643895-22.1Wo
Fig. 28 Hanging the boiler
27
INSTALLATION
To connect the expansion vessel flexible pipe to the
hydraulic manifold situated to the left of the pump:
NOTICE: The pressure relief connector
must be repositioned after the boiler has
been correctly mounted to the wall
mounting frame.
B Remove and discard the plastic cap from the
expansion vessel flexible pipe.
1. Refer to figure 30, release the retaining clip.
To ease assembly of components, apply
silicone lubricant to sealing surfaces.
2. Remove and discard the orange plastic blanking plug
from the pressure vessel connection at the hydraulic
manifold.
1. Push the lever on the pressure relief connector UP
until the stop on the inside of the handle is over the
shoulder of the metal bracket to secure in place.
2.
1.
1.
6720643895-26.1Wo
6720643895-27.1Wo
Fig. 30 Blanking plug
1. Refer to figure 31 and insert the expansion vessel
flexible pipe it to the fitting on the pump.
2. Secure in place with the wire retaining clip.
Fig. 29 PRV in the up position
B Remove the screw from the control panel retaining
bracket and lower the control panel into the service
position.
1.
B Make connections to the heating system.
Connect the gas supply to the boiler gas cock 22mm
compression.
Connect mains water in and DHW out.
2.
6720643895-28.1Wo
Fig. 31 Expansion vessel hose connection
B Connect the pressure relief drain pipe to 15mm
compression joint using the compression nut and
olive supplied in the literature/hardware pack.
28
6 720 643 895a (2010/10)
INSTALLATION
4.5
FLUE INSTALLATION
4.5.2
REDUCING THE TELESCOPIC FLUE LENGTH:
HORIZONTAL FLUE (60/100mm diameter)
Ensure that the “TOP” label is facing up
before securing the flue section to the
turret.
For vertical flues and 80/125mm horizontal flues, please
refer to separate instructions supplied with the flue kit.
To ease assembly of flue components, apply
silicone lubricant to sealing surfaces.
Basic instructions for the 60/100mm diameter flue are
shown below.
The flue terminal MUST be fitted with the 'TOP' label
uppermost to allow the correct fit and use of the plume
management system.
3
WALL
189 mm
1
2
6720643895-31.1Wo
Fig. 34 Reducing the standard terminal
Edge
of
case
B Remove securing screws (3) to detach the terminal
assembly from the turret.
200 mm
6720643895-29.1Wo
Fig. 32 Flue turret centre
4.5.1
MEASURING THE FLUE (STANDARD FLUE):
B Measure from the outside of the wall to the centre line
of the flue turret to determine length L.
B Subtract 50mm from the length L to give the correct
dimension to the flue elbow connection.
B If the length L falls within the telescopic range of 350
to 570mm, then no cutting will be required.
B If the required length is less than 350mm the standard
telescopic flue can be modified, refer to following
section.
B If the required length is greater than 570mm, then flue
extensions will have to be used. Refer to the 60/100
Horizontal Flue Instruction manual provided in the
telescopic flue kit.
Adjusting the telescopic flue length:
B Slide terminal section (2) from the terminal assembly
and discard.
B To use terminal (1) without cutting remove the
location lug (4) on the inner flue tube (5) and remove
any burrs.
To reduce the flue length further:
265 mm
1
130 mm
MIN
4
6
5
6720643895-32.2Wo
Fig. 35 Further reduction
L
B Mark the length required for the terminal as shown
(min. 130mm) and cut square, taking care not to
damage the tubes.
570 mm
350 mm
B Remove any burrs and chamfer the outer edge of the
tubes to assist ease of connection and prevent seal
damage.
2
1
6720643895-30.1Wo
Fig. 33 Standard telescopic flue
The aluminium tape is not required when
reducing the terminal.
Extend tube (1) by withdrawing from tube (2) to achieve
the flue length required, between 350 - 570mm.
Secure with screw provided and seal joint with the
aluminium tape supplied.
6 720 643 895a (2010/10)
29
INSTALLATION
4.5.3
INSTALLING THE TELESCOPIC FLUE:
Refer to figure 36.
1. Set the flue length to the distance required, secure
with screws provided.
B If fitting the outer seal from outside the building, slide
the outer wall seal onto the terminal as shown.
2. Seal the joint with the aluminium tape provided.
4. If fitting from inside the building; slide the outer wall
seal onto the terminal.
3.
2.
1. 1.
1.
3. Slide the inner wall seal onto the terminal.
4.
TOP
3.
1.
2.
110
1.
6720643895-33.1Wo
Fig. 38 Telescopic flue installation
4.
6720644842-08.1Wo
Fig. 36 Telescopic flue
The turret securing screws are from the
boiler and are not in flue kit.
For more information refer to the 60/100
Horizontal Flue kit Instruction Manual
ADDITIONAL NOTES AND REMINDERS:
• Ensure that all cut lengths are square and free from
burrs.
Refer to figures 37 & 38.
1. Remove the three inner flue tube retaining screws (2).
The inner tube will be held in place in the appliance.
2. Check the boiler flue seal is correctly seated and
apply silicone grease.
3. Position terminal through the flue opening in the wall
to the outside of the building by the distance shown.
4. Align the flue turret to the boiler flue outlet with flat
facing (1) to the rear of the boiler.
The flue turret should be pushed straight down, on to
the boiler.
• The flue is sealed when assembled correctly and the
components are pushed fully home.
• The flue is set at an angle of 3° or 52mm per metre
length.
2m
1m
52mm
104mm
Fig. 39 Slope for condensate disposal
1
2
6720643895-35.1Wo
Fig. 37 Aligning the turret
B Fit the screws removed in step 1 to secure flue turret.
30
6 720 643 895a (2010/10)
6720644842-10.1Wo
INSTALLATION
4.5.4
FLUE TERMINAL PLUME RE-DIRECTION:
NOTICE: Outlet position
The flue discharge can be re-directed allowing some
plume redirection control, alternatively, a complete
plume management system can be fitted to the flue
terminal.
B The flue terminal outlet position must
follow those stated in the relevant
appliance instruction manual.
When redirecting the flue discharge the
outlet terminal must be at least 1500mm
from any opening in the direction of the
discharge to prevent combustion
products from entering the building.
RE-DIRECTING THE FLUE DISCHARGE
1. Remove screws (1) and rotate the terminal end (2)
through 180°.
NOTICE: DO NOT rotate the complete
terminal assembly.
1
1. Refit the terminal end (2) and secure with screws (1).
2. Loosen screws (3) and rotate the entire outlet
assembly to redirect the plume. Tighten screws (3) to
secure in the required position.
The flue terminal outlet has built-in stops to
limit rotation for horizontal fluing to allow
condensate to run back into the boiler for
safe disposal. Do not attempt to force
beyond the limit stops.
4
2
1.
3
6720643895-119.1Wo
1
2
Fig. 41 Plume distance to opening
2.
180°
±80°
1
Opening in building
2
Flue discharge
3
Plume deflector
4
Minimum 1500mm from an opening in the
building
Tab. 19 Key to figure 41
3.
3 1
6720643895-34.1Wo
Fig. 40 Plume redirection
6 720 643 895a (2010/10)
31
INSTALLATION
4.6
CONDENSATE CONNECTION
Never terminate or discharge into any open source,
including; sink, bath, shower, bidet, toilet etc.
NOTICE: Any external condensate pipe work
must be protected with weather resistant
insulation to help prevent freezing.
• Ensure that the condensate drain is a 22mm diameter
plastic pipe. The pipe must fall at least 50mm per metre
towards the outlet.
1. Push the syphon onto the sump assembly, until the
lug on the sump is fully engaged with the slot on the
back of the syphon assembly and the clip is engaged
in the top of the syphon.
NOTICE: Do not use solvents, adhesive or
lubricant when pushing the pipe onto the
rubber connector.
2. Push the discharge hose, onto the wall frame
connector, until fully engaged.
Do not use lubricants or sealing compounds.
1. Remove the sump blanking cap from the sump.
1.
B Fill syphon with 200 to 250 millilitres of water.
1.
2.
6720643895-37.1Wo
6720643895-36.1Wo
Fig. 42 Remove blanking cap
Fig. 44 Fitting syphon
Maintenance
NOTICE: Pull the fan lead, DHW NTC sensor
lead and ignition cable out of the way when
fitting the syphon to ensure that they are not
trapped by the syphon assembly or
discharge hose.
There is no need to remove the Syphon Assembly for
servicing unless cleaning is required.
To drain debris from the syphon, during the annual
service:
B Release the clips and remove the drainage cap (1)
from the bottom of the syphon.
To fit the syphon assembly:
B Remove orange seal retainer and discard.
B Empty the debris and condensate from the syphon
into a suitable container.
6720643895-103.1Wo
B Ensure that the drainage cap and seal are completely
clean.
B Re-fit the drainage cap to bottom of the syphon.
Fig. 43 Seal retainer
1
Fig. 45 Syphon drainage cap
32
6 720 643 895a (2010/10)
6720643895-38.1Wo
INSTALLATION
4.7
ELECTRICAL
Refer to figure 47.
CAUTION: ISOLATE THE MAINS
ELECTRICITY SUPPLY BEFORE STARTING
ANY WORK AND OBSERVE ALL RELEVANT
SAFETY PRECAUTIONS.
1. Unscrew the three screws in the control panel.
2. Remove the connections cover.
1.
2.
The boiler is already wired with a mains
supply cable.
A spare strain relief block is supplied in case
the pre-wired cable is not used.
1.
1.
The mains supply to the boiler must be either:
• The isolator shall be situated next to the boiler for
new systems and, where practicable, replacement
boilers.
• The isolator must have a contact separation of 3mm
minimum between all poles. Any system connected to
the boiler must not have a separate electrical supply.
6720643895-40.1Wo
• The mains electrical supply to the boiler and system
wiring centre must be common and through either a
common fused double pole isolator or a fused three
pin plug and unswitched socket.
Fig. 47 Removing the connection cover
B Pass the 230 V mains power cable, from the control
box, through the hole at the right hand side of the preplumbing manifold, marked “Mains cable” and route
to the mains isolator next to the boiler.
• Use a 3A fuse in both situations.
SI1
Fuse F1 2.5A
ACCESS TO ELECTRICAL CONNECTIONS:
SI2
Fuse F2 0.5A
B Remove boiler casing to access control panel.
SI3
Fuse F3 1.5A
1. Refer to figure 46 and remove the screw securing the
control panel.
ST6
Frost thermostat connection
ST10
Mains in & external controls connections
ST19
EMS bus connection
2. Lower the control panel into the horizontal service
position.
Tab. 20
6720643895-39.1Wo
2.
Fig. 46 Moving control panel into the service position
When stripping wires always ensure copper
strands do not fall into the control box.
6 720 643 895a (2010/10)
SI1
SI2
SI3
ST19
6720643895-45.1Wo
ST6
ST10
1.
Fig. 48 Electrical connector information
33
INSTALLATION
230 V ROOM STAT/CLOCK ST10:
PROGRAMMABLE THERMOSTAT
The figures below show the options of room thermostat
with programmer, programmer only, or room thermostat
only.
Programmable
Thermostat
230V
MAINS
SUPPLY
C
NC NO
live
brown
L
green/yellow
N
blue
N E L
The programmable thermostat may be a
hard wired or RF type.
This diagram is applicable for the hard wired
unit and the receiver section of the RF pack.
neutral
switched live
Room Thermostat
230V
MAINS
SUPPLY
Programmer
M
LR LS NS N
ST10
1
L
live
brown
blue
neutral
green/yellow
N E L
switched live
1
1
LR LS NS N
ST10
L
B Connect external controls LIVE supply to terminal LS
B Connect external controls LIVE return to terminal LR
Fig. 49 Room thermostat and programmer
Live Return (LR) is sometimes referred to as
‘Call for Heat’ or ‘Switched Live’.
Series connector, not supplied.
Make the connector safe, once wired in.
ROOM THERMOSTAT ONLY
DT20 Twin Channel
Programmer
The link between the Live (L) and Common (C)
may already be fitted as part of the
Programmable thermostat, if not then a link will
need to be wired in.
B Remove the link between LR and LS.
6720643895-42.1Wo
1
6720643895-44.1Wo
Fig. 51 Programmable thermostat
B Connect external controls NEUTRAL to terminal NS
230V
MAINS
SUPPLY
Room Thermostat
Some devices do not require connection of
a neutral i.e. battery powered devices.
OR
MT10 Mechanical
Timer
live
brown
blue
neutral
green/yellow
N E L
switched live
OPTIONAL EXTERNAL FROST STAT CONNECTION ST6:
Frost Thermostat
LR LS NS N
ST10
L
6720643895-41.1Wo
Fig. 50 Room thermostat only
FR FS NP LP
ST6
6720643895-43.1Wo
Fig. 52 Frost Thermostat
B Connect frost thermostat cables to terminals FS & FR.
B These are not polarity sensitive.
B The external frost thermostat only operates the pump
(see page 71 for internal frost protection).
34
6 720 643 895a (2010/10)
COMMISSIONING
5
COMMISSIONING
5.1
CONVERTING TO LOW NOx
NOTICE: Low NOx
ST6
ST10
B The Low NOx performance is achieved by
changing the code plug.
No adjustments need to be made.
ST8
The boiler can be converted to a “Low NOx” version.
ST18
The specifications are only applicable to the central
heating function of the boiler.
CAUTION:
B ISOLATE THE MAINS ELECTRICAL
SUPPLY BEFORE STARTING ANY WORK
AND OBSERVE ALL RELEVANT SAFETY
PRECAUTIONS.
ST17
6720645222-09.1Wo
ST15
The “Low NOx” specifications can be found in the
Technical Data on page 7.
Fig. 54 Connector locations
B Identify ST18, the code plug and connector.
The Greenstar Si combi boiler range requires a new code
plug to convert them to low NOx variants.
Each conversion kit is specific to the boiler size, refer to
the table below.
Boiler type
Gas type
Code plug no.
25kW Si Kit
NG
1132
30kW Si Kit
NG
1133
Tab. 21 Code plug number
2.
1.
ST18
ACCESS TO CODE PLUG
6720645222-10.1Wo
B Remove boiler casing to access control panel.
Fig. 55 Remove and replace the code plug
1. Remove the screw securing the control panel.
2. Lower the control panel into the horizontal service
position.
1. Refer to figure 55 and remove the code plug from the
controller, cut the tie securing the plug to the boiler
chassis and discarded the plug and tie.
2. The new code plug, tie and low NOx labels are found
in a plastic bag attached to the left hand side wall of
the boiler under the control panel.
Fit the code plug from the kit, making sure that code
plug is secured to the boiler chassis with the new tie.
B Confirm that the number on the code plug
corresponds to the boiler type in table 21.
B Replace the control panel cover.
B Move the control panel into the operational position
and secure.
B Replace the boiler casing.
1. Referring to figure 53, unscrew the three screws in
the control panel.
2. Remove the connections cover.
1.
2.
1.
1.
6720643895-40.1Wo
UPDATE DATA LABEL
Fig. 53 Removing the connection cover
6 720 643 895a (2010/10)
The data label is located on the right-hand inside wall of
the boiler, refer to item 1 of figure 57.
B The data label must be updated to show the “Low
NOx” variant data, peel off the larger portion of the
green label and apply over the original data label.
B The boiler must be identified as a “Low NOx” variant,
peel off the smaller portion of the green label and
apply to the bottom, right corner of the fascia.
35
COMMISSIONING
5.2
PRE-COMMISSIONING CHECKS
CAUTION: ISOLATE THE MAINS
ELECTRICITY SUPPLY BEFORE STARTING
ANY WORK AND OBSERVE ALL RELEVANT
SAFETY PRECAUTIONS.
B Check that the condensate pipe (1) has been
connected to the syphon.
Check that the service and water pipes are connected to
the correct position on the manifold.
1.
2.
3.
4.
5.
1
67206438
6720643895-24.1Wo
Fig. 56 Pipe fittings
Ensure that the washers have been fitted to the water
connections and the bonded washer to the gas
connection on the manifold.
o
95-47.1W
Fig. 58 Syphon connection
B Referring to figure 59, check pressure relief drain
pipe (1) is correctly fitted and securely tightened.
1. - CH Flow (22mm)
2. - DHW (15mm)
7
3. - Gas inlet (22mm)
4. - Domestic cold mains water in (15mm)
5. - CH Return (22mm)
B Check the gas type specified on the identification
plate (1), on the inside of the flap, matches that of the
gas supply.
6720643895-46.1Wo
Fig. 59 Pressure relief drain pipe
1
NOTICE: If the boiler is not to be
commissioned immediately then, after
successfully completing all of the checks
and any rectification work:
B Close the gas valve
B Close the water shut off valve
B Isolate the gas supply
B Isolate the electricity supply
6720643895-113.1Wo
B Label appropriately
Fig. 57 Identification plate
B Turn on the main gas supply, check the gas pipe work,
connections and rectify any leaks.
36
6 720 643 895a (2010/10)
COMMISSIONING
5.3
FILLING THE SYSTEM
5.4
1. Turn on the water main and open the system valves.
2. Open all radiator valves.
3. Fill the system via a WRAS approved filling loop to 1
bar then turn the valve anticlockwise to close.
4. Vent (1) any air from the boiler heat exchanger using
a suitable container to collect any water. Ensure tube
outlet (2) is directed away from the fan or any other
electrical component to prevent any water damage.
Also place a suitable cover over the fan to prevent any
spillage of water on to electrical connections. Ensure
the cover is removed after venting.
1
NOTICE:
B ARTIFICIALLY SOFTENED WATER MUST
NOT BE USED TO FILL THE CENTRAL
HEATING SYSTEM.
ENSURE THAT THE SYSTEM HAS BEEN CLEANED AS
ON PAGE 11 OF THESE INSTRUCTIONS.
FLUSHING (Central Heating):
B Switch off the boiler.
B Open all drain cocks and drain the system while the
appliance is hot.
B Close drain cocks and add a suitable flushing agent at
the correct strength for the system condition in
accordance with the manufacturer's instructions.
B Run the boiler/system at normal operating
temperature for the time stated by the manufacturer
of the flushing agent.
B Drain and thoroughly flush the system to remove the
flushing agent and debris.
INHIBITOR (Central Heating):
2
Fig. 60 Venting
WATER TREATMENT
6720643895-51 1Wo
5. Vent all radiators, tighten when completed and check
the system and correct any leaks.
B The boiler integral expansion vessel is pre-charged to
0.75 bar (equal to a static head of 7.5m (22ft). A
Schraeder type valve is fitted to the expansion vessel
to allow for pressure adjustment if required.
B If an extra expansion vessel is fitted to the central
heating return, adjust this to the same pressure as the
appliance internal expansion vessel, refer to separate
instructions with the extra expansion vessel.
6. If required increase system pressure back to 1 bar.
7. Rotate the adjustable pointer on the pressure gauge
to record the set system pressure.
8. Isolate and remove filling loop connection to system
or if using the optional integral filling connection (not
supplied with the boiler) remove the key and place in
its storage position on the bottom cover of the boiler.
An optional filling loop: 7 716 192 281 is
available to fill the system (not supplied
with the boiler).
6 720 643 895a (2010/10)
B Check drain cocks are closed and all radiator valves
are open before adding a suitable inhibitor
compatible with aluminium (or combined inhibitor/
anti-freeze if the system is exposed to freezing
conditions) to the heating system water in
accordance with the manufacturers instructions.
The pH value of the system water must be
less than 8 or the appliance warrantee will
be invalidated.
B Fill system via a WRAS approved filling loop to
between 1 and 2 bar.
B Vent all radiators; tighten vents when complete.
B Vent any air from the boiler heat exchanger using a
suitable container to collect any water.
B Ensure tube outlet is directed away from the fan or
any other electrical component to prevent damage.
Also place a suitable cover over the fan to prevent any
spillage of water onto electrical connections. Ensure
the cover is removed after venting.
B Vent all radiators.
B Re-pressurise if necessary to 1bar.
B Set all controls to maximum.
B Record the date when the inhibitor was added to the
system on the warrantee card.
NOTICE:
B The concentration of inhibitor in the
system should be checked every 12
months or sooner if system content is
lost.
B The addition of sealing agents to the
system water is not recommended as this
can cause problems with deposits left in
the heat exchanger.
37
COMMISSIONING
5.5
STARTING THE APPLIANCE
CAUTION: RUNNING THE APPLIANCE
B Never run the appliance when the
appliance/system is empty or partially
filled.
2
3
4
5
6
7
8
9
6720643895-52.1Wo
1
Fig. 61 Control panel
Switching the appliance on/off:
B Turn on mains power supply, the power on indicator
(5) illuminates BLUE.
B Turn on any external controls
B Set the thermostatic radiator controls to maximum
temperature
B Set the clock/programmer to continuously ON and the
room thermostat to maximum temperature
1
Central heating temperature control
2
Burner indicator (Green)
3
Service button
4
Cover or optional Programmer
5
Power ON and fault indicator (Blue)
6
ECO button
7
Reset button
8
DHW temperature control
9
System pressure gauge
Turn the boiler CH temperature control (1) to maximum.
The burner on indicator (2) illuminates GREEN when the
burner has lit.
If the boiler fails to light, the BLUE power indicator (5)
and reset button (7) will flash.
NOTICE: RESET
B Do not press the blue power indicator to
reset the boiler.
To reset the boiler, press and hold the reset button (7)
for more than two seconds. The boiler will be reset.
Tab. 22 Control panel legend
38
6 720 643 895a (2010/10)
COMMISSIONING
5.6
COMMISSIONING
NOTICE: The combustion settings on this
gas-fired boiler have been checked, adjusted
and preset at the factory for operation on
the gas type defined on the data plate.
No measurement of the combustion values is
necessary provided there is a meter installed
allowing the gas rate to be checked.
DO NOT ADJUST THE AIR/GAS RATIO VALVE.
When running in the service mode, the boiler
will operate both the central heating and the
domestic hot water circuits. This is to allow
sufficient time for this part of the
commissioning procedure. It will be
necessary to run water through the domestic
hot water circuit to ensure that the boiler will
not cycle on low heating demands.
Having checked:
GAS PRESSURE WITHIN THE SYSTEM
Refer to the figures below for natural gas or L.P.G gas
pressures.
The pressure at the boiler must not be less than the
pressure read at the meter minus 1 mbar.
The pressure drop from the meter to the gas valve must
not be more than 2.5 mbar. The pressure at the gas valve
must not be less than the pressure read at the meter
minus 2.5 mbar.
If the pressure drops are greater than shown below,
then this would indicate a problem with the pipe work or
connections within the system.
Meter
B That the boiler has been installed in accordance with
the installation instructions.
B The integrity of the flue system and flue seals, as
described in section 6.3 of this manual.
B The integrity of the boiler combustion circuit and
relevant seals.
5.6.1
Ensure inlet pressure is satisfactory with all
other gas appliances working.
Gas Control
valve
19 - 23 mbar
16.5 - 20.5 mbar
CHECKING THE GAS INLET PRESSURE
The inlet pressure to the appliance must be checked
using the following procedure:
Natural Gas
Boiler inlet
1 mbar
drop
1.5 mbar
drop
MEASURING THE INLET PRESSURE
18 - 22 mbar
6720644744-44.1Wo
Fig. 63 Natural gas pressures
Regulator
L.P.G.
Gas Control
valve
1
32 - 45 mbar
28 - 41 mbar
6720643895-53.1Wo
Fig. 62 Inlet pressure test point
B Close gas isolation valve.
B Slacken the screw in the inlet pressure test point (1)
and connect a manometer.
B Open gas isolation valve.
B Measure the pressure with the boiler running at
maximum.
– Press service button for more than ten seconds
and set Central Heating temperature to maximum.
– The service button will illuminate continually and
the blue power indicator will pulse five times.
B Check the gas supply working pressure at the gas
valve conforms to values shown in Fig. 63 or Fig. 64.
6 720 643 895a (2010/10)
Boiler inlet
2.5 mbar
drop
1.5 mbar
drop
29.5 - 42.5 mbar
6720644744-45.1Wo
Fig. 64 L.P.G. pressures
NOTICE:
Do not continue commissioning until the
correct gas pressure is achieved.
39
COMMISSIONING
5.6.2
CHECKING THE GAS RATE
B The gas rate should be measured at the gas meter
after 10 minutes operation at maximum.
See technical data section at the front of this manual.
B Where a gas meter is not available (e.g. L.P.G.) the
CO/CO2 must be checked to the units shown in the
setting of the air/gas ratio, refer to section 6.6.
B If pressure and gas rate are satisfactory press the
service button again and the boiler will return to
normal operation.
– If left in the service mode the control will return to
normal operation after 15 minutes.
B Close the gas isolation valve.
B Remove the manometer.
B Re-seal the screw in the gas inlet pressure test point.
B Open the gas isolation valve.
B Ensure that there are no gas leaks.
B Replace the outer case.
5.6.3
DOMESTIC HOT WATER:
Controlling the hot water temperature:
The hot water temperature can be set to between
approximately 40°C and 60°C using the DHW
temperature control.
DOMESTIC HOT WATER PRE-HEAT:
Pre-heat reduces the time taken to produce hot water at
the tap and is controlled by the ECO button.
B Press the ECO button to select either state:
– When the ECO button is not illuminated the boiler
will be in pre-heat mode (which will reduce the
time taken to produce hot water at the tap).
– OR
– When the ECO button is illuminated the boiler will
be in Economy mode with pre-heat no longer
active.
40
6 720 643 895a (2010/10)
COMMISSIONING
5.7
FINISHING COMMISSIONING
5.7.1
REPLACE OUTER CASING:
5.7.3
INSTALLING BOTTOM PANEL
B Replace outer casing making sure that the securing
points are properly located.
B The bottom panel slides onto two ledges (C) either
side of the boiler frame.
B Replace top two screws (1).
B Hold the panel up against the underside of the boiler
and slide towards the rear, until there is no more
movement.
B Tighten bottom two screws (2).
B Slide the panel forward until it is fully engaged.
1.
6720643895-54.1Wo
1.
6720643895-55.1Wo
Fig. 66 Bottom panel installation
NOTICE: Every time the power to the
appliance is turned off and on, the
appliance enters a learning mode and may
take some time to optimise the boiler
performance. This time is variable and is
dependant on hot water and central heating
demand.
2.
2.
5.7.4
B Complete the Benchmark Gas Boiler Commissioning
Checklist.
Fig. 65 Fitting case
5.7.2
HANDOVER
FITTING FASCIA FLAP
B Present the flap up to the appliance with the hinge
pins facing the appliance.
B Engage the left hand pin into the grey pivot. The hinge
pin and pivot hole are both square, rotate the flap to
ensure that the pin is located in the pivot.
B Support the flap in your left hand and with your right
hand, bend the right side down. This should enable
you to engage the right hand pin in the pivot. Rotate
the flap to ensure that the pins and pivots are located
securely.
B Close the flap.
6 720 643 895a (2010/10)
The Benchmark Checklist can be found at
the rear of these instructions.
B Open the fascia cover by gently pressing the centre
top of the cover.
B Set up the controls and show the user how to operate
all the controls shown in the User Guide.
B Ensure that the user guide is left with the boiler or
homeowner.
B If the appliance is unused and exposed to freezing
conditions, shut off all the mains supplies and drain
the system and boiler.
41
SERVICE AND SPARES
6
SERVICE AND SPARES
6.1
INSPECTION AND SERVICE
CAUTION: TURN OFF THE GAS SUPPLY AND
ISOLATE THE MAINS SUPPLIES BEFORE
STARTING ANY WORK AND OBSERVE ALL
RELEVANT SAFETY PRECAUTIONS.
COMPONENT ACCESS
1. Removing outer case
– Remove bottom panel by pushing it fully back and
then pulling it forward and down to remove.
– Undo and remove two screws (1) securing boiler
casing at the top of the appliance.
NOTICE: COMPONENTS.
– Undo but do not remove the two lower screws (2).
B After replacement of any components
always check for gas tightness where
relevant and carry out functional checks
as described in Commissioning.
Damaged O-rings or gaskets must be
replaced.
– Pull case forward and remove.
1.
1.
6720643895-57.1Wo
NOTICE: Service work must be carried out
by a competent registered engineer, such as
British Gas or Gas Safe registered
personnel!
NOTICE: SERVICE MUST NOT BE
ATTEMPTED IF A CO/CO2 ANALYSER IS NOT
AVAILABLE.
• To ensure the continued efficient operation of the
appliance it must be checked at regular intervals.
• The frequency of servicing will depend upon the
particular installation conditions and usage however,
an annual service is recommended.
2.
2.
• The extent of the service required by the appliance is
determined by the operating condition of the
appliance when tested by fully qualified engineers.
The service interval record sheet at the rear of these
instructions must be completed after each service.
INSPECTION
1. Check that the terminal and the terminal guard, if
fitted, are clear and undamaged.
2. If the appliance is in a compartment or cupboard
check that the specified service space around the
appliance is clear.
3. Check all the joints and connections in the system and
remake any that show signs of leakage.
Refill and re-pressurise if applicable as described in
Commissioning, section 5.3.
4. Operate the appliance and take note of any
irregularities.
Refer to Fault Finding on page 66 for rectification
procedures.
Fig. 67 Remove outer case
2. Lowering boiler control to the service position:
– Remove screw (1) securing the control panel.
– Pull the panel (2) forward into the service position.
1.
2.
Fig. 68 Control panel into service position
42
6 720 643 895a (2010/10)
6720643895-39.1Wo
•
SERVICE AND SPARES
6.2
CHECK THE GAS INLET PRESSURE
Refer to section 5.6.1 for more information
6.3
CHECKING FLUE INTEGRITY
The integrity of the flue system and performance of the
boiler can be checked via the flue turret sample points.
NOTICE:
B Ensure that the gas inlet pressure is
satisfactory with all other gas appliances
working.
B Do not continue with the other checks if
the correct gas inlet pressure can not be
achieved.
Flue gas sample point
1
Air inlet sample point
2
Tab. 23 Key to figure 69
B Check the gas supply working pressures in the system
conform to the readings shown in the table below:
1
Natural gas
Allowed mbar pressure drop
meter/
across
regulator pipework
19 - 23
1
boiler
inlet
across
boiler
gas control
valve
18-22
1.5
16.5 - 20.5
1.5
28 - 41
2
1
L.P.G.
2.5
29.5 - 42.5
1
2
mbar range
6720643895-67.1Wo
Fig. 69 Flue test points
B With the boiler case on and the boiler running at
maximum.
B Insert the analyser probe into the air intake test point.
B Allow the readings to stabilise and check that:
– O2 is equal to, or greater than 20.6%
– CO2 is less than 0.2%
B If the readings are outside these limits then this
indicates that there is a problem with the flue system
or combustion circuit, e.g. missing or dislodged seals.
6720643895-104.1Wo
32 - 45
2
Fig. 70 Flue integrity test
6 720 643 895a (2010/10)
43
SERVICE AND SPARES
6.4
FAN PRESSURE TEST
B Remove the cover and connect a digital manometer to
the fan pressure test point.
This test is to determine if the heat cell
requires cleaning/attention.
B After measurement replace test point cover.
B The pressure will read negative, refer to the chart in
figure 73.
SETTING THE BOILER TO MAXIMUM
1. Press and HOLD service button for more than 10
seconds
NOTICE:
The boiler must be run at maximum output
for Fan Pressure test and the Flue Gas
analysis.
2. Set the Central Heating temperature to maximum.
– The service button will illuminate continually and
the blue power indicator will pulse 5 times.
– The boiler will stay in this mode for 15 minutes
unless the service button is pressed again.
FAN PRESSURE TEST
Clean Heat Ex.
Heat Ex. ok
NG Boilers
- 4.5
30 Si:
- 3.3
25 Si:
0
1.
-1
-2
-3
-5
-4
mbar
-6
-7
-8
-6
-7
-8
LPG Boilers
- 5.2
6720643895-106.1Wo
30 Si:
2.
Fig. 71 Set boiler to maximum
When running in the service mode, the
boiler will operate both the Central Heating
and DHW circuits. This is to allow sufficient
time for setting procedure.
It will be necessary to run water through the
DHW circuit to ensure that the boiler will not
cycle on low heating demands.
- 3.7
25 Si:
0
-1
-2
-3
-5
-4
mbar
6720643895-68.1Wo
Fig. 73 Fan pressure readings
If the boiler fails the fan pressure test then before
adjusting the air/gas ratio, try the following:
B Check the syphon is not blocked.
1. Remove the screws securing the sump cover.
2. Remove the sump cover.
3. Clean the sump and heat exchanger with a suitable
brush
B Check the exhaust path and flue for restriction.
FAN PRESSURE
B Re-check the Fan Pressure readings
3.
6720643895-58.1Wo
2.
Fig. 72 Fan pressure test point
44
1.
1.
6720643895-112.1Wo
Fig. 74 Sump access
6 720 643 895a (2010/10)
SERVICE AND SPARES
6.5
FLUE GAS ANALYSIS
COMBUSTION TEST:
Ensure that the gas inlet pressure has been
checked and is satisfactory,
refer to section 5.6.1
B Connect the flue gas analyser to the flue gas sampling
point as shown in the figure below.
B Run the boiler at maximum output for at least 10
minutes.
6720643895-101.1Wo
B Check the CO/CO2 readings against the information
in table 24 “CO/CO2 settings” on page 46.
Fig. 75 Combustion test
If the boiler fails the combustion test, check:
1. Air intake for restriction
2. Diaphragm in the fan, for correct operation
3. Cleanliness of the heat cell, plus blockages in the
condensate disposal.
6 720 643 895a (2010/10)
45
SERVICE AND SPARES
6.6
SETTING THE AIR/GAS RATIO
NOTICE: THE SETTING OF THE GAS RATIO
MUST BE CARRIED OUT BY A COMPETENT
PERSON. SETTING OF THE GAS RATIO
MUST NOT BE ATTEMPTED UNLESS THE
PERSON CARRYING OUT THE TEST IS
EQUIPPED WITH A COMBUSTION
ANALYSER CONFORMING TO BS 7927 AND
IS COMPETENT IN ITS USE.
6.6.1
SETTING THE CO/CO2
When running in the service mode, the
boiler will operate both the central heating
and DHW circuits. This is to allow sufficient
time for the setting procedure. It will be
necessary to run sufficient water through
the DHW circuit to ensure that the boiler will
not cycle on low heating demands.
B Refer to section 5.6.1 and ensure that the gas inlet
pressure is correct before continuing.
B To adjust the CO/CO2 it will be necessary to first
operate the boiler at maximum output.
B Measure the CO/CO2 and check against table 24
below.
If required set the minimum CO/CO2 via adjuster (2)
on the gas valve until the correct measurement is set:
– Remove dust cap with flat bladed screw driver.
– Using a 4mm Allen key adjust CO2.
– Replace the dust cap.
B Check that the CO is less than 200ppm.
B Return to maximum and re-check the CO/CO2.
If correct, press the service button;
the button will cease to be illuminated and the blue
power indicator will be permanently illuminated.
B Re-assemble and refit boiler case.
MAX
1
2.5 mm
MIN
2
4 mm
1. Press and hold down the service button for more than
10 seconds until illuminated.
The blue power indicator will pulse 5 times.
2. Turn central heating control to maximum; the boiler
will then go to maximum output.
6720643895-66.1Wo
Fig. 77 Gas valve adjustment
The control will resume normal operation
after 15 minutes or if the service button is
pressed for more than a second.
CO/CO2 settings for Greenstar Si
CO/CO2 should be measured after 10 minutes.
Gas type
CO2 max.
CO2 min.
Natural gas
9.8% ± 0.5
8.8% ± 0.5
L.P.G.
11.0% ± 0.5
10.5% ± 0.5
NOTE: When checking an existing appliance the
tolerance is ± 0.5.
3.
2.
6720643895-120.1Wo
1.
Fig. 76 Setting the boiler
If checking after cleaning or component replacement
or for adjustment when the reading obtained is
outside the tolerances given above, then the
tolerance is ± 0.2.
CO - less than 200 ppm (0.002 ratio)
Tab. 24 CO/CO2 settings
B Refer to table 24 and check the CO/CO2 at maximum
and if required adjust for maximum using a 2.5mm
Allen key.
B Check CO is less than 200ppm.
3. Set the central heating control to minimum.
B The boiler will go to minimum power.
46
6 720 643 895a (2010/10)
SERVICE AND SPARES
6.7
CLEANING THE HEAT EXCHANGER
NOTICE: COMBUSTION TESTING
B Combustion testing must be carried out
by a competent person. Testing must not
be attempted unless the person carrying
out the combustion check is equipped
with a Combustion Analyser conforming
to BS 7927 and is competent in its use.
B Disconnect spark electrode and flame sensor
connections.
1. Refer to figure 79 and undo the securing nut on the
top of the heat exchanger and remove the retaining
plate assembly.
NOTICE: CO/CO2 CHECKS
1.
B If the joint between the Air/Gas manifold
and heat exchanger is disturbed the
sealing gasket must be replaced.
There is a special accessory kit available
specifically designed for cleaning the heat
exchanger. If required order 7 716 192 312.
B Isolate the power to the appliance and remove outer
case and base panel.
1. Refer to figure 78 and remove the clip from gas valve
outlet.
6720643895-60.1Wo
B After completing the service of the
appliance, the CO/CO2 must be checked
and set to the limits shown in “Setting
the air/gas ratio” on page 46.
Fig. 79 Securing nut
1. Refer to figure 80 and rotate fan and air/gas manifold
assembly around the top of the heat exchanger until
it stops at the lug.
B Lift up assembly and remove from boiler.
2. Remove the cover panel by removing retaining screw.
If the plastic elbow can not be easily
removed, undo the nut to push the plastic
elbow out of the fitting.
2.
2. Pull the gas outlet elbow free from the gas valve.
1.
2.
1.
6720643895-63.1Wo
6720643895-72.1Wo
Fig. 80 Rotate air/gas manifold
Fig. 78 Gas valve connection
B Remove electrical connector and earth wire from fan.
To prevent damage to the electrodes when
removing the air/gas manifold, disconnect
the leads to the electrodes.
6 720 643 895a (2010/10)
47
SERVICE AND SPARES
BURNER REMOVAL
BAFFLE REMOVAL
Refer to figure 81
Refer to figure 82.
1. Remove clamping plate.
1. Remove top baffle.
2. Remove spark/flame electrode assembly and seal
from the top of the heat exchanger.
2. Remove lower baffle.
If the lower baffle is stuck, it may be
necessary to use the “Baffle removal tool”
from the heat exchanger cleaning kit
- 7 716 192 312, as shown in figure 82.
3. Remove burner.
1.
1.
2.
6720643895-61.1Wo
3.
Fig. 81 Burner removal
Checking and cleaning the electrode assembly:
NOTICE: Cleaning
B Inspect the condition of the electrodes and ceramics,
replace if necessary.
2.
B Use a plastic scouring pad to clean the electrodes.
Fig. 82 Baffle removal
48
6 720 643 895a (2010/10)
6720643895-64.1Wo
B Do not use wire wool to clean the
electrodes
SERVICE AND SPARES
ACCESS COVER REMOVAL
THE HEAT EXCHANGER DOES NOT HAVE TO
BE REMOVED TO CLEAN.
The heat exchanger is shown removed from
the boiler to illustrate cleaning more clearly.
Refer to figure 83.
1. Remove the two pozi-drive screws
2. Remove the access cover
3. Remove the gasket.
3.
2.
1.
6720643895-65.1Wo
1.
6720643895-112.1Wo
Fig. 83 Access cover removal
CLEANING THE PRIMARY HEAT EXCHANGER
Refer to figure 84.
B Access the heat exchanger flue ways by inserting the
cleaning brush (7 716 192 312) through the top
access hole in the casing, removal of panel shown in
figure 80.
B Clean heat exchanger flue ways using the cleaning
brush removing any debris from the access point in
the sump.
B Clean around the sealing surface on the sump.
B Replace the access cover.
B Using a suitable container to collect water from
syphon connection at the base of the boiler flush heat
exchanger with water.
B Re-assemble ensuring that the lower baffle (2) and
the top baffle (1) are refitted correctly.
B Refer to figure 81 when re-fitting the burner to ensure
that it fits centrally within the heat exchanger and
location tabs are situated in location holes.
B Ensure seal is replaced with new seal and is correctly
fitted.
B Check the syphon unit is clean before refitting to
boiler.
Fig. 84 Cleaning heat exchanger
NOTICE: Heat exchanger baffles.
The baffles (1) and (2) must be refitted into
the heat exchanger in the order shown in
figure 82. Failure to do so may result in
damage to the boiler.
NOTICE: CO/CO2 CHECKS
B If the joint between the Air/Gas manifold
and heat exchanger is disturbed the
sealing gasket must be replaced.
After completing the service of the
appliance, the CO/CO2 must be checked
and set to the limits shown in “Setting
the air/gas ratio” on page 46.
B When replacing the burner gasket ensure
that the clamping plate is fully tightened
down to the heat exchanger.
CLEANING THE SYPHON
There is no need to remove the Syphon to clean.
To drain debris from the syphon, release the clips and
remove the drainage cap from the bottom of the syphon.
Catch the debris and condensate from the syphon into a
suitable container.
B Reassemble and check combustion as stated in
“SETTING THE AIR/GAS RATIO” section on page 46.
6 720 643 895a (2010/10)
49
SERVICE AND SPARES
6.8
REPLACEMENT OF PARTS
CAUTION: TURN OFF THE GAS SUPPLY
AND ISOLATE THE MAINS SUPPLIES
BEFORE STARTING ANY WORK AND
OBSERVE ALL RELEVANT SAFETY
PRECAUTIONS.
6.8.1
To gain access to the following components
the outer case has to be removed:
B Primary sensor
B Overheat thermostat
B Flue limit thermostat
NOTICE: REPLACEMENT OF
COMPONENTS.
6.8.2
PRIMARY SENSOR (CH NTC)
B After replacement of any components
always check for gas tightness where
relevant and carry out functional checks
as described in Commissioning.
Damaged O-rings or gaskets must be
replaced.
1. Remove electrical connection by pulling upwards.
Squeeze retaining clip on plastic moulding of sensor
and pull back and up until clear of pocket in heat
exchanger.
Refer to figure 86 for removal.
REMOVING OUTER CASE
2. Pull forward to remove completely.
B Coat new sensor with heat conductive paste and
replace.
B Remove bottom tray by pulling forward on the tag on
the underside of the tray.
6.8.3
1. Undo the two screws securing the top of the boiler
casing.
B Remove two electrical connectors from thermostat.
2. Undo the two screws securing the bottom of the
boiler casing.
B Pull case forward and remove.
OVERHEAT THERMOSTAT
Refer to figure 86 for removal.
3. Slacken and remove fixing screw and thermostat (3).
B When replacing ensure thermostat sits correctly on
surface of the casting with the left hand side of
thermostat sitting up against the shoulder.
It is essential that the mating surface of the
thermostat is coated with heat conductive
paste.
1.
2.
3.
1.
6720643895-69.1Wo
6720643895-57.1Wo
1.
2.
2.
Fig. 86 Primary sensor and overheat thermostat
Fig. 85 Remove outer case
50
6 720 643 895a (2010/10)
SERVICE AND SPARES
6.8.4
FLUE OVERHEAT THERMOSTAT
(WITH GROMMET)
6.8.5
MOVING CONTROLS TO SERVICE POSITION
To remove the following components
require the control box must be moved in to
the service position:
To remove and replace the thermostat either:
B Using a small terminal screwdriver, prise the
thermostat and grommet from the plastic housing.
Take care not to damage the plastic housing.
B Gas valve
B Syphon
-or-
B PCB
1. Release the flue connection from the sump.
B Fuse
2. Push the flue tube up.
B Transformer
NOTICE: REPLACEMENT OF THE GAS
VALVE MUST NOT BE CARRIED OUT IF A
CO/CO2 ANALYSER IS NOT AVAILABLE.
1. Remove the screw securing control panel.
2. Gently pull the panel forward.
6720643895-71.1Wo
2.
1.
2.
Fig. 87 Lower exhaust section
6720643895-39.1Wo
1.
B Remove electrical connections.
1. Push the flue limit thermostat in from the sump.
Fig. 89 Control panel to service position
B Retrieve the thermostat from the sump well.
1.
6720643895-70.1Wo
Fig. 88 Remove thermostat
To replace, push the thermostat and new grommet
gently back into the opening until contact with the
locating ridge is felt.
6 720 643 895a (2010/10)
51
SERVICE AND SPARES
6.8.6
GAS VALVE
6.8.7
Refer to figure 90
AIR/GAS MANIFOLD AND FAN ASSEMBLY
The following components require the
air/gas manifold and fan assembly to be
removed:
B Isolate gas supply at boiler gas cock.
1. Remove wire clip from the gas valve outlet.
2. Pull the gas pipe free from the gas valve.
If the pipe will not pull out, unscrew the nut to aid
removal.
B Fan electrode assembly
B Burner
B Heat exchanger
NOTICE:
B If the joint between the Air/Gas manifold
and heat exchanger is disturbed the
sealing gasket must be replaced.
2.
1.
6720643895-72.1Wo
Fig. 90 Gas valve upper connection
B After re-assembly the combustion must
be checked using the procedure in the
section “Setting the Air/Gas ratio”.
Measurement and setting (if necessary)
of the gas ratio must not be attempted
unless the person is equipped with a
combustion analyser conforming to
BS 7927 and is competent in its use.
B Remove electrical connector and earth wire the from
fan.
Refer to figure 91
1. Undo bottom gas connection to gas valve.
2. Undo two securing screws on the underside of casing.
B Remove wire clip from gas valve outlet then pull gas
pipe free from the gas valve (see figure 90).
B Disconnect electrical connections.
B Pull valve up and forward out of boiler.
1.
6720643895-60.1Wo
B Replace valve with new seals and check for gas
tightness.
2.
Fig. 92 Retaining plate assembly
6720643895-73.1Wo
1.
Fig. 91 Gas valve lower connection
NOTICE: The valve will require setting;
follow procedure “Setting the air/gas ratio”.
52
B Undo the securing nut at the top of the heat
exchanger and remove the retaining plate assembly
(1).
Disconnect spark electrodes and flame
sensor connection.
This will prevent damage to the electrodes
and sensor when the air/gas manifold is
rotated.
6 720 643 895a (2010/10)
SERVICE AND SPARES
B Rotate fan and air/gas manifold assembly (1.) around
the top of the heat exchanger until the lug on the air/
gas manifold is visible.
2.
2.
1.
1.
4.
3.
5.
1.
5.
6.
5.
6720643895-63.1Wo
Fig. 93 Rotate the air/gas manifold assembly
B Lift up assembly and remove from boiler.
6720643895-81.1Wo
Fig. 94 Dismantling the air/gas manifold assembly
FLAP VALVE ASSEMBLY
NOTICE: After re-assembly, check the CO/
CO2 levels as described in section 6.6
Setting the air/gas ratio.
6.8.8
FAN
1. Twist the mounting flange clockwise to release.
2. Pull mounting flange off the flap valve assembly.
3. Pull rubber flap off flap valve assembly.
B To replace the flap valve:
B Remove the air/gas manifold from the boiler as
described in the previous section.
– Press the two lugs on the back of the flap into the
two slots in the flap valve assembly.
1. Remove two screws retaining the fan to the air/gas
manifold.
3.
2. Remove the air/gas manifold.
3. Remove the screw holding the retaining plate.
4. Remove the retaining plate.
5. Remove three screws and the mixing chamber.
Re-assemble with new fan ensuring seals are correctly
fitted.
1.
2.
6720643895-117.1Wo
Fig. 95 Flap valve assembly
6 720 643 895a (2010/10)
53
SERVICE AND SPARES
6.8.9
ELECTRODE ASSEMBLY AND BURNER
6.8.10 HEAT EXCHANGER
Refer to figure 96.
B Disconnect spark electrodes and flame sensor
connection.
B Remove clamping plate.
B Isolate flow and return valves then drain the boiler.
1. Remove spark/flame electrode assembly from heat
exchanger.
2. Remove the seal from the top of the heat exchanger.
3. Remove the burner.
Refer to figure 97.
B Remove syphon.
B Remove the air/gas manifold and fan.
1. Remove the clip from plastic elbow on the flow pipe.
2. Pull flow pipe away from heat exchanger.
B Replace new burner in correct position.
B Ensure that burner tabs, as shown in figure 96, fit
correctly their respective locations.
NOTICE: Heat exchanger seal
B If the joint between the Air/Gas manifold
and heat exchanger is disturbed the
sealing gasket must be replaced.
B After re-assembly the combustion must
be checked using the procedure in the
section 6.6 “Setting the Air/Gas ratio”.
2.
1.
B Ensure that the seal is fitted.
6720643895-82.1Wo
CAUTION: Clamping plate
B Ensure that the clamping plate is firmly
tightened down on top of the heat
exchanger.
B Replace the clamping plate.
Fig. 97 Flow pipe removal
Refer to figure 98
1. Remove the three screws securing the turret to the
top of the boiler.
2. Turn the upper exhaust connector anticlockwise to
release from the hook.
3. Pull the upper exhaust connector down.
1.
1.
2.
3.
3.
Fig. 96 Electrode assembly and burner
Fig. 98 Upper exhaust assembly
54
6 720 643 895a (2010/10)
6720643895-114.1Wo
6720643895-61.1Wo
2.
SERVICE AND SPARES
Refer to figure 99.
1. Release the clip.
2. Move the lower exhaust connector up
B Remove the complete exhaust assembly.
2.
1.
6720643895-71.1Wo
2.
6720643895-115.1Wo
1.
Fig. 101 Heat exchanger removal
B Reassemble and check combustion as stated in the
gas conversion section. 6.6.
Fig. 99 Release lower exhaust connection
Refer to figure 100.
1. Unscrew the plastic nut.
NOTICE: CO/CO2 CHECKS
2. Remove the nut from the bottom of the boiler.
B If the joint between the Air/Gas manifold
and heat exchanger is disturbed the
sealing gasket must be replaced.
3. Rotate lever to release the return pipe.
B After completing the service of the
appliance, the CO/CO2 must be checked
and set to the limits shown in “Setting
the air/gas ratio” on page 46.
2.
6720643895-83.1Wo
3.
1.
Fig. 100 Sump connections
Refer to figure 101.
1. Lift the heat exchanger up to clear.
2. Pull the heat exchanger forward from the case.
6 720 643 895a (2010/10)
55
SERVICE AND SPARES
6.8.11 ACCESS TO BOILER CONTROL COMPONENTS
6.8.13 TRANSFORMER/PCB
1. Remove three screws.
Refer to figure 105.
2. Remove cover from control.
B Disconnect all electrical connections from the
control.
1.
1. Remove five screws retaining the rear panel of the
control.
1.
2.
2. Remove the rear panel.
1.
3. Remove the transformer cover.
1.
2.
6720643895-40.1Wo
1.
1.
1.
1.
3.
6.8.12 PCB FUSE
B Remove fuse holder with fuse F1 (1) from the PCB
and replace with a new fuse.
6720643895-76.1Wo
Fig. 102 Removing the connection cover
Fig. 105 Transformer/PCB access
Pump
Harness
Fan
Harness
ST19
FR FS NP LP
ST8
9
L
N NS LS LR
ST6
ST10
REFITTING THE CONTROL BOARD COVER:
B
B
4
2
1
A
F
B Ensure that all wires are fully within the control board.
8
B Align the front right hand corner of the cover with the
front right hand corner of the control board.
7
S11
2 5 A 230 V AC
DV
Harness
6720643895-74.1Wo
1
Main
Harness
2
S12
05A
S13
16A
3
Code Plug
B Align the rear right hand .
B Holding the cover level, slide the cover onto the
control board, ensuring that the incoming cables, at
the top, are held clear.
Fig. 103 Fuse locations
B Spare fuses are clipped into the underside of the
electrical cover.
1. T2.5H 250V
2. T500L 250V
3. T1.6L 250V
3
1
6720643895-75.1Wo
2
Fig. 104 Spare fuses
56
6 720 643 895a (2010/10)
SERVICE AND SPARES
6.8.14 REPLACING CONTROLS
Refer to figure 108.
NOTICE:
1. Using a suitable tool, press the button upwards.
B Do not replace the control unit if a
CO/CO2 analyser is NOT available.
2. Slide the control support bracket to the left.
The control unit is supplied within its plastic
housing. The complete unit must be
replaced.
2.
Refer to figure 106.
2. Carefully remove the system pressure gauge from the
fascia by parting the plastic retaining lugs securing
the gauge in place. Take care not to damage or kink
the capillary tube.
3. Remove the code plug. The code plug should be left
attached to the frame of the boiler by its plastic safety
thread.
6720643895-79.1Wo
1. Remove all electrical connections from the control
PCB including where cables run through restraints.
These can be unclipped from the plastic moulding
noting their position.
1.
Fig. 108 Control unit release
Refer to figure 109.
B Support the control unit and unclip control support
cable (1) from the boiler frame.
B Remove the support cable and fit to the new control
unit.
1.
B Remove appropriate cable restraints from the new
control unit.
6720643895-80.1Wo
67
20
64
38
95
-77
.1W
o
2.
3.
Fig. 106 Replacing the controls
1
Refer to figure 107.
1. Remove the three screws retaining the front fascia
making sure to support the fascia when removing the
last screw.
2. Remove the front fascia.
Fig. 109 Support cable connection
B Fit control unit to the boiler.
B Re-connect support cable (1) to the boiler and all
electrical connections and system to the new control.
1.
B Ensure that the code plug is re-fitted to the new
control. If this is not done, the boiler will indicate an
error and will not function.
1.
1.
B Replace the fascia to the new control unit and secure
the system pressure gauge back in the fascia.
95
38
64
B After re-assembly, check the CO/CO2
levels as described in section 6.6 air/gas
ratio setting.
67
20
2.
-78
.1W
o
NOTICE:
Fig. 107 Fascia removal
6 720 643 895a (2010/10)
57
SERVICE AND SPARES
6.8.15 SYPHON REMOVAL
6.8.16 DIVERTER VALVE MOTOR
Removal of the syphon assembly will give
access to the Auto Air Vent.
To release the syphon from the sump:
1. Disconnect the discharge hose at the plumbing
manifold.
2. Using a screwdriver, disengage the retaining clip on
top of the syphon.
3. Pull the syphon towards you and remove the
complete assembly.
B Connect electrical power to the appliance.
B Enter the service mode to ensure that the diverter
valve is in the mid position (there is no need to drain
the appliance).
B Electrically isolate the appliance.
B Remove diverter valve cover, if fitted.
B Disconnect the electrical connector from the diverter
valve motor.
1. Pull the motor assembly towards you.
The assembly will slide free from the valve.
B To fit the new diverter valve motor, slide the body into
the housing.
2.
B Ensure that “H” section of the motor actuator is fitted
correctly into valve body.
B Re-connect the electrical connection.
B Re-fit the protective cover (if available).
3.
3.
2.
1.
6720643895-56.1Wo
1.
Fig. 110 Syphon removal
6720643895-84.1Wo
Fig. 111 Diverter valve and motor
6.8.17 DIVERTER VALVE
To ease assembly of components, apply
silicone lubricant to sealing surfaces.
B Ensure the appliance has been fully drained.
B Disconnect the electrical connector from the diverter
valve motor.
B Remove the diverter valve cover, if fitted.
2. Undo the two screws holding the valve to the plastic
housing.
3. Withdraw the valve and clean the valve chamber if
necessary.
B To refit, follow the above in reverse.
B Ensure any seals that have been disturbed are
renewed.
58
6 720 643 895a (2010/10)
SERVICE AND SPARES
6.8.18 AUTO AIR VENT
6.8.19 DHW TEMPERATURE SENSOR (NTC)
Removal of the syphon assembly will give
access to Auto air vent. Refer to page 58.
B Ensure the domestic hot water circuit is fully drained.
B Disconnect the electrical connection from the sensor.
1. Withdraw the spring clip.
B Ensure the appliance has been fully drained.
2. Withdraw the sensor from the housing.
B Use a screwdriver or similar to rotate the air vent
anticlockwise, as shown below.
6720643895-87.1Wo
1.
2.
6720643895-85.1Wo
Fig. 112 Auto air vent
1. Lift the air vent (1) out of the housing and remove.
Fig. 114 DHW temperature sensor
B To refit, follow the above in reverse.
6.8.20 PUMP HEAD
1.
B Ensure the boiler is fully drained.
B Disconnect the electrical connection from the bottom
of the pump.
NOTICE: Water damage
B Protect the Control unit from water
ingress when removing the Pump head.
1. Remove the four Allen bolts securing the pump at
each corner.
6720643895-86.1Wo
Fig. 113 Auto air vent removal
2. Gently pull the pump towards you and remove.
NOTICE:
B The “O” ring must be fitted to the Auto air
vent and NOT the hydraulic block
otherwise the Auto air vent will be
difficult to fit.
B Apply silicone lubricant to the “O” ring to
ease assembly.
2.
1.
1.
1.
1.
B To refit, follow the above in reverse.
6720643895-88.1Wo
Fig. 115 Pump head removal
B To refit, follow the above in reverse.
6 720 643 895a (2010/10)
59
SERVICE AND SPARES
6.8.21 FLOW SENSOR, FLOW RESTRICTOR HOUSING
AND FILTER
B Ensure the domestic hot water circuit is fully drained.
B Disconnect the electrical connection to the turbine.
1. Remove the spring clip from the housing and move
the brass pipe to one side.
B Remove the wire mesh filter from the free end of the
pipe and clean thoroughly.
B Insert the wire mesh filter with the round end first.
6.8.23 DRAIN TAP
B Ensure the appliance has been fully drained.
1. Rotate the drain tap fully anticlockwise and push in.
2. Withdraw the drain tap from its housing
6.
2.
1.
1.
5.
2.
4.
3.
6720643895-90.1Wo
Fig. 116 Flow sensor
6720643895-89.1Wo
2. Withdraw the flow sensor and filter from the housing.
B Using the cartridge tag, withdraw the flow restrictor
housing. If the regulator housing has become stuck, a
pair of long nosed pliers may be used to grip the
housing.
B Apply silicone lubricant to the seals to ease assembly.
B To refit, follow the above in reverse. Ensure any seals
that have been disturbed are renewed.
Fig. 118 Drain tap and pressure gauge removal
B Ensure any seals that have been disturbed are
renewed.
B Apply silicone lubricant to the seals to ease assembly.
B To refit, follow the above in reverse.
6.8.24 PRESSURE GAUGE
6.8.22 FLOW REGULATOR
B Refer to figure 118
B Remove the flow restrictor housing (See Removing
the flow sensor, flow restrictor housing and filter).
B Ensure the appliance has been fully drained.
1
2
3
3. Prise the lugs apart (3) securing the pressure gauge to
the fascia.
4. Remove the gauge (4) taking care not to damage or
kink the capillary.
5. Withdraw the spring clip from the pressure sensing
head housing.
6. Remove the pressure sensing head and pressure
gauge capillary from the housing.
4
6720643895-91.1Wo
Fig. 117 Flow regulator
B Using a small Allen key or similar, push the flow
restrictor cartridge out of the housing.
B To refit, follow the above in reverse.
B Ensure any seals that have been disturbed are
renewed.
1
2
3
4
Turbine
Flow Restrictor - 25Si = orange, 30Si = brown
Spacers
Flow restrictor housing
NOTICE: Heat damage
B Route the plastic capillary tube away
from the pump to ensure that the pipe is
not melted against the hot pump body.
B To refit, follow the above in reverse. DO NOT forget to
fit the washer from the capillary when fitting a
replacement gauge.
Tab. 25 Flow regulator parts
60
6 720 643 895a (2010/10)
SERVICE AND SPARES
6.8.25 HYDRAULIC BLOCK REMOVAL
Remove the syphon assembly.
Refer to Syphon assembly removal page 58
B Ensure the appliance has been fully drained.
B Take care not to snag the harness.
3.
B Disconnect the electrical connections to the NTC
sensor, turbine and pump.
B Remove the syphon.
B Undo the nuts securing the copper water pipes to the
manifold (there is no need to remove the gas pipe).
B Release the spring clip securing the expansion vessel
pipe to the plastic housing and remove the pipe.
B Release the spring clip securing the pressure gauge
sensing head to the plastic housing and remove the
sensing head.
1. Release the locking devices that secure the two
copper water pipes leading to the combustion
chamber by squeezing the two tabs together and
rotating anticlockwise (viewed from above).
This is not essential but makes the removal
of the hydraulic block easier.
4.
6
64
720
389
5-93
o
.1W
Fig. 120 Hydraulic block removal part 2
The block will still contain an amount of
water, which will spill out if the block is
tilted.
B To refit, follow the above in reverse. Ensure any seals
that have been disturbed are renewed.
6.8.26 CH PRESSURE RELIEF VALVE
B Lower the pressure relief connector by pulling the
lever forward and down.
B Remove the hydraulic block from the boiler (See
6.8.25 Removing the Hydraulic Block).
2. Undo the two screws securing the hydraulic block to
the chassis (located top left / top right of the
housing).
1. Release the spring clip from the Pressure Relief Valve
housing.
2. Withdraw the Pressure Release Valve from its
housing.
1.
1.
2.
2.
2.
6720643895-92.1Wo
Fig. 119 Hydraulic block removal part 1
3. Lift the left hand side of the block slightly.
4. Manoeuvre the block out, starting at the right hand
side.
6 720 643 895a (2010/10)
Fig. 121 PRV removal
B To refit, follow the above in reverse. Ensure any seals
that have been disturbed are renewed.
61
SERVICE AND SPARES
6.8.27 DHW PRESSURE RELIEF VALVE
6.8.28 DHW PLATE HEAT EXCHANGER
NOTICE: DEVICE REMOVAL
B If the hydraulic block has already been
removed from the appliance, steps 3 and
4 are all that is required to remove the
DHW pressure relief valve.
B Ensure the system is fully drained.
Remove the Hydraulic block from the boiler
(See section 6.8.25 removing the Hydraulic
Block).
1. Undo the two screws securing the plastic housing to
the heat exchanger.
2. Remove the heat exchanger
B Disconnect all pipes connected to the pump housing.
2.
B Remove the electrical connection to the pump.
1. Remove the metal clip to the right of the pump head
to release the pump housing.
1.
2. Slide the pump housing to the left and withdraw from
the appliance.
3. Remove the spring clip from the pressure relief valve
housing.
4. Withdraw the pressure relief valve.
1.
6720643895-96.1Wo
Fig. 123 DHW heat exchanger
4.
3.
B To refit, follow the above in reverse.
B Ensure any seals that have been disturbed are
renewed.
6.8.29 BYPASS VALVE
1. Remove the two spring clips at either end of the
copper bypass pipe.
2.
1.
6720643895-95.1Wo
Fig. 122 DHW pressure relief valve
B To refit, follow the above in reverse. Ensure any seals
that have been disturbed are renewed.
1.
2.
6720643895-97.1Wo
Fig. 124 Removing the bypass valve
B Undo the screw securing the left hand plastic housing
to the heat exchanger.
B Move the housing to the left to free up the one end of
the pipe.
B Remove the pipe from the right hand housing to reveal
the bypass valve.
2. Using a pair of pliers, pull out the bypass valve from
the housing
B To refit, follow the above in reverse. Ensure any seals
are renewed.
62
6 720 643 895a (2010/10)
SERVICE AND SPARES
6.8.30 EXPANSION VESSEL
The expansion vessel can be replaced with the boiler in
position if there is a side exit flue fitted and a minimum
clearance of 340mm above the boiler casing. If a vertical
flue is fitted then a similar clearance to one side of the
flue is required.
If this clearance is not available, then the boiler will need
to be removed from the mounting frame to gain access
to the expansion vessel.
Alternatively a second vessel of at least the capacity of
seven litres can be fitted to the return from the heating
system as close as possible to the boiler.
Expansion vessel replacement (Removing the Boiler)
B Isolate electrical supply.
B Isolate system and gas connections at the service
valves.
B Drain the boiler.
B Disconnect electrical supply and any external
controls.
B Disconnect flue connection from the boiler.
B Undo connection to boiler at the service valves.
Expansion vessel replacement (Boiler in place)
2.
B Isolate mains power from the boiler.
B Lower the control panel to the service position.
1.
B Isolate the boiler from the heating system (and
cylinder return if internal diverter valve is fitted) using
service valves.
B Drain the boiler.
B At the pump manifold, release the clip and disconnect
the expansion vessel hose.
3.
6720643895-98.1Wo
2.
Fig. 126 Removing expansion vessel from wall frame
B Release the clip from expansion vessel connection to
the pump manifold.
B Carefully lift the boiler off the mounting frame.
1.
6720643895-99.1Wo
1. Remove the expansion vessel retaining screw.
Fig. 125 Removing the expansion vessel
2. Lift the expansion off the cross beam.
3. Pull the expansion vessel towards you to remove.
B Replace expansion vessel in the reverse order and
refit the boiler to the mounting frame.
B Follow the commissioning procedure in this manual.
1. Remove screw (1) retaining the vessel to the top of
the boiler casing.
2. Pull the vessel up (2) and out over the flue system or
to one side if fitted with a vertical flue.
B Remove the flexible hose from the expansion vessel
and fit to the replacement vessel using a new seal.
B Reassemble expansion vessel into wall frame and
reconnect the flexible pipe to pump manifold and
secure with the clip.
6 720 643 895a (2010/10)
63
SERVICE AND SPARES
6.9
SHORT PARTS LIST
Fan
8 717 204 453 0
GC No. H26 536
Control board
HT3 Bus enabled
8 748 300 650 0
Used on:
Si & i
System
boilers
Control box assembly
8 717 207 937
Burner
8 718 120 619 0
GC No. H26 538
Flue overheat
thermostat
(grommet type)
8 716 506 267 0
Electrodes
(including gasket)
8 718 107 087 0
Flow regulator
Type E 11 litre
(Brown)
8 716 107 044 0
GC No. 394 291
Used on 30Si
Used on:
i junior boilers
Control box
assembly
8 717 207 939
Gasket - burner
8 716 110 534 0
Seal - Inner case/mantel
8 716 106 635 0
DHW
temperature
sensor (NTC)
8 714 500 081 0
GC No. H02 538
Pressure relief valve
DHW
8 717 401 029 0
GC No. H02 526
Pressure gauge
8 718 224 344 0
Gas Valve
8 716 111 325 0
GC No. H26 540
Flow regulator
Type E 9 litre
(Orange)
8 716 141 143 0
GC No. 379 215
Used on 25Si
Pump assembly
3 speed
8 716 106 355 0
GC No. H02 527
Flow sensor
8 716 107 223 0
GC No. H02 529
Used on
25Si &
24 i junior
boilers
Heat exchanger 12 plate
8 716 106 686 0
GC No. H02 538
Used on
30Si &
28 i junior
boilers
By-pass valve
8 716 106 434 0
GC No. H02 532
Diverter valve assembly
8 716 106 845 0
GC No. H02 533
Heat exchanger 16 plate
8 716 106 685 0
GC No. Ho2 531
Diverter valve
motor
8 716 106 847 0
GC No. H02 534
Flow temperature sensor (NTC)
8 716 106 688 0
GC No. H26 542
Tab. 26
64
6 720 643 895a (2010/10)
High limit stat
8 707 206 196 0
GC No. H26 584
SERVICE AND SPARES
Automatic air vent
8 716 106 445 0
Expansion vessel
8 716 105 545 0
GC No. H05 206
Fusing element set
8 744 503 010 0
Containing fuses:
3.15 Amp
2.5 Amp
1.6 Amp
0.5 Amp
Pressure relief
valve
8 716 106 431 0
GC No. H09 750
Seals kit
8 716 107 224 0
GC No. H10 876
Tab. 26
6 720 643 895a (2010/10)
65
FAULT FINDING AND DIAGNOSIS
7
FAULT FINDING AND DIAGNOSIS
7.1
FAULT FINDING
This fault finding information is for guidance
only. Worcester cannot be held responsible
for costs incurred by persons not deemed to
be competent.
The electronic control system for this boiler
incorporates a blue central indicator. This normally
confirms the permanent mains supply but, by flashing at
different rates during a fault, provides a guide to the
cause as listed.
Blue light
indication
Lockout
reset button
Off
Off
This fault finding system assumes that the appliance has
been operating normally until the time of failure (i.e. not
a first installation error).
PRELIMINARY CHECKS : Preliminary electrical system
checks are the first electrical checks to be carried out
during a fault-finding procedure. On completion of the
Service/Fault-Finding task which has required the
breaking and remaking of electrical connections, check:
(a) EARTH CONTINUITY,
(b) SHORT CIRCUIT CHECK,
(c) POLARITY and
(d) RESISTANCE TO EARTH.
Fault
Possible solution/check
No power at
control board
Permanent mains supply to boiler.
Fuse F1 - 2.5A or Fuse F3 - 0.5A.
Transformer (primary coil below 60 Ω, both secondary coil
below 10 Ω).
Otherwise replace control board.
On
Off
Boiler not
operating during
central heating
demand (HW ok)
Live demand at ST10-LR (from external room thermostat/timer)
Fascia mounted timer (if fitted)
CH knob in winter position
Diverter valve
Control board
Boiler operating
without live
demand at ST10LR (from external
room thermostat
timer)
Some older thermostats (containing capacitors) may give a low
voltage return at ST10-LR when the thermostat contacts are
open.
Boiler not
operating during
hot water
demand (CH ok)
Ensure cold inlet DHW outlet are correctly piped i.e. are not
crossed piped.
Check that there is no permanent live at ST10-LR from another
source.
Flow Turbine test:
B Check for 5 volts d.c. across red and black wires
B Check for 2.5 volts d.c. across the yellow and red wires with
the water flowing.
Check diverter and motor and control board.
Boiler not
operating during
any demand.
Fan
Control board
Tab. 27
66
6 720 643 895a (2010/10)
FAULT FINDING AND DIAGNOSIS
Blue light
indication
Lockout
reset button
Slow flash
(mostly
off, flashes
on)
Flashing
(reset
required)
Fault
Possible solution/check
Ignition lockout
B Gas present and at correct pressure?
B Gas valve
– Check that there is 35V d.c. to each solenoid
– Check the resistance of each solenoid:
Top solenoid = 380 Ω ± 10% (342 - 418 Ω)
Bottom solenoid = 190 Ω ± 10% (171 - 209 Ω)
B Combustion CO2 level.
B Flue condition.
– Blocked flue?
B Blocked condensate pipe or frozen condensate.
B Gas valve adjustment.
B Ignition electrodes/harness/connections.
– Check for condition and continuity
B Otherwise replace control board
Slow flash
(mostly
on, flashes
off)
Flashing
(reset
required)
Flue overheat
B Heat exchanger baffles removed and not refitted.
Heat exchanger
overheat
B Heat exchanger blocked
B Water pressure
B All air vented
B Pump/harness/connections.
B Water leaks/blockage
B Safety thermostats/low voltage wiring harness/connections
B Otherwise replace control board
Fast flash
Off
Volatile lockout Fan does not run
B Temperature sensors
– Check condition and continuity of leads/sensors
B Fan
– 230V a.c. across the live (purple) and neutral (brown)
B Fan lead
– Check continuity
B Code plug
– Is code plug missing or not inserted properly.
Fast flash
Flashing
Internal fault
Replace control board
2 pulses
No light
Not a fault code
Service mode selected to minimum, press service button to
return to normal
5 pulses
No light
Not a fault code
Service mode selected to maximum, press service button to
return to normal
Tab. 27
6 720 643 895a (2010/10)
67
FAULT FINDING AND DIAGNOSIS
7.1.1
CIRCUIT DIAGRAM
FLAME SENSE
ELECTRODE
† Fan wiring:
Live = purple
Neutral = brown
SPARK
ELECTRODES
OVERHEAT
STAT
FLOW TEMP.
SENSOR (NTC)
Colour sequence †
FAN
GAS
VALVE
FLUE
OVERHEAT
STAT
SAFETY
SOLENOID
SAFETY
SOLENOID
DIVERTER
VALVE
PUMP
DHW TEMP.
SENSOR (NTC)
MAINS
SUPPLY
FLOW
TURBINE
Earth
PUMP
SUPPLY
230V
EXTERNAL
CONTROLS
OPTION
EXTERNAL
FROST STAT
(OPTIONAL)
Wall plate contacts
(for FX controls)
B B
Neutral Supply
Live Return
Colour sequence †
CH TEMPERATURE
CONTROL
*
ST5
LR LS NS N
Neutral
Live
Live Supply
ST4
L
DHW TEMPERATURE
CONTROL
B
B
4
2
FR FS NP LP ST6 1
A
F
ST8
ST10
9
Outside sensor
(FW 100)
*
ST17
Blue
Blue
Purple
Purple
Orange
Orange
EMS BUS contacts
(for FX controls)
WORCESTER 24V CONTROLS
OPTION, PLUG IN POINT
(under blanking cover on fascia)
9V
25V
ST9
SI2
Yellow
Yellow
Red
Red
Fuse F2, slow T1.6 A
SI3
ST1
68
DIAGNOSTIC
INTERFACE
Green
Black
Yellow
Red
Fuse F3, slow T 0.5 A
230V/AC
Red
Orange
Blue
Yellow
Green
Black
ST18
*
Fuse F1, slow
2.5 A, AC 230 V
7
SI1
8
SPARK
TRANSFORMER
PRE WIRED LINK
6720643895-118.1Wo
CODE PLUG
6 720 643 895a (2010/10)
FAULT FINDING AND DIAGNOSIS
7.2
CENTRAL HEATING FUNCTION
6 720 643 895a (2010/10)
69
FAULT FINDING AND DIAGNOSIS
7.3
70
PREHEAT AND DHW FUNCTION
6 720 643 895a (2010/10)
FAULT FINDING AND DIAGNOSIS
7.4
PROTECTION FUNCTION
AUTOMATIC INTERNAL FROST FUNCTION
Internal boiler
temperature
between
8°C & 5°C
Pump runs
Internal boiler
temperature
rises above 9°C
Pump switches off
after a 3 minute
overrun period
Boiler automatic
frost function
(monitors internal boiler
primary temperature)
Internal boiler
temperature
below 5°C
Central heating
demand is activated
Internal boiler
temperature
rises above 12°C
Central heating
demand switches
off
Pump switches off
after a 3 minute
overrun period
PUMP OVERRUN FUNCTION
End of boiler demand
(central heating or
domestic hot water)
Pump runs for 3 minutes
to dissipate heat from
the boiler into the system
PUMP ANTISEIZE FUNCTION
No central heating
demand after
a 24hr period
Pump runs 5 seconds
every 24hrs from
last time pump ran
A central heating demand
activated, pump runs
normally
6720643895-111.1Wo
Fig. 127
6 720 643 895a (2010/10)
71
NOTES
72
6 720 643 895a (2010/10)
6 720 643 895a (2010/10)
73
Service Record
It is recommended that your heating system is serviced regularly and that the appropriate Service Interval Record is completed.
Service Provider
Before completing the appropriate Service Record below, please ensure you have carried out the service as described in the
manufacturer’s instructions.
Always use the manufacturer’s specified spare part when replacing controls.
Service 1
Date:
Service 2
Date:
Engineer Name:
Engineer Name:
Company Name:
Company Name:
Telephone No.
Telephone No.
Gas Safe Register No.
Gas Safe Register No.
Comments:
Comments:
Signature:
Signature:
Service 3
Date:
Service 4
Date:
Engineer Name:
Engineer Name:
Company Name:
Company Name:
Telephone No.
Telephone No.
Gas Safe Register No.
Gas Safe Register No.
Comments:
Comments:
Signature:
Signature:
Service 5
Date:
Service 6
Date:
Engineer Name:
Engineer Name:
Company Name:
Company Name:
Telephone No.
Telephone No.
Gas Safe Register No.
Operative ID No.
Comments:
Comments:
Signature:
Signature:
Service 7
Date:
Service 8
Date:
Engineer Name:
Engineer Name:
Company Name:
Company Name:
Telephone No.
Telephone No.
Gas Safe Register No.
Gas Safe Register No.
Comments:
Comments:
Signature:
Signature:
Service 9
Date:
Service 10
Date:
Engineer Name:
Engineer Name:
Company Name:
Company Name:
Telephone No.
Telephone No.
Gas Safe Register No.
Gas Safe Register No.
Comments:
Comments:
Signature:
Signature:
Failure to install and commission according to the manufacturer’s instructions and complete this Benchmark Commissioning Checklist will invalidate the warranty. This
does not affect the customer’s statutory rights.
If yes, and if required by the manufacturer, has a water scale reducer been fitted?
CONDENSING BOILERS ONLY
The condensate drain has been installed in accordance with the manufacturer’s instructions and/or BS5546/BS6798
Yes
If the condensate pipe terminates externally has the pipe diameter been increased and weatherproof insulation fitted?
Yes
WORCESTER, BOSCH GROUP:
Worcester, Bosch Group
Cotswold Way, Warndon, Worcester WR4 9SW.
Tel. 0844 892 9900
Worcester, Bosch Group is a brand name of Bosch Thermotechnology Ltd.
worcester-bosch.co.uk
6 720 643 895a (2010/10)
TECHNICAL SUPPORT:
0844 892 3366
APPOINTMENTS:
0844 892 3000
SPARES:
01905 752571
LITERATURE:
0844 892 9800
TRAINING:
01905 752526
SALES:
01905 752640