1
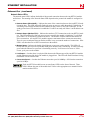
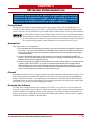
ADVANCED MICRO CONTROLS INC. User M Manual #: 940-0A042 al u n a GENERAL INFORMATION Important User Information The products and application data described in this manual are useful in a wide variety of different applications. Therefore, the user and others responsible for applying these products described herein are responsible for determining the acceptability for each application. While efforts have been made to provide accurate information within this manual, AMCI assumes no responsibility for the application or the completeness of the information contained herein. UNDER NO CIRCUMSTANCES WILL ADVANCED MICRO CONTROLS, INC. BE RESPONSIBLE OR LIABLE FOR ANY DAMAGES OR LOSSES, INCLUDING INDIRECT OR CONSEQUENTIAL DAMAGES OR LOSSES, ARISING FROM THE USE OF ANY INFORMATION CONTAINED WITHIN THIS MANUAL, OR THE USE OF ANY PRODUCTS OR SERVICES REFERENCED HEREIN. No patent liability is assumed by AMCI, with respect to use of information, circuits, equipment, or software described in this manual. The information contained within this manual is subject to change without notice. This manual is copyright 2014 by Advanced Micro Controls Inc. You may reproduce this manual, in whole or in part, for your personal use, provided that this copyright notice is included. You may distribute copies of this complete manual in electronic format provided that they are unaltered from the version posted by Advanced Micro Controls Inc. on our official website: www.amci.com. You may incorporate portions of this documents in other literature for your own personal use provided that you include the notice “Portions of this document copyright 2014 by Advanced Micro Controls Inc.” You may not alter the contents of this document or charge a fee for reproducing or distributing it. Standard Warranty ADVANCED MICRO CONTROLS, INC. warrants that all equipment manufactured by it will be free from defects, under normal use, in materials and workmanship for a period of [18] months. Within this warranty period, AMCI shall, at its option, repair or replace, free of charge, any equipment covered by this warranty which is returned, shipping charges prepaid, within eighteen months from date of invoice, and which upon examination proves to be defective in material or workmanship and not caused by accident, misuse, neglect, alteration, improper installation or improper testing. The provisions of the "STANDARD WARRANTY" are the sole obligations of AMCI and excludes all other warranties expressed or implied. In no event shall AMCI be liable for incidental or consequential damages or for delay in performance of this warranty. Returns Policy All equipment being returned to AMCI for repair or replacement, regardless of warranty status, must have a Return Merchandise Authorization number issued by AMCI. Call (860) 585-1254 with the model number and serial number (if applicable) along with a description of the problem during regular business hours, Monday through Friday, 8AM - 5PM Eastern. An "RMA" number will be issued. Equipment must be shipped to AMCI with transportation charges prepaid. Title and risk of loss or damage remains with the customer until shipment is received by AMCI. 24 Hour Technical Support Number 24 Hour technical support is available on this product. If you have internet access, start at www.amci.com. Product documentation and FAQ’s are available on the site that answer most common questions. If you require additional technical support, call (860) 583-7271. Your call will be answered by the factory during regular business hours, Monday through Friday, 8AM - 5PM Eastern. During non-business hours an automated system will ask you to enter the telephone number you can be reached at. Please remember to include your area code. The system will page an engineer on call. Please have your product model number and a description of the problem ready before you call. We Want Your Feedback Manuals at AMCI are constantly evolving entities. Your questions and comments on this manual are both welcomed and necessary if this manual is to be improved. Please direct all comments to: Technical Documentation, AMCI, 20 Gear Drive, Terryville CT 06786, or fax us at (860) 584-1973. You can also e-mail your questions and comments to [email protected] ADVANCED MICRO CONTROLS INC. TABLE OF CONTENTS General Information Important User Information ..................... Standard Warranty ................................... Returns Policy .......................................... 24 Hour Technical Support Number ........ We Want Your Feedback ......................... Chapter 3: Network Configuration 2 2 2 2 2 Chapter 1: AnyNET-I/O Ethernet Connection Audience .................................................. Applicable Units ...................................... Trademark Notices ................................... Revision Record ....................................... Revision History ............................ 5 Navigating this Manual ............................ Manual Conventions ................................ AnyNET-I/O ............................................ 5 5 5 5 6 6 7 Chapter 2: Ethernet Installation Location ................................................... Safe Handling Guidelines ........................ Prevent Electrostatic Damage ........ 9 Prevent Debris From Entering the Module .................... 9 Remove Power Before Servicing in a Hazardous Environment ....... 9 Mounting .................................................. Minimum Spacing ......................... 10 DIN Rail Installation ..................... 10 Installing IC-5 Connectors ............ 11 Mounting the AnyNET-I/O Modules ....................................... 11 Addressing ............................................... Ethernet Port ............................................ Network Status LED’s ................... 13 9 9 10 11 12 Factory Default ......................................... Assumptions ............................................. Firewalls ................................................... Download the Software ............................ Configure Your Network Interface Card (NIC) .............................. Attach your AnyNET-I/O Module ........... Using the AMCI Net Configurator .......... Start the Software .......................... 17 Scanning for your AnyNET-I/O Module ................. 18 The Meaning of the Product Name ............................. 19 Manually Connecting to your AnyNET-I/O Module ......... 19 Changing the IP Address .............. 20 Setting Communications Protocol ....................................... 21 Cycle Power to the AnyNET-I/O Module ................. 21 Testing the New Address .............. 21 Additional Tabs ............................. 21 Using the Ping Command ........................ 15 15 15 15 16 17 17 22 Chapter 4: EtherNet/IP Configuration AnyNET-I/O Stack Size ........................... RSLogix 5000 Configuration ................... Configure Bridge Module (As Needed) ................................ 23 Configuring a Built-in Ethernet Port (As Needed) .......... 24 Adding the AnyNET-I/O Stack .... 25 RSLogix 500 Configuration ..................... Using Message Instructions in a MicroLogix 1100 PLC .................... Troubleshooting ............................ 30 20 Gear Drive, Plymouth Ind. Park, Terryville, CT 06786 Tel: (860) 585-1254 Fax: (860) 584-1973 http://www.amci.com 23 23 26 26 3 TABLE OF CONTENTS Chapter 5: Modbus/TCP Configuration Modbus Addressing .................................. Modbus Table Mapping ................ 31 Host Addressing ............................ 31 AnyNET-I/O Stack Memory Layout ........ Addressing AnyNET-I/O Modules .......... Supported Modbus Functions ................... Supported Modbus Exceptions ................. Sample Modbus Configuration ................ Initial Configuration ..................... 34 Configuring the Ethernet Scanner ....................................... 35 Adding the AnyNET-I/O Stack .... 35 Download Project to PLC ............. 39 View AnyNET-I/O Data ............... 39 31 32 32 33 33 34 Appendix A: IP Address Setup with Bootp Initial Configuration ................................. 41 Using the RA BOOTP Server .................. 41 Attach the AnyNET-I/O Module ........................................ 41 Start Your Bootp Server ............... 41 Set the Default Gateway Address ....................................... 42 Enabling Bootp Protocol ............... 42 Setting the IP Address ................... 44 Disabling the Bootp Protocol ........ 45 Testing the New IP Address ..................... 45 4 ADVANCED MICRO CONTROLS INC. CHAPTER 1 ANYNET-I/O ETHERNET CONNECTION This manual is designed to get the Ethernet connection on your AnyNET-I/O module up and running quickly. As such, it assumes you have some basic knowledge of Ethernet, such as IP addresses and subnet masks, as well as a basic understanding of either the EtherNet/IP or Modbus/TCP protocols. If these standards are new to you, we’re here to help. AMCI has a great deal of information on our website and we are adding more all the time. If you can’t find what you’re looking for at http:///www.amci.com, send us an e-mail or call us. We’re here to support you with all of our knowledge and experience. Audience This manual explains the set-up, installation, and operation of the Ethernet interface available on all of the modules in the AnyNET-I/O product line from AMCI. It is written for the engineer responsible for incorporating these modules into a design, as well as the engineer or technician responsible for their actual installation. Applicable Units This manual applies to all AnyNET-I/O modules that have a built-in Ethernet port. Generally, if the model number of the AnyNET-I/O module ends in “E”, such as “ANG1E” or “ANR2E”, this module has an integral Ethernet port. This port allows the module to connect itself, and up to five other modules, to an EtherNet/IP or Modbus/TCP network. This manual only covers how to set-up, install and use the Ethernet interface on an AnyNET-I/O module. It does not cover any other functionality of the module. For a complete description of the functionality of your module, please refer to the appropriate user manual found on our website, www.amci.com. Trademark Notices The AMCI logo and “AnyNET-I/O” are trademarks of Advanced Micro Controls Inc. All other trademarks contained herein are the property of their respective holders. Revision Record This manual, 940-0A042, is the third revision of this manual that removes the reference to hot-swappable backplane and corrects typographical errors. It was first released July 22nd, 2014. Revision History 940-0A041 Removed hot-swappable backplane references 940-0A040 Initial Release. 20 Gear Drive, Plymouth Ind. Park, Terryville, CT 06786 Tel: (860) 585-1254 Fax: (860) 584-1973 http://www.amci.com 5 1 AnyNET-I/O ETHERNET CONNECTION Navigating this Manual This manual is designed to be used in both printed and on-line formats. Its on-line form is a PDF document, which requires Adobe Acrobat Reader version 7.0+ to open it. The manual is laid out with an even number of pages in each chapter. This makes it easier to print a chapter to a duplex (double sided) printer. Bookmarks of all the chapter names, section headings, and sub-headings were created in the PDF file to help navigate it. The bookmarks should have appeared when you opened the file. If they didn’t, press the F5 key on Windows platforms to bring them up. Throughout this manual you will also find blue text that functions as a hyperlink in HTML documents. Clicking on the text will immediately jump you to the referenced section of the manual. If you are reading a printed manual, most links include page numbers. The PDF file is password protected to prevent changes to the document. You are allowed to select and copy sections for use in other documents and, if you own Adobe Acrobat version 7.0 or later, you are allowed to add notes and annotations. Manual Conventions Three icons are used to highlight important information in the manual: NOTES highlight important concepts, decisions you must make, or the implications of those decisions. CAUTIONS tell you when equipment may be damaged if the procedure is not followed properly. WARNINGS tell you when people may be hurt or equipment may be damaged if the pro- cedure is not followed properly. The following table shows the text formatting conventions: Format Normal Font Emphasis Font Cross Reference 6 Description Font used throughout this manual. Font used the first time a new term is introduced. When viewing the PDF version of the manual, clicking on the cross reference text jumps you to referenced section. ADVANCED MICRO CONTROLS INC. 1 AnyNET-I/O ETHERNET CONNECTION AnyNET-I/O AnyNET-I/O is a growing product line from AMCI. The concept is simple: specialty and/or high speed I/O that can be attached to any popular industrial network; hence the name AnyNET-I/O. AnyNet-I/O is designed for a broad range of applications, from small machines with a single control enclosure, to large machines that extensively use distributed I/O to minimize wiring costs. What makes the AnyNET-I/O line different is that all of the modules are available with or without a network interface. Eliminating the need for a separate networking module lowers the total cost of ownership for all applications, but especially for the cost sensitive small machines that only require one or two sophisticated functions. Like many low cost controllers, AnyNet-I/O modules are designed to be DIN rail mounted. Up to six AnyNET-I/O modules can be stacked together and accessed over a single network interface. “Stacking” is accomplished through a small backplane connector that snaps into the DIN rail before the AnyNET-I/O modules are installed. These connectors allow the AnyNET-I/O modules to communicate with each other. To the network, the stack of modules appear as one continuous block of I/O words. 20 Gear Drive, Plymouth Ind. Park, Terryville, CT 06786 Tel: (860) 585-1254 Fax: (860) 584-1973 http://www.amci.com Figure 1.1 AnyNET-I/O Module Stack 7 1 AnyNET-I/O ETHERNET CONNECTION Notes 8 ADVANCED MICRO CONTROLS INC. CHAPTER 2 ETHERNET INSTALLATION Location AnyNET-I/O modules are suitable for use in an industrial environment that meet the following criteria: Only non-conductive pollutants normally exist in the environment, but an occasional temporary con- ductivity caused by condensation is expected. Transient voltages are controlled and do not exceed the impulse voltage capability of the product’s insu- lation. Note that these criteria apply to the system as a whole. These criteria are equivalent to the Pollution Degree 2 and Over Voltage Category II designations of the International Electrotechnical Commission (IEC). Safe Handling Guidelines Prevent Electrostatic Damage Electrostatic discharge can damage an AnyNET-I/O module if you touch the rear bus connector pins. Follow these guidelines when handling the module. 1) Touch a grounded object to discharge static potential before handling the module. 2) Work in a static-safe environment whenever possible. 3) Wear an approved wrist-strap grounding device. 4) Do not touch the pins of the bus connector or I/O connector. 5) Do not disassemble the module 6) Store the module in its anti-static bag and shipping box when it is not in use. Prevent Debris From Entering the Module During DIN rail mounting of all devices, be sure that all debris (metal chips, wire strands, tapping liquids, etc.) is prevented from falling into the module. Debris may cause damage to the module or unintended machine operation with possible personal injury. The DIN rail for the modules should be securely installed and grounded before the modules are mounted on it. Remove Power Before Servicing in a Hazardous Environment Remove power before removing or installing any modules in a hazardous environment. 20 Gear Drive, Plymouth Ind. Park, Terryville, CT 06786 Tel: (860) 585-1254 Fax: (860) 584-1973 http://www.amci.com 9 2 ETHERNET INSTALLATION Mounting Minimum Spacing As shown in figure 2.1, you must maintain a minimum spacing of 2 inches (50.8 millimeters) from enclosure walls, wireways, adjacent equipment, etc. for adequate system ventilation. ADDRESS ADDRESS ADDRESS ADDRESS ADDRESS Also note that the AnyNET-I/O modules must be mounted in the orientation shown in the figure. Mounting the system in any other orientation will decrease the efficiency of the ventilation slots on the top and bottom of each module which may lead to system overheating and malfunction. ADDRESS Minimum Spacing (All dimensions) 2.0 inches / 50.8 mm STATUS STATUS STATUS STATUS STATUS STATUS Stepper Indexer Driver Stepper Indexer Driver Stepper Indexer Driver Stepper Indexer Driver Stepper Indexer Driver Stepper Indexer Driver When you use AnyNET-I/O modules that have high power outputs, such as the ANG1 and ANG1E Stepper Indexer Drivers, it is possible for the modules to overheat. It is difficult to calculate Figure 2.1 Ventilation Spacing when this can occur because it is based on not only the current and duty cycle of outputs, but also such variables as enclosure size and ambient temperature. If overheating does occur, you have two choices. You can install a cooling fan beneath the stack to force additional air up through the modules or you can install an addition IC-5 connector between each module to space them out. Information on installing the IC-5 connectors can be found in the Mounting section of this manual starting on page 11. DIN Rail Installation AnyNET-I/O modules can be mounted on following DIN Rail EN 05 022 - 35 x 7.5 (35 x 7.5 mm) If you are only installing one AnyNET-I/O module instead of an interconnected stack, then you can also use the following DIN rail. EN 05 022 - 35 x 15 (35 x 15 mm) 0.40" typ. 0.13" typ. The EN 05 022 - 35 x 15 DIN rail is unacceptable when installing multiple AnyNET-I/O modules as a stack. The IC-5 connector that is used to interconnect the modules requires the EN 05 022 - 35 x 7.5 DIN rail for proper operation. The DIN Rail must be securely mounted to a panel and solidly grounded before the modules are installed. Grounding is usually accomplished through the mounting hardware, by first removing any paint or other material from all surfaces that may interfere with proper grounding. Another option is to install a heavy gauge wire from the DIN rail to your system’s ground bus. Figure 2.2 7.5 mm DIN Rail Installation Figure 2.2 shows the amount of clearance space available for either a bolt head or a washer and nut when installing the 7.5mm deep DIN rail. The left side of the figure shows the clearance when installing a single AnyNET-I/O module and the right side of the figure shows the clearance when using the IC-5 connector to interconnect multiple modules in an AnyNET-I/O Stack. When installing a single module on 15mm deep rail, the clearance is 0.70 inches. 10 ADVANCED MICRO CONTROLS INC. 2 ETHERNET INSTALLATION Mounting (continued) Installing IC-5 Connectors (as needed) If you are installing a stack of AnyNET-I/O modules instead of a single unit, then you need to install the IC-5 connectors on the DIN rail to allow the modules in the stack to communicate. Figure 2.3 shows how to install the IC-5 connectors in the DIN rail. 1) EN 05 022 - 35 x 7.5 DIN rail must be used. The IC-5 connectors are not properly supported in EN 05 022 - 35 x 15 DIN Rail Figure 2.3 IC-5 Connector Installation 2) Note the orientation of the IC-5 connectors when installing them. The module key goes towards the bottom of the DIN rail. Mounting the AnyNET-I/O Modules Mounting an AnyNET-I/O module is a very simple process thanks to the design of the enclosure. If you are using the IC-5 connectors, then you will have to partially engage the connector in to the enclosure. Once that is done, engage the top clip in the enclosure with the top of the DIN rail and rotate the module down until the metal bracket on the module snaps on to the DIN Rail. Once all of your modules are installed, it is strongly suggested to use the end caps from Phoenix Contact with the part number of 271 37 80 to secure the modules on the DIN Rail. These end caps prevent the module from sliding along the DIN rail if it is subjected to shock or vibration during machine operation. Addressing Each module is a stack needs to be given an address before the system will operate correctly. The address is set with the five position DIP switch on the front of the module. ADDRESS 3) If a module with a network interface has a non-zero address, then its network interface is disabled. This allows two modules with network interfaces to work in a single stack. ADDRESS 2) The module that has an address of zero must have a network interface and it is the only module in the stack that can have a direct connection to the network. ADDRESS 1) Only a single switch should be in the “ON” position when setting the address. Address =0 Address =1 Address =2 Figure 2.4 Addressing Example Figure 2.4 is a close up of three modules in an AnyNET-I/O Stack. The module on the left is an unit with a network interface, and has an address of zero (All DIP switches off.) This module has the active network interface and connects the stack to the network. Reading left to right, the remaining modules have addresses of one and two respectively. These modules can be any type of AnyNET-I/O modules. If they have network interfaces, these interfaces are disabled. 20 Gear Drive, Plymouth Ind. Park, Terryville, CT 06786 Tel: (860) 585-1254 Fax: (860) 584-1973 http://www.amci.com 11 2 ETHERNET INSTALLATION Ethernet Port The Ethernet Port is located on the bottom of your AnyNET-I/O module. The connector is a standard RJ-45 jack that will accept any standard 100baseT cable. The Ethernet port on the module has “auto switch” capability which eliminates the need for a crossover cable when directly connecting the AnyNET-I/O module and a personal computer. A standard cable can be used when connecting the module to any device, including a personal computer. AnyNET-I/O Module Bottom View (Partial) Network Status LED Module Status LED Link Status LED Ethernet Connector 10/100Mbps Connection Speed LED Figure 2.5 Ethernet Port Location - Single Width Modules Network Status LED Module Status LED Link Status LED Ethernet Connector 10/100Mbps Connection Speed LED HMI Port Cannot be used to attach module or AnyNET-I/O Stack to network. Figure 2.6 Ethernet Port Location - Dual Width Modules 12 ADVANCED MICRO CONTROLS INC. ETHERNET INSTALLATION 2 Ethernet Port (continued) Network Status LED’s The network status LED’s indicate the health of the network connection between the AnyNET-I/O module and its host. The meaning of the Network Status LED depends on the protocol the module is configured to use. Network Status (EtherNet/IP) – Indicates the status of the connection between the AnyNET-I/O mod- ule and its host. This LED will briefly flash red-green on power up while the module is initializing. It will flash green when the module has an IP address but not yet have a valid CIP connection. It is on steady green when a CIP connection is established. It will be on steady red if there is an IP address conflict. Network Status (Modbus/TCP) – Indicates the number of TCP connections to the AnyNET-I/O mod- ule. This LED will briefly flash red-green on power up while the module is initializing. It will flash green when a TCP connection is made to the driver. The number of flashes indicates the number of active connections. All AnyNET-I/O modules support a maximum of three concurrent connections. There is a two second pause between flashes to make it easy to count the number of connections. If the LED is off, then there are no RTCP connections to the module. Module Status – Indicates the health of the Ethernet co-processor on the module. This LED will briefly flash red once on power up and then flash green while the unit is initializing. It will be on steady green when the Ethernet co-processor is functioning correctly. It will turn red on an error. If this occurs, cycle power to the module. Link Status – On when there is a physical link between the Ethernet port of the AnyNET-I/O module and the Ethernet port of the device the module is plugged into. This LED will flash when data is being transmitted over the Ethernet link. Connection Speed – On when the Ethernet connection speed is 100Mbps. Off when the connection speed is 10 Mbps. Each AnyNET-I/O module has one or more Status LED’s on the front of the unit. These LED’s indicate the state of the module itself. Refer to the appropriate user manual for information on there LED’s. 20 Gear Drive, Plymouth Ind. Park, Terryville, CT 06786 Tel: (860) 585-1254 Fax: (860) 584-1973 http://www.amci.com 13 2 ETHERNET INSTALLATION Notes: 14 ADVANCED MICRO CONTROLS INC. CHAPTER 3 NETWORK CONFIGURATION This chapter covers how to use the AMCI Net Configurator software to set an IP address and the communications protocol. It is also possible to use a Bootp server to set the IP address of an AnyNET-I/O module. Instructions on using the Bootp server from Rockwell Automation are available in Appendix A. Factory Default All AnyNET-I/O modules with an Ethernet interface ship from the factory with a default IP address of 192.168.0.50 and a subnet mask of 255.255.255.0. All AnyNET-I/O modules retain their IP address when power is removed. The present address of your module may be different unless it is directly from the factory. It is not possible to restore factory default settings in the field. If you do not know the address of the module, the AMCI Net Configurator software can scan for the module as long as it is on the same subnet as your computer. If you do not know which subnet the module is configured for, a packet sniffing program, such as Wireshark (www.wireshark.org), can be used. Assumptions This chapter makes a few assumptions: 1) You understand how IP addressing works and you only need instructions on setting the IP address of the module. If you do not yet understand IP addressing, there is plenty of information on the Internet. At the time of this writing, entering the phrase “ip addressing tutorial” into a popular search engine returned 93,000 hits. 2) You have administrative privileges on the computer you are using to configure the AnyNET-I/O module. You will only need these privileges if you have to change the IP addressing of the network interface card used when configuring the unit. 3) You are configuring an AnyNET-I/O module that has the factory default address of 192.168.0.50 and a subnet mask of 255.255.255.0. If you have a module that has already been configured with a different address, you must know this address and adjust these instructions accordingly. If you do not know the address of your module, the AMCI Ethernet Configurator software will still be able to connect to the module if they reside on the same subnet mask. Firewalls Firewalls are hardware devices or software that prevent unwanted network connections from occurring. Firewall software is present in Windows XP and above and it may prevent your computer for communicating with the AnyNET-I/O module. If you think that your firewall may be interfering with the AMCI Ethernet Configurator software, then the easiest thing to do is temporarily disable the firewall from the Control Panel and enable it once you have finished configuring the module. Download the Software The AMCI Net Configurator software is available on our website, www.amci.com. It can be found in our Tech Library section under Product Software. Simply download the zip file, extract it, and run the program to install the AMCI Net Configurator software on your computer. The software installs as most products do, giving you the option to change the file locations before installing the software. Once the install is complete, a link to the software is available on the Start Menu. 20 Gear Drive, Plymouth Ind. Park, Terryville, CT 06786 Tel: (860) 585-1254 Fax: (860) 584-1973 http://www.amci.com 15 3 NETWORK CONFIGURATION Configure Your Network Interface Card (NIC) Ideally, the NIC that you will use when configuring your AnyNET-I/O module is not the NIC that attaches your computer to your corporate network. It is far easier to configure the AnyNET-I/O module with a standalone laptop or when your computer has two NIC’s in it, one for the corporate network and one for the module. If you only have one NIC, and it is used to attach your computer to your corporate network, you must disconnect your computer from the corporate network before configuring the AnyNET-I/O module. DO NOT place a router between your computer and the corporate network so you can try to have access to the network and your module at the same time. The Network Administrator at AMCI can testify to the fact that “Bad Things” can happen when a rogue DHCP server in engineering starts to offer network information to computers around it. Save yourself and your IT department some headaches and disconnect yourself from your corporate network if you only have one NIC in the computer that you will used to configure your AnyNET-I/O module. A wireless adapter does count as a network interface and if you have a laptop, it may be possible to connect to your corporate network with the wireless interface and use a NIC to configure the AnyNET-I/O module. It should also be possible to configure your module over a wireless connection by attaching it to a wireless router. However, this configuration has not yet been tested by AMCI. The easiest way to check the current settings for your NIC is with the ‘ipconfig’ command. For Windows XP, click on the [Start] button, and click on [Run...]. A dialog box will open. Enter ‘cmd’ on the text line and press [Enter] on the keyboard. For Vista and Windows 7, click on the [Start] button, and type “cmd” in the “Search programs and files” text box. Press [Enter] on the keyboard to open the command prompt. For Windows 8, bring up the ‘Apps’ search bar and type “cmd” into the text box. Press [Enter] on the keyboard to open the command prompt. A DOS like terminal will open. Type in ‘ipconfig’, press [Enter] on the keyboard and the computer will return the present Address, Subnet Mask, and Default Gateway for all of your network interfaces. If your present address is 192.168.0.x, where ‘x’ does not equal 50, and your subnet mask is 255.255.255.0, then you are ready to configure your AnyNET-I/O module. Figure 3.1 shows the output of an ipconfig command that shows the “Local Area Connection 2” interface on the 192.168.0 subnet. Figure 3.1 ipconfig Command 16 ADVANCED MICRO CONTROLS INC. NETWORK CONFIGURATION 3 Configure Your Network Interface Card (NIC) (continued) If your present address in not in the 192.168.0.x range, type in ‘ncpa.cpl’ at the command prompt and hit [Enter] on the keyboard. In XP, this opens the Network and Dial-up Connections window. Right click on the appropriate inter- face and select ‘Properties’ from the menu. This will open the Properties windows for the selected interface. Click on the ‘Internet Protocol (TCP/IP)’ component and then click on the [Properties] button. For Vista and Windows 7, this opens the Network Connections window. Double click on the appropri- ate interface. In the window that opens, select “Internet Protocol Version 4 (TCP/IP v4)” from the list and then click on the [Properties] button. For Windows 8, this opens the Network Connections window. Double click on the appropriate interface and the Status window for that interface opens. Click on the [Properties] button. In the next window that opens, select “Internet Protocol Version 4 (TCP/IP v4)” from the list and then click on the [Properties] button. Set the address and subnet mask to appropriate values. (192.168.0.1 and 255.255.255.0 will work for an AnyNET-I/O module with factory default settings.) You can ignore the default gateway and DNS settings. Attach your AnyNET-I/O Module The next step in configuring your AnyNET-I/O module is attaching it to your computer. Any Cat5, 5e, or 6 cable can be used. You can attach your module directly to your computer or use a network switch. The module has an “auto-switch” port which eliminates the need for a crossover cable in direct connect applications. Once the cables are attached, you can power up your AnyNET-I/O module. Using the AMCI Net Configurator Start the Software To start the program, simply navigate through your start menu and click on the program’s icon. The program will present a screen similar to figure 3.2 below. Figure 3.2 AMCI NET Configurator Screen 20 Gear Drive, Plymouth Ind. Park, Terryville, CT 06786 Tel: (860) 585-1254 Fax: (860) 584-1973 http://www.amci.com 17 3 NETWORK CONFIGURATION Using the AMCI Ethernet Configurator (continued) Scanning for your AnyNET-I/O Module The first step in configuring your AnyNET-I/O module is to connect to it. The simplest method is to click on the [Scan] button and the Configurator software will attempt to find your module. This scan will only work if your network card and the AnyNET-I/O module are on the same network. If the scan is successful, the unit will appear in the scan list. Figure 3.3 shows the window after successfully scanning for an ANG1E module. Figure 3.3 ANG1E Scan Results If a scan for the module does not work, then one of three problems is the usual cause. The first cause only occurs if you have two or more network adapters in your computer. (A wireless adapter counts as an adapter. Some bluetooth adapters also appear as network interfaces.) If this is the case, then it is likely that the identification request to the AnyNET-I/O module is not going out on the correct network interface. You can try to manually connect to your AnyNET-I/O module as outlined below or you can disable all network adapters except for the one used to communicate with the AnyNET-I/O module and try the scan again. The second cause is that your module does not have an AnyNET-I/O address of zero and the interface is disabled. See Addressing on page 11 for more information. The third cause is that the AnyNETI/O module is not on the same subnet as the network interface. If this is the case, you can try another subnet that is commonly used at your facility, or use a network protocol analyzing program such as Wireshark to view the address of the AnyNET-I/O module. 18 ADVANCED MICRO CONTROLS INC. 3 NETWORK CONFIGURATION Using the AMCI Configurator Software (continued) The Meaning of the Product Name Once you successfully scan and connect to the AnyNET-I/O module, the Product Name will show up in the scan list. The Product Name gives you clues to the configuration of the AnyNET-I/O Stack. As shown in figure 3.4 below, the Product Name is broken down into four parts. AnyNET-Ev11-G***** Fixed “E” = EtherNet/IP Protocol Enabled “T” = Modbus/TCP Protocol Enabled Firmware Revision Modules in Stack Figure 3.4 Product Name Description The AnyNET-I/O system allows you to stack up to six AnyNET-I/O modules together and attach them to a single network connection. The last section of the product name lists all of the modules in the stack as individual letters. The letter used is equal to the third letter in the product name. For example, a “G” is the code for the ANG1 while an “R” is used for the ANR2 modules. An “*” is used as a place holder when no module is present. The modules are ordered by their address settings, not their physical location in the stack. For simplicity’s sake, AMCI strongly suggests using consecutive address settings and place them in numeric order in the physical stack. Once you’ve located the AnyNET-I/O stack that you wish to configure, double click on its IP address to open the configuration window for the stack. Manually Connecting to your AnyNET-I/O Module You have the option to manually connect to your AnyNET-I/O module if you already know the address of the unit. If you have multiple network adapters, you may have to use this method to guarantee that the identification requests use the correct network adapter to reach your module. To start a manual connection, press the [Manual connect] button. This will result in the window shown in figure 3.5 below. Figure 3.5 Manually Connect to an AnyNET-I/O Module From here, you can enter the IP address and press the [Connect] button. 20 Gear Drive, Plymouth Ind. Park, Terryville, CT 06786 Tel: (860) 585-1254 Fax: (860) 584-1973 http://www.amci.com 19 3 NETWORK CONFIGURATION Using the AMCI Configurator Software (continued) Changing the IP Address Once you have connected to your AnyNET-I/O stack, you will be presented with a window that allows you to configure each module in the group. Each module is assigned its own tab in the window. The General tab allows you to change the network configuration for the stack. A sample window is shown below. Figure 3.6 Sample Configuration Window Before you can change the IP address or communication protocol, you have to click on the check box titled “Allow IP configuration changes. You will need to restart the device.”. When the box is checked, the [Set IP Address], [Set As EtherNet/IP Device], and [Set as Modbus TCP Device] buttons are enabled. The next step in configuring the Ethernet interface is to set the New IP Address, Subnet Mask, and Default Gateway fields to your desired values. The Default Gateway must be set to a valid value, even if the AnyNET-I/O module will never need to communicate with a different subnet. This means that the default gateway must be on the same subnet as the module but cannot be the address used by the module. AMCI suggests setting the default gateway to the address of your host controller. Once these values are set, click on the [Set IP Address] button to write these values to the AnyNET-I/O module. You will see a pop up window reminding you that you must cycle power to the module before the changes take effect. 20 ADVANCED MICRO CONTROLS INC. NETWORK CONFIGURATION 3 Using the AMCI Configurator Software (continued) Setting Communications Protocol Click on either button to set the communications protocol for your Ethernet Interface. When you click on either, you You will see a pop up window reminding you that you must cycle power to the module before the changes take effect. Cycle Power to the AnyNET-I/O Module The AnyNet-I/O module will not use the new configuration settings until the next time it powers up. You must cycle power to the module before you can test the new IP address. Testing the New Address Once the AnyNET-I/O module finishes its power up sequence, press the [Scan] button and re-connect to the unit or re-connect to it manually. This step will verify the new address and Network Protocol settings. If you have changed the network address that the module response to, you may have to adjust the address settings of your network interface card before you can reconnect to the module. If you have to change the address of your NIC, refer back to the Configure Your Network Interface Card (NIC) section of this chapter, starting on page 16 if you need additional information. Additional Tabs When you are connected to your device, you will notice a tab at the top of the window for every module in your AnyNET-I/O stack. See figure 3.6 on page 20 for an example. The second tab is named “Module 0: ANG1”. These tabs allow you to configure the module and test it before attaching it to your host controller. The screens are unique to each module. Refer to the corresponding AnyNET-I/O module manual for information on the settings and the AMCI NET Configurator on-line help system to navigate the screens. 20 Gear Drive, Plymouth Ind. Park, Terryville, CT 06786 Tel: (860) 585-1254 Fax: (860) 584-1973 http://www.amci.com 21 3 NETWORK CONFIGURATION Using the Ping Command If you do not have access to the AMCI NET Configurator software in the field, the easiest way to test the address of the AnyNET-I/O module is with the “ping” command. Before you can use the command, you have to be sure the module and your computer are still on the same subnet. For example, if the new address of the module is 192.168.0.42 and your computer has an address of 192.168.0.1, with a subnet mask of 255.255.255.0, then the two pieces of equipment are on the same subnet. (In this case, the first three numbers of the IP address must match.) If the new address of the module is 192.168.50.50, then the computer and module are not on the same subnet and you must go back into the Network Configuration panel and change your adapter’s TCP/IP settings. Refer back to the Configure Your Network Interface Card (NIC) section of this chapter, starting on page 16. Once you are sure your computer and AnyNET-I/O module are on the same subnet, open the DOS terminal if necessary: For Windows XP, click on the [Start] button, and click on [Run...]. A dialog box will open. Enter ‘cmd’ on the text line and press [Enter] on the keyboard. For Vista and Windows 7, click on the [Start] button, and type “cmd” in the “Search programs and files” text box. Press [Enter] on the keyboard. For Windows 8, bring up the ‘Apps’ search bar and type “cmd” into the text box. Press [Enter] on the keyboard to open the command prompt. Once the terminal is open, type in ‘ping aaa.bbb.ccc.ddd’ where ‘aaa.bbb.ccc.ddd’ in the new IP address of your AnyNET-I/O module. The computer will ping the module and the message “Reply from aaa.bbb.ccc.ddd: bytes=32 time<10ms TTL=128” should appear four times. Figure 3.7 IP Address Changed Successfully If the message “Request timed out.” or “Destination host unreachable” appears, then one of four things has occurred: 22 You set the new IP address, but have not yet cycled power to the AnyNET-I/O module You did not enter the correct address in the ping command. The new IP address of the AnyNET-I/O module was not set correctly. The AnyNET-I/O module and the computer are not on the same subnet. ADVANCED MICRO CONTROLS INC. CHAPTER 4 ETHERNET/IP CONFIGURATION An AnyNET-I/O Stack requires a host controller to issue commands and read data from these modules. This chapter tells you how to configure Rockwell Automation ControlLogix, CompactLogix, and MicroLogix controllers to act as hosts for the AnyNET-I/O Stack. All of these RA platforms use the EtherNet/IP communications protocol. AnyNET-I/O Stack Size You must determine the number of I/O words used by your AnyNET-I/O Stack before you can add it to your project. The number of words needed is simply the sum of all the I/O words used by the AnyNET-I/O modules in the stack. The number of I/O words needed by a module is listed in the Specifications section of the unit’s manual. Refer to the manuals of all of the modules in the AnyNET-I/O Stack to determine the number of needed I/O words. RSLogix 5000 Configuration RSLogix 5000 is used to configure both the ControlLogix and CompactLogix platforms. When using these platforms, you have the option of using a separate Ethernet Bridge module or an Ethernet port built into the processor. If the Ethernet port is built into processor, the only step you have to take is to create a new project with the correct processor or modify an existing project before adding an AnyNET-I/O Stack. Once this is done, the Ethernet port will automatically appear in the Project Tree. If you are using a Ethernet Bridge module, you will have to add it to the I/O Configuration tree before adding the AnyNET-I/O Stack to your project. Configure Bridge Module (As Needed) The first step is to create a new project or open an existing one. A 1756-L1 processor is used in the screen images below. 1) Insert a bridge module into the I/O Configuration tree. As shown in figure 4.1 on the right, right click on the I/ O Configuration folder and select “New Module...” in the pop-up menu. Figure 4.1 Defining a Bridge Module 20 Gear Drive, Plymouth Ind. Park, Terryville, CT 06786 Tel: (860) 585-1254 Fax: (860) 584-1973 http://www.amci.com 23 4 EtherNet/IP CONFIGURATION RSLogix 5000 Configuration (continued) Configure Bridge Module (As Needed) (continued) 2) In the Select Module Type windows that opens, select the proper Ethernet Bridge module. (In this example, the 1756-ENET/B.) Click on the [OK] button. 3) Enter the following information in the Module Properties window that opens. All parameters not listed here are optional. Figure 4.2 shows a completed screen. Name: A descriptive name for the Bridge Module. IP Address: Must be the address you want for the bridge module, not the address you want for the AnyNET-I/O Stack. Slot: The slot the bridge module will reside in. Figure 4.2 Setting Module Properties 4) When done, click on [Finish>>] to complete the setup of the Ethernet bridge module. Configuring a Built-in Ethernet Port (As Needed) You will still have to set an IP address for the Ethernet Port if the port is built into your processor. Right click on the port name in the I/O Configuration screen and select “Properties”. A Module Properties window similar to the one shown in figure 4.2 will open. In this window you must set the IP Address for the port, not the IP address of the AnyNET-I/O Stack. 24 ADVANCED MICRO CONTROLS INC. 4 EtherNet/IP CONFIGURATION RSLogix 5000 Configuration (continued) Adding the AnyNET-I/O Stack You can add the AnyNET-I/O Stack to the project once the Ethernet port (built-in or bridge module) is configured. 1) As shown in figure 4.3 on the right, the Ethernet port will be listed under the I/O Configuration tree. Right click on the port and then click on “New Module...” in the pop-up menu. 2) In the resulting window, click on the “By Vendor” tab towards the bottom of the window if necessary. Scroll down the list until you find the entry that has a Module Type of ETHERNET-MODULE and a description of “Generic Ethernet Module”. Click on the module name to select and then click the [OK] button. A Module Properties window will open. 3) Set the following parameters in the Module Properties window. All parameters not listed here are optional. Figure 4.4 shows a completed screen. Name: A descriptive name for the AnyNET-I/O Stack. Comm Format: Data - INT (MUST be changed from Figure 4.3 Adding an AnyNET-I/O Module the default Data - DINT.) IP Address: Must be the address you set for the network module in the AnyNET-I/O Stack. Refer to Chapter 3 starting on page 15 for information on setting the IP Address of an AnyNET-I/O module. Input: Assembly Instance = 100, Size = Number of input words needed by the entire AnyNET-I/O Stack. Refer to the Specifications section of the appropriate manuals to determine the number of input words needed by all AnyNET-I/O modules in the stack. Output: Assembly Instance = 150, Size = Number of output words needed by the entire AnyNET-I/O Stack. Refer to the Specifications section of the appropriate manuals to determine the number of input words needed by all AnyNET-I/O modules in the stack. Configuration: Assembly Instance = 110, Size = 0 Figure 4.4 Sample AnyNET-I/O Module Configuration Screen 4) Click on [Next>]. Set the RPI time as required for your system. The minimum RPI time for an AnyNET-I/O Stack is 1.5 milliseconds per module. (Nine milliseconds for a stack of six modules.) When done, click on [Finish>>] to complete the setup. 20 Gear Drive, Plymouth Ind. Park, Terryville, CT 06786 Tel: (860) 585-1254 Fax: (860) 584-1973 http://www.amci.com 25 4 EtherNet/IP CONFIGURATION RSLogix 500 Configuration Platforms supported by the RSLogix 500 software package require Message Instructions to communicate with the AnyNET-I/O Stack. This section uses a MicroLogix 1100 to describe how to configure these instructions. Two instructions are required to transfer data between the PLC and the AnyNET-I/O Stack. One instruction reads data from the stack and the other writes data to it. The following table gives the required attributes for the instructions. Service Type Service Code Class Instance Attribute Length Read Instruction Write Instruction Read Assembly E (hex) 4 (hex) 100 (decimal) 3 (hex) Varies Write Assembly 10 (hex) 4 (hex) 150 (decimal) 3 (hex) Varies Table 4.1 Message Instruction Attributes Length is the sum of all input or output words needed by all of the modules in the stack. The number of I/O words needed by a module is listed in the Specifications section of the unit’s manual. Refer to the manuals of all of the modules in the AnyNET-I/O Stack to determine the number of I/O words needed. Using Message Instructions in a MicroLogix 1100 PLC Only RSLogix 500 version 8.0 or above can be used to configure Message Instructions to communicate with an EtherNet/IP device. 1) Create four new data files. An Integer file to contain the data from the AnyNET-I/O Stack. This file must have enough ele- ments to contain all of the data read from all of the modules. An Integer file to contain the data sent to the AnyNET-I/O Stack. This file must be large enough to contain all of the data written to all of the modules. A Message (MG) data file. This file must have at least two elements, one to control the Read Operation and one to control the Write Operation. An Extended Routing Information (RIX) data file. This file is used to store information used by the Message Instructions. This file must have at least two elements, one for the Read Operation and one for the Write Operation. 26 ADVANCED MICRO CONTROLS INC. EtherNet/IP CONFIGURATION 4 Using Message Instructions in a MicroLogix 1100 PLC (continued) 2) Add the Message Instruction(s) to your Ladder Logic. The following rungs show how you can alternately read data from and write data to your AnyNET-I/O Stack. Figure 4.5 Message Instruction Example 3) Double Click on Setup Screen text inside the Message Instruction. The following window will open. Note that this is the default window and its appearance will change considerably as you progress through these steps. Figure 4.6 Message Instruction Setup Screen 4) Double click in the Channel field, click on the , select “1 (Integral)”, and press Enter. 5) Double click in the Communication Command field, click on the , select “CIP Generic” and press Enter. 6) If the Message Instruction is being used to read data from the AnyNET-I/O Stack, enter the integer file where the data will be placed in the Data Table Address (Received) field and press enter. If the Message Instruction is being used to write data to the AnyNET-I/O Stack, enter the integer file where the source data will be located in the Data Table Address (Send) field and press Enter. 7) Enter the number of bytes needed for the entire AnyNET-I/O Stack in either the Size In Bytes (Receive) or Size In Bytes (Send) field. This value is twice the number of words used by the stack. For example, a stack of three modules that each use ten input words must have this parameter set to 60. (3X10X2) 8) Enter a RIX address in the Extended Routing Info field. Please note that each Message Instruction must have its own RIX address. 20 Gear Drive, Plymouth Ind. Park, Terryville, CT 06786 Tel: (860) 585-1254 Fax: (860) 584-1973 http://www.amci.com 27 4 EtherNet/IP CONFIGURATION Using Message Instructions in a MicroLogix 1100 PLC (continued) 9) Double click in the Service field and select “Read Assembly” for a Message Instruction that is being used to read data from the AnyNET-I/O Stack, or “Write Assemble” for a Message Instruction that is being used to send data to the AnyNET-I/O Stack, and press Enter. 10)For Read operations, the Service Code field will change to “E” (hex). For Write operations, the Service Code field will change to “10” (hex). For both read and write operations, the Class field will change to “4” (hex), and the Attribute field will change to “3” (hex). 11)For Read operations, enter a value of 64 hex (100 decimal) in the Instance field. For Write operations, enter a value of 96 hex (150 decimal) in the Instance field. The figure below shows a typical configuration for Message Instructions being used to read data from one AnyNET-I/O module that uses ten words. Please note that the Data Table Address (Receive) and the Size in Bytes (Receive) fields may be different in your application. Figure 4.7 Read Message Instruction Setup Screen 28 ADVANCED MICRO CONTROLS INC. EtherNet/IP CONFIGURATION 4 Using Message Instructions in a MicroLogix 1100 PLC (continued) The figure below show a typical configuration for Message Instructions being used to write data to a single AnyNET-I/O module that uses ten words. Please note that the Data Table Address (Send) and Size in Bytes (Send) fields may be different in your application. Figure 4.8 Write Message Instruction Setup Screen For both read and write message instructions, click on the MultiHop tab on the top of the window. As shown in figure 4.9, enter the IP address of the AnyNET-I/O Stack and press Enter. Figure 4.9 Message Instruction MultiHop Settings After you are finished adding both the read and write message instructions to your program, save and download the program to the PLC. 20 Gear Drive, Plymouth Ind. Park, Terryville, CT 06786 Tel: (860) 585-1254 Fax: (860) 584-1973 http://www.amci.com 29 4 EtherNet/IP CONFIGURATION Using Message Instructions in a MicroLogix 1100 PLC (continued) Troubleshooting If you are unable to communicate with the AnyNET-I/O Stack, the problem may be that the Ethernet port of your MicroLogix 1100 has not been configured. To check this, double click on Channel Configuration in the Project Tree and then select the Channel 1 tab. The following window will open. Figure 4.10 MicroLogix Ethernet Configuration Screen Enter the IP address and Subnet Mask of your host controller, not the AnyNET-I/O Stack, and click on the [Apply] button. The Ethernet Port should now be working. 30 ADVANCED MICRO CONTROLS INC. CHAPTER 5 MODBUS/TCP CONFIGURATION An AnyNET-I/O Stack requires a host controller to issue commands and read data from the modules. This chapter tell you how the I/O words used by an AnyNET-I/O Stack are mapped to the Modbus I/O registers. Modbus Addressing The register addresses used in this manual are the Modbus logical reference numbers†, which are unsigned integers starting at zero. This is often called zero based addressing. In this scheme, the first register is given an address of zero. This is the actual addressing scheme used in the Modbus packets. All AMCI AnyNET-I/O manuals use zero based addressing. Another common addressing scheme is one based or data model addressing. In this scheme, the register’s number is used as its address, so the first register, Register 1 in the data model, has an address of 1. Modbus Table Mapping The Discrete Input and Input Register tables in the Modbus data model map to the same physical memory locations in all AnyNET-I/O modules. These registers hold data that is reported from the AnyNET-I/O module to the host controller. This data is typically command responses and status data. Addresses for these registers and inputs start at 0 in zero based addressing. As examples: Discrete Input 0 is the same memory location as bit 0 of the first Input Register. Register address 3, the fourth register, contains Discrete Inputs 48 through 63. The Coil and Holding Register tables in the Modbus data model map to the same physical memory locations in all AnyNET-I/O modules. These registers hold data that is from the host controller to the AnyNET-I/O module. This data is typi- cally commands. Addresses for these registers start at 1024 in zero based addressing. Coil addresses start at 16,384 in zero based addressing (1024*16). As examples: Coil 16384 is the same memory location as bit 0 of the first Holding Register. Register address 1025, the address of the second Holding Register, contains Discrete Inputs 16,400 through 16,415. Host Addressing Your host controller may not use these basic addressing schemes for communicating over a Modbus connection. For example, Modicon controllers use addresses starting at 30000 for Input Registers and addresses starting at 40000 for Holding Registers. GE hosts internally use their %R memory for Holding Registers and %AI memory for Input Registers. If this is the case, you will define a mapping between your host controller’s addressing scheme and the zero based AnyNET-I/O addresses when you add the AnyNET-I/O module or stack to your host controller. Refer to your host controller’s documentation for information on how to accomplish this. † MODBUS Application Protocol Specification V1.1b3, section 4.3: MODBUS Data model. www.modbus.org 20 Gear Drive, Plymouth Ind. Park, Terryville, CT 06786 Tel: (860) 585-1254 Fax: (860) 584-1973 http://www.amci.com 31 5 Modbus/TCP CONFIGURATION AnyNET-I/O Stack Memory Layout The networked module in every AnyNET-I/O Stack, which has a stack address of “0”, has a starting Input Register address of 0 and a starting Output Register address of 1024. The next module in the AnyNET-I/O Stack, which has a stack address of “1”, is addressed immediately after the previous module. Input Registers hold the data from the AnyNET-I/O Stack while Output Registers hold the data to be written to the stack. Figure 5.1 shows how an AnyNET-I/O Stack, which consists of an ANG1E and an ANE2, is mapped to the Modbus data reference. The complete specification for the Modbus protocol can be downloaded at: http://www.modbus.org/specs.php. 15 Register 0 0 159 Register 9 144 175 Register 10 319 Register 19 ANG1E Network Input Data ANE2 Network Input Data Mapped as: Discrete Inputs Holding Registers 160 Input Registers 304 Input Register Addresses Discrete Input Addresses Not Implemented Coil Addresses Holding Register Addresses 16,399 Register 1024 16,384 16,543 Register 1033 16,528 16,558 Register 1034 Mapped as: Coils Holding Registers 16,544 16,703 Register 1043 16,688 ANG1E Network Output Data ANE2 Network Output Data Figure 5.1 Modbus Data Reference Map: Stack of ANG1E and ANE2 Addressing AnyNET-I/O Modules There are two ways that you can address modules in your AnyNET-I/O Stack when using Modbus/TCP. You can address the stack as a whole, or you can address modules individually by selecting the correct starting address and number of registers for the Modbus/TCP transfer. If you decide to address the stack as a whole, the number of words needed is simply the sum of all the I/O words used by all AnyNET-I/O modules in the stack. The number of I/O words needed by a module is listed in the Specifications section of the unit’s manual. Refer to the manuals of all of the modules in the AnyNET-I/O Stack to determine the number of needed I/O words. 32 ADVANCED MICRO CONTROLS INC. 5 Modbus/TCP CONFIGURATION Supported Modbus Functions Function Code Function Name ANG1(E) Register 1 2 Read Coils Read Discrete Inputs OUTPUT INPUT 3 Read Holding Registers OUTPUT & INPUT 4 5 6 15 16 22 Read Input Registers Write Single Coil Write Single Register Write Multiple Coils Write Multiple Registers Mask Write Register INPUT OUTPUT OUTPUT OUTPUT OUTPUT OUTPUT 23 Read/Write Registers INPUT/OUTPUT Addressing method Bit: Addresses starting at 16,384 Bit: Addresses starting at 0 Word: Out Regs. Starting at 1024 In Regs. Starting at 0 Word: Addresses starting at 0. Bit: Addresses starting at 16,384 Word: Addresses starting at 1024 Bit: Addresses starting at 16,384 Word: Addresses starting at 1024 Word: Addresses starting at 1024 Word: Out Regs. Starting at 1024 In Regs. Starting at 0 Table 5.1 Supported Modbus Functions Table 5.1 above lists the Modbus functions that are supported by AnyNET-I/O modules. AMCI supports all of these functions so that you can control the stack as you see fit. However, if you are looking for the easiest way to interface with the stack, then you only need to use the Read/Write Registers function, which is function code 23. Each AnyNET-I/O module buffers the data that it sends over the network. If you use the Read/ Write Registers function to write configuration data to the module, then the data read with that command will not contain the response to the new configuration data. The response to the new data will be sent with the next data read. Supported Modbus Exceptions Code Name 01 02 03 Illegal function Illegal data address Illegal data value Description The module does not support the function code in the query The data address received in the query is outside the initialized memory area The data in the request is illegal Table 5.2 Supported Modbus Exceptions 20 Gear Drive, Plymouth Ind. Park, Terryville, CT 06786 Tel: (860) 585-1254 Fax: (860) 584-1973 http://www.amci.com 33 5 Modbus/TCP CONFIGURATION Sample Modbus Configuration The following section uses the Schneider-Electric Modicon M340 platform as an example of how to configure a Modbus/TCP device. Unity Pro 6.0 software is used along with a BMXP342020 processor and a BMXNOC0401 Ethernet Communications module. The example assumes that you are starting a new project. You may have to adjust module location and data addressing to match your existing application. Initial Configuration From the menu bar, click on File -> New (Ctrl+N) and select your processor. (P342020 in this example.) In Project browser, double click on the PLC bus. The Hardware catalog will open along with a picture of your rack. In the Hardware catalog, expand the Communication section and drag the name of the communications module to the proper slot of the rack picture. (A BMX NOC 0401 in slot 1 is used in this example.) A "Properties of device" window will open that allows you to rename the device. As shown in figure 5.2, it is left to its default name in this example. Figure 5.2 Configuring the M340 Rack Once you set the name, click [OK] and the device is added. Add all other devices needed by your application and then close the PLC bus window to close the Hardware catalog. 34 ADVANCED MICRO CONTROLS INC. Modbus/TCP CONFIGURATION 5 Sample Modbus Configuration (continued) Configuring the Ethernet Scanner In the Project Browser, expand the rack if necessary and double click on the communications module. (The BMX NOC 0401 in this example.) This will open a window that allows you to set the number of I/O words assigned to the device. The number of input and output words has to be large enough to accommodate all of the modules in the AnyNET-I/O Stack plus the sixteen input and sixteen output words needed by the NOC0401 for communication status bits. Assuming ten input and ten output words per module, you will need seventy-six I/O words for a six module AnyNET-I/O Stack. Other devices attached to the NOC0401 will need additional I/O words. In this example, the stack consists of an ANG1E and an ANG1 so thirty-six input and thirty-six output words are assigned to the NOC0401. As shown in figure 5.3, the %MW index values must be even. Figure 5.3 Assigning IO Words to Ethernet Module Once you update the index and size values, click on Edit -> Validate (Ctrl+W) to validate the change. Then press the [Update application] button to create the Derived Data Types. You can then close the BMX NOC0401 window. Adding the AnyNET-I/O Stack Click on Tools -> DTM Browser (Alt+Shift+1) to open the DTM Browser window. Double click on the NOC0401 module. In the “fdtConfiguration” window that opens, select Channel Properties + TCP/IP to set the Scanner IP Address, Sub-Network Mask, and Gateway IP Address. The Scanner IP address must be on the same subnet as the AnyNET-I/O Stack. Close the “fdtConfiguration” window. In the DTM Browser, right click on the NOC0401 and select "Add..." In the “Add” window that opens, scroll down to “Modbus Device” and double click on it. Enter an Alias name for the AnyNET-I/O Stack. In this example, the name is set to “AnyNET_IO_50”. (50 is the last octet of its IP address) Click [OK] to close the window. In the DTM Browser, double click on the NOC0401. A configuration window will open. Under “Device List” on the left side, click on the AnyNET_IO_50 entry. There are three tabs that have information that must be set. 20 Gear Drive, Plymouth Ind. Park, Terryville, CT 06786 Tel: (860) 585-1254 Fax: (860) 584-1973 http://www.amci.com 35 5 Modbus/TCP CONFIGURATION Sample Modbus Configuration (continued) Adding the AnyNET-I/O Stack (continued) Under the Properties tab, change the “Import Mode:” to “Manual”. See figure 5.4 below. Click on the [Apply] button. Figure 5.4 AnyNET-I/O Stack Properties 36 ADVANCED MICRO CONTROLS INC. Modbus/TCP CONFIGURATION 5 Sample Modbus Configuration (continued) Adding the AnyNET-I/O Stack (continued) Under the Address Setting tab, set the IP Address to the one used by the AnyNET-I/O Stack. AnyNET-I/O modules do not use DHCP, so do not enable it for this device. See figure 5.5 below. Press [Tab] to leave the IP address field and the click on the [Apply] button. Figure 5.5 AnyNET-I/O Stack Addressing 20 Gear Drive, Plymouth Ind. Park, Terryville, CT 06786 Tel: (860) 585-1254 Fax: (860) 584-1973 http://www.amci.com 37 5 Modbus/TCP CONFIGURATION Sample Modbus Configuration (continued) Adding the AnyNET-I/O Stack (continued) The Request Setting tab is used to set up implicit communications between the PLC and the AnyNET-I/O Stack. The scanner will automatically update the stack at the programmed rate if you configure these settings. It is also possible to communicate with the stack under program control by addressing the AnyNET-I/O stack in your code. Click on the [Add Request] button to start the settings. Connection Bit: Leave as is Unit ID: Leave as is Health Time Out (ms): The PLC sets an error if the AnyNET-I/O stack does not respond in this amount of time. This setting must be greater that the Repetitive Rate setting. 1500 milliseconds has been used in testing at AMCI. Repetitive Rate (ms): How often the stack is updated. Range of 5 to 60,000 milliseconds, with intervals of five milliseconds. An AnyNET-I/O stack of six modules can be updated every ten milliseconds, but you may want to increase that time based on need and network load. RD Address: The starting address of the read data. The stack read address starts at 0. RD Length: The number of words transferred by the request from the AnyNET-I/O Stack. Check the user manual for each module to determine the number of words used by it. This information is available in the Specifications section of the manual. In this example, both modules in the stack require ten words and are both read by the request, so the length is set to twenty. Last Value: Choose what will happen to the data if communication is lost. WR Address: The starting address of the write data. The stack write address starts at 1024. WR Length: The number of words transferred by the request to the AnyNET-I/O Stack. Check the user manual for each module to determine the number of words used by it. This information is available in the Specifications section of the manual. In this example, both modules in the stack require ten words and are both written to by the request, so the length is set to twenty. Figure 5.6 shows the tab after the request is configured to read the entire stack every five milliseconds Figure 5.6 Configuring a Stack Transfer Request 38 ADVANCED MICRO CONTROLS INC. Modbus/TCP CONFIGURATION 5 Sample Modbus Configuration (continued) Adding the AnyNET-I/O Stack (continued) It is also possible to communicate with the modules in the stack individually using the Request Settings tab. For example, you may want to receive updates from an ANG1 stepper controller every 200 milliseconds, but updates from an ANE2 SSI interface every 10 milliseconds for position feedback. Figure shows two requests. The first updates the first AnyNET-I/O module in the stack every 200 milliseconds. The second updates the second module in the stack every 10 milliseconds. Note the changes in RD Address, and WR Address parameters. The RD Length and WR length parameters are also set to ten words so they only access one module in the stack. Figure 5.7 Configuring Module Transfer Requests Once you have set the parameters for the AnyNET-I/O stack, click the [OK] button to save the parameters and close the window. Download Project to PLC In the menu bar, click on Build -> Analyze Project. The test should complete without error and the Derived Data Types for the AnyNET-I/O stack should appear in the Project Browser. In the menu bar, click on Build and either Build Changes or Rebuild All Project. This will compile the project. With the PLC connected to your PC, and the AnyNET-I/O Stack attached to the NOC0401, click on PLC -> Standard Mode to be sure you are going to communicate with the BMXP342020. Then click PLC -> Connect (Ctrl+K) to connect to the PLC. After communication is established, click on PLC -> Transfer Project to PLC (Ctrl+L). In the window that opens, click the [Transfer] button. The project is downloaded to the PLC. Click on PLC -> Run (Ctrl+R) to place the PLC in Run Mode. View AnyNET-I/O Data In order to see the values coming from the stack, you must create an Animation Table. In the Project Browser, right click on the Animation Tables and select New Animation Table. Give the table an appropriate name, such as “AnyNET_IO_50” which is used in this example. Unity Pro creates an empty table. Double click on the first cell of the table and then click on the ellipsis “...” button to open the “Instance Selection” window. In the Instance Selection window, hold down the shift key and select the input and output words assigned to the AnyNET-I/O Stack. Click the [OK] button to populate your Animation Table. 20 Gear Drive, Plymouth Ind. Park, Terryville, CT 06786 Tel: (860) 585-1254 Fax: (860) 584-1973 http://www.amci.com 39 5 Modbus/TCP CONFIGURATION Sample Modbus Configuration (continued) View AnyNET-I/O Data (continued) Figure 5.8 shows a populated animation table for the input and output words assigned to the AnyNET-I/O Stack. When using the Modbus Device DTM, the data is organized into bytes and the names are fixed. The M340 platform uses the little-endian format, so the least significant byte is in the even number word. For example, figure 5.8 shows the input data from an ANG1E. Free0[0] and Free0[1] make up Status Word 1 for the module, with Free0[0] the least significant byte. The combined value of 16#6408 is the value the ANG1 sends over the network on power up if it is not configured. Figure 5.8 shows the input data from the AnyNET-I/O stack in two arrays, Free0 and Free1. This results from setting up two transfer requests as shown in figure 5.8. Free0 holds the data from the module with the AnyNET-I/O stack address of zero. The Free1 array holds the data from the module with an address of one. Figure 5.8 Data from AnyNET-I/O Stack 40 ADVANCED MICRO CONTROLS INC. APPENDIX A IP ADDRESS SETUP WITH BOOTP It is possible to use a Bootp server to set the IP address of an AnyNET-I/O module. This appendix explains how to use the Bootp server from Rockwell Automation to set the IP address. Initial Configuration Starting at the beginning of chapter 3, Network Configuration, follow those instructions up to the point where you have your network interface card configured to communicate with the AnyNET-I/O module. This is explained in the section Configure Your Network Interface Card (NIC) which is on page 16. Using the RA BOOTP Server Attach the AnyNET-I/O Module The first step in configuring the AnyNET-I/O module when using a Bootp server is attaching the module to your computer. Any Cat5, 5e, or 6 cable can be used. You can attach the module directly to your computer or use a network switch. All AnyNET-I/O modules have an “auto-switch” port which eliminates the need for a crossover cable in direct connect applications. Do not power up the AnyNET-I/O at this point. Just attach it to your network. Start Your Bootp Server If needed, start your Bootp server. The Bootp-DHCP server software, version 2.3, from Rockwell Automation is used in this example. The R.A. Bootp server window is broken down into two panes, “Request History” and “Relation List”. “Request History” tells you what responses come over the network and the “Relation List” shows the setup data you have entered. Figure A.1 RA Bootp Server 20 Gear Drive, Plymouth Ind. Park, Terryville, CT 06786 Tel: (860) 585-1254 Fax: (860) 584-1973 http://www.amci.com 41 A IP ADDRESS SETUP WITH BOOTP Using the RA BOOTP Server (continued) Set the Default Gateway Address In order to conform with the ODVA specification, all modules require a valid default gateway address setting when changing their IP address. AMCI suggests using the address of your host controller as the default gateway address. Figure A.2 shows an example default gateway address of 192.168.0.250. The Default Gateway must be set to a valid value, even if the AnyNET-I/O module will never need to communicate with a different subnet. This means that the default gateway must be on the same subnet as the module but cannot be the address used by the module. AMCI suggests setting the default gateway to the address of your host controller. Figure A.2 Default Gateway Settings Enabling Bootp Protocol Changing the IP address of the AnyNET-I/O module requires you to first enable the Bootp protocol on the module. All AnyNET-I/O modules have the Bootp protocol disabled by default. Per the ODVA standard, if Bootp protocol is enabled and a Bootp server is not available, the AnyNET-I/O module will not be able to join the network. 1) In the “Relation List” pane of the RA Bootp Server software, click on [New]. In the window that opens, enter the MAC address of the AnyNET-I/O module which is printed on the module’s serial number tag. You do not have to enter the “-” characters when entering the address on the screen. You must also enter the module’s current IP address. This is 192.168.0.50 by default. The hostname and Description fields can be left blank. Click [OK]. 2) Apply power to the module and wait for the Module Status LED to come on solid green and the Network Status LED to be flashing green. AnyNET-I/O Module Bottom View (Partial) Network Status LED Module Status LED Link Status LED Ethernet Connector 10/100Mbps Connection Speed LED Figure A.3 Network LED’s Typical Placement 42 ADVANCED MICRO CONTROLS INC. IP ADDRESS SETUP WITH BOOTP A Using the RA BOOTP Server (continued) Enabling Bootp Protocol (continued) 3) Click on your new entry in the “Relation List”. This will activate the buttons in the pane. Click on the [Enable BOOTP] button. The message “[Enable BOOTP] Command successful” should appear instantly in the status line at the bottom of the window. Figure A.4 shows the state of the RA Bootp Server software at this point. Figure A.4 Bootp Enabled 4) The BOOTP protocol is now enabled on the AnyNET-I/O Module. Remove power from the module before continuing. 20 Gear Drive, Plymouth Ind. Park, Terryville, CT 06786 Tel: (860) 585-1254 Fax: (860) 584-1973 http://www.amci.com 43 A IP ADDRESS SETUP WITH BOOTP Using the RA BOOTP Server (continued) Setting the IP Address With the Bootp protocol enabled on the AnyNET-I/O module, you can now change the IP address of the unit. 1) Double click on your new entry in the “Relation List” This will bring up the Properties window again. Enter the new IP address for the AnyNET-I/O module and click [OK]. Figure A.5 Defining the New IP Address 2) Apply power to the module and wait for the Module Status LED to come on solid green and the Network Status LED to be flashing green. At this point, you should also have a message in the “Request History” pane that lists the MAC address of the AnyNET-I/O module along with the new IP address that you requested. Figure A.6 New IP Address For AnyNET-I/O Module 44 ADVANCED MICRO CONTROLS INC. IP ADDRESS SETUP WITH BOOTP A Using the RA BOOTP Server (continued) Disabling the Bootp Protocol Unless your target system has a BOOTP server running all of the time, you must disable the BOOTP protocol on the AnyNET-I/O module. In order to comply with ODVA specifications, the module will issue BOOTP requests on power up until a valid response is received. There is no time out value. If BOOTP is enabled on the AnyNET-I/O module and a BOOTP server is not available, the module will not be able to join the network. To disable BOOTP protocol on an AnyNET-I/O module: 1) With power still applied to the unit, click on your new entry in the “Relation List”. This will enable the buttons above it. 2) Click on the [Disable BOOTP/DHCP] button. The message “[Disable BOOTP] Command successful” should appear instantly in the status line at the bottom of the window. The AnyNET-I/O module is now configured. Testing the New IP Address The easiest way to test the new address of your AnyNET-I/O module is with the “ping” command. Before you can use the command, you have to be sure your module and your computer are still on the same subnet. For example, if the new address of the module is 192.168.0.42 and your computer has an address of 192.168.0.1, with a subnet mask of 255.255.255.0, then the two pieces of equipment are on the same subnet. (In this case, the first three numbers of the IP address must match.) If the new address of your AnyNET-I/O module is 192.168.50.50, then the computer and module are not on the same subnet and you must go back into the Network Configuration panel and change your adapter’s TCP/IP settings. Refer back to the Configure Your Network Interface Card (NIC) section of this chapter, starting on page 16 for more information. Once you are sure your computer and AnyNET-I/O module are on the same subnet, open the DOS terminal if necessary: For Windows XP, click on the [Start] button, and click on [Run...]. A dialog box will open. Enter ‘cmd’ on the text line and press [Enter] on the keyboard. For Vista and Windows 7, click on the [Start] button, and type “cmd” in the “Search programs and files” text box. Press [Enter] on the keyboard. For Windows 8, bring up the Apps Search bar and type “cmd” into the text box. Press [Enter] on the keyboard to open the command prompt. 20 Gear Drive, Plymouth Ind. Park, Terryville, CT 06786 Tel: (860) 585-1254 Fax: (860) 584-1973 http://www.amci.com 45 A IP ADDRESS SETUP WITH BOOTP Testing the New IP Address (continued) Once the terminal is open, type in ‘ping aaa.bbb.ccc.ddd’ where ‘aaa.bbb.ccc.ddd’ in the new IP address of your AnyNET-I/O module. The computer will ping the module and the message “Reply from aaa.bbb.ccc.ddd: bytes=32 time<10ms TTL=128” should appear four times. Figure A.7 IP Address Changed Successfully If the message “Request timed out.” or “Destination host unreachable” appears, then one of four things has occurred: The new IP address of the AnyNET-I/O module was not set correctly The AnyNET-I/O module and the computer are not on the same subnet. You did not enter the correct address in the ping command. 46 ADVANCED MICRO CONTROLS INC. IP ADDRESS SETUP WITH BOOTP A Notes 20 Gear Drive, Plymouth Ind. Park, Terryville, CT 06786 Tel: (860) 585-1254 Fax: (860) 584-1973 http://www.amci.com 47 ADVANCED MICRO CONTROLS INC. LEADERS IN ADVANCED CONTROL PRODUCTS