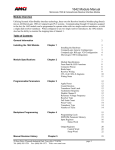
1
ADVANCED MICRO CONTROLS INC. User M Manual #: 940-0A070 al u n a GENERAL INFORMATION Important User Information The products and application data described in this manual are useful in a wide variety of different applications. Therefore, the user and others responsible for applying these products described herein are responsible for determining the acceptability for each application. While efforts have been made to provide accurate information within this manual, AMCI assumes no responsibility for the application or the completeness of the information contained herein. UNDER NO CIRCUMSTANCES WILL ADVANCED MICRO CONTROLS, INC. BE RESPONSIBLE OR LIABLE FOR ANY DAMAGES OR LOSSES, INCLUDING INDIRECT OR CONSEQUENTIAL DAMAGES OR LOSSES, ARISING FROM THE USE OF ANY INFORMATION CONTAINED WITHIN THIS MANUAL, OR THE USE OF ANY PRODUCTS OR SERVICES REFERENCED HEREIN. No patent liability is assumed by AMCI, with respect to use of information, circuits, equipment, or software described in this manual. The information contained within this manual is subject to change without notice. This manual is copyright 2013 by Advanced Micro Controls Inc. You may reproduce this manual, in whole or in part, for your personal use, provided that this copyright notice is included. You may distribute copies of this complete manual in electronic format provided that they are unaltered from the version posted by Advanced Micro Controls Inc. on our official website: www.amci.com. You may incorporate portions of this documents in other literature for your own personal use provided that you include the notice “Portions of this document copyright 2013 by Advanced Micro Controls Inc.” You may not alter the contents of this document or charge a fee for reproducing or distributing it. Standard Warranty ADVANCED MICRO CONTROLS, INC. warrants that all equipment manufactured by it will be free from defects, under normal use, in materials and workmanship for a period of [18] months. Within this warranty period, AMCI shall, at its option, repair or replace, free of charge, any equipment covered by this warranty which is returned, shipping charges prepaid, within eighteen months from date of invoice, and which upon examination proves to be defective in material or workmanship and not caused by accident, misuse, neglect, alteration, improper installation or improper testing. The provisions of the "STANDARD WARRANTY" are the sole obligations of AMCI and excludes all other warranties expressed or implied. In no event shall AMCI be liable for incidental or consequential damages or for delay in performance of this warranty. Returns Policy All equipment being returned to AMCI for repair or replacement, regardless of warranty status, must have a Return Merchandise Authorization number issued by AMCI. Call (860) 585-1254 with the model number and serial number (if applicable) along with a description of the problem during regular business hours, Monday through Friday, 8AM - 5PM Eastern. An "RMA" number will be issued. Equipment must be shipped to AMCI with transportation charges prepaid. Title and risk of loss or damage remains with the customer until shipment is received by AMCI. 24 Hour Technical Support Number 24 Hour technical support is available on this product. If you have internet access, start at www.amci.com. Product documentation and FAQ’s are available on the site that answer most common questions. If you require additional technical support, call (860) 583-7271. Your call will be answered by the factory during regular business hours, Monday through Friday, 8AM - 5PM Eastern. During non-business hours an automated system will ask you to enter the telephone number you can be reached at. Please remember to include your area code. The system will page an engineer on call. Please have your product model number and a description of the problem ready before you call. We Want Your Feedback Manuals at AMCI are constantly evolving entities. Your questions and comments on this manual are both welcomed and necessary if this manual is to be improved. Please direct all comments to: Technical Documentation, AMCI, 20 Gear Drive, Terryville CT 06786, or fax us at (860) 584-1973. You can also e-mail your questions and comments to [email protected] ADVANCED MICRO CONTROLS INC. TABLE OF CONTENTS GENERAL INFORMATION Important User Information ..................... Standard Warranty ................................... Returns Policy .......................................... 24 Hour Technical Support Number ........ We Want Your Feedback ......................... 2 2 2 2 2 Chapter 1: AnyNET-I/O Modbus RTU Interface Audience .................................................. Applicable Units ...................................... Trademark Notices ................................... Revision Record ....................................... Revision History ............................ 5 Navigating this Manual ............................ Manual Conventions ................................ AnyNET-I/O ............................................ 5 5 5 5 5 6 6 Chapter 2: Modbus RTU Installation Modbus Parameters .................................. Location ................................................... Safe Handling Guidelines ........................ Prevent Electrostatic Damage ........ 7 Prevent Debris From Entering the Module ................................... 7 Remove Power Before Servicing in a Hazardous Environment ....... 7 Mounting .................................................. Module Dimensions ....................... 8 Minimum Spacing ......................... 8 DIN Rail Installation ..................... 9 Installing IC-5 Connectors (as needed) ................................... 9 Mounting the AnyNET-I/O Modules ....................................... 10 7 7 7 8 Chapter 2: Modbus RTU Installation (continued) Addressing ................................................ AnyNet-I/O Stack Addressing ...... 10 Modbus RTU Network Addressing .................................. 11 Modbus Network Connector .................... Modbus Network Wiring ......................... 4-Wire Bus .................................... 12 Network Status LED ................................ 10 11 12 13 Chapter 3: AMCI NET Configurator Software USB Connection ....................................... 15 Installing the AMCI NET Configurator Software ................................................. 15 USB Driver Installation ................ 15 Using the AMCI NET Configurator Software ................................................. 16 Connect to the AnyNET-I/O Stack ........................................... 16 The Meaning of the Product Name .......................................... 17 Setting Modbus Serial Line Parameters .................................. 17 Configuring an AnyNET-I/O Module (optional) ...................... 18 Chapter 4: Modbus RTU Register Mapping AnyNET-I/O Stack Memory Layout ....... AnyNET-I/O Stack Addressing ............... Supported Modbus Functions .................. Supported Modbus Exceptions ................ 20 Gear Drive, Plymouth Ind. Park, Terryville, CT 06786 Tel: (860) 585-1254 Fax: (860) 584-1973 http://www.amci.com 19 20 20 20 3 TABLE OF CONTENTS Notes 4 ADVANCED MICRO CONTROLS INC. CHAPTER 1 AnyNET-I/O MODBUS RTU INTERFACE This manual is designed to get the Modbus RTU connection on your AnyNET-I/O module up and running quickly. As such, it assumes you have some basic knowledge of Modbus networking. If the Modbus standards are new to you, we’re here to help. AMCI has a great deal of information on our website and we are adding more all the time. If you can’t find what you’re looking for at http:/// www.amci.com, send us an e-mail or call us. We’re here to support you with all of our knowledge and experience. Audience This manual explains the set-up, installation, and operation of the 2-wire, RS485, Modbus RTU interface available on the modules in the AnyNET-I/O product line from AMCI. It is written for the engineer responsible for incorporating these modules into a design, as well as the engineer or technician responsible for their actual installation. Applicable Units This manual applies to all AnyNET-I/O modules that have a built-in Modbus RTU interface. Generally, if the model number of the AnyNET-I/O module ends in “M”, such as “ANG1M” or “ANR2M”, this module has an integrated Modbus RTU interface. This interface allows the module to connect itself, and up to five other AnyNET-I/O modules, to a Modbus RTU network. This manual only covers how to set-up, install and use the Modbus RTU interface on an AnyNET-I/O module. It does not cover any other functionality of the module. For a complete description of the functionality of your module, please refer to the appropriate user manual found on our website, www.amci.com. Trademark Notices The AMCI logo and “AnyNET-I/O” are trademarks of Advanced Micro Controls Inc. All other trademarks contained herein are the property of their respective holders. Revision Record This manual, 940-0A070, is the first revision of this manual. It was first released February 4th, 2013. Revision History 940-0A070 Initial Release. Navigating this Manual This manual is designed to be used in both printed and on-line formats. Its on-line form is a PDF document, which requires Adobe Acrobat Reader version 7.0+ to open it. The manual is laid out with an even number of pages in each chapter. This makes it easier to print a chapter to a duplex (double sided) printer. Bookmarks of all the chapter names, section headings, and sub-headings were created in the PDF file to help navigate it. The bookmarks should have appeared when you opened the file. If they didn’t, press the F5 key on Windows platforms to bring them up. Throughout this manual you will also find blue text that functions as a hyperlink in HTML documents. Clicking on the text will immediately jump you to the referenced section of the manual. If you are reading a printed manual, most links include page numbers. The PDF file is password protected to prevent changes to the document. You are allowed to select and copy sections for use in other documents and, if you own Adobe Acrobat version 7.0 or later, you are allowed to add notes and annotations. 20 Gear Drive, Plymouth Ind. Park, Terryville, CT 06786 Tel: (860) 585-1254 Fax: (860) 584-1973 http://www.amci.com 5 1 AnyNET-I/O MODBUS RTU INTERFACE Manual Conventions Three icons are used to highlight important information in the manual: NOTES highlight important concepts, decisions you must make, or the implications of those decisions. CAUTIONS tell you when equipment may be damaged if the procedure is not followed properly. WARNINGS tell you when people may be hurt or equipment may be damaged if the pro- cedure is not followed properly. The following table shows the text formatting conventions: Format Description Normal Font Emphasis Font Font used throughout this manual. Font used the first time a new term is introduced. When viewing the PDF version of the manual, clicking on the cross reference text jumps you to referenced section. When viewing the PDF version of the manual, clicking on the URL Reference text opens the referenced document. Cross Reference URL Reference AnyNET-I/O AnyNET-I/O is a growing product line from AMCI. The concept is simple: specialty and/or high speed I/O that can be attached to any popular industrial network; hence the name AnyNET-I/O. AnyNet-I/O is designed for a broad range of applications, from small machines with a single control enclosure, to large machines that extensively use distributed I/O to minimize wiring costs. What makes the AnyNET-I/O line different is that all of the modules are available with or without a network interface. Eliminating the need for a separate networking module lowers the total cost of ownership for all applications, but especially for the cost sensitive small machines that only require one or two sophisticated functions. AnyNet-I/O modules are designed to be DIN rail mounted. Up to six AnyNET-I/O modules can be stacked together and accessed over a single network interface. “Stacking” is accomplished through a small backplane connector that snaps into the DIN rail before the AnyNET-I/O modules are installed. These connectors allow the AnyNET-I/O modules to communicate with each other. To the network, the stack of modules appear as one continuous block of I/O words. 6 Figure 1.1 AnyNET-I/O Module Stack ADVANCED MICRO CONTROLS INC. CHAPTER 2 MODBUS RTU INSTALLATION Modbus Parameters Address Range ....... 1 to 99 Physical Interface .. 2-Wire RS485 RS485 Unit Load ... 1/8 (256 devices max.) Protocol .................. RTU Baud Rate .............. 2,400, 9,600, 14,400, 19,200, 38,400, 57,600, and 115,200, default of 19,200 Parity Checking ..... Even, Odd, or None, default of Even Interface IC............. ADM2485 (2.5kV galvanic isolation) Location AnyNET-I/O modules are suitable for use in an industrial environment that meet the following criteria: Only non-conductive pollutants normally exist in the environment, but an occasional temporary con- ductivity caused by condensation is expected. Transient voltages are controlled and do not exceed the impulse voltage capability of the product’s insulation. Note that these criteria apply to the system as a whole. These criteria are equivalent to the Pollution Degree 2 and Over Voltage Category II designations of the International Electrotechnical Commission (IEC). The AnyNET-I/O unit itself has an environmental rating of IP20. Safe Handling Guidelines Prevent Electrostatic Damage Electrostatic discharge can damage an AnyNET-I/O module if you touch the rear bus connector pins. Follow these guidelines when handling the module. 1) Touch a grounded object to discharge static potential before handling the module. 2) Work in a static-safe environment whenever possible. 3) Wear an approved wrist-strap grounding device. 4) Do not touch the pins of the bus connector or I/O connector. 5) Do not disassemble the module 6) Store the module in its anti-static bag and shipping box when it is not in use. Prevent Debris From Entering the Module During DIN rail mounting of all devices, be sure that all debris (metal chips, wire strands, tapping liquids, etc.) is prevented from falling into the module. Debris may cause damage to the module or unintended machine operation with possible personal injury. The DIN rail for the modules should be securely installed and grounded before the modules are mounted on it. Remove Power Before Servicing in a Hazardous Environment Remove power before removing or installing any modules in a hazardous environment. Removing and installing a module while under power will not damage the module, but the potential exists for electrical arcing. You cannot “hot-swap” AnyNET-I/O modules in the stack. The modules themselves will not be damaged, but the AnyNET-I/O will not reconfigure itself for the new module. It is a best practise to remove power before working with AnyNET-I/O modules. 20 Gear Drive, Plymouth Ind. Park, Terryville, CT 06786 Tel: (860) 585-1254 Fax: (860) 584-1973 http://www.amci.com 7 2 MODBUS RTU INSTALLATION Mounting Module Dimensions Figure 2.1 lists the dimensions of the AnyNET-I/O modules with a Modbus RTU interface. I/O Mating Connector 4.47" (113.5) 0.89" 5.20" (132.1) 4.55" (115.6) (99.1) 3.90" ADDRESS (22.6) 0.26" (6.6) Modbus RTU Port Shown with Mating Connector 3.14" (79.8) C L Figure 2.1 Modbus RTU AnyNET-I/O Module Dimensions ADDRESS ADDRESS ADDRESS ADDRESS ADDRESS Also note that the AnyNET-I/O modules must be mounted in the orientation shown in the figure. Mounting the system in any other orientation will decrease the efficiency of the ventilation slots on the top and bottom of each module which may lead to system overheating and malfunction. Minimum Spacing (All dimensions) 2.0 inches / 50.8 mm ADDRESS Minimum Spacing As shown in figure 2.2, you must maintain a minimum spacing of 2 inches (50.8 millimeters) from enclosure walls, wireways, adjacent equipment, etc. for adequate system ventilation. STATUS STATUS STATUS STATUS STATUS STATUS Stepper Indexer Driver Stepper Indexer Driver Stepper Indexer Driver Stepper Indexer Driver Stepper Indexer Driver Stepper Indexer Driver When you use an AnyNET-I/O module that has high power outputs, such as the ANG1 Stepper Indexer Driver, it is possible for the module to overheat. It is difficult to calculate when this can Figure 2.2 Ventilation Spacing occur because it is based on not only the current and duty cycle of outputs, but also such variables as enclosure size and ambient temperature. If overheating does occur, you have two choices. You can install a cooling fan beneath the stack to force additional air up through the modules or you can install an addition IC-5 connector between each module to space them out. Information on installing the IC-5 connectors can be found in the Mounting section of this manual starting on page 9. 8 ADVANCED MICRO CONTROLS INC. 2 MODBUS RTU INSTALLATION Mounting (continued) DIN Rail Installation AnyNET-I/O modules can be mounted on following DIN Rail EN 05 022 - 35 x 7.5 (35 x 7.5 mm) If you are only installing one AnyNET-I/O module instead of an interconnected stack, then you can also use the following DIN rail. EN 05 022 - 35 x 15 (35 x 15 mm) 0.40" typ. 0.13" typ. The EN 05 022 - 35 x 15 DIN rail is unacceptable when installing multiple AnyNET-I/O modules as a stack. The IC-5 connector that is used to interconnect the modules requires the EN 05 022 - 35 x 7.5 DIN rail for proper operation. The DIN Rail must be securely mounted to a panel and solidly grounded before the modules are installed. Grounding is usually accomplished through the mounting hardware, by first removing any paint or other material from all surfaces that may interfere with proper grounding. Another option is to install a heavy gauge wire from the DIN rail to your system’s ground bus. Figure 2.3 7.5 mm DIN Rail Installation Figure 2.3 shows the amount of clearance space available for either a bolt head or a washer and nut when installing the 7.5mm deep DIN rail. The left side of the figure shows the clearance when installing a single AnyNET-I/O module and the right side of the figure shows the clearance when using the IC-5 connector to interconnect multiple modules in an AnyNET-I/O Stack. When installing a single module on 15mm deep rail, the clearance is 0.70 inches. Installing IC-5 Connectors (as needed) If you are installing a stack of AnyNET-I/O modules instead of a single unit, then you need to install the IC-5 connectors on the DIN rail to allow the modules in the stack to communicate. Figure 2.4 shows how to install the IC-5 connectors in the DIN rail. 1) EN 05 022 - 35 x 7.5 DIN rail must be used. The IC-5 connectors are not properly supported in EN 05 022 - 35 x 15 DIN Rail Figure 2.4 IC-5 Connector Installation 2) Note the orientation of the IC-5 connectors when installing them. The module key goes towards the bottom of the DIN rail. 20 Gear Drive, Plymouth Ind. Park, Terryville, CT 06786 Tel: (860) 585-1254 Fax: (860) 584-1973 http://www.amci.com 9 2 MODBUS RTU INSTALLATION Mounting (continued) Mounting the AnyNET-I/O Modules Mounting an AnyNET-I/O module is a very simple process thanks to the design of the enclosure. If you are using the IC-5 connectors, then you will have to partially engage the connector in to the enclosure. Once that is done, engage the top clip in the enclosure with the top of the DIN rail and rotate the module down until the metal bracket on the module snaps on to the DIN Rail. Once all of your modules are installed, it is strongly suggested to use the end caps from Phoenix Contact with the part number of 271 37 80 to secure the modules on the DIN Rail. These end caps prevent the module from sliding along the DIN rail if it is subjected to shock or vibration during machine operation. Addressing 3) If a module with a network interface has a non-zero address, then its network interface is disabled. This allows two modules with network interfaces to work in a single stack. ADDRESS 2) The module that has an address of zero must have a network interface and it is the only module in the stack that can have a direct connection to the network. ADDRESS 1) Only a single switch should be in the “ON” position when setting the address. ADDRESS AnyNet-I/O Stack Addressing Each module in the AnyNET-I/O Stack requires an address before the system will operate correctly. Note that this is the address of a module within the AnyNET-I/O Stack, not the node address of the stack on the Modbus network. The stack address is set with the five position DIP switch on the front of the module. Address =0 Address =1 Address =2 Figure 2.5 Addressing Example Figure 2.5 is a close up of three modules in an AnyNET-I/O Stack. The module on the left is an unit with a network interface, and has an address of zero (All DIP switches off.) This module has the active network interface and connects the stack to the network. Reading left to right, the remaining modules have addresses of one and two respectively. These modules can be any AnyNET-I/O modules. If they have network interfaces, these interfaces are disabled. 10 ADVANCED MICRO CONTROLS INC. 2 MODBUS RTU INSTALLATION Addressing (continued) Modbus RTU Network Addressing The node address of the AnyNET-I/O Stack on the Modbus RTU network is set with two rotary switches that are behind the front panel door. The address can be set to any value between 01 and 99. The top switch, which is nearest the red DIP switches, sets the first digit of the address, and the bottom switch sets the second digit. As shown in figure 2.6, the rotary knob has a slot for a small flat head screwdriver and part of the shaft is cut away to indicate the number selected by the switch. The figure shows a Modbus RTU network address of 08. Note that every device on the Modbus RTU network must have a different address. The figure also shows the AnyNet-I/O module address of zero. This is the proper setting for an AnyNET-I/O module that acts as the stack’s network interface. Figure 2.6 Modbus Addressing Modbus Network Connector The Modbus network connector is located on the bottom of your module. The mating connector is included. Spare connectors are sold separately by AMCI under the part number MS-2X4. It is also available from Phoenix Contact under their part number 173 88 27. The connector is laid out so that you can easily wire your AnyNET-I/O module into the trunk cable. This is called a Trunk Interface (ITr) in the Modbus over Serial Line specification and is the preferred connection for the AnyNET-I/O module. The three required interface lines are each brought out on two pins which makes it easy to daisy-chain the AnyNET-I/O module in the trunk, or add the required Line Termination resistors if the AnyNET-I/O module is the last device on the trunk. A +5 Vdc, 50 mA supply is also available on the connector. This supply is made available as a convenient location to place Line Polarization resistors if your system requires them. AnyNET-I/O modules do not require Line Polarization resistors for proper operation. The +5 Vdc, 50 mA supply is for Line Polarization resistors only. Do not power digital inputs from this supply. Drawing excessive current from this supply may force the module into a reset state or damage it. Modbus Network Status Modbus RTU Network Connector Figure 2.7 Modbus Connector Location 20 Gear Drive, Plymouth Ind. Park, Terryville, CT 06786 Tel: (860) 585-1254 Fax: (860) 584-1973 http://www.amci.com 11 2 MODBUS RTU INSTALLATION Modbus Network Wiring Each AnyNET-I/O module with a Modbus RTU interface is designed to be wired as a Trunk Interface (ITr) device on a 2-wire serial bus. Figure 2.8 shows how to wire the module to the Trunk Cable as well as how to install the Line Termination Resistor if the module is the last device on the cable. The final part of the figure shows how to wire an AnyNET-I/O module to a Modbus serial line using a single twisted pair cable. This practice does not follow the Modbus over serial line specification, but it is commonly seen in practice. AMCI strongly recommends a three wire cable for a trunk cable. TWISTED PAIR Cabling using 1.5 pair cable with Modbus recommended colors GRY COMMON BRN D0 D0 D1 D1 YEL COMMON SHIELD SHIELD TWISTED PAIR Line Termination Resistor GRY COMMON BRN D0 YEL Line Termination Resistor Exact Value depends on Cable Characteristics. 150 ohm, 0.5 Watt typical. D1 SHIELD Common Practice of using single twisted pair and shield as Common connection TWISTED PAIR COMMON COMMON D0 D0 D1 D1 SHIELD SHIELD Figure 2.8 Wiring of Modbus over Serial Line 4-Wire Bus The Modbus over serial line specification allows a four wire interface for the trunk cable. AnyNET-I/O modules do not implement a 4-wire interface. Refer to the latest version of the MODBUS over Serial Line Specification and Implementation Guide found on the www.modbus.org website for information on connecting a 2-wire bus device to a 4-wire bus. 12 ADVANCED MICRO CONTROLS INC. MODBUS RTU INSTALLATION 2 Network Status LED The Network Status LED shown in figure 2.7 indicate the health of the serial connection between the AnyNET-I/O module and its host. Steady Green - The AnyNET-I/O module is powered, but there is no active communication between the unit and its host. Blinking Green - The AnyNET-I/O module is successfully communicating with its host over the Modbus Serial Line network Blinking Red - The AnyNET-I/O module received a malformed packet over the Modbus Serial Line network. This is typically caused by noise on the RS-485 line, an improperly terminated RS-485 trunk cable, or problems with one of the devices on the trunk. Every AnyNET-I/O module also has one or more Status LED’s on the front of the unit as well. These Status LED’s indicates the working state of the module. Information on their blink codes is available in the user’s manual for the module itself. 20 Gear Drive, Plymouth Ind. Park, Terryville, CT 06786 Tel: (860) 585-1254 Fax: (860) 584-1973 http://www.amci.com 13 2 MODBUS RTU INSTALLATION Notes 14 ADVANCED MICRO CONTROLS INC. CHAPTER 3 AMCI NET CONFIGURATOR SOFTWARE This chapter covers how to connect to an AnyNET-I/O module with a Modbus RTU interface using the AMCI NET Configurator software. With this software, it is possible to communicate and configure all of the modules in the AnyNET-I/O stack. This chapter only gives a brief introduction to the AMCI NET Configurator software. Check our website for additional information that may be available. USB Connection AnyNET-I/O modules with the Modbus RTU interface also have a micro USB connector behind the front panel door. When connected to a computer, this USB connection acts as a serial port and allows you to connect to every module in your AnyNET-I/O stack. This connection is only for configuring the modules using an AMCI utility. The USB port does not implement the Modbus RTU protocol. You may require a windows driver when you use the USB connection for the first time. The software and driver are both available as free downloads from the AMCI website using the following address: http://www.amci.com/product-software.asp. Once on the page, click on the appropriate links to download the software. Installing the AMCI NET Configurator Software Because many corporate firewalls prevent their users from downloading executable files, the install program exists as a ZIP file from our website. Installation is straight forward. 1) Download the software from http://www.amci.com/product-software.asp. 2) Extract the ZIP file to your computer. The resulting file is a simple install file. 3) Run the install program. When you do this, the following changes are made to your computer: An AMCI folder is created in your programs folder. This folder is typically \Program Files\AMCI on XP systems and \Program Files (x86)\AMCI on Windows 7 systems. The AMCI NET Configurator program and the USB driver files are placed in this directory A shortcut to the AMCI NET Configurator program is created on the desktop and a program listing is created that will display the program off of the Start Menu. No changes are made to the registry. The AMCI NET program can be easily un-installed by deleting the AMCI directory in the programs folder and the desktop and Start Menu shortcuts. USB Driver Installation After the AMCI NET program is installed, apply power to your AnyNET-I/O Modbus RTU module and plug in a USB cable between the module and your computer. At this point, your system may notify you that an unknown device has been plugged into the computer and the system will start to look for the required driver. AMCI uses a popular USB to serial chipset so the required drivers may already exist on your computer. If the drivers are on your system, they will install automatically. If the “Found New Hardware Wizard” opens on your system, and it asks “Can Windows connect to Windows Update to search for software?” you can click on the radio button that selects “Yes, this time only” and click on the [Next >] button. Your system should be able to locate the required driver. Alternately, you can click on the “No, not at this time” radio button and click the [Next >] button. On the next screen, select the “Install from a list or specific location” radio button and click the [Next >] button. Now select the “Search for the best driver in these locations” radio button, un-check the “Search removable media” check box, check the “Include this location in the search” check box, and click on the [Browse] button. Browse to the install folder, typically \Program Files\AMCI on XP systems or \Program Files (x86)\AMCI on Windows 7 systems, and click the [OK] button. Click the [Next >] button, and your system should install the required driver. You may have to repeat the process to install the USB serial port driver. 20 Gear Drive, Plymouth Ind. Park, Terryville, CT 06786 Tel: (860) 585-1254 Fax: (860) 584-1973 http://www.amci.com 15 3 AMCI NET CONFIGURATOR SOFTWARE Using the AMCI NET Configurator Software To start the program, click on the desktop icon or navigate from the start button to the program listing and click on the icon there. The program will present a screen similar to figure 3.1 below. Figure 3.1 AMCI NET System software Connect to the AnyNET-I/O Stack The first step is to either click on the [Manual connect] button or double click on the name of the module in the device tree on the left of the screen. Either way, a “Device Properties” window will open that allows you to connect to your module. If you clicked on the [Manual connect] button you now have to click on the drop down menu and change the choice from “TCP/IP” to “USB”. Click on the [Connect] button to connect to your Modbus RTU module. Figure 3.2 Modbus RTU Module Device Properties 16 ADVANCED MICRO CONTROLS INC. AMCI NET CONFIGURATOR SOFTWARE 3 Using the AMCI NET Software (continued) The Meaning of the Product Name Once you successfully connect to your AnyNET-I/O Stack, the Product Name will show up in the General tab of the Device Properties windows. The Product Name gives you clues to the configuration of your AnyNET-I/O Stack. As shown in figure 3.3 below, the Product Name is broken down into four parts. AnyNET-Mv22-G***** Fixed “M” = Modbus RTU Protocol Firmware Revision Modules in Stack Figure 3.3 Product Name Description The AnyNET-I/O system allows you to stack up to six AnyNET-I/O modules together and attach them to a single network connection. The last section of the product name lists all of the modules in the stack as individual letters. A “G” is the code for the ANG1 modules. Generally, the third letter of the product name is used as the module code. An “*” is used as a place holder when no module is present. The modules are ordered by their address settings, not their physical location in the stack. For simplicity’s sake, AMCI strongly suggests using consecutive address settings and place them in numeric order in their physical stack. Setting Modbus Serial Line Parameters The General tab also shows you the current Modbus serial line baud rate and parity and allows you to change these settings. Simply click on the drop down boxes to select the proper baud rate and parity for your application and the press the [Set Bus Parameters] button. When the save is complete in your AnyNET-I/O module, a window will open that tells you that you must cycle power to the stack before the parameter changes are accepted. 20 Gear Drive, Plymouth Ind. Park, Terryville, CT 06786 Tel: (860) 585-1254 Fax: (860) 584-1973 http://www.amci.com 17 3 AMCI NET CONFIGURATOR SOFTWARE Using the AMCI NET Software (continued) Configuring an AnyNET-I/O Module (optional) The remaining tab(s) in the Device Properties window allow you to configure the modules in the AnyNet-I/O stack. These tabs are typically used for bench testing as they can help you determine the correct configuration and command data to use in your host controller’s program. As an example, figure 3.4 below shows the configuration and command window for an ANG1. Figure 3.4 Configuration and Command Screen 18 ADVANCED MICRO CONTROLS INC. CHAPTER 4 MODBUS RTU REGISTER MAPPING An AnyNET-I/O Stack requires a host controller to issue commands and read data to the modules in the stack. This chapter tell you how the I/O words used by an AnyNET-I/O Stack are mapped to the Modbus I/O registers. AnyNET-I/O Stack Memory Layout The first module in every AnyNET-I/O Stack has a starting Input Register address of 0 and a starting Output Register address of 1024. The module order is based on the AnyNET-I/O address set with the red DIP switches behind the front panel, not their physical location in the stack. Therefore the module that connects to the Modbus RTU network always has a starting Input Register address of 0 and starting Output Register address of 1024. The module with the next lowest AnyNET-I/O address uses the Modbus Register addresses immediately following the previous module. Input Registers hold the data from the AnyNET-I/O Stack while Output Registers hold the data to be written to the stack. Figure 4.1 shows how an AnyNET-I/O Stack, which consists of an ANG1M and an ANG1 in this example, is mapped to the Modbus data reference. 15 Register 0 0 159 Register 9 144 175 Register 10 319 Register 19 ANG1M Network Input Data ANG1 Network Input Data Mapped as: Discrete Inputs Holding Registers 160 Input Registers 304 LSB and MSB Numbers Not Implemented 16,399 Register 1024 16,384 16,543 Register 1033 16,528 16,558 Register 1034 Mapped as: Coils Holding Registers 16,544 16,703 Register 1043 16,688 ANG1M Network Output Data ANG1 Network Output Data Figure 4.1 Modbus Data Reference Map: Stack of ANG1M and ANG1 The complete specification for the Modbus protocol can be downloaded at http://www.modbus.org/specs.php. 20 Gear Drive, Plymouth Ind. Park, Terryville, CT 06786 Tel: (860) 585-1254 Fax: (860) 584-1973 http://www.amci.com 19 4 MODBUS RTU REGISTER MAPPING AnyNET-I/O Stack Addressing There are two ways that you can address modules in your AnyNET-I/O Stack when using Modbus-RTU. You can address the stack as a whole, or you can address modules individually by selecting the correct starting address and number of registers for the Modbus-RTU transfer. If you decide to address the stack as a whole, the number of words needed is simply the sum of all the I/O words used by all AnyNET-I/O modules in the stack. Refer to the user manuals of your modules to determine the number of I/O words used by them. Supported Modbus Functions Function Code Function Name ANG1(M) Register 1 2 Read Coils Read Discrete Inputs OUTPUT INPUT 3 Read Holding Registers OUTPUT & INPUT 4 5 6 15 16 Read Input Registers Write Single Coil Write Single Register Write Multiple Coils Write Multiple Registers INPUT OUTPUT OUTPUT OUTPUT OUTPUT Addressing method Bit: Addresses starting at 16,384 Bit: Addresses starting at 0 Word: Out Regs. Starting at 1024 In Regs. Starting at 0 Word: Addresses starting at 0. Bit: Addresses starting at 16,384 Word: Addresses starting at 1024 Bit: Addresses starting at 16,384 Word: Addresses starting at 1024 Table 4.1 Supported Modbus Functions Table 4.1 above lists the Modbus functions that are supported by all AnyNET-I/O modules. AMCI supports all of these functions so that you can control the stack as you see fit. Supported Modbus Exceptions Code Name 01 02 03 Illegal function Illegal data address Illegal data value Description The module does not support the function code in the query The data address received in the query is outside the initialized memory area The data in the request is illegal Table 4.2 Supported Modbus Exceptions 20 ADVANCED MICRO CONTROLS INC. MODBUS RTU REGISTER MAPPING 4 Notes 20 Gear Drive, Plymouth Ind. Park, Terryville, CT 06786 Tel: (860) 585-1254 Fax: (860) 584-1973 http://www.amci.com 21 ADVANCED MICRO CONTROLS INC. LEADERS IN ADVANCED CONTROL PRODUCTS