1
Power Supply Selection
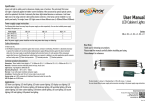
The table shows the capability of different power supply. Select suitable power
supply accordingly.
Power Supply
6W
L=300MM
2
L=500MM
1
4
8
12
2
4
6
12W
24W
36W
USER MANUAL
L=1000MM
Waterproof LED Light
XXX
1
2
3
The power supply's power should be larger than the total power of lamps.
Dear Customer:
Thank you for choosing our product.Please read
this manual before installation and keep it as reference
Notes
.Before installation,please make sure all the components are in the package
without damage;
.When installing, please make sure the power supply is disconnected to the lamp;
.Do not expose to high temperature sources;
.Keep it away from children;
.Please use dry cloth to clean the lamp if necessary, do not use chemical
solution to clean it.
.Do not try to disassemble or repair the lamp yourself which will void the
warranty of the product.
After Sales Service
We provide 3 years warranty for normal operation.Please contact our
representative for any malfunction.We are not responsible for
following situations:
1.Damages caused by earthquakes,fires,floods and other natural
disasters,grid failure,polluation,corrosion;
2.Damage caused by incorrect operation,storage or maintenance;
3.Damage caused by using non-our components to replace or connect
our lamp.
4
Inspector:
QC Passed
1
Connection Guide
Basic Connection
Notes:
1. The power supply's power should be over the
total power when lamps are l inked up.
2. The power totally can not more than 36W per run.
Operating Environment
Indoor or within waterproof case use only
Working temperature: -20℃-40℃
Working humidity: 10%-80%
Storage temperature:-20℃-40℃
Storage humidity: 10%-80%
Applications
Cooler Cabinet lighting;
Bath Room;
Refrigerator lighting
Aquarium lighting;
Under cabinet lighting;
Kitchen cabinet lighting; etc.
IR Sensor switch
Components
Standard Package: 1pc cabinet light, 2pcs mounting brackets, 2pcs M2.6X10
screws, 1 set user manual
Option: Calbe connector, interface connector,
power supply, IR Sensor switch, On/Off switch, Touch switch,
Touch & Remote switch, Remote.
Interface Connection
IR Sensor Switch
On&off Switch
Cable Connector
Touch Dimmer
Interface Connector
Touch & Remote Dimmer
Power Supply
Remote
Installation infor mation
1. Mount 2 brackets on the Cabinet wall with the M2.6 screw,
make sure the distance between them is less than the length
of the LED Lamp.
2. Slide the LED Lamp in the brackets.
2
3