1
Versa Electronics
www.marcumtech.com
This is a great way to learn new ice fishing hotspots. Imagine finding a rock
pile that no one else on your lake knows about! Always use extra caution when
viewing around underwater obstructions, like boulders, cribs, or wrecks. If the
camera becomes hung up, back up from the direction you were traveling from
and slowly try to back the camera out of the snag. DO NOT pull directly upward
with force unless all other avenues have been pursued.
Battery Charging
Your Marcum system comes with a 3-stage battery charger. This style of
charger has proven to be the most effective and easiest to use of all charging
systems available. While the rate of charge is low, a completely discharged
battery can be brought back to a full charge in as little as 12 hours. Because
this is a 3-stage charger, there is no danger of overcharging your battery. Therefore, it is recommended that you charge your battery overnight after each
use, and once every few months during periods of non-use.
A 3-Stage charger works like this—
Stage 1 (Bulk Stage): Constant current charging at a high voltage level at
maximum amperage to minimize charge time.
Stage 2 (Absorption Stage): Current tapers off for final 10% of charge.
Stage 3 (Maintenance Stage): Lower voltage mode to prevent electrolyte
loss, keeping your battery at full charge indefinitely.
Some common sense safety tips:
For safety reasons, it is recommended that you place your system on a flat, hard
surface like cement or tile when charging it, away from any flammable materials. Be sure to disconnect the charger from the wall when not in use, and avoid
leaving your battery hooked up to the charger for extended periods of time.
To charge your battery:
Your battery has a wiring harness attached to it that has “piggyback” terminals
on it, enabling you to keep the power cord from the monitor attached to the
battery at all times, as well as having the wiring harness with receptacle for
your charger attached at all times. To charge, simply couple the end of the
charger with the end of the wiring harness and once connected, plug the
transformer end of the charger into a 110 volt AC wall outlet. You will see the
red LED light appear at this time. When your battery is fully charged, the green
LED comes on. At this time, you can disconnect the charger from the battery
and wall outlet. However, no harm will come to your battery if you leave it
attached to the charger.
If you need to remove the battery, unplug the two battery terminals from the
battery. Remove the Velcro strap that is holding the battery in place and lift
the battery out. To replace the battery, place a new battery of similar specifications into the battery compartment and secure it with the Velcro strap and
re-connect the positive and negative terminals.
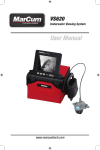
Tip: To preserve battery run time, try to keep the VS825sd in a relatively warm
environment to minimize the use of the built in LCD heater system. By starting
out with a warm monitor, there is less power consumed and less warm up time
required.
-9-