1
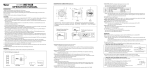
FX3U-1PG
USER'S MANUAL
Safety Precautions
(Read these precautions before use.)
Before installation, operation, maintenance or inspection of this product, thoroughly read through and
understand this manual and all of the associated manuals. Also, take care to handle the module properly and
safely.
This manual classifies the safety precautions into two categories:
and
.
Indicates that incorrect handling may cause hazardous conditions, resulting in death or severe
injury.
Indicates that incorrect handling may cause hazardous conditions, resulting in medium or slight
personal injury or physical damage.
Depending on the circumstances, procedures indicated by
may also cause severe injury.
It is important to follow all precautions for personal safety.
Store this manual in a safe place so that it can be taken out and read whenever necessary. Always forward it
to the end user.
1. DESIGN PRECAUTIONS
Reference
•
Make sure to have the following safety circuits outside of the PLC to ensure safe system operation even during
external power supply problems or PLC failure.
Otherwise, malfunctions may cause serious accidents.
1) Most importantly, have the following: an emergency stop circuit, a protection circuit, an interlock circuit for
opposite movements (such as normal vs. reverse rotation), and an interlock circuit (to prevent damage to the
equipment at the upper and lower positioning limits).
2) Note that when the PLC CPU detects an error, such as a watchdog timer error, during self-diagnosis, all outputs
are turned off. Also, when an error that cannot be detected by the PLC CPU occurs in an input/output control
block, output control may be disabled.
External circuits and mechanisms should be designed to ensure safe machinery operation in such a case.
3) Note that when an error occurs in a relay, triac or transistor output device, the output could be held either on or
off. For output signals that may lead to serious accidents, external circuits and mechanisms should be designed
to ensure safe machinery operation in such a case.
15
27
Reference
•
•
Make sure to observe the following precautions in order to prevent any damage to the machinery or accidents due
to abnormal data written to the PLC under the influence of noise:
1) Do not bundle the main circuit line together with or lay it close to the main circuit, high-voltage line or load line.
Otherwise, noise disturbance and/or surge induction are likely to take place. As a guideline, lay the control line
at least 100mm (3.94") or more away from the main circuit or high-voltage lines.
2) Ground the shield wire or shield of a shielded cable. Do not use common grounding with heavy electrical
systems.
Install module so that excessive force will not be applied to the terminal blocks.
Failure to do so may result in wire damage/breakage or PLC failure.
(1)
15
27
Safety Precautions
(Read these precautions before use.)
2. INSTALLATION PRECAUTIONS
Reference
•
Make sure to cut off all phases of the power supply externally before attempting installation work.
Failure to do so may cause electric shock or damage to the product.
21
Reference
•
•
•
•
•
•
•
•
Use the product within the generic environment specifications described in PLC main unit manual (Hardware
Edition). Never use the product in areas with excessive dust, oily smoke, conductive dusts, corrosive gas (salt air,
Cl2, H2S, SO2, or NO2), flammable gas, vibration or impacts, or expose it to high temperature, condensation, or
rain and wind. If the product is used in such conditions, electric shock, fire, malfunctions, deterioration or damage
may occur.
Do not touch the conductive parts of the product directly.
Doing so may cause device failures or malfunctions.
Install the product securely using a DIN rail or mounting screws.
Install the product on a flat surface.
If the mounting surface is rough, undue force will be applied to the PC board, thereby causing nonconformities.
When drilling screw holes or wiring, make sure that cutting and wiring debris do not enter the ventilation slits.
Failure to do so may cause fire, equipment failures or malfunctions.
Be sure to remove the dust proof sheet from the PLC's ventilation slits when installation work is completed.
Failure to do so may cause fire, equipment failures or malfunctions.
Make sure to attach the top cover, offered as an accessory, before turning on the power or initiating operation after
installation or wiring work.
Failure to do so may cause electric shock.
Connect extension cables securely to their designated connectors.
Loose connections may cause malfunctions.
21
3. WIRING PRECAUTIONS
Reference
•
Make sure to cut off all phases of the power supply externally before attempting wiring work.
Failure to do so may cause electric shock or damage to the product.
24
Reference
•
•
•
•
Connect the DC power supply wiring to the dedicated terminal described in this manual.
If an AC power supply is connected to a DC input/output terminal or DC power supply terminal, the PLC will burn
out.
Make sure to attach the top cover, offered as an accessory, before turning on the power or initiating operation after
installation or wiring work.
Failure to do so may cause electric shock.
When drilling screw holes or wiring, make sure that cutting and wiring debris do not enter the ventilation slits.
Failure to do so may cause fire, equipment failures or malfunctions.
Make sure to properly wire the extension equipment in accordance with the following precautions.
Failure to do so may cause electric shock, equipment failures, a short-circuit, wire breakage, malfunctions, or
damage to the product.
- The disposal size of the cable end should follow the dimensions described in the manual.
- Tightening torque should follow the specifications in the manual.
(2)
24
Safety Precautions
(Read these precautions before use.)
4. STARTUP AND MAINTENANCE PRECAUTIONS
Reference
•
•
•
Do not touch any terminal while the PLC's power is on.
Doing so may cause electric shock or malfunctions.
Before cleaning or retightening terminals, cut off all phases of the power supply externally.
Failure to do so may cause electric shock.
Before modifying or disrupting the program in operation or running the PLC, carefully read through this manual and
the associated manuals and ensure the safety of the operation.
An operation error may damage the machinery or cause accidents.
111
118
Reference
•
•
•
Do not disassemble or modify the PLC.
Doing so may cause fire, equipment failures, or malfunctions.
For repair, contact your local Mitsubishi Electric representative.
Turn off the power to the PLC before connecting or disconnecting any extension cable.
Failure to do so may cause equipment failures or malfunctions.
Turn off the power to the PLC before attaching or detaching the following devices.
Failure to do so may cause equipment failures or malfunctions.
- Peripheral devices, display modules, expansion boards and special adapters
- I/O extension units/blocks, FX Series terminal block and the special function units/blocks
- Battery and memory cassette
111
118
5. DISPOSAL PRECAUTIONS
Reference
•
Please contact a certified electronic waste disposal company for the environmentally safe recycling and disposal of
your device.
15
6. TRANSPORTATION AND STORAGE PRECAUTIONS
Reference
•
The PLC is a precision instrument. During transportation, avoid impacts larger than those specified in the general
specifications of the PLC main unit manual by using dedicated packaging boxes and shock-absorbing palettes.
Failure to do so may cause failures in the PLC.
After transportation, verify operation of the PLC and check for damage of the mounting part, etc.
(3)
15
Safety Precautions
(Read these precautions before use.)
MEMO
(4)
FX3U-1PG User's Manual
FX3U-1PG
User's Manual
Manual number
JY997D47301
Manual revision
B
Date
4/2015
Foreword
This manual describes the FX3U-1PG pulse output block and should be read and understood before
attempting to install the hardware.
Store this manual in a safe place so that you can take it out and read it whenever necessary. Always forward
it to the end user.
This manual confers no industrial property rights or any rights of any other kind, nor does it confer any patent licenses. Mitsubishi
Electric Corporation cannot be held responsible for any problems involving industrial property rights which may occur as a result of
using the contents noted in this manual.
© 2012 MITSUBISHI ELECTRIC CORPORATION
1
FX3U-1PG User's Manual
Outline Precautions
• This manual provides information for the use of the FX3U-1PG pulse output block.
The manual has been written to be used by trained and competent personnel. The definition of such a
person or persons is as follows;
1) Any engineer who is responsible for the planning, design and construction of automatic equipment using
the product associated with this manual should be of a competent nature, trained and qualified to the
local and national standards required to fulfill that role. These engineers should be fully aware of all
aspects of safety with aspects regarding to automated equipment.
2) Any commissioning or maintenance engineer must be of a competent nature, trained and qualified to the
local and national standards required to fulfill the job. These engineers should also be trained in the use
and maintenance of the completed product. This includes being familiar with all associated manuals and
documentation for the product. All maintenance should be carried out in accordance with established
safety practices.
3) All operators of the completed equipment should be trained to use that product in a safe and coordinated
manner in compliance with established safety practices. The operators should also be familiar with
documentation that is connected with the actual operation of the completed equipment.
Note: The term 'completed equipment' refers to a third party constructed device that contains or uses the
product associated with this manual.
• This product has been manufactured as a general-purpose part for general industries, and has not been
designed or manufactured to be incorporated in a device or system used in purposes related to human life.
• Before using the product for special purposes such as nuclear power, electric power, aerospace, medicine
or passenger movement vehicles, consult with Mitsubishi Electric.
• This product has been manufactured under strict quality control. However when installing the product
where major accidents or losses could occur if the product fails, install appropriate backup or failsafe
functions into the system.
• When combining this product with other products, please confirm the standards and codes of regulation to
which the user should follow. Moreover, please confirm the compatibility of this product with the system,
machines, and apparatuses to be used.
• If there is doubt at any stage during installation of the product, always consult a professional electrical
engineer who is qualified and trained in the local and national standards. If there is doubt about the
operation or use, please consult your local Mitsubishi Electric representative.
• Since the examples within this manual, technical bulletin, catalog, etc. are used as reference; please use it
after confirming the function and safety of the equipment and system. Mitsubishi Electric will not accept
responsibility for actual use of the product based on these illustrative examples.
• The content, specification etc. of this manual may be changed for improvement without notice.
• The information in this manual has been carefully checked and is believed to be accurate; however, if you
notice any doubtful point, error, etc., please contact your local Mitsubishi Electric representative.
Registration
• The company name and the product name to be described in this manual are the registered trademarks or
trademarks of each company.
2
Table of Contents
FX3U-1PG User's Manual
Table of Contents
SAFETY PRECAUTIONS .................................................................................................. (1)
Standards................................................................................................................................... 7
Certification of UL, cUL standards ....................................................................................................... 7
Compliance with EC directive (CE Marking) ........................................................................................ 7
Associated Manuals.................................................................................................................. 9
Generic Names and Abbreviations Used in the Manual ...................................................... 11
Reading the Manual ................................................................................................................ 12
1. Introduction
13
1.1 Outline........................................................................................................................................... 13
1.1.1 Major Features of the FX3U-1PG .................................................................................................. 13
1.2 External Dimensions and Part Names .......................................................................................... 13
1.3 Status LEDs .................................................................................................................................. 14
1.4 Terminal Layout ............................................................................................................................ 14
2. Specification
2.1
2.2
2.3
2.4
15
General Specifications .................................................................................................................. 16
Power Supply Specifications......................................................................................................... 16
Performance Specifications .......................................................................................................... 16
Input Specifications ....................................................................................................................... 17
2.4.1 Input specifications ........................................................................................................................ 17
2.4.2 Internal input circuit ....................................................................................................................... 17
2.5 Output Specifications .................................................................................................................... 18
2.5.1 Output specifications ..................................................................................................................... 18
2.5.2 Internal output circuit ..................................................................................................................... 18
3. System Configuration
19
3.1 General Configuration ................................................................................................................... 19
3.2 Applicable PLC.............................................................................................................................. 20
3.3 Connection with PLC..................................................................................................................... 20
4. Installation
21
4.1 DIN rail Mounting .......................................................................................................................... 22
4.2 Direct Mounting ............................................................................................................................. 23
5. Wiring
24
5.1 Input Wiring ................................................................................................................................... 25
5.1.1 Sink input wiring ............................................................................................................................ 25
5.1.2 Source input wiring ........................................................................................................................ 25
5.2
5.3
5.4
5.5
Output Wiring ................................................................................................................................ 25
Wiring Precautions ........................................................................................................................ 26
Grounding ..................................................................................................................................... 26
Screw Size and Tightening Torque ............................................................................................... 26
5.5.1 Terminal screw size and tightening torque .................................................................................... 26
3
Table of Contents
FX3U-1PG User's Manual
6. Before Starting Positioning Operation
27
6.1 Various Positioning Operation and Buffer Memory Setting........................................................... 28
6.2 Outline of Positioning Operation ................................................................................................... 29
6.3 System Wiring ............................................................................................................................... 30
6.3.1 System wiring example.................................................................................................................. 30
6.3.2 For DOG terminal, STOP terminal................................................................................................. 30
6.3.3 Interrupt input via PLC (BFM)........................................................................................................ 33
6.4 Handling the Forward Limit and Reverse Limit ............................................................................. 36
6.4.1 Handling the forward limit and reverse limit................................................................................... 36
6.4.2 Operations at forward limit/reverse limit ........................................................................................ 36
6.4.3 Restarting method after the forward limit/reverse limit operation .................................................. 37
6.5 Handling the STOP Command...................................................................................................... 37
6.5.1 Operation by the STOP command ................................................................................................ 37
6.5.2 Remaining distance operation ....................................................................................................... 38
6.6
6.7
6.8
6.9
Operation Speed Change Function............................................................................................... 40
Target Address Change Function ................................................................................................. 43
Approximate S-shaped Acceleration/Deceleration Function......................................................... 46
Cautions for Positioning Operation ............................................................................................... 48
6.9.1 Command error when machine system units are used and
when combined system units are used ......................................................................................... 48
6.9.2 Stepwise output pulse ................................................................................................................... 49
7. Buffer Memory
50
7.1 How to Read/Write from/to Buffer Memory ................................................................................... 50
7.1.1 Direct specification of buffer memory ............................................................................................ 50
7.1.2 FROM/TO instructions................................................................................................................... 51
7.2 Buffer Memory List ........................................................................................................................ 52
7.3 Positioning Parameters ................................................................................................................. 55
7.3.1 [BFM#0] Pulse rate........................................................................................................................ 55
7.3.2 [BFM#2, #1] Feed rate................................................................................................................... 55
7.3.3 [BFM#3] Operation parameter....................................................................................................... 56
7.3.4 [BFM#5, #4] Maximum speed........................................................................................................ 60
7.3.5 [BFM#6] Bias speed ...................................................................................................................... 61
7.3.6 [BFM#8, #7] JOG speed................................................................................................................ 61
7.3.7 [BFM#10, #9] Zero return speed (high speed) .............................................................................. 61
7.3.8 [BFM#11] Zero return speed (creep) ............................................................................................. 62
7.3.9 [BFM#12] Number of zero-point signal for zero return .................................................................. 62
7.3.10 [BFM#14, #13] Zero-point address.............................................................................................. 63
7.3.11 [BFM#15] Acceleration/deceleration time.................................................................................... 63
7.3.12 [BFM#32] Positioning parameter selection.................................................................................. 64
7.3.13 [BFM#34, #33] Pulse rate............................................................................................................ 64
7.3.14 [BFM#36, #35] Feed rate............................................................................................................. 64
7.3.15 [BFM#37] Operation parameter................................................................................................... 65
7.3.16 [BFM#39, #38] Maximum speed.................................................................................................. 67
7.3.17 [BFM#41, #40] Bias speed .......................................................................................................... 68
7.3.18 [BFM#43, #42] JOG speed.......................................................................................................... 68
7.3.19 [BFM#45, #44] Zero return speed (high speed) .......................................................................... 68
7.3.20 [BFM#47, #46] Zero return speed (creep) ................................................................................... 69
7.3.21 [BFM#48] Number of zero-point signal for zero return ................................................................ 69
7.3.22 [BFM#50, #49] Zero-point address.............................................................................................. 69
7.3.23 [BFM#51] Acceleration time ........................................................................................................ 70
7.3.24 [BFM#52] Deceleration time ........................................................................................................ 70
4
Table of Contents
FX3U-1PG User's Manual
7.4 Control Data .................................................................................................................................. 71
7.4.1
7.4.2
7.4.3
7.4.4
7.4.5
7.4.6
7.4.7
7.4.8
7.4.9
[BFM#16] Starting delay time ........................................................................................................ 71
[BFM#18, #17] Target address Ι.................................................................................................... 72
[BFM#20, #19] Operation speed Ι ................................................................................................. 72
[BFM#22, #21] Target address ΙΙ................................................................................................... 73
[BFM#24, #23] Operation speed ΙΙ ................................................................................................ 73
[BFM#25] Operation command ..................................................................................................... 74
[BFM#54, #53] Target address change value ............................................................................... 75
[BFM#56, #55] Operation speed change value ............................................................................. 76
[BFM#57] Operation command ΙΙ .................................................................................................. 76
7.5 Monitor Data.................................................................................................................................. 77
7.5.1
7.5.2
7.5.3
7.5.4
7.5.5
7.5.6
7.5.7
[BFM#27, #26] Current address .................................................................................................... 77
[BFM#28] Status information ......................................................................................................... 77
[BFM#29] Error code ..................................................................................................................... 79
[BFM#30] FX Series model code................................................................................................... 79
[BFM#59, #58] Current address (pulse converted value).............................................................. 79
[BFM#61, #60] Current value of operation speed.......................................................................... 80
[BFM#62] Version information ....................................................................................................... 80
8. Manual Control
81
8.1 Functions Available with Manual Control ...................................................................................... 81
8.2 JOG Operation .............................................................................................................................. 82
8.3 Mechanical Zero Return Operation ............................................................................................... 84
8.3.1 Outline of mechanical zero return operation.................................................................................. 84
8.3.2 DOG type mechanical zero return operation ................................................................................. 85
8.3.3 Data-set type mechanical zero return operation............................................................................ 88
9. Positioning Control
9.1
9.2
9.3
9.4
9.5
9.6
9.7
9.8
89
Functions Available with Each Positioning Operation ................................................................... 89
1-speed Positioning Operation...................................................................................................... 90
Interrupt 1-speed Positioning Operation ....................................................................................... 92
2-speed Positioning Operation...................................................................................................... 95
External Command Positioning Operation .................................................................................... 99
Variable Speed Operation........................................................................................................... 102
Interrupt Stop Operation.............................................................................................................. 105
Interrupt 2-speed Positioning Operation ..................................................................................... 108
10. Program Example
111
10.1 Assignments.............................................................................................................................. 112
10.1.1 I/O assignments......................................................................................................................... 112
10.1.2 Device assignments .................................................................................................................. 112
10.1.3 Buffer memory assignments...................................................................................................... 113
10.2 Explanation of Operation........................................................................................................... 114
10.2.1 DOG type mechanical zero return operation ............................................................................. 114
10.2.2 JOG operation ........................................................................................................................... 115
10.2.3 1-speed positioning operation ................................................................................................... 115
10.3 Sequence Program ................................................................................................................... 116
5
Table of Contents
FX3U-1PG User's Manual
11. Troubleshooting
118
11.1 LED Diagnostics........................................................................................................................ 119
11.2 Error Codes............................................................................................................................... 120
11.3 Diagnostics on the PLC Main Unit ............................................................................................ 121
11.3.1 POWER (POW) LED [ON/Flicker/OFF]..................................................................................... 121
11.3.2 BATT (BAT) LED [ON/OFF] ...................................................................................................... 121
11.3.3 ERROR (ERR) LED [ON/Flicker/OFF] ...................................................................................... 122
Appendix A: Version Information
123
Appendix A-1 Version Information ............................................................................................ 123
Appendix A-1-1 Version check method ................................................................................................ 123
Appendix A-1-2 Version upgrade history.............................................................................................. 123
Appendix B: Example Connection
Appendix B-1
Appendix B-2
Appendix B-3
Appendix B-4
Appendix B-5
124
Example of Connection with MR-J4-[ ]A Servo Amplifier ................................... 124
Example of Connection with MR-J3-[ ]A Servo Amplifier ................................... 125
Example of Connection with MR-J2S-[ ]A Servo Amplifier................................. 126
Example of Connection with MR-JN-[ ]A Servo Amplifier................................... 127
Example of Connection with Stepping Motor Driver........................................... 128
Appendix C: Differences with FX2N-1PG
129
Appendix C-1 Differences of Specification ............................................................................... 129
Appendix C-2 Differences of Buffer Memory ............................................................................ 130
Appendix C-3 Differences in Operation .................................................................................... 132
Appendix C-3-1 Differences in properties common to all operation modes ......................................... 132
Appendix C-3-2 Differences in individual operation modes.................................................................. 133
Warranty................................................................................................................................. 137
Revised History ..................................................................................................................... 138
6
Standards
FX3U-1PG User's Manual
Standards
Certification of UL, cUL standards
FX3U-1PG units comply with the UL standards (UL, cUL).
UL, cUL File number: E95239
Regarding the standards that comply with the main unit, please refer to either the FX series product catalog or
consult with your nearest Mitsubishi product provider.
Compliance with EC directive (CE Marking)
This document does not guarantee that a mechanical system including this product will comply with the
following standards.
Compliance to EMC directive and LVD directive for the entire mechanical module should be checked by the
user/manufacturer. For more information please consult with your nearest Mitsubishi product provider.
Regarding the standards that comply with the main unit, please refer to either the FX series product catalog or
consult with your nearest Mitsubishi product provider.
Requirement for Compliance with EMC directive
The following products have shown compliance through direct testing (of the identified standards below) and
design analysis (through the creation of a technical construction file) to the European Directive for
Electromagnetic Compatibility (2004/108/EC) when used as directed by the appropriate documentation.
Attention
• This product is designed for use in industrial applications.
Note
• Authorized Representative in the European Community:
Mitsubishi Electric Europe B.V.
Gothaer Str. 8, 40880 Ratingen, Germany
7
Standards
FX3U-1PG User's Manual
Type: Programmable Controller (Open Type Equipment)
Models: MELSEC FX3U series manufactured
from September 1st, 2012
FX3U-1PG
Standard
Remark
EN61131-2: 2007
Programmable controllers
- Equipment requirements and tests
Compliance with all relevant aspects of the standard.
EMI
• Radiated Emission
• Conducted Emission
EMS
• Radiated electromagnetic field
• Fast transient burst
• Electrostatic discharge
• High-energy surge
• Voltage drops and interruptions
• Conducted RF
• Power frequency magnetic field
Caution to conform with EC Directives
• Installation in Enclosure
Programmable logic controllers are open-type devices that must be installed and used within conductive
control cabinets. Please use the programmable logic controller while installed within a conductive shielded
control cabinet. Please secure the cabinet door to the control cabinet (for conduction).
Installation within a control cabinet greatly affects the safety of the system and aids in shielding noise from
the programmable logic controller.
• Control cabinet
- The control cabinet must be conductive.
- Ground the control cabinet with the thickest possible grounding cable.
- To ensure that there is electrical contact between the control cabinet and its door, connect the cabinet
and its doors with thick wires.
- In order to suppress the leakage of radio waves, the control cabinet structure must have minimal
openings. Also, wrap the cable holes with a shielding cover or other shielding devices.
- The gap between the control cabinet and its door must be as small as possible by attaching EMI gaskets
between them.
Shielding cover
Shielded cable
Wires*1
*1.
EMI gasket
These wires are used to improve the conductivity between the door and control cabinet.
• Note for compliance with EN61131-2: 2007
General note on the use of the power supply cable.
The FX3U-1PG unit requires that the cable used for power supply is 30 m or less.
• The shield of the twisted pair cable used for the FP, RP, PG0, and CLR signal wires should be grounded at
both ends of the cable.
• Please attach a ferrite core less than 200 mm from the other end of the FP, RP, PG0, and CLR signal
wires. The ferrite core should be a product equivalent to ZCAT3035-1330 by TDK Corp.
8
Associated Manuals
FX3U-1PG User's Manual
Associated Manuals
Only the installation manual is packed together with the FX3U-1PG pulse output block.
For a detailed explanation of the FX3U-1PG pulse output block, refer to this manual.
For the hardware information and instructions on the PLC main unit, refer to the respective manuals.
: Refer to these manuals
: Refer to the appropriate equipment manual
: For a detailed explanation, refer to an additional manual
Title of manual
Document
number
Description
Model code
Manual for the Main Unit
FX3U Series PLCs Main Unit
Supplied
Manual
FX3U Series
Hardware Manual
Describes FX3U Series PLC specification for I/O, wiring
and installation extracted from the FX3U User's Manual JY997D50301 Hardware Edition.
For details, refer to FX3U Series User's Manual Hardware Edition.
Additional
Manual
FX3U Series
User's Manual
- Hardware Edition
JY997D16501
Describes FX3U Series PLC specification details for I/O,
wiring, installation and maintenance.
-
09R516
FX3UC Series PLCs Main Unit
Supplied
Manual
Describes FX3UC (D, DS, DSS) Series PLC specification
for I/O, wiring and installation extracted from the FX3UC
FX3UC (D, DS, DSS) Series
JY997D50501 Series User's Manual - Hardware Edition.
Hardware Manual
For details, refer to FX3UC Series User's Manual Hardware Edition.
-
Supplied
Manual
FX3UC-32MT-LT-2
Hardware Manual
Describes FX3UC-32MT-LT-2 specification for I/O,
wiring and installation extracted from the FX3UC User's
JY997D31601 Manual - Hardware Edition.
For details, refer to FX3UC Series User's Manual Hardware Edition.
-
Supplied
Manual
Describes FX3UC-32MT-LT specification for I/O, wiring
FX3UC-32MT-LT
and installation extracted from the FX3UC User's Manual
Hardware Manual
JY997D12701 - Hardware Edition.
(Only Japanese document)
For details, refer to FX3UC Series User's Manual Hardware Edition.
-
Additional
Manual
FX3UC Series
User's Manual
- Hardware Edition
JY997D28701
Describes FX3UC Series PLC specification details
for I/O, wiring, installation and maintenance.
09R519
Additional
Manual
FX3S/FX3G/FX3GC/FX3U/
FX3UC Series
Programming Manual
- Basic & Applied
Instruction Edition
JY997D16601
Describes FX3S/FX3G/FX3GC/FX3U/FX3UC Series PLC
programming for basic/applied instructions and devices.
09R517
Additional
Manual
MELSEC-Q/L/F
Structured Programming
Manual (Fundamentals)
SH-080782
Programming methods, specifications, functions, etc.
required to create structured programs.
13JW06
Additional
Manual
FX CPU Structured
Programming Manual
[Device & Common]
JY997D26001
Devices, parameters, etc. provided in structured
projects of GX Works2.
09R925
Additional
Manual
FX CPU Structured
Programming Manual
[Basic & Applied
Instruction]
JY997D34701
Sequence instructions provided in structured projects of
GX Works2.
09R926
Additional
Manual
FX CPU Structured
Programming Manual
[Application Functions]
JY997D34801
Application functions provided in structured projects of
GX Works2.
09R927
Additional
Manual
FX3S/FX3G/FX3GC/FX3U/
FX3UC Series
User's Manual Positioning Control Edition
Provides detailed information on the positioning
JY997D16801 functions incorporated in the FX3S/FX3G/FX3GC/FX3U/
FX3UC Series.
09R620
Programming
9
Associated Manuals
FX3U-1PG User's Manual
Title of manual
Document
number
Description
Model code
Manuals for FX3U-1PG pulse output block
10
Supplied
Manual
FX3U-1PG
Installation Manual
Describes installation specifications for the
FX3U-1PG pulse output block extracted from the FX3UJY997D47101
1PG User's Manual.
For details, refer to FX3U-1PG User's Manual.
Additional
Manual
FX3U-1PG User's Manual
(This Manual)
JY997D47301 Describes details of the FX3U-1PG pulse output block.
-
09R629
Generic Names and Abbreviations Used in the Manual
FX3U-1PG User's Manual
Generic Names and Abbreviations Used in the Manual
Generic name or abbreviation
Description
PLC
FX3U series
FX3U PLC or main unit
FX3UC series
FX3UC PLC or main unit
Generic name for FX3U Series PLC
Generic name for FX3U Series PLC main unit
Generic name for FX3UC Series PLC
Generic name for FX3UC Series PLC main unit
Expansion board
Generic name for expansion board
The number of connectable units, however, depends on the type of main unit.
To check the number of connectable units, refer to the User's Manual - Hardware Edition of the main
unit to be used for your system.
Special adapter
Generic name for high-speed input/output special adapter, communication special adapter, analog
special adapter, and CF card special adapter.
The number of connectable units, however, depends on the type of main unit.
To check the number of connectable units, refer to the User's Manual - Hardware Edition of the main
unit to be used for your system.
I/O extension unit/block
Generic name for input/output powered extension unit and input/output extension block
The number of connectable units, however, depends on the type of main unit.
To check the number of connectable units, refer to the User's Manual - Hardware Edition of the main
unit to be used for your system.
Special function unit/block or
Special extension unit
Generic name for special function unit and special function block
The number of connectable units, however, depends on the type of main unit.
To check the number of connectable units, refer to the User's Manual - Hardware Edition of the main
unit to be used for your system.
Special function unit
Generic name for special function unit
Special function block
Generic name for special function block
FX3U-1PG
Abbreviated name for FX3U-1PG pulse output block
Memory cassette
Generic name for memory cassette.
The number of connectable units, however, depends on the type of main unit.
To check the number of connectable units, refer to the User's Manual - Hardware Edition of the main
unit to be used for your system.
Battery
Abbreviated name for FX3U-32BL
FX Series terminal block
Generic name for FX Series terminal block.
The number of connectable units, however, depends on the type of main unit.
To check the number of connectable units, refer to the User's Manual - Hardware Edition of the main
unit to be used for your system.
Peripheral unit
Peripheral unit
Generic name for programming software, handy programming panel, and indicator
Programming tool
Programming tool
Generic name for programming software and handy programming panel
Programming software
Generic name for programming software
GX Works2
GX Developer
Handy programming panel (HPP)
Abbreviation of programming software packages SW DNC-GXW2-E
Abbreviation of programming software packages SW D5C-GPPW-E
Generic name for FX-30P and FX-20P-E
Indicator
GOT1000 series
Generic name for GT16, GT15, GT14, GT11 and GT10
Manual
FX3U Hardware Edition
Abbreviation of FX3U Series User's Manual - Hardware Edition
FX3UC Hardware Edition
Abbreviation of FX3UC Series User's Manual - Hardware Edition
Programming manual
Abbreviation of FX3S/FX3G/FX3GC/FX3U/FX3UC Series Programming Manual - Basic and Applied
Instruction Edition
Communication control Edition
Abbreviation of FX Series User's Manual - Data Communication Edition
Analog control Edition
Abbreviation of FX3S/FX3G/FX3GC/FX3U/FX3UC Series User's Manual - Analog Control Edition
Positioning control Edition
Abbreviation of FX3S/FX3G/FX3GC/FX3U/FX3UC Series User's Manual - Positioning Control Edition
11
Reading the Manual
FX3U-1PG User's Manual
Reading the Manual
In this manual, the following formats are used for describing the common items.
Shows the manual title.
This area shows the
manual title for the current
page.
Shows the title of the chapter and the title
Indexes the chapter number.
of the section.
The right side of each page
indexes the chapter number
for the page currently opened.
This area shows the title of the chapter and the
title of the section for the current page.
2 Specification
FX3U-1PG User's Manual
Input Specifications
2.4.1
Input specifications
1
Introduction
2.4
2.4 Input Specifications
Item
2
Specification
Group 1
Input signal name
Signal voltage
24 V DC
(Power is supplied from S/S terminal.)
Input current
7.0 mA
ON current
4.5 mA or more
OFF current
1.5 mA or less
Signal form
No-voltage contact input
Sink input: NPN open collector transistor
Source input: PNP open collector transistor
Response time
DOG input: 1 ms
STOP input: 4 ms
Circuit insulation
5 to 24 V DC
Group 2
20 mA or less
ON current
4.0 mA or more
OFF current
0.5 mA or less
Signal form
NPN open collector transistor
Response time
4 Ps or more
Circuit insulation
Photo-coupler insulation
Operation display
LED ON at input ON
6
Before Starting
Positioning
Operation
2.4.2
5
Wiring
LED ON at input ON
Signal voltage
Input current
4
Photo-coupler insulation
Operation display
3
Installation
Group 1
PG0: Zero point signal input
Used for DOG type mechanical zero return operation
System
Configuration
Group 2
DOG:
Used for DOG input of DOG type mechanical zero return operation or used for
interrupt input of External command positioning, Interrupt 1-speed positioning,
Interrupt stop, Interrupt 2-speed positioning operation
Specification
STOP:
Deceleration stop input or used for interrupt input of External command positioning,
Interrupt 2-speed positioning operation
Internal input circuit
7
oRefer to Section 5.1.
Buffer Memory
For the internal input circuit diagram, refer to the following.
8
Manual Control
9
Shows the reference.
Positioning
Control
The " " mark indicates
a reference destination
and reference manual.
10
Program
Example
17
The above is different from the actual page, as it is provided for explanation only.
12
1 Introduction
FX3U-1PG User's Manual
1.1 Outline
1
Introduction
2
Outline
FX3U-1PG Pulse Output Block (hereinafter referred to as FX3U-1PG) is a special function block that can
output a maximum 200 kHz pulse train and drive one servo motor or stepping motor through the servo
amplifier or stepping motor driver.
Major Features of the FX3U-1PG
• FX3U-1PG controls the positioning operation of one servo motor or stepping motor per unit.
• A pulse train of max. 200 kHz can be output. (transistor output)
4
• The connected FX3U/FX3UC*1 PLC reads/writes the positioning data from/to the FX3U-1PG.
External Dimensions and Part Names
[4]
2-φ4.5 mounting holes
[6]
[9]
[7]
[1]
[8]
9 (0.36")
4 (0.16")
6
Before Starting
Positioning
Operation
[2]
5
[8]
90 (3.55")
[3]
Without top cover
[5]
Wiring
80 (3.15")
(mounting hole pitch)
1.2
An FX2NC-CNV-IF or FX3UC-1PS-5V is necessary to connect the FX3U-1PG to the FX3UC PLC.
Installation
*1.
87 (3.43")
43 (1.7")
3
System
Configuration
1.1.1
Specification
1.1
Introduction
1.
7
Status LEDs (red)
[6]
DIN rail mounting groove
(DIN rail: DIN46277, 35 mm (1.38") width)
[2]
Extension cable
[7]
DIN rail mounting hook
[3]
Power LED (green)
[8]
Terminal block (M3 screw)
[4]
Direct mounting hole: 2 holes of 4.5 (0.18")
(mounting screw: M4 screw)
[9]
Extension connector
[5]
Name plate
Refer to Section 1.4.
8
Manual Control
[1]
Buffer Memory
Unit: mm (inches)
MASS (Weight): Approx. 0.2 kg (0.44 lbs)
Accessories: Special unit/block No. label,
Dust proof protection sheet,
Manual supplied with product
9
Positioning
Control
10
Program
Example
13
1 Introduction
FX3U-1PG User's Manual
1.3
1.3 Status LEDs
Status LEDs
LED
display
LED
color
POWER
Green
STOP
Red
DOG
Red
PG0
Red
FP
Red
RP
Red
Status
OFF
5 V DC is not being supplied from the PLC
ON
5 V DC is being supplied from the PLC
OFF
STOP input OFF
ON
STOP input ON
OFF
DOG input OFF
ON
DOG input ON
OFF
Zero point signal OFF
ON
Zero point signal ON
OFF
Forward pulse or pulse train interrupted
Flicker
OFF
CLR
Red
ERR
Red
Flicker
Forward pulses or pulse train is being output
Reverse pulse or directional output interrupted
Reverse pulses is being output
ON
Directional output is being output
OFF
CLR signal is not output
ON
CLR signal is being output
OFF
Operating normally
Flicker
ON
1.4
Description
Error occurred
CPU error occurred
Terminal Layout
FP PG0-
COM0 RP PG0+
VIN
Terminal name
VIN
COM0
Description
Power terminal for pulse output
Common terminal for pulse output
FP
Terminal which outputs forward pulse or pulse train
RP
Terminal which outputs reverse pulse or direction signal
PG0-
Input terminal for zero point signal
PG0+
Power terminal for zero point signal
COM1
Common terminal for CLR signal output
CLR STOP DOG
COM1 S/S S/S
CLR
Terminal for CLR signal output
S/S
24 V DC power terminal for STOP input and DOG input
STOP
Terminal for STOP input or interrupt input 1
DOG
Terminal for DOG input or interrupt input 0
• Terminal block screw size and tightening torque
Terminal block screw: M3 screw
Tightening torque: 0.5 to 0.8 N•m
Do not tighten terminal block mounting screws with a torque outside the above-mentioned range. Failure to
do so may cause equipment failures or malfunctions.
14
2 Specification
FX3U-1PG User's Manual
1
Introduction
2.
Specification
2
•
Make sure to observe the following precautions in order to prevent any damage to the machinery or accidents due to abnormal data
written to the PLC under the influence of noise:
1) Do not bundle the main circuit line together with or lay it close to the main circuit, high-voltage line or load line.
Otherwise, noise disturbance and/or surge induction are likely to take place. As a guideline, lay the control line at least 100mm
(3.94") or more away from the main circuit or high-voltage lines.
2) Ground the shield wire or shield of a shielded cable. Do not use common grounding with heavy electrical systems.
Install module so that excessive force will not be applied to the terminal blocks.
Failure to do so may result in wire damage/breakage or PLC failure.
6
Before Starting
Positioning
Operation
DISPOSAL PRECAUTIONS
•
Please contact a certified electronic waste disposal company for the environmentally safe recycling and disposal of your device.
TRANSPORTATION AND
STORAGE PRECAUTIONS
7
The PLC is a precision instrument. During transportation, avoid impacts larger than those specified in the general specifications of the
PLC main unit manual by using dedicated packaging boxes and shock-absorbing palettes.
Failure to do so may cause failures in the PLC.
After transportation, verify operation of the PLC and check for damage of the mounting part, etc.
Buffer Memory
•
5
Wiring
•
4
Installation
DESIGN PRECAUTIONS
•
3
System
Configuration
Make sure to have the following safety circuits outside of the PLC to ensure safe system operation even during external power supply
problems or PLC failure.
Otherwise, malfunctions may cause serious accidents.
1) Most importantly, have the following: an emergency stop circuit, a protection circuit, an interlock circuit for opposite movements
(such as normal vs. reverse rotation), and an interlock circuit (to prevent damage to the equipment at the upper and lower
positioning limits).
2) Note that when the PLC CPU detects an error, such as a watchdog timer error, during self-diagnosis, all outputs are turned off.
Also, when an error that cannot be detected by the PLC CPU occurs in an input/output control block, output control may be
disabled.
External circuits and mechanisms should be designed to ensure safe machinery operation in such a case.
3) Note that when an error occurs in a relay, triac or transistor output device, the output could be held either on or off. For output
signals that may lead to serious accidents, external circuits and mechanisms should be designed to ensure safe machinery
operation in such a case.
Specification
DESIGN PRECAUTIONS
8
Manual Control
9
Positioning
Control
10
Program
Example
15
2 Specification
FX3U-1PG User's Manual
2.1
2.1 General Specifications
General Specifications
Items other than the following are equivalent to those of the PLC main unit.
For general specifications, refer to the manual of the PLC main unit.
Refer to FX3U Hardware Edition.
Refer to FX3UC Hardware Edition.
Item
2.2
Specification
Dielectric withstand voltage
500 V AC for one minute
Insulation resistance
5 M or more by 500 V DC Megger
Between all terminals and ground terminal
Power Supply Specifications
Item
Drive power
supply
2.3
Specification
Input signal
24 V DC 10%
Current consumption 40 mA or less
Output signal
For pulse output: 5 to 24 V DC Current consumption 35 mA or less
For CLR signal: 5 to 24 V DC Current consumption 20 mA or less
Inner control
5 V DC Current consumption 150 mA
(Power is supplied through the extension cable from the PLC.)
Performance Specifications
Item
Number of control axes
Created by sequence programs (using FROM/TO instruction or direct specification of
Positioning program
Positioning
the buffer memory etc. on the MOV instruction etc.*1)
Method
Increment, Absolute
Unit
PLS, m, 10-4 inch, mdeg
Unit magnification
1, 10, 100, 1000-fold
Range
-2,147,483,648 to 2,147,483,647 PLS
Operation speed
Hz, cm/min, inch/min, 10deg/min
Output frequency
1 Hz to 200 kHz
Acceleration/
deceleration process
Trapezoidal acceleration/deceleration:
1 to 32,767 ms
Approximate S-shaped acceleration/deceleration:
1 to 5,000 ms
Starting time
Motor system: 1 ms or less
Machine system: 2 ms or less
Number of I/O occupied points
*1.
16
Specification
One axis
8 points
(taken from either the input or output points of the PLC)
For details of other applied instructions and methods, refer to the FX3S/FX3G/FX3GC/FX3U/FX3UC
Programming Manual.
2 Specification
FX3U-1PG User's Manual
Input Specifications
2.4.1
Input specifications
1
Introduction
2.4
2.4 Input Specifications
Item
2
Specification
Group 1
Input signal name
24 V DC
(Power is supplied from S/S terminal.)
Input current
7.0 mA
ON current
4.5 mA or more
OFF current
1.5 mA or less
Signal form
No-voltage contact input
Sink input: NPN open collector transistor
Source input: PNP open collector transistor
Response time
DOG input: 1 ms
STOP input: 4 ms
Circuit insulation
Photo-coupler insulation
Operation display
LED ON at input ON
Signal voltage
5 to 24 V DC
Input current
20 mA or less
ON current
4.0 mA or more
0.5 mA or less
Signal form
NPN open collector transistor
Response time
4 s or more
Circuit insulation
Photo-coupler insulation
Operation display
LED ON at input ON
5
6
Before Starting
Positioning
Operation
OFF current
4
Wiring
2.4.2
Signal voltage
Internal input circuit
7
Refer to Section 5.1.
Buffer Memory
For the internal input circuit diagram, refer to the following.
3
Installation
Group 2
Group 2
PG0: Zero point signal input
Used for DOG type mechanical zero return operation
System
Configuration
Group 1
DOG:
Used for DOG input of DOG type mechanical zero return operation or used for
interrupt input of External command positioning, Interrupt 1-speed positioning,
Interrupt stop, Interrupt 2-speed positioning operation
Specification
STOP:
Deceleration stop input or used for interrupt input of External command positioning,
Interrupt 2-speed positioning operation
8
Manual Control
9
Positioning
Control
10
Program
Example
17
2 Specification
FX3U-1PG User's Manual
2.5
Output Specifications
2.5.1
Output specifications
2.5 Output Specifications
Item
Output signal name
Group 1
Group 2
Group 1
Group 2
2.5.2
Specification
FP: Forward pulse or pulse train
RP: Reverse pulse or direction signal
CLR: CLR signal
Output form
Transistor
Output system
Forward (FP) and reverse (RP) pulse or pulse (PLS) with direction (DIR) can be
selected.
Output frequency
1 Hz to 200 kHz
Rated load voltage
5 to 24 V DC
Max. load current
20 mA or less
VIN current consumption
5 to 24 V DC 35 mA or less
Output ON voltage
1.0 V or less
Operation display
LED ON at output ON
Output form
Transistor
Output system
Pulse (Output pulse width: 20 ms)
Rated load voltage
5 to 24 V DC
Max. load current
20 mA or less
Output ON voltage
1.5 V or less
Operation display
LED ON at output ON
Internal output circuit
For the internal output circuit diagram, refer to the following.
18
Refer to Section 5.2.
3 System Configuration
FX3U-1PG User's Manual
3.1 General Configuration
1
System Configuration
2
General Configuration
Specification
3.1
Introduction
3.
[3] PC software
[4] Personal computer
3
[5] Connection
cables
Ladder
FX3U-1PG
[6] Twisted
pair cable
4
Pulse train
Monitor data
Control data
Positioning parameter
• Forward limit signal
• Reverse limit signal
• Emergency stop signal
[7]
Servo amplifier
Stepping motor driver
High speed
input/output
Installation
FROM/TO
FX3U/FX3UC instructions
PLC
etc.
[1] Pulse output block
System
Configuration
[2] PLC
5
• STOP input
• DOG input
Wiring
• Forward limit (LSF)
• Reverse limit (LSR)
• Interrupt input (INT0, INT1)
[8]
Servo motor
Stepping motor
6
Component list
Model name
Remarks
[1]
Pulse output block
FX3U-1PG
-
[2]
PLC
FX3U/FX3UC PLC
-
[3]
PC software
GX Works2
GX Developer
[4]
Personal computer
Connection cable
PLC programming software.
-
7
-
FX-USB-AW
-
F2-232CAB-1
FX-232AWC-H
FX-422CAB0
-
[6]
Twisted pair cable
-
Use shielded twisted-pair cables for connecting cables.
[7]
Servo amplifier
Stepping motor driver
-
-
[8]
Servo motor
Stepping motor
-
-
Buffer Memory
[5]
Before Starting
Positioning
Operation
Part name
8
Manual Control
9
Positioning
Control
10
Program
Example
19
3 System Configuration
FX3U-1PG User's Manual
3.2
3.2 Applicable PLC
Applicable PLC
Model name
Applicability
Maximum number of connectable units
FX3U Series PLC
Ver. 2.20 and later
8 units
FX3UC Series PLC*1
Ver. 2.20 and later
6 units
The version number can be checked by reading the last three digits of device D8001/D8101.
*1.
3.3
An FX2NC-CNV-IF or FX3UC-1PS-5V is necessary to connect the FX3U-1PG with the FX3UC PLC.
Connection with PLC
The FX3U-1PG connects to a PLC via an extension cable.
The FX3U-1PG is handled as a special extension block of the PLC. The unit number of the FX3U-1PG is
automatically assigned No. 0 to No. 7 (Unit No. 1 to No. 7 is assigned when the main unit is an FX3UC-32MTLT(-2).) starting from the special function unit/block closest to the PLC main unit.
(This unit number is used in FROM/TO instructions.)
For details on the assignment of the I/O number and unit number of the PLC, refer to the following manual
corresponding to the connected PLC.
Refer to FX3U Hardware Edition.
Refer to FX3UC Hardware Edition.
FX3U PLC
Other
FX3U-1PG extension
units/blocks
Other
FX3UC PLC extension FX3U-1PG
units/blocks
FX2NC-CNV-IF
• An FX2NC-CNV-IF or FX3UC-1PS-5V is necessary to connect the FX3U-1PG to the FX3UC PLC.
• For extension, the separately available FX0N-65EC/FX0N-30EC extension cable and FX2N-CNV-BC are
used. One extension cable can be used per system.
• The number of I/O points occupied by the FX3U-1PG is eight. Make sure that the total number of I/O points
(occupied I/O points) of the main unit, extension unit(s), extension block(s) and the number of points
occupied by special function blocks does not exceed the maximum number of I/O points of the PLC.
For information on the maximum number of I/O points of the PLC, refer to the respective product manual.
Refer to FX3U Hardware Edition.
Refer to FX3UC Hardware Edition.
20
4 Installation
FX3U-1PG User's Manual
1
Introduction
4.
Installation
2
•
Specification
INSTALLATION PRECAUTIONS
Make sure to cut off all phases of the power supply externally before attempting installation work.
Failure to do so may cause electric shock or damage to the product.
3
•
•
•
•
•
6
Before Starting
Positioning
Operation
Only one FX3U-1PG unit can be connected to the right side of the main unit, extension unit or extension block.
To connect to an FX3UC PLC or FX2NC PLC extension block, the FX2NC-CNV-IF or FX3UC-1PS-5V is
necessary.
For details, refer to the respective PLC manual.
Refer to FX3U Hardware Edition.
Refer to FX3UC Hardware Edition.
The FX3U-1PG may be installed in a control cabinet with a 35 mm wide DIN46277 DIN rail mounting or M4
screw direct mounting.
5
Wiring
•
4
Installation
•
•
Use the product within the generic environment specifications described in PLC main unit manual (Hardware Edition). Never use the
product in areas with excessive dust, oily smoke, conductive dusts, corrosive gas (salt air, Cl2, H2S, SO2, or NO2), flammable gas,
vibration or impacts, or expose it to high temperature, condensation, or rain and wind. If the product is used in such conditions, electric
shock, fire, malfunctions, deterioration or damage may occur.
Do not touch the conductive parts of the product directly.
Doing so may cause device failures or malfunctions.
Install the product securely using a DIN rail or mounting screws.
Install the product on a flat surface.
If the mounting surface is rough, undue force will be applied to the PC board, thereby causing nonconformities.
When drilling screw holes or wiring, make sure that cutting and wiring debris do not enter the ventilation slits.
Failure to do so may cause fire, equipment failures or malfunctions.
Be sure to remove the dust proof sheet from the PLC's ventilation slits when installation work is completed.
Failure to do so may cause fire, equipment failures or malfunctions.
Make sure to attach the top cover, offered as an accessory, before turning on the power or initiating operation after installation or
wiring work.
Failure to do so may cause electric shock.
Connect extension cables securely to their designated connectors.
Loose connections may cause malfunctions.
System
Configuration
INSTALLATION PRECAUTIONS
7
Buffer Memory
8
Manual Control
9
Positioning
Control
10
Program
Example
21
4 Installation
FX3U-1PG User's Manual
4.1
4.1 DIN rail Mounting
DIN rail Mounting
The product may be mounted on a 35 mm wide DIN46277 (DIN rail).
1
2
Fit the upper edge (A in the figure to the right) of the DIN
rail mounting groove onto the DIN rail.
Push the product onto the DIN rail.
• An interval space of 1 to 2 mm (0.04" to 0.08") between each unit is necessary.
3
Connect the extension cable.
Connect the extension cable (B in the figure to the right) to
the main unit, I/O extension unit/block or special function
unit/block on the left side of the product.
For information on the extension cable connection
procedure, refer to the respective product PLC manual.
Refer to FX3U Hardware Edition.
Refer to FX3UC Hardware Edition.
• Example of installation on DIN rail
- In the case of the FX3U PLC
1 to 2 mm
(0.04" to 0.08")
1 to 2 mm
(0.04" to 0.08")
FX3U Series
main unit
FX3U-1PG
Other
extension
equipment
DIN rail
- In the case of the FX3UC PLC
1 to 2 mm
(0.04" to 0.08")
1 to 2 mm
(0.04" to 0.08")
FX3UC Series
main unit
DIN rail
FX2NC-CNV-IF or
FX3UC-1PS-5V
22
FX3U-1PG
Other
extension
equipment
B
4 Installation
FX3U-1PG User's Manual
1
Direct Mounting
1
3
System
Configuration
2
Create mounting holes in the mounting
surface according to the external dimensions
diagram.
Fit the FX3U-1PG (A in the figure to the right)
to the mounting holes and tighten with M4
screws (B in the figure to the right).
4
Installation
For the screw position and quantity, refer to the
dimensioned drawing specified below.
For dimensions, refer to Section 1.2.
3
2
Specification
The product can be installed directly with screws.
An interval space of 1 to 2 mm (0.04" to 0.08") between each unit is necessary.
For installation details, refer to the following respective PLC manual.
For mounting hole pitches, refer to Section 1.2.
Refer to FX3U Hardware Edition.
Refer to FX3UC Hardware Edition.
Introduction
4.2
4.2 Direct Mounting
Connect the extension cable.
5
B
Wiring
Connect the extension cable to the main unit, I/O
extension unit/block or special function unit/block on the left
side of the product.
(Refer to Step 3 in Section 4.1.)
For information on the extension cable connection
procedure, refer to the respective PLC manual.
A
B
6
Before Starting
Positioning
Operation
Refer to FX3U Hardware Edition.
Refer to FX3UC Hardware Edition.
• Example of direct installation
1 to 2 mm
(0.04" to 0.08")
1 to 2 mm
(0.04" to 0.08")
FX3U-1PG
Buffer Memory
FX3U Series
main unit
7
Other
extension
equipment
(+ shows the M4 screw)
8
Manual Control
9
Positioning
Control
10
Program
Example
23
5 Wiring
FX3U-1PG User's Manual
5.
Wiring
WIRING PRECAUTIONS
•
Make sure to cut off all phases of the power supply externally before attempting wiring work.
Failure to do so may cause electric shock or damage to the product.
WIRING PRECAUTIONS
•
•
•
•
Connect the DC power supply wiring to the dedicated terminal described in this manual.
If an AC power supply is connected to a DC input/output terminal or DC power supply terminal, the PLC will burn out.
Make sure to attach the top cover, offered as an accessory, before turning on the power or initiating operation after installation or
wiring work.
Failure to do so may cause electric shock.
When drilling screw holes or wiring, make sure that cutting and wiring debris do not enter the ventilation slits.
Failure to do so may cause fire, equipment failures or malfunctions.
Make sure to properly wire the extension equipment in accordance with the following precautions.
Failure to do so may cause electric shock, equipment failures, a short-circuit, wire breakage, malfunctions, or damage to the product.
- The disposal size of the cable end should follow the dimensions described in the manual.
- Tightening torque should follow the specifications in the manual.
This chapter explains the wiring for input/output.
For examples of connection to servo amplifier and stepping motor driver, refer to Appendix B.
24
5 Wiring
FX3U-1PG User's Manual
Input Wiring
5.1.1
Sink input wiring
1
Introduction
5.1
5.1 Input Wiring
2
FX3U-1PG
Specification
S/S
DOG
3
System
Configuration
STOP
Servo amplifier
PG0+
Cable length:
2 m or less
4
PG0-
Installation
5.1.2
Source input wiring
5
Wiring
FX3U-1PG
S/S
DOG
6
Before Starting
Positioning
Operation
STOP
7
Buffer Memory
5.2
Output Wiring
8
Manual Control
FX3U-1PG
Servo amplifier
VIN
FP
Cable length:
2 m or less
9
COM0
Positioning
Control
RP
COM1
Cable length:
2 m or less
10
CLR
Program
Example
25
5 Wiring
FX3U-1PG User's Manual
5.3
5.3 Wiring Precautions
Wiring Precautions
1) The power supply used for FP, RP, PG0, and CLR should be separate from the power supply used for the
other signals.
2) In an environment with a lot of noise, when malfunctions such as position gap occur, the influence of
noise may be mitigated with the following measures.
• Attach a noise filter (TDK-Lambda Corp. MXB-1210-33 or similar) on the FX3U-1PG power supply line,
one on the end nearest the servo amplifier, and one on the end nearest the power supply unit.
• Attach a ferrite core (TDK Corp. ZCAT3035-1330 or similar) to the VIN, FP, RP, PG0, and CLR signal
wires, on the end nearest the servo amplifier.
5.4
Grounding
Ground the cables as follows.
• The grounding resistance should be 100 or less.
• Independent grounding should be established whenever possible.
Independent grounding should be performed for best results.
When independent grounding is not configured, perform "shared grounding" as shown in the following
figure.
For details, refer to the respective PLC manual.
Refer to FX3U Hardware Edition.
Refer to FX3UC Hardware Edition.
PLC
Other
equipment
Independent grounding
Best condition
PLC
Other
equipment
Shared grounding
Good condition
PLC
Other
equipment
Shared grounding
Not allowed
• The grounding point should be close to the PLC, and all grounding wires should be as short as possible.
5.5
Screw Size and Tightening Torque
5.5.1
Terminal screw size and tightening torque
The terminals on the FX3U-1PG use M3 screws.
Refer to the figures below for cable end treatment.
Set the tightening torque to 0.5 to 0.8 N•m.
Do not tighten terminal screws with a torque outside the above-mentioned range. Failure to do so may cause
equipment failures or malfunctions.
• When one wire is connected to one terminal
6.2 mm (0.24")
or less
6.2 mm (0.24")
or less
3.2 (0.13")
Terminal Crimp
screw
terminal
3.2 (0.13")
Terminal
• When two wires are connected to one terminal
6.2 mm (0.24")
or less
6.2 mm (0.24")
or less
26
3.2 (0.13")
6.3 mm (0.25")
or more
Terminal Crimp
screw
terminal
3.2 (0.13")
Terminal
6.3 mm (0.25")
or more
6 Before Starting Positioning Operation
FX3U-1PG User's Manual
1
Introduction
6.
Before Starting Positioning Operation
2
•
Make sure to observe the following precautions in order to prevent any damage to the machinery or accidents due to abnormal data
written to the PLC under the influence of noise:
1) Do not bundle the main circuit line together with or lay it close to the main circuit, high-voltage line or load line.
Otherwise, noise disturbance and/or surge induction are likely to take place. As a guideline, lay the control line at least 100mm
(3.94") or more away from the main circuit or high-voltage lines.
2) Ground the shield wire or shield of a shielded cable. Do not use common grounding with heavy electrical systems.
Install module so that excessive force will not be applied to the terminal blocks.
Failure to do so may result in wire damage/breakage or PLC failure.
5
Wiring
•
4
Installation
DESIGN PRECAUTIONS
•
3
System
Configuration
Make sure to have the following safety circuits outside of the PLC to ensure safe system operation even during external power supply
problems or PLC failure.
Otherwise, malfunctions may cause serious accidents.
1) Most importantly, have the following: an emergency stop circuit, a protection circuit, an interlock circuit for opposite movements
(such as normal vs. reverse rotation), and an interlock circuit (to prevent damage to the equipment at the upper and lower
positioning limits).
2) Note that when the PLC CPU detects an error, such as a watchdog timer error, during self-diagnosis, all outputs are turned off.
Also, when an error that cannot be detected by the PLC CPU occurs in an input/output control block, output control may be
disabled.
External circuits and mechanisms should be designed to ensure safe machinery operation in such a case.
3) Note that when an error occurs in a relay, triac or transistor output device, the output could be held either on or off. For output
signals that may lead to serious accidents, external circuits and mechanisms should be designed to ensure safe machinery
operation in such a case.
Specification
DESIGN PRECAUTIONS
6
Before Starting
Positioning
Operation
7
Buffer Memory
8
Manual Control
9
Positioning
Control
10
Program
Example
27
6 Before Starting Positioning Operation
FX3U-1PG User's Manual
6.1
6.1 Various Positioning Operation and Buffer Memory Setting
Various Positioning Operation and Buffer Memory Setting
Setting items of the buffer memory in each operation mode are as follows.
Setting of the positioning parameter selection (BFM#32) determines whether the positioning parameter is
used or the extension positioning parameter is used.
For details on the positioning operations and the buffer memory, refer to the following sections.
For details on the buffer memory, refer to the Chapter 7.
For details on the JOG operation and mechanical zero return operation, refer to the Chapter 8.
For details on the positioning operation, refer to the Chapter 9.
#0
#34, #33
Pulse rate
#2, #1
#36, #35
Feed rate
#3
#37
#5, #4
#39, #38
Maximum speed
Interrupt 2-speed positioning operation
Interrupt stop operation
Required for machine system and combined system of
units.
Operation parameter
-
#6
#41, #40
Bias speed
#8, #7
#43, #42
JOG speed
-
-
-
-
-
-
-
-
#10, #9
#45, #44
Zero return speed (high speed)
-
-
-
-
-
-
-
-
-
#11
#47, #46
#12
#48
#14, #13
#50, #49
#15
-
#16
-
Zero return speed (creep)
-
-
-
-
-
-
-
-
-
Number of zero-point signal for
zero return
-
-
-
-
-
-
-
-
-
Zero-point address
-
-
-
-
-
-
-
-
-
-
-
-
-
-
-
-
Acceleration/deceleration time
-
#51
Acceleration time
-
#52
Deceleration time
-
Starting delay time
-
-
-
#18, #17
Target address Ι
-
-
-
#20, #19
Operation speed Ι
-
-
-
#22, #21
Target address ΙΙ
-
-
-
-
-
#24, #23
Operation speed ΙΙ
-
-
-
-
-
-
-
#25
Operation command
#32
Positioning parameter selection
#54, #53
Target address change value
#56, #55
Operation speed change value
#57
Operation command ΙΙ
-
-
-
-
-
-
-
-
: Setting items necessary for operation
: Setting items necessary to change operation speed and target address during the operation
: Setting items necessary for variable speed operation with acceleration/deceleration
: Setting items necessary for interrupt input via PLC
- : Setting not necessary
28
Variable speed operation
External command positioning operation
2-speed positioning operation
Interrupt 1-speed positioning operation
JOG operation
Setting items
1-speed positioning operation
Extension
positioning
parameter
Positioning
parameter
Data-set type mechanical zero return operation
Operation mode
DOG type mechanical zero return operation
BFM No.
-
6 Before Starting Positioning Operation
FX3U-1PG User's Manual
1
Outline of Positioning Operation
The relationship between the operation speed, acceleration/deceleration time and travel distance of the
positioning operation is shown below.
Speed
2
Specification
Maximum speed
Approximate S-shaped
acceleration/deceleration
Operation speed
3
Bias speed
Time
4
Acceleration/deceleration time
(Deceleration time)
Installation
Acceleration/deceleration time
(Acceleration time)
System
Configuration
Trapezoidal
acceleration/deceleration
BFM No.
Item
Maximum speed
#5, #4
#39, #38
Upper speed limit in each operation mode.
#6
#41, #40
Lower speed limit in each operation mode.
Content
5
Operation speed Ι
#20, #19
Operation speed in each operation mode.
Operation speed ΙΙ
#24, #23
Operation speed for 2-speed positioning operation,
external command positioning operation and Interrupt 2speed positioning operation.
#15
-
Time needed to reach the maximum speed from bias
speed (bias speed from the maximum speed).
Acceleration time
-
#51
Time needed to reach the maximum speed from bias
speed.
Deceleration time
-
#52
Time needed to reach bias speed from the maximum
speed.
#37 b6
Selection of a control method at the time of acceleration/
deceleration.
OFF: Operates in the trapezoidal acceleration/deceleration
ON: Operates in the approximate S-shaped acceleration/
deceleration
#3 b6
Target address Ι
#18, #17
Target position (absolute address) or travel distance
(relative address) in each positioning operation.
Target address ΙΙ
#22, #21
Target position (absolute address) or travel distance
(relative address) for 2-speed positioning operation.
• Setting of the positioning parameter selection (BFM#32) determines whether the positioning parameter is
used or the extension positioning parameter is used. Set the buffer memories that correspond to the
selected positioning parameter.
• Set the acceleration/deceleration time for approximate S-shaped acceleration/deceleration within the
range from 1 ms to 5000 ms.
• When the operation speed I, operation speed II, JOG speed, zero return speed (high speed), and zero
return speed (creep) is at the maximum speed or faster, the operation is executed at the maximum speed.
29
9
10
Program
Example
• When the operation speed I, operation speed II, JOG speed, zero return speed (high speed), and zero
return speed (creep) is at the bias speed or slower, the operation is executed at the bias speed. However,
if the bias speed is 0, the operation is executed at 1 Hz.
8
Positioning
Control
• The gradient of acceleration/deceleration is determined by the maximum speed, bias speed, acceleration
time and deceleration time.
7
Manual Control
Point
6
Buffer Memory
Acceleration/
deceleration time
Acceleration/deceleration mode
(Operation parameter)
Travel
distance
Extension
positioning
parameter
Before Starting
Positioning
Operation
Acceleration/
deceleration
time
Positioning
parameter
Wiring
Bias speed
Operation
speed
Introduction
6.2
6.2 Outline of Positioning Operation
6 Before Starting Positioning Operation
FX3U-1PG User's Manual
6.3 System Wiring
6.3
System Wiring
6.3.1
System wiring example
Set the system wiring of the FX3U/FX3UC series PLC, FX3U-1PG, and the servo amplifier as below.
System wiring example
X**
X**
DOG
LSN
Limit switch
(Servo amplifier)
LSP
PLC
(FX3U/FX3UC)
FX3U-1PG
Servo amplifier
X**
STOP
EMC
STOP
Forced stop
X**
Start
Limit switch
(PLC)
DOG switch
Limit switch
(PLC)
Limit switch
(Servo amplifier)
Motor
INT0
X**
INT1
• Wire the limit switches to the PLC and the servo amplifier, with the inner limit switch connected to the PLC
and the outer limit switch connected to the servo amplifier.
• Wire the Forced stop signal to the servo amplifier.
• Wire the DOG switch to the FX3U-1PG.
• Wire the Start signal for the positioning operation to the PLC.
• Wire the STOP signal for the positioning operation to the PLC or to the FX3U-1PG.
• Wire the INT0 (interrupt input 0) and the INT1 (interrupt input 1) for the positioning operation to the PLC.
6.3.2
For DOG terminal, STOP terminal
In each operation mode, various inputs are connected to the DOG terminal and the STOP terminal.
The DOG terminal is used for the DOG input for the mechanical zero return operation, and for the interrupt
input 0 for the external command positioning operation, the interrupt 1-speed positioning operation, the
interrupt stop operation, and the interrupt 2-speed positioning operation.
The STOP terminal is used for the decelerate stop input, the external command positioning operation, and the
interrupt input 1 for the interrupt 2-speed positioning operation. In addition, ON/OFF polarities of these inputs
invert depending on the setting of the DOG input polarity (b12) and the STOP input polarity (b14) of BFM#3/
BFM#37.
Examples of connections which express the above description are shown below.
Operation mode selection indicates the operation mode to be used. Interrupt signal indicates the signals used
in the given operation mode.
30
6 Before Starting Positioning Operation
FX3U-1PG User's Manual
6.3 System Wiring
1
Operation mode selection
Introduction
• When a normally opened contact is used in the BFM#3 (b14=0, b12=0) and BFM#37 (b14=0, b12=0)
- In case of sink input
Interrupt signal
DOG
Interrupt 1-speed
Interrupt input 0
Interrupt stop
Interrupt input 0
Interrupt 2-speed
Interrupt input 0
External command
Interrupt input 0
2
Specification
Zero return
3
Interrupt 2-speed
Interrupt input 1
External command
Interrupt input 1
System
Configuration
STOP
4
24V
S/S
STOP
Installation
0V
DOG
FX3U-1PG
FX3U PLC
5
Operation mode selection
Wiring
- In case of source input
Interrupt signal
DOG
Interrupt 1-speed
Interrupt input 0
Interrupt stop
Interrupt input 0
Interrupt 2-speed
Interrupt input 0
External command
Interrupt input 0
6
Before Starting
Positioning
Operation
Zero return
7
STOP
Interrupt input 1
External command
Interrupt input 1
0V
FX3U PLC
S/S
STOP
8
DOG
Manual Control
24V
Buffer Memory
Interrupt 2-speed
FX3U-1PG
9
Positioning
Control
10
Program
Example
31
6 Before Starting Positioning Operation
FX3U-1PG User's Manual
6.3 System Wiring
• When a normally closed contact is used in the BFM#3 (b14=1, b12=1) and BFM#37 (b14=1, b12=1)
- In case of sink input
Operation mode selection
Interrupt signal
Zero return
DOG
Interrupt 1-speed
Interrupt input 0
Interrupt stop
Interrupt input 0
Interrupt 2-speed
Interrupt input 0
External command
Interrupt input 0
STOP
Interrupt 2-speed
Interrupt input 1
External command
Interrupt input 1
0V
24V
S/S
STOP
DOG
FX3U-1PG
FX3U PLC
- In case of source input
Operation mode selection
Interrupt signal
Zero return
DOG
Interrupt 1-speed
Interrupt input 0
Interrupt stop
Interrupt input 0
Interrupt 2-speed
Interrupt input 0
External command
Interrupt input 0
STOP
Interrupt 2-speed
Interrupt input 1
External command
Interrupt input 1
24V
0V
FX3U PLC
S/S
STOP
DOG
FX3U-1PG
• Response times when using the STOP or DOG terminal as an interrupt input
- For STOP terminal
During operation at 1 kHz or higher: within 6 ms
During operation at less than 1 kHz: within 6 pulses
- For DOG terminal
During operation at 1 kHz or higher: within 3 ms
During operation at less than 1 kHz: within 3 pulses
32
6 Before Starting Positioning Operation
FX3U-1PG User's Manual
1
Interrupt input via PLC (BFM)
Interrupt input setting [BFM#3 (b3, b2), BFM#37 (b3, b2)]
BFM#3 or BFM#37
Interrupt input 0
Interrupt input 1
0
DOG
STOP
The DOG terminal is used for interrupt input 0.
The STOP terminal is used for interrupt input 1.
0
1
DOG
INT1
The DOG terminal is used for the interrupt input 0.
Interrupt input 1 (INT1) via PLC is used for interrupt input 1.
1
0
INT0
STOP
Interrupt input 0 (INT0) via PLC is used for interrupt input 0.
The STOP terminal is used for interrupt input 1.
1
1
INT0
INT1
Interrupt input 0 (INT0) via PLC is used for interrupt input 0.
Interrupt input 1 (INT1) via PLC is used for interrupt input 1.
b2
0
Content
3
Interrupt input via PLC (BFM) will be used for INT0 and INT1.
The DOG terminal and STOP terminal of the FX3U-1PG are used for DOG and STOP.
5
Operation command ΙΙ (BFM#57)
Item
Content
b0
INT0
The interrupt input is executed via the PLC (BFM).
The INT0 turns to ON when b0 = ON.
b1
INT1
The interrupt input is executed via the PLC (BFM).
The INT1 turns to ON when b1 = ON.
#57
Wiring
BFM No.
4
Installation
Point
System
Configuration
b3
2
Specification
In the interrupt 1-speed positioning operation, the interrupt stop operation, the interrupt 2-speed positioning
operation, and the external command positioning operation, interrupt input (INT0, INT1) via PLC (BFM) can
be used.
When interrupt input via PLC (BFM) is used, select a terminal to be used for the interrupt input in the interrupt
input setting BFM#3 (b3, b2), BFM#37 (b3, b2) and turn on operation command II BFM#57 (b1, b0) by the
PLC input.
Introduction
6.3.3
6.3 System Wiring
6
Point
Response time
Response time of INT0, INT1 is as follows.
Before Starting
Positioning
Operation
Connect and link an arbitrary input of the PLC (X000, X001, etc.) to the INT0 (b0), INT1 (b1) of the operation
command II (BFM#57).
7
• During operation at 1 kHz or higher: within 3 ms
Buffer Memory
• During operation at less than 1 kHz: within 3 pulses
Caution of interrupt input is used
When both INT0 and INT1 are set to ON at the same time in the external command positioning or interrupt 2speed positioning, INT0 is effective.
8
Manual Control
9
Positioning
Control
10
Program
Example
33
6 Before Starting Positioning Operation
FX3U-1PG User's Manual
6.3 System Wiring
A connection example of interrupt input via PLC (BFM) is shown below.
Operation mode selection indicates the operation mode to be used. Interrupt signal indicates the signals used
in the given operation mode. INT0, INT1 is connected to X000, X001 of the FX3U PLC.
• When interrupt input via PLC (BFM) is used
When interrupt input via PLC (BFM) is used, BFM#3 (b3=1, b2=1) and BFM#37 (b3=1, b2=1)
- In case of sink input
Operation mode selection Interrupt signal
Interrupt 1-speed
Interrupt input 0
Interrupt stop
Interrupt input 0
Interrupt 2-speed
Interrupt input 0
External command
Interrupt input 0
Interrupt 2-speed
Interrupt input 1
External command
Interrupt input 1
X000 X001
(INT0) (INT1)
0V
24V
S/S
S/S
FX3U PLC
STOP
DOG
STOP
DOG
FX3U-1PG
- In case of source input
Operation mode selection Interrupt signal
Interrupt 1-speed
Interrupt input 0
Interrupt stop
Interrupt input 0
Interrupt 2-speed
Interrupt input 0
External command
Interrupt input 0
Interrupt 2-speed
Interrupt input 1
External command
Interrupt input 1
X000 X001
(INT0) (INT1)
24V
FX3U PLC
34
0V
S/S
S/S
STOP
DOG
STOP
DOG
FX3U-1PG
6 Before Starting Positioning Operation
FX3U-1PG User's Manual
6.3 System Wiring
1
Introduction
Program description example
The following program is the example of a program which uses interrupt input via PLC (BFM).
X000 of the PLC is used as interrupt input 0 (INT0).
Interrupt input 0 (INT0) turns ON, at the rising edge of X000.
2
M8002
FNC 12
MOV
Initial pulse
H0008
U0\G3
Specification
FNC 04
EI
Writing of operation
parameter
User program
3
System
Configuration
FNC 06
FEND
M8000
I001
RUN monitor
FNC 12
MOV
H0001
U0\G57
Writing of operation
command II
4
Installation
FNC 03
IRET
END
5
Wiring
6
Before Starting
Positioning
Operation
7
Buffer Memory
8
Manual Control
9
Positioning
Control
10
Program
Example
35
6 Before Starting Positioning Operation
FX3U-1PG User's Manual
6.4 Handling the Forward Limit and Reverse Limit
6.4
Handling the Forward Limit and Reverse Limit
6.4.1
Handling the forward limit and reverse limit
The FX3U-1PG does not have a terminal for connecting the forward or reverse limit switch. Connect the limit
switch to the PLC and turn on/off the forward limit (BFM#25 b2) or the reverse limit (BFM#25 b3) at each
input.
Set the forward/reverse limit switches at the servo amplifier side as well as the PLC side for safety. At this
time, the limit switch at the PLC side reacts a little earlier than the limit switch at the servo amplifier side.
Reverse limit
Reverse limit
(Servo amplifier side) (PLC side)
Forward limit
(PLC side)
Forward limit
(Servo amplifier side)
Servo motor
Reverse
Forward
Point
• The stepping motor driver does not have terminals for connecting limit switches. Connect limit switches to
the PLC.
• Do not use the forward limit/reverse limit for any purposes other than limiting.
6.4.2
Operations at forward limit/reverse limit
Operations when the forward limit/reverse limit is turned on change depending on the setting of the limit
deceleration mode (BFM#3 b11/BFM#37 b11).
• Operation when the limit deceleration mode is OFF (Refer to Fig. 1 below.)
When the forward limit/reverse limit in the operating direction turns on during operation, the forward pulse/
reverse pulse is immediately stopped, and the CLR signal is output. (The output pulse width of the CLR
signal is 20 ms.)
• Operation when the limit deceleration mode is ON (Refer to Fig. 2 below.)
When the forward limit/reverse limit in the operating direction turns on during operation, the operation
decelerates and stops. The CLR signal is not output. In addition, at this time, the acceleration/deceleration
time (BFM#15) or the deceleration time (BFM#52) is applied for the deceleration time.
Reverse limit
(PLC side)
Forward limit
(PLC side)
Motor
Reverse
Forward
Speed
Acceleration/deceleration time
(Deceleration time)
Maximum speed
Operation speed
1)
1-speed positioning
operation start
(BFM#25 b8)
36
2)
Position
ON
OFF
Forward limit
(BFM#25 b2)
OFF
Error flag
(BFM#28 b7)
OFF
ON
ON
6 Before Starting Positioning Operation
FX3U-1PG User's Manual
1
Restarting method after the forward limit/reverse limit operation
Handling the STOP Command
6.5.1
Operation by the STOP command
3
The STOP command in any positioning operation is always valid. Deceleration stop or immediate stop by
input from the STOP terminal or input (BFM#25 b1) from the BFM is possible. (Refer to the following table.)
However, if the STOP command is input during the deceleration stop of a positioning operation, the STOP
command is ignored. The positioning completion flag turns on.
Variable speed operation (Without acceleration/deceleration)
Data-set type mechanical zero return
Any other operation
Stop operation
4
Installation
Operation mode
System
Configuration
6.5
2
Specification
When the forward limit/reverse limit in the operation direction turns on during operation, the forward limit and
reverse limit error is output (error code: K6). Moving to the activated forward limit/reverse limit direction
cannot be executed.
Use the JOG operation in opposite direction to avoid the limit error. At that time, forward limit/reverse limit
error is also reset. In addition, it is also possible to avoid the limit error by using the positioning operation in
the opposite direction of the forward limit/reverse limit after resetting the error.
Introduction
6.4.3
6.5 Handling the STOP Command
Immediate stop
Ignore
Deceleration stop
When the input from the STOP terminal is set to interrupt input 1 by the operation parameter (BFM#3 b3, b2
or BFM#37 b3, b2), operation varies depending on the operation mode.
5
Wiring
• In any operation other than the external command positioning operation or interrupt 2-speed positioning
operation
The input from the STOP terminal functions as the STOP input.
6
Point
When input from the STOP terminal is used as interrupt input 1, the external command positioning operation
and the interrupt 2-speed positioning operation become different from other positioning operations.
7
Buffer Memory
In case of input from the STOP terminal, the operation varies depending on the setting of the STOP input
polarity (BFM#3 b14 or BFM#37 b14).
- When STOP input polarity = 0: Input is ON, STOP becomes valid.
- When STOP input polarity = 1: Input is OFF, STOP becomes valid.
In case of input from the BFM, STOP becomes valid when BFM#25 b1 is ON.
Before Starting
Positioning
Operation
• External command positioning operation or interrupt 2-speed positioning operation
The input from the STOP terminal functions as an interrupt input.
For the external command positioning operation, refer to Section 9.5.
For the interrupt 2-speed positioning operation, refer to Section 9.8.
8
Manual Control
9
Positioning
Control
10
Program
Example
37
6 Before Starting Positioning Operation
FX3U-1PG User's Manual
6.5.2
6.5 Handling the STOP Command
Remaining distance operation
When the STOP command is used to stop the positioning operation, the restart operation changes depending
on the STOP input mode (BFM#3 b15 or BFM#37 b15) setting.
When the STOP input mode is OFF, the remaining distance operation is executed by the restart command.
After the positioning operation completes, the positioning completion flag turns ON.
When the STOP input mode is ON, the remaining distance operation is not executed, and the positioning
ends at the stop position. The positioning completion flag remains off.
1. Positioning operations where remaining distance operation is possible
Operations applicable to the remaining
distance operation
Operations not applicable to the remaining
distance operation
1-speed positioning operation
JOG operation
2-speed positioning operation
DOG type mechanical zero return (high speed)
Interrupt stop operation
DOG type mechanical zero return (creep)
-
Data-set type mechanical zero return
-
Interrupt 1-speed positioning operation
-
External command positioning operation
-
Variable speed operation
-
Interrupt 2-speed positioning operation
2. Operation
Speed
Operation speed I
Remaining
distance
Bias speed
Time
1-speed positioning
operation start
(BFM#25 b8)
ON
STOP command
(BFM#25 b1)
READY
(BFM#28 b0)
Remaining distance
operation waiting
(BFM#28 b12)
Positioning
completion flag
(BFM#28 b8)
38
ON
OFF
OFF
OFF
ON
ON
OFF
ON
OFF
ON
ON
OFF
OFF
ON
OFF
ON
6 Before Starting Positioning Operation
FX3U-1PG User's Manual
6.5 Handling the STOP Command
1
The following operation cancels the remaining distance operation. When the remaining distance operation is
cancelled, the positioning completion flag remains off.
• When a write operation is executed to a buffer memory other than BFM#25 during the remaining distance
operation waiting, the remaining distance operation is cancelled, and the operation ends.
3
System
Configuration
Operation during cancellation of the remaining distance operation
2
Specification
• When the start command of a different operation command is turned on during remaining distance
operation waiting, the remaining distance operation is cancelled, and the command input later starts the
operation.
In addition, even in the same operation command, when an operation is started by switching the address
specification method (relative/absolute), the remaining distance operation is cancelled, and the operation
starts with the newly set address specification method.
Introduction
Cancelling the remaining distance operation
Speed
Operation speed I
4
Installation
Bias speed
Time
1-speed positioning
operation start
(BFM#25 b8)
ON
OFF
ON
ON
OFF
ON
ON
6
OFF
Before Starting
Positioning
Operation
OFF
ON
Wiring
STOP command
(BFM#25 b1)
READY
(BFM#28 b0)
Remaining distance
operation waiting
(BFM#28 b12)
Positioning
completion flag
(BFM#28 b8)
5
OFF
OFF
Write to BFM other than BFM#25
7
Buffer Memory
8
Manual Control
9
Positioning
Control
10
Program
Example
39
6 Before Starting Positioning Operation
FX3U-1PG User's Manual
6.6
6.6 Operation Speed Change Function
Operation Speed Change Function
This function changes the speed of the positioning operation to the specified speed.
When starting the positioning operation, the value of the operation speed I (BFM#20, #19) is written to the
operation speed change value (BFM#56, #55).
Then, when a new value is written to the operation speed change value, the operation speed changes.
When the 2-speed is changed in the 2-speed positioning operation, interrupt 2-speed positioning operation
and external command positioning operation, the value of the operation speed II (BFM#24, #23) is written to
the operation speed change value after the operation at the first speed is completed. Then, when a new value
is written to the operation speed change value, the operation speed changes.
Point
• Even when a value is written to the operation speed change value, the operation speed I and the operation
speed II values do not change.
• In case of positioning operations for which the operation speed change function is invalid, the operation
speed is not written to the operation speed change value.
The operation speed change value remains as what was written for the last time.
• When the operation is stopped by the STOP command and the remaining distance operation is executed
after the operation speed is changed, operation resumes with the changed speed.
1. Positioning operations for which operation speed change function can be used
Operations applicable to the operation
speed change function
Operations not applicable to the operation
speed change function
JOG operation
DOG type mechanical zero return (creep)
DOG type mechanical zero return (high speed)
Data-set type mechanical zero return
1-speed positioning operation
Variable speed operation
Interrupt 1-speed positioning operation
-
2-speed positioning operation
-
External command positioning operation
-
Interrupt stop operation
-
Interrupt 2-speed positioning operation
-
2. Operation
Speed
Maximum Operation speed
speed
after change
Actual
operation
Operation
before change
Operation
speed I
Target address I
Bias speed
1-speed positioning
operation start
(BFM#25 b8) OFF
Operation speed
change value
(BFM#56, #55)
40
Time
Acceleration/
deceleration time
(Acceleration time)
ON
Acceleration/
deceleration time
(Deceleration time)
Operation speed I
Operation speed after change
6 Before Starting Positioning Operation
FX3U-1PG User's Manual
6.6 Operation Speed Change Function
1
After the operation speed change value is updated, the time required until the operation speed changes is as
follows.
Introduction
3. Update time for the operation speed change value
• During operation at 1 kHz or higher: Within 3 ms
• During operation at less than 1 kHz: Within 3 pulses
2
Specification
Cautions when the operation speed change function is used
• In the following conditions, writing a value to the operation speed change value does not validate the
operation speed change. No error will occur either.
- During deceleration by the STOP command (STOP, forward limit, reverse limit)
- During deceleration and stopping of the positioning operation
- Operation that the operation speed change function cannot be used
- During use of the approximate S-shaped acceleration/deceleration function
- In JOG operation inching movement
- During remaining distance operation waiting (remaining distance operation is cancelled)
- After interrupt input detection of the interrupt stop operation
3
System
Configuration
4
• When the value set for the speed change value is at the creep speed or smaller, the operation will be
executed at the creep speed. (In DOG type mechanical zero return operation)
Installation
• When the value set for the speed change value is larger than the maximum speed, the operation will be
executed in the maximum speed. When the value set for the speed change value is at the bias speed or
smaller, the operation will be executed at the bias speed. However, if the bias speed is 0, the operation is
executed at 1 Hz.
5
Wiring
• If the travel time is shorter than the required acceleration/deceleration time, the operation speed set by the
speed change value cannot be reached.
Speed
6
Operation speed
after change
Before Starting
Positioning
Operation
Actual operation
speed
Operation speed
before change
7
Buffer Memory
Time
Travel time
Time required for acceleration/deceleration
8
Manual Control
9
Positioning
Control
10
Program
Example
41
6 Before Starting Positioning Operation
FX3U-1PG User's Manual
6.6 Operation Speed Change Function
4. Program description example
In the program below, the operation speed is changed as follows.
Operation speed will be changed to 200,000 Hz if the current address exceeds K2,000.
Operation speed will be changed to 100,000 Hz if the current address exceeds K5,000.
M8000
RUN monitor
M20
READY
FNC 12
U0\G26
DMOV
D10
FNC 12 U0\G28
MOV
K4M20
FNC 12 U0\G60
DMOV
D30
Reading of status information
Reading of current value of
operation speed
FNC233
ANDD>
D10
K2000
FNC 12 K200000 U0\G55
DMOV
Changes the operation speed
to 200,000 Hz
FNC233
ANDD>
D10
K5000
FNC 12 K100000 U0\G55
DMOV
Changes the operation speed
to 100,000 Hz
END
42
Reading of current address
6 Before Starting Positioning Operation
FX3U-1PG User's Manual
1
Target Address Change Function
Point
1. Positioning operations for which the target address change function can be used
Operations applicable to the target
address change function
Operations not applicable to the target
address change function
JOG operation
Interrupt 1-speed positioning operation
DOG type mechanical zero return (high speed)
2-speed positioning operation
DOG type mechanical zero return (creep)
Interrupt stop operation
Data-set type mechanical zero return
Interrupt 2-speed positioning operation
External command positioning operation
-
4
Installation
1-speed positioning operation
3
System
Configuration
When the target address is changed by specifying the relative address, the relative travel distance from the
start position of the positioning operation changes. When the 2-speed is changed in the 2-speed positioning
operation, the relative travel distance from the 2-speed start position changes.
It is not the travel distance from the target address change position.
2
Specification
This function changes the target address of the positioning operation to the specified target address.
When the positioning operation is started, the value of the target address I (BFM#18, #17) is written to the
target address change value (BFM#54, #53). Then, when a new value is written to the target address change
value, the target address changes.
In case of the 2-speed positioning operation, the value of the target address II (BFM#22, #21) is written to the
target address change value after the completion of the 1-speed operation. Then, when a new value is written
to the target address change value, the target address changes.
Introduction
6.7
6.7 Target Address Change Function
5
Variable speed operation
Wiring
2. Operation
• When the operation direction does not change after the target address is changed
Operates in a same direction as the operation direction.
Speed
6
Before Starting
Positioning
Operation
Maximum speed
Operation speed I
Target address
before change
Target address
after change
Target address
before change
Time
Acceleration/deceleration time
(Deceleration time)
8
Target address after change
Manual Control
Target address
change value
(BFM#54, #53)
Acceleration/deceleration time
(Acceleration time)
7
Buffer Memory
Bias speed
9
Positioning
Control
10
Program
Example
43
6 Before Starting Positioning Operation
FX3U-1PG User's Manual
6.7 Target Address Change Function
• When the operation direction inverts after the target address is changed
After the target address is changed, the motor decelerates and stops once, and then starts rotation in the
reverse direction within 1 ms in the case of forward pulse/reverse pulse output or within 2 ms in the case of
pulse/direction output.
Speed
Maximum speed
Operation
speed I
Target address
before change
Bias speed
*1
Acceleration/
Acceleration/
deceleration time deceleration time
(Acceleration time) (Deceleration time)
Target address
change value
(BFM#54, #53)
*1.
Target address
before change
Target address
after change
Time
Target address after change
In the case of forward pulse/reverse pulse output: Within 1 ms
In the case of pulse/direction output: Within 2 ms
3. Update time for the target address change value
After the target address change value is updated, the time required until the target address is changed will be
as follows.
• During operation at 1 kHz or higher: Within 3 ms
• During operation at less than 1 kHz: Within 3 pulses
Caution when the target address change function is used
• In the following conditions, writing a value to the target address change value does not validate the target
address change. No error will occur either.
- During deceleration by the STOP command (STOP, forward limit, reverse limit)
- During deceleration and stopping of the positioning operation
- Operation that the target address change function cannot be used
- During use of the approximate S-shaped acceleration/deceleration function
- After interrupt input detection of the interrupt stop operation
- When changing to the target address that requires inverting during the interrupt 1-speed positioning
operation or the interrupt 2-speed positioning operation
- During remaining distance operation waiting (remaining distance operation is cancelled)
• When no change in operation direction occurs after the target address change
- When the travel distance from the positioning operation start position to the target address after the
change exceeds 32 bit, the deceleration stop is executed at the position where the target address is
changed. The set value overflow error occurs.
• When the operation direction inverts after the target address change
- When the travel distance from the deceleration stop position to the target address after the change
exceeds 32 bit, it stops at the deceleration stop position. The set value overflow error occurs.
44
6 Before Starting Positioning Operation
FX3U-1PG User's Manual
6.7 Target Address Change Function
1
Introduction
4. Program description example
In the program below, the target address is changed as follows.
When turning X000 to ON, changes the target address to K15,000.
M8000
RUN monitor
READY
M27
X000
Error Target address
flag change command
U0\G28
K4M20
Reading of status information
FNC 12
DMOV
K15000
U0\G53
Changes the target address
to K15,000
END
2
Specification
M20
FNC 12
MOV
3
System
Configuration
4
Installation
5
Wiring
6
Before Starting
Positioning
Operation
7
Buffer Memory
8
Manual Control
9
Positioning
Control
10
Program
Example
45
6 Before Starting Positioning Operation
FX3U-1PG User's Manual
6.8
6.8 Approximate S-shaped Acceleration/Deceleration Function
Approximate S-shaped Acceleration/Deceleration Function
The approximate S-shaped acceleration/deceleration reduces the load applied on the motor at the start of
operation and the stop of operation.
When the acceleration/deceleration mode (BFM#3 b6 or BFM#37 b6) is ON, both acceleration and
deceleration become approximate S-shaped acceleration/deceleration control.
1. Positioning operations for which approximate S-shaped acceleration/deceleration function
can be used
Operations applicable to the approximate
S-shaped acceleration/deceleration function
JOG operation
Operations not applicable to the approximate
S-shaped acceleration/deceleration function
Mechanical zero return
1-speed positioning operation
2-speed positioning operation
Interrupt 1-speed positioning operation
External command positioning operation
Interrupt stop operation
Variable speed operation
-
Interrupt 2-speed positioning operation
2. Operation
Speed
Maximum speed
Operation speed I
Approximate S-shaped
acceleration/deceleration
Trapezoidal
acceleration/deceleration
Bias speed
Acceleration/deceleration time*1
(BMF#15)
*1.
46
Time
Acceleration/deceleration time*1
(BMF#15)
When the acceleration time and the deceleration time are set individually by using the extension
positioning parameter, the approximate S-shaped acceleration/deceleration is executed at the value
set for the acceleration time.
6 Before Starting Positioning Operation
FX3U-1PG User's Manual
6.8 Approximate S-shaped Acceleration/Deceleration Function
1
The following acceleration and deceleration are executed in the approximate S-shaped acceleration/
deceleration.
Introduction
3. Slope of the approximate S-shaped acceleration/deceleration
1) From the start of operation to 10% of the acceleration/deceleration time required to reach the operation
speed I
Acceleration/deceleration using the Sin curve.
2
Speed
1) 0 to 10%
2)
Maximum speed
3) 90% to
100%
Approximate S-shaped
acceleration/deceleration
Trapezoidal
acceleration/deceleration
Operation speed
3
System
Configuration
3) From 90% to the end of the acceleration/deceleration time required to reach the operation speed I
Acceleration/deceleration using the Sin curve.
Specification
2) From 10% to 90% of the acceleration/deceleration time required to reach the operation speed I
Linear acceleration/deceleration
The slope at this time is up to 1.2 times the slope of the trapezoidal acceleration/deceleration.
In order to set the same acceleration/deceleration as the trapezoidal acceleration/deceleration, it is
necessary to change the acceleration/deceleration time to 1.2 times the original value.
4
Installation
Bias speed
5
Time
Wiring
Acceleration time required to
reach operation speed *1
Acceleration/deceleration time
(Acceleration time)
*1.
Caution when the approximate S-shaped acceleration/deceleration function is used
Speed
Acceleration/deceleration time
(Acceleration time)
Maximum speed
7
Buffer Memory
• The acceleration/deceleration time cannot be set individually. Acceleration/deceleration is executed at the
set value of the acceleration time.
• Set the acceleration/deceleration time within the range from 1 ms to 5000 ms.
• The operation speed change function and the target address change function cannot be used.
• If deceleration is executed before acceleration ends, the approximate S-shaped acceleration/deceleration
is executed at the deceleration start position. At this time, the times required for the acceleration and the
deceleration become same.
6
Before Starting
Positioning
Operation
Acceleration time required to reach operation speed = Operation speed I ÷ Maximum speed ×
Acceleration/deceleration time
8
Manual Control
Operation speed
9
Positioning
Control
Bias speed
10
Program
Example
Time
Time required for acceleration = Time required for deceleration
47
6 Before Starting Positioning Operation
FX3U-1PG User's Manual
6.9
6.9 Cautions for Positioning Operation
Cautions for Positioning Operation
• Set the relative travel distance (travel distance from the current value to the target address) in the
positioning operation to a converted pulse value within ±32 bits (-2,147,483,648 to +2,147,483,647 PLS).
When the relative travel distance exceeds 32 bit in the pulse conversion value, the set value overflow
error occurs.
• Only in the variable speed operation and the external command positioning operation, can a negative
value can be set to operation speed I and operation speed II.
• When operation speed I, operation speed II, JOG speed, zero return speed (high speed), and zero return
speed (creep) is at the bias speed or slower, operation is executed at the bias speed. However, if the bias
speed is 0, operation is executed at 1 Hz.
• When operation speed I, operation speed II, JOG speed, zero return speed (high speed), and zero return
speed (creep) is at the maximum speed or faster, operation is executed at the maximum speed.
• Setting of the positioning parameter selection (BFM#32) determines whether the positioning parameter is
used or the extension positioning parameter is used. Set the buffer memories that correspond to the
selected positioning parameter.
• For approximate S-shaped acceleration/deceleration, set the acceleration/deceleration time within the
range from 1 ms to 5000 ms.
• When several operation start commands turn on at the same time in the operation command (BFM#25 b6,
b8 to b15), the positioning operation is not executed. The operation command multiple selection error
occurs.
• When another operation command is turned on during operation, the operation command turned on later is
ignored, and no error will occur.
• The FX3U-1PG continues the positioning operation even if the PLC mode changes from RUN to STOP
during the positioning operation.
6.9.1
Command error when machine system units are used and when combined system
units are used
When the pulse rate is A, the feed rate is B and the relative travel distance is C, the value "C × (A/B)"
indicates the pulse quantity which should be generated by the FX3U-1PG.
Even if the value "(A/B)" is not an integer, error is not generated in the command if the value "C × (A/B)" is
integer.
However, when C x (A/B) is not an integer, an error within 1 pulse when rounding off occurs.
When the operation is executed using the absolute address specification, an error within one pulse by
rounding off occurs. When positioning operation is repeatedly made using relative address specification,
errors accumulate.
Point
• Error accumulation does not occur in the case of the motor system unit.
• When the travel distance (PLS) exceeds 32 bit, the set value overflow error occurs.
• When the maximum speed, bias speed exceeds 200 kHz, the numeral value set failure error occurs.
48
6 Before Starting Positioning Operation
FX3U-1PG User's Manual
1
Stepwise output pulse
Introduction
6.9.2
6.9 Cautions for Positioning Operation
The output pulse frequency (f) of FX3U-1PG is stepwise as follows.
f
24×10 6
n
1 to 200,000 Hz
2
Specification
Where, n: Integer in range of 120 to 24,000,000
For example,
n = 120 f = 200,000 Hz
n = 121 f = 198,347 Hz
Any pulse whose frequency is between the two values above cannot be generated.
3
Point
System
Configuration
In the operation speed current value (BFM#61, #60), the actual operation speed is stored. Because the actual
output pulse is stepwise, it is possible that the current operation speed value is different from the user set
operation speed I (BFM#20, #19), the operation speed II (BFM#24, #23), and the operation speed change
value (BFM#56, #55).
4
Installation
5
Wiring
6
Before Starting
Positioning
Operation
7
Buffer Memory
8
Manual Control
9
Positioning
Control
10
Program
Example
49
7 Buffer Memory
FX3U-1PG User's Manual
7.
7.1 How to Read/Write from/to Buffer Memory
Buffer Memory
The FX3U-1PG positioning parameter, control data, and monitor data are read/written from/to the PLC via the
buffer memory (BFM).
When the FX3U-1PG power supply is off, the buffer memory data is cleared, and initial values are written
when the power supply is turned on.
The buffer memory is mainly classified into the following three types.
• Positioning parameters (BFM#0 to #15, #32 to #52)
The positioning parameters to set speed and units of measurement.
For details, refer to Section 7.3.
• Control data (BFM#16 to #25, #53 to #57)
The control data is user-specified data for controlling the positioning control.
For details, refer to Section 7.4.
• Monitor data (BFM#26 to #30, #58 to #62)
Operating conditions for the positioning control are stored as monitor data.
For details, refer to Section 7.5.
Caution
The instruction data format (FROM/TO, DFROM/DTO, etc.) must match the target BFM's data format. When
the instruction data format does not match the target BFM's data format (16-bit/32-bit), the FX3U-1PG will not
read/write data to the BFM properly, and no error will appear. This may cause an operation error for
positioning.
7.1
How to Read/Write from/to Buffer Memory
To read/write from/to buffer memory in the FX3U-1PG, use the FROM/TO instructions or applied instructions
that directly specify the buffer memory. For details on the other methods, refer to the following Manual.
Refer to Programming manual.
7.1.1
Direct specification of buffer memory
When directly specifying the buffer memory, specify the following device in the source or destination area of
the applied instruction as follows:
is substituted with a number
Buffer memory No. (0 to 32766)
Unit No. (0 to 7)
1. Reading out BFM data to PLC (MOV instruction)
If the following program is created, 1 point of data will be read out from the buffer memory BFM#30 of unit No. 1
to data register D10.
Read command
FNC 12
MOV
U1\G30
D10
Unit No.
Buffer memory No.
Transfer result
2. Writing PLC data into BFM (MOV instruction)
If the following program is created, 1 point of data (K4000) will be written to buffer memory BFM#0 of unit No. 1.
Write command
FNC 12
MOV
K4000
U1\G0
Buffer memory No.
Transfer source
50
Unit No.
7 Buffer Memory
FX3U-1PG User's Manual
1
FROM/TO instructions
Introduction
7.1.2
7.1 How to Read/Write from/to Buffer Memory
1. FROM instruction (Reading out BFM data to PLC)
Use the FROM instruction to read the data from the buffer memory.
If the following program is created, 1 point of data will be read out from the buffer memory BFM#30 of unit No. 1
to data register D10.
FNC 78
FROM
K1
K30
D10
Specification
Read command
K1
Unit No.
Number of transfer points
Buffer memory No.
3
Transfer destination
Use the TO instruction to write data to the buffer memory.
If the following program is created, 1 point of data (K4000) will be written to buffer memory BFM#0 of unit No. 1.
Unit No.
Buffer memory No.
K1
K0
K4000
4
K1
Installation
FNC 79
TO
System
Configuration
2. TO instruction (Writing PLC data into BFM)
Write command
2
Number of transfer points
Transfer source
5
Wiring
6
Before Starting
Positioning
Operation
7
Buffer Memory
8
Manual Control
9
Positioning
Control
10
Program
Example
51
7 Buffer Memory
FX3U-1PG User's Manual
7.2
7.2 Buffer Memory List
Buffer Memory List
The table below provides a brief description and reference information for the FX3U-1PG buffer memory.
For details on the buffer memory, refer to the Section 7.3 or later.
Control data
Positioning parameter
BFM No.
Item
Default
R/W Reference
Number of pulses to rotate the motors once.
1 to 32,767 PLS/REV
K2,000
R/W
Subsection
7.3.1
Feed rate
Travel distance per revolution of the motor.
1 to 2,147,483,647 (user unit)
K1,000
R/W
Subsection
7.3.2
#3
Operation parameter
Setting of basic conditions such as the unit
system
H0000
R/W
Subsection
7.3.3
#5
#4
Maximum speed
1 to 2,147,483,647 (user unit)
Set the value within 1 to 200,000 Hz when
converted to pulse data.
K100,000
R/W
Subsection
7.3.4
-
#6
Bias speed
0 to 32,767 (user unit)
Set the value within 0 to 200,000 Hz when
converted to pulse data.
K0
R/W
Subsection
7.3.6
#8
#7
JOG speed
1 to 2,147,483,647 (user unit)
Set the value within 1 to 200,000 Hz when
converted to pulse data.
K10,000
R/W
Subsection
7.3.6
#10
#9
Zero return speed
(high speed)
1 to 2,147,483,647 (user unit)
Set the value within 1 to 200,000 Hz when
converted to pulse data.
K50,000
R/W
Subsection
7.3.7
-
#11
Zero return speed
(creep)
1 to 32,767 (user unit)
Set the value within 1 to 200,000 Hz when
converted to pulse data.
K1,000
R/W
Subsection
7.3.8
-
#12
Number of zero-point Number of zero-point signals for zero return
signal for zero return
0 to 32,767
K10
R/W
Subsection
7.3.9
#14
#13
Zero-point address
Address at zero return completion
-2,147,483,648 to 2,147,483,647 (user unit)
Set the value within -2,147,483,648 to
2,147,483,647 PLS when converted to pulse data.
K0
R/W
Subsection
7.3.10
K100
R/W
Subsection
7.3.11
High order
16bit
Low order
16bit
-
#0
Pulse rate
#2
#1
-
Content, Setting range
-
#15
Acceleration/
deceleration time
Time between the bias speed and the maximum
speed
Trapezoidal acceleration/deceleration:
1 to 32,767 ms
Approximate S-shaped acceleration/deceleration:
1 to 5,000 ms
-
#16
Starting delay time
Starting delay time
0 to 1,000 ms
K0
R/W
Subsection
7.4.1
#18
#17
Target address Ι
-2,147,483,648 to 2,147,483,647 (user unit)
Set the value within -2,147,483,648 to
2,147,483,647 PLS when converted to pulse data.
K0
R/W
Subsection
7.4.2
#20
#19
Operation speed Ι
K10
R/W
Subsection
7.4.3
K0
R/W
Subsection
7.4.4
K10
R/W
Subsection
7.4.5
H0000
R/W
Subsection
7.4.6
K0
R/W
Subsection
7.5.1
-
R
Subsection
7.5.2
K0
R
Subsection
7.5.3
K5,130
R
Subsection
7.5.4
1 to 2,147,483,647 (user unit)
Set the value within 1 to 200,000 Hz when
converted to pulse
#22
#21
Target address ΙΙ
#24
#23
Operation speed ΙΙ
-2,147,483,648 to 2,147,483,647 (user unit)
Set the value within -2,147,483,648 to
2,147,483,647 PLS when converted to pulse data.
1 to 2,147,483,647 (user unit)
Set the value within 1 to 200,000 Hz when
Monitor data
converted to pulse
52
data.*1
data.*2
-
#25
Operation command
Operation information such as the positioning
operation command
#27
#26
Current address
-2,147,483,648 to 2,147,483,647 (user unit)
-
#28
Status information
Status information such as READY
-
#29
Error code
An error code is stored at the time of the error
occurrence.
-
#30
Model code
The model code of the FX3U-1PG is stored.
7 Buffer Memory
FX3U-1PG User's Manual
7.2 Buffer Memory List
1
Default
-
-
-
-
Positioning parameter type is selected.
H0000
R/W
Subsection
7.3.12
Pulse rate
Number of pulses to rotate the motors once.
1 to 2,147,483,647 PLS/REV
K2,000
R/W
Subsection
7.3.13
#35
Feed rate
Travel distance per revolution of the motor.
1 to 2,147,483,647 (user unit)
K1,000
R/W
Subsection
7.3.14
-
#37
Operation parameter
Setting of basic conditions such as the unit
system
H0000
R/W
Subsection
7.3.15
#39
#38
Maximum speed
1 to 2,147,483,647 (user unit)
Set the value within 1 to 200,000 Hz when
converted to pulse data.
K100,000
R/W
Subsection
7.3.16
#41
#40
Bias speed
0 to 2,147,483,647 (user unit)
Set the value within 1 to 200,000 Hz when
converted to pulse data.
K0
R/W
Subsection
7.3.17
#43
#42
JOG speed
1 to 2,147,483,647 (user unit)
Set the value within 1 to 200,000 Hz when
converted to pulse data.
K10,000
R/W
Subsection
7.3.18
4
#45
#44
Zero return speed
(high speed)
1 to 2,147,483,647 (user unit)
Set the value within 1 to 200,000 Hz when
converted to pulse data.
K50,000
R/W
Subsection
7.3.19
#47
#46
Zero return speed
(creep)
1 to 2,147,483,647 (user unit)
Set the value within 1 to 200,000 Hz when
converted to pulse data.
K1,000
R/W
Subsection
7.3.20
#48
Number of zero-point Number of zero-point signals for zero return
signal for zero return
0 to 32,767
Low order
16bit
-
#31
Not used
-
#32
Positioning
selection
#34
#33
#36
Control data
Zero-point address
Address at the zero return completion
-2,147,483,648 to 2,147,483,647 (user unit)
Set the value within -2,147,483,648 to
2,147,483,647 PLS when converted to pulse data.
K0
R/W
Acceleration time
Time from the bias speed to the maximum speed
Trapezoidal acceleration/deceleration:
1 to 32,767 ms
Approximate S-shaped acceleration/deceleration:
1 to 5,000 ms
However, the acceleration and deceleration
times are the same for approximate S-shaped
acceleration/deceleration.
K100
Time from the maximum speed to the bias speed
Trapezoidal acceleration/deceleration:
1 to 32,767ms
Approximate S-shaped acceleration/deceleration:
Same as the acceleration time
K100
R/W
Subsection
7.3.24
K0
R/W
Subsection
7.4.7
K0
R/W
Subsection
7.4.8
H0000
R/W
Subsection
7.4.9
K0
R/W
Subsection
7.5.5
9
K0
R
Subsection
7.5.6
-
R
Subsection
7.5.7
-
#52
Deceleration time
#54
#53
-2,147,483,648 to 2,147,483,647 (user unit)
Target address change
Set the value within -2,147,483,648 to
value
2,147,483,647 PLS when converted to pulse data.
#56
#55
Operation speed
change value
1 to 2,147,483,647 (user unit)
Set the value within 1 to 200,000 Hz when
converted to pulse
6
R/W
Operation command ΙΙ
Interrupt input via the PLC (BFM)
#59
#58
Current address
-2,147,483,648 to 2,147,483,647 PLS
(pulse converted value)
#61
#60
Current value of
operation speed
0 to 2,147,483,647 (user unit)
-
#62
Version information
The version of FX3U-1PG is stored.
R/W : Read or Write
R : Read only
8
Positioning
Control
#57
Subsection
7.3.23
7
data.*2
-
Subsection
7.3.22
Buffer Memory
Monitor data
K10
Manual Control
#51
5
Subsection
R/W
7.3.21
Before Starting
Positioning
Operation
-
#49
3
Wiring
#50
2
Installation
-
parameter
R/W Reference
Specification
Positioning parameter
Content, Setting range
System
Configuration
-
Item
Introduction
BFM No.
High order
16bit
10
Program
Example
53
7 Buffer Memory
FX3U-1PG User's Manual
54
7.2 Buffer Memory List
*1.
In case of external command positioning operation
-2,147,483,647 to -1, 1 to 2,147,483,647 (user unit). Set the value within -200,000 to -1, 1 to 200,000
Hz when converted to pulse data.
In case of variable speed operation
-2,147,483,647 to 2,147,483,647 (user unit). Set the value within -200,000 to 200,000 Hz when
converted to pulse data.
*2.
In case of external command positioning operation
-2,147,483,647 to -1, 1 to 2,147,483,647 (user unit). Set the value within -200,000 to -1, 1 to 200,000
Hz when converted to pulse data.
7 Buffer Memory
FX3U-1PG User's Manual
1
Positioning Parameters
Set the units and speed used for positioning control.
For the positioning parameter, there are two types: the extension positioning parameter, for which the setting
range is extended, and the positioning parameter. The difference between the positioning parameter and the
extension positioning parameter is as follows.
3
[BFM#0] Pulse rate
BFM No.
Low order
16bit
-
#0
Description
Setting range: 1 to 32,767 PLS/REV
R/W
Default
R/W
K2,000
Point
• If any electronic gearing is present in the servo amplifier, it is necessary to consider its effect.
The relationship between pulse rate and electronic gearing is shown below.
Pulse rate = Resolution power of encoder (positioning feedback pulses) ÷ Electronic gearing
7
Buffer Memory
• When the extension positioning parameter is used, use the pulse rate (BFM#34, #33).
[BFM#2, #1] Feed rate
BFM No.
#2
#1
Description
Setting range: 1 to 2,147,483,647 (μm/REV, mdeg/REV, 10-4 inch/REV)
R/W
Default
R/W
K1,000
Point
When the extension positioning parameter is used, use the feed rate (BFM#36, #35).
9
Positioning
Control
Low order
16bit
8
Manual Control
Set the travel distance of the machine for one turn of the motor.
Setting is necessary when the unit system is set to "machine system unit" or "combined system unit."
When "motor system unit" is selected, the setting here will be ignored.
For details on the system of units, refer to Subsection 7.3.3.
High order
16bit
6
Before Starting
Positioning
Operation
High order
16bit
5
Wiring
Set the number of pulses required to rotate the motor for one turn.
Setting is necessary when the unit system is set to "machine system unit" or "combined system unit."
When "motor system unit" is selected, the setting here will be ignored.
For details on the system of units, refer to Subsection 7.3.3.
4
Installation
• Setting of the positioning parameter selection (BFM#32) determines whether the positioning parameter is
used or the extension positioning parameter is used.
System
Configuration
Specification
• Extension positioning parameter (#32 to #52)
Different allocation from the BFM of the FX2N-1PG. It uses the extended set range of the pulse rate, the
bias speed, and the creep speed. Or, it is used when setting the acceleration time and the deceleration
time individually.
• The positioning parameter becomes valid at operation start-up. Therefore, set before the start-up of the
operation.
When the setting is changed during operation or during the remaining distance operation waiting, the
change is not reflected to the current operation but from the next operation.
7.3.2
2
• Positioning parameter (BFM#0 to #15)
Same allocation as the BFM of the FX2N-1PG. It is used when operation is executed without changing the
FX2N-1PG program.
Point
7.3.1
Introduction
7.3
7.3 Positioning Parameters
10
Program
Example
55
7 Buffer Memory
FX3U-1PG User's Manual
7.3.3
7.3 Positioning Parameters
[BFM#3] Operation parameter
Set basic conditions such as the unit system.
BFM No.
High order
16bit
Low order
16bit
-
#3
Description
Refer to the following.
R/W
Default
R/W
H0000
Point
When the extension positioning parameter is used, use the operation parameter (BFM#37).
b1, b0: System of units
Units for positioning control are set as follows.
Bit status
b1
b0
System of
units
Position unit
Speed unit
Remarks
0
0
Motor system
PLS
Hz
The pulse number is used as the standard for the position
command and the operation speed.
0
1
Machine
system
μm
mdeg
cm/min
10deg/min
inch/min
μm, mdeg, and 10-4 inch is used as the standard for the
position command and the speed.
Hz
Combined units are used, such as the machine system unit for
the position command and the motor system unit for the speed
command.
1
1
0
1
Combined
system
10-4
inch
μm
mdeg
10-4 inch
Conversion of the unit system
The following relationship exists between the motor system unit and the machine system unit, and the pulse
conversion is executed automatically.
• Travel distance (PLS) = Travel distance (μm, mdeg, 10-4 inch) × Pulse rate × Position data multiplier ÷
Feed rate
• Operation speed (Hz) = Operation speed (cm/min, 10deg/min, inch/min) × Pulse rate × 104 ÷ Feed rate ÷ 60
For the command errors, refer to Subsection 6.9.1.
Point
• When the unit system is set to the machine system unit or the combined system unit, settings of the pulse
rate and the feed rate are necessary.
• When the operation speed is executed in the machine system unit, set the value such that its pulse
converted equivalent is within the motor system unit (Hz) range or the combined system unit (Hz) range.
56
7 Buffer Memory
FX3U-1PG User's Manual
7.3 Positioning Parameters
1
Setting example
Condition
Setting item
Setting value
Feed rate
(BFM#2, #1 or BFM#36, #35)
100 [μm/REV, mdeg/REV, 10-1 minch/REV]
Position data multiplier
[BFM#3 (b5, b4) or BFM#37 (b5, b4)]
0, 0
(b5=0, b4=0)
Electronic gear in servo amplifier
(Setting of the servo amplifier side)
1/1
The travel distance is regarded as "μm",
"mdeg" or "10-4 inch".
4
*1.
The unit is aligned during calculation. 1 cm = 104 μm, 1 min = 60 s.
The unit is aligned during calculation. 1 deg = 103 mdeg, 1 min = 60 s.
9
Positioning
Control
*3.
8
Manual Control
When you set values in "10-4 inch"
In a positioning operation with travel distance of 100 [× 10-4 inch] and operation speed of 6 [inch/min], the
following pulse output is given.
Generated pulse quantity = Travel distance ÷ Feed rate × Pulse rate
= 100 [× 10-4 inch] ÷ 100 [× 10-4 inch/REV] × 4,000 [PLS/REV]
= 4,000 [PLS]
Pulse frequency = Operation speed*3 ÷ Feed rate × Pulse rate
= 6 [inch/min] × 104 ÷ 60 ÷ 100 [× 10-4 inch/REV] × 4,000 [PLS/REV]
= 40,000 [Hz]
7
Buffer Memory
*2.
6
Before Starting
Positioning
Operation
When you set values in "mdeg"
In a positioning operation with travel distance of 100 [mdeg] and operation speed of 6 [10 deg/min], the
following pulse output is given.
Generated pulse quantity = Travel distance ÷ Feed rate × Pulse rate
= 100 [mdeg] ÷ 100 [mdeg/REV] × 4,000 [PLS/REV]
= 4,000 [PLS]
Pulse frequency = Operation speed*2 ÷ Feed rate*2 × Pulse rate
= 6 [10deg/min] × 104 ÷ 60 ÷ 100 [mdeg/REV] × 4,000 [PLS/REV]
= 40,000 [Hz]
5
Wiring
When you set values in "μm"
In a positioning operation with travel distance of 100 [μm] and operation speed of 6 [cm/min], the following
pulse output is given.
Generated pulse quantity = Travel distance ÷ Feed rate × Pulse rate
= 100 [μm] ÷ 100 [μm/REV] × 4,000 [PLS/REV]
= 4,000 [PLS]
Pulse frequency = Operation speed*1 ÷ Feed rate*1 × Pulse rate
= 6 [cm/min] × 104 ÷ 60 ÷ 100 [μm/REV] × 4,000 [PLS/REV]
= 40,000 [Hz]
Installation
4,000 [PLS/REV]
3
Remarks
System
Configuration
Pulse rate
(BFM#0 or BFM#34, #33)
2
Specification
When operation parameter BFM#3 (b1, b0) or BFM#37 (b1, b0) (system of units) is set to "(0, 1)", "(1, 0)" or
"(1, 1)", the mechanical system of units ("μm", "mdeg", "10-4 inch") is selected. At this time, there is no
positioning parameter to select any one among "μm", "mdeg", "10-4 inch". However, because all of the
positioning parameters (extension positioning parameters) as well as the positioning data and the speed data
used in the positioning program adopt the same unit, the same pulse output is acquired without regard to the
unit as long as the set value is equivalent.
Introduction
Concept of mechanical system of units
The unit is aligned during calculation. 1 min = 60 s.
10
Program
Example
57
7 Buffer Memory
FX3U-1PG User's Manual
7.3 Positioning Parameters
How to use an electronic gear
Some servo motors require pulse trains at 200 kHz or more (in calculation) in order to satisfy the rated
rotation speed. For example, the command pulse frequency required to operate the MR-JN Series servo
amplifier and HF-KN Series servo motor manufactured by Mitsubishi at the rated rotation speed of 3,000 rev/
min can be obtained as follows.
(Suppose that the electronic gear ratio is the initial value "1/1", the number of command input pulses per
revolution is the initial value "10,000".)
f0 = FBP × 100 ×
f0 = 10,000 ×
CDV
N0
×
CMX
60
3,000
×1
60
f0
: Command pulse frequency [Hz]
(open collector type)
CMX
: Electronic gear (numerator of command
pulse magnification)
CDV
: Electronic gear (denominator of command
pulse magnification)
N0
: Rotation speed of servo motor [rev/min]
f0 = 500,000 [Hz]
FBP×100 : Number of command input pulses per
revolution [PLS/REV]
However, because the input command pulse in the open collector type servo amplifier and the pulse output
from the FX3U-1PG is 200 kHz maximum, operation at 500,000 Hz is impossible.
In such a case, you should change the electronic gear in the servo amplifier.
The electronic gear can be obtained as follows.
CMX
N0 1
= FBP × 100 ×
×
CDV
f0
60
f0
: Command pulse frequency [Hz]
(open collector type)
CMX
3,000
1
= 10,000 ×
×
CDV
60
200,000
CMX
5
=
CDV
2
CMX
: Electronic gear (numerator of command
pulse magnification)
CDV
: Electronic gear (denominator of command
pulse magnification)
N0
: Rotation speed of servo motor [rev/min]
FBP×100 : Number of command input pulses per
revolution [PLS/REV]
The table below shows the setting of major electronic gears and pulse rates obtained by the above
calculation.
Rated rotation
speed of servo
motor
3,000 r/min
58
Servo amplifier
Maximum input pulse
frequency
200 kHz
(open collector)
Command pulse frequency (200 kHz)
Number of command
input pulses per
revolution
10,000 PLS/REV
Electronic gear
Pulse rate
5/2
50,000 PLS/REV
25/2
131,072 PLS/REV
4,096/125
4,000 PLS/REV
7 Buffer Memory
FX3U-1PG User's Manual
7.3 Positioning Parameters
Bit status
Interrupt input 1
0
DOG
STOP
1
DOG
INT1
1
0
INT0
STOP
1
1
INT0
INT1
b2
0
0
2
Specification
Interrupt input 0
b3
Magnification
b4
0
0
100
0
1
101
1
0
102
1
1
103
4
Installation
b5
b6: Acceleration/deceleration mode
Set the acceleration/deceleration mode.
b6 = 0: Use trapezoidal acceleration/deceleration.
b6 = 1: Use approximate S-shaped acceleration/deceleration.
6
Before Starting
Positioning
Operation
b7: Variable speed operation acceleration/deceleration setting
Set whether acceleration/deceleration is set for the variable speed operation.
b7 = 0: Variable speed operation without acceleration/deceleration
b7 = 1: Variable speed operation with acceleration/deceleration
Forward pulse
OFF
8
ON
Manual Control
OFF
Reverse pulse
ON
b8 = 1: Pulse (PLS)/Direction (DIR)
ON
Forward
Reverse
Positioning
Control
RP
(DIR)
9
OFF
FP
(PLS)
7
Buffer Memory
b8: Pulse output format
Set the pulse output format. When it is set, the ON/OFF condition of the pulse output terminal FP/RP changes
as follows.
b8 = 0: Forward pulse (FP)/Reverse pulse (RP)
FP
5
Wiring
Example of setting: When b5, b4 = (1, 1)
When the target address I (BFM#18, #17) = 123, the actual address or the travel distance becomes as follows.
Motor system of units: 123×103 = 123,000 PLS
Machine system of units, Combined system of units: 123×103 = 123,000 (μm, mdeg, 10-4 inch)
= 123 (mm, deg, 10-1 inch)
RP
3
System
Configuration
b5, b4: Position data multiplier
Multiplier for the position data written for the zero-point address (BFM#14, #13), the target address I
(BFM#18, #17), the target address II (BFM#22, #21), the current address (BFM#27, #26), and the target
address change value (BFM#54, #53).
Bit status
1
Introduction
b3, b2: Interrupt input setting
The interrupt signals used for interrupt inputs in the interrupt 1-speed positioning operation, external
command positioning operation, interrupt stop operation or interrupt 2-speed positioning operation are set.
OFF
ON
59
10
Program
Example
b9: Rotation direction
Set the rotating direction. It is used for the initial setting. It is not necessary to change the rotating direction for
each actual operation.
b9 = 0: The current address increases with forward pulse (FP).
b9 = 1: The current address decreases with forward pulse (FP).
7 Buffer Memory
FX3U-1PG User's Manual
7.3 Positioning Parameters
b10: Zero return direction
Set the zero return direction.
b10 = 0: At the time of zero return, the operation starts toward the direction in which the current address
decreases.
b10 = 1: At the time of zero return, the operation starts toward the direction in which the current address
increases.
b11: Limit deceleration mode
Set the operation when the forward limit/reverse limit turns on.
b11 = 0: When the forward limit/reverse limit turns on, the operation immediately stops and outputs the CLR
signal.
b11 = 1: When the forward limit/reverse limit turns on, the operation decelerates and stops. The CLR signal is
not output.
b12: DOG input polarity
The polarity of the DOG input is set.
b12 = 0: Normally-opened (operates when the DOG input is on)
b12 = 1: Normally-closed (operates when the DOG input is off)
b13: Count start point
Set the count start point for zero-point signal.
b13 = 0: DOG forward end (After DOG forward end detection, the zero-point signal count starts.)
b13 = 1: DOG backward end (After DOG forward end detection and backward end finish, the zero-point signal
count starts.)
b14: STOP input polarity
The polarity of the STOP input is set. It is valid only for the input of the FX3U-1PG STOP terminal.
b14 = 0: Normally-opened (operates when the STOP input is ON)
b14 = 1: Normally-closed (operates when the STOP input is OFF)
b15: STOP input mode
The operation for the STOP input is set.
b15 = 0: After deceleration stop by STOP command is executed during operation, the remaining distance
operation is executed when the restart command is given.
b15 = 1: After deceleration stop by STOP command is executed during operation, the positioning ends
without executing the remaining distance operation.
7.3.4
[BFM#5, #4] Maximum speed
Sets the upper speed limit in each operation.
For details on the maximum speed, refer to Section 6.2.
BFM No.
High order
16bit
Low order
16bit
#5
#4
Description
R/W
Setting range: 1 to 2,147,483,647 (user unit)
R/W
The value must be within the range from 1 to 200,000 Hz when converted to pulse data.
Default
K100,000
Point
• For the JOG speed, zero return speed (high speed), zero return speed (creep), operation speed I, and
operation speed II, set the speed same or lower than the maximum speed. When the set speed is higher
than the maximum speed, the operation is executed at the maximum speed.
• When the extension positioning parameter is used, use the maximum speed (BFM#39, #38).
60
7 Buffer Memory
FX3U-1PG User's Manual
1
[BFM#6] Bias speed
Set the bias speed at the time of startup.
When the FX3U-1PG and the stepping motor are combined and used together, set the speed taking the
resonance area and the self-start frequency of the stepping motor into account.
For details on the bias speed, refer to Section 6.2.
High order
16bit
Low order
16bit
-
#6
Description
R/W
Setting range: 0 to 32,767 (user unit)
R/W
The value must be within the range from 0 to 200,000 Hz when converted to pulse data.
Default
K0
3
Point
System
Configuration
• For the bias speed, set the value the same or lower than the maximum speed.
• When the extension positioning parameter is used, use the bias speed (BFM#41, #40).
7.3.6
2
Specification
BFM No.
Introduction
7.3.5
7.3 Positioning Parameters
[BFM#8, #7] JOG speed
BFM No.
High order
16bit
Low order
16bit
#8
#7
Description
R/W
Default
Setting range: 1 to 2,147,483,647 (user unit)
R/W
The value must be within the range from 1 to 200,000 Hz when converted to pulse data.
K10,000
4
Installation
Set the speed of the manual forward JOG/reverse JOG operation.
For details on the JOG speed, refer to Section 8.2.
5
Wiring
Point
• Set the JOG speed in the range between the bias speed and the maximum speed.
• When the extension positioning parameter is used, use the JOG speed (BFM#43, #42).
7.3.7
[BFM#10, #9] Zero return speed (high speed)
BFM No.
High order
16bit
Low order
16bit
#10
#9
Description
R/W
Default
Setting range: 1 to 2,147,483,647 (user unit)
R/W
The value must be within the range from 1 to 200,000 Hz when converted to pulse data.
K50,000
• Set the zero return speed (high speed) in the range between the bias speed and the maximum speed.
• When the zero return speed (high speed) is at the maximum speed or higher, the operation is executed at
the maximum speed. When the zero return speed (high speed) is at the bias speed or lower, the operation
is executed at the bias speed. However, if the bias speed is 0, the operation is executed at 1 Hz.
9
Positioning
Control
• When the extension positioning parameter is used, use the zero return speed (high speed) (BFM#45, #44).
8
Manual Control
Point
7
Buffer Memory
Set the high-speed return speed in the mechanical zero return.
For details on the mechanical zero return, refer to Section 8.3.
6
Before Starting
Positioning
Operation
• When the JOG speed is at the maximum speed or higher, the operation is executed at the maximum
speed. When the JOG speed is at the bias speed or lower, the operation is executed at the bias speed.
However, if the bias speed is 0, the operation is executed at 1 Hz.
10
Program
Example
61
7 Buffer Memory
FX3U-1PG User's Manual
7.3.8
7.3 Positioning Parameters
[BFM#11] Zero return speed (creep)
In the mechanical zero return, the operation speed after the near point signal (DOG) input is set.
For details on the mechanical zero return, refer to Section 8.3.
BFM No.
High order
16bit
Low order
16bit
-
#11
Description
R/W
Default
Setting range: 1 to 32,767 (user unit)
R/W
The value must be within the range from 1 to 200,000 Hz when converted to pulse data.
K1,000
Point
• Set the zero return speed (creep) in the range between the bias speed and the maximum speed. However,
set the speed at the zero return speed (high speed) or slower.
• When the zero return speed (creep) is at the maximum speed or higher, the operation is executed at the
maximum speed. When the zero return speed (creep) is at the bias speed or lower, the operation is
executed at the bias speed. However, if the bias speed is 0, the operation is executed at 1 Hz.
• To increase the stop accuracy at the zero position, it is recommended to keep the creep speed as low as
possible.
• When the extension positioning parameter is used, use the zero return speed (creep) (BFM#47, #46).
7.3.9
[BFM#12] Number of zero-point signal for zero return
Set the zero-point signal count that is used for the mechanical zero return.
For details on the mechanical zero return, refer to Section 8.3.
BFM No.
High order
16bit
Low order
16bit
-
#12
Description
Setting range: 0 to 32,767
R/W
Default
R/W
K10
Point
• The zero-point signal count is detected on the falling edge.
• When the zero-point signal count is set to 0, the operation immediately stops when the zero-point signal
count is started. In this case, the operation immediately stops from the zero return speed (high speed or
creep). If there is a possibility to damage the machine due to the immediate stop, be careful with the
following points.
- Set the zero return speed (creep) at a safe speed.
- Set the zero-point signal count start point at DOG backward end.
- Design the DOG such that the speed can be reduced to the zero return speed (creep) until the start of
the zero-point signal count.
• When the extension positioning parameter is used, use the number of zero-point signal for zero return
(BFM#48).
62
7 Buffer Memory
FX3U-1PG User's Manual
7.3 Positioning Parameters
1
Set the zero-point address when the zero return operation is completed.
When the zero return operation completes, this value is written to the current address.
For the zero return operation, refer to Section 8.3.
BFM No.
Low order
16bit
#14
#13
Description
Setting range: -2,147,483,648 to 2,147,483,647 (user unit)
Set the value within -2,147,483,648 to 2,147,483,647 PLS in the converted pulse data.
R/W
Default
R/W
K0
Point
3
System
Configuration
• Value is in user units and includes the position data multiplier.
• When the extension positioning parameter is used, use the zero-point address (BFM#50, #49).
7.3.11 [BFM#15] Acceleration/deceleration time
BFM No.
-
#15
Description
Setting range:
Trapezoidal acceleration/deceleration: 1 to 32,767 ms
Approximate S-shaped acceleration/deceleration: 1 to 5,000 ms
R/W
Default
R/W
K100
5
Wiring
Low order
16bit
4
Installation
Set the time required to accelerate from the bias speed to the maximum speed (decelerate from the
maximum speed to the bias speed).
For details on the acceleration/deceleration time, refer to Section 6.2.
High order
16bit
2
Specification
High order
16bit
Introduction
7.3.10 [BFM#14, #13] Zero-point address
Point
When the extension positioning parameter is used, use the acceleration time (BFM#51) and the deceleration
time (BFM#52). It is necessary to set the acceleration time (BFM#51) and the deceleration time (BFM#52)
individually.
6
Before Starting
Positioning
Operation
7
Buffer Memory
8
Manual Control
9
Positioning
Control
10
Program
Example
63
7 Buffer Memory
FX3U-1PG User's Manual
7.3 Positioning Parameters
7.3.12 [BFM#32] Positioning parameter selection
Select whether the positioning parameter (BFM#0 to #15) is used or the extension positioning parameter
(BFM#33 to #52) is used.
BFM No.
High order
16bit
Low order
16bit
-
#32
Description
b0 = OFF (0): Positioning parameter (BFM#0 to #15) is used
b0 = ON (1): Extension positioning parameter (BFM#32 to #52) is used
b1 to b15: Not used
R/W
Default
R/W
H0000
Point
• When the parameter is changed during the operation, the change becomes valid from the next operation.
• Set the positioning parameter to the buffer memory that corresponds to the selected positioning parameter.
7.3.13 [BFM#34, #33] Pulse rate
Set the number of pulses required to rotate the motor for one turn.
Setting is necessary when the unit system is set to "machine system unit" or "combined system unit."
When "motor system unit" is selected, the setting here will be ignored.
For details on the system of units, refer to Subsection 7.3.15.
BFM No.
High order
16bit
Low order
16bit
#34
#33
Description
Setting range: 1 to 2,147,483,647 PLS/REV
R/W
Default
R/W
K2,000
Point
• If any electronic gearing is present in the servo amplifier, it is necessary to consider its effect.
The relationship between pulse rate and electronic gearing is shown below.
Pulse rate = Resolution power of encoder (positioning feedback pulses) ÷ Electronic gearing
• When the positioning parameter is used, use the pulse rate (BFM#0).
7.3.14 [BFM#36, #35] Feed rate
Set the travel distance of the machine for one turn of the motor.
Setting is necessary when the unit system is set to "machine system unit" or "combined system unit."
When "motor system unit" is selected, the setting here will be ignored.
For details on the system of units, refer to Subsection 7.3.15.
BFM No.
High order
16bit
Low order
16bit
#36
#35
Description
Setting range: 1 to 2,147,483,647 (μm/REV, mdeg/REV, 10-4 inch/REV)
Point
When the positioning parameter is used, use the feed rate (BFM#2, #1).
64
R/W
Default
R/W
K1,000
7 Buffer Memory
FX3U-1PG User's Manual
7.3 Positioning Parameters
1
Introduction
7.3.15 [BFM#37] Operation parameter
Set basic conditions such as the unit system.
BFM No.
Low order
16bit
-
#37
Description
Refer to the following.
R/W
Default
R/W
H0000
Point
When the positioning parameter is used, use the operation parameter (BFM#3).
3
b0
System of
units
Position unit
Speed unit
Remarks
0
0
Motor system
PLS
Hz
The pulse number is used as the standard for the position
command and the operation speed.
0
1
Machine
system
μm
mdeg
cm/min
10deg/min
inch/min
μm, mdeg, and 10-4 inch is used as the standard for the
position command and the speed.
Hz
Combined units are used, such as the machine system unit for
the position command and the motor system unit for the speed
command.
1
1
0
1
Combined
system
10-4
inch
μm
mdeg
10-4 inch
Conversion of the unit system
5
Wiring
The following relationship exists between the motor system unit and the machine system unit, and the pulse
conversion is executed automatically.
4
Installation
b1
System
Configuration
b1, b0: System of units
Units for positioning control are set as follows.
Bit status
2
Specification
High order
16bit
• Travel distance (PLS) = Travel distance (μm, mdeg, 10-4 inch) × Pulse rate × Position data multiplier ÷
Feed rate
• Operation speed (Hz) = Operation speed (cm/min, 10deg/min, inch/min) × Pulse rate × 104 ÷ Feed rate ÷ 60
For the command errors, refer to Subsection 6.9.1.
• When the unit system is set to the machine system unit or the combined system unit, settings of the pulse
rate and the feed rate are necessary.
• When the operation speed is executed in the machine system unit, set the value such that its pulse
converted equivalent is within the motor system unit (Hz) range or the combined system unit (Hz) range.
For concept of mechanical system of units and how to use an electronic gear, refer to Subsection 7.3.3.
Bit status
Interrupt input 1
0
DOG
STOP
1
DOG
INT1
1
0
INT0
STOP
1
1
INT0
INT1
b2
0
0
9
Positioning
Control
Interrupt input 0
b3
8
Manual Control
b3, b2: Interrupt input setting
The interrupt signals used for interrupt inputs in the interrupt 1-speed positioning operation, external
command positioning operation, interrupt stop operation or interrupt 2-speed positioning operation are set.
7
Buffer Memory
Concept of mechanical system of units and how to use an electronic gear
Before Starting
Positioning
Operation
Point
6
10
Program
Example
65
7 Buffer Memory
FX3U-1PG User's Manual
7.3 Positioning Parameters
b5, b4: Position data multiplier
Multiplier for the position data written for the zero-point address (BFM#14, #13), the target address I
(BFM#18, #17), the target address II (BFM#22, #21), the current address (BFM#27, #26), and the target
address change value (BFM#54, #53).
Bit status
Magnification
b5
b4
0
0
100
0
1
101
1
0
102
1
1
103
Example of setting: When b5, b4 = (1, 1)
When the target address I (BFM#18, #17) = 123, the actual address or the travel distance becomes as
follows.
Motor system of units: 123×103 = 123,000PLS
Machine system of units, Combined system of units: 123×103 = 123,000 (μm, mdeg, 10-4 inch)
= 123 (mm, deg, 10-1 inch)
b6: Acceleration/deceleration mode
Set the acceleration/deceleration mode.
b6 = 0: Use trapezoidal acceleration/deceleration.
b6 = 1: Use approximate S-shaped acceleration/deceleration.
b7: Variable speed operation acceleration/deceleration setting
Set whether acceleration/deceleration is set for the variable speed operation.
b7 = 0: Variable speed operation without acceleration/deceleration
b7 = 1: Variable speed operation with acceleration/deceleration
b8: Pulse output format
Set the pulse output format. When it is set, the ON/OFF condition of the pulse output terminal FP/RP changes
as follows.
b8 = 0: Forward pulse (FP)/Reverse pulse (RP)
FP
RP
Forward pulse
OFF
ON
OFF
Reverse pulse
ON
b8 = 1: Pulse (PLS)/Direction (DIR)
OFF
FP
(PLS)
RP
(DIR)
ON
Forward
Reverse
OFF
ON
b9: Rotation direction
Set the rotating direction. It is used for the initial setting. It is not necessary to change the rotating direction for
each actual operation.
b9 = 0: The current address increases by with forward pulse (FP).
b9 = 1: The current address decreases by with forward pulse (FP).
b10: Zero return direction
Set the zero return direction.
b10 = 0: At the time of zero return, the operation starts toward the direction in which the current address
decreases.
b10 = 1: At the time of zero return, the operation starts toward the direction in which the current address
increases.
66
7 Buffer Memory
FX3U-1PG User's Manual
7.3 Positioning Parameters
1
Introduction
b11: Limit deceleration mode
Set the operation when the forward limit/reverse limit turns on.
b11 = 0: When the forward limit/reverse limit turns on, the operation immediately stops and outputs the CLR
signal.
b11 = 1: When the forward limit/reverse limit turns on, the operation decelerates and stops. The CLR signal is
not output.
2
Specification
b13: Count start point
Set the count start point for zero-point signal.
b13 = 0: DOG forward end (After DOG forward end detection, the zero-point signal count starts.)
b13 = 1: DOG backward end (After DOG forward end detection and backward end finish, the zero-point signal
count starts.)
3
b14: STOP input polarity
The polarity of the STOP input is set. It is valid only for the input of the FX3U-1PG STOP terminal.
b14 = 0: Normally-opened (operates when the STOP input is ON)
b14 = 1: Normally-closed (operates when the STOP input is OFF)
System
Configuration
b12: DOG input polarity
The polarity of the DOG input is set.
b12 = 0: Normally-opened (operates when the DOG input is on)
b12 = 1: Normally-closed (operates when the DOG input is off)
4
Installation
5
Wiring
b15: STOP input mode
The operation for the STOP input is set.
b15 = 0: After deceleration stop by STOP command is executed during operation, the remaining distance
operation is executed when the restart command is given.
b15 = 1: After deceleration stop by STOP command is executed during operation, the positioning ends
without executing the remaining distance operation.
7.3.16 [BFM#39, #38] Maximum speed
Sets the upper speed limit in each operation.
BFM No.
High order
16bit
Low order
16bit
#39
#38
Description
R/W
Setting range: 1 to 2,147,483,647 (user unit)
R/W
The value must be within the range from 1 to 200,000 Hz when converted to pulse data.
Default
K100,000
• For the JOG speed, zero return speed (high speed), zero return speed (creep), operation speed I, and
operation speed II, set the speed same or lower than the maximum speed. When the set speed is higher
than the maximum speed, the operation is executed at the maximum speed.
• When the positioning parameter is used, use the maximum speed (BFM#5, #4).
7
Buffer Memory
Point
6
Before Starting
Positioning
Operation
For details on the maximum speed, refer to Section 6.2.
8
Manual Control
9
Positioning
Control
10
Program
Example
67
7 Buffer Memory
FX3U-1PG User's Manual
7.3 Positioning Parameters
7.3.17 [BFM#41, #40] Bias speed
Set the bias speed at the time of startup.
When the FX3U-1PG and the stepping motor are combined and used together, set the speed taking the
resonance area and the self-start frequency of the stepping motor into account.
For details on the bias speed, refer to Section 6.2.
BFM No.
High order
16bit
Low order
16bit
#41
#40
Description
R/W
Setting range: 0 to 2,147,483,647 (user unit)
R/W
The value must be within the range from 0 to 200,000 Hz when converted to pulse data.
Default
K0
Point
• For the bias speed, set the value the same or lower than the maximum speed.
• When the positioning parameter is used, use the bias speed (BFM#6).
7.3.18 [BFM#43, #42] JOG speed
Set the speed of the manual forward JOG/reverse JOG operation.
For details on the JOG speed, refer to Section 8.2.
BFM No.
High order
16bit
Low order
16bit
#43
#42
Description
R/W
Default
Setting range: 1 to 2,147,483,647 (user unit)
R/W
The value must be within the range from 1 to 200,000 Hz when converted to pulse data.
K10,000
Point
• Set the JOG speed in the range between the bias speed and the maximum speed.
• When the JOG speed is at the maximum speed or higher, the operation is executed at the maximum
speed. When the JOG speed is at the bias speed or lower, the operation is executed at the bias speed.
However, if the bias speed is 0, the operation is executed at 1 Hz.
• When the positioning parameter is used, use the JOG speed (BFM#8, #7).
7.3.19 [BFM#45, #44] Zero return speed (high speed)
Set the high-speed return speed in the mechanical zero return.
For details on the mechanical zero return, refer to Section 8.3.
BFM No.
High order
16bit
Low order
16bit
#45
#44
Description
R/W
Default
Setting range: 1 to 2,147,483,647 (user unit)
R/W
The value must be within the range from 1 to 200,000 Hz when converted to pulse data.
K50,000
Point
• Set the zero return speed (high speed) in the range between the bias speed and the maximum speed.
• When the zero return speed (high speed) is at the maximum speed or higher, the operation is executed at
the maximum speed. When the zero return speed (high speed) is at the bias speed or lower, the operation
is executed at the bias speed. However, if the bias speed is 0, the operation is executed at 1 Hz.
• When the positioning parameter is used, use the zero return speed (high speed) (BFM#10, #9).
68
7 Buffer Memory
FX3U-1PG User's Manual
7.3 Positioning Parameters
1
In the mechanical zero return, the operation speed after the near point signal (DOG) input is set.
For details on the mechanical zero return, refer to Section 8.3.
BFM No.
Low order
16bit
#47
#46
Description
R/W
Default
Setting range: 1 to 2,147,483,647 (user unit)
R/W
The value must be within the range from 1 to 200,000 Hz when converted to pulse data.
K1,000
Point
• When the zero return speed (creep) is at the maximum speed or higher, the operation is executed at the
maximum speed. When the zero return speed (creep) is at the bias speed or lower, the operation is
executed at the bias speed. However, if the bias speed is 0, the operation is executed at 1 Hz.
• To increase the stop accuracy at the zero position, it is recommended to keep the creep speed as low as
possible.
7.3.21 [BFM#48] Number of zero-point signal for zero return
Set the zero-point signal count that is used for the mechanical zero return.
For details on the mechanical zero return, refer to Section 8.3.
Low order
16bit
-
#48
Description
Setting range: 0 to 32,767
R/W
Default
R/W
K10
5
Wiring
BFM No.
High order
16bit
4
Installation
• When the positioning parameter is used, use the zero return speed (BFM#11).
3
System
Configuration
• Set the zero return speed (creep) in the range between the bias speed and the maximum speed. However,
set the speed at the zero return speed (high speed) or slower.
2
Specification
High order
16bit
Introduction
7.3.20 [BFM#47, #46] Zero return speed (creep)
6
Point
• When the positioning parameter is used, use the number of zero-point signal for zero return (BFM#12).
Set the zero-point address when the zero return operation is completed.
When the zero return operation completes, this value is written to the current address.
For details on the mechanical zero return, refer to Section 8.3.
BFM No.
Low order
16bit
#50
#49
Description
R/W
Setting range: -2,147,483,648 to 2,147,483,647 (user unit)
The value must be within the range from -2,147,483,648 to 2,147,483,647 PLS when R/W
converted to pulse data.
Default
K0
9
Positioning
Control
High order
16bit
8
Manual Control
7.3.22 [BFM#50, #49] Zero-point address
7
Buffer Memory
• When the zero-point signal count is set to 0, the operation immediately stops when the zero-point signal
count is started. In this case, the operation immediately stops from the zero return speed (high speed or
creep). If there is a possibility to damage the machine due to the immediate stop, be careful with the
following points.
- Set the zero return speed (creep) at a safe speed.
- Set the zero-point signal count start point at DOG backward end.
- Design the DOG such that the speed can be reduced to the zero return speed (creep) until the start of
the zero-point signal count.
Before Starting
Positioning
Operation
• The zero-point signal count is detected at the falling edge.
10
Point
Program
Example
• Value is in user units and includes the position data multiplier.
• When the positioning parameter is used, use the zero-point address (BFM#14, #13).
69
7 Buffer Memory
FX3U-1PG User's Manual
7.3 Positioning Parameters
7.3.23 [BFM#51] Acceleration time
The time required to accelerate from the bias speed to the maximum speed is set.
For details on the acceleration time, refer to Section 6.2.
BFM No.
High order
16bit
Description
Low order
16bit
-
#51
R/W
Setting range:
Trapezoidal acceleration/deceleration: 1 to 32,767 ms
Approximate S-shaped acceleration/deceleration: 1 to 5,000 ms
R/W
However, the acceleration and deceleration times are the same when using approximate
S-shaped acceleration/deceleration.
Default
K100
Point
When the positioning parameter is used, use the acceleration/deceleration time (BFM#15). However, the
acceleration time and the deceleration time cannot be set individually.
7.3.24 [BFM#52] Deceleration time
Set the time required from the maximum speed to the bias speed.
For details on the deceleration time, refer to Section 6.2.
BFM No.
High order
16bit
Low order
16bit
-
#52
Description
Setting range:
Trapezoidal acceleration/deceleration: 1 to 32,767 ms
Approximate S-shaped acceleration/deceleration: Same as acceleration time
R/W
Default
R/W
K100
Point
When the positioning parameter is used, use the acceleration/deceleration time (BFM#15). However, the
acceleration time and the deceleration time cannot be set individually.
70
7 Buffer Memory
FX3U-1PG User's Manual
1
Control Data
Introduction
7.4
7.4 Control Data
Set the data for positioning control.
Point
[BFM#16] Starting delay time
Set the start delay time of the FX3U-1PG.
After the operation command, the operation starts when the time set for the startup delay time has elapsed
after the normal startup time*1.
High order
16bit
Low order
16bit
-
#16
*1.
Description
Setting range: 0 to 1,000 ms
R/W
Default
R/W
K0
1 ms or less for the motor system unit, and 2 ms or less for the machine system unit.
4
Installation
BFM No.
3
System
Configuration
7.4.1
2
Specification
The control data becomes valid when an operation starts. Therefore, set before the start-up of the operation.
When the setting is changed during the operation or during the remaining distance operation waiting, the
change is not reflected to the current operation but from the next operation.
However, setting can be changed during operation for the operation speed I, the target address change
value, the operation speed change value, the operation command (b1 to b3), and the operation command II
of the variable speed operation.
5
Point
Wiring
The positioning operations that correspond to the starting delay time is as follows.
• 1-speed positioning operation
• Interrupt 1-speed positioning operation
• 2-speed positioning operation
6
Before Starting
Positioning
Operation
• External command positioning operation
• Variable speed operation
• Interrupt stop operation
• Interrupt 2-speed positioning operation
7
Buffer Memory
8
Manual Control
9
Positioning
Control
10
Program
Example
71
7 Buffer Memory
FX3U-1PG User's Manual
7.4.2
7.4 Control Data
[BFM#18, #17] Target address Ι
Set the target address I (target position or travel distance) of the positioning operation.
BFM No.
High order
16bit
Low order
16bit
#18
#17
Description
R/W
Setting range: -2,147,483,648 to 2,147,483,647 (user unit)
The value must be within the range from -2,147,483,648 to 2,147,483,647 PLS when R/W
converted to pulse data.
Default
K0
Point
• Operation will be as follows according to whether relative or absolute addressing is specified in the
operation command (BFM#25 b7).
- With absolute address specified:
By using the current address as a base, the positioning operation to the specified target position is
executed.
At this time, the rotation direction is determined by the current address and the target address I.
- With relative address specified:
By using the current work position as a base, the positioning operation to the specified travel distance is
executed.
At this time, the rotation direction is determined according to the target address I sign.
• Value is in user units and includes the position data multiplier.
7.4.3
[BFM#20, #19] Operation speed Ι
Set the operation speed I of the positioning operation.
BFM No.
High order
16bit
Low order
16bit
#20
#19
*1.
Description
Setting range: 1 to 2,147,483,647 (user unit)
Set the value within 1 to 200,000 Hz when converted to pulse data.*1
R/W
Default
R/W
K10
In case of external command positioning operation
-2,147,483,647 to -1, 1 to 2,147,483,647 (user unit). Set the value within -200,000 to -1, 1 to 200,000
Hz when converted to pulse data.
In case of variable speed operation
-2,147,483,647 to 2,147,483,647 (user unit). Set the value within -200,000 to 200,000 Hz when
converted to pulse data.
Point
• Set the operation speed I in the range between the bias speed and the maximum speed.
• In case of the variable speed operation and the external command positioning operation, the rotating
direction is determined according to the sign of the operation speed I.
• When the operation speed I is at the maximum speed or higher, the operation is executed at the maximum
speed. When the operation speed I is at the bias speed or lower, the operation is executed at the bias
speed. However, if the bias speed is 0, the operation is executed at 1 Hz.
• The operation speed is not changed even if the operation speed I is changed during the operation. When
changing the operation speed during the operation, use the operation speed change function. However,
the operation speed can be changed during the variable speed operation.
For details of the operation speed change function, refer to Section 6.6.
72
7 Buffer Memory
FX3U-1PG User's Manual
1
[BFM#22, #21] Target address ΙΙ
Introduction
7.4.4
7.4 Control Data
Set the target address II (target position or travel distance) of the positioning operation.
It is used only in the 2-speed positioning operation.
BFM No.
Low order
16bit
#22
#21
Description
R/W
Setting range: -2,147,483,648 to 2,147,483,647 (user unit)
The value must be within the range from -2,147,483,648 to 2,147,483,647 PLS when R/W
converted to pulse data.
Default
K0
Point
3
System
Configuration
4
Installation
• Operation will be as follows according to whether relative or absolute addressing is specified in the
operation command (BFM#25 b7).
- With absolute address specified:
By using the current address as a base, the positioning operation to the specified target position is
executed.
At this time, the rotation direction is determined by the target address I and the target address II.
- With relative address specified:
By using the current work position as a base, the positioning operation to the specified travel distance is
executed.
At this time, the rotation direction is determined according to the target address II sign.
2
Specification
High order
16bit
• Value is in user units and includes the position data multiplier.
5
[BFM#24, #23] Operation speed ΙΙ
Set the operation speed II of the positioning operation.
It is used for the 2-speed positioning operation, the external command positioning operation, and the interrupt
2-speed positioning operation.
BFM No.
Low order
16bit
#24
#23
*1.
Description
Setting range: 1 to 2,147,483,647 (user unit)
Set the value within 1 to 200,000 Hz when converted to pulse data.*1
R/W
Default
R/W
K10
Point
• Set the operation speed II in the range between the bias speed and the maximum speed.
• The operation speed is not changed even if the operation speed II is changed during the operation. When
changing the operation speed during the operation, use the operation speed change function.
For details of the operation speed change function, refer to Section 6.6.
8
Manual Control
• When the operation speed II is at the maximum speed or higher, the operation is executed at the maximum
speed. When the operation speed II is at the bias speed or lower, the operation is executed at the bias
speed. However, if the bias speed is 0, the operation is executed at 1 Hz.
7
Buffer Memory
In case of external command positioning operation
-2,147,483,647 to -1, 1 to 2,147,483,647 (user unit). Set the value within -200,000 to -1, 1 to 200,000
Hz when converted to pulse data.
6
Before Starting
Positioning
Operation
High order
16bit
Wiring
7.4.5
9
Positioning
Control
10
Program
Example
73
7 Buffer Memory
FX3U-1PG User's Manual
7.4.6
7.4 Control Data
[BFM#25] Operation command
A list of operation commands is as shown in the following table.
BFM No.
High order
16bit
Low order
16bit
Bit
No.
Description
Detection*1
Error reset
When it is turned on while an error is output, it
resets the error flag, the error code, and the
positioning completion flag. (It is valid only when the
error is occurring.)
Level
STOP
When it is turned on during the positioning
operation (including JOG operation and mechanical
zero return operation), the operation stops.
For details on the STOP, refer to Section 6.5.
Level
Forward limit
When it is turned on while the forward pulse is
output, the operation stops.
It is used to stop the operation at the forward limit
position.
For details on the forward limit, refer to
Section 6.4.
Level
Reverse limit
When it is turned on while the reverse pulse is
output, the operation stops.
It is used to stop the operation at the reverse limit
position.
For details on the reverse limit, refer to
Section 6.4.
Level
Forward JOG
operation
When it is turned on, the unit outputs pulses in the
direction in which in the current address increases.
When it is turned off, the unit stops outputting
pulses.
For details on the JOG operation, refer to
Section 8.2.
Level
Reverse JOG
operation
When it is turned on, the unit outputs pulses in the
direction in which in the current address decreases.
When it is turned off, the unit stops outputting
pulses.
For details on the JOG operation, refer to
Section 8.2.
Level
DOG type
mechanical zero
return operation
start
When it is turned on, it starts the DOG type
mechanical zero return operation.
For details on the DOG type mechanical zero
return operation, refer to Subsection 8.3.2.
Edge
b7
Relative/absolute
address
It selects the absolute address specification or the
relative address specification.
OFF: Operates with the absolute address
specification
ON: Operates with the relative address
specification
Level
b8
When it is turned on, it starts the 1-speed
1-speed positioning positioning operation.
operation start
For details on the 1-speed positioning
operation, refer to Section 9.2.
Edge
b9
When it is turned on, it starts the interrupt 1-speed
Interrupt 1-speed
positioning operation.
positioning
For details on the interrupt 1-speed
operation start
positioning operation, refer to Section 9.3.
Edge
b10
When it is turned on, it starts the 2-speed
2-speed positioning positioning operation.
operation start
For details on the 2-speed positioning
operation, refer to Section 9.4.
Edge
b11
When it is turned on, it starts the external command
External command
positioning operation.
positioning
For details on the external command
operation start
positioning operation, refer to Section 9.5.
Edge
b12
Variable speed
operation
ON: It starts the variable speed operation.
OFF: It stops the variable speed operation.
For details on the variable speed operation,
refer to Section 9.6.
Level
b0
b1
b2
b3
b4
b5
-
#25
b6
74
Item
Default
H0000
7 Buffer Memory
FX3U-1PG User's Manual
7.4 Control Data
1
Low order
16bit
Detection*1
b13
Interrupt stop
operation start
When it is turned on, the interrupt stop operation
starts.
For details on the interrupt 1-speed
positioning operation, refer to Section 9.7.
Edge
b14
When it is turned on, the interrupt 2-speed
Interrupt 2-speed
positioning operation starts.
positioning
For details on the interrupt 2-speed
operation start
positioning operation, refer to Section 9.8.
Edge
b15
Data-set type
mechanical zero
return operation
start
Edge
When it is turned on, the data-set type mechanical
zero return operation starts.
For details on the data-set type mechanical
zero return operation, refer to Subsection 8.3.3.
Default
2
H0000
3
System
Configuration
*1.
#25
Description
Item
Timing of detection.
Level detection: activated when the bit is set or cleared.
Edge detection: activated at OFF-to-ON transition.
4
Point
Priority high
Priority low
Error reset (b0) > Forward/reverse limit (b2, b3) > STOP (b1) > Forward JOG/reverse JOG (b4, b5) > Positioning operation (b6, b8 to b15)
• Create the sequence program as each bit (b0, b6, b8 to b11, b13 to b15) of the edge detection always
turns off after being turned on. Without turning off each bit, the second or further operations cannot be
executed.
• Do not use the forward limit (b2)/reverse limit (b3) for any purposes other than limiting.
• The positioning operations (b6, b8 to b15) become valid when all bits of the BFM#25 (b0 in the normal
status, excluding the b2/b3 and b7 opposite from the operation direction) are turned off and then on.
7
[BFM#54, #53] Target address change value
BFM No.
#53
Description
R/W
Setting range: -2,147,483,648 to 2,147,483,647 (user unit)
The value must be within the range from -2,147,483,648 to 2,147,483,647 PLS when R/W
converted to pulse data.
Default
K0
Point
Value is in user units and includes the position data multiplier.
8
Manual Control
#54
Low order
16bit
Buffer Memory
Set the target address change value that is used in the target address change function.
For details on the target address change function, refer to Section 6.7.
High order
16bit
6
Before Starting
Positioning
Operation
• Error reset (b0) is executed only when an error is occurring.
5
Wiring
• When another operation command is turned on during operation, the operation command turned on later is
ignored, and no error will occur.
Installation
• The priority order of each bit becomes as follows. When several bits are turned on, the bit with higher
priority becomes valid. However, if several bits of the positioning operations (b6, b8 to b15) turn on, the
operation is not executed, and the operation command multiple selection error occurs.
7.4.7
Specification
-
Bit
No.
Introduction
BFM No.
High order
16bit
9
Positioning
Control
10
Program
Example
75
7 Buffer Memory
FX3U-1PG User's Manual
7.4.8
7.4 Control Data
[BFM#56, #55] Operation speed change value
Set the operation speed change value that is used in the operation speed change function.
For details on the operation speed change function, refer to Section 6.6.
BFM No.
High order
16bit
Low order
16bit
#56
#55
*1.
7.4.9
Description
R/W
Setting range: 1 to 2,147,483,647 (user unit)
The value must be within the range from 1 to 200,000 Hz when converted to pulse R/W
data.*1
Default
K0
In case of external command positioning operation
-2,147,483,647 to -1, 1 to 2,147,483,647 (user unit). Set the value within -200,000 to -1, 1 to 200,000
Hz when converted to pulse data.
[BFM#57] Operation command ΙΙ
A list of operation command II is as shown in the following table.
BFM No.
High order
16bit
-
*1.
Low order
16bit
#57
Bit
No.
Item
b0
INT0
The interrupt input is executed via the PLC (BFM).
INT0 turns on when b0 = ON.
Edge
b1
INT1
The interrupt input is executed via the PLC (BFM).
INT1 turns on when b1 = ON.
Edge
b2 to
b15
-
Description
Not used
Detection*1
H0000
-
Timing of detection.
Level detection: activated when the bit is set or cleared.
Edge detection: activated at OFF-to-ON transition.
Point
If INT0 (b0) or INT1 (b1) is on when the positioning operation starts, it automatically turns off.
76
Default
-
7 Buffer Memory
FX3U-1PG User's Manual
1
Monitor Data
Stores the operation condition of the positioning control. The monitor data are read-only, excluding the
current address and the current address (pulse conversion value).
7.5.1
2
[BFM#27, #26] Current address
Specification
Stores the current address data.
BFM No.
High order
16bit
Low order
16bit
#27
#26
Description
-2,147,483,648 to 2,147,483,647 (user unit)
R/W
Default
R/W
K0
• The stored address is always an absolute address. However, when the positioning is completed in the
interrupt 1-speed positioning or in the interrupt 2-speed positioning operation, the address is the relative
address after the interrupt detection.
• The address change during the positioning operation is invalid.
• Value is in user units and includes the position data multiplier.
5
Wiring
• A value read from the servo amplifier by the ABS instruction (FNC155) of the PLC is the pulse conversion
value. Write in the current address (pulse conversion value) (BFM#59, #58).
4
Installation
• The current address can be changed to any specified address during stop.
When a value is written in the current address, the current address (pulse conversion value) (BFM#59,
#58) is also updated.
3
System
Configuration
Point
7.5.2
Introduction
7.5
7.5 Monitor Data
[BFM#28] Status information
The FX3U-1PG condition can be checked in the ON/OFF condition of each bit.
BFM No.
Low order
16bit
Bit
No.
b0
Forward/Reverse
#28
Default
Turns on when the positioning operation can be executed.
• Conditions to turn on
- During the power supply start up
- At the completion of positioning
- During stop by STOP command during positioning
operation
- At error reset
• Conditions to turn off
- During the positioning operation
- At the time of error occurrence
7
ON: Turns on during the forward pulse output
Stays on even after the forward pulse stops.
OFF: Turns off during the reverse pulse output
Stays on even after the reverse pulse stops.
b3
STOP input ON
ON: STOP input ON
OFF: STOP input OFF
Same as the ON/OFF condition of the FX3U-1PG STOP
terminal.
DOG input ON
ON: DOG input ON
OFF: DOG input OFF
Same as the ON/OFF condition of the FX3U-1PG DOG
terminal.
R
-
9
10
Program
Example
Zero return
completion
8
Positioning
Control
Turns on when the zero return completes.
• Conditions to turn on
- At the completion of the DOG type mechanical zero
return operation
- At the completion of the data set type mechanical
zero return operation
• Conditions to turn off
- The power is off
- When K0 is written to the status information
b2
b4
6
R/W
Manual Control
-
READY
Description
Buffer Memory
b1
Item
Before Starting
Positioning
Operation
High order
16bit
77
7 Buffer Memory
FX3U-1PG User's Manual
BFM No.
High order
16bit
Low order
16bit
7.5 Monitor Data
Bit
No.
Item
Description
b5
PG0 input ON
ON: PG0 input ON
OFF: PG0 input OFF
Same as the ON/OFF condition of the FX3U-1PG PG0
terminal.
b6
Current value
overflow
When the current address (BFM#27, #26 or BFM#59, #58)
value exceeds the 32 bit data range, it turns on.
Turns off when the power is turned off, or when the DOG
type mechanical zero return operation or the data-set type
mechanical zero return operation is executed.
Error flag
Turns on when an error occurs, and the error code number
is stored to the error code (BFM#29).
Turns off when the power is turned off or when error reset
(BFM25 b0) is executed.
Positioning
completion flag
Turns on when the positioning operation is completed
normally.
Turns off when the mechanical zero return operation start,
positioning operation start (excluding the variable speed
operation), or the error reset (only when an error occurred)
is executed.
b7
b8
-
#28
b9
Turns on when the 2-speed positioning operation, the
external command positioning, or the 1-speed of the
interrupt 2-speed positioning operation completes.
• Conditions to turn on
- When the 2-speed positioning operation, the external
command positioning operation, or the 1-speed of the
interrupt 2-speed positioning operation completes.
1-speed completion
• Conditions to turn off
flag
- At the completion of positioning
- At the time of error occurrence
- When the remaining distance operation is cancelled
- When the remaining distance operation is not
executed (BFM#3 b15 or #37 b15 is ON), and when
the operation is decelerated and stopped by the
STOP command
b10
Interrupt input 0
ON
ON: Turns on when the interrupt input 0 is detected in an
operation mode for which the interrupt input 0 is effective.
OFF: Turns off when the next operation is started.
b11
Interrupt input 1
ON
ON: Turns on when the interrupt input 1 is detected in an
operation mode for which the interrupt input 1 is effective.
OFF: Turns off when the next operation is started.
b12
b13
to
b15
R/W
Default
R
-
Turns on during the remaining distance waiting when the
positioning operation (1-speed positioning operation, 2Remaining distance speed positioning operation, and interrupt stop operation)
operation waiting decelerates and stops by the STOP input.
Turns off when the writing operation is executed to the
restart command or BFM other than BFM#25.
Not used
-
Point
• READY (b0) turns off while the error is active, and the start command is not received.
• When K0 is written to the status information, only the zero return execution completion (b2) turns off.
78
7 Buffer Memory
FX3U-1PG User's Manual
1
[BFM#29] Error code
An error code is stored at the time of the error occurrence.
For the details of the error code, refer to Section 11.2.
BFM No.
Low order
16bit
Error code
K0
-
#29
Description
Default
R
K0
No error.
K
1*1
K
*1
3
Setting range is incorrect.
K
4*1
Setting value overflow error.
K5
R/W
Large/small relationship is incorrect.
Operation command multiple selection error.
Forward limit/reverse limit error.
K7
Watchdog timer error
represents the BFM number for which there is an error.
*1.
Point
[BFM#30] FX Series model code
5
The model code of the FX3U-1PG is stored.
7.5.5
Low order
16bit
-
#30
Description
The model code of the FX3U-1PG is K5,130.
R/W
Default
R
K5,130
6
[BFM#59, #58] Current address (pulse converted value)
BFM No.
Low order
16bit
#59
#58
Description
-2,147,483,648 to 2,147,483,647 PLS
R/W
Default
R/W
K0
• Stored address is always a pulse conversion value of the absolute address.
• The current address can be changed to any specified address during stop.
When a value is written in the current address (pulse conversion value), the current address (BFM#27,
#26) is also updated.
• A value read from the servo amplifier by the ABS instruction (FNC155) of the PLC is the pulse conversion
value. Write in this buffer memory.
8
Manual Control
• The address change during the positioning operation is invalid.
7
Buffer Memory
Point
Before Starting
Positioning
Operation
Stores the current address data in the pulse converted value.
High order
16bit
Wiring
BFM No.
High order
16bit
4
Installation
After removing the cause of the error, clear the error code by turning off the power supply or by the error reset
(BFM#25 b0).
7.5.4
3
System
Configuration
K6
2
Specification
High order
16bit
Introduction
7.5.3
7.5 Monitor Data
9
Positioning
Control
10
Program
Example
79
7 Buffer Memory
FX3U-1PG User's Manual
7.5.6
7.5 Monitor Data
[BFM#61, #60] Current value of operation speed
Stores the current operation speed.
Becomes "0" when the operation is at stop.
BFM No.
High order
16bit
Low order
16bit
#61
#60
Description
0 to 2,147,483,647 (user unit)
R/W
Default
R
K0
Point
• In the current operation speed value, the actual operation speed is stored. Because the actual output pulse
is stepwise, it is possible that the current operation speed value is different from the operation speed I
(BFM#20, #19), the operation speed II (BFM#24, #23), and the operation speed change value (BFM#56,
#55) that the user set.
For the stepwise of the output pulse, refer to Subsection 6.9.2.
• In the case of machine system units, the current value of the operation speed is as follows.
Current value of operation speed = Actual output frequency × Feed rate × 60 / Pulse rate / 104
When the result is not an integer, the value rounded down is stored as the current value of the operation
speed.
7.5.7
[BFM#62] Version information
The version of FX3U-1PG is stored.
BFM No.
80
High order
16bit
Low order
16bit
-
#62
Description
Ver. 1.00 is stored as K100.
R/W
Default
R
-
8 Manual Control
FX3U-1PG User's Manual
8.1 Functions Available with Manual Control
1
Introduction
8.
Manual Control
2
This chapter explains manual control.
Specification
8.1
Functions Available with Manual Control
Manual operations and available functions are as shown in the following table.
3
Operation mode
JOG operation
High speed
Creep
Data-set type mechanical
zero return operation
Extension positioning
parameter
Reference
Section 7.3
-
Section 6.4
STOP command
-
Section 6.5
Remaining distance
operation
-
Approximate S-shaped
acceleration/deceleration
-
-
-
Subsection
6.5.2
-
-
-
Section 6.8
-
-
Section 6.6
Operation speed change
function
-
-
-
-
Section 6.7
Starting delay time
-
-
-
-
Subsection
7.4.1
: Applicable
- : Not applicable or not targeted
5
Wiring
Target address change
function
4
Installation
Forward limit/Reverse limit
System
Configuration
Functions
DOG type mechanical zero
return operation
6
Before Starting
Positioning
Operation
7
Buffer Memory
8
Manual Control
9
Positioning
Control
10
Program
Example
81
8 Manual Control
FX3U-1PG User's Manual
8.2
8.2 JOG Operation
JOG Operation
While the forward JOG operation is on, the motor rotates in the current address increasing direction. While
the reverse JOG operation is on, the motor rotates in the current address decreasing direction.
For details on the STOP command, refer to Section 6.5.
For details on the approximate S-shaped acceleration/deceleration, refer to Section 6.8.
1. Operation
• While the forward JOG operation is on, the motor rotates in the current address increasing direction. When
the forward JOG operation turns off, the motor decelerates and stops.
• While the reverse JOG operation is on, the motor rotates in the current address decreasing direction. When
the reverse JOG operation turns off, the motor decelerates and stops.
• When the ON time of the forward JOG operation/reverse JOG operation is less than 300 ms, the inching
operation, which outputs 1 pulse or 1 user unit, is executed.
• When the ON time of the forward JOG operation/reverse JOG operation is 300 ms or longer, the pulse is
output continuously.
• When the JOG operation for the reverse direction is executed during the forward JOG operation/reverse
JOG operation, the operation decelerates and stops. While the operation is at stop, the READY remains
ON. Then, when the forward JOG operation/reverse JOG operation is turned off, the JOG operation
resumes.
Speed
Less than 300 ms
300 ms
Maximum speed
JOG speed
Bias speed
Time
Acceleration/
deceleration time
(Acceleration time)
Forward JOG operation/
Reverse JOG operation
(BFM#25 b4/b5)
OFF
ON
OFF
ON
READY
(BFM#28 b0)
ON
OFF
ON
OFF
Acceleration
/deceleration time
(Deceleration time)
OFF
ON
Point
• When the ON time of the forward JOG operation/reverse JOG operation is less than 300 ms, the following
operation is executed.
The FX3U-1PG outputs pulses corresponding to 1 user unit.
However, the FX3U-1PG outputs 1 pulse even if the value "Position data multiplier × Pulse rate" is smaller
than the feed rate in the machine system setting or combined system setting and the pulse number
required for the travel in 1 user unit is less than 1 pulse.
• When the operation stops at the forward limit/reverse limit, avoiding the limit is possible by the JOG
operation to the opposite direction.
• When the forward JOG operation/reverse JOG operation is turned off and the JOG operation is re-turned
on during the deceleration, the operation decelerates and stops once, and then accelerates again. When
stopped, READY turns on only for an instant.
2. Positioning completion flag
Before and after the JOG operation execution, the positioning completion flag does not change.
82
8 Manual Control
FX3U-1PG User's Manual
8.2 JOG Operation
1
When changing the JOG speed during the JOG operation, use the operation speed change function.
However, the operation speed cannot be changed during the inching operation.
For details of the operation speed change function, refer to Section 6.6.
2
Setting items of JOG operation
Extension
positioning
parameter
Setting items
#34, #33
Pulse rate
#36, #35
Feed rate
#3 b1, b0
#37 b1, b0
System of units
#3 b5, b4
#37 b5, b4
Position data multiplier
#3 b6
#37 b6
#3 b8
#37 b8
#3 b9
#37 b9
Rotation direction
#3 b11
#37 b11
Limit deceleration mode
#3 b14
#37 b14
STOP input polarity
#5, #4
#39, #38
Maximum speed
#6
#41, #40
Bias speed
#8, #7
#43, #42
JOG speed
#15
-
-
#51
Acceleration time
-
#52
Deceleration time
Pulse output format
4
Acceleration/deceleration time
Operation command
5
Wiring
#56, #55
Acceleration/deceleration mode
Operation parameter
Installation
#25 b5
3
System
Configuration
#0
#2, #1
#25 b4
Specification
BFM No.
Positioning
parameter
Introduction
3. Speed change during the JOG operation
Forward JOG operation
Reverse JOG operation
Operation speed change value
6
Before Starting
Positioning
Operation
7
Buffer Memory
8
Manual Control
9
Positioning
Control
10
Program
Example
83
8 Manual Control
FX3U-1PG User's Manual
8.3
Mechanical Zero Return Operation
8.3.1
Outline of mechanical zero return operation
8.3 Mechanical Zero Return Operation
1. Types of mechanical zero return operation
The mechanical zero return method for the FX3U-1PG includes the following two variations.
• DOG type mechanical zero return
The position after stopping from the DOG signal with the zero signal of the servo amplifier becomes the
zero-point.
For details on the DOG type mechanical zero return, refer to Subsection 8.3.2.
• Data-set type mechanical zero return
The position after moving with the JOG operation etc. is defined as the zero-point.
For details on the data-set type mechanical zero return, refer to Subsection 8.3.3.
2. Mechanical zero return operation
The mechanical zero return operation varies according to the zero return type. For details, refer to the
following.
For details on the DOG type mechanical zero return, refer to Subsection 8.3.2.
For details on the data-set type mechanical zero return, refer to Subsection 8.3.3.
84
8 Manual Control
FX3U-1PG User's Manual
1
DOG type mechanical zero return operation
The zero return starts by the DOG type mechanical zero return operation start command. When the DOG
search function is used, the DOG type mechanical zero return becomes possible from any position.
1. Operation
2) When the DOG input turns on, deceleration to the zero return speed (creep) starts.
3) When the count start point is passed, the zero-point signal count starts.
5) After the zero-return completion, the set value of the zero-point address is written to the current address.
6) The positioning completion flag and the zero return completion turn on.
Speed
3
System
Configuration
4) When the count, which is set to the zero return zero-point signal number, is reached, the operation stops.
(It outputs the CLR signal.)
2
Specification
1) When the DOG type mechanical zero return operation start command of the operation command is
turned from off to on, movement in the zero return direction starts at zero return speed (high speed). (The
positioning completion flag turns off.)
Introduction
8.3.2
8.3 Mechanical Zero Return Operation
4
Installation
Maximum speed
Zero return
speed
(high speed)
5
Wiring
Zero return speed (creep)
Bias speed
Time
Acceleration/
deceleration time
(Acceleration time)
ON
6
Before Starting
Positioning
Operation
DOG type mechanical
zero return operation start
(BFM#25 b6)
Acceleration/
deceleration time
(Deceleration time)
DOG
Zero-point
signal (PG0)
OFF
7
OFF
Zero return completion
(BFM#28 b2)
(Does not change)
ON
ON
OFF
ON
ON
OFF
ON
Current address
Zero-point address
setting value
READY
(BFM#28 b0)
Positioning
completion flag
(BFM#28 b8)
Current address
(BFM#27, #26)
8
Manual Control
DOG
Buffer Memory
ON
9
Positioning
Control
2. Zero return direction
Sets the zero return direction.
When BFM#3 b10/BFM#37 b10 = 0: The operation starts in the current address decreasing direction.
When BFM#3 b10/BFM#37 b10 = 1: The operation starts in the current address increasing direction.
3. DOG input polarity
10
Program
Example
The polarity of the DOG input is set.
When BFM#3 b12/BFM#37 b12 = 0: Normally-open (Operates when the DOG input is on)
When BFM#3 b12/BFM#37 b12 = 1: Normally-close (Operates when the DOG input is off)
85
8 Manual Control
FX3U-1PG User's Manual
8.3 Mechanical Zero Return Operation
4. Count start point
Sets the count start point of the zero-point signal.
When BFM#3 b13/BFM#37 b13 = 0: DOG forward end (After detecting the DOG forward end, zero-point
signal count starts.)
When BFM#3 b13/BFM#37 b13 = 1: DOG backward end (After detecting the DOG forward end and passing
the backward end, zero-point signal count starts.)
Point
• When the DOG forward end
- Set the number of zero-point signals such that the deceleration completes before the stop position.
• When the DOG backward end
- Set the DOG length such that the deceleration completes before passing the DOG.
5. Zero return completion
Turns on when the zero return is completed and after the zero-point address is written to the current address.
Turns off when the power is turned off or when K0 is written to the status information. It does not turn off when
the zero return operation is started.
6. Positioning completion flag
The positioning completion flag turns off when the DOG type mechanical zero return operation starts.
The positioning completion flag turns on when the zero return operation is completed.
7. Speed change during the zero return operation
When changing the zero return speed (high speed) during the zero return operation, use the operation speed
change function. However, zero return speed (creep) cannot be changed.
For details of the operation speed change function, refer to Section 6.6.
Setting items of the DOG type mechanical zero return operation
BFM No.
Extension
positioning
parameter
Positioning
parameter
#0
#34, #33
Pulse rate
#2, #1
#36, #35
Feed rate
#3 b1, b0
#37 b1, b0
System of units
#3 b5, b4
#37 b5, b4
Position data multiplier
#3 b8
#37 b8
Pulse output format
#3 b9
#37 b9
Rotation direction
#3 b10
#37 b10
#3 b11
#37 b11
#3 b12
#37 b12
DOG input polarity
#3 b13
#37 b13
Count start point
#3 b14
#37 b14
STOP input polarity
#3 b15
#37 b15
#5, #4
#39, #38
Operation parameter
#41, #40
Bias speed
#45, #44
Zero return speed (high speed)
#11
#47, #46
Zero return speed (creep)
#12
#48
#14, #13
#50, #49
Number of zero-point signal for zero return
Zero-point address
#15
-
-
#51
Acceleration time
-
#52
Deceleration time
#28 b2
Limit deceleration mode
STOP input mode
#6
#56, #55
Zero return direction
Maximum speed
#10, #9
#25 b6
86
Setting items
Acceleration/deceleration time
Operation command
DOG type mechanical
operation start
Status information
Zero return completion
Operation speed change value
zero
return
8 Manual Control
FX3U-1PG User's Manual
8.3 Mechanical Zero Return Operation
1
When the forward limit/reverse limit is set, zero return operation by DOG search function becomes possible.
The zero return operation becomes as follows according to the zero return start position.
In addition, operation at the forward limit/reverse limit follows the operation set in the limit deceleration mode
(BFM#3 b11 or BFM#37 b11).
Speed
2
Specification
DOG search function operation
Introduction
8. DOG search function
Limit deceleration mode
In case of immediate stop
In case of deceleration stop
DOG
Zero return direction
3
Forward limit
System
Configuration
Reverse limit
4
Position
3) Zeropoint
2)
1)
Installation
4)
8
Manual Control
9
Positioning
Control
4) When the reverse limit/forward limit in the zero return direction is on
a) Operates in the direction opposite of the zero return direction at the zero return speed (high speed)
b) The operation decelerates and stops when it moves outside of the DOG.
c) Operates in the zero return direction at the zero return speed (high speed)
d) After the DOG detection, deceleration starts to the zero return speed (creep)
e) The operation stops when the zero-point signal of the specified number (zero-point signal number) is
counted.
7
Buffer Memory
3) When DOG signal is OFF at starting position (after passing the DOG)
a) Operates in the zero return direction at the zero return speed (high speed)
b) The operation immediately stops or decelerates to stop at the reverse limit/forward limit.
c) Operates in the direction opposite of the zero return direction at the zero return speed (high speed)
d) The operation decelerates and stops when it moves outside of the DOG.
e) Operates in the zero return direction at the zero return speed (high speed)
f) After the DOG detection, deceleration starts to the zero return speed (creep)
g) The operation stops when the zero-point signal of the specified number (zero-point signal number) is
counted.
6
Before Starting
Positioning
Operation
2) When DOG signal is ON at starting position (within the DOG)
a) Operates in the direction opposite of the zero return direction at the zero return speed (high speed)
b) The operation decelerates and stops when it moves outside of the DOG.
c) Operates in the zero return direction at the zero return speed (high speed)
d) After the DOG detection, deceleration starts to the zero return speed (creep)
e) The operation stops when the zero-point signal of the specified number (zero-point signal number) is
counted.
5
Wiring
1) When DOG signal is OFF at starting position (before passing the DOG)
a) Operates in the zero return direction at the zero return speed (high speed)
b) After the DOG detection, deceleration starts to the zero return speed (creep).
c) After detection of the zero-point signal count start point, the zero-point signal count starts.
d) When the zero-point signal of the specified number (zero-point signal number) is counted, the
operation stops.
10
Program
Example
Caution
If the DOG is not detected during the DOG search operations, a forward limit/reverse limit error occurs.
87
8 Manual Control
FX3U-1PG User's Manual
8.3.3
8.3 Mechanical Zero Return Operation
Data-set type mechanical zero return operation
Data-set type mechanical zero return is the zero return method that is used to set the position, which is
traveled by the JOG operation etc., as a zero position. Therefore, the work piece does not move when the
data-set type mechanical zero return command is turned on.
This zero return method is often used in equipment for which the DOG cannot be used or in the transfer line
that does not have a mechanical zero position.
For details on the JOG speed, refer to Section 8.2.
1. Operation
1) Move the work piece to the position to be set as a zero position, by the JOG operation etc.
2) Set the data-set type mechanical zero return operation start from off to on. (It outputs the CLR signal.)
3) The set value of the zero-point address is written to the current address.
4) The zero return completion turns on.
In case of the data-set type zero return, the positioning completion flag does not turn on.
2. Positioning completion flag
Turns on when the zero return is completed and after the zero-point address is written to the current address.
Turns off when the power is turned off or when K0 is written to the status information. It does not turn off when
the operation is started.
3. Positioning completion flag
The positioning completion flag turns off when the data-set type mechanical zero return operation starts.
The positioning completion flag does not turn on when the zero return operation is completed.
Setting items of the data-set type mechanical zero return operation
BFM No.
88
Positioning
parameter
Extension
positioning
parameter
#3 b1, b0
#37 b1, b0
#3 b5, b4
#37 b5, b4
#14, #13
#50, #49
Setting items
Operation parameter
System of units
Position data multiplier
Zero-point address
#25 b15
Operation command
Data-set type mechanical zero return
operation start
#28 b2
Status information
Zero return completion
9 Positioning Control
FX3U-1PG User's Manual
9.1 Functions Available with Each Positioning Operation
1
Introduction
9.
Positioning Control
2
This chapter explains the control of each positioning operation.
Specification
9.1
Functions Available with Each Positioning Operation
Positioning operations and available functions are as shown in the following table.
Operation mode
Variable
speed
operation
Interrupt
stop
operation
Interrupt
Reference
2-speed
positioning
operation
Section 7.3
Forward limit/Reverse
limit
Section 6.4
STOP command
Section 6.5
Remaining distance
operation
Approximate S-shaped
acceleration/deceleration
-
-
-
-
Subsection
6.5.2
-
-
-
Section 6.8
Target address change
function
Starting delay time
-
-
Section 6.6
-
Section 6.7
Subsection
7.4.1
6
Before Starting
Positioning
Operation
: Applicable
- : Not applicable
5
Wiring
Operation speed change
function
4
Installation
Extension positioning
parameter
3
System
Configuration
Function
Interrupt
External
1-speed
2-speed
1-speed
command
positioning
positioning
positioning
positioning
operation
operation
operation
operation
7
Buffer Memory
8
Manual Control
9
Positioning
Control
10
Program
Example
89
9 Positioning Control
FX3U-1PG User's Manual
9.2
9.2 1-speed Positioning Operation
1-speed Positioning Operation
By the 1-speed positioning operation start command, the operation starts at the operation speed I, and the
operation decelerates and stops at target address I.
For change of the operation speed, refer to Section 6.6.
For change of the target address, refer to Section 6.7.
For details on the approximate S-shaped acceleration/deceleration, refer to Section 6.8.
For details on the STOP command, refer to Section 6.5.
1. Operation
1) Set the operation speed 1 and target address 1.
2) When the 1-speed positioning operation start of the operation command is turned from off to on, the 1speed positioning operation in operation speed I starts. (The positioning completion flag turns off.)
3) The operation decelerates and stops at target address I. The positioning completion flag turns on, and the
operation ends.
Speed
Maximum speed
Operation speed I
Target address I
Bias speed
Time
1-speed positioning
operation start
(BFM#25 b8)
Acceleration/
deceleration time
(Deceleration time)
Acceleration/
deceleration time
(Acceleration time)
ON
OFF
Positioning
completion flag
(BFM#28 b8)
ON
OFF
ON
READY
(BFM#28 b0)
ON
OFF
ON
Point
When the travel amount is 0, the positioning operation is not executed even when the 1-speed positioning
operation start is turned on. In addition, the positioning completion flag also does not change. The READY
turns off only for an instant.
2. Address specification
Both absolute address and the relative address specification is possible.
With absolute address specified: Specifies the distance from the address 0.
With relative address specified: Specifies a travel distance from the current address.
3. Rotation direction
• With absolute address specified:
The rotation direction is determined according to the relationship between the current address and the
target address I.
- Current address < Target address Ι: Forward
- Current address > Target address Ι: Reverse
• With relative address specified:
The rotation direction is determined by the sign (positive/negative) of the target address I.
- Target address Ι > 0: Forward
- Target address Ι < 0: Reverse
90
9 Positioning Control
FX3U-1PG User's Manual
9.2 1-speed Positioning Operation
1
Introduction
4. Positioning completion flag
The positioning completion flag turns off when the operation starts.
The positioning completion flag turns on when the operation reaches the target address.
Setting items of the 1-speed positioning operation
2
BFM No.
Positioning
parameter
Extension
positioning
parameter
#0
#34, #33
Pulse rate
Feed rate
#2, #1
#36, #35
#3 b1, b0
#37 b1, b0
System of units
#3 b5, b4
#37 b5, b4
Position data multiplier
#37 b6
Acceleration/deceleration mode
#3 b8
#37 b8
Pulse output format
#3 b9
#37 b9
#3 b11
#37 b11
Limit deceleration mode
#3 b14
#37 b14
STOP input polarity
#3 b15
#37 b15
STOP input mode
#5, #4
#39, #38
Maximum speed
#6
#41, #40
Bias speed
-
-
#51
-
#52
Acceleration/deceleration time
Acceleration time
5
Deceleration time
Starting delay time
#18, #17
Target address Ι
#20, #19
Operation speed Ι
#25 b8
4
Operation command
#54, #53
Target address change value
#56, #55
Operation speed change value
Wiring
#16
Rotation direction
Installation
#15
Operation parameter
3
System
Configuration
#3 b6
Specification
Setting items
1-speed positioning operation start
6
• Operation when the travel amount to the target position is small
When the time required for the travel amount (target address I) is shorter than the time required for the
acceleration/deceleration, the actual operation speed does not reach operation speed I.
Before Starting
Positioning
Operation
Caution of the 1-speed positioning operation
7
Buffer Memory
Speed
Operation speed I
8
Manual Control
Time
9
Positioning
Control
Travel time
Time required for acceleration/deceleration
10
Program
Example
91
9 Positioning Control
FX3U-1PG User's Manual
9.3
9.3 Interrupt 1-speed Positioning Operation
Interrupt 1-speed Positioning Operation
By the interrupt 1-speed positioning start command, the operation starts with operation speed I. After
detecting the rise/fall edge of the interrupt input 0, the operation decelerates and stops at the target address I.
For change of the operation speed, refer to Section 6.6.
For change of the target address, refer to Section 6.7.
For details on the approximate S-shaped acceleration/deceleration, refer to Section 6.8.
For details on the STOP command, refer to Section 6.5.
1. Operation
1) Set operation speed 1 and target address 1.
2) When the interrupt 1-speed positioning operation start of the operation command is turned from off to on,
the interrupt 1-speed positioning operation in the operation speed I starts. (The positioning completion
flag turns off.)
3) When the interrupt input 0 is detected, the traveling is executed for the distance set to target address I in
the operation speed I, and decelerates and stops.
The positioning completion flag turns on and the operation ends.
Speed
Maximum speed
Operation speed I
Target address I
Bias
speed
Time
Interrupt 1-speed
positioning operation start
(BFM#25 b9)
Acceleration/
deceleration time
(Acceleration time)
ON
Acceleration/
deceleration time
(Deceleration time)
OFF
ON
OFF
Interrupt input 0
Positioning completion flag
ON
(BFM#28 b8)
READY
(BFM#28 b0)
ON
Current address
(BFM#27, #26)
0
OFF
ON
OFF
ON
0→Target address I
Target address I
Point
• The current address is cleared by the interrupt 1-speed positioning operation start command. After
detecting the interrupt input 0, the current address starts changing.
• When the travel amount is 0, the positioning operation is not executed even when the interrupt 1-speed
positioning operation start is turned on. In addition, the positioning completion flag also does not change.
The READY turns off only for an instant.
2. Address specification
Address specification is handled as a relative address (the travel amount is specified by using the distance
from the current address.
(Even when the absolute address is specified, relative address specification is used.)
92
9 Positioning Control
FX3U-1PG User's Manual
9.3 Interrupt 1-speed Positioning Operation
1
Introduction
3. Rotation direction
The operation direction is determined by the sign (positive/negative) of the target address I.
When the target address I sign is positive: Forward
When the target address I sign is negative: Reverse
4. Positioning completion flag
2
5. Interrupt input 0
The contents of the interrupt input 0 and the detection edge change as follows by the interrupt input setting
and the DOG input polarity setting.
DOG input polarity
(BFM#3 b12 or BFM#37 b12)
Interrupt input 0
(0, 1) or (0, 0)
0
DOG
Rising edge
(0, 1) or (0, 0)
1
DOG
Falling edge
(1, 1) or (1, 0)
-
INT0
Rising edge
Detection edge
Point
3
System
Configuration
Interrupt input setting
(BFM#3 b3, b2 or BFM#37 b3, b2)
Specification
The positioning completion flag turns off when the operation starts.
The positioning completion flag turns on when the operation reaches to the target address I.
4
• When interrupt input 0 is off at the start of the positioning operation and the falling edge is the detection
edge, interrupt input 0 becomes valid when the signal turns ON and then OFF again.
5
Setting items of the interrupt 1-speed positioning operation
Extension
positioning
parameter
#0
#34, #33
Pulse rate
#2, #1
#36, #35
Feed rate
#3 b1, b0
#37 b1, b0
Setting items
Interrupt input setting
#37 b5, b4
Position data multiplier
#3 b6
#37 b6
#3 b11
#37 b11
Acceleration/deceleration mode
Operation parameter
Pulse output format
Limit deceleration mode
#3 b12
#37 b12
DOG input polarity
#3 b14
#37 b14
STOP input polarity
#3 b15
#37 b15
#5, #4
#39, #38
Maximum speed
STOP input mode
Bias speed
#6
#41, #40
#15
-
-
#51
Acceleration time
-
#52
Deceleration time
Starting delay time
#18, #17
Target address Ι
#20, #19
Operation speed Ι
Operation command
#54, #53
Target address change value
#56, #55
Operation speed change value
#57 b0
Operation command ΙΙ
9
Interrupt 1-speed positioning operation
start
Positioning
Control
#25 b9
8
Acceleration/deceleration time
Manual Control
#16
7
Rotation direction
Buffer Memory
#37 b8
#37 b9
Before Starting
Positioning
Operation
#37 b3, b2
#3 b5, b4
#3 b9
6
System of units
#3 b3, b2
#3 b8
Wiring
BFM No.
Positioning
parameter
Installation
• When interrupt input 0 is on at the start of the positioning operation and the rising edge is the detection
edge, interrupt input 0 becomes valid when the signal turns OFF and then ON again.
INT0
10
Program
Example
93
9 Positioning Control
FX3U-1PG User's Manual
9.3 Interrupt 1-speed Positioning Operation
Caution of the interrupt 1-speed positioning operation
• Operation when the travel amount to the target position is small
When the time required for the travel amount (target address I) is shorter than the time required for
deceleration, the operation immediately stops when the operation reaches target address I. In addition,
when the travel amount is smaller than (operation speed/1,000) × 3 pulse, variation occurs in the detection
of the interrupt input.
- During operation at 1 kHz or higher: Within 3 ms
- During operation at less than 1 kHz: Within 3 pulses
Speed
Operation speed I
Travel time
Target address I
Bias speed
Time
Time required for deceleration
• Operation when the interrupt input 0 is detected during the acceleration
When the interrupt input 0 is detected during the acceleration, the following operation is executed
according to the size of target address I.
1) When the target address I < the number of pulses required for deceleration from the current speed
As soon as the interrupt input 0 turns on, the deceleration immediately starts. When the operation
reaches to the target address I, it immediately stops.
2) When the number of pulses required for deceleration from the current speed ≤ target address I < pulse
number required for acceleration/deceleration from the current speed
The acceleration is executed up to the position where the remaining pulse number = pulse number
required for deceleration, and then the operation decelerates and stops.
3) When the pulse number required for acceleration/deceleration from the current speed ≤ the target
address I
The operation accelerates to the operation speed I and then decelerates and stops.
Speed
Operation speed I
1)
2)
3)
ON
Interrupt input 0
OFF
• Operation when the interrupt input 0 is not detected
The operation continues until the interrupt input 0 is detected.
94
Time
9 Positioning Control
FX3U-1PG User's Manual
1
2-speed Positioning Operation
1. Operation
1) Set the operation speed I, operation speed II, target address I, and target address II.
3) The speed changes to the operation speed II at the target address I.
(The 1-speed completion flag turns on.)
4) The operation decelerates and stops at the target address II and turns on the positioning completion flag
and ends the operation.
Maximum speed
Operation speed I
5
Operation speed II
Wiring
Target address I
4
Installation
Speed
3
System
Configuration
2) When the 2-speed positioning operation start of the operation command is turned from off to on, the 2speed positioning operation in the operation speed I starts. (The positioning completion flag turns off.)
2
Specification
By the 2-speed positioning operation start command, the operation starts with the operation speed I. It moves
to target address I, changes the speed to operation speed II, and travels to the target address II, and
decelerates and stops.
For change of the operation speed, refer to Section 6.6.
For change of the target address, refer to Section 6.7.
For details on the STOP command, refer to Section 6.5.
Introduction
9.4
9.4 2-speed Positioning Operation
Target address II
Bias speed
Time
6
Acceleration/
deceleration time
(Deceleration time)
Before Starting
Positioning
Operation
2-speed positioning
operation start
(BFM#25 b10)
Acceleration/
deceleration time
(Acceleration time)
ON
OFF
ON
OFF
ON
READY
(BFM#28 b0)
ON
OFF
ON
1-speed completion flag
(BFM#28 b9)
OFF
ON
7
Buffer Memory
Positioning
completion flag
(BFM#28 b8)
OFF
8
Point
2. Address specification
Manual Control
When the travel amount is 0, the positioning operation is not executed even when the 2-speed positioning
operation start is turned on. In addition, the positioning completion flag also does not change. The READY
turns off only for an instant.
9
Positioning
Control
Both absolute address and the relative address specification is possible.
With absolute address specified: Specifies the distance from the address 0.
With relative address specified: Specifies the travel distance from the current address.
3. Rotation direction
95
10
Program
Example
• With the specified absolute address:
The rotation direction is determined according to the relationship between the current address, the target
address I, and the target address II.
- Current address < Target address Ι, Target address I < Target address ΙΙ: Forward
- Current address > Target address Ι, Target address I > Target address ΙΙ: Reverse
9 Positioning Control
FX3U-1PG User's Manual
9.4 2-speed Positioning Operation
• With the specified relative address:
The rotation direction is determined by the sign (positive/negative) of the target address I and the target
address II.
- Target address Ι, Target address ΙΙ > 0: Forward
- Target address Ι, Target address ΙΙ < 0: Reverse
Caution
An abrupt change in the rotation direction may cause damage to the machine. It may also cause an error
through motor overload.
If the operation in a different direction requires stop time, use the 1-speed positioning operation.
Point
When the traveling direction to the target address I and target address II is not the same as shown below, the
motor decelerates and stops at the target address I, and then starts rotation in the reverse direction within 1
ms in the case of forward pulse/reverse pulse output or within 2 ms in the case of pulse/direction output.
• With the specified absolute address: When the relationship between "the current address and the target
address I" and "the target address I and the target address II" is different
• With the specified relative address: When the target address I and the target address II signs (positive/
negative) are different
4. 1-speed completion flag
• Conditions to turn on
- When the operation reaches target address I
- When the operation exceeds target address I during deceleration by an error or by STOP
• Conditions to turn off
- When the positioning completes
- When the operation stops by an error
- When the operation stops by the STOP command (only when the remaining distance operation is
invalid)
- When the remaining distance operation is cancelled (only when the remaining distance operation is
valid)
5. Positioning completion flag
The positioning completion flag turns off when the operation starts.
The positioning completion flag turns on when the operation reaches target address II.
Setting items of the 2-speed positioning operation
BFM No.
Extension
positioning
parameter
Positioning
parameter
#0
#34, #33
Pulse rate
#2, #1
#36, #35
Feed rate
#3 b1, b0
#37 b1, b0
System of units
#3 b5, b4
#37 b5, b4
Position data multiplier
#3 b8
#37 b8
Pulse output format
#3 b9
#37 b9
#3 b11
#37 b11
Limit deceleration mode
#3 b14
#37 b14
STOP input polarity
#3 b15
#37 b15
#5, #4
#39, #38
Maximum speed
Bias speed
#6
#41, #40
#15
-
-
#51
-
#52
#16
96
Setting items
Operation parameter
Rotation direction
STOP input mode
Acceleration/deceleration time
Acceleration time
Deceleration time
Starting delay time
#18, #17
Target address Ι
#20, #19
Operation speed Ι
9 Positioning Control
FX3U-1PG User's Manual
9.4 2-speed Positioning Operation
1
Extension
positioning
parameter
Positioning
parameter
Introduction
BFM No.
Setting items
Target address ΙΙ
#24, #23
Operation speed ΙΙ
#25 b10
Operation command
#54, #53
Target address change value
#56, #55
Operation speed change value
2
2-speed positioning operation start
Specification
#22, #21
Caution of the 2-speed positioning operation
3
System
Configuration
• Operation when the 1-speed travel amount is small
- When the time required to accelerate to the operation speed I < the travel time to target address I
The operation accelerates until reaching target address I
Speed
4
Operation speed I
Installation
Operation speed II
5
Target address I
Wiring
Target address II
Time
Travel time
Time required for acceleration
• Operation when the 2-speed travel amount is small
- When the time required to decelerate from operation speed I > the travel time to target address II
The deceleration starts after the 1-speed completion and stops when target address II is reached.
7
Buffer Memory
Speed
Travel time
Operation speed I
6
Before Starting
Positioning
Operation
- When the 1-speed travel amount is 0
When the 1-speed travel amount is 0, the operation starts with operation speed II and decelerates and
stops at the target address II. The 1-speed completion flag turns on at the startup of the operation and
turns off when the positioning completes.
Operation speed II
8
Manual Control
Target address II
9
Time
Positioning
Control
Time required for deceleration
10
Program
Example
97
9 Positioning Control
FX3U-1PG User's Manual
9.4 2-speed Positioning Operation
- When the time required to decelerate from operation speed I < the travel time to target address II < time
required to change the speed to operation speed II + time required to decelerate from the operation
speed II
The deceleration starts before reaching operation speed II
Speed
Travel time
Operation speed II
Operation speed I
Target address II
Time
Time required for the gear to reach operation speed II
+ Time required for deceleration from operation speed II
- When the 2-speed travel amount is 0
When the 2-speed travel amount is 0, the operation starts with operation speed I and decelerates and
stops at the target address I. The 1-speed completion flag does not turn on, and the positioning
completion flag turns on when the positioning completes.
• Caution when the target address change function and the operation speed change function are used.
When a value is set to the target address change value (BFM#54, #53) or operation speed change value
(BFM#56, #55) within the time shown below just before the speed changes from the 1-speed to the 2-speed,
the travel amount at the 2-speed may change.
- During operation at 1 kHz or higher: within 3 ms
- During operation at less than 1 kHz: within 3 pulses
6. Speed switching
Speed switching is classified into “standard switching” and “front-load switching”.
In the FX3U-1PG, the speed is switched by standard switching. (Refer to the figure below.)
<Operation by standard switching>
Speed
<Operation by front-load switching>
Switches the speed to the operating
speed II when the target address I
is reached.
Speed
Starts positioning at the operating
speed II when the target address I
is reached.
Time
Time
Target address I
98
Target address I
9 Positioning Control
FX3U-1PG User's Manual
1
External Command Positioning Operation
1. Operation
1) Set operation speed I and operation speed II.
3) When interrupt input 0 is detected, the speed changes to operation speed II.
4) When interrupt input 1 is detected, the operation immediately stops, and the operation completes by
turning on the positioning completion flag.
3
System
Configuration
2) When the operation command to start external command positioning operation is turned from off to on,
the external command positioning operation starts with operation speed I. (The positioning completion
flag turns off.)
2
Specification
By the external command positioning operation start command, the operation starts with operation speed I,
detects the rise/fall edge of interrupt input 0, and changes the speed to operation speed II. Then, the rise/fall
edge of the interrupt input 1 is detected and stops immediately.
For change of the operation speed, refer to Section 6.6.
For details on the STOP command, refer to Section 6.5.
Introduction
9.5
9.5 External Command Positioning Operation
4
Speed
Installation
Maximum speed
Operation speed I
5
Operation speed II
Wiring
Bias speed
Time
Acceleration/
deceleration time
(Deceleration time)
6
Before Starting
Positioning
Operation
External command
positioning
operation start
(BFM#25 b11)
Acceleration/
deceleration time
(Acceleration time)
ON
OFF
ON
Interrupt input 0
OFF
7
ON
1-speed completion flag
(BFM#28 b9)
OFF
ON
Buffer Memory
OFF
Interrupt input 1
OFF
ON
OFF
ON
READY
(BFM#28 b0)
ON
OFF
ON
8
Point
Manual Control
Positioning
completion flag
(BFM#28 b8)
When the interrupt input 1 is detected before the interrupt input 0 is detected, the operation immediately
stops.
9
Positioning
Control
2. Rotation direction
The rotating direction is determined by the sign (positive/negative) of the operation speed I.
• Operation speed Ι > 0: Forward
• Operation speed Ι < 0: Reverse
10
When the signs (positive/negative) of the operation speed I and the operation speed II are different, the 2speed is operated with the bias speed. However, if the bias speed is 0, the operation is executed at 1 Hz.
99
Program
Example
Point
9 Positioning Control
FX3U-1PG User's Manual
9.5 External Command Positioning Operation
3. 1-speed completion flag
• Conditions to turn on
- When interrupt input 0 is detected
• Conditions to turn off
- When the positioning completes
- When the operation stops by an error
- When the operation stops by the STOP command
4. Positioning completion flag
The positioning completion flag turns off when the operation starts.
The positioning completion flag turns on when interrupt input 1 is detected and the operation is stopped.
5. Interrupt input 0, Interrupt input 1
The contents of the interrupt input 0, the interrupt input 1, and the detection edge change as follows
depending on the interrupt input setting, DOG input polarity, and the STOP input polarity setting.
Interrupt input setting
(BFM#3 b3, b2 or
BFM#37 b3, b2)
DOG input polarity
(BFM#3 b12 or
BFM#37 b12)
STOP input polarity
(BFM#3 b14 or
BFM#37 b14)
Interrupt input 0:
Detection edge
Interrupt input 1:
Detection edge
(0, 0)
0
0
DOG: Rising edge
STOP (Terminal):
Rising edge
(0, 0)
0
1
DOG: Rising edge
STOP (Terminal):
Falling edge
(0, 0)
1
0
DOG: Falling edge
STOP (Terminal):
Rising edge
(0, 0)
1
1
DOG: Falling edge
STOP (Terminal):
Falling edge
(0, 1)
0
-
DOG: Rising edge
INT1: Rising edge
(0, 1)
1
-
DOG: Falling edge
INT1: Rising edge
(1, 0)
-
0
INT0: Rising edge
STOP (Terminal):
Rising edge
(1, 0)
-
1
INT0: Rising edge
STOP (Terminal):
Falling edge
(1, 1)
-
-
INT0: Rising edge
INT1: Rising edge
Point
• When interrupt input 0 and interrupt input 1 are on at the start of the positioning operation and the rising
edge is the detection edge, interrupt input 0 and interrupt input 1 become valid when their signals turns
OFF and then ON again, respectively.
• When interrupt input 0 and interrupt input 1 are off at the start of the positioning operation and the falling
edge is the detection edge, interrupt input 0 and interrupt input 1 become valid when their signals turns ON
and then OFF again, respectively.
100
9 Positioning Control
FX3U-1PG User's Manual
9.5 External Command Positioning Operation
1
Introduction
Setting items of the external command positioning operation
BFM No.
Extension
positioning
parameter
Positioning
parameter
Setting items
#34, #33
Pulse rate
#36, #35
Feed rate
#3 b1, b0
#37 b1, b0
2
System of units
#3 b3, b2
#37 b3, b2
Interrupt input setting
#3 b5, b4
#37 b5, b4
Position data multiplier
#3 b8
#37 b8
#3 b9
#37 b9
#3 b11
#37 b11
Limit deceleration mode
#3 b12
#37 b12
DOG input polarity
#3 b14
#37 b14
STOP input polarity
#3 b15
#37 b15
#5, #4
#39, #38
Maximum speed
Bias speed
-
-
#51
-
#52
4
Acceleration/deceleration time
Acceleration time
Deceleration time
#20, #19
Operation speed Ι
#24, #23
Operation speed ΙΙ
#25 b11
Operation command
#56, #55
Operation speed change value
Operation command ΙΙ
5
Wiring
Starting delay time
#57 b1
3
STOP input mode
#16
#57 b0
Pulse output format
Rotation direction
Installation
#41, #40
Operation parameter
System
Configuration
#6
#15
Specification
#0
#2, #1
External command positioning operation
start
INT0
INT1
6
Before Starting
Positioning
Operation
7
Buffer Memory
8
Manual Control
9
Positioning
Control
10
Program
Example
101
9 Positioning Control
FX3U-1PG User's Manual
9.6
9.6 Variable Speed Operation
Variable Speed Operation
By the variable speed operation command, the operation starts with operation speed I. When operation
speed I is changed during the operation, the operation is executed with the changed speed.
When the variable speed operation command is turned off, the operation immediately stops or decelerates
and stops. For the variable speed operation, select "without acceleration/deceleration" and "with acceleration/
deceleration" by the variable speed operation acceleration/deceleration setting (BFM#3 b7 or BFM#37 b7).
For details on the STOP command, refer to Section 6.5.
1. Operation
1) Set operation speed I to any value other than 0.
2) When the variable speed operation command of the operation command is turned on, the variable speed
operation starts.
3) When the variable speed operation command of the operation command is turned off, the variable speed
operation stops. (Without acceleration/deceleration: immediately stops, With acceleration/deceleration:
decelerates and stops)
Without acceleration/deceleration (when BFM#3 b7 or BFM#37 b7 is off)
Speed
Maximum speed
c
Operation speed I
a
d
b
Bias speed
0
Variable speed
operation
(BFM#25 b12)
READY
(BFM#28 b0)
Positioning
completion flag
(BFM#28 b8)
Operation speed I
(BFM#20, #19)
102
OFF
ON
OFF
ON
OFF
ON
(Does not change)
a
b
c
0
d
Time
9 Positioning Control
FX3U-1PG User's Manual
9.6 Variable Speed Operation
1
Introduction
With acceleration/deceleration (when BFM#3 b7 or BFM#37 b7 is on)
Speed
Maximum speed
c
2
Operation speed I
Specification
a
d
b
Bias speed
0
OFF
ON
OFF
ON
OFF
ON
4
(Does not change)
a
b
c
0
Installation
READY
(BFM#28 b0)
Positioning
completion flag
(BFM#28 b8)
Operation speed I
(BFM#20, #19)
3
Acceleration/
deceleration time
(Deceleration time)
System
Configuration
Variable speed
operation
(BFM#25 b12)
Acceleration/
deceleration time
(Acceleration time)
Time
d
5
Point
Wiring
• Operation speed I does not change in the following cases
- During deceleration by the deceleration command (STOP, forward limit, reverse limit)
- During deceleration stop by operation command OFF
• When operation speed I is started with 0, the pulse output is not executed, but READY turns OFF.
2. Rotation direction
The rotating direction is determined by the sign (positive/negative) of operation speed I.
6
Before Starting
Positioning
Operation
• When the variable speed operation command (with acceleration/deceleration) is turned off and the
operation command is turned on again during deceleration, the operation decelerates and stops once and
then accelerates again. After the deceleration and stop, READY turns on for an instant. Take note that
READY ON may possibly be detected depending on the timing.
7
Buffer Memory
• Operation speed Ι > 0: Forward
• Operation speed Ι < 0: Reverse
• When operation speed I = 0, or the absolute value of operation speed I < bias speed: Stop
Caution
8
Manual Control
An abrupt change in the rotation direction may cause damage to the machine. It may also cause an error
through motor overload.
To change the rotation direction, set operation speed I value to 0, and wait for the motor to stop completely
after stop.
If operation speed I value changes from positive to negative (e.g. 100 -100), the work piece will stop, and
start reverse operation.
9
Point
3. Acceleration/deceleration speed setting of the variable speed operation
• When the acceleration/deceleration speed setting of the variable speed operation is on: Variable speed
operation with the acceleration/deceleration
103
10
Program
Example
• When the acceleration/deceleration speed setting of the variable speed operation is off: Variable speed
operation without acceleration/deceleration
Positioning
Control
When the sign (positive or negative) of the operation speed I is changed during the operation, the motor
immediately stops or decelerates and stops, and then starts rotation in the reverse direction within 1 ms in the
case of forward pulse/reverse pulse output or within 2 ms in the case of pulse/direction output.
9 Positioning Control
FX3U-1PG User's Manual
9.6 Variable Speed Operation
4. Positioning completion flag
Before and after the variable speed operation, the positioning completion flag does not change.
5. Response time
When operation speed I is changed, the time required to change the speed becomes as follows.
• During operation at 1 kHz or higher: Within 3 ms
• During operation at less than 1 kHz: Within 3 pulses
Setting items of the variable speed operation
BFM No.
Extension
positioning
parameter
Positioning
parameter
Setting items
#0
#34, #33
Pulse rate
#2, #1
#36, #35
Feed rate
#3 b1, b0
#37 b1, b0
System of units
#3 b5, b4
#37 b5, b4
Position data multiplier
#3 b7
#37 b7
Variable speed operation acceleration/
deceleration setting
#3 b8
#37 b8
#3 b9
#37 b9
Rotation direction
#3 b11
#37 b11
Limit deceleration mode
#3 b14
#37 b14
STOP input polarity
#3 b15
#37 b15
#5, #4
#39, #38
Maximum speed
Bias speed
#6
#41, #40
#15
-
-
#51
-
#52
Pulse output format
Operation parameter
STOP input mode
Acceleration/deceleration time
Acceleration time
Deceleration time
#16
Starting delay time
#20, #19
Operation speed Ι
#25 b12
Operation command
Variable speed operation
Caution of the variable speed operation
• Operation when the STOP command is set to ON during the variable speed operation
The motor stops when the STOP command is set to ON during the variable speed operation, and restarts
the operation when the STOP command is set to OFF.
Example when acceleration/deceleration is provided
Speed
Operation speed I
Operation speed I
Time
Variable speed
operation
(BFM#25 b12)
OFF
READY
(BFM#28 b0)
ON
STOP command
(BFM#25 b1 or
STOP terminal)
Positioning completion
flag (BFM#28 b8)
104
ON
OFF
OFF
(Does not change)
ON
ON
ON
OFF
9 Positioning Control
FX3U-1PG User's Manual
1
Interrupt Stop Operation
2
Specification
By the interrupt stop operation start command, the operation starts with operation speed I. After detecting the
rise/fall edge of interrupt input 0, the operation decelerates and stops. In addition, when interrupt input 0 is not
detected, the operation decelerates and stops at the target address I.
For change of the operation speed, refer to Section 6.6.
For change of the target address, refer to Section 6.7.
For details on the approximate S-shaped acceleration/deceleration, refer to Section 6.8.
For details on the STOP command, refer to Section 6.5.
Introduction
9.7
9.7 Interrupt Stop Operation
1. Operation
1) It sets the operation speed I and the target address I.
3) When interrupt input 0 is detected, the operation decelerates and stops. Turn on the positioning
completion flag to end the operation.
Speed
3
System
Configuration
2) When the interrupt stop operation start of the operation command is turned from off to on, the interruption
stop operation starts with operation speed I. (The positioning completion flag turns off.)
4
Installation
Maximum speed
Operation speed I
5
Wiring
Target address I
Bias speed
Time
Acceleration/
deceleration time
(Deceleration time)
6
Before Starting
Positioning
Operation
Interrupt stop
operation start
(BFM#25 b13)
Acceleration/
Acceleration/
deceleration time deceleration time
(Acceleration time) (Deceleration time)
ON
OFF
ON
OFF
Interrupt input 0
ON
OFF
ON
READY
(BFM#28 b0)
ON
OFF
ON
7
Buffer Memory
Positioning
completion flag
(BFM#28 b8)
Point
2. Address specification
Both absolute address and the relative address can be specified.
With absolute address specified: Specifies the distance from address 0.
With relative address specified: Specifies the travel amount from the current address.
8
Manual Control
When the travel amount is 0, the positioning operation is not executed even when the interrupt stop operation
start is turned on. In addition, the positioning completion flag also does not change. The READY turns off only
for an instant.
9
105
10
Program
Example
• With specified absolute address:
The rotating direction is determined according to the relationship between the current address and target
address I.
- Current address < Target address Ι: Forward
- Current address > Target address Ι: Reverse
Positioning
Control
3. Rotation direction
9 Positioning Control
FX3U-1PG User's Manual
9.7 Interrupt Stop Operation
• With specified relative address:
The rotating direction is determined by the sign (positive/negative) of target address I.
- Target address Ι > 0: Forward
- Target address Ι < 0: Reverse
4. Positioning completion flag
The positioning completion flag turns off when the operation starts.
After the interrupt input 0 is detected, and the operation decelerates and stops, the positioning completion flag
turns on.
When the interrupt input 0 is not detected, after the operation reaches to the target address I, the positioning
completion flag turns on.
5. Interrupt input 0
The contents of the interrupt input 0 and the detection edge change as follows depending on the interrupt
input setting and the DOG input polarity setting.
Interrupt input setting
(BFM#3 b3, b2 or BFM#37 b3, b2)
DOG input polarity
(BFM#3 b12 or BFM#37 b12)
Interrupt input 0
(0, 1) or (0, 0)
0
DOG
Rising edge
(0, 1) or (0, 0)
1
DOG
Falling edge
(1, 1) or (1, 0)
-
INT0
Rising edge
Detection edge
Point
• When interrupt input 0 is on at the start of the positioning operation and the rising edge is the detection
edge, interrupt input 0 becomes effective when the signal turns OFF and then ON again.
• When interrupt input 0 is off at the start of the positioning operation and the falling edge is the detection
edge, interrupt input 0 becomes effective when the signal turns ON and then OFF again.
Setting items for the interrupt stop operation
BFM No.
Extension
positioning
parameter
Positioning
parameter
#0
#34, #33
Pulse rate
#2, #1
#36, #35
Feed rate
#3 b1, b0
#37 b1, b0
System of units
#3 b3, b2
#37 b3, b2
Interrupt input setting
#3 b5, b4
#37 b5, b4
Position data multiplier
#3 b6
#37 b6
Acceleration/deceleration mode
#3 b8
#37 b8
Pulse output format
#3 b9
#37 b9
#3 b11
#37 b11
Limit deceleration mode
#3 b12
#37 b12
DOG input polarity
#3 b14
#37 b14
STOP input polarity
#3 b15
#37 b15
#5, #4
#39, #38
Maximum speed
Bias speed
#6
#41, #40
#15
-
-
#51
-
#52
#16
Operation parameter
Rotation direction
STOP input mode
Acceleration/deceleration time
Acceleration time
Deceleration time
Starting delay time
#20, #19
Operation speed Ι
#25 b13
Operation command
#54, #53
Target address change value
#56, #55
Operation speed change value
#57 b0
106
Setting items
Operation command ΙΙ
Interrupt stop operation start
INT0
9 Positioning Control
FX3U-1PG User's Manual
9.7 Interrupt Stop Operation
1
• Operation when interrupt input 0 is not detected
When interrupt input 0 is not detected, the positioning completion flag turns on after the operation reaches
the target address I.
Introduction
Caution of the interrupt stop positioning operation
2
Speed
Specification
Maximum speed
Operation speed I
3
System
Configuration
Target address I
Bias speed
Time
4
Acceleration/
deceleration time
(Deceleration time)
Installation
Interrupt stop
operation start
(BFM#25 b13)
Acceleration/
deceleration time
(Acceleration time)
ON
OFF
OFF
Interrupt input 0
ON
OFF
ON
READY
(BFM#28 b0)
ON
OFF
ON
5
Wiring
Positioning
completion flag
(BFM#28 b8)
• Operation when interrupt input 0 is detected during acceleration
The following operation is executed when interrupt input 0 is detected during acceleration.
6
Before Starting
Positioning
Operation
Speed
Acceleration/
deceleration time
(Acceleration time)
Maximum speed
7
Operation speed Ι
Buffer Memory
Trapezoidal
control
8
Bias speed
Manual Control
Approximate
S-shaped
control
Time
Time required for acceleration = Time required for deceleration
9
Positioning
Control
10
Program
Example
107
9 Positioning Control
FX3U-1PG User's Manual
9.8
9.8 Interrupt 2-speed Positioning Operation
Interrupt 2-speed Positioning Operation
By the interrupt 2-speed positioning start command, the operation starts with operation speed I. After
detecting the rise/fall edge of interrupt input 0, the operation speed changes to operation speed II. Then, after
the rise/fall edge of interrupt input 1 is detected, the operation decelerates and stops at target address I.
For change of the operation speed, refer to Section 6.6.
For change of the target address, refer to Section 6.7.
For details on the STOP command, refer to Section 6.5.
1. Operation
1) Set operation speed I, operation speed II, and target address I.
2) When the interrupt 2-speed positioning operation start of the operation command is turned from off to on,
the interrupt 2-speed positioning operation in operation speed I starts. (The positioning completion flag
turns off).
3) When interrupt input 0 is detected, the speed changes to operation speed II.
4) When interrupt input 1 is detected, traveling is executed for the amount set to the target address I with
operation speed II, and the operation completes by turning on the positioning completion flag.
Speed
Maximum speed
Operation speed I
Operation speed II
Target address I
Bias speed
Time
Interrupt 2-speed
positioning
operation start
(BFM#25 b14)
Acceleration/
deceleration time
(Acceleration time)
ON
Acceleration/
deceleration time
(Deceleration time)
OFF
ON
Interrupt input 0
OFF
ON
OFF
Interrupt input 1
1-speed completion flag
(BFM#28 b9)
OFF
ON
OFF
Positioning
completion flag
(BFM#28 b8)
ON
OFF
ON
READY
(BFM#28 b0)
ON
OFF
ON
Current address
(BFM#27, #26)
0
0→Target address I
Target address I
Point
• When interrupt input 1 is detected before interrupt input 0 is detected, interrupt input 1 is ignored.
• The current address is cleared by interrupt 2-speed positioning operation start command. After detecting
interrupt input 1, the current address starts changing.
• When the travel amount is 0, the positioning operation is not executed even when the interrupt 2-speed
positioning operation start is turned on. In addition, the positioning completion flag also does not change.
READY turns off only instantaneously.
108
9 Positioning Control
FX3U-1PG User's Manual
9.8 Interrupt 2-speed Positioning Operation
1
Is handled as a relative address (the travel amount is specified by using the distance from the current
address.)
(Even when an absolute address is specified, it is treated as a relative address.)
3. Rotation direction
Introduction
2. Address specification
2
Specification
The operation direction is determined by the sign (positive/negative) of target address I.
When the target address I sign is positive: Forward
When the target address I sign is negative: Reverse
4. 1-speed completion flag
• Conditions to turn on
- When interrupt input 0 is detected
3
System
Configuration
• Conditions to turn off
- When the positioning completes
- When the operation stops by an error
- When the operation sops by the STOP command
4
The positioning completion flag turns off when the operation starts.
When the interrupt input 1 is detected, and the operation reaches to the target address I, the positioning
completion flag turns on.
6. Interrupt input 0, Interrupt input 1
DOG input polarity
(BFM#3 b12 or
BFM#37 b12)
STOP input polarity
(BFM#3 b14 or
BFM#37 b14)
Interrupt input 0:
Detection edge
Interrupt input 1:
Detection edge
(0, 0)
0
0
DOG: Rising edge
STOP (Terminal):
Rising edge
(0, 0)
0
1
DOG: Rising edge
STOP (Terminal):
Falling edge
(0, 0)
1
0
DOG: Falling edge
STOP (Terminal):
Rising edge
(0, 0)
1
1
DOG: Falling edge
STOP (Terminal):
Falling edge
0
-
DOG: Rising edge
INT1: Rising edge
(0, 1)
1
-
DOG: Falling edge
INT1: Rising edge
(1, 0)
-
0
INT0: Rising edge
STOP (Terminal):
Rising edge
(1, 0)
-
1
INT0: Rising edge
STOP (Terminal):
Falling edge
(1, 1)
-
-
INT0: Rising edge
INT1: Rising edge
• When interrupt input 0 and interrupt input 1 are on at the start of the positioning operation and the rising
edge is the detection edge, interrupt input 0 and interrupt input 1 become valid when their signals turns
OFF and then ON again, respectively.
9
Positioning
Control
• When interrupt input 0 and interrupt input 1 are off at the start of the positioning operation and the falling
edge is the detection edge, interrupt input 0 and interrupt input 1 become valid when their signals turns ON
and then OFF again, respectively.
8
Manual Control
Point
7
Buffer Memory
(0, 1)
6
Before Starting
Positioning
Operation
Interrupt input setting
(BFM#3 b3, b2 or
BFM#37 b3, b2)
5
Wiring
The contents of the interrupt input 0, the interrupt input 1, and the detection edge change as follows
depending on the interrupt input setting, the DOG input polarity, and the STOP input polarity settings.
Installation
5. Positioning completion flag
10
Program
Example
109
9 Positioning Control
FX3U-1PG User's Manual
9.8 Interrupt 2-speed Positioning Operation
Setting items of the interrupt 2-speed positioning operation
BFM No.
Extension
positioning
parameter
Positioning
parameter
Setting items
#0
#34, #33
Pulse rate
#2, #1
#36, #35
Feed rate
#3 b1, b0
#37 b1, b0
System of units
#3 b3, b2
#37 b3, b2
Interrupt input setting
#3 b5, b4
#37 b5, b4
Position data multiplier
#3 b8
#37 b8
#3 b9
#37 b9
#3 b11
#37 b11
Limit deceleration mode
#3 b12
#37 b12
DOG input polarity
#3 b14
#37 b14
STOP input polarity
#3 b15
#37 b15
#5, #4
#39, #38
Maximum speed
Bias speed
#6
#41, #40
#15
-
-
#51
-
#52
Pulse output format
Operation parameter
Rotation direction
STOP input mode
Acceleration/deceleration time
Acceleration time
Deceleration time
#16
Starting delay time
#20, #19
Operation speed Ι
#22, #21
Target address ΙΙ
#24, #23
Operation speed ΙΙ
#25 b14
Operation command
#56, #55
Operation speed change value
#57 b0
#57 b1
Interrupt 2-speed positioning operation
start
INT0
Operation command ΙΙ
INT1
Caution of the interrupt 2-speed positioning operation
• Operation when the travel amount to the target position is small
When the time required for the travel amount (target address I) is shorter than the time required for
deceleration, the operation immediately stops when the operation reaches the target address I. In addition,
when the travel amount is smaller than (operation speed/1,000) × 3 pulse, variation occurs in the detection
of the interrupt input.
- During operation at 1 kHz or higher: Within 3 ms
- During operation at less than 1 kHz: Within 3 pulses
Speed
Operation speed I
Travel time
Operation speed II
Target address I
Time
ON
Interrupt input 0
Time required for deceleration
OFF
ON
Interrupt input 1
110
OFF
10 Program Example
FX3U-1PG User's Manual
1
Introduction
10. Program Example
2
•
•
•
STARTUP AND MAINTENANCE
PRECAUTIONS
•
•
4
Do not disassemble or modify the PLC.
Doing so may cause fire, equipment failures, or malfunctions.
For repair, contact your local Mitsubishi Electric representative.
Turn off the power to the PLC before connecting or disconnecting any extension cable.
Failure to do so may cause equipment failures or malfunctions.
Turn off the power to the PLC before attaching or detaching the following devices.
Failure to do so may cause equipment failures or malfunctions.
- Peripheral devices, display modules, expansion boards and special adapters
- I/O extension units/blocks, FX Series terminal block and the special function units/blocks
- Battery and memory cassette
Installation
•
3
System
Configuration
Do not touch any terminal while the PLC's power is on.
Doing so may cause electric shock or malfunctions.
Before cleaning or retightening terminals, cut off all phases of the power supply externally.
Failure to do so may cause electric shock.
Before modifying or disrupting the program in operation or running the PLC, carefully read through this manual and the associated
manuals and ensure the safety of the operation.
An operation error may damage the machinery or cause accidents.
Specification
STARTUP AND MAINTENANCE
PRECAUTIONS
5
Wiring
6
Before Starting
Positioning
Operation
7
Buffer Memory
8
Manual Control
9
Positioning
Control
10
Program
Example
111
10 Program Example
FX3U-1PG User's Manual
10.1
10.1 Assignments
Assignments
10.1.1 I/O assignments
PLC
Device No.
X000
Name
Remarks
Error reset
X001
STOP
X002
Forward limit
Use external wiring with NC contacts.
X003
Reverse limit
Use external wiring with NC contacts.
X004
Forward JOG operation
X005
Reverse JOG operation
X006
DOG type mechanical zero return operation start
X007
1-speed positioning operation start
Y000
Stand by display
FX3U-1PG
Terminal name
Description
DOG
DOG input of DOG type mechanical zero return
STOP
Deceleration stop input
PG0
FP
RP
CLR
Remarks
Zero point signal is input form the servo amplifier
Forward pulses output
Reverse pulses output
CLR signal is being output
10.1.2 Device assignments
Device No.
M0
M1
STOP
M2
Forward limit
M3
Reverse limit
M4
Forward JOG operation
M5
Reverse JOG operation
M6
DOG type mechanical zero return operation start
M7
Relative/absolute address
M8
1-speed positioning operation start
Remarks
Relative address specification
M9
Interrupt 1-speed positioning operation start
Always OFF
M10
2-speed positioning operation start
Always OFF
M11
External command positioning operation start
Always OFF
M12
Variable speed operation
Always OFF
M13
Interrupt stop operation start
Always OFF
M14
Interrupt 2-speed positioning operation start
Always OFF
M15
Data-set type mechanical zero return operation start
Always OFF
M20
READY
M28
D11, D10
112
Name
Error reset
Positioning completion flag
Current address
D21, D20
Current address (pulse converted value)
D31, D30
Current value of operation speed
10 Program Example
FX3U-1PG User's Manual
10.1 Assignments
1
BFM No.
Name
Setting value
#0
Pulse rate
K8,192
#2, #1
Feed rate
K1,000
Introduction
10.1.3 Buffer memory assignments
Remarks
PLS/REV
μm/REV
2
System of units
b1=1, b0=0: Combined system
#3 b3, b2
Interrupt input setting
b3=0, b2=0: Not used
#3 b5, b4
Position data multiplier
b5=1, b4=1:103
#3 b6
Acceleration/deceleration
mode
b6=0: Trapezoidal acceleration/deceleration
#3 b7
Variable
speed
operation
acceleration/deceleration
setting
b7=0: Not used
Pulse output format
H2032
3
System
Configuration
#3 b8
Operation
parameter
b8=0: Forward pulse/Reverse pulse
#3 b9
Rotation direction
#3 b10
Zero return direction
b10=0: Current address decreases
#3 b11
Limit deceleration mode
b11=0: Immediately stop
#3 b12
DOG input polarity
b12=0: NO contacts
#3 b13
Count start point
b13=1: DOG backward end
#3 b14
STOP input polarity
b14=0: NO contacts
#3 b15
STOP input mode
b15=0: Remaining distance operation
Maximum speed
b9=0: Current address increases
K200,000
Bias speed
K0
#8, #7
JOG speed
K10,000
#10, #9
Zero return speed (high speed)
K10,000
#11
Zero return speed (creep)
K1,500
#12
Number of zero-point signal for zero return
#15
#16
Zero-point address
Acceleration/deceleration time
Starting delay time
Target address Ι
#20, #19
K3
K0
K100
6
K0
K1,000
Operation speed Ι
K200,000
#25
Operation command
M15 to M0
Refer to Subsection 10.1.2.
#28
Status information
M35 to M20
Refer to Subsection 10.1.2.
#32
Positioning parameter selection
K0
Before Starting
Positioning
Operation
#18, #17
5
Wiring
#6
#14, #13
4
Installation
#5, #4
Specification
#3 b1, b0
Use the positioning parameter
7
Buffer Memory
8
Manual Control
9
Positioning
Control
10
Program
Example
113
10 Program Example
FX3U-1PG User's Manual
10.2
10.2 Explanation of Operation
Explanation of Operation
The motor executes reciprocating movements using the 1-speed positioning operation.
The motor can execute also the DOG type mechanical zero return operation and JOG operation.
Do not put the load on the motor for safety reasons when you confirm the operation according to this program
example.
10.2.1 DOG type mechanical zero return operation
1) When X006 (DOG type mechanical zero return operation start) in the PLC main unit is set to ON, the
motor starts the DOG type mechanical zero return operation in the current value decreasing direction.
2) When the DOG input turns ON, the motor decelerates to the zero return speed (creep).
3) When the zero-point signal is input for 3 counts after the DOG input turns OFF again, the motor stops, the
zero-point address "0" is written to the current address, and the CLR signal is output.
Speed
Maximum speed
(200,000 Hz)
Zero return speed
(high speed)
(10,000 Hz)
Zero return speed (creep)
(1,500 Hz)
Acceleration/
deceleration time
(100 ms)
Time
Acceleration/
deceleration time
(100 ms)
DOG
Zero-point signal (PG0)
X006
ON
Remarks
The DOG search function can be used depending on the start position of the DOG type mechanical zero
return operation.
114
10 Program Example
FX3U-1PG User's Manual
10.2 Explanation of Operation
1
When X004 (Forward JOG operation) in the PLC main unit is set to ON, the motor executes the JOG
operation in the current value increasing direction.
Introduction
10.2.2 JOG operation
2
Speed
Specification
Maximum speed
(200,000 Hz)
JOG speed
(10,000 Hz)
3
System
Configuration
Time
Less
than
300 ms
OFF
ON
OFF
Acceleration/
deceleration time (100 ms)
ON
4
OFF
Installation
X004
Acceleration/
300 ms deceleration time (100 ms)
Remarks
When X005 (Reverse JOG operation) in the PLC main unit is set to ON, the work starts moving in the reverse
direction at the same speed as above.
5
Wiring
10.2.3 1-speed positioning operation
1) When X007 (1-speed positioning operation start) is set to ON, the motor moves 1,000 mm in the forward
direction, and stops for 2 seconds. At this time, "Y000" is output as the waiting indication.
2) After that, the motor moves 1,000 mm in the reverse direction, and finishes the operation.
6
Before Starting
Positioning
Operation
Speed
Operation speed I
(200,000 Hz)
Acceleration/
deceleration time
(100 ms)
7
Acceleration/
deceleration time
(100 ms)
Time
Acceleration/
deceleration time
(100 ms)
Stop for
2 seconds
Y000
Operation speed I
(200,000 Hz)
9
ON
Positioning
Control
X007
8
Target address I
(-1,000 mm)
Manual Control
Acceleration/
deceleration time
(100 ms)
Buffer Memory
Target address I
(1,000 mm)
ON
10
Program
Example
115
10 Program Example
FX3U-1PG User's Manual
10.3
10.3 Sequence Program
Sequence Program
M8002
Initial pulse
M8002
Initial pulse
M20
M28
READY Positioning
completion flag
M20
M28
READY Positioning
completion flag
FNC232
ANDD=
D10
K0
FNC232
ANDD=
D10
K1000
FNC 12
MOV
K8192
U0\G0
Writing of pulse rate
FNC 12
DMOV
K1000
U0\G1
Writing of feed rate
FNC 12
MOV
H2032
U0\G3
Writing of operation parameter
FNC 12
K200000
DMOV
U0\G4
Writing of maximum speed
FNC 12
MOV
U0\G6
Writing of bias speed
FNC 12 K10000
DMOV
U0\G7
Writing of JOG speed
FNC 12 K10000
DMOV
U0\G9
Writing of zero return speed
(high speed)
FNC 12
MOV
K1500
U0\G11
Writing of zero return speed
(creep)
FNC 12
MOV
K3
U0\G12
Writing of number of zero-point
signals for zero return
FNC 12
DMOV
K0
U0\G13
Writing of zero-point address
FNC 12
MOV
K100
U0\G15
Writing of acceleration/
deceleration time
FNC 12
MOV
K0
U0\G16
Writing of starting delay time
FNC 12
MOV
K0
U0\G32
Positioning parameter
selection
FNC 12
DMOVP
K1000
U0\G17
When current address is 0.
Writing of target address I
(At forward)
FNC 12 K-1000
DMOVP
U0\G17
When current address is 1,000.
Writing of target address I
(At reverse)
K0
K20
T0
Y000
M8002
Initial pulse
FNC 12
K200000 U0\G19
DMOV
Stop for 2 seconds
Stand by display
Writing of operation speed I
X000
M0
Error reset
M1
STOP
M2
Forward limit
(When wiring Limit (LS) by NC)
M3
Reverse limit
(When wiring Limit (LS) by NC)
X001
X002
X003
To next page
116
To next page
10 Program Example
FX3U-1PG User's Manual
10.3 Sequence Program
1
Introduction
From previous page
From previous page
X004
M4
Forward JOG operation
M5
Reverse JOG operation
M6
DOG type mechanical zero
return operation start
M7
Relative address
M8
1-speed positioning
operation start
M9
Interrupt 1-speed
positioning operation start
M10
2-speed positioning
operation start
M11
External command
positioning operation start
M12
Variable speed
operation
M13
Interrupt stop
operation start
M14
Interrupt 2-speed
positioning operation start
M15
Data-set type mechanical
zero return operation start
X005
2
Specification
X006
M8000
RUN monitor
X007
M8000
RUN monitor
RUN monitor
U0\G25
FNC 12
DMOV
U0\G26
D10
FNC 12
MOV
U0\G28
K4M20
FNC 12
DMOV
U0\G58
D20
Reading of current address
(pulse converted value)
FNC 12
DMOV
U0\G60
D30
Reading of current value of
operation speed
5
6
Writing of operation command
Before Starting
Positioning
Operation
M8000
K4M0
Not
used
Wiring
RUN monitor
FNC 12
MOV
4
Installation
M8000
System
Configuration
T0
3
Reading of current address
7
Reading of status information
Buffer Memory
8
Manual Control
END
9
Positioning
Control
10
Program
Example
117
11 Troubleshooting
FX3U-1PG User's Manual
11. Troubleshooting
When a fault occurs, check the power supply voltage, the PLC main unit and the FX3U-1PG for loose terminal
screws, and examine the connectors for a defective contact.
STARTUP AND MAINTENANCE
PRECAUTIONS
•
•
•
Do not touch any terminal while the PLC's power is on.
Doing so may cause electric shock or malfunctions.
Before cleaning or retightening terminals, cut off all phases of the power supply externally.
Failure to do so may cause electric shock.
Before modifying or disrupting the program in operation or running the PLC, carefully read through this manual and the associated
manuals and ensure the safety of the operation.
An operation error may damage the machinery or cause accidents.
STARTUP AND MAINTENANCE
PRECAUTIONS
•
•
•
118
Do not disassemble or modify the PLC.
Doing so may cause fire, equipment failures, or malfunctions.
For repair, contact your local Mitsubishi Electric representative.
Turn off the power to the PLC before connecting or disconnecting any extension cable.
Failure to do so may cause equipment failures or malfunctions.
Turn off the power to the PLC before attaching or detaching the following devices.
Failure to do so may cause equipment failures or malfunctions.
- Peripheral devices, display modules, expansion boards and special adapters
- I/O extension units/blocks, FX Series terminal block and the special function units/blocks
- Battery and memory cassette
11 Troubleshooting
FX3U-1PG User's Manual
11
LED Diagnostics
LED
display
State
POWER
Corrective action
•
•
5 V DC is not supplied via the extension cable from
•
PLC.
Correctly connect the extension cable.
Properly supply the power of the PLC.
When the service power supply of the PLC main unit
is used, make sure that the supply capacity is not
exceeded.
5 V DC is supplied via the extension cable from
The power supply is normal.
PLC.
STOP
OFF
When the stop command is not input to the STOP When the LED does not turn on even when the STOP
terminal.
command is input, check the input wires.
DOG
OFF
When DOG input is not entered.
When the LED does not turn on even when the DOG is
input, check the input wires.
PG0
OFF
When zero point signal is not entered.
When the LED does not turn on even when the zero-point
signal is input, check the input wires.
FP
OFF
Forward pulse or pulse train interrupted.
OFF
Reverse pulse or directional output interrupted.
•
When the LED does not turn on when the zero return
completes, confirm that the zero return operation is
executed in the program of the PLC.
When the LED does not turn on even when the
forward limit/reverse limit is on, confirm that the limit
deceleration mode (BFM#3 b11 or BFM#37 b11) is off
in the program of the PLC.
OFF
CLR signal is not output.
•
ON
CLR signal is output.
When the deviation counter is not cleared at the servo
amplifier side even when the CLR signal is output, check
the output wire.
OFF
Normal operation.
No error.
Error occurred.
An error occurred at FX3U-1PG. Check the error code
(BFM#29) and take appropriate measures.
CPU error occurred.
If the FX3U-1PG does not fix the problem when powered
ON again, consult your local Mitsubishi Electric
representative.
CLR
Flicker
ERR
ON
119
C
Differeces with
FX2N-1PG
RP
When the LED does not turn on or blink even when each
positioning operation is executed, check the following
items.
• Confirm that the positioning operation is executed in
the program of the PLC.
• When the STOP command or the forward limit/reverse
limit command is input, the pulse output is not
executed.
B
Example
Connection
ON
A
Version
Information
OFF
Content of Error
Troubleshooting
11.1
11.1 LED Diagnostics
11 Troubleshooting
FX3U-1PG User's Manual
11.2
11.2 Error Codes
Error Codes
When an error occurs, the error contents can be checked by the error code (BFM#29).
After removing the error cause, clear the error code by turning off the power supply or by error reset (BFM#25
b0).
Error code
K0
Error corrective action
-
K
1*1
Speed relationship is incorrect.
Set the maximum speed > the bias speed or the zero
When the high speed < the bias speed or the zero return
return speed (high speed) > the creep speed and
speed (high speed) < the creep speed is set and the
execute error reset.
operation is started, this error is output.
K
3*1
Setting range is incorrect.
When a value beyond the setting range is set to the Change the positioning parameter set value to a value
positioning parameter and the operation is started, this error within the set range and execute error reset.
is output.
K
4*1
Setting value overflow error.
When the converted pulse value of the travel distance Set the travel amount to a value within 32 bit and
exceeds ±32 bits (at the start of operation or while the target execute error reset.
address is changed), this error is output.
*1.
120
Error Content
No error.
K5
Operation command multiple selection error.
Change the sequence program so that only one
When several operation commands are simultaneously on in
operation command turns on, and execute error reset.
b6, b8 to b15 of BFM#25, this error is output.
K6
When the forward limit/reverse limit turns off, this error
Forward limit/reverse limit error.
is reset.
When the forward limit (BFM#25 b2) or the reverse limit
Move away from the forward limit/reverse limit by using
(BFM#25 b3) turn on, this error is output.
the JOG operation.
K7
Watchdog timer error.
If the error remains even when the power is turned from
OFF to ON, consult your local Mitsubishi Electric
representative.
represents the BFM number for which there is an error.
11 Troubleshooting
FX3U-1PG User's Manual
11
Diagnostics on the PLC Main Unit
11.3.1 POWER (POW) LED [ON/Flicker/OFF]
The table below describes details for the LED statuses.
LED Status
B
Error corrective action
Power of the specified voltage is being
The power supply is normal.
supplied to the power supply terminal.
Example
Connection
ON
PLC Status
Check the supply voltage.
After disconnecting cables other than the power cable, turn the power ON
again, and check for changes in the state. If no improvement is obtained,
consult your local Mitsubishi Electric representative.
OFF
One of the following causes may have
occurred.
•
• The power supply is OFF.
• Incorrect external wiring.
• Power of the specified voltage is not •
being supplied to the power supply
terminal.
• The power cable is broken.
If the power is not OFF, check the power supply and the power supply
route. If power is being supplied correctly, consult your local Mitsubishi
Electric representative.
After disconnecting cables other than the power cable, turn the power ON
again, and check for changes in the state. If no improvement is obtained,
consult your local Mitsubishi Electric representative.
11.3.2 BATT (BAT) LED [ON/OFF]
The table below describes details for the LED statuses.
PLC Status
Error corrective action
ON
The battery voltage is low.
Immediately replace the battery.
OFF
The battery voltage is higher than the value
Normal.
with D8006.
121
C
Differeces with
FX2N-1PG
Flicker
One of the following causes may have
occurred.
•
• Power and current of the specified
•
voltage is not being supplied to the power
supply terminal.
• Incorrect external wiring.
• Internal errors in the PLC.
LED Status
A
Version
Information
The following describes some of the PLC errors from the LED lights on the PLC.
For details related to the PLC main unit wiring, special auxiliary relays, and special data registers, refer to the
following respective manuals.
Refer to FX3U Hardware Edition.
Refer to FX3UC Hardware Edition.
Troubleshooting
11.3
11.3 Diagnostics on the PLC Main Unit
11 Troubleshooting
FX3U-1PG User's Manual
11.3 Diagnostics on the PLC Main Unit
11.3.3 ERROR (ERR) LED [ON/Flicker/OFF]
The table below describes details for the LED statuses.
LED Status
PLC Status
Error corrective action
1)
ON
Flicker
OFF
122
Stop the PLC, and turn the power ON again.
If the ERROR (ERR) LED goes out, a watchdog timer error may have
occurred. Adopt any of the following measures:
- Review the program.
Set the maximum value (D8012) lower than the watchdog timer value.
- Check that the input used for input interrupt or pulse catch is not being
abnormally turned ON and OFF in one scan.
- Check that the frequency of the pulse (duty 50%) input to the highspeed counter is not exceeding the specified range.
- Add WDT instructions.
A watchdog timer error may have occurred,
Add some WDT instructions to the program, and reset the watchdog
or the hardware of the PLC may be
timer several times in one scan.
damaged.
- Change the watchdog timer value.
Change the watchdog timer setting (D8000) in the program so that the
setting is larger than the maximum value of the scan time (D8012).
2) Remove the PLC and supply the power to it from another power source.
If the ERROR (ERR) LED goes out, noise may have affected the PLC.
Adopt the following measures:
- Check the ground wiring, and re-examine the wiring route and
installation location.
- Fit a noise filter onto the power supply line.
3) If the ERROR (ERR) LED does not go out even after measures in 1) and
2) are adopted, consult your local Mitsubishi Electric representative.
One of the following errors has occurred on
the PLC:
• Parameter error
Perform PLC diagnosis and program check with the programming tool.
• Syntax error
• Ladder error
No errors to stop the PLC have occurred.
If the operations of the PLC are abnormal, perform PLC diagnosis and
program check with the programming tool.
An I/O error, parallel link/communication error, or operation error may have
occurred.
Appendix A: Version Information
FX3U-1PG User's Manual
Appendix A-1 Version Information
11
Troubleshooting
Appendix A: Version Information
A
Version
Information
Appendix A-1 Version Information
Appendix A-1-1 Version check method
B
The version of FX3U-1PG can be checked by the following method.
The version of the FX3U-1PG is shown as "VERSION" indicated on the label adhered to the right side of the
product.
Example
Connection
1. Checking the nameplate
C
Differeces with
FX2N-1PG
Right side
1 . 0
0
Version
2. Checking the buffer memory (BFM)
In the FX3U-1PG, users can obtain the FX3U-1PG version information by monitoring BFM#62 (decimal
number).
Appendix A-1-2 Version upgrade history
The table below lists the version upgrade history of the FX3U-1PG.
Version
Ver. 1.00
Contents of version upgrade
First product
123
Appendix B: Example Connection
FX3U-1PG User's Manual
Appendix B-1 Example of Connection with MR-J4-[ ]A Servo Amplifier
Appendix B: Example Connection
This chapter explains FX3U-1PG connected to a FX3U Series PLC (AC power supply type), and examples of
connection with the servo amplifier and stepping motor driver.
For details of other PLC, servo amplifier and stepping motor driver, refer to the manual of each product.
Appendix B-1 Example of Connection with MR-J4-[ ]A Servo Amplifier
FX3U Series
PLC
L1
L
N
AC power supply
Class-D
grounding
Main circuit
power supply
L2
MR-J4-
A
Servo amplifier*1
L3
U
V
To servo
motor
W
24V
X000
Error reset
RA1
RD 49
X001
STOP
RA2
INP 24
X002
Forward limit
RA3
ALM 48
X003
Reverse limit
X004
Forward JOG
X005
Reverse JOG
Zero return
command
Start
X006
X007
X010
X011
X012
Servo ready
Positioning
RA2 completion
Servo failure
RA3
RA1
0V
S/S
FX3U-1PG
S/S
CN1
DICOM 21
SON 15
RES 19
LSP 43
LSN 44
CN1
EM2 42
DOCOM 47
24 V DC
power supply
Regenerative
option
P
CN2
C
DOG
LSD
STOP
STOP
Encoder
OPC 12
DICOM 20
VIN
FP
Cable length:
2 m or less
COM0
NP 35
Cable length:
2 m or less
PG0-
*1.
124
CN1
CR 41
CLR
PG0+
PP 10
DOCOM 46
RP
COM1
SD Plate
Cable length:
2 m or less
P15R 1
OP 33
Set the command pulse input form of the servo amplifier (PA13) MR-J4- A to “021*” (negative logic,
command input pulse train filter: 500 kpps or less).
In “*”, set “0” when the pulse output type of FX3U-1PG is “Forward/reverse pulse train”, and set “1”
when it is “Pulse train + Direction”.
Appendix B: Example Connection
FX3U-1PG User's Manual
Appendix B-2 Example of Connection with MR-J3-[ ]A Servo Amplifier
11
FX3U Series
PLC
L1
L
AC power supply
L2
L3
U
V
To servo
motor
W
24V
Error reset
RA1
RD 49
X001
STOP
RA2
INP 24
X002
Forward limit
RA3
ALM 48
X003
Reverse limit
X004
Forward JOG
X005
Reverse JOG
Zero return
command
Start
X006
X010
X011
X012
Servo ready
RA1
Positioning
RA2 completion
Servo failure
RA3
0V
S/S
FX3U-1PG
S/S
DICOM 21
SON 15
C
RES 19
LSP 43
LSN 44
CN1
EMG 42
DOCOM 47
24 V DC
power supply
Regenerative
option
P
CN2
C
DOG
LSD
STOP
STOP
Encoder
OPC 12
DICOM 20
VIN
FP
Cable length:
2 m or less
COM0
PG0-
PP 10
NP 35
Cable length:
2 m or less
CN1
CR 41
CLR
PG0+
SD Plate
DOCOM 46
RP
COM1
B
Differeces with
FX2N-1PG
X007
CN1
Example
Connection
X000
Cable length:
2 m or less
A
Version
Information
N
Class-D
grounding
Main circuit
power supply
MR-J3-
A
Servo amplifier
Troubleshooting
Appendix B-2 Example of Connection with MR-J3-[ ]A Servo Amplifier
P15R 1
OP 33
125
Appendix B: Example Connection
FX3U-1PG User's Manual
Appendix B-3 Example of Connection with MR-J2S-[ ]A Servo Amplifier
Appendix B-3 Example of Connection with MR-J2S-[ ]A Servo Amplifier
FX3U Series
PLC
L1
L
N
Class-D
grounding
AC power supply
Main circuit
power supply
L2
MR-J2S-
A
Servo amplifier
L3
U
To servo
motor
V
W
24V
X000
Error reset
RA1
RD 19
X001
STOP
RA2
INP 18
X002
Forward limit
X003
Reverse limit
RA3
ALM 18
X004
Forward JOG
VDD 3
X005
Reverse JOG
Zero return
command
Start
COM 13
X006
X007
X010
X011
X012
FX3U-1PG
Servo ready
RA1
Positioning
RA2 completion
Servo failure
RA3
RES 14
LSP 16
TL
9
S/S
SG 10
Regenerative
option
P
DOG
LSD
STOP
STOP
FP
Cable length:
2 m or less
PP
NP
Cable length:
2 m or less
3
Cable length:
2 m or less
2
SG 10
CR
CLR
PG0-
Encoder
SD Plate
SG 01
RP
PG0+
CN2
C
OPC 11
COM0
COM1
CON1B
LSN 17
EGM 15
VIN
126
SON 5
0V
S/S
CON1A
8
P15R 4
OP 14
CON1A
Appendix B: Example Connection
FX3U-1PG User's Manual
Appendix B-4 Example of Connection with MR-JN-[ ]A Servo Amplifier
11
FX3U Series
PLC
L
AC power supply
L2
MR-JN-
A
Servo amplifier*1
RA1
RD 11
X000
Error reset
RA2
INP 10
X001
STOP
RA3
ALM 9
X002
Forward limit
X003
Reverse limit
X004
Forward JOG
X005
Reverse JOG
Zero return
command
Start
X010
X011
X012
Servo ready
RA1
Positioning
RA2 completion
Servo failure
RA3
0V
S/S
S/S
CN1
B
DICOM 1
SON 4
C
RES 3
LSP 6
LSN 7
CN1
EM1 8
DOCOM 13
24 V DC
power supply
Regenerative
option
P
CN2
C
DOG
LSD
STOP
STOP
Encoder
OPC 2
DICOM 1
VIN
FP
Cable length:
2 m or less
COM0
COM1
PG0-
*1.
PP 23
NP 25
Cable length:
2 m or less
CLR
PG0+
SD Plate
DOCOM 13
RP
Cable length:
2 m or less
A
Differeces with
FX2N-1PG
X007
To servo
motor
V
Example
Connection
X006
U
W
24V
FX3U-1PG
L1
Version
Information
N
Class-D
grounding
Main circuit
power supply
Troubleshooting
Appendix B-4 Example of Connection with MR-JN-[ ]A Servo Amplifier
CR
24 V DC
power supply
CN1
5
LG 14
OP 21
Set the command pulse input form of the servo amplifier (PA13) MR-JN- A to “21*” (negative logic,
command input pulse train filter: 200 kpps or less).
In “*”, set “0” when the pulse output type of FX3U-1PG is “Forward/reverse pulse train”, and set “1”
when it is “Pulse train + Direction”.
127
Appendix B: Example Connection
FX3U-1PG User's Manual
Appendix B-5 Example of Connection with Stepping Motor Driver
Appendix B-5 Example of Connection with Stepping Motor Driver
FX3U Series
PLC
L
N
Class-D
grounding
AC power supply
24V
X000
Error reset
X001
STOP
X002
Forward limit
X003
Reverse limit
X004
Forward JOG
X005
Reverse JOG
X006
Zero return command
X007
Start
X010
X011
X012
0V
S/S
FX3U-1PG
Stepping motor driver
S/S
DOG
LSD
STOP
STOP
VIN
DC power supply*1
Cable length:
2 m or less
FP
COM0
RP
Cable length:
2 m or less
CW+
Class-D
grounding
CCWClass-D
grounding
COM1
CLR
CW-
CCW+
Stepping
motor
DC power Cable length:
supply*1 2 m or less
PG0+
PG0Class-D
grounding
*1.
128
Zero-point
sensor
The I/O specification of the FX3U-1PG is 5 to 24 V DC. However, confirm the voltage range and circuit
configuration of the stepping motor driver before wiring.
For the voltage range and circuit configuration of the FX3U-1PG, refer to the following.
For the voltage range, refer to Section 2.4 and 2.5.
For the circuit configuration, refer to Section 5.1 and 5.2.
Appendix C: Differences with FX2N-1PG
FX3U-1PG User's Manual
Appendix C-1 Differences of Specification
11
Troubleshooting
Appendix C: Differences with FX2N-1PG
Appendix C-1 Differences of Specification
B
Example
Connection
Differences in specification between FX3U-1PG and FX2N-1PG are shown in the following table.
Item
Applicable PLC
FX3U-1PG
FX3U/FX3UC PLC
Range
Output
frequency
Positioning
-2,147,483,648 to 2,147,483,647 (user unit)
FX2N-1PG
FX2N/FX2NC/FX3U/FX3UC PLC
FX2N PLC: Up to 8 blocks can be extended.
FX2NC PLC: Up to 4 blocks can be extended.
FX3U PLC: Up to 8 blocks can be extended.
FX3UC (D, DS, DSS) PLC: Up to 8 blocks can be extended.
FX3UC-32MT-LT(-2) PLC: Up to 7 blocks can be extended.
-999,999 to 999,999 (user unit)
1 Hz to 200 kHz
10 Hz to 100 kHz
The output pulse frequency (f) of FX3U-1PG is The output pulse frequency (f) of FX2N-1PG is stepwise as
stepwise as follows.
follows.
f = 24 × 106 / n (Hz)
f = 1 × 10⁶ / 0.25n (Hz)
Where, n: Integer in range of 120 to 24,000,000 Where, n: Integer in range of 40 to 400,000
Trapezoidal acceleration/deceleration:
Acceleration
1 to 32,767 ms
Trapezoidal acceleration/deceleration:
/deceleration
Approximate S-shaped acceleration/deceleration: 50 to 5,000 ms
time
1 to 5,000 ms
Starting time
Motor system: 1 ms or less
Machine system: 2 ms or less
1st time: 500 ms or less
2nd time and later: Approximately 10 ms
5 V DC Current consumption 150 mA
5 V DC Current consumption 55 mA
Drive power
Inner control (Power is supplied through the extension cable (Power is supplied through the extension cable from the
supply
from the PLC.)
PLC.)
129
C
Differeces with
FX2N-1PG
Number of connectable FX3U PLC: Up to 8 blocks can be extended.
units to the main unit
FX3UC PLC: Up to 6 blocks can be extended.
A
Version
Information
This appendix describes the differences between the FX3U-1PG and the FX2N-1PG.
The following are differences between the FX3U-1PG and the FX2N-1PG. Be careful when replacing the
FX2N-1PG with the FX3U-1PG.
Change the system or sequence program as needed.
Appendix C: Differences with FX2N-1PG
FX3U-1PG User's Manual
Appendix C-2 Differences of Buffer Memory
Appendix C-2 Differences of Buffer Memory
BFM No.
High
order
16bit
Setting range
Low
order
16bit
Item
FX3U-1PG
-
#0
Pulse rate
1 to 32,767 PLS/REV
#2
#1
Feed rate
1 to 2,147,483,647 (user unit)
FX2N-1PG
1 to 999,999 (user unit)
b1, b0: System of units
b3, b2: Interrupt input setting
b3, b2: Not used
b5, b4: Position data multiplier
b6: Acceleration/deceleration mode
b6: Not used
b7: Variable speed operation acceleration/
b7: Not used
deceleration setting
-
#3
Operation parameter
b8: Pulse output format
b9: Rotation direction
b10: Zero return direction
b11: Limit deceleration mode
b11: Not used
b12: DOG input polarity
b13: Count start point
b14: STOP input polarity
b15: STOP input mode
#5
#4
Maximum speed
1 to 2,147,483,647 (user unit)
1 to 153,000 (user unit)
Set the value within 1 to 200,000 Hz when Set the value within 10 to 100,000 Hz
converted to pulse data.
when converted to pulse data.
-
#6
Bias speed
0 to 32,767 (user unit)
0 to 15,300 (user unit)
Set the value within 0 to 200,000 Hz when Set the value within 0 to 10,000 Hz when
converted to pulse data.
converted to pulse data.
#8
#7
JOG speed
1 to 2,147,483,647 (user unit)
1 to 153,000 (user unit)
Set the value within 1 to 200,000 Hz when Set the value within 10 to 100,000 Hz
converted to pulse data.
when converted to pulse data.
#10
#9
Zero return speed
(high speed)
1 to 2,147,483,647 (user unit)
1 to 153,000 (user unit)
Set the value within 1 to 200,000 Hz when Set the value within 10 to 100,000 Hz
converted to pulse data.
when converted to pulse data.
-
#11
Zero return speed
(creep)
1 to 32,767 (user unit)
1 to 15,300 (user unit)
Set the value within 1 to 200,000 Hz when Set the value within 0 to 10,000 Hz when
converted to pulse data.
converted to pulse data.
-
#12
Number of zero-point
0 to 32,767
signal for zero return
#14
Zero-point address
-
#15
Acceleration/
deceleration time
Trapezoidal acceleration/deceleration:
1 to 32,767 ms
Trapezoidal acceleration/deceleration:
Approximate
S-shaped
acceleration/
50 to 5,000 ms
deceleration:
1 to 5,000 ms
-
#16
Starting delay time
0 to 1,000 ms
Not used
#18
#17
Target address Ι
-2,147,483,648 to 2,147,483,647 (user
unit)
-999,999 to 999,999 (user unit)
Set the value within -2,147,483,648 to Set the value within -999,999 to 999,999
2,147,483,647 PLS when converted to PLS when converted to pulse data.
pulse data.
#20
#19
Operation speed Ι
1 to 2,147,483,647 (user unit)
1 to 153,000 (user unit)
Set the value within 1 to 200,000 Hz when Set the value within 10 to 100,000 Hz
converted to pulse data.
when converted to pulse data.
Target address ΙΙ
-2,147,483,648 to 2,147,483,647 (user
unit)
-999,999 to 999,999 (user unit)
Set the value within -2,147,483,648 to Set the value within -999,999 to 999,999
2,147,483,647 PLS when converted to PLS when converted to pulse data.
pulse data.
#22
130
#13
-2,147,483,648 to 2,147,483,647 (user
unit)
-999,999 to 999,999 (user unit)
Set the value within -2,147,483,648 to Set the value within -999,999 to 999,999
2,147,483,647 PLS when converted to PLS when converted to pulse data.
pulse data.
#21
Appendix C: Differences with FX2N-1PG
FX3U-1PG User's Manual
Appendix C-2 Differences of Buffer Memory
11
Low
order
16bit
#24
#23
Setting range
Item
Operation speed ΙΙ
FX3U-1PG
FX2N-1PG
1 to 2,147,483,647 (user unit)
1 to 153,000 (user unit)
Set the value within 1 to 200,000 Hz when Set the value within 10 to 100,000 Hz
converted to pulse data.
when converted to pulse data.
Troubleshooting
BFM No.
High
order
16bit
A
Version
Information
b0: Error reset
b1: STOP
b2: Reverse limit
b3: Reverse limit
b4: Forward JOG operation
B
b5: Reverse JOG operation
Example
Connection
b6: DOG type mechanical zero return operation start
b7: Relative/absolute address
-
#25
Operation command
b8: 1-speed positioning operation start
b9: Interrupt 1-speed positioning operation start
C
b10: 2-speed positioning operation start
Differeces with
FX2N-1PG
b11: External command positioning operation start
b12: Variable speed operation
b13: Interrupt stop operation start
b13: Not used
b14: Interrupt 2-speed positioning
operation start
b14: Not used
b15: Data-set type mechanical zero return
b15: Not used
operation start
#27
#26
Current address
-2,147,483,648 to 2,147,483,647 (user unit)
b0: READY
b1: Forward/Reverse
b2: Zero return completion
b3: STOP input ON
b4: DOG input ON
b5: PG0 input ON
-
#28
Status information
b6: Current value overflow
b7: Error flag
b8: Positioning completion flag
b9: 1-speed completion flag
b9: Not used
b10: Interrupt input 0 ON
b10: Not used
b11: Interrupt input 1 ON
b11: Not used
b12: Remaining distance operation waiting b12: Not used
b13 to b15: Not used
-
#29
Error code
An error code is stored at the time of the error occurrence.
-
#30
Model code
K5,130
-
#31
Not used
Not used
Buffer memories BFM#32 and later are new in the FX3U-1PG.
Refer to Section 7.2 for the contents of buffer memories BFM#32 and later.
K5,110
Not used
131
Appendix C: Differences with FX2N-1PG
FX3U-1PG User's Manual
Appendix C-3 Differences in Operation
Appendix C-3 Differences in Operation
Appendix C-3-1 Differences in properties common to all operation modes
Differences in properties common to all operation modes of FX3U-1PG and FX2N-1PG are shown in the
following table.
Change point
Starting time
Operation when the PLC mode
changes from RUN to STOP
Forward limit/
Reverse limit
(forward pulse
stop or reverse
pulse stop)
132
FX2N-1PG
Replacement point
The actual output frequency may be
The output pulse frequency (f) of The output pulse frequency (f) of
different even if the same operation
FX3U-1PG is stepwise as follows. FX2N-1PG is stepwise as follows.
speed I is set as shown in the
6
6
f = 1 × 10 / 0.25n (Hz)
f = 24 × 10 / n (Hz)
example on the left because the
Where, n: Integer in range of 120 to Where, n: Integer in range of 40 to stepwise property of the output
400,000
24,000,000
frequency is different.
Example:
Example:
Confirm that no problem is expected
When the operation speed I is set When the operation speed I is set in the system.
to "99,000 Hz"
to "99,000 Hz"
Change the sequence program as
99,000 = 1 × 10⁶ / 0.25n
99,000 = 24 × 106 / n
needed.
The frequency which can be output
n = 1 × 10⁶ / 0.25 / 99,000
n = 24 × 106 / 99,000
from the FX2N-1PG can be output
= 40.4 (Rounded off)
= 242.4 (Rounded off)
also from the FX3U-1PG.
242
40
Accordingly, by setting the actual
When the "n = 242"
When the "n = 40"
output frequency of the FX2N-1PG
Output pulse frequency
Output pulse frequency
in the FX3U-1PG, the motor can
f = 24 × 106 / 242
f = 4 × 10⁶ / 40
operate at the same speed using
= 99,174 Hz
= 100,000 Hz
the FX3U-1PG.
Output frequency
Operation
command
(BFM#25)
FX3U-1PG
Motor system: 1 ms or less
Machine system: 2 ms or less
Confirm that that the difference in
the starting time causes no problem
1st time: 500 ms or less
in the system.
2nd time and later: Approximately
Change the sequence program,
10 ms
such as setting up starting delay
time (BFM#16) if needed.
Continues the positioning
operation.
The motor decelerates and stops.
However, the motor continues the
operation
if
the
FROM/TO
instruction, etc. is being executed
by the BFM monitoring function,
etc.
Level detection.
STOP detection
It is necessary to keep the STOP Edge detection.
(BFM#25 b1)
signal ON for 1 ms or more.
Operation when
the forward limit
or reverse limit
(forward pulse
stop or reverse
pulse stop) is
detected in the
operation
direction
The operation varies as follows
depending on the setting of the
limit deceleration mode (BFM#3
b11 or BFM#37 b11):
• When the limit deceleration
mode (b11) is OFF
The motor stops immediately,
and the FX3U-1PG outputs the
CLR signal.
• When the limit deceleration
mode (b11) is ON
The motor decelerates and
stops, and the FX3U-1PG does
not output the CLR signal.
In either mode, the forward limit/
reverse limit error (Error code: K6)
occurs after the motor stops.
When the positioning operation is
stopped by the PLC mode change
from RUN to STOP, change the
sequence program so that the
positioning operation is stopped by
the STOP signal (BFM#25 b1 or
STOP terminal).
When the STOP is set to "OFF
ON OFF" in less than 1 ms,
change the sequence program so
that the STOP remains ON for 1 ms
or more.
In a sequence program that detects
errors and then performs a specified
The motor stops immediately, and
action, confirm that no problem is
the FX2N-1PG outputs the CLR
expected when the forward limit/
signal.
reverse limit error occurs.
No error occurs.
Change the sequence program as
needed.
Appendix C: Differences with FX2N-1PG
FX3U-1PG User's Manual
Appendix C-3 Differences in Operation
11
Differences in individual operation modes of FX3U-1PG and FX2N-1PG are shown in the following table.
JOG operation
Change point
FX2N-1PG
A
Replacement point
DOG type mechanical zero return operation
Change point
FX3U-1PG
Replacement point
The motor starts the DOG search
DOG search operation when operation even when the direction of
the forward limit/reverse limit the forward limit or reverse limit in the
is ON
ON status is the same as the zero
return direction.
The motor does not perform the
operation when the direction of the
forward pulse stop (forward limit) or
reverse pulse stop (reverse limit) in the
ON status is the same as the zero
return direction.
Confirm that no problem is expected
in the system when an error occurs at
the forward limit or reverse limit, the
zero return operation is executed
from the corresponding limit position,
and the motor reverses the operation
direction.
Change the sequence program as
needed.
The motor stops at the forward limit (or
reverse limit) and the forward limit/
reverse limit error occurs if the DOG
cannot be detected while the motor
Operation when the DOG
starts the zero return operation,
cannot be detected
reverses the operation direction at the
reverse limit (or forward limit) and then
reaches the forward limit (or reverse
limit).
The motor stops at the forward limit (or
reverse limit) but no error occurs if the
DOG cannot be detected while the
motor starts the zero return operation,
reverses the operation direction at the
reverse limit (or forward limit) and then
reaches the forward limit (or reverse
limit).
Confirm that no problem is expected
in the system when an error occurs at
the forward limit or reverse limit, the
zero return operation is executed
from the corresponding limit position,
and the motor reverses the operation
direction.
Change the sequence program as
needed.
FX2N-1PG
Replacement point
Interrupt 1-speed positioning operation
Change point
Operation when the travel
amount is small
(When the time required to
perform deceleration from
the operation speed I is
longer than the travel time)
FX3U-1PG
The motor decelerates when the The motor does not accelerate until
interrupt input is detected, and stops at the operation speed I is reached, and
the target address I.
performs acceleration only until it
reaches a speed so as to achieve
"Travel amount during deceleration = Confirm that no problem is expected
Target address I".
in the system when the operation
speed is different or when the travel
Time
required
Speed
Travel time
amount is small and the motor stops
Speed
for deceleration
Operation
immediately.
Operation
speed I
Change the sequence program as
speed I
needed so that the motor operation
using the FX3U-1PG becomes the
same motor operation using the
Time
Time FX2N-1PG by reducing the operation
Target address I
speed I.
Time required
Target address I
for deceleration
DOG
OFF
ON
DOG
OFF
Travel time
ON
133
C
Differeces with
FX2N-1PG
FX2N-1PG
B
Example
Connection
Confirm that no problem is expected
in the system when the travel amount
generated by 1 inching operation is
large
if
the
pulse
number
corresponding to 1 user unit is larger
than 1 pulse.
Change the sequence program as
needed.
Version
Information
Inching travel amount
FX3U-1PG
The FX3U-1PG outputs pulses
corresponding to 1 user unit.
However, the FX3U-1PG outputs 1
pulse even if the value "Position data
multiplier x Pulse rate" is smaller than
The FX2N-1PG outputs 1 pulse.
the feed rate in the machine system
setting or combined system setting
and the pulse number required for the
travel in 1 user unit is less than 1
pulse.
Troubleshooting
Appendix C-3-2 Differences in individual operation modes
Appendix C: Differences with FX2N-1PG
FX3U-1PG User's Manual
Appendix C-3 Differences in Operation
2-speed positioning operation
Change point
FX3U-1PG
FX2N-1PG
Replacement point
The motor reaches the target address The motor reaches the target address
I at the operation speed I, reverses the II at the operation speed II from the
Confirm that no problem is expected
operation direction, and then reaches beginning.
in the system when the motor
the target address II at the operation
reverses the operation direction if the
speed II.
operation direction is different
Speed
When the operation direction Speed
between the 1-speed and the 2is different between the 1speed.
Operation speed I
speed and the 2-speed
1-speed positioning operation can be
substituted for operation of the FX2N1PG.
Time
Time
Change the sequence program as
needed.
Operation speed II
Operation speed II
The motor performs acceleration until The motor starts with operation speed
it reaches the target address I.
II from the beginning.
Speed
Operation when the travel
amount at the 1-speed is
small
(When the time required to
perform acceleration until the
operation speed I is longer
than the travel time until the
target address I)
Speed
Operation speed I
Operation speed I
Target
address I
Operation speed II
Target address II
Travel time
Target
address I
Operation
speed II
Target address II
Time
Time required for acceleration
The motor starts deceleration at the
end of the 1-speed, and stops
immediately when it reaches the target
Operation when the travel address II.
amount at the 2-speed is Speed
Travel time
small
Operation
(When the time required to
speed I
perform deceleration from
Operation
the operation speed I is
speed II
longer than the travel time
until the target address II)
Time
Travel time
Time required for acceleration
The motor starts deceleration before it
reaches the target address I, and
stops when it reaches the target
address II.
Speed
Operation
speed I Operation
speed II
Target address II
Time required for deceleration
134
Time
Confirm that acceleration until the
operation speed I causes no problem
in the system.
1-speed positioning operation can be
substituted for operation of the FX2N1PG.
Change the sequence program as
needed.
Time
Target address II
Confirm that immediate stop causes
no problem in the system.
1-speed positioning operation can be
substituted for operation of the FX2N1PG.
Change the sequence program as
needed.
Appendix C: Differences with FX2N-1PG
FX3U-1PG User's Manual
Appendix C-3 Differences in Operation
11
Change point
FX3U-1PG
FX2N-1PG
Replacement point
The FX3U-1PG does not output
Operation when the operation
The motor operates at the bias speed. Change the sequence program so
pulses.
speed I starts at a speed
(The motor operates at 10 Hz if the that the operation speed I at the
The READY flag (BFM#28 b0) turns
lower than the bias speed
bias speed is set to "0".)
beginning is set to the bias speed.
OFF.
The motor restarts the operation when The motor does not restart the
the STOP signal is set to OFF.
operation even if the STOP signal is
set to OFF.
Speed
Operation
speed I
Operation when the STOP is
set from ON to OFF while the
operation command remains
ON
Time
ON
ON OFF
Variable speed
operation
(BFM#25 b12)
STOP
(BFM#25 b1)
Time
ON
ON OFF
135
B
C
Differeces with
FX2N-1PG
Variable speed
operation
(BFM#25 b12)
STOP (BFM#25 b1
or STOP terminal)
Operation
speed I
Confirm that no problem is expected
in the system when the operation is
restarted by setting the STOP signal
to OFF.
Change the sequence program as
needed so that the motor is stopped
by the STOP signal, the operation
command is set to OFF, and then the
STOP signal is set to OFF.
Example
Connection
Speed
A
Version
Information
Operation when the operation
The FX3U-1PG stops the pulse output. The motor operates at the bias speed. Change the sequence program so
speed I is changed to a
The READY flag (BFM #28 b0) (The motor operates at 10 Hz if the that the operation speed I is changed
speed lower than the bias
remains OFF.
bias speed is set to "0".)
to the bias speed.
speed
Troubleshooting
Variable speed operation
Appendix C: Differences with FX2N-1PG
FX3U-1PG User's Manual
Appendix C-3 Differences in Operation
MEMO
136
Warranty
FX3U-1PG User's Manual
Warranty
Please confirm the following product warranty details before using this product.
1. Gratis Warranty Term and Gratis Warranty Range
If any faults or defects (hereinafter "Failure") found to be
the responsibility of Mitsubishi occurs during use of the
product within the gratis warranty term, the product shall be
repaired at no cost via the sales representative or
Mitsubishi Service Company. However, if repairs are
required onsite at domestic or overseas location, expenses
to send an engineer will be solely at the customer's
discretion. Mitsubishi shall not be held responsible for any
re-commissioning, maintenance, or testing on-site that
involves replacement of the failed module.
[Gratis Warranty Term]
The gratis warranty term of the product shall be for one
year after the date of purchase or delivery to a designated
place. Note that after manufacture and shipment from
Mitsubishi, the maximum distribution period shall be six (6)
months, and the longest gratis warranty term after
manufacturing shall be eighteen (18) months. The gratis
warranty term of repair parts shall not exceed the gratis
warranty term before repairs.
[Gratis Warranty Range]
1) The range shall be limited to normal use within the
usage state, usage methods and usage
environment, etc., which follow the conditions and
precautions, etc., given in the instruction manual,
user's manual and caution labels on the product.
2) Even within the gratis warranty term, repairs shall be
charged for in the following cases.
a) Failure occurring from inappropriate storage or
handling, carelessness or negligence by the user.
Failure caused by the user's hardware or software
design.
b) Failure caused by unapproved modifications, etc.,
to the product by the user.
c) When the Mitsubishi product is assembled into a
user's device, Failure that could have been
avoided if functions or structures, judged as
necessary in the legal safety measures the user's
device is subject to or as necessary by industry
standards, had been provided.
d) Failure that could have been avoided if
consumable parts (battery, backlight, fuse, etc.)
designated in the instruction manual had been
correctly serviced or replaced.
e) Relay failure or output contact failure caused by
usage beyond the specified Life of contact
(cycles).
f) Failure caused by external irresistible forces such
as fires or abnormal voltages, and failure caused
by force majeure such as earthquakes, lightning,
wind and water damage.
g) Failure caused by reasons unpredictable by
scientific technology standards at time of shipment
from Mitsubishi.
h) Any other failure found not to be the responsibility
of Mitsubishi or that admitted not to be so by the
user.
2. Onerous repair term after discontinuation of
production
1) Mitsubishi shall accept onerous product repairs for
seven (7) years after production of the product is
discontinued.
Discontinuation of production shall be notified with
Mitsubishi Technical Bulletins, etc.
2) Product supply (including repair parts) is not available
after production is discontinued.
3. Overseas service
Overseas, repairs shall be accepted by Mitsubishi's local
overseas FA Center. Note that the repair conditions at
each FA Center may differ.
4. Exclusion of loss in opportunity and secondary
loss from warranty liability
Regardless of the gratis warranty term, Mitsubishi shall not
be liable for compensation of damages caused by any
cause found not to be the responsibility of Mitsubishi, loss
in opportunity, lost profits incurred to the user or third
person by Failures of Mitsubishi products, special
damages and secondary damages whether foreseeable or
not, compensation for accidents, and compensation for
damages to products other than Mitsubishi products,
replacement by the user, maintenance of on-site
equipment, start-up test run and other tasks.
5. Changes in product specifications
The specifications given in the catalogs, manuals or
technical documents are subject to change without prior
notice.
6. Product application
1) In using the Mitsubishi MELSEC programmable logic
controller, the usage conditions shall be that the
application will not lead to a major accident even if any
problem or fault should occur in the programmable
logic controller device, and that backup and fail-safe
functions are systematically provided outside of the
device for any problem or fault.
2) The Mitsubishi programmable logic controller has been
designed and manufactured for applications in general
industries, etc. Thus, applications in which the public
could be affected such as in nuclear power plants and
other power plants operated by respective power
companies, and applications in which a special quality
assurance system is required, such as for Railway
companies or Public service purposes shall be
excluded from the programmable logic controller
applications.
In addition, applications in which human life or property
that could be greatly affected, such as in aircraft,
medical applications, incineration and fuel devices,
manned transportation, equipment for recreation and
amusement, and safety devices, shall also be
excluded from the programmable logic controller range
of applications.
However, in certain cases, some applications may be
possible, providing the user consults their local
Mitsubishi representative outlining the special
requirements of the project, and providing that all
parties concerned agree to the special circumstances,
solely at the users discretion.
137
Revised History
FX3U-1PG User's Manual
Revised History
138
Date
Revision
Description
9/2012
A
First Edition
4/2015
B
• The description of speed switching in the 2-speed positioning operation is added.
• Errors are corrected.
FX3U-1PG
USER'S MANUAL
HEAD OFFICE:
TOKYO BUILDING, 2-7-3 MARUNOUCHI, CHIYODA-KU, TOKYO 100-8310, JAPAN
MODEL
FX3U-1PG-U-E
MODEL CODE
09R629
JY997D47301B
(MEE)
Effective April 2015
Specifications are subject to change without notice.