1
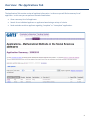
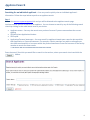
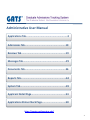
Administrative User Manual Applications Tab...........................................................3 Admissions Tab..........................................................10 Reviews Tab...............................................................19 Messages Tab.............................................................29 Documents Tab..........................................................36 Reports Tab................................................................44 System Tab.................................................................49 Applicant Detail Page.................................................54 Applications Status Check Page..................................58 https://nugats.northwestern.edu/ 1 LoggingIn The login page for GATS can be found at: https://nugats.northwestern.edu/ Note that Firefox (by Mozilla) is the only approved browser for use with GATS. Certain elements of GATS will not function properly when using Internet Explorer. Archive Database To view admissions data from prior years (2010/2011 and later), you can access the GATS archive database at: https://nugats‐report.northwestern.edu/ 2 Applications Tab Overview: The Applications Tab Searching for Applicants Sending an Email to an Applicant Regarding Completion Status of Application 3 Overview:TheApplicationsTab The Applications Tab contains a view of applicant information. In this area you will find a summary list of applicants. In this area you can perform the tasks listed below: View a summary list of all applicants. Search for an individual applicant or applicants based using a variety of criteria. Send reminder emails to applicant regarding “complete” or “incomplete” applications. 4 ApplicantSearch Searching for an individual applicant – You may need to quickly view an individual applicant’s information. Follow the steps below to perform an applicant search. Step 1 Click on the search for a particular applicant link and you will be directed to the applicant search page. You have several options to search for an applicant. You can choose to search by any of the following search criteria by clicking on the radio button next to your choice. Applicant names – You may also search on a portion of a name if you are unsure about the correct spelling SES Admissions Application Number SES Emplid Application/Personal statement – You may search for applicants based upon a word or phrase within their Application or Personal Statement. For example, a faculty member may wish to see applicants who have mentioned his or her name within the personal statement. Enter the last name of the faculty member to search for these results. ** This feature will not search documents that have been scanned. Enter the term(s) for which you would like to search in the text box, select your search criteria and click the button. 5 If your search has matching results they will be displayed in a table under “Search Results”. A message will display if your search returns no matching results. Searching for applicants based on dates – You may need to quickly view applicants based on the date application submission. To view only applicants from a specific date range, follow the steps below. Step 1 Click in the “Application Submitted” date box and a calendar will appear. Select your beginning date. Select your ending date in the next box. (You may also type in the dates but make sure you follow the YYYY‐MM‐DD format.) Step 2 Click the Step 3 button to apply the date range to your applicants. To remove the date range, click the button. 6 SendingApplicationCompletionStatusEmails You are able to send applicants an email reminding them that their application is incomplete from the Applications Tab. You are also able to send a message to an applicant informing them that all application materials have been received and their application is now complete. GATS will keep a history of messages sent to the applicant which can also be viewed here. To send an applicant a reminder message, follow the steps below. Step 1 Scroll down to view your list of applicants. Listed under the field labeled “Complete”, you will see a “Yes” or a “No” indicating if the application is complete or it is not complete. Next to the “Yes” or “No” you will see the message icon. Click the button. The Notify Applicant page will appear. Note: Marking an application as complete is performed in the Admissions tab. See the Admissions Tab document for more information. 7 Step 2 Above the message text you will see the E‐mail Notice History indicating any application completion status messages that have been sent to the applicant and the date and time they were sent. Below the e‐mail notice history you will see the text for the message you can send to the applicant. Review the text to ensure you wish to send the message. Examples of the two different application completion status messages are below: 8 Step 3 Once you have reviewed the text to ensure that you wish to send the applicant this message, click the button. The message will be sent and a blind copy of the message has been sent to you. You can return to this page to view the E‐mail Notice History by clicking on the icon. 9 Admissions Tab Overview: The Admissions Tab Viewing the Status of Required Application Materials Viewing Administrative Notes Marking TOEFL & GRE scores received Making Applications Complete Recording a Recommended Admission Decision Searching for Applicants Based on a Date Range 10 Overview:TheAdmissionsTab The Admissions Tab will allow you to view the status of required materials for your applicants, mark applications as complete, and record the “recommended” admission decision for the applicant. In this area you can perform the following tasks listed below: View the status of required application materials for each applicant View administrative notes Mark TOEFL scores as received Mark an application as complete Enter a recommended decision for admission Search for applicants based on a specific date range 11 Viewing the Status of Required Application Materials The admissions tab has pre defined fields that you will view for your applicants. The data fields available to you will provide you with a summary of all application materials received to date. The Transcripts, Letters of Recommendations, and Reviews columns will display the number of files received over the total number of expected files. For example, if the applicant has marked that he/she will provide two Transcript files and both are received, the column will display as “2/2”. The same logic is used for Letters of Recommendation as well as the number of Reviews that have been completed for the applicant. GRE and TOEFL test scores are also available. Please note that those marked with an asterisk (*) are self reported, unofficial scores. Official scores received are moved from SES to GATS on a nightly basis and will be displayed accordingly on the Admissions tab. The “Status” column indicates the final admissions decision that has been entered into SES. The admissions decision is moved from SES to GATS on a nightly basis. This is discussed in more detail in the Recording a Recommended Admission Decision section of this document. 12 Entering and Viewing Administrative Notes Administrative notes can be entered by admissions administrators for the purpose of documenting supplemental information regarding a particular applicant. It is important to note that notes entered here will not be viewable by the applicant. If an Administrative Note has been added to a applicant’s record you will see the note icon next to the applicant’s last name. When you roll your mouse over the the administrative note will appear. If the note is too long it will be truncated you would need to click the icon to view the entire note. To view or edit the full Administrative Note click on the last name of the applicant and you will be taken to the Applicant Detail page where you are able to view and edit Administrative Notes. 13 Marking TOEFL & GRE scores received Some applicants may require the submission of TOEFL scores to complete their application materials. There are several ways for GATS to document the receipt of the TOEFL scores: 1. 2. 3. TOEFL & GRE scores received in SES will flow to GATS in the nightly interface. Scores received in this manner will automatically be marked as “RECEIVED” in the applicant’s Status Check page. Applicants who have a self‐reported score or who may have sent a hard copy of text scores through the mail, must have their TOEFL scores manually marked as “RECEIVED” through the Applicant’s Status Check header under the Applicant Detail page. To do this, click the “Mark as RECEIVED” button (see image below). NOTE: Hard copies of TOEFL score reports received in the mail can be scanned into the Documents section of GATS (see the Documents tab document for instructions). If an applicant has test scores in the suspense file (Applicant Detail page), you can also use the “Mark as RECEIVED” button once you have verified the score as a match. 14 Making Applications Complete When a applicant has completed the requirements for the application you will mark the application as “Complete”. The applicant will see that his or her application materials have been received and no further action is required by viewing his or her person GATS web page. As such, you can also send an email notification to the applicant notifying them that their application is complete. (Detailed instructions are available in the GATS Application document.) ** By associating documents to an applicant record, GATS will mark the document as received in most cases. It is recommended that you do not scan in all documents until you are prepared to mark the “Complete” box on the Admissions tab. Applicants will become confused and contact you if they see that all documents are received and their file is “Incomplete.” Step 1 Immediately following the receipt of all documents and entry of the documents in the GATS system, locate the record of the applicant(s) with a completed application on the Admissions tab. (Instructions on how to scan and associate documents to applicants are available in the Documents Tab document.) Check the box in the “Complete” column across from the applicant name. Step 2 At any point you can view an applicant’s individual GATS web page to ensure you have entered the correct data. Click on the applicant’s last name and you will be taken to the Applicant Detail page. Scroll to the bottom of the Applicant Detail page and expand the “Status Check Page” area by clicking on the button. You will see a replica of what the applicant sees when they log into their GATS account. 15 Step 3 If you see that the application has been incorrectly marked as Complete, you can go back to the Admissions tab and uncheck the “Complete” box. This will change the applicant’s page and it will show as “Incomplete”. Once you are done reviewing the record, simply close the window to return to the Admissions tab. 16 Recording Recommended Admissions Decisions The GATS application allows admissions administrators to enter a recommended admission decision into the Admissions tab. It is important to note that this is only a “recommended” decision and can only be viewed by administrative GATS users for your program. Once a final admissions decision has been reached by the department, that decision must be entered in SES. Once the decision has been entered in SES and has subsequently been moved to GATS, the applicant will see a message on his or her personal GATS status page that the decision has been reached. The instructions on that page will direct the applicant to log into the Apply Yourself web center for details. Note: This process has a 48 hour delay. GATS will not show that a decision has been made until 48 hours after a decision has been made in SES. Should you enter an incorrect decision, please contact either Beth Bogdewic or Sara Wright at The Graduate School for assistance with any corrections. Step 1 Locate the applicant you wish to enter a decision for on the Admissions tab. In the column marked “Rec. Decision” you will see a drop down box. Click the drop down box to select the admissions decision you wish to display. If you would like to view the decision status on the applicant web page after you have entered a decision in SES, click the last name of the applicant to open the Applicant Detail Page. Scroll to the bottom of the page and expand the Status Check Page area. Again, the decision status in GATS will not be updated unitl 48 hours after it is entered in SES. 17 Searching for applicants based on a specific date range Unlike the Applications tab, you cannot search for an individual applicant on the Admissions tab. However, you are able to search for a list of applications based on a specific date range. In addition, you can search for applications based upon whether the application has been marked complete or not. Tip: You may also sort your results by clicking on any column heading that has a double arrow. Step 1 Click in the “Application Submitted” date box and a calendar will appear. Select your beginning date. Select your ending date in the next box. (You may also type in the dates but make sure you follow the YYYY‐MM‐DD format.) Step 2 From the status drop down, select the type of applicants you wish to view. Your options are All, Complete, or Not Complete. Step 3 Click the button to view your results. If you would like to clear your filter, click the button. 18 Reviews Tab Overview: The Reviews tab Creating Faculty Reviewer Groups Assigning Reviewers/Reviewer Groups to an Applicant Managing Applicant Reviews Assigned to You Viewing and Editing Reviewer Assignments 19 Overview:TheReviewsTab The Reviews tab is where you will create and maintain faculty application reviews for your program. In this area you can perform these tasks: Create a faculty reviewer group Assign individual or groups of reviewers to an applicant Manage applicant reviews assigned to you View and edit reviewer assignments for your program 20 CreatingaFacultyReviewerGroup In some instances you may wish to have more than one faculty member review an application. For cases such as this, GATS has the capability of creating a reviewer group comprised of multiple faculty members in your program. Step 1 From the Reviews tab, click on the manage the reviewer groups link. Step 2 A new page will appear with several options. Click the button. 21 Step 3 A pop‐up box will appear on the page. Enter a new “Group Name”. The “Scope” dropdown should always be set to “Department”. You can also enter a brief description for the group. Click the finished and then close the pop‐up box. button when The faculty group you created now appears in the “Reviewer Groups” area. Step 4 Once the group has been created, you can add “Group members” (faculty reviewers) to the newly created group. Highlight the group you would like to add members to by clicking on its row. The “Group members” grid is now active. Click the button in the “Group members” area. 22 Step 5 A pop‐up window will appear. Select the reviewer you would like to add from the dropdown list, the click the button (the reviewer’s name will now appear in the “Group members” area). Note: In order for a reviewer’s name to appear in the drop down list, they must first be provisioned as a reviewer in the Systems tab. See the Systems Tab document for instructions on adding a faculty reviewer to GATS. After you hit “Submit”, the faculty reviewer’s name will appear in the Group Members area. Now you can add additional reviewers or close the pop‐up box. 23 AssigningIndividualsandGroupstoApplicants Step 1 In the Reviews Tab, select one or more applicants from the “Select applicants…” dropdown list. Step 2 Select one or more reviewers and/or reviewer groups from the “Select reviewers…” dropdown list. Note: In order for a reviewer’s name to appear in the drop down list, they must first be provisioned as a reviewer in the Systems tab. See the Systems Tab document for instructions on adding a faculty reviewer to GATS. Step 3 Click the button when finished. This new assignment will now be visible to the assigned reviewers when they login to GATS. You can also view the assignments in the Curent Assignments tab within the Reviews tab (see page 9 of this document). 24 ManagingApplicantReviewsAssignedtoYou If you have applicants assigned to you for review, you will see them listed in the My Applicants tab in the Reviews tab. As a reviewer, you are responsible for completing an application review for all applicants assigned to you. To review an application, follow these steps: Step 1 Click on the applicant name that you would like to review. Step 2 This opens the Applicant Review page. Click on the next to any of the application headers you wish to view or check the Expand All box to see all available applicant information. 25 Step 3 Enter notes in the “Reviewer notes” text box. Then enter a value from the Score Scale in the “Overall reviewer score” text box. Note: The score scale is a predefined list specified by the program administrator at the beginning of the application period. Step 4 Click the “My review is complete” checkbox once you have completed your review. Then click the button to submit your review. Close the Applicant Review page. The review for the applicant will now be marked complete in the My Applicants tab. 26 ViewingandEditingReviewerAssignments There may be times when you need to remove a reviewer/applicant assignment. Follow the steps below to “Unassign” a reviewer from an applicant: Step 1 Click the Current Assignments tab in the Reviewers tab. Step 2 There are three options to search for reviewer assignments: “Reviewer Last Name”, “Applicant Last Name”, or “List All”. Choose your search preference and click the button. Step 3 Your search results will display. Click the Unassign link next to the assignment you would like to remove. A pop‐up box will appear to confirm that this is the action you wish to perform. Click Ok to proceed. 27 Step 4 “Success” will appear in the Action column. The next time the page is refreshed, this assignment will no longer appear on the list of Current Assignments. 28 Messages Tab Overview: The Messages Tab Inbox: Viewing and Replying to Messages Composing New Messages Archiving Messages 29 Overview:TheMessageCenter The Message Center will be the central forum for communication between applicants and department admissions administrators. Applicants will be able to send messages through their personal GATS applicant page. In turn, administrators will be able to reply to these messages via the GATS message center and compose new messages as well. It is important to note that this communication is not via email; rather messages will be stored in the GATS Message Center. A notification of a new message will be sent to the applicant via their personal email account; however, they must log in to their GATS account to view the message content. The Message Center will keep a log of all received and sent messages. You will be able to search through sent or archived messages to locate specific applicant communications. In the Messages Tab you can perform these tasks: View and Reply to applicant messages Compose a new message to an applicant Archive applicant messages It is recommended that you login to GATS daily to ensure that you don’t miss any applicant messages. This will allow you to respond to applicants in a timely manner and decrease phone calls during peak application periods. Tip: The main menu will alert you to any new messages that you have waiting for you in the Message Center. To view these messages open the Messages tab (see below). 30 Inbox:ViewingandReplyingtoMessages When you click on the Messages Tab, messages that applicants have sent will appear on this screen. Step 1 You can view the complete text of any message by clicking on the Subject field. Unread messages appear in bold. Step 2 When viewing a message you will have the option to send a reply, to archive the message, or return to the Message List. To compose a reply message to the applicant, click the button. Once you have completed your response message, click the button. A pop‐up box will appear. Click the button to confirm that you wish to send the message. Note: When a reply message is sent back to the applicant, they will receive an email alerting them that there is a new message waiting for them in their GATS applicant page. The text of the message you send via the Message Center does not appear in the email, it is only an alert. 31 ComposingNewMessages If you would like to compose a new message to a applicant, you will use the Compose New Mail tab. Step 1 Click the drop down next to the “To” field. This drop down contains a full list of current applicants to your program. Select the applicant you wish to receive the message. Step 2 Enter the subject and text for your message. Tip: GATS does not have a spell check feature so you may want to type your message in a word document and past it into GATS. Once you are satisfied with your message click the GATS under the Sent Messages tab. button. A copy of your sent message will be stored in Note: When a message is sent to an applicant, they will receive an email alerting them that there is a new message waiting for them in their GATS applicant page. The text of the message you send via the Message Center does not appear in the email, it is only an alert. 32 ArchivingMessages The Archive feature allows you to retain a copy of applicant communications, easily search for those communications, and keep your inbox organized. If you choose to archive the message it will be removed from the Inbox and placed in Archived Messages section. Tip: A good practice is to archive messages once you have completed responses and tasks related to them. This helps keep your Inbox clean and organized with messages that still require attention. Option A You can choose to Archive a message by opening it in your Inbox and clicking then the the message. button below The message will be transferred from your Inbox to the Archived Messages section. Option B In your Inbox check the box next to the message or messages you wish to archive. Then click the button. 33 AccessingMessagesthathavebeenArchived Step 1 Click and open the Archived Messages tab in the Message Center. Up to most recent 30 messages that have been archived will be displayed on the page by default. To view the complete text of the message, click on the Subject field. Step 2 You can also search for messages on the page. Click in the drop down list and choose the search parameter you would like to use (Applicant’s last name or ApplyYourself application number). Enter the search terms (case sensitive) in the text box and click the button to submit. 34 AdditionalMessageCenterFeatures You are able to open the Applicant Detail Page directly from the messages tab by clicking the hyperlinked applicant name in the “From” field. You are also able to view any messages that may have already been sent as a reply to a message. Click the link in the Follow‐up line to view corresponding replies. Click to Open Applicant Detail Window Click to view the reply to the message 35 Documents Tab Overview: The Documents Tab Scanning Documents Linking Scanned Documents to an Applicant Viewing and Deleting Documents Linked to an Applicant Uploading a Document 36 Overview:DocumentsTab The Documents Tab is where you will manage the supplemental application materials that applicants submit as part of the application process. Documents may include official transcripts from prior colleges or universities, letters of recommendation, resumes, writing samples, etc. The documents that you receive will need to be scanned and transferred to the GATS application via an automated upload process. In this area you can perform these tasks: Link scanned documents to an applicant View a list of documents already assigned to an applicant Manually upload PDF documents and assign them directly to an applicant 37 ScanningDocuments Paper copies of application materials can be scanned and sent to GATS and associated with an applicant, eliminating the need to keep paper files of application materials. You department’s scanner must be able to send scanned documents to the GATS server via FTP. Note: For information on scanner requirements, please contact SES. When you scan documents to send to GATS, you must use your scanner’s interface to name each document according to this naming convention (do not include brackets): [ApplyYourself‐application‐number].[document‐type].[description] Tip: the .[description] portion is optional. Document types are as below: 1 = application 2 = transcript 3 = letter of recommendation 4 = statement of purpose 5 = resume 6 = GRE score report 7 = TOEFL score report 8 = GMAT Score Report 9 = IELTS Score Report 10 = Writing Sample 99 = other For example, if you are scanning a transcript for an applicant with the ApplyYourself application number 7654321, you would name the file: 7654321.2.smithtranscript or just 7654321.2 38 LinkScannedDocumentstoanApplicant After scanning documents into the system you will need to link them to the appropriate applicant. Step 1 After you have scanned a document into the system, it will appear on the Documents Tab awaiting assignment to the appropriate applicant. The system will automatically pull the applicant that is most likely a match based on the ApplyYourself application number. For some document types, you will need to select the Document Source. If the Document Source (specific institution or reviewer names) was listed by the applicant in ApplyYourself, it will appear as a choice in the drop down box. Step 2 (Only if entering a Custom Value) If your Document Source does not appear in the drop down list, you will need to add a custom value to name the document. Select “Enter a Custom Value” from the drop down list. A pop‐up box will appear with a field for you to enter text to describe the document. Enter the text and click OK. Tip: Entering a custom value may be helpful when a applicant has an Undergraduate and Graduate work from the same institution. You may wish to title the received document accordingly so the two can be seen as different transcripts required. 39 Step 3 Once you have determined that the applicant and document should be linked and any necessary custom values have been entered, click the Assign link. When your document has been assigned the Actions area will read SUCCESS. 40 Viewing&DeletingDocumentsLinkedtoanApplicant You are able to view and download all documents linked to an applicant through the documents panel. In order to search for your applicant’s documents you will need the Apply Yourself application number or the applicant’s full last name. Step 1 Click the “Assigned Documents” tab located within the Documents tab. Step 2 Select the criteria you will use to search for your applicant from the drop down box. Enter the applicant information (full last name, case sensitive, or ApplyYourself application number) in the text box and click the button. 41 Step 3 Your search results will appear in the box below your search criteria. Click the Download link to view or save a document or click the Delete link to remove the document from the system. 42 UploadingaDocument You may receive some application materials in PDF format instead of paper form. In GATS, any document in a PDF file format can be uploaded to GATS without scanning the paper copy. Step 1 On the Documents Tab, click the upload the file link. Step 2 Select the Department, Applicant, Document Type and Document Source (when applicable) from the drop down menus. The Document Source dropdown will populate with the selections from the ApplyYourself system or you may enter a custom value. Step 3 Click the button next to the “Document to Upload” field. Select the PDF document you wish to upload from its location on your computer. Once you have selected the document, click the button. 43 Reports Tab Overview: The Reports Tab Download Applicant Data Generate Folder Labels 44 Overview:TheReportTab The Report tab will allow you to download applicant data into an Excel document. In this area you can perform these tasks: Download application data Generate folder labels using applicant data 45 AccessingApplicantReports You have the option to download a complete set of application data into an Excel format using the “Download Applicant Data” function. The data will include all fields that appear in GATS for all applicants in the specified program. You can filter through the data to obtain specific applicant group information once the data is in Excel. Step 1 If you have access to multiple departments you may select them one by one and run your reports individually, or you can also select the All Programs option from the drop down to get the data from all the programs in one file. To access your applicant reports, select your applicant group from the drop down and click the button. Step 2 When prompted, save or open your report. 46 GenerateFolderLabels You will also have the option to generate applicant file labels. You can select a date range of applications to narrow your labels to a specific group. This information will also export in Excel. The data fields are limited and you are able to use this file to create a Word Mail Merge for your labels. Step 1 To generate folder labels, click on the Generate Folder Labels tab while in the Reports tab. Step 2 Choose your program from the dropdown and set the date range for the applicant labels you wish to create by clicking in the date range box and selecting your desired dates. 47 Step 3 Click the button. Your data will be in the form of an Excel file. You can then save the file to your local machine. The recommended use for data in this format is to create a Microsoft Word Mail Merge document. 48 System Tab Overview: The System tab Add or Delete a Faculty Reviewer Search for Faculty Reviewers 49 Overview:SystemTab The System tab is where you will add new Faculty Reviewers as GATS users. In this area you can: Add or delete Faculty Reviewers Search for Faculty Reviewers 50 AddaFacultyReviewer Step 1 Click on the Step 2 button at the bottom of the page. A pop‐up window will appear. Add the user’s Last Name, First Name, NetID, and choose the Program Name. Click the Now you can add another reviewer or close the pop‐up window. Step 3 The user has now been added to the list of Faculty Reviewers. button. 51 DeleteaFacultyReviewer Step 1 Click on a row to highlight the user you would like to delete as a Faculty Reviewer. Then click the at the bottom of the screen. button Step 2 A pop‐up window will appear. Click the Delete button. Once the delete button is clicked the user will be removed from the grid of Faculty Reviewers. Warning: Once a user is deleted as a faculty reviewer, any review information entered by that reviewer will be lost. This action cannot be undone. 52 SearchforaFacultyReviewer Step 1 Click on the button at the bottom of the screen. A pop‐up window will appear. Step 2 Enter the search parameters for the user you are trying to find. Then click the button. Any user matching the criteria you are searching with will be displayed in the Faculty Reviewer list. 53 Applicant Detail Page Overview: The Applicant Detail page Entering Administrative Notes Viewing Documents 54 Overview:ApplicantDetailpage A detailed view of all information pertaining to a particular applicant can be viewed on the Applicant Detail page. In this area you can perform the following tasks: Enter administrative notes View applicant documents This page can be accessed on any page where the applicant’s name is hyperlinked (Applications tab, Admissions tab, Reviews tab, and Messages tab). When you select your applicant, the Applicant Detail screen opens in a new window. Click on the next to any applicant header you wish to see more detail for or check the “Expand All” box to see all available applicant information. 55 EnteringAdministrativenotes Administrative notes can be entered by GATS administrative users for the purpose of documenting supplemental information regarding a particular applicant. It is important to note that notes entered here cannot be viewed by applicants or reviewers (unless the reviewer also has administrative GATS access). Tip: If an Administrative Note has been added to an applicant’s record, you will see the note icon the applicant’s last name on the Admissions tab next to Step 1 Click on the icon next to the Administrative Notes header to expand the section. Once clicked you are able to see if notes have already been entered. Step 2 To enter a new note or delete an existing note. Click the Edit link. Step 3 You may delete a “Current note” by checking the “Delete?” check box, then clicking You may enter an additional note by typing it in the text box, then clicking . . 56 ViewingDocuments Application documents that have been either scanned or manually uploaded into GATS can be viewed in the Applicant Detail page. Step 1 Click on the icon next to the Documents header to expand this section. Once clicked you are able to see a list of the application documents that have been associated with this applicant. Step 2 Click the View link next to the document you would like to view. If you would like to view all the documents in a single concatenated file, click the View All link. Note: Documents are stored in the GATS database in .pdf file format. 57 Applications Status Check Page Overview: Applications Status Check Page 58 Overview:ApplicationsStatusCheckPage An applicant will use the Applications Status Check Page (http://Gradstatus.northwestern.edu) to check the status of their application. Once a applicant submits an application in ApplyYourself they will be notified via email to check their application status check page in GATS. The applicant can also check here to see if an admissions decision has been rendered and will be instructed to check Apply Yourself once this has occurred. 59 An applicant will be able to check on the progress of their application as materials are received. * The application status is set manually and so may not appear as completed as soon as the GATS system receives your materials. Please allow 7‐9 business days to process your application materials. ** Not all applicants are required to submit TOEFL scores, please check your program's website for information on TOEFL requirements. Communication between the applicant and the admissions administrator will occur in the Message Center. 60