1
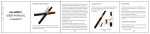
OpenRep FREE user's manual Version 3.0 (c) OpenRep Institute Table of Contents Preface........................................................................................................................................................2 Introduction................................................................................................................................................2 List of changes in the version 2.7...............................................................................................................2 Development..............................................................................................................................................2 System overview.........................................................................................................................................3 System Requirements.................................................................................................................................3 Performance...............................................................................................................................................3 Minimum System Requirements...........................................................................................................3 Recommended System Requirements...................................................................................................3 Getting started............................................................................................................................................4 Installation..................................................................................................................................................5 Linux.....................................................................................................................................................5 Windows................................................................................................................................................5 First start of the OpenRep..........................................................................................................................6 Using OpenRep homeopathic software......................................................................................................6 Setting preferences................................................................................................................................6 Viewing the Reversed Materia Medica.................................................................................................7 Importing new repertories.....................................................................................................................8 Opening imported repertories...............................................................................................................8 Removing imported repertories.............................................................................................................9 Using Drag and Drop technique............................................................................................................9 Working with a repertory......................................................................................................................9 Searching in a repertory.......................................................................................................................13 Starting a new case..............................................................................................................................16 Saving the current case........................................................................................................................16 Opening the saved case........................................................................................................................16 Repertorizing the case.........................................................................................................................16 Defining Symptom Grades..................................................................................................................17 Using positive and negative filters in the repertorization....................................................................17 Creating a new repertory.....................................................................................................................18 Editing the Repertory..........................................................................................................................18 Patient Management System................................................................................................................20 Adding a new patient......................................................................................................................20 Editing patient's data.......................................................................................................................20 Deleting a patient............................................................................................................................20 Editing diagnoses............................................................................................................................20 Backup / Restore.............................................................................................................................21 Searching in PMS...........................................................................................................................21 Create / Edit a diagnosis.................................................................................................................21 Using Console......................................................................................................................................21 Troubleshooting........................................................................................................................................21 Program does not start.........................................................................................................................21 Program starts, but no repertory is displayed......................................................................................22 I cannot install the Java Runtime Environment...................................................................................22 Error reporting.........................................................................................................................................22 List of keyboard shortcuts........................................................................................................................22 Preface This software user's manual describes how to use the OpenRep FREE homeopathic software version 2.9. Introduction OpenRep FREE is a 100% pure Java desktop application designed to serve as a homeopathic software with capabilities to open and use multiple repertories, perform repertorizations and view its results, manage patients and view different materia medicae. It is also designed to save and load data in human readable xml format. List of changes in the version 3.0 1. Changed the repertory format to improve speed and efficiency. Development Vladimir Polony is the developer of OpenRep FREE. He wrote it primarily to provide a free homeopathic software for everyone in order to support the homeopathic community. He is responsible for designing the original repertory data model and for designing and programming the OpenRep desktop application and the OpenRep repertory editor. He is also responsible as an editor and main contributor for the Repertorium Publicum – the first free homeopathic repertory. As of 22.10.2008, OpenRep FREE is released as an Open Source project under the GNU GPL 3 license. System overview OpenRep FREE is based on the Java Runtime Environment developed by Sun Microsystems and on the Swing GUI (Graphical users interface) developed by Sun Microsystem. The OpenRep is fully dependent on these components, so if either of these components cannot be properly executed on a computer, the OpenRep may not be executed correctly System Requirements Although OpenRep was designed to run on any machine that is capable of running the Java Runtime Environment (JRE) from Sun Microsystems, in order to run OpenRep properly there are certain minimum requirements on your operating system and on your machine. Performance The maximum performance of OpenRep can be gained in Windows by running OpenRep in Performance mode. OpenRep can be run in Performance mode by executing the OpenRep (Performance mode) menu item in the Windows Start menu under the item OpenRep. On other machines, it is necessary to start the java virtual machine (JVM) with the following parameters: Xmx256 Xms 256. Where the “256m” means, that JVM will allocate 256 megabytes of memory to OpenRep application, which will ensure much faster operation. Please note, that if you wish to execute this command, you have to be located in the folder where the openrep was installed. Example: java jar OpenRep.jar Xmx256 Xms256 Minimum System Requirements Operating system: Any operating system that can run the JRE (Java Runtime Environment) from Sun. Available hard drive space: 25 MB Memory: 512MB Processor: Intel Pentium M 1.73 GHz Screen resolution: 800 x 600 Recommended System Requirements Operating system: Ubuntu Linux 8.04 (Hardy Heron), or 7.10 (Gutsy Gibbon) Available hard drive space: 100MB (installation and swap) Memory: 1GB Processor: AMD 64X2 DualCore Screen resolution: 1280x800 The OpenRep was successfully tested on the Ubuntu Linux v. 7.10 (Gutsy Gibbon), on the Ubuntu Linux 8.04 (Hardy Heron) and on the Microsoft Windows Vista. Getting started The easiest way to begin using OpenRep is by making sure, that the Java Runtime Environment is properly installed and working on your machine and that you meet at least the minimum system requirements (for more information, see the Installation section). After making sure, that your system meets at least the minimum requirements, simply unzip the installation file to a folder on your computer and unzip at least one repertory into a folder on your computer (this is valid only for Linux installation – Windows installation contains an executable setup file). In Linux, run the install.sh file (after checking that the permissions allow executing it) and the OpenRep will be installed to a /home/user_name/openrep installation folder. OpenRep now comes with the preinstalled Repertorium Publicum by default making the installation procedure much simpler. Please note, that the installation will replace your current version of the Repertorium Publicum for the latest version of Repertorium Publicum making your the possible changes to repertory useless. Before installing the new version of OpenRep, always backup your version of Repertorium Publicum. In Linux, either rightclick the OpenRep.jar file and select the “Open with Sun Java Runtime”. Alternatively, in Linux you can open a terminal window, going into the folder in which the OpenRep is installed and typing “java jar OpenRep.jar”. Microsoft Windows users need to only doubleclick the “OpenRep.jar” file to execute it through the Java Runtime Environment. Once the OpenRep is running and no repertory is loaded, first import at least one repertory that you have unzipped to a folder on your computer, by clicking the “Repertories, Import” menu item (see Picture 1.1) and selecting a “.rd” file in the folder into which you have unzipped the repertory. Once this is done, simply open the repertory by clicking the “Repertories, Open” menu item (see Picture 1.1). Picture 1.1 – The “Repertories” menu item Installation Ubuntu Linux The prerequisite for installing OpenRep homeopathic software is correctly installed and functional version of Java Runtime Environment. To install the Java Runtime Environment on your computer, Ubuntu Linux by default supports the OpenJDK implementation of Java, because the producer of Java (Sun Microsystems) was bought by Oracle company in 2010 and hence all the support that the Linux was getting from Sun Microsystems was canceled by Oracle. The OpenJDK package that is by default in the Synaptic manager is not fully supported by OpenRep FREE. This means, that it is necessary to install the last edition of Java from Sun Microsystems. In Synaptic package manager, in menu Settings, Repositories, in tab Other Software, click the Add button and enter the deb http://archive.canonical.com/ lucid partner line into the edit box and click Add Source button. Alternatively you can enter the command “addapt repository "deb http://archive.canonical.com/ lucid partner" in the terminal. After finishing this, your Synaptic manager will contain the packages sunjava6bin, sunjava6fonts, sunjava6jre, sunjava6jdk, which must be installed. After installing them, simply unzip the OpenRep FREE into a folder on your computer, rightclick the file OpenRep.jar and select the “Open with Sun Java 6 Runtime” option. This will execute the OpenRep FREE. Windows The prerequisite for installing OpenRep homeopathic software is correctly installed and functional version of Java Runtime Environment. To install the Java Runtime Environment on your computer, please visit the http://www.java.com/en/download/manual.jsp website, download and install the Java JRE. Please note, that if you do not install the Java Runtime Environment correctly, OpenRep may not work properly or at all. After installing the Java Runtime Environment (JRE), simply execute the downloaded setup file and OpenRep will be installed on your computer. After the installation an OpenRep icon will be placed on your Desktop, that can be used to execute the program directly. Otherwise, you can locate the OpenRep.jar executable file in the installation folder (C:\openrep\) OpenRep now comes with the preinstalled Repertorium Publicum by default making the installation procedure much simpler. Please note, that the installation will replace your current version of the Repertorium Publicum for the latest version of Repertorium Publicum making your the possible changes to repertory useless. Before installing the new version of OpenRep, always backup your version of Repertorium Publicum. Portable version Since version 0.7, OpenRep is a truly portable homeopathic software. This means, that installation of OpenRep does not rely on installation folder in which the OpenRep is installed. OpenRep always uses the folder from which it is executed as the source for repertories, configuration files and Patient Management System data. This does not mean, that it is impossible to install repertories into a totally different folder than OpenRep installation folder. This option has remained. But, when importing a repertory that is located in the OpenRep installation folder, OpenRep will replace the absolute path with a relative path, which means, that even if the drive letter changes (e.g. when the USB key on which the OpenRep is installed will change its name from E: to G:), OpenRep will always find the repertories in its installation drive. Installation of OpenRep to an USB key is very simple. Simply download the OpenRep – version for all OS from the www.homeopathyonline and unzip the installation file into any folder on your USB key and execute the OpenRep.jar file. First start of the OpenRep OpenRep comes in a package with the list of all available repertories. The repertories are installed into the “default_rep” folder. After the first start of the OpenRep, these repertories are moved directly into the installation directory of OpenRep. This means, that directory “/openrep/default_rep/bach” will be moved to “/openrep/bach” where it will be accessible by OpenRep. If the directory “/openrep/bach” already exists, OpenRep will prompt the user to confirm whether he wants to rewrite his repertories with the repertories from the installation package. This is done to prevent an accidental deletion of a repertory, that contains the changes / additions performed by the user. Using OpenRep homeopathic software Setting preferences Since version 0.6, all preferences can be set in the preferences dialog. To open the preferences dialog, click the “File, preferences” main menu item. Open repertory on startup By selecting a repertory in the preferences dialog (item “Open on startup”) a repertory is selected, that will be opened every time you start OpenRep. Automatic saving of changes The item “Automatically save changes to the repertory” allows to save the changes to the repertory to be saved just after they have been performed. This means, that even in case that the data could be lost (e.g. power shortage etc.), there is a greater chance, that the changes will be saved. The only drawback is, that it slows down the whole process of editing repertory. Automatic repertorization By selecting the “Automatic repertorization” checkbox in the preferences dialog, OpenRep performs a repertorization every time the repertorization was changed. Search in all available repertories This item allows searching in all available repertories that have been imported. The repertories do not have to be opened. They will be opened every time the search will take place and will be closed immediately to save the memory space. Viewing the Reversed Materia Medica Reversed Repertory is a materia medica generated by reversing the current repertory. This means that after selecting a remedy, OpenRep displays all the symptoms in which the remedy is present. The symptoms have a different color determined by the grade of the remedy in the symptom. Remedy with grade 1 = gray color Remedy with grade 2 = black bold color Remedy with grade 3 = blue color bold Remedy with grade 4 = red color bold Remedy with grade 5 = red color bold To open the Reversed Repertory, click the “View, Reversed Materia Medica” menu item, or click the Reversed Materia Medica button on the top toolbar. Picture 1.5 – The “Reversed Materia Medica” In the Reversed Materia Medica dialog, simply select a remedy in the Remedy Tree (Picture 1.5. item 1) and click the Display Symptoms for the Selected Remedy button (Picture 1.5. item 3) and a list of symptoms will be displayed in the Symptom Tree ( Picture 1.5. item 2). The Reversed Materia Medica allows to filterout the symptoms according to the grade of the remedy that is contained in the symptom. To see only the symptoms with grade 2 and greater, click the “Select remedy grade” button and select the remedy grade 2. The selected remedy grade is the minimum grade that will be displayed. This means, that after selecting remedy grade 2, symptoms with grade 2 and 3 will be displayed. To search within the selected symptoms, simply enter the search phrase in the search edit and press the ENTER key. The search capabilities of Reversed Materia Medica are the same ones as the ones in the OpenRep main search. Importing new repertories OpenRep homeopathic software is a software based on idea of using repertories. A repertory is a database of symptoms, remedies, remedy additions to symptoms and other information that are the informational source used in repertorization. If there is no repertory opened, the OpenRep is unable to browse the tree structure and display the symptoms of a repertory. To import a repertory, it is first necessary to download it from the www.homeopathyonline.org website and to unzip it into a folder on your hard drive. After unzipping the repertory into a folder, execute the OpenRep homeopathic software and select the “Repertories, import” menu item from the main menu (see Picture 1.1. page 3) and select the repertory descriptor file that is located in the directory into which you have unzipped the repertory. Now, the repertory is imported into the OpenRep and you are ready to open it. Opening imported repertories To open an imported repertory, click the “Repertories, open” menu item from the main menu (see Picture 1.1. page 3) and select the repertory you want to work with from the list of available repertories. If the list is empty, it means, that you have not imported any repertories yet. To import a repertory, see the Importing new repertories section. Removing imported repertories If you wish to import a repertory from the list of available repertories, click the “Repertories, remove” menu item from the main menu (see Picture 1.1. page 3). The removed repertory WILL NOT be deleted, it will only be removed from the list of available repertories. Using Drag and Drop technique Drag and Drop technique makes the interaction with the repertory and repertorization much more user friendly and effective. Drag and Drop technique is very simple. To perform Drag and Drop: 1. Select a symptom or symptoms in the SymptomTree 2. Click on the selected symptoms and while holding the left mouse button, move the mouse cursor to the Repertorization tree. 3. While having the cursor still in the Repertorization tree, release the left mouse button. Working with a repertory After opening a repertory, the tree structure of the opened repertory will appear in the Repertory Symptom Tree section of the OpenRep (see Picture 1.2. section 1). Picture 1.2. Repertory Symptom Tree The Repertory Symptom Tree consists of either all symptoms located in the repertory, or it can change to list of symptoms retrieved by performing a search in the repertory. The Repertory Symptom Tree allows to view the contents of branches of symptoms either by double clicking the branch, or by clicking the expand icon. Viewing symptom remedies To see the remedies in a specific symptom, simply select the symptom either by leftclicking it with the mouse, or by selecting it using the keyboard. To display the remedies, either click the F1 key, or right click the symptom and select the “Display remedies” popupmenu item. A window containing the remedies will appear (see Picture 1.7). By clicking the button “Filter remedy grades” in this dialog it is possible to filterout the remedies with smaller grades and to see only the most important remedies. By clicking the button “Sort by Name / Remedy grade” in this dialog it is possible to either see the remedies in the symptom sorted alphabetically, or according to the grades (highest grades are displayed first). By clicking the button “Set this window as ACTIVE”, this tool turns out to be the most useful tool to browse the repertory. After clicking this button, this dialog will automatically display any symptom that is selected in the repertory without having to open the dialog. In this way, the user can simply click on symptoms and immediately see the contents of the symptom. By clicking the “Copy to Clipboard” or pressing CTRL+C the contents of this symptom will be copied into the clipboard and can be pasted into a different textprocessing program, etc. by using the CTRL+V shortcut. Picture 1.7 Remedies in symptoms Browsing through the repertory The repertory consists of either the list of symptoms returned by the Search function or by the list of all symptoms in the Tree structure. To Expand the nodes of a tree structure, either doubleclick the expandable node, or press the right arrow key on your keyboard. To go from a subrubric to a higher rubric, simply press the left arrow key on your keyboard. Viewing symptom crossreferences A large number of symptoms in Repertorium Publicum contains crossreferences to other symptoms. To display them, simply select the symptom and either rightclick it and select the “Display symptom references” or press the F3 button. A window containing all the symptoms that this symptom is referenced will appear. The filtering / sorting options in this window are exactly the same as in the window used for viewing the symptom remedies (see the Viewing symptom remedies section). Picture 1.8 Viewing symptom crossreferences Adding a symptom to the repertorization To select a symptom and add it to the repertorization, simply select the desired symptoms by clicking on them and holding a SHIFT / CTRL key. Selected symptoms can be then added to the repertorization by pressing the ENTER key, or by rightclicking the selected symptoms and selecting the “Add symptom to repertorization”. The symptom will be added to the currently selected repertorization desktop. OpenRep supports also the Drag and Drop system, so the symptoms can be added to the repertorizations simply by selecting symptoms, clicking on them with the left mouse button and while holding the mouse button, dragging them to the repertorization. After they are dragged to the repertorization, while still in the repertorization tree, it is necessary to release the mouse button. Using repertorization desktops Repertorization desktops offer a way to perform separate repertorizations of one case. In this way it is possible to repertorize different aspects of the patient in one place. Each repertorization desktop contains its own symptoms and its own repertorization. To change between the repertorization desktops, simply click the desktop icon, or press the CTRL+1, CTRL+2, CTRL+3, CTRL+4 or CTRL+5 key combinations. OpenRep also allows you to select multiple repertorization desktops at the same time. To do so, simply press and hold the CTRL button and click on repertorization desktop icons you wish to select. After clicking these icons, you can see, that these icons remain selected. After selecting the desktops, if you wish to add a symptom to all the repertorization desktops that you have selected, simply add the symptom to repertorization and it will be added to all the selected repertorization desktops. All the changes performed in the repertorization (such as deleting a symptom from the repertorization, merging symptoms, etc.) will be performed in all the selected repertorization desktops at the same time. OpenRep supports also the Drag and Drop system, so the symptoms can be copied between the repertorization desktops by selecting symptoms, clicking on them with the left mouse button and while holding the mouse button, dragging them to the other repertorization desktop (icon of the repertorization desktop). After they are dragged to the repertorization, while still in the it is necessary to release the mouse button. The dragged symptoms will be MOVED to the other repertorization. If we wish to copy them, it is necessary to hold the CTRL key while dragging them to another repertorization desktop. Deleting a symptom from a repertorization To delete the symptoms from the repertorization, select the repertorized symptoms, rightclick on them and click the “Delete symptom(s) from repertorization”. Deleting symptoms from repertorization is also possible by using Drag and Drop technique. To delete a symptom, simply select it in the Repertorization tree and drag it back to the Symptom tree. This will delete it from the repertorization. Merging and adding symptoms directly from the repertory To merge the symptoms before they are added to repertorization simply select the symptoms in the Symptom List and click the “Add the selected symptoms merged into one symptom” button. After clicking the button, you will be prompted to enter the new name of the symptom into which the symptoms will be merged and the resulting symptom will be added to the repertorization. Merging symptoms in a repertorization To merge two, or more symptoms in a repertorization, simply select the symptoms that you wish to merge by clicking on it, then hold down the CTRL key and click on any other symptoms you wish to merge and click the “Merge symptoms in repertorization” button or press the F7 key. A dialog will pop up requesting the name of the new symptom, into which all the selected symptoms will be merged and the merge will be performed. The original symptoms from which the merge was performed will be deleted. Please note, that you have to select the symptoms, that are already selected in the repertorization to merge them. Selecting the symptoms in the Symptom List and pressing the “Merge symptoms in repertorization” will have no effect. Please note, that merging of the symptoms is not a permanent change to the repertory. It affects only the repertorization. If the symptom contains a symptom reference (symptom reference can by any reference from the current symptom to another symptom(s)), the symptom icon contains the reference triangle and looks like this: To display the referenced symptoms, select the symptom by leftclicking it and rightclick and select the “Display symptom references”. Searching in a repertory OpenRep allows the full text search through the repertory by using the Search Edit Line. The Search Edit Line is located just above the Repertory Tree Structure (see Picture 1.2.). The search is activated by entering a keyword or search phrase and pressing the ENTER key. To display the full Repertory Symptom Tree, delete all contents of the Search Edit Line and press ENTER key again. Searching in all repertories OpenRep allows the user to search within all the imported repertories. To enable this feature, open the menu “File, Preferences” and select the “Search in all available repertories” checkbox. Search using a single keyword – Professional Search System The unique search system of the OpenRep uses the dot convention. What does it mean? Dot convention says, that whenever a search phrase contains a dot (either before or after the searched text), the dot stands for the end of the search word. This means, that when searching for a word that does not contain dots, the OpenRep will perform a search that will include any words containing the keyword. This means, that when searching for the word “pain”, the OpenRep will search for any symptoms containing word “pain” that contain words like “painful” or “painless”. If the dot is at the beginning of the word like word“.pain”, OpenRep will try to locate any symptom that contains a word starting with the word “pain”. This will find symptoms containing words like “painless”, “painful” but not the word “unpainful”. If the dot is at the end of the word, like “pain.”, the OpenRep will try to locate any symptom containing word that ends with the word “noon”. This will return words like “afternoon”, “forenoon” or simply “noon”. If the dots are at the beginning and end of the word, like “.sleep.”, OpenRep will perform an exact search. Examples: Search word Type of word All symptoms containing words pain Does not contain dots asleep, sleep, sleepless pain. Dot at the end asleep, sleep .sleep Dot at the beginning pain, painless, painful .sleep. Dot at beginning and end sleep Search using multiple keywords – Professional Search System Apart from searching for a symptom containing a single keyword, OpenRep allows to search for symptoms containing a combination of keywords. There are different types of combinations. If the keywords are separated by a space e.g “stomach thirstless”, OpenRep will find all symptoms that contain the word “stomach” and the word “thirstless”. If we however separate the keywords by a comma e.g “abdomen, pain”, OpenRep will search for all symptoms that contain a word “abdomen” followed by a word “pain”. This means, that while the search “abdomen pain” without a comma would also return a symptom “Back, pain, lying abdomen” which is not quite what we are looking for, the search for “abdomen, pain” with a comma would return only the desired symptoms. When enclosing multiple words in the characters “”, the exact search will be performed. Examples: Keywords Resulting symptoms containing words abdomen pain Abdomen AND pain abdomen, pain Abdomen FOLLOWED BY pain “abdomen, pain” Symptoms containing the string “abdomen, pain” Search using multiple search phrases – Professional Search System Now we know how to construct a search phrase (search phrase is a combination of keywords used to search for a symptom). Apart from a simple system of searching for keywords and key phrases, OpenRep allows also searching for multiple search phrases. What does this mean? It means, that if we want to locate all symptoms containing words “abdomen” and “pain” TOGETHER with all symptoms containing the words “back” “pain”, we enter the both search phrases by using a semicolon character, like this “abdomen pain; back pain”. This search will return symptoms containing the words “abdomen” and “pain” AND symptoms containing the words “back” and “pain”. If we enter a search phrase that begins with a minus sign, we will delete from the search results any symptoms, that satisfy the search phrase. To do so, we can e.g. enter “abdomen pain; abdomen pain umbilicus”. This will locate all symptoms that contain words “abdomen” and “pain”, but do not contain the combination of words “abdomen” “pain” and “umbilicus”. Picture 1.4. Editing repertory Examples: Search phrase Resulting symptoms contain abdomen pain; back pain (abdomen AND pain) OR (back AND pain) abdomen pain; back pain (abdomen AND pain) AND NOT (back AND pain) Simple Search System The Simple Search System (SSS) is a search system designed to bring more simplicity into searching through the repertory. The users can type exactly what they are looking for, without necessary knowing the language of the repertory and its use. This means, that the user does not necessary have to use the Asterisk convention used in the Professional Search System, nor the specific terms used in the repertory. To search for symptoms containing multiple words, simply use connecting words “and” or “with”. Example: headache with stomachache and fever => this will be translated to head pain stomach pain fever To search for symptoms containing one search word or another, simply use the connecting word “or”. Example: headache or toothache => this will return symptoms containing the “head pain” or the words “tooth pain” Some of the less usual words used in repertory are interpreted from a more common search words: Search phrase Interpreted as headache head pain toothache tooth pain stomachache stomach pain *ache * pain worse by agg. better by amel. worse from agg. better from amel. outside open air Starting a new case To start working with a new case, click the “File, new case” menu item from the main menu, or click the “Create new case” button located on the top toolbar. Creating a new case will discard any unsaved changes that you have performed in your current case, it will remove the current repertorization results and clear the list of selected symptoms. Saving the current case To save the current case to a file, click the “File, save” menu item, or “File, save as” menu item to save it to a different file. Opening the saved case The case saved previously to a file can be opened by clicking the “File, open” menu item and by selecting the file that we wish to open. Please note, that in order to open the file in the OpenRep, you don't have to have the repertory that was used to repertorized open. All the data needed to perform the repertorization are saved in the file and there is no need to open the repertory. Repertorizing the case To repertorize and evaluate the case, either click the “Case, repertorize” main menu item or click the “Repertorize the case” button, or simply press the shortcut F9. After repertorizing the case, the results are displayed in the Repertorization Results section of the main window (see Picture 1.3. section 2). If you want to perform the repertorization automatically every time the list of symptoms in repertorization changes, open the preferences dialog, by clicking the “File, preferences” menu item and select the “Automatic repertorization” checkbox. Another possibility of displaying the repertorization results is by using the “Display full repertorization results” button, or by using the “Case, full results” main menu icon. By using this option, you will be able to see the repertorization according to the selected symptoms. Picture 1.3. Repertorization Results section Defining Symptom Grades Symptom grade is a system of determining an importance of a symptom in a case. Since in every case, the difference symptom varies, OpenRep allows to define symptom grades. There are 5 different grades, that can be used in the repertorization. Every symptom added to the repertorization has an initial grade equal to AVERAGE grade. To change this grade, rightclick the symptom in the repertorization (not a symptom in a Symptom Tree, but the selected symptom in Repertorization Tree) and select the symptom grade in the popupmenu. There are 5 grades: ESSENTIAL – this symptom is essential in the case and remedies in this symptom are key (it has a grade 10) VERY IMPORTANT – remedies in this symptom are very important in the case (it has a grade 8) IMPORTANT – remedies in this symptom are of higher importance (it has grade 6) AVERAGE – the default grade of a symptom – is also used when the symptom importance is not very clear (it has a grade 3) NOT IMPORTANT – symptom is either too general or vague in this case (it has grade 1). The repertorization then calculates the values for every remedy based on the multiplication of a symptom grade and the remedy grade in the symptom. Using positive and negative filters in the repertorization The positive and negative filters offer a powerful way to repertorize the case. If the symptom is selected as a member of the Negative filter, all of the remedies that it contains will be removed from the repertorization. This means, that if we e.g. select a symptom containing the remedy “Apis, Lyc, Sulph” as a member of the Negative filter, the remedies “Apis, Lyc and Sulph” will be removed from the repertorization. If our repertorization contains a symptom selected as a member of the Positive filter, the repertorization will contain ONLY the remedies that are contained in this symptom. This is a powerful method that allows the user to select the most striking and important symptoms into the positive filter, which means, that the resulting repertorization will contain only the remedies, that are contained in these most important symptoms. To add a symptom into a Positive or Negative filter, simply select it and press the “Positive / Negative filter” button. To remove the symptom from the Positive filter, select it and click the “Positive filter” button again. The same applies for the negative filter. Creating a new repertory A new repertory can be created by clicking the “Repertories, New repertory...” menu item. After entering the required parameters such as repertory name, author name, etc. the OpenRep will create an empty repertory that does not contain any symptoms, remedies or remedy additions. The newly created repertory can be edited in the same way as an existing repertory. Editing the Repertory OpenRep allows since the version 0.3 Beta permanent editing of any opened repertory. This means, that the edition to the repertory will be saved in the repertory and further repertorizations will be based on this changed version of the repertory. Please note, that editing the repertory is permanent and can be reverted only by reinstalling the original repertory! To edit the repertory name, author name or repertory shortcut, simply click the “Repertories, Repertory properties” menu item. Adding a symptom to the repertory A new symptom can be added by clicking the “Add a new symptom to the repertory button” button 1 on the picture 1.4. The name of the newly added symptom must be unique and cannot be an empty string. Please note, that the symptom name cannot contain the following characters: “:#| [TAB] [RETURN] Deleting a symptom from the repertory To delete a symptom from a repertory, select the symptom / symptoms and click the “Delete symptom from the repertory” button – button 2 on the picture 1.4. Deleting a symptom that contains in the tree some children WILL NOT delete the children, only the parent node. Editing symptom's name To change the name of a symptom, select the symptom and click the “Edit symptom name” button – button 3 on the picture 1.4. The new name of the symptom must be unique and cannot be an empty string. Please note, that the symptom name cannot contain the following characters: “:#| [TAB] [RETURN] Editing remedy additions To edit remedy additions, simply select the symptom and click the “Edit remedy additions” button – button 4 on the picture 1.4. A new window (further called also Edit Remedy Additions dialog), containing the list of all remedy additions in the selected symptom will appear. It allows adding, deleting and editing remedy additions in a symptom. If you click in this window the button “Add new remedy addition”, you will be able to add a new remedies to the symptom. A new dialog will appear, in which you can specify the remedies that you wish to add to the symptom. If the remedy does not exist in this symptom, you can add it by clicking the “Add new” button. After fillingout the remedy name and remedy grade, simply click the “OK” button to perform the addition. Please note, that the remedy name cannot contain the following characters: “:;#| [TAB] [RETURN] The remedy shortcut cannot also contain a [SPACE] character. Please note, that the newly added remedies will be added with a grade 1. To change the grade, select them and change the grade by using the “Edit remedy addition” button. If you click the “Delete remedy addition” in the Edit Remedy Additions dialog, you will be able to delete all selected remedies from the symptom. By clicking the “Edit remedy addition” in the Edit Remedy Additions dialog, you can easily change the remedy grade of all selected remedies in the symptom. Saving changes to the repertory The changes to the repertory will not be saved to the file (e.g. will not be permanent) unless you save them. To save the changes, click the main menu item “Repertories, Save changes to repertory”. Clicking this menu item will make the additions permanent. There is also a way of automatically saving all the changes to the repertory after they are performed by opening the preferences dialog, by clicking the “File, preferences” menu item and selecting the “Automatically save changes to the repertory”. Submitting repertory changes to the www.homeopathyonline.org If you wish to share your additions to the repertory with the homeopathic community and to support the Repertorium Publicum project, simply click the “Repertories, Export repertory changes to file” and all the changes that you have performed will be saved to a humanreadable .xml file that you can send to the [email protected]. The submitted changes will be then added to the new version of Repertorium Publicum and you name (if you wish it) will be added to the list of contributors. Patient Management System Patient management system allows to manage information about your patients and about diagnoses and prescriptions that have been performed. The Patient Management System (PMS) can be accessed by clicking the “View, Patient Management System” menu item. Patient Management dialog contains the: list of the patients (Patients) additional information about a patient (Additional Information) Adding a new patient To add a new patient, simply click the “Add” button and fillout all the required information. The patient will be afterwards added to the list of patients. Editing patient's data To edit patient's data, simply select the patient from the list of patients, click the “Edit” button and perform the changes in newly opened dialog. Deleting a patient To delete a patient, select the patient from the list of patients and click the “Delete” button. The patient will be removed from the list of patients. Editing diagnoses To manage the diagnoses of patient, select the patient from the list of patients and click the “Diagnosis”. A new window will appear, in which it is possible to edit diagnoses. Backup / Restore To backup / restore the whole contents of the PMS, simply click the “Backup” button and select a file, into which the data will be saved. Restoring the data by using the “Restore” button will overwrite the current PMS database and delete all the current data. Searching in PMS PMS allows for searching in the database of patients. This can be done by selecting the type of information we are searching for, typing in the search text and clicking the “Search” button. To display the list of all patients again, click the “Search” button again to reset the search. Create / Edit a diagnosis To create / edit a diagnosis, simply start writing in any of the fields and the OpenRep automatically creates a new record and saves it to a database. Editing data can be performed simply by rewriting the information in edits. The buttons next to the PMS record allow to: delete the record add repertorization data open repertorization data To add the list of symptoms to the description text, simply drag and drop the symptoms from the main symptom list into the description area. Opening the repertorization in PMS will discard any unsaved repertorizations currently opened. Saving a repertorization in PMS will also change the currently opened file to a PMS file and the repertorization will be saved in the PMS. This means, that even after closing the PMS, the saved repertorization will be updated when the PMS repertorization is updated. Using Console The console can be opened from the “File, Console” main menu item. You can start by typing the “help” command that displays all available commands and their meaning. Troubleshooting Program does not start If the program does not start, it is highly likely, that your system does not meet the minimum requirements, or that the Java Runtime Environment (JRE) is not properly installed (for more information, please see the Installation and Getting started section). Program starts, but no repertory is displayed It is possible that, either you did not import a repertory, did not open the imported repertory, that the repertory is corrupted, or that your system does not meet the minimum requirements (especially the size of available memory RAM). I cannot install the Java Runtime Environment Please consult the Microsystem's Java home page on the www. java .com/en/download/manual.jsp . Error reporting OpenRep is currently in early phases of development and can contain some errors. If you spot some errors, or would like to see some improvements, please report this on the [email protected]. List of keyboard shortcuts CTRL+1 Opens the Repertorization Desktop number 1 CTRL+2 Opens the Repertorization Desktop number 2 CTRL+3 Opens the Repertorization Desktop number 3 CTRL+4 Opens the Repertorization Desktop number 4 CTRL+5 Opens the Repertorization Desktop number 5 CTRL+N Open a new case CTRL+S Save the current case CTRL+X Exit OpenRep CTRL+W Add a new symptom to the repertory CTRL+D Delete a symptom from the repertory CTRL+E Edit symptom name in the repertory CTRL+R Edit remedy additions in the repertory CTRL+F9 View the details of the repertorization of the current case CTRL+PGUP Displays the previous search result in the repertory CTRL+PGDNDisplays the next search result in the repertory CTRL+UP Displays the Repertory tree view ENTER Add the selected symptom to the repertorization F1 Display remedy additions of the selected symptom F3 Display symptom references F4 Add the selected symptom to the repertorization F5 Delete the selected symptom from a repertorization F7 Merge symptoms in repertorization F9 Repertorize the current case ALT+1 Set the symptom grade to ESSENTIAL ALT+2 Set the symptom grade to VERY IMPORTANT ALT+3 Set the symptom grade to IMPORTANT ALT+4 Set the symptom grade to AVERAGE ALT+5 Set the symptom grade to NOT IMPORTANT ALT+UP Increases the size of the font ALT+DOWN Decreases the size of the font