1
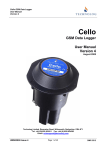
Cello Wizard
User Manual
Cello Wizard
User Manual
Version 1.16
Technolog Limited, Ravenstor Road, Wirksworth, Derbyshire, DE4 4FY
Tel: +44 (0)1629 823611 Fax: +44 (0)1629 824283
Email: [email protected]
UMZ29000 Issue 2
Page 1 of 17 DMR: 2868
Cello Wizard
User Manual
Table of Contents
1.
Introduction
2.
Software Installation
3.
Instructions
Step 1a
Step 1b
Step 2
Step 3
Step 4
Step 5
Step 6
Step 7
–
–
–
–
–
–
–
–
Setting the communications port
Configuring the Cello
Signal Strength Testing
Synchronizing the Cello clock
Setting the dial-out information
Entering the site name
Live inputs
Finally
Appendix 1
Cello Mk4 Flow Input Connections
Appendix 2
Universal Cello Cable Connections
Appendix 3
Cello I.S. Flow Input Connections
Appendix 4
Cello 5 Meter Reader Connection Details
UMZ29000 Issue 2
Page 2 of 17 DMR: 2868
Cello Wizard
User Manual
1.
Introduction
The Cello Wizard software is designed for commissioning and maintaining Technolog's series of Cello data
loggers. The software is available for Microsoft Windows on both the PC and Pocket PC platforms, from
Windows 95 onwards and Pocket PC 3 onwards.
The Cello Wizard is capable of
•
•
•
•
•
•
Configuring Cello
Live signal strength tests and signal strength recording
Setting the Cello's internal clock
Programming the Cello's dial out numbers and site identification
Taking live readings from the Cello's inputs
Starting and stopping the Cello's logging function
The Cello Wizard can also be used to commission Cello as part of a Modulo Control system.
2.
Software Installation
•
•
Place the Cello Wizard disc into CD drive, the PC should automatically run the disc and start the
installation process. If it doesn’t automatically install: Run SETUP.EXE and INSTALL.)
Follow the step by step instructions on screen to install the software.
UMZ29000 Issue 2
Page 3 of 17 DMR: 2868
Cello Wizard
User Manual
3.
Running The Wizard
Step 1a: Setting the communications port.
On executing the Cello Wizard you will see the initial page (below left). Ensure that you are connecting via
the correct communications port by selecting Setup and then choosing from the drop down menu, before
pressing OK (below right). This usually will only require doing once. Each time the Wizard is restarted it will
use this setting as its default.
UMZ29000 Issue 2
Page 4 of 17 DMR: 2868
Cello Wizard
User Manual
Step 1b: Configuring the Cello
Attach the Cello to the PC using the Logger to PC
cable. Select Connect to establish communications
with the Cello. If communications fail, check the
communication port settings.
The Cello details will be displayed on the screen
(figure 1). This will show the current status and the
active channels. Cellos are shipped pre-configured
for a certain application, however you may wish to
change the mode of the Cello by re-configuration.
Choose Configure, select the required configuration
file for your Cello, and press open (figure 2). Details
will be displayed about the configuration file settings
(figure 3). Select Yes if you are sure this is the mode
you want, and the Cello will be re-configured. Note
at this stage any data in the Cello will be lost.
Press Next to go to the Signal strength testing
screen.
Figure 2
Figure 1
Figure 3
UMZ29000 Issue 2
Page 5 of 17 DMR: 2868
Cello Wizard
User Manual
Step 2: Signal Strength Testing
Two methods of signal testing are available: a spot test and the preferred two minute signal strength test.
The main differences are that the two minute test can be done with the Cello disconnected from the PDA or
PC, this is ideal for testing underground installations. The logging function in the Cello is temporarily used to
record the signal strength information for a period of two minutes. The recorded signal strengths are then
retrieved and displayed on the PDA or PC in a graphical format.
The spot test uses the display of the PDA or PC to show the instantaneous readings as communications
between the Cello and PDA or PC are continuous. The spot test is useful for above ground installations or
where the communication cable can be carefully passed down the side of a chamber cover (without
damaging it) with the Cello mounted underground.
To do the spot test (right), click on the Start button. Cello
Wizard will initialize the Cello modem and begin testing
signal strength. On the display you will see all the
networks detected by the modem and SIM with the
strongest readings first. These readings are updated
every five seconds until the Stop button is pressed.
All signal strength readings are based on a scale that
runs from 0-63. A signal strength reading of about 15 or
more for any one network is desirable. Ideally two or
more base stations with a signal greater than 15 is
optimal.
The two minute test (below right) is initiated by choosing
the red record button. You will be prompted to disconnect
the Cello and install it in your preferred installation
position. Once the two minutes are complete, reconnect
the Cello and download your signal strength data by
pressing the green play button.
After the two minute test has been completed a text (.txt)
file will have been created and saved in the Cello Wizard
Data folder. This file shows all the signal strengths
recorded in the two minute period. This file can be viewed
in any word processing software.
When you are happy with your installation position,
choose Next.
Message Reserve
This field indicates the number of SMS messages left in
the Cello.
Message Expiry
Indicates the predicted message expiry date, being 3
months from this date. If this field displays “Expired” then
this must be cleared prior to use. Contact Technolog or
Utility Data Services and request a message expiry
cleared message.
UMZ29000 Issue 2
Page 6 of 17 DMR: 2868
Cello Wizard
User Manual
Step 3: Synchronizing the Cello clock.
The Set clock screen displays the current time
according to the PDA or PC clock and the time
according to the Cello’s internal clock. If you wish
to change the Cello time to that of the PC then
choose Set Time. Once complete, choose Next.
Typically, loggers are set to GMT. In the UK the
Cello clock will be automatically adjusted over time
to synchronise with the GSM network clock
(network permitting).
UMZ29000 Issue 2
Page 7 of 17 DMR: 2868
Cello Wizard
User Manual
Step 4: Setting the dial-out information
From the Dial-out details screen the user is able to
specify the number for the host PC that the Cello is
to send its data and alarms to. The time of day that
the data is sent is also programmable.
The Host number is entered manually. If the UDSL
“Utility Data Service Limited” Data Centre at
Technolog’s premises in Derbyshire is to be used,
these numbers are pre-programmed in the
software and accessible by right clicking or click
and holding in the entry field and choosing ‘UK
Cellos’. This is not applicable if overseas.
Enter the time at which you wish the data to be
sent each day.
Enable for Modulo Control
If the Cello is to be used for Modulo control then
tick the box to enable this function.
Once you are satisfied with the dial-out details
select Next.
Advanced Dial - Out
Send meter index to host computer
Tick this box to enable index readings to be
transferred with the data to the host PC at the time
of the regular dial-out.
Send error log to host computer
Tick this box to enable error log information to be
transferred with the data to the host computer at
the time of the regular dial-out.
View error log
Select this button to view the Cello Error log. This
information is essential when trying to fault find
Cello problems.
UMZ29000 Issue 2
Page 8 of 17 DMR: 2868
Cello Wizard
User Manual
Error Log
This information is essential when trying to Cello
fault find Cello problems.
If an error is reported during GSM transmissions
then it will be reported in this error log.
This information includes:• Date and Time stamp of the error
• Error results
• Signal strength at the time of the error
• Duration of attempted communications
UMZ29000 Issue 2
Page 9 of 17 DMR: 2868
Cello Wizard
User Manual
Step 5: Entering the Site Name.
On the site identification screen you can enter a
site name, Site number and PMAC ID for your
Cello. Once entered, choose Next.
The Site Name should be a logical site
name
The Site No can be a user defined
reference number
The PMAC ID must be a unique 5 digit
number (i.e. 00001 Æ 99999).
Note these fields are dependant on the
configuration file used
Step 6: Live inputs
The live inputs screen enables you to cycle
through the active channels and initiate a live
reading on each of the inputs.
Each active channel can be checked in turn by
selecting the channel number and pressing Start.
Ensure that the pressure port is vented to
atmosphere prior to setting the pressure channel to
zero. Pressure channels should be set to zero
before connection to the pressure source by
pressing the Zero button. Ideally, checks should be
made against another pressure gauge to ensure
that they are reading correctly.
Where channel scaling is applicable, for example
in flow channels, this can be edited in the scale
factor field.
Meter index values can be entered in the index
field.
Use the Stop button to halt readings and move to
the next channel.
Once complete select Next.
UMZ29000 Issue 2
Page 10 of 17 DMR: 2868
Cello Wizard
User Manual
Step 7. Finished.
On the final screen, choose Finished to write the
details to the Cello. Choose Start Logging to
begin recording data and enable regular daily dialout. The Cello Wizard will close down. The Cello
will send the contents of its notepad to the host PC
and begin recording at the desired recording
interval.
If set for Modulo Control then control messages will
be initiated at the first logging interval.
UMZ29000 Issue 2
Page 11 of 17 DMR: 2868
Cello Wizard
User Manual
Appendix 1
UMZ29000 Issue 2
Page 12 of 17 DMR: 2868
Cello Wizard
User Manual
Appendix 2
UMZ29000 Issue 2
Page 13 of 17 DMR: 2868
Cello Wizard
User Manual
UMZ29000 Issue 2
Page 14 of 17 DMR: 2868
Cello Wizard
User Manual
UMZ29000 Issue 2
Page 15 of 17 DMR: 2868
Cello Wizard
User Manual
Appendix 3
UMZ29000 Issue 2
Page 16 of 17 DMR: 2868
Cello Wizard
User Manual
Appendix 4
UMZ29000 Issue 2
Page 17 of 17 DMR: 2868