1
Installation and Operation Manual
X-TMF-5860i-MFM-eng
Part Number: 541B110AAG
November, 2008
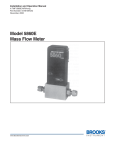
Model 5860i
Mass Flow Meter
Brooks® Model 5860i
Brooks® Model 5860i
Installation and Operation Manual
X-TMF-5860i-MFM-eng
Part Number: 541B110AAG
November, 2008
Essential Instructions
Read this page before proceeding!
Brooks Instrument designs, manufactures and tests its products to meet many national and international standards. Because
these instruments are sophisticated technical products, you must properly install, use and maintain them to ensure they
continue to operate within their normal specifications. The following instructions must be adhered to and integrated into your
safety program when installing, using and maintaining Brooks Products.
• Read all instructions prior to installing, operating and servicing the product. If this instruction manual is not the correct
manual, please see back cover for local sales office contact information. Save this instruction manual for future reference.
• If you do not understand any of the instructions, contact your Brooks Instrument representative for clarification.
• Follow all warnings, cautions and instructions marked on and supplied with the product.
• Inform and educate your personnel in the proper installation, operation and maintenance of the product.
• Install your equipment as specified in the installation instructions of the appropriate instruction manual and per applicable
local and national codes. Connect all products to the proper electrical and pressure sources.
• To ensure proper performance, use qualified personnel to install, operate, update, program and maintain the product.
• When replacement parts are required, ensure that qualified people use replacement parts specified by Brooks Instrument.
Unauthorized parts and procedures can affect the product's performance and place the safe operation of your process at
risk. Look-alike substitutions may result in fire, electrical hazards or improper operation.
• Ensure that all equipment doors are closed and protective covers are in place, except when maintenance is being
performed by qualified persons, to prevent electrical shock and personal injury.
Pressure Equipment Directive (PED)
All pressure equipment with an internal pressure greater than 0.5 bar (g) and a size larger than 25mm or 1" (inch) falls under the
Pressure Equipment Directive (PED). The Directive is applicable within the European Economic Area (EU plus Norway, Iceland
and Liechtenstein). Pressure equipment can be traded freely within this area once the PED has been complied with.
• Section 1 of this manual contains important safety and operating instructions related to the PED directive.
• Meters described in this manual are in compliance with EN directive 97/23/EC module H Conformity Assessment.
• All Brooks Instrument Flowmeters fall under fluid group 1.
• Meters larger than 25mm or 1" (inch) are in compliance with category I, II, III of PED.
• Meters of 25mm or 1" (inch) or smaller are Sound Engineering Practice (SEP).
ESD (Electrostatic Discharge)
Handling Procedure:
1. Power to unit must be removed.
2. Personnel must be grounded, via a wrist strap or other safe, suitable means before any printed circuit card or other internal device is
installed, removed or adjusted.
3. Printed circuit cards must be transported in a conductive container. Boards must not be removed from protective enclosure until
immediately before installation. Removed boards must immediately be placed in protective container for transport, storage or return to
factory.
Comments
This instrument is not unique in its content of ESD (electrostatic discharge) sensitive components. Most modern electronic designs contain
components that utilize metal oxide technology (NMOS, SMOS, etc.). Experience has proven that even small amounts of static electricity
can damage or destroy these devices. Damaged components, even though they appear to function properly, exhibit early failure.
Installation and Operation Manual
X-TMF-5860i-MFM-eng
Part Number: 541B110AAG
November, 2008
Brooks® Model 5860i
Dear Customer,
We appreciate this opportunity to service your flow measurement and control requirements with a Brooks
Instrument device. Every day, flow customers all over the world turn to Brooks Instrument for solutions to their
gas and liquid low-flow applications. Brooks provides an array of flow measurement and control products for
various industries from biopharmaceuticals, oil and gas, fuel cell research and chemicals, to medical devices,
analytical instrumentation, semiconductor manufacturing, and more.
The Brooks product you have just received is of the highest quality available, offering superior performance,
reliability and value to the user. It is designed with the ever changing process conditions, accuracy requirements
and hostile process environments in mind to provide you with a lifetime of dependable service.
We recommend that you read this manual in its entirety. Should you require any additional information concerning
Brooks products and services, please contact your local Brooks Sales and Service Office listed on the back cover
of this manual or visit www.BrooksInstrument.com
Yours sincerely,
Brooks Instrument
Installation and Operation Manual
X-TMF-5860i-MFM-eng
Part Number: 541B110AAG
November, 2008
Brooks® Model 5860i
THIS PAGE WAS
INTENTIONALLY
LEFT BLANK
Contents
Installation and Operation Manual
X -TMF-5860i-MFM-eng
Part Number: 541B110AAG
November, 2008
Brooks® Model 5860i
Section 1
Introduction
Paragraph
Number
Page
Number
1-1
1-2
1-3
Purpose ............................................................................. 1-1
Description ........................................................................ 1-1
Specifications .................................................................... 1-2
2-1
2-2
2-3
2-4
2-5
2-6
2-7
2-8
Receipt of Equipment ........................................................
Recommended Storage Practice.......................................
Return Shipment ...............................................................
Gas Connections ...............................................................
Installation .........................................................................
In-Line Filter ......................................................................
Electrical Interfacing ..........................................................
Configuring PC Board .......................................................
2-1
2-1
2-3
2-4
2-4
2-5
2-5
2-6
3-1
3-2
3-3
3-4
3-5
Theory of Operation ..........................................................
Operating Procedure .........................................................
Zero Adjustment ................................................................
Calibration Procedure ........................................................
Response (Flow Output Signal) ........................................
3-1
3-2
3-2
3-3
3-7
4-1
4-2
4-3
4-4
4-5
4-6
General ..............................................................................
Troubleshooting .................................................................
Sensor Tube ......................................................................
Disassembly and Assembly ..............................................
Use of the Conversion Tables ............................................
Restrictor Sizing ................................................................
4-1
4-1
4-4
4-4
4-6
4-9
5-1
General .............................................................................. 5-1
Section 2
Installation
Section 3
Operation
Section 4
Maintenance
Section 5
Parts List
Section A
CE Certification
CE Certification of Mass Flow Equipment ......................... A-1
i
Contents
Installation and Operation Manual
X -TMF-5860i-MFM-eng
Part Number:541B110AAG
November, 2008
Brooks® Model 5860i
Figures
Figure
Number
Page
Number
1-1
Typical Response to Flow Step Changes .......................... 1-2
2-1
2-2
2-3
2-4
Model 5860i Dimensions ...................................................
"D" Type Connector Pin Arrangement ...............................
Maximum Allowable Loop Resistance ...............................
Common Electrical Hook-Ups ...........................................
2-2
2-2
2-3
2-6
3-1
3-2
3-3
3-4
3-5
Flow Sensor Operational Diagram ....................................
Model 5860i Calibration Connections ................................
Adjustment Potentiometer Location ...................................
Fast Response Adjustment ...............................................
PC Board Jumper Location and Function ..........................
3-2
3-4
3-4
3-4
3-6
5-1
Model 5860i Parts Drawing ............................................... 5-2
Tables
Table
ii
Page
2-1
Recommended Filter Size ................................................. 2-5
4-1
4-2
4-3
4-4
Bench Troubleshooting ...................................................... 4-2
Sensor Troubleshooting ..................................................... 4-2
Conversion Factors (Nitrogen Base) ................................. 4-7
Restrictor Selection Guide................................................ 4-11
5-1
5-2
Model 5860i Replacement Parts List ................................. 5-3
Tool and Spare Part Kits for 5860i .......................................... 5-3
Section 1 Introduction
Installation and Operation Manual
X-TMF-5860i-MFM-eng
Part Number: 541B110AAG
November, 2008
Brooks® Model 5860i
1-1 Purpose
The Brooks® Model 5860i Flow Meter is a mass flow measurement device
designed for accurately measuring flows of gases. This instruction manual
is intended to provide the user with all the information necessary to install,
operate and maintain the Brooks 5860i Mass Flow Meter. This manual is
organized into five sections:
Section 1 - Introduction
Section 2 - Installation
Section 3 - Operation
Section 4 - Maintenance
Section 5 - Replacement Parts
It is recommended that this manual be read in its entirety before attempting
to operate or repair the Model 5860i.
1-2 Description
The Brooks Model 5860i Mass Flow Meter is widely used where manual,
electronic or computer controlled gas handling occurs. The Model 5860i
consists of two basic units: a flow sensor and an integral electronic signal
conditioner. This combination produces a stable gas flow indication, which
eliminates the need to continuously monitor and compensate for changing
gas pressures and temperatures. Standard features include:
Fast Response rapidly indicates changes in actual mass flow rate. Refer
to Figure 1-1.
Removable Cleanable Sensor permits the user to clean or replace the
sensor. Refer to Section 4-4.
Output Limiting prevents possible damage to delicate data acquisition
devices by limiting the output to +6.8 Vdc and -.7 Vdc on the voltage
signal output and 0 to 26 mA on the current output.
1-3 Specifications
1-1
Section 1 Introduction
Installation and Operation Manual
X-TMF-5860i-MFM-eng
Part Number: 541B110AAG
November, 2008
Brooks® Model 5860i
Figure 1-1 Typical Response to Flow Step Changes
Standard Ranges
Any full scale flowrate from 3 sccm to 30 slpm* (Nitrogen equivalent)
*Standard temperature and pressure in accordance with SEMI
(Semiconductor Equipment and Materials International) standard: 0° C and
101.3 kPa (760 Torr).
Accuracy
±1% full scale including linearity at calibration conditions.
±1.5% full scale including linearity for flow ranges greater than 20 slpm.
Repeatability
0.25% of rate
Response Time (Flow Output Signal)
Less than 6 seconds response to within 2% of full scale final value with a 0
to 100% flow step.
Power Requirements
+15 to +28 Vdc @ 90 mA
1-2
Section 1 Introduction
Installation and Operation Manual
X-TMF-5860i-MFM-eng
Part Number: 541B110AAG
November, 2008
Brooks® Model 5860i
Ambient Temperature Limits
Operating: 5 to 65°C (40 to 150°F)
Non-Operating: -25 to 100°C (-13 to +212°F)
Working Pressure
4500 psi (31.03 MPa) maximum
Output Signal
0-5 Vdc into 2000 ohms or greater. Maximum ripple 3 mV. Jumper
selectable 4-20 mAdc or 0-20 mAdc. Refer to Figure 2-3 for maximum total
loop resistance.
Temperature Sensitivity
Zero: Less than ±0.075% F.S. per degree C
Span: Less than ±1.0% F.S. shift over 10-50° C range
Pressure Sensitivity
0.03% per PSI up to 200 PSIG
Power Supply Sensitivity
Negligible over the allowable voltage range
Mounting Attitude Sensitivity
±0.5% maximum full scale deviation after re-zeroing
Leak Integrity
1 x 10⁻⁹ Atm. scc/sec Helium
Usable Range
50 to 1
Mechanical Connection
Compatible with most popular mass flow equipment. Refer to Figure 2-1.
Electrical Connection
D-type, 15 pin connector (DA-15P)
*Standard temperature and pressure in accordance with SEMI
(Semiconductor Equipment and Materials International) standard: 0°C and
101.3 kPa (760 Torr). The mass flowmeter can be calibrated to other
reference standard conditions. Specify at time of ordering.
1-3
Section 1 Introduction
Installation and Operation Manual
X-TMF-5860i-MFM-eng
Part Number: 541B110AAG
November, 2008
Brooks® Model 5860i
THIS PAGE WAS
INTENTIONALLY
LEFT BLANK
1-4
Section 2 Installation
Installation and Operation Manual
X-TMF-5860i-MFM-eng
Part Number: 541B110AAG
November, 2008
Brooks® Model 5860i
2-1 Receipt of Equipment
When the equipment is received, the outside packing case should be
checked for damage incurred during shipment. If the packing case is
damaged, the local carrier should be notified at once regarding his liability.
A report should be submitted to the Product Service Department, Brooks
Instrument, Hatfield, Pennsylvania 19440-0903.
Remove the envelope containing the packing list. Carefully remove the
equipment from the packing case. Make sure spare parts are not
discarded with the packing materials. Inspect for damaged or missing
parts.
Brooks Instrument
407 W. Vine Street
P.O. Box 903
Hatfield, PA 19440 USA
Toll Free (888) 554-FLOW (3569)
Tel (215) 362-3700
Fax (215) 362-3745
E-mail: [email protected]
www.BrooksInstrument.com
Brooks Instrument
Neonstraat 3
6718 WX Ede, Netherlands
P.O. Box 428
6710 BK Ede, Netherlands
Tel 31-318-549-300
Fax 31-318-549-309
E-mail: [email protected]
Brooks Instrument
1-4-4 Kitasuna Koto-Ku
Tokyo, 136-0073 Japan
Tel 011-81-3-5633-7100
Fax 011-81-3-5633-7101
Email: [email protected]
2-2 Recommended Storage Practice
If intermediate or long-term storage is required for equipment as supplied
by Brooks Instrument, it is recommended that said equipment be stored in
accordance with the following:
a. Within the original shipping container.
b. Store in a sheltered area with the following conditions:
1. Ambient temperature 21°C (70°F) nominal.
2. Relative humidity 45% nominal, 60% maximum/25% minimum.
Upon removal from storage, a visual inspection should be conducted
to verify its condition is “as received.” If the equipment has been in
storage for an excess of ten (10) months or in conditions in excess
of those recommended, all pressure boundary seals should be
replaced and the device subjected to a pneumatic pressure test in
accordance with applicable vessel codes.
2-1
Section 2 Installation
Installation and Operation Manual
X-TMF-5860i-MFM-eng
Part Number: 541B110AAG
November, 2008
Brooks® Model 5860i
Figure 2-3 Maximum Allowable Loop Resistance
2-3 Return Shipment
Prior to returning any Brooks equipment to the factory, contact the factory for a Return Materials Authorization Number (RMA#). This can be obtained
at Brooks Instrument, Product Service Department, 407 West Vine Street,
Hatfield, PA 19440-0903, or call toll free 1-888-554-FLOW (3569).
Brooks Instrument
407 W. Vine Street
P.O. Box 903
Hatfield, PA 19440 USA
Toll Free (888) 554-FLOW (3569)
Tel (215) 362-3700
Fax (215) 362-3745
E-mail: [email protected]
www.BrooksInstrument.com
Brooks Instrument
Neonstraat 3
6718 WX Ede, Netherlands
P.O. Box 428
6710 BK Ede, Netherlands
Tel 31-318-549-300
Fax 31-318-549-309
E-mail: [email protected]
2-2
Brooks Instrument
1-4-4 Kitasuna Koto-Ku
Tokyo, 136-0073 Japan
Tel 011-81-3-5633-7100
Fax 011-81-3-5633-7101
Email: [email protected]
Also, completion of Form RPR003-1, Brooks Instrument Decontamination
Statement, as well as, a Material Safety Data Sheet (MSDS) for the fluid(s)
used in the meter, is required before any Brooks Personnel can begin
processing the equipment. Copies of the form can be obtained at the
location above.
Section 2 Installation
Installation and Operation Manual
X-TMF-5860i-MFM-eng
Part Number: 541B110AAG
November, 2008
Brooks® Model 5860i
2-4 Gas Connections
Standard inlet and outlet connections supplied on the Model 5860i are 1/
4" compression fittings for flow rates up to 10 slpm, and 3/8" compression
fittings for higher flow rates.
Optional 1/8 compression, VCOTM and VCRTM connections are available
upon request. Prior to installation, make certain all piping is clean and free
of obstructions. Install the piping in such a manner that permits easy
removal if the instrument is to be removed for cleaning or test bench
troubleshooting.
2-5 Installation (Refer to Figures 2-1 through 2-2)
Recommended installation procedures:
a. The Model 5860i should be located in a clean dry atmosphere
relatively free from shock and vibration.
b. Leave sufficient room for access to the electrical components.
c. Install in such a manner that permits easy removal if the instrument
requires cleaning.
d. The Model 5860i Mass Flowmeter can be installed in any position.
However mounting orientations other than the original factory
calibration (see data sheet) will result in a ±0.5% maximum full scale
shift after re-zeroing.
e. When installing flowmeters with full scale flow rates of 10 slpm or
greater, be aware that sharp, abrupt angles in the system piping
directly upstream of the meter may cause a small shift in accuracy.
If possible have at least 10 pipe diameters of straight tubing upstream of the Model 5860i Mass Flowmeter.
2-3
Section 2 Installation
Installation and Operation Manual
X-TMF-5860i-MFM-eng
Part Number: 541B110AAG
November, 2008
Brooks® Model 5860i
INCHES/MILLIMETERS
Connection
"X"Dim.
1/4"Compression
Fitting
4.32
109.7
1/4" Tube VCO
3.86
98.0
1/4" Tube VCR
4.18
106.2
3/8"Compression
Fitting
4.44
112.8
Figure 2-1 Model 5860i Dimensions
PIN NO.
1*
2
3
4
5
6
7*
8
9
10
11*
12*
13
14
15
FUNCTION
Set Point Return
Volt Signal Output
Not Used
Current Signal Output
+15 to +28 Vdc Supply
Not Used
Current Setpoint Input
Voltage Setpoint Input
Supply Common
Signal Output Return
+5 Volt Reference Output
Valve Override Input
Not Used
Chassis Ground
Not Used
COLOR CODE
Black
White
Green
Orange
Wht/Blk
Red/Blk
Grn/Blk
Org/Blk
Blu/Blk
Blk/Wht
Grn/Wht
* These connections are used for the 5850i and 5851i Mass Flow Controllers.
Make no connections to these pins.
2-4
Figure 2-2 "D" Type Connector Pin Arrangement
NOTE:
1. Cable shield tied to chassis ground
in meter connector. Make no
connection on customer end.
2. All power leads must be connected
to power supply.
Section 2 Installation
Installation and Operation Manual
X-TMF-5860i-MFM-eng
Part Number: 541B110AAG
November, 2008
Brooks® Model 5860i
2-6 In-Line Filter
It is recommended that an in-line filter be installed upstream from the
flowmeter to prevent the possibility of any foreign material entering the flow
sensor. The filtering element should be replaced periodically or
ultrasonically cleaned.
Table 2-1 Recommended Filter Size
Maximum Flow Rate
100 sccm
500 sccm
1 to 5 slpm
10 to 30 slpm
Recommended Filter Size
1 micron
2 microns
7 microns
15 microns
Note: The above lists the maximum recommended porosity for each flow
range. It is recommended that the minimum micron porosity that does not
limit the full scale flowrate be used.
2-7 Electrical Interfacing
To insure proper operation the Model 5860i must be connected per Figures
2-2, 2-3 and 2-4 and configured according to section 2-7.
The following minimum electrical connections must be made for new
installations:
Chassis Ground
Signal Output Return
Voltage or Current Signal Output
+15 - +28 Vdc Supply
Supply Common
Electrical Hook-Up
Signal Output
The flow signal output can be measured as a voltage and a current
simultaneously on two different pins of the D-connector. Pin 2 indicates the
flow rate with a 0-5 Vdc signal proportional to the mass flow rate. Pin 4
indicates the flow rate with either a 0-20mAdc or 4-20mAdc current signal
as determined by jumpers on the printed circuit board ( refer to Section 2-7
for jumper positions ). Both the current and voltage signals are returned on
Pin 10 of the D-connector.
Supply
The power for the mass flow meter is connected to Pin 5 (+15 to +28 Vdc)
and Pin 9 ( supply common ) of the D-connector. Refer to Section 1-3 for
the power requirements.
NOTE: The length of wire for the power supply connections ( Pins 5&9 )
must be kept as short as possible to insure the minimum voltage (+15 ) is
available at the mass flow meter.
Chassis Ground
Connect earth ground to Pin 14 of the D-connector.
2-5
Section 2 Installation
Brooks® Model 5860i
Installation and Operation Manual
X-TMF-5860i-MFM-eng
Part Number: 541B110AAG
November, 2008
2-8 Configuring the PC Board
NOTE: To obtain access to the jumpers, the electronics cover must be
removed. Disconnect the power to the mass flow meter, and cables to the
D-connector. Remove the three screws at the base of the can and remove
the top jack post of the D-connector. Remove the can. The can must be
replaced before returning the unit to service.
Refer to Section 2-6 for the proper electrical hook-up. Refer to Figure 3-5
for printed circuit board jumper locations and functions.
Signal Output
A 0-5 Vdc flow signal is always available. The current signal output is
jumper-selectable for either 0-20 mAdc or 4-20 mAdc. Jumpers J3 and J4
( blue ) must be in the upper position for 0-20 mAdc output and in the lower
position for 4-20 mAdc output.
NOTE: Both J3 and J4 must be in the same position. Jumpers J3 and J4
do not affect the voltage output.
2-6
Figure 2-4 Common Electrical Hook-Ups
Section 3 Operation
Installation and Operation Manual
X-TMF-5860i-MFM-eng
Part Number: 541B110AAG
November, 2008
Brooks® Model 5860i
3-1 Theory of Operation
The thermal mass flow sensing technique used in the 5860i works as
follows:
A precision power supply provides a constant power heat input (P) at the
heater which is located at the midpoint of the sensor tube. (Refer to Figure
3-1) At zero or no flow conditions, the heat reaching each temperature
sensor (one upstream and one downstream of the heater) is equal.
Therefore, the temperatures T1 and T2 are equal. When gas flows through
the tube, the upstream sensor is cooled and the downstream sensor is
heated, producing a temperature difference. The temperature difference
T2-T1 is directly proportional to the gas mass flow.
The equation is:
Where,
ΔT
=
Cp
=
P
m
A
=
=
=
ΔT = A * P * Cp * m
temperature difference T2 - T1 (OK)
specific heat of the gas at constant pressure
(kJ/kg-OK)
heater power (kJ/s)
mass flow (kg/s)
constant of proportionality (S2-OK2/kJ2)
A bridge circuit interprets the temperature difference and a differential
amplifier generates a linear 0-5 Vdc signal directly proportional to the gas
mass flow rate.
The flow restrictor shown in Figure 3-1 performs a ranging function similar
to a shunt resistor in an electrical ammeter. The restrictor provides a
pressure drop that is linear with flow rate. The sensor tube has the same
linear pressure drop/flow relationship. The ratio of the restrictor flow to the
sensor tube flow remains constant over the range of the meter. Different
restrictors have different pressure drops and produce meters with different
full scale flow rates. The span adjustment in the electronics affects the fine
adjustment of the meter's full scale flow.
The Model 5860i has the following features incorporated in the integral
signaling conditioning circuit:
Fast Response adjusted by the anticipate potentiometer. This circuit, when
properly adjusted, allows the high frequency information contained in
the sensor signal to be amplified to provide a faster responding flow
signal for remote indication.
Removable cleanable sensor permits the user to clean or replace the
sensor. Refer to Section 4-4.
Output Limiting prevents possible damage to delicate data acquisition
devices by limiting the output to +6.8 Vdc and -.7 Vdc, on the voltage
signal output and 0-26 mA on the current signal output.
3-1
Section 3 Operation
Installation and Operation Manual
X-TMF-5860i-MFM-eng
Part Number: 541B110AAG
November, 2008
Brooks® Model 5860i
Figure 3-1 Flow Sensor Operational Diagram
3-2 Operating Procedure
a. Apply power to the flowmeter and allow approximately 45 minutes for
the instrument to warm-up and stabilize its temperature.
b. Turn on the gas supply.
c. Shut-off flow to the meter and observe the flowmeter's output signal.
If the output is not 0mVdc (±10mVdc), check for leaks and if none
are found, refer to the re-zeroing procedure in Section 3-3.
d. Adjust for the desired flow and assume normal operation.
3-3 Zero Adjustment
Each Model 5860i is factory adjusted to provide a 0 ±10mVdc or a 4 mAdc
±0.05 mA signal at zero flow. The adjustment is made in our calibration
laboratory which is temperature controlled to 21.1°C (70°F ±2°F). After
initial installation and warm-up in the gas system the zero flow indication
may be other than the factory setting. This is primarily caused by changes
in temperature between our calibration laboratory and the final installation.
The zero flow reading can also be affected to a small degree by changes in
line pressure and mounting attitude.
3-2
To check zero always mount the meter in its final configuration and allow a
minimum of 20 minutes for the temperature of the meter and its
environment to stabilize. Using a suitable voltmeter check the meter output
signal. If it differs from the factory setting adjust it by removing the lower
pot hole plug, which is located closest to the meter body. Adjust the zero
Installation and Operation Manual
X-TMF-5860i-MFM-eng
Part Number: 541B110AAG
November, 2008
Section 3 Operation
Brooks® Model 5860i
potentiometer (refer to Figure 3-3) until the desired output signal is
obtained.
3-4 Calibration Procedure
NOTE 1: Calibration of the Model 5860i mass flowmeter requires the use
of a digital voltmeter (DVM) a flow control valve or mass flow controller to
set the flow rate and a precision flow standard calibrator such as the
Brooks Vol-U-Meter®. It is recommended that the calibration be performed
only by trained and qualified service personnel.
NOTE 2: If the mass flow meter is to be used on a gas other than the
calibration gas, apply the appropriate sensor conversion factor. Refer to
Section 4-5.
a. Adjust the anticipate potentiometer fully clockwise (20 turns). Then
adjust the anticipate potentiometer 10 turns counterclockwise to
center the potentiometer. This will provide a rough adjustment of this
circuit and make the flow signal stable for calibration.
b. Connect the DVM positive lead to the 0-5V signal output, pin 2, and
the negative lead to signal common (TP4). Adjust the zero
potentiometer for an output of 0mV ±2mV.
c. Increase the flow rate until the flow signal output equals 5.000V.
Connect the DVM positive lead to the TP2 (linearity voltage)and the
negative lead to TP4 (signal common). Adjust the linearity
potentiometer for an output of 0.0V (zero volts).
d. Connect the DVM positive lead to the 0-5V signal output (pin 2) and
the negative lead to TP4 (circuit common). Measure the flow rate
using suitable volumetric calibration equipment. Adjust the flow rate
to the proper full scale flow.
Adjust the span potentiometer until the voltage at pin 2 is 5.000V.
e. Measure the voltage at TP1. The voltage at TPl is -100 times the
output voltage of the sensor. This voltage can range from -1.2 to -12
volts, however it is recommended that this voltage stay between 2.0
and 9.0 volts for proper operation. If the recommended voltage
range exceeds this then the desired accuracy and/or signal stability
may not be achieved. If one of the limits is reached check the
restrictor sizing procedures. Refer to Section 4-6.
f. Shut off the flow. Connect the DVM positive lead to flow signal output
(pin 2) and the negative lead to TP4. Readjust the zero
potentiometer for an output of 0mV ±2mV as necessary.
g. Increase the flow rate for a flow signal output of 50% (2.500V) and
measure the flow rate. Calculate the error as a percentage of full
scale.
3-3
Section 3 Operation
Brooks® Model 5860i
Installation and Operation Manual
X-TMF-5860i-MFM-eng
Part Number: 541B110AAG
November, 2008
Figure 3-2 Model 5860i Calibration Connections
Figure 3-3 Adjustment Potentiometer Location
3-4
Figure 3-4 Fast Response Adjustment
Section 3 Operation
Installation and Operation Manual
X-TMF-5860i-MFM-eng
Part Number: 541B110AAG
November, 2008
Brooks® Model 5860i
Example:
What is the percent of full scale error when full scale is equal to 100 sccm?
Measured flow rate = 50.0 sccm
Indicated flow rate = 48.5 sccm
h. Calculate the TP2 correction voltage:
(error recorded in step g) x 0.450 volts
Example:
Error = -1.5%
TP2 correction voltage = -1.5 x 0.450 = -0.675 volts
New TP2 voltage = 0 volts + (-0.675) = -0.675 volts
i. Flow rate for a flow signal output of 100% (5.000V). Connect the DVM
positive lead to TP2 and the negative lead to TP4.
j. Adjust the linearity potentiometer for an output equal to the new
calculated TP2 voltage.
k. Repeat steps d,e,f and g.
1. If the error recorded in step g is less than 0.5%, then the
calibration procedure is complete.
2. If the error is greater than 0.5% set the flow rate for a flow signal
output of 100% (5.000V). Connect the DVM positive lead to TP2
(linearity voltage) and the negative lead to TP4 (circuit common).
Calculate a new TP2 voltage as follows:
Example:
Sensor error = 0.7%
Measured TP2 voltage = -0.567 volts
TP2 correction = 0.7 x 0.450 = 0.315 volts
New TP2 correction = 0.315 + (-0.567) = -0.252 volts
Adjust the linearity potentiometer for an output equal to the new TP2
voltage and then repeat steps f, g and h.
Note: The voltage at TP2 can range from -10 to +3 volts, however, it is
recommended that this voltage stay between -2.5 and +2.5 volts for proper
operation. If the recommended voltage range is exceeded the desired
accuracy and/or signal stability may not be achieved. If one of the limits is
reached, check the restrictor sizing. Refer to Section 4-6.
3-5
Section 3 Operation
Brooks® Model 5860i
3-6
Figure 3-5 PC Board Jumper Location and Function
Installation and Operation Manual
X-TMF-5860i-MFM-eng
Part Number: 541B110AAG
November, 2008
Installation and Operation Manual
X-TMF-5860i-MFM-eng
Part Number: 541B110AAG
November, 2008
Section 3 Operation
Brooks® Model 5860i
3-5 Response (Flow Output Signal)
To achieve the proper response characteristics the response
compensation circuit must be adjusted. This adjustment is performed by
observing the output signal of the meter when the flow is suddenly
stopped. Place a metering valve upstream of the Model 5860i to control
the flow rate.
A Brooks NRSTM precision metering valve is well suited for this application.
Also place a fast acting shut-off valve immediately downstream of the
flowmeter. A solenoid valve is ideal for this, but a manual toggle valve will
do. Keep the length of interconnecting tubing as short as possible
between the valves and the Model 5860i since the tubing can have a
dampening effect on the flow and the gas may not stop flowing the instant
the downstream valve is closed as desired. Adjustment of the fast
response circuit will not alter the steady state accuracy of the flowmeter as
adjusted in Section 3-4.
Note: This procedure requires an oscilloscope, chart recorder, or a DVM
with a sample speed three samples per second or greater to monitor the
rate of change of the output signal during the test. Monitor the output signal
at pin 2 of D-Connector. TP4 may be used for ground.
a. With the shut-off valve open adjust the metering valve so that the
output voltage of the Model 5860i is 5.000 Vdc. Allow the output to
become stable at this setting.
b. Close the shut off valve to stop the flow. Observe the output signal as
it decays.
c. The behavior of the output signal during the transition between 100%
and 0% flow indicates the adjustment required of the anticipate
potentiometer. Refer to Figure 3-4.
1. If the flow signal decays to -0.05 to -0.5V then rises to 0.0V, the
anticipate potentiometer is properly adjusted.
2. If the flow signal decays rapidly and goes below -0.5V before rising to
0.0V, the anticipate potentiometer must be adjusted clockwise and
steps a and b repeated.
3. If the flow signal decays slowly and does not go below -0.05V, the
anticipate potentiometer must be adjusted counterclockwise and
steps a and b repeated.
3-7
Section 3 Operation
Installation and Operation Manual
X-TMF-5860i-MFM-eng
Part Number: 541B110AAG
November, 2008
Brooks® Model 5860i
THIS PAGE WAS
INTENTIONALLY
LEFT BLANK
3-8
Installation and Operation Manual
X-TMF-5860i-MFM-eng
Part Number: 541B110AAG
November, 2008
Section 4 Maintenance
Brooks® Model 5860i
4-1 General
No routine maintenance is required on the Model 5860i other than an
occasional cleaning. If an in-line filter is used, the filtering element should
periodically be replaced or ultrasonically cleaned.
4-2 Troubleshooting
A. System Checks
The Model 5860i is generally used as a component in gas handling
systems which can be quite complex. This can make the task of isolating a
malfunction in the system a difficult one. An incorrectly diagnosed
malfunction can cause many hours of unnecessary downtime. If possible,
make the following system checks before removing a suspected defective
mass flow meter for bench troubleshooting or return, especially if the
system is new:
1. Verify low resistance power supply connections and that the correct
power supply voltage and signals are reaching and leaving the meter.
The breakout board (P/N S273Z668AAA) listed in Section 5 will make
this job much easier.
2. Verify that the process gas connections have been correctly terminated
and leak checked.
3. Verify that all user selectable jumpers are in their desired positions.
Refer to Figure 3-5.
B. Bench Troubleshooting
1. Properly connect the mass flow meter to a +15 to +28 Vdc power
supply, and connect an output signal readout device (4-1/2 digit
4-1
Section 4 Maintenance
Brooks® Model 5860i
Installation and Operation Manual
X-TMF-5860i-MFM-eng
Part Number: 541B110AAG
November, 2008
Table 4-1 Bench Troubleshooting
Trouble
Possible Cause
Check/Corrective Action
Output stays at 0 Volts
regardless of flow.
Clogged Sensor.
Clean sensor. Refer to cleaning procedure. Section 4-2.
Output signal stays at +6.8V
and there is no flow through
the meter.
Defective PC Board.
Replace PC Board. Refer to Section 4-4.
Defective Sensor.
Replace Sensor Assembly. Refer to Section 4-4.
Meter grossly out of calibration. Partially clogged sensor.
Flow is higher than indicated.
Clean sensor, refer to the cleaning procedure. Section 4-2.
Meter grossly out of calibration. Partially clogged restrictor.
Flow is lower than indicated.
Replace restrictor. Refer to Section 4-4.
Meter output oscillates.
Anticipate potentiometer out of adjustment. Adjust anticipate potentiometer. Refer to Section 3-4.
Faulty pressure regulator.
Check regulator output.
Defective PC Board.
Replace PC Board. Refer to Section 4-4.
Table 4-2 Sensor Troubleshooting
4-2
Installation and Operation Manual
X-TMF-5860i-MFM-eng
Part Number: 541B110AAG
November, 2008
Section 4 Maintenance
Brooks® Model 5860i
voltmeter recommended) pins 2 and 10 (Refer to Figure 2-2). Apply
power, and allow the flowmeter to warm up for 45 minutes. Do not
connect to a gas source at this time. Observe the output signal and,
if necessary perform the zero adjustment procedure (Section 3-3). If
the output signal will not zero properly, refer to the sensor
troubleshooting section and check the sensor. If the sensor is
electrically functional, the printed circuit board is defective and will
require replacement.
2. Connect the flowmeter to a source of the gas on which it was
originally calibrated. Increase the flow until 100% indication
(5.00Vdc) is achieved. Vary the flow rate over the 2 to 100% range
and verify that the output signal follows the flow rate. If possible,
connect a flow measurement device in series with the mass
flowmeter to observe the actual flow behavior and verify the
accuracy of the mass flowmeter. If the mass flowmeter functions as
described above, it is functioning properly and the problem may lie
elsewhere.
Table 4-1 lists possible malfunctions which may be encountered during
bench troubleshooting.
C. Sensor Troubleshooting
If it is believed the sensor coils are either open or shorted, troubleshoot
using Table 4-2. If any of the steps do not produce the expected results the
sensor assembly is defective and must be replaced. Refer to Section 4-4
for the disassembly and assembly procedures to use when replacing the
sensor.
Note: Do not attempt to disassemble the sensor.
D. Cleaning Procedures
Should the Model 5860i Mass Flow Meter require cleaning due to
deposition, use the following procedures:
1. Remove the unit from the system.
2. Refer to Section 4-4 to disassemble the meter.
3. Use a hemostat or tweezers to push a 0.007" dia. piano wire through
the flow sensor tube to remove any contamination. For best results
push the wire into the downstream opening of the sensor tube. The
sensor tube can be flushed with a non-residuous solvent (Freon TF®
recommended). A hypodermic needle filled with solvent is a
convenient means to accomplish this.
4-3
Section 4 Maintenance
Brooks® Model 5860i
Installation and Operation Manual
X-TMF-5860i-MFM-eng
Part Number: 541B110AAG
November, 2008
An alternate method for flushing out the sensor is to replace the restrictor
element with a low flow plug restrictor. This plug forces all the flow through
the sensor and may dislodge any obstructions. Subject the flow meter to a
high differential pressure. Pressurizing the outlet of the flowmeter higher
than the inlet may help force the obstruction upstream and out of the
sensor tube.
4. Deposits of silicon dioxide may be removed by soaking the internal
parts in solution of 5% hydrofluoric acid (5 parts hydrofluoric acid
(HF), 95 parts water (H2O)) followed by Freon TF.
5. Wire mesh and A.C.L.F.E. type restrictor elements can be cleaned in
an ultrasonic bath. Refer to Section 4-7 for the correct restrictor to
use.
6. Blow all parts dry with dry nitrogen and reassemble. Refer to Section
4-4b (assembly).
7. Purge the assembled controller with dry nitrogen.
8. Perform the calibration procedure in Section 3-4.
9. When the flowmeter is reinstalled in the system, the connections
should be leak tested and the system should be purged with dry
nitrogen for 30 minutes prior to start-up to prevent the formation of
deposits.
4-3 Sensor Tube
The sensor tube is part of a calibrated flow divider that is designed to
operate within a preset gas flow range. The sensor assembly may be
removed or replaced by referring to Section 4-4, Disassembly and
Assembly. If the sensor assembly is cleaned and reinstalled, a calibration
check should be performed. Refer to Section 3-4.
4-4 Disassembly and Assembly
The Model 5860i Mass Flowmeter may be disassembled in the field by the
user for cleaning, re-ranging or servicing. Disassemble and assemble the
meter as follows:
NOTE: The 5860i Mass Flowmeter should be disassembled and
assembled in a clean environment to prevent particulate
contamination.
A. Disassembly
The numbers in ( ) refer to the spare parts exploded view in Figure 5-1.
4-4
Installation and Operation Manual
X-TMF-5860i-MFM-eng
Part Number: 541B110AAG
November, 2008
Section 4 Maintenance
Brooks® Model 5860i
1. Remove the three screws (8) attaching the electronics cover and
loosen the upper jack post on the D-Connector. Remove the
electronics cover (11).
2. Unplug the sensor connector from the PC Board. Remove the two
screws securing the bracket (13) and PC Board (2). Remove the
bracket and PC Board.
3. Remove the two screws (6) and washers (7) securing the sensor
assembly (3). Remove the sensor assembly.
Note: Do not attempt to disassemble the sensor assembly.
4. Remove the backup rings (5) and the sensor assembly O-rings (4)
from the flowmeter body (1). Using the Brooks O-ring removal tool
will help prevent scratching the sealing surface.
5. Remove the adapter fittings (15) from the flowmeter body (1).
6. Remove the restrictor assembly (9) from the inlet side of the
flowmeter body (1) using the restrictor tool (part of service tool kit
listed in Section 5, Table 5-2).
B. Assembly
Note: It is recommended that all O-rings be replaced during meter
assembly. All O-rings should be lightly lubricated with Fomblin lubricant
(part of O-ring kit, Section 5) prior to their installation.
1. Examine all parts for signs of wear or damage, replace as necessary.
2. Place the restrictor O-ring on the restrictor assembly. Screw the
restrictor assembly (9) into the inlet side of the flowmeter body using the
restrictor tool, hand tighten snug.
3. Press the lubricated sensor O-rings (4) into the flowmeter body (1).
Press the back up rings (5) into the O-ring cavity above the O-rings.
Be sure that the O-rings are seated squarely and the backup rings
are below the surface of the body. The back end of the O-ring
removal tool is useful to press the backup rings all the way into the
body.
4-5
Section 4 Maintenance
Installation and Operation Manual
X-TMF-5860i-MFM-eng
Part Number: 541B110AAG
November, 2008
Brooks® Model 5860i
4. Install the sensor assembly (3) as shown in Figure 5-1 and secure
with the two socket head cap screws (6) and washers (7). Tighten
the screws to 28 in-lbs.
5. Install the printed circuit board (2), secure with bracket (13) and two
screws (8). Plug the connector from the sensor assembly (3) onto
the PC Board. The flow arrow on the connector should be pointing in
the direction of the flow.
6. Install the electronics cover (11) on the meter and secure with three
screws (8). Tighten the upper jack post on the D-Connector.
7. Prior to installation leak and pressure test, the assembled flowmeter
to any applicable pressure vessel codes.
4-5 Use of the Conversion Tables
If a mass flowmeter is operated on a gas other than the gas it was
calibrated with, a scale shift will occur in the relationship between the
output signal and the mass flow rate. This is due to the difference in heat
capacities between the two gases. This scale shift can be approximated by
using the ratio of the molar specific heat of the two gases, or sensor
conversion factor. A list of sensor conversion factors is given in Table 4-3.
To change to a new gas, multiply the output reading by the ratio of the gas
factor for the desired gas to the gas factor for the calibration gas.
Actual gas
flow rate
=
Output
reading
x
factor of the new gas
factor of the calibrated gas
Example:
The flowmeter is calibrated for Nitrogen.
The desired gas is Carbon Dioxide.
The output reading is 75 sccm when Carbon Dioxide is flowing.
Then 75 x 0.778 = 58.35 sccm
In order to calculate the conversion factor for a gas mixture, the following
formula should be used:
Where,
P1 = percentage (%) of gas 1 (by volume)
P2 = percentage (%) of gas 2 (by volume)
Pn = percentage (%) of gas n (by volume)
Example: The desired gas is 20% Helium (He) and 80% Chlorine
(Cl) by volume. The desired full scale flow rate of the mixture is 20
slpm.
Sensor conversion factor for the mixture is:
4-6
Nitrogen equivalent flow = 20/.901 = 22.20 slpm Nitrogen
Section 4 Maintenance
Installation and Operation Manual
X-TMF-5860i-MFM-eng
Part Number: 541B110AAG
November, 2008
Brooks® Model 5860i
Table 4-3 Conversion Factors (Nitrogen Base)
GAS NAME
FORMULA
Acetylene
Air
Allene
Ammonia
Argon
Arsine
Boron Trichloride
Boron Trifluoride
Bromine Pentafluoride
Bromine Trifluoride
Bromotrifluoroethylene
Bromotrifluoromethane f-13B1
1,3-Butadiene
Butane
1-Butene
CIS-2-Butene
Trans-2-Butene
Carbon Dioxide
Carbon Disulfide
Carbon Monoxide
Carbon Tetrachloride
Carbon Tetrafluoride f-14
Carbonyl Fluoride
Carbonyl Sulfide
Chlorine
Chlorine Dioxide
Chlorine Trifluoride
2-Chlorobutane
Chlorodifluoromethane f-22
Chloroform (Trichloromethane)
Chloropentafluoroethane f-115
Chlorotrifluoroethylene
Chlorotrifluoromethane f-13
Cyanogen
Cyanogen Chloride
Cyclobutane
Cyclopropane
Deuterium
Diborane
Diboromodifluoromethane f-12B2
1,2-Dibromotetrafluoroethane f-114B2
Dichlorodifluoromethane f-12
Dichlorofluoromethane f-21
Dichlorosilane
1,2-Dichloroethane
1,2-Dichlorotetrafluoroethane f-114
2,2 Dichloro
1,1-Difluoro-1-Chloroethane
1,1-Difluoroethane
1,1-Difluoroethylene
Diethylsilane
Difluoromethane f-32
Dimethylamine
Dimethylether
2,2-Dimethylpropane
Disilane
Ethane
Ethanol
Ethylacetylene
Ethyl Chloride
Ethylene
Ethylene Oxide
Fluorine
Fluoroform f-23
Germane
Germanium Tetrachloride
Halothane (R-123B1)
Helium
Hexafluoroacetone
Hexaflorobenzine
Hexafluoroethane f-116
Hexafuoropropylene (HFP)
Hexamethyldisilane (HMDS)
Hexane
C2H2
Mixture
C3H4
NH3
Ar
AsH3
BCL3
BF3
BrF 5
BrF 3
C 2BrF3
CBrF3
C4H6
C4H10
C4H8
C4H8
C4H8
CO2
CS2
CO
CCL4
CF4
COF2
COS
CL2
CLO2
CLF3
C4H9Cl
CHCLF2
CHCL3
C2CLF5
C2CLF3
CCLF3
(CN)2
CLCN
C4H8
C3H6
D2
B2H6
CBr2F2
C 2Br2F4
CCL2F2
CHCL2F
SiH 2CL2
C2H4Cl2
C2CL2F4
C2HC12F3
C2H3CLF2
CH3CHF2
CH2CF2
C 4H12Si
CF2H2
(CH 3)2NH
(CH3)2O
C(CH3 )4
Si2 H6
C2H6
C2H6O
C4H6
C2H5CL
C2H4
C2H4O
F2
CHF3
GeH4
GeCl4
C2 HBrClF3
He
F 3CCOCF3
C6F6
C2F6
C3F6
(CH2)6Si2
C6H14
SENSOR
FACTOR
0.615
0.998
0.478
0.786
1.395
0.754
0.443
0.579
0.287
0.439
0.326
0.412
0.354
0.257
0.294
0.320
0.291
0.773
0.638
0.995
0.344
0.440
0.567
0.680
0.876
0.693
0.433
0.234
0.505
0.442
0.243
0.337
0.430
0.498
0.618
0.387
0.505
0.995
0.448
0.363
0.215
0.390
0.456
0.442
0.382
0.231
0.259
0.341
0.415
0.458
0.183
0.627
0.370
0.392
0.247
0.332
0.490
0.394
0.365
0.408
0.619
0.589
0.924
0.529
0.649
0.268
0.257
1.386
0.219
0.632
0.255
0.249
0.139
0.204
ORIFICE
FACTOR
0.970
1.018
1.199
0.781
1.195
1.661
2.044
1.569
2.502
2.214
2.397
2.303
1.413
1.467
1.435
1.435
1.435
1.255
1.650
1.000
2.345
1.770
1.555
1.463
1.598
1.554
1.812
1.818
1.770
2.066
2.397
2.044
1.985
1.366
1.480
1.413
1.224
0.379
1.000
2.652
2.905
2.099
1.985
1.897
1.879
2.449
2.336
1.957
1.536
1.512
1.775
1.360
1.269
1.281
1.613
1.493
1.038
1.282
1.384
1.516
1.000
1.254
1.163
1.584
1.653
2.766
2.654
0.378
2.434
2.577
2.219
2.312
2.404
1.757
DENSITY
(kg/m3)
1.173
1.293
1.787
0.771
1.784
3.478
5.227
3.025
7.806
6.108
7.165
6.615
2.491
2.593
2.503
2.503
2.503
1.977
3.393
1.250
6.860
3.926
2.045
2.180
3.214
3.011
4.125
4.134
3.906
5.340
7.165
5.208
4.912
2.322
2.730
2.491
1.877
0.177
1.235
8.768
10.53
5.492
4.912
4.506
4.419
7.479
6.829
4.776
2.940
2.860
3.940
2.411
2.013
2.055
3.244
2.779
1.357
2.057
2.388
2.879
1.261
1.965
1.695
3.127
3.418
9.574
8.814
0.178
7.414
8.309
6.139
6.663
7.208
3.847
4-7
Section 4 Maintenance
Installation and Operation Manual
X-TMF-5860i-MFM-eng
Part Number: 541B110AAG
November, 2008
Brooks® Model 5860i
Table 4-3 Conversion Factors (Nitrogen Base) Continued
4-8
GAS NAME
FORMULA
Hydrogen
Hydrogen Bromide
Hydrogen Chloride
Hydrogen Cyanide
Hydrogen Fluoride
Hydrogen Iodide
Hydrogen Selenide
Hydrogen Sulfide
Iodine Pentafluoride
Isobutane
Isobutene
Isopentane
Krypton
Methane
Methylacetylene
Methyl Bromide
3-Methyl-1-butene
Methyl Chloride
Methyl Fluoride
Methyl Mercaptan
Methyl Silane
Methyl Trichlorosilane (MTS)
Methyl Vinyl Ether
Monoethanolamine
Monoethylamine
Monomethylamine
Neon
Nickel Carbonyl
Nitric Oxide
Nitrogen
Nitrogen Dioxide
Nitrogen Trifluoride
Nitrogen Trioxide
Nitrosyl Chloride
Nitrous Oxide
Octofluorocyclobutane
Oxygen
Oxygen Difluoride
Ozone
Pentafluorethane f-125
Pentane (n-Pentane)
Perchloryl Fluoride
Perfluorobutane
Perfluoro-2-Butene
Perfluoromethyl-vinylether
Perfluoropropane
Pentane (n-Pentane)
Phosgene
Phosphine
Phosphorous Pentafluoride
Phosphorous Trifluoride
Propane (same as CH3CH 2CH3)
Propylene (Propene)
Rhenium Hexafluoride
Silane
Silicon Tetrachloride
Silicon Tetrafluoride
Sulfur Dioxide
Sulfur Hexafluoride
Sulfur Tetrafluoride
Sulfur Trioxide
Sulfuryl Fluoride
Tetrachloromethane
Tetrafluoroethylene (TFE)
Tetrafluorohydrazine
Trichlorofluoromethane f-11
Trichlorosilane
Trimethyloxyborane (TMB)
1,1,2-Trichloro-1,1,2-Triflouroet f-113
Trimethylamine
Tungsten Hexafluoride
Uranimum Hexafluoride
Vinyl Bromide
Vinyl Chloride
Vinyl Fluoride
Water Vapor
Xenon
H2
HBr
HCL
HCN
HF
HI
H2Se
H2S
IF5
C4H10
C4H8
C5H12
Kr
CH4
C3H4
CH3Br
C5H10
CH3CL
CH3F
CH4S
CH6Si
CH3Cl3Si
C3H6O
C2H7NO
C2HH5NH2
CH3NH2
Ne
Ni(CO)4
NO
N2
NO2
NF3
N2O3
NOCL
N2O
C4F8
O2
OF2
O3
C2HF5
C5H12
CLO 3F
C4F10
C4F8
PMVE
C3F8
C5H12
COCL2
PH3
PF5
PF3
C3H8
C3H6
ReF6
SiH4
SiCL4
SiF4
SO2
SF6
SF4
SO3
SO2F2
CCL4
C2F4
N2F4
CCL3F
SiHCL3
B(OCH 3)3
C2CL3F3
(CH3)3N
WF6
UF6
C2H3Br
C2H3CL
C2H3F
H2O
Xe
SENSOR
FACTOR
1.008
0.987
0.983
0.744
0.998
0.953
0.837
0.850
0.283
0.260
0.289
0.211
1.382
0.763
0.473
0.646
0.252
0.687
0.761
0.588
0.393
0.267
0.377
0.305
0.359
0.565
1.398
0.212
0.995
1.000
0.758
0.501
0.443
0.644
0.752
0.169
0.988
0.672
0.738
0.287
0.212
0.448
0.738
0.268
0.296
0.179
0.212
0.504
0.783
0.346
0.495
0.343
0.401
0.230
0.625
0.310
0.395
0.728
0.270
0.353
0.535
0.423
0.344
0.361
0.367
0.374
0.329
0.300
0.231
0.316
0.227
0.220
0.524
0.542
0.576
0.861
1.383
ORIFICE
FACTOR
0.269
1.695
1.141
0.973
0.845
2.144
1.695
1.108
2.819
1.440
1.435
1.605
1.729
0.763
1.196
1.834
1.584
1.347
1.102
1.313
1.283
2.310
1.435
1.477
1.269
1.067
0.847
2.371
1.030
1.000
1.713
1.598
1.649
1.529
1.259
2.672
1.067
1.388
1.310
2.070
1.605
1.905
2.918
2.672
2.029
2.591
1.605
1.881
1.100
2.109
1.770
1.274
1.234
3.279
1.070
2.465
1.931
1.529
2.348
1.957
1.691
1.931
2.345
1.905
1.926
2.244
2.201
1.929
2.520
1.467
3.264
3.548
1.985
1.492
1.281
0.802
2.180
DENSITY
(kg/m3 )
0.090
3.645
1.639
1.179
0.893
5.789
3.613
1.539
9.907
2.593
2.503
3.222
3.708
0.717
1.782
4.236
3.127
2.308
1.518
2.146
2.061
6.675
2.567
2.728
2.013
1.420
0.902
7.008
1.339
1.251
2.052
3.168
3.389
2.913
1.964
8.933
1.429
2.402
2.138
5.360
3.222
4.571
10.61
8.933
5.131
8.396
3.222
4.418
1.517
5.620
3.906
2.008
1.875
13.41
1.440
7.579
4.648
2.858
6.516
4.776
3.575
4.648
6.858
4.526
4.624
6.281
6.038
4.638
7.920
2.639
13.28
15.70
4.772
2.788
2.046
0.804
5.851
Installation and Operation Manual
X-TMF-5860i-MFM-eng
Part Number: 541B110AAG
November, 2008
Section 4 Maintenance
Brooks® Model 5860i
It is generally accepted that the mass flow rate derived from this equation
is only accurate to ±5%. The sensor conversion factors given in Table 4-3
are calculated based on a gas temperature of 21°C and a pressure of one
atmosphere. The specific heat of most gases is not strongly pressure and
temperature dependent, however gas conditions that vary widely from
these reference conditions may cause an additional error due to the
change in specific heat due to temperature and/or pressure.
4-6 Restrictor Sizing
The restrictor assembly is a ranging device for the sensor portion of the
flowmeter. It creates a pressure drop which is linear with flow rate. This
diverts a sample quantity of the process gas flow through the sensor. Each
restrictor maintains the ratio of sensor flow to restrictor flow, however the
total flow through each restrictor is different. Different restrictors (micron
porosity and active area) have different pressure drops and produce
meters with different full scale flow rates. For a discussion of the
interaction of the various parts of the meter, you are urged to review
Section 3-1 (Theory of Operation).
If the restrictor assembly has been contaminated with foreign matter, the
pressure drop vs. flow characteristics will be altered and it must be cleaned
or replaced. It may also be necessary to replace the restrictor assembly
when the mass flowmeter is to be calibrated to a new flow rate.
Restrictor assembly replacement should be performed only by trained
personnel. The tools required for the removal/replacement procedure are
as follows:
Appropriate size wrench for the removal of the inlet process
connection. Restrictor removal tool (contained in service tool kit P/N
S778D017AAA) Restrictor O-ring, refer to the spare parts Section 5, for
the correct part number.
Restrictors
The Model 5860i Series Mass Flowmeters use two types of restrictor
assemblies depending on full scale flowrate.
1. Sintered wire mesh for Nitrogen equivalent flow rates above 3.4
slpm. These restrictor assemblies are made from a cylinder of
sintered wire mesh and are easily cleaned if they become
contaminated in service.
2. Anti-Clog Laminar Flow Element (ACLFE). This type of restrictor
assembly is used for Nitrogen equivalent flow rates less than 3.4
slpm.
Sizing
All Model 5860i Series Restrictor Assemblies are factory adjusted to
provide a 115 mm water column pressure drop for a specific flow rate.
This corresponds to the desired full scale flow rate. A list of restrictor
assemblies used in the Model 5860i Series Mass Flowmeters is shown in
Table 4-4.
4-9
Section 4 Maintenance
Brooks® Model 5860i
Installation and Operation Manual
X-TMF-5860i-MFM-eng
Part Number: 541B110AAG
November, 2008
Example:
The desired gas is Silane (SiH4).
The desired full scale flow rate is 200 sccm.
Sensor conversion factor is 0.679 from Table 4-3.
Air equivalent flow = 200/0.679 = 294.5 sccm Nitrogen.
In the example above a size P restrictor would be selected.
NOTE: If the calculated flow rate is such that two different size restrictors
could be used, always select the larger size.
If a mixture of two or more gases is being used the restrictor selection
must be based on the nitrogen equivalent flow rate of the mixture.
Example:
The desired gas is 20% Helium (He) and 80% Chlorine (Cl) by volume.
The desired full scale flow rate of the mixture is 20 slpm.
Sensor conversion factor for the mixture is:
Nitrogen equivalent flow = 20/.901 = 22.20 slpm Nitrogen.
In this example a size 4 wire mesh assembly would be selected.
4-10
Section 4 Maintenance
Installation and Operation Manual
X-TMF-5860i-MFM-eng
Part Number: 541B110AAG
November, 2008
Brooks® Model 5860i
Table 4-4 Model 5860i Standard Restrictors
Size
D
E
F
G
H
J
K
L
M
N
P
Q
R
S
T
U
V
W
X
Y
1
2
3
4
Range
sccm Air Equivalent Flow
Low
High
8.038
11.38
11.25
15.93
15.75
22.30
22.05
31.23
30.88
43.73
43.23
61.21
60.52
85.70
84.73
119.9
118.6
167.9
166.0
235.2
232.5
329.3
325.4
460.9
455.7
645.3
638.0
903.4
893.2
1265.
1250.
1771.
1750.
2479.
2451.
3471.
3431.
4859.
4804.
6802.
6724.
9523.
9388.
13337.
13176.
18667.
18457.
30060.
Part Number
ACLFE
S110Z275*
S110Z276
S110Z277
S110Z278
S110Z279
S110Z280
S110Z281
S110Z282
S110Z283
S110Z284
S110Z285
S110Z286
S110Z287
S110Z288
S110Z289
S110Z290
S110Z291
S110Z292
Wire Mesh
S110Z319*
S110Z321
S110Z317
S110Z228
S110Z226
S110Z224
*Materials: BMT = 316 Stainless Steel (ACLFE only)
CVA = Hastelloy® C (ACLFE and Sintered)
DCA = Monel® R (ACLFE and Sintered)
BMA = Sintered 316 Stainless Steel (Wire Mesh and Sintered)
NOTE:For flow rates less than 8 sccm use the low flow plug, P/N 618-K-020-BMT in place of a
restrictor assembly.
4-11
Section 4 Maintenance
Installation and Operation Manual
X-TMF-5860i-MFM-eng
Part Number: 541B110AAG
November, 2008
Brooks® Model 5860i
THIS PAGE WAS
INTENTIONALLY
LEFT BLANK
4-12
Section 5 Parts List
Installation and Operation Manual
X-TMF-5860i-MFM-eng
Part Number: 541B110AAG
November, 2008
Brooks® Model 5860i
5-1 General
When ordering parts, please specify:
Brooks Serial Number
Model Number
Part Description
Part Number
Quantity
(Refer to Figure 5-1 and Tables 5-1 and 5-2).
5-1
Section 5 Parts List
Brooks® Model 5860i
5-2
Figure 5-1 Model 5860i Parts Drawing
Installation and Operation Manual
X-TMF-5860i-MFM-eng
Part Number: 541B110AAG
November, 2008
Section 5 Parts List
Installation and Operation Manual
X-TMF-5860i-MFM-eng
Part Number: 541B110AAG
November, 2008
Brooks® Model 5860i
Table 5-1 Model 5860i Replacement Parts List
Item
No.
1
2
3
4
5
6
7
8
9
Qty.
1
1
1
2
2
2
2
5
1
10
11
12
13
14
1
1
1
1
2
NS
2
15
NS
NS
2
2
1
NS
2
Description
Flowmeter Body
PC Board Assembly (D-Connector)
Sensor Assembly
O-ring, Sensor, Size 004
Backup Ring, Sensor
Screw Sensor Body
Lock Washer, Sensor
Screw, Sensor PC Board Cover
Restrictor Assembly and Components
(Refer to Section 4-7 for sizing)
O-ring, Restrictor, Size 109
Electronics Cover Can (D-Connector)
Cover Plate
PC Board Mounting Bracket
Pot Hole Plug
Fittings:
1/4" Compression, Swagelok
1/4" Male VCR, Cajon
1/4" Male VCO, Cajon
O-ring, Fitting, Size 906
O-ring, VCO Gland, Size 010
Interconnecting Cables:
Connector on one end
with no termination
on other end
Part Number
092Z773BM%
S097Y901AAA
S774Z607AAA
375B004***
962A027NZA
751Z107AA0
926D006AWA
753L056AWZ
375B109***
219Z430EA%
852Z213EA%
079Z135EAA
620Z434SXA
Length:
5 Feet
10 Feet
25 Feet
50 Feet
5 Feet
10 Feet
25 Feet
50 Feet
Connector on one end
with Connector for Model 5870
Series Secondary
Electronics on other end
8-32 Mounting Screw
320B136BMA
315Z036BMA
315Z035BMA
375B906***
375B010***
D-type
S124Z361AAA
S124Z362AAA
S124Z363AAA
S124Z435AAA
S124Z576AAA
S124Z577AAA
Not Recommended
Not Recommended
Customer Supplied
***QTA=Viton, SUA=Buna, TTA=Kalrez, AR=As Required, NS=Not Shown
Table 5-2 Tool and Spare Part Kits for Model 5860i
Model 5850/5860 Service Tool Kit
P/N S778D017AAA
Model 5850/5860 Break Out Board Assembly
P/N S273Z668AAA
Permits the complete disassembly of the
Model 5860i for servicing.
Installs directly between mass flow sensor/
controller and interconnecting cable. Allows
convenient access to all signals for easy
troubleshooting of system.
Contains:
1 - Break Out PC Board
1 - 5 foot Extension Cable
1 - Terminal PC Board
Contains:
1 - O-ring Removal Tool
1 - Potentiometer Adjustment Tool
1 - Ball Point Allen Wrench
1 - Phillips Screw Driver
1 - Nut Driver for Orifice
1 - Restrictor Removal Tool
1 - Common Screw Driver
Additional publications available:
MFC Contamination Control
5-3
Section 5 Parts List
Installation and Operation Manual
X-TMF-5860i-MFM-eng
Part Number: 541B110AAG
November, 2008
Brooks® Model 5860i
THIS PAGE WAS
INTENTIONALLY
LEFT BLANK
5-4
Installation and Operation Manual
X-TMF-5860i-MFM-eng
Part Number: 541B110AAG
November, 2008
Section A CE Certifiction
Brooks® Model 5860i
Dansk
Brooks Instrument
407 West Vine St.
Hatfield, PA 19440
U.S.A.
Emne
:
Tillæg til instruktions manual.
Reference
:
CE mærkning af Masse Flow udstyr
Dato
:
Januar-1996.
Brooks Instrument har gennemført CE mærkning af elektronisk udstyr med succes, i henhold til regulativet om elektrisk støj
(EMC direktivet 89/336/EEC).
Der skal dog gøres opmærksom på benyttelsen af signalkabler i forbindelse med CE mærkede udstyr.
Kvaliteten af signal kabler og stik:
Brooks lever kabler af høj kvalitet, der imødekommer specifikationerne til CE mærkning.
Hvis der anvendes andre kabel typer skal der benyttes et skærmet kabel med hel skærm med 100% dækning.
Forbindelses stikket type “D” eller “cirkulære”, skal være skærmet med metalhus og eventuelle PG-forskruninger skal enten
være af metal eller metal skærmet.
Skærmen skal forbindes, i begge ender, til stikkets metalhus eller PG-forskruningen og have forbindelse over 360 grader.
Skærmen bør være forbundet til jord.
“Card Edge” stik er standard ikke af metal, der skal derfor ligeledes benyttes et skærmet kabel med hel skærm med 100%
dækning.
Skærmen bør være forbundet til jord.
Forbindelse af stikket; venligst referer til vedlagte instruktions manual.
Med venlig hilsen,
Deutsch
Brooks Instrument
407 West Vine St.
Hatfield, PA 19440
U.S.A.
Subject
:
Nachtrag zur Bedienungsanleitung.
Referenz
:
CE Zertifizierung für Massedurchflußgeräte
Datum
:
Januar-1996.
Nach erfolgreichen Tests enstprechend den Vorschiften der Elektromagnetischen Verträglichkeit (EMC Richtlinie 89/336/
EEC) erhalten die Brooks-Geräte (elektrische/elektronische Komponenten) das CE-Zeichen.
Bei der Auswahl der Verbindungskabel für CE-zertifizierte Geräte sind spezielle Anforderungen zu beachten.
Qualität der Verbindungskabel, Anschlußstecker und der Kabeldurchführungen
Die hochwertigen Qualitätskabel von Brooks entsprechen der Spezifikation der CE-Zertifizierung.
Bei Verwendung eigener Verbindungskabel sollten Sie darauf achten, daß eine
100 %igenSchirmababdeckung des Kabels gewährleistet ist.
•“D” oder “Rund” -Verbindungsstecker sollten eine Abschirmung aus Metall besitzen.
Wenn möglich, sollten Kabeldurchführungen mit Anschlußmöglichkeiten für die Kabelabschrimung verwendet werden.
Die Abschirmung des Kabels ist auf beiden Seiten des Steckers oder der Kabeldurchführungen über den vollen Umfang von
360 ° anzuschließen.
Die Abschirmung ist mit dem Erdpotential zu verbinden.
Platinen-Steckverbindunger sind standardmäßige keine metallgeschirmten Verbindungen. Um die Anforderungen der CEZertifizierung zu erfüllen, sind Kabel mit einer 100 %igen Schirmababdeckung zu verwenden.
Die Abschirmung ist mit dem Erdpotential zu verbinden.
Die Belegung der Anschlußpins können Sie dem beigelegten Bedienungshandbuch entnehmen.
A-1
Section A CE Certifiction
Brooks® Model 5860i
Installation and Operation Manual
X-TMF-5860i-MFM-eng
Part Number: 541B110AAG
November, 2008
English
Brooks Instrument
407 West Vine St.
Hatfield, PA 19440
U.S.A.
Subject
:
Addendum to the Instruction Manual.
Reference
:
CE certification of Mass Flow Equipment
Date
:
January-1996.
The Brooks (electric/electronic) equipment bearing the CE mark has been successfully tested to the regulations of the Electro
Magnetic Compatibility (EMC directive 89/336/EEC).
Special attention however is required when selecting the signal cable to be used with CE marked equipment.
Quality of the signal cable, cable glands and connectors:
Brooks supplies high quality cable(s) which meets the specifications for CE certification.
If you provide your own signal cable you should use a cable which is overall completely screened with a 100% shield.
“D” or “Circular” type connectors used should be shielded with a metal shield. If applicable, metal cable glands must be used
providing cable screen clamping.
The cable screen should be connected to the metal shell or gland and shielded at both ends over 360 Degrees.
The shield should be terminated to a earth ground.
Card Edge Connectors are standard non-metallic. The cables used must be screened with 100% shield to comply with CE
certification.
The shield should be terminated to a earth ground.
For pin configuration : Please refer to the enclosed Instruction Manual.
Español
Brooks Instrument
407 West Vine St.
Hatfield, PA 19440
U.S.A.
Asunto
:
Addendum al Manual de Instrucciones.
Referencia
:
Certificación CE de los Equipos de Caudal Másico
Fecha
:
Enero-1996.
Los equipos de Brooks (eléctricos/electrónicos) en relación con la marca CE han pasado satisfactoriamente las pruebas
referentes a las regulaciones de Compatibilidad Electro magnética (EMC directiva 89/336/EEC).
Sin embargo se requiere una atención especial en el momento de seleccionar el cable de señal cuando se va a utilizar un
equipo con marca CE
Calidad del cable de señal, prensaestopas y conectores:
Brooks suministra cable(s) de alta calidad, que cumple las especificaciones de la certificación CE .
Si usted adquiere su propio cable de señal, debería usar un cable que esté completamente protegido en su conjunto con un
apantallamiento del 100%.
Cuando utilice conectores del tipo “D” ó “Circular” deberían estar protegidos con una pantalla metálica. Cuando sea posible,
se deberán utilizar prensaestopas metálicos provistos de abrazadera para la pantalla del cable.
La pantalla del cable deberá ser conectada al casquillo metálico ó prensa y protegida en ambos extremos completamente en
los 360 Grados.
La pantalla deberá conectarse a tierra.
Los conectores estandar de tipo tarjeta (Card Edge) no son metálicos, los cables utilizados deberán ser protegidos con un
apantallamiento del 100% para cumplir con la certificación CE.
La pantalla deberá conectarse a tierra.
Para ver la configuración de los pines: Por favor, consultar Manual de Instrucciones adjunto.
A-2
Installation and Operation Manual
X-TMF-5860i-MFM-eng
Part Number: 541B110AAG
November, 2008
Section A CE Certifiction
Brooks® Model 5860i
Français
Brooks Instrument
407 West Vine St.
Hatfield, PA 19440
U.S.A.
Sujet
:
Annexe au Manuel d’Instructions.
Référence
:
Certification CE des Débitmètres Massiques à Effet Thermique.
Date
:
Janvier 1996.
Messieurs,
Les équipements Brooks (électriques/électroniques) portant le label CE ont été testés avec succès selon les règles de la
Compatibilité Electromagnétique (directive CEM 89/336/EEC).
Cependant, la plus grande attention doit être apportée en ce qui concerne la sélection du câble utilisé pour véhiculer le signal
d’un appareil portant le label CE.
Qualité du câble, des presse-étoupes et des connecteurs:
Brooks fournit des câbles de haute qualité répondant aux spécifications de la certification CE.
Si vous approvisionnez vous-même ce câble, vous devez utiliser un câble blindé à 100 %.
Les connecteurs « D » ou de type « circulaire » doivent être reliés à la terre.
Si des presse-étoupes sont nécessaires, ceux ci doivent être métalliques avec mise à la terre.
Le blindage doit être raccordé aux connecteurs métalliques ou aux presse-étoupes sur le pourtour complet du câble, et à
chacune de ses extrémités.
Tous les blindages doivent être reliés à la terre.
Les connecteurs de type « card edge » sont non métalliques. Les câbles utilisés doivent être blindés à 100% pour satisfaire à la
réglementation CE.
Tous les blindages doivent être reliés à la terre.
Se référer au manuel d’instruction pour le raccordement des contacts.
Greek
Brooks Instrument
407 West Vine St.
Hatfield, PA 19440
U.S.A.
1996
A-3
Section A CE Certifiction
Brooks® Model 5860i
Installation and Operation Manual
X-TMF-5860i-MFM-eng
Part Number: 541B110AAG
November, 2008
Italiano
Brooks Instrument
407 West Vine St.
Hatfield, PA 19440
U.S.A.
Oggetto
:
Addendum al manuale di istruzioni.
Riferimento
:
Certificazione CE dei misuratori termici di portata in massa
Data
:
Gennaio 1996.
Questa strumentazione (elettrica ed elettronica) prodotta da Brooks Instrument, soggetta a marcatura CE, ha superato con successo
le prove richieste dalla direttiva per la Compatibilità Elettomagnetica (Direttiva EMC 89/336/EEC).
E’ richiesta comunque una speciale attenzione nella scelta dei cavi di segnale da usarsi con la strumentazione soggetta a marchio
CE.
Qualità dei cavi di segnale e dei relativi connettori:
Brooks fornisce cavi di elevata qualità che soddisfano le specifiche richieste dalla certificazione CE. Se l’utente intende usare
propri cavi, questi devono possedere una schermatura del 100%.
I connettori sia di tipo “D” che circolari devono possedere un guscio metallico. Se esiste un passacavo esso deve essere metallico
e fornito di fissaggio per lo schermo del cavo.
Lo schermo del cavo deve essere collegato al guscio metallico in modo da schermarlo a 360° e questo vale per entrambe le estemità.
Lo schermo deve essere collegato ad un terminale di terra.
I connettori “Card Edge” sono normalmente non metallici. Il cavo impiegato deve comunque avere una schermatura del 100%
per soddisfare la certificazione CE.
Lo schermo deve essere collegato ad un terminale di terra.
Per il corretto cablaggio dei terminali occorre fare riferimento agli schemi del manuale di istruzioni dello strumento.
Nederlands
A-4
Brooks Instrument
407 West Vine St.
Hatfield, PA 19440
U.S.A.
Onderwerp
: Addendum voor Instructie Handboek
Referentie: CE certificering voor Mass Flow Meters & Controllers
Datum
: Januari 1996
Dames en heren,
Alle CE gemarkeerde elektrische en elektronische produkten van Brooks Instrument zijn met succes getest en voldoen aan de
wetgeving voor Electro Magnetische Compatibiliteit (EMC wetgeving volgens 89/336/EEC).
Speciale aandacht is echter vereist wanneer de signaalkabel gekozen wordt voor gebruik met CE gemarkeerde produkten.
Kwaliteit van de signaalkabel en kabelaansluitingen:
• Brooks levert standaard kabels met een hoge kwaliteit, welke voldoen aan de specificaties voor CE certificering.
Indien men voorziet in een eigen signaalkabel, moet er gebruik gemaakt worden van een kabel die volledig is afgeschermd
met een bedekkingsgraad van 100%.
• “D” of “ronde” kabelconnectoren moeten afgeschermd zijn met een metalen connector kap. Indien kabelwartels worden
toegepast, moeten metalen kabelwartels worden gebruikt die het mogelijk maken het kabelscherm in te klemmen
Het kabelscherm moet aan beide zijden over 360° met de metalen connectorkap, of wartel verbonden worden.
Het scherm moet worden verbonden met aarde.
• “Card-edge” connectors zijn standaard niet-metallisch. De gebruikte kabels moeten volledig afgeschermd zijn met een
bedekkingsgraad van 100% om te voldoen aan de CE certificering.
Het scherm moet worden verbonden met aarde.
Voor pin-configuraties a.u.b. verwijzen wij naar het bijgesloten instruktie handboek.
Hoogachtend,
Installation and Operation Manual
X-TMF-5860i-MFM-eng
Part Number: 541B110AAG
November, 2008
Section A CE Certifiction
Brooks® Model 5860i
Norsk
Brooks Instrument
407 West Vine St.
Hatfield, PA 19440
U.S.A.
Vedrørende
:
Referanse
:
Dato
:
Vedlegg til håndbok
CE sertifisering av utstyr for massestrømsmåling og regulering
Januar 1996
Til den det angår
Brooks Instrument elektrisk og elektronisk utstyr påført CE-merket har gjennomgått og bestått prøver som
beskrevet i EMC forskrift om elektromagnetisk immunitet, direktiv 89/336/EEC.
For å opprettholde denne klassifisering er det av stor viktighet at riktig kabel velges for tilkobling av det
måletekniske utstyret.
Utførelse av signalkabel og tilhørende plugger:
• Brooks Instrument tilbyr levert med utstyret egnet kabel som møter de krav som stilles til CE-sertifisering.
• Dersom kunden selv velger kabel, må kabel med fullstendig, 100% skjerming av lederene benyttes.
“D” type og runde plugger og forbindelser må være utført med kappe i metall og kabelnipler må være utført i metall for
jordet innfesting av skjermen. Skjermen i kabelen må tilknyttes metallet i pluggen eller nippelen i begge ender over 360°,
tilkoblet elektrisk jord.
• Kort-kantkontakter er normalt utført i kunststoff. De tilhørende flatkabler må være utført med fullstendig, 100% skjerming som kobles til elektrisk jord på riktig pinne i pluggen, for å møte CE sertifiseringskrav.
For tilkobling av medleverte plugger, vennligst se håndboken som hører til utstyret.
Vennlig hilsen
Português
Brooks Instrument
407 West Vine St.
Hatfield, PA 19440
U.S.A.
Assunto
:
Adenda ao Manual de Instruções
Referência
:
Certificação CE do Equipamento de Fluxo de Massa
Data
:
Janeiro de 1996.
O equipamento (eléctrico/electrónico) Brooks com a marca CE foi testado com êxito nos termos do regulamento da Compatibilidade Electromagnética
(directiva CEM 89/336/EEC).
Todavia, ao seleccionar-se o cabo de sinal a utilizar com equipamento contendo a marca CE, será necessário ter uma atenção especial.
Qualidade do cabo de sinal, buchas de cabo e conectores:
A Brooks fornece cabo(s) de qualidade superior que cumprem os requesitos da certificação CE.
Se fornecerem o vosso próprio cabo de sinal, devem utilizar um cabo que, na sua totalidade, seja isolado com uma blindagem de 100%.
Os conectores tipo “D” ou “Circulares” devem ser blindados com uma blindagem metálica. Se tal for necessário, deve utilizar-se buchas metálicas de cabo
para o isolamento do aperto do cabo.
O isolamento do cabo deve ser ligado à blindagem ou bucha metálica em ambas as extremidades em 360º.
A blindagem deve terminar com a ligação à massa.
Os conectores “Card Edge” não são, em geral, metálicos e os cabos utilizados devem ter um isolamento com blindagem a 100% nos termos da Certificação
CE..
A blindagem deve terminar com ligação à massa.
Relativamente à configuração da cavilha, queiram consultar o Manual de Instruções.
A-5
Section A CE Certifiction
Brooks® Model 5860i
Installation and Operation Manual
X-TMF-5860i-MFM-eng
Part Number: 541B110AAG
November, 2008
Suomi
Brooks Instrument
407 West Vine St.
Hatfield, PA 19440
U.S.A.
Asia
: Lisäys Käyttöohjeisiin
Viite
: Massamäärämittareiden CE sertifiointi
Päivämäärä
: Tammikuu 1996
Brooksin CE merkillä varustetut sähköiset laitteet ovat läpäissyt EMC testit (direktiivi 89/336/EEC).
Erityistä huomiota on kuitenkin kiinnitettävä signaalikaapelin valintaan.
Signaalikaapelin, kaapelin läpiviennin ja liittimen laatu
Brooks toimittaa korkealaatuisia kaapeleita, jotka täyttävät CE sertifikaatin vaatimukset. Hankkiessaan signaalikaapelin itse, olisi
hankittava 100%:sti suojattu kaapeli.
“D” tai “Circular” tyyppisen liitimen tulisi olla varustettu metallisuojalla. Mikälì mahdollista, tulisi käyttää metallisia kaapeliliittimiä
kiinnitettäessä suojaa.
Kaapelin suoja tulisi olla liitetty metallisuojaan tai liittimeen molemmissa päissä 360°:n matkalta.
Suojan tulisi olla maadoitettu.
“Card Edge Connector”it ovat standarditoimituksina ei-metallisia. Kaapeleiden täytyy olla 100%: sesti suojattuja jotta ne olisivat
CE sertifikaatin mukaisia.
Suoja on oltava maadoitettu.
Nastojen liittäminen; katso liitteenä oleva manuaali.
Ystävällisin terveisin,
Svensk
Brooks Instrument
407 West Vine St.
Hatfield, PA 19440
U.S.A.
Subject
: Addendum to the Instruction Manual
Reference
: CE certification of Mass Flow Equipment
Date
: January 1996
Brooks (elektriska / elektronik) utrustning, som är CE-märkt, har testats och godkänts enligt gällande regler för elektromagnetisk
kompabilitet (EMC direktiv 89/336/EEC).
Speciell hänsyn måste emellertid tas vid val av signalkabel som ska användas tillsammans med CE-märkt utrustning.
Kvalitet på signalkabel och anslutningskontakter:
Brooks levererar som standard, kablar av hög kvalitet som motsvarar de krav som ställs för CE-godkännande.
Om man använder en annan signalkabel ska kabeln i sin helhet vara skärmad till 100%.
“D” eller “runda” typer av anslutningskontakter ska vara skärmade. Kabelgenomföringar ska vara av metall alternativt med
metalliserad skärmning.
Kabelns skärm ska, i bada ändar, vara ansluten till kontakternas metallkåpor eller genomföringar med 360 graders skärmning.
Skärmen ska avslutas med en jordförbindelse.
Kortkontakter är som standard ej metalliserade, kablar som används måste vara 100% skarmade för att överensstämma med CEcertifieringen.
Skärmen ska avslutas med en jordförbindelse.
För elektrisk anslutning till kontaktstiften hänvisas till medföljande instruktionsmanual.
A-6
Installation and Operation Manual
X-TMF-5860i-MFM-eng
Part Number: 541B110AAG
November, 2008
Brooks® Model 5860i
THIS PAGE WAS
INTENTIONALLY
LEFT BLANK
Installation and Operation Manual
X-TMF-5860i-MFM-eng
Part Number: 541B110AAG
November, 2008
Brooks® Model 5860i
LIMITED WARRANTY
Seller warrants that the Goods manufactured by Seller will be free from defects in materials or workmanship under normal use
and service and that the Software will execute the programming instructions provided by Seller until the expiration of the
earlier of twelve (12) months from the date of initial installation or eighteen (18) months from the date of shipment by Seller.
Products purchased by Seller from a third party for resale to Buyer (“Resale Products”) shall carry only the warranty extended
by the original manufacturer.
All replacements or repairs necessitated by inadequate preventive maintenance, or by normal wear and usage, or by fault of
Buyer, or by unsuitable power sources or by attack or deterioration under unsuitable environmental conditions, or by abuse,
accident, alteration, misuse, improper installation, modification, repair, storage or handling, or any other cause not the fault of
Seller are not covered by this limited warranty, and shall be at Buyer’s expense.
Goods repaired and parts replaced during the warranty period shall be in warranty for the remainder of the original warranty
period or ninety (90) days, whichever is longer. This limited warranty is the only warranty made by Seller and can be
amended only in a writing signed by an authorized representative of Seller.
BROOKS SERVICE AND SUPPORT
Brooks is committed to assuring all of our customers receive the ideal flow solution for their application, along with
outstanding service and support to back it up. We operate first class repair facilities located around the world to provide
rapid response and support. Each location utilizes primary standard calibration equipment to ensure accuracy and reliability
for repairs and recalibration and is certified by our local Weights and Measures Authorities and traceable to the relevant
International Standards.
Visit www.BrooksInstrument.com to locate the service location nearest to you.
START-UP SERVICE AND IN-SITU CALIBRATION
Brooks Instrument can provide start-up service prior to operation when required.
For some process applications, where ISO-9001 Quality Certification is important, it is mandatory to verify and/or (re)calibrate
the products periodically. In many cases this service can be provided under in-situ conditions, and the results will be traceable
to the relevant international quality standards.
CUSTOMER SEMINARS AND TRAINING
Brooks Instrument can provide customer seminars and dedicated training to engineers, end users and maintenance persons.
Please contact your nearest sales representative for more details.
HELP DESK
In case you need technical assistance:
1-888-554-FLOW
Americas
Europe
+(31) 318 549 290
Within Netherlands
+011-81-3-5633-7100
Asia
0318 549 290
Due to Brooks Instrument's commitment to continuous improvement of our products, all specifications are subject to change
without notice.
TRADEMARKS
Brooks .......................................................... Brooks Instrument, LLC
Fomblin ............................................................................... Ausimont
Freon TF .......................................... E. I. DuPont deNemours & Co.
Hasteloy ............................................................ Haynes International
Kalrez .......................................................... DuPont Dow Elastomers
NRS ............................................................. Brooks Instrument, LLC
VCO ......................................................................... Cajon Company
VCR ......................................................................... Cajon Company
Viton .............................................. DuPont Performance Elastomers