1
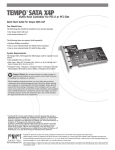
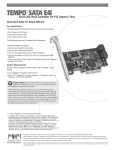
TEMPO
SATA E4P
eSATA Host Controller for PCI Express
™
Quick Start Guide for Tempo SATA E4P
You Should Have
The following item should be included in your product package:
• One Tempo SATA E4P card
The following items are required (sold separately):
• One or more external Serial ATA drive enclosures
• One or more external Serial ATA (eSATA) data cables
System Requirements
The Tempo SATA E4P requires the following in order to
operate in your system:
• One available PCI Express (PCIe) x4, x8, or x16 slot*
• Mac OS® X Version 10.3 or later, Mac OS X Server Version 10.3 or
later, Windows® 7, Windows Vista®, Windows XP with SP2 installed,
Windows Server 2008, or Windows Server 2003**
• Internet connection (for driver download)
Support Notes: We recommend that you make a backup of important
information on your system’s current hard drive prior to installing new
hardware or software.
When handling computer products, you must take care to prevent components
from being damaged by static electricity. Before opening your computer or
removing parts from their packages, always ground yourself first by touching
a metal part of the computer, such as a port access cover, and work in an area
free of static electricity; avoid carpeted areas. Handle all electronic components
only by their edges, and avoid touching connector traces and component pins.
Also, avoid touching the logic board and any of its components.
* x1 slot compatible, but with reduced performance
** Creating RAID volumes under Windows requires dynamic disk storage, a formatting
option available with Windows Server 2008 R2, Windows Server 2003 SP1,
Windows 7 Professional, Enterprise or Ultimate (32- and 64-bit versions), Windows
Vista Enterprise or Ultimate (32- and 64-bit versions), or Windows XP Professional
(32- and 64-bit versions).
In order to create RAID volumes larger than 2TB, you must do one of the following:
Span (link together in a virtual chain) the volumes, and then format them as NTFS.
-OR- Use GPT formatting. Note that drives and volumes with GPT formatting are
not visible to any version of Windows XP Professional, nor to the 32-bit version of
Windows Server 2003 SP1.
Remember to register your product online at http://registration.sonnettech.com to be informed of future upgrades and product releases.
Software updates and links are available from the Sonnet web site at www.sonnettech.com. • Online support form available at http://supportform.sonnettech.com.
Sonnet Technologies Customer Service hours are Mon.-Fri., 7 a.m.–4 p.m. Pacific Time • Customer Service Phone: 1-949-472-2772 • E-mail: [email protected]
Sonnet Technologies, Inc., Irvine, California USA • Tel: 1-949-587-3500 Fax: 1-949-457-6349
©2011 Sonnet Technologies, Inc. All rights reserved. Sonnet, the Sonnet logotype, Simply Fast, the Simply Fast logotype, and Tempo are trademarks of Sonnet Technologies, Inc. Mac, the Mac logo, Mac OS and Power
Mac are trademarks of Apple Inc., registered in the United States and other countries. Other product names are trademarks of their respective owners. Product specifications subject to change without notice.
QS-TSATAII-E4P-E-E-061011
Quick Start Guide for Tempo SATA E4P
Installation Preparation
Prior to installing the Tempo SATA E4P into your system and
connecting any drive enclosures, you should familiarize yourself with
the parts to be installed. We also strongly recommend that you read the
sections in your computer’s user manual that address PCI Express card
installation.
eSATA connectors
1. Figure 1 shows the Tempo card’s locking eSATA ports; depending
on the drive enclosure(s) used, you will need to use data cables with
eSATA connectors on both ends, or cables with an eSATA connector
on one end and a SATA I connector on the other end. Enclosures
with external SATA connectors use eSATA connectors. Note: SATA I
connectors are used on bare SATA hard drives.
Figure 1
2. Figure 2 shows eSATA and SATA I connectors.
eSATA connector
Hardware Installation Steps
This section covers the installation of the Tempo SATA E4P into your
system and connection of one or more drive enclosures.
eSATA connector
1. Shut down your computer, and then open it to access the
expansion card area (PCI Express slots); refer to your computer’s
user manual for specific information.
2. Locate an available x4 (4-lane) or x8 (8-lane) PCI Express slot inside
your computer and remove its access cover.
3. Remove the Sonnet card from its packaging, and then install it
into the PCI Express slot; make sure the card is firmly seated and
secured.
Support Note for Mac Users: Please install the Tempo SATA
E4P in a recommended slot:
Mac Pro (Mid 2010) - Use only slot 3 or 4
Mac Pro (Early 2009) - Use only slot 3 or 4
Mac Pro (Early 2008) - Use only slot 3 or 4
Pre-2008 Mac Pro - Use any available slot
Power Mac G5 - Use slot 2 or 4.
4. Close your computer.
5. Connect the eSATA data cable(s) between the Tempo card and the
drive enclosures; make sure all cables are connected securely to
the Tempo card and the enclosures.
Support Note: Sonnet strongly recommends you use high
quality external SATA cables to connect your drive enclosures to
Tempo SATA E4P. Low quality cables do not offer the proper shielding and
durability high quality cables afford, and may allow data to be corrupted.
1
SATA I connector
SATA I connector
Figure 2
Quick Start Guide for Tempo SATA E4P
Windows 7 Driver Installation
Support Note: If you have installed the Tempo card into
a Power Mac G5 computer, skip to page 5; Tempo SATA
E4P does not require the installation of software when installed
in a Power Mac G5.
This section describes the download and installation of drivers to
support the Tempo SATA E4P in systems running Windows 7.
1. Turn on your computer and log in; during startup, an
Installing Device Driver Software pop-up will appear, followed
by a message that the device driver software was not
successfully installed. Close the message.
Mac Pro Driver Installation
This section describes the download and installation of drivers to
support the Tempo SATA E4P in Mac Pro computers.
2. Log onto the Internet. Go to http://www.sonnettech.com/
support/kb/kb.php, click on the Computer Cards link, and
then click on the PCIe Cards link.
1. Turn on your computer; if you installed the Tempo card into
a Mac Pro (Early 2008) or newer computer, skip to the next
step. If you installed the card into a pre-2008 Mac Pro,
depending on which version of Mac OS X your computer
is running, the Expansion Slot Utility application will open
automatically. If it does not open by itself, you must do so
manually (Expansion Slot Utility is located in the
/System/Library/CoreServices folder). Select the
configuration appropriate for your setup (Tempo SATA E4P
is an x4 card, and should be assigned at least an x4 slot), and
then click Quit if the default configuration was appropriate,
or click Save and Restart if you changed the configuration.
3.Locate and click the Tempo SATA E4P link, then the
Driver link, and then click Tempo SATA Pro Family Driver
(Windows) x.x.x. Click the Download Now link. Depending
on how your computer is configured, a new window may
appear asking you what to do with the file; click Open. If
another window appears asking for permission to open the
file, click Allow.
2.Log onto the Internet. Go to http://www.sonnettech.com/
support/kb/kb.php, click on the Computer Cards link, and
then click on the PCIe Cards link.
4.When the window showing the contents of the .zip
file appears, accept the default location or select a new
destination for the files to be extracted, note the name and
location of the file, and then click Extract Files.
3.Locate and click the Tempo SATA E4P link, then click the
Driver link, and then click the Tempo SATA Pro Family
Driver (OS X) appropriate for your setup.
5.Click Start > Control Panel. In the Control Panel window,
click Device Manager. If you haven’t disabled User Account
Control (UAC), a UAC window will appear; click Continue.
4.Click the Download Now button; the file will be downloaded.
6.When the Device Manager window appears, click the arrow
next to IDE ATA/ATAPI controllers to expand the list. Rightclick “Standard Dual Channel PCI IDE Controller” and
select Update Driver Software.
5.Double-click the temposatapro_vxxx.zip file you just
downloaded. Locate and double-click the Tempo SATA Pro
Installer x.x.x.pkg file to launch the installer; when the
Welcome to the Tempo SATA Pro for Mac Pro and MacBook Pro
Installer window appears, click Continue.
7.When the Update Driver Software window appears, click
“Browse my computer for driver software”.
8.When the next window appears, click Browse. When
the Browse for Folder window appears, locate the file you
extracted (unzipped), click it, and then click OK.
6.When the Important Information window appears, click
Continue.
7.When the Software License Agreement window appears, read
the license, click Continue, and then click Agree.
9.Back in the Browse for driver software window, click Next; the
driver software will be installed.
8.When the Select a Destination window appears, accept the
default or choose a new location, and then click Install.
10.When the Windows has successfully updated your driver
software window appears, click Close; you may now format
drives attached to the Tempo card. Skip to page 7 for drive
formatting information.
9.When asked, enter your password, and then click OK.
10.Click Continue Installation to install the driver.
Support Note: After its driver software has been
11.While the driver is installed, a progress bar appears. When
the Installation Completed Successfully screen appears, click
Restart; you may format drives attached to the Tempo card
after your system finishes restarting. Skip to page 5 for drive
formatting information.
updated, Tempo SATA E4P will be listed as a Storage
Controller in the Device Manager window under Windows 7.
2
Quick Start Guide for Tempo SATA E4P
Windows Vista Driver Installation
13. When the Windows has successfully updated your driver
software window appears, click Close; you may now format
drives attached to the Tempo card. Skip to page 7 for drive
formatting information.
This section describes the download and installation of drivers to
support the Tempo SATA E4P in systems running Windows Vista.
1. Turn on your computer and log in; during startup, an
Installing Device Driver Software pop-up will appear, followed
by a message that the device driver software was not
successfully installed. Close the message.
Support Note: After its driver software has been
updated, Tempo SATA E4P will be listed as a Storage
Controller in the Device Manager window under Windows Vista.
2. Log onto the Internet. Go to http://www.sonnettech.com/
support/kb/kb.php, click on the Computer Cards link, and
then click on the PCIe Cards link.
Windows XP Professional Driver Installation
This section describes the installation of drivers to support the
Tempo SATA E4P in systems running Windows XP Professional.
3.Locate and click the Tempo SATA E4P link, then the
Driver link, and then click Tempo SATA Pro Family Driver
(Windows) x.x.x. Click the Download Now link. Depending
on how your computer is configured, a new window may
appear asking you what to do with the file; click Open. If
another window appears asking for permission to open the
file, click Allow.
1. Turn on your computer; during startup, two New Hardware
Found pop-ups may briefly appear, with IDE Controller and
Standard Dual Channel PCI IDE Controller listed as the new
hardware types.
2. Log onto the Internet. Go to http://www.sonnettech.com/
support/kb/kb.php, click on the Computer Cards link, and
then click on the PCIe Cards link.
4.When the window showing the contents of the .zip
file appears, accept the default location or select a new
destination for the files to be extracted, note the name and
location of the file, and then click Extract Files.
5. Click Start > Settings > Control Panel. In the Control Panel
window, double-click Device Manager. If you haven’t
disabled User Account Control (UAC), a UAC window will
appear; click Continue.
3.Locate and click the Tempo SATA E4P link, then the
Driver link, and then click Tempo SATA Pro Family Driver
(Windows) x.x.x. Click the Download Now link. Depending
on how your computer is configured, a new window may
appear asking you what to do with the file; click Open. If
another window appears asking for permission to open the
file, click Allow.
6. When the Device Manager window appears, click the arrow
next to IDE ATA/ATAPI controllers to expand the list. Rightclick “Standard Dual Channel PCI IDE Controller” and
select Update Driver Software.
4. Click Start > Settings > Control Panel. When the Control
Panel window appears, double-click the System icon. (If the
System icon is not visible, click the Switch to Classic View
link to make it appear.)
7. When the next window appears, click “Let me pick from a
list of device drivers on my computer”.
5. When the System Properties window appears, click the
Hardware tab, and then click Device Manager.
8. When the Select the device driver window appears, click Have
Disk.
6. When the Device Manager window appears, click the + sign
next to IDE ATA/ATAPI controllers to expand the list. Rightclick “Standard Dual Channel PCI IDE Controller” and then
select Update Driver.
9. When the Install From Disk window appears, click Browse.
10. When the Locate File window appears, double-click the
Vistax.x.x folder. Double-click the appropriate folder (x32 for
32-bit operating systems, x64 for 64-bit versions), and then
double-click the “mvsata” file.
7. When the Hardware Update Wizard window appears, select
“No, not this time”, and then click Next.
8.When the next window appears, click “Install from a list or
specific location”, and then click next.
11. Back in the Install from Disk window, click OK.
9.When the next window appears, click “Don’t search. I will
choose the driver to install”, and then click Next.
12.Back in the Select the device driver window, click Next; the
driver software will be installed.
10.When the next window appears, select Standard Dual
Channel PCI IDE Controller, and then click Have Disk.
(continued on next page)
3
Quick Start Guide for Tempo SATA E4P
Windows XP Professional Driver Installation
(continued)
11.When the Install From Disk window appears, click Browse.
12 When the Locate File window appears, double-click the
Vistax.x.x folder. Double-click the appropriate folder (x32 for
32-bit operating systems, x64 for 64-bit versions), and then
double-click the “mvsata” file.
13. Back in the Install from Disk window, click OK.
14.Back in the Hardware Update Wizard window, click Next; the
software will be installed. (If a window appears stating that
the Tempo software has not passed Windows Logo testing,
click Continue Anyway.)
15.When the next window appears, click Finish; you may now
format drives attached to the Tempo card. Skip to page 7 for
drive formatting information.
Support Note: After its driver software has been
updated, Tempo SATA E4P will be listed as a SCSI and
RAID Controller in the Device Manager window under Windows XP.
4
Quick Start Guide for Tempo SATA E4P
Mac OS X Drive Formatting—RAID Sets
This section describes the process of formatting (initializing) multiple
hard drives connected to the Tempo SATA E4P using Disk Utility under
Mac OS X Version 10.5; the process is nearly identical under Mac OS X
Versions 10.6 and 10.4. If you choose to do so, you may format your drives
using SoftRAID 3.1 or later; refer to that product’s documentation for
instructions.
Support Note: Depending on how you set it up, a drive
drives connected
to Tempo card
enclosure with a built-in hardware RAID controller, like Sonnet’s
Fusion D400QR5, may not present its drives separately to the operating
system. For instance, if you choose a RAID 0 or RAID 5 configuration,
only one “drive” will appear in Disk Utility. If this is the case, skip to
“Mac OS X Drive Formatting—Individual Drives” on the next page for
drive formatting instructions.
1.Turn on your storage system, and then turn on your computer.
During startup, one or more messages referring to unreadable
volumes will be displayed; click Initialize… to launch Disk Utility.
After Disk Utility launches, click the Initialize button in each
remaining message window.
Figure 3
2.If it is not already open, launch Disk Utility (Figure 3). Note that
all drives attached to the Tempo card may be identified in the
information window by their custom icon with the Sonnet S logo.
Support Notes: The remaining steps in this section describe the
creation of a RAID 0 (striped) set. If you intend to create a RAID 1
(mirrored) or RAID 10 (striped/mirrored) set, the procedure is similar to the
remaining steps. Please refer to Disk Utility help for further information.
All hard drives connected to the Tempo card will be described by Disk
Utility as having an internal connection.
3.Select one of the drives you want to format in a RAID set by
clicking the drive symbol or the “name” of the drive; a set of tabs
will appear in the right pane. Click the RAID tab, select all the
drives you will use to create your striped RAID set, and then drag
them into the disk field (Figure 4). Be careful NOT to accidentally
drag in a drive you don’t want included in the RAID.
Figure 4
4.From the drop-down menus, select the volume format and the
RAID scheme (Striped RAID Set), and then type in the name for
your RAID volume (Figure 4).
5.Click the Options button. From the drop down menu, select a
RAID block size (Figure 5). If you are working with video, selecting
the largest block size will help improve performance. If you are
working with many smaller files (databases, etc.) a smaller block size
will work well. Click OK.
6.Click Create. When the Creating RAID window appears, click the
Create button; all of the selected drives will be formatted and the
RAID volume created. Close Disk Utility; your drives are now ready
for use and your installation is complete.
Support Note: See page 8 for port and channel identification,
and information on Tempo SATA E4P’s status LEDs.
Figure 5
5
Quick Start Guide for Tempo SATA E4P
Mac OS X Drive Formatting—Individual Drives (Not in a
RAID Set)
This section describes the process of formatting (initializing) individual
hard drives connected to the Tempo SATA E4P using Disk Utility under
Mac OS X Version 10.5; the process is nearly identical under Mac OS X
Versions 10.6 and 10.4. If you intend to create a Mac OS-formatted RAID
set with the drives attached to the Tempo card, go back to “Mac OS X
Drive Formatting—RAID Sets” on the previous page.
1.Turn on your storage system, and then turn on your computer.
During startup, one or more messages referring to unreadable
volumes will be displayed; click Initialize… to launch Disk Utility.
After Disk Utility launches, click the Initialize button in each
remaining message window.
2.If it is not already open, launch Disk Utility (Figure 6). Note that
all drives attached to the Tempo card may be identified in the
information window by their custom icon with the Sonnet S logo.
drives connected
to Tempo card
Figure 6
3.Select one of the drives you want to format by clicking the drive
symbol or the “name” of the drive; a set of tabs will appear in the
right pane. Click the Partition tab, and then click on the drop down
menu beneath “Volume Scheme:” to select a number of partitions
for the volume; you may optionally choose to partition each drive
to create two or more smaller “virtual” drives (Figure 7).
4. Click to highlight a partition, and then type a name in the Name
field; repeat for each partition (Figure 7). After formatting, each
partition will appear in the Finder window as a drive.
5. Click Apply (Figure 7).
Figure 7
6. When the Partition Disk window appears, click the Partition
button (Figure 8). If necessary, repeat steps 3–5 to partition any
other drives connected to the Tempo card. When partitioning and
formatting are complete, close the Disk Utility application; you can
now use your drive(s).
Support Note: See page 8 for port and channel identification,
and information on Tempo SATA E4P’s status LEDs.
Figure 8
6
Quick Start Guide for Tempo SATA E4P
Windows Drive Formatting
If you intend to format drives connected to the Tempo SATA E4P
using Windows drive formatting tools, you may find much more
information by using “format volume” as the search item in Windows
Help. The procedure listed below describes the process of formatting and
configuring drives under Windows Vista; steps for formatting under
Windows 7 and XP Professional are very similar.
1.Turn on your storage system, start Windows, log in, and then click
Start > Control Panel.
2.In the Control Panel window, double-click Administrative Tools. If
you are using Windows Vista or Windows 7 and have not disabled
User Account Control (UAC), a UAC window will appear; click
Continue.
3.In the Administrative Tools window, double-click Computer
Management.
Figure 9
4.In the Computer Management window, click Disk Management
under Storage to launch the Disk Management application.
5.If an Initialize Disk window appears or if disks are described as not
initialized, select a partition style for the attached drive(s), and then
click OK; the drive will be initialized (Figure 9). Repeat as necessary
with other drives attached to the Tempo card.
6.Right-click the field next to the name field of one of the attached
drives and select the formatting type you wish to use for it. Repeat as
necessary with other drives attached to the Tempo card (Figure 10).
7. Depending on the formatting type you chose, a New Partition
Wizard may appear; follow the onscreen instructions to complete
formatting of the drive(s). Once the drives are finished being
formatted, they are ready to use.
Figure 10
7
Quick Start Guide for Tempo SATA E4P
About Tempo SATA E4P’s Ports and LEDs
1. Each eSATA connector on the Tempo card is assigned a channel
number that may be helpful if you need to diagnose any issues
(Figure 11). Depending on the drive enclosure you use (with or
without port multiplier), each channel can support from one to five
drives.
Channel 1
Channel 2
Channel 3
Channel 4
Figure 11
2. When drives connected to the Tempo card are powered and active,
the status LEDs on the card will light (Figure 12):
• Green LED ON: Drive(s) present and ready.
• Amber LED ON/Flashing: Drive(s) reading/writing data.
amber LEDs
green LEDs
Figure 12
Additional information for Mac Users
When drive enclosures with port multipliers are connected to Tempo
SATA E4P, you can identify individual drives within those enclosures
in Disk Utility (Figure 13, top). In the Connection ID field, “Channel”
indicates the channel (as well as the connector) on the Tempo card,
while “Port” identifies the drive in the enclosure.
When drive enclosures without port multipliers are connected, a simple
drive-to-card signal path exists. In the Connection ID field in Disk
Utility, “Channel” indicates the channel (as well as the connector) on
the Tempo card and the drive in the enclosure (Figure 13, bottom).
drive in enclosure
with port multiplier
drive in enclosure
without port multiplier
Figure 13
8