1
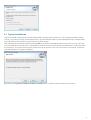
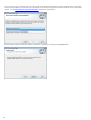
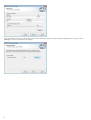
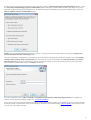
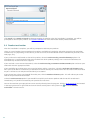
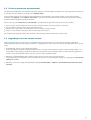
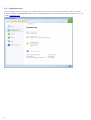
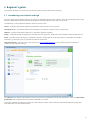
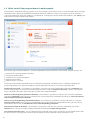
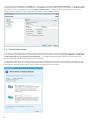
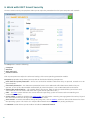
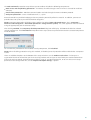
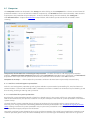
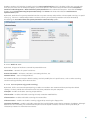
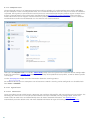
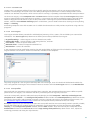
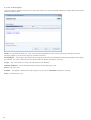
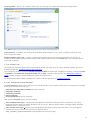
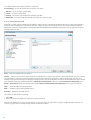
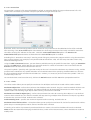
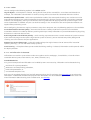
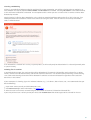
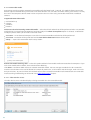
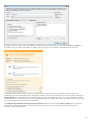
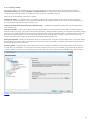
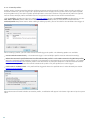
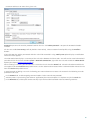
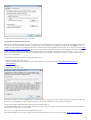
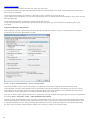
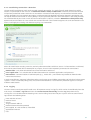
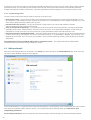
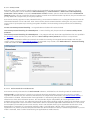
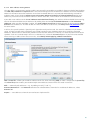
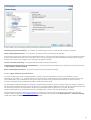
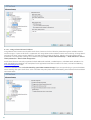
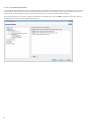
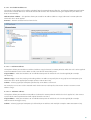
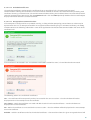
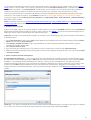
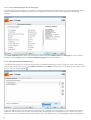
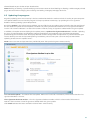
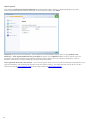
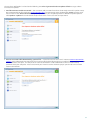
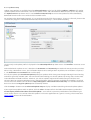
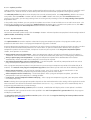
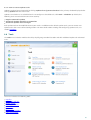
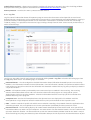
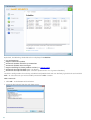
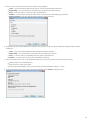
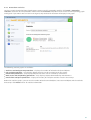
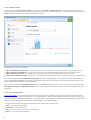
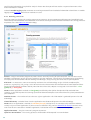
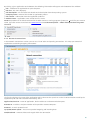
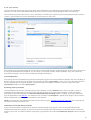
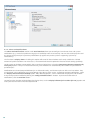
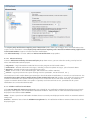
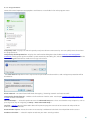
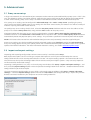
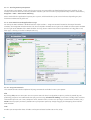
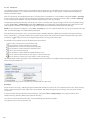
5. Advanced user
5.1 Proxy server setup
In large LAN networks, the connection of your computer to the Internet can be mediated by a proxy server. If this is the
case, the following settings need to be defined. Otherwise the program will not be able to update itself automatically.
In ESET Smart Security, proxy server setup is available in two different sections within the Advanced setup tree.
First, proxy server settings can be configured in Advanced setup under Tools > Proxy server. Specifying the proxy
server at this level defines global proxy server settings for all of ESET Smart Security. Parameters here will be used by all
modules requiring connection to the Internet.
To specify proxy server settings for this level, select the Use proxy server checkbox and then enter the address of the
proxy server into the Proxy server field, along with the Port number of the proxy server.
If communication with the proxy server requires authentication, select the Proxy server requires authentication
checkbox and enter a valid Username and Password into the respective fields. Click the Detect proxy server button to
automatically detect and populate proxy server settings. The parameters specified in Internet Explorer will be copied.
NOTE: This feature does not retrieve authentication data (username and password); it must be supplied by you.
Proxy server settings can also be established within Advanced update setup (Update branch of the Advanced setup
tree). This setting applies for the given update profile and is recommended for laptops that often receive virus signature
updates from different locations. For more information about this setting, see section Advanced update setup.
5.2 Import and export settings
Importing and exporting configurations of ESET Smart Security is available under Setup.
Both import and export use the .xml file type. Import and export are useful if you need to backup the current
configuration of ESET Smart Security to be able to use it later. The export settings option is also convenient for users
who wish to use their preferred configuration of ESET Smart Security on multiple systems – they can easily import an .
xml file to transfer the desired settings.
Importing a configuration is very easy. In the main program window, click Setup > Import and export settings..., and
then select the Import settings option. Enter the path to the configuration file or click the ... button to browse for the
configuration file you wish to import.
The steps to export a configuration are very similar. In the main program window, click Setup > Import and export
settings.... Select the Export settings option and enter the File name of the configuration file (i.e. export.xml). Use the
browser to select a location on your computer to save the configuration file.
95