1
Introduction
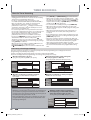
FUNCTIONAL OVERVIEW
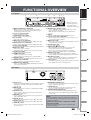
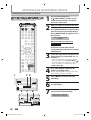
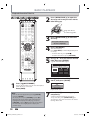
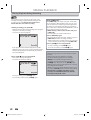
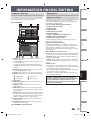
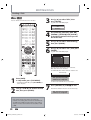
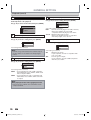
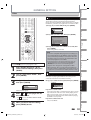
Front Panel
1
2
3*
4
DUBBING
6
7
DVD
SELECT
L2
VIDEO
L3
L
R
DV IN
(*) The unit can also be
turned on by pressing
these buttons or by
inserting a cassette tape.
Recording
Playback
1
Disc
Management
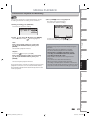
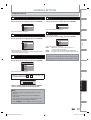
Rear Panel
Basic Setup
22 21 20 19 18 17 16 15 14 13 12 11 10 9* 8
14. TRACKING
/
buttons (VCR)
1. I/y ON/STANDBY button (DVD/VCR)
• Press to adjust the tracking during playback or in slow
• Press to turn on the unit, or to turn the unit into the
motion of the cassette tape.
standby mode. (To completely shut down the unit, you
• While playback is in still mode, you can stabilize the
must unplug the AC power cord.)
picture.
2. Cassette compartment (VCR)
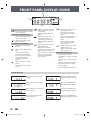
15. Display
• Insert a cassette tape here.
• Refer to “FRONT PANEL DISPLAY GUIDE” on page 18.
3. A OPEN/CLOSE button (DVD)*
16. Infrared sensor window (DVD/VCR)
• Press to open or close the disc tray.
• Receive signals from your remote control so that you can
4. Disc tray (DVD)
control the unit from a distance.
• Place a disc when it is open.
17. I REC button (VCR)
5. VIDEO input jack (L2) (DVD/VCR)
• Press once to start a recording. Press repeatedly to start the
• Use to connect external device with an RCA video cable.
one-touch timer recording.
6. AUDIO input jacks (L2) (DVD/VCR)
18. PLAY B button (VCR)
• Use to connect external device with an RCA audio cable.
• Press to start playback.
7. DV IN jack (L3) (DVD/VCR)
19. EJECT/STOP A/C button (VCR)
• Use to connect the DV output of external device with a DV cable.
• When the unit is in stop mode, press to remove the
8. I REC button (DVD)
cassette tape from the cassette compartment.
• Press once to start a recording.
• Press to stop cassette tape playback or recording.
• Press repeatedly to start the one-touch timer recording.
• Press to stop the proceeding timer recording in VCR.
9. PLAY B button (DVD)*
20. FWD D button (VCR)
• Press to start or resume playback.
• Press to rapidly advance the cassette tape, or view the
10. STOP C button (DVD)
picture rapidly in forward during playback (forward search).
• Press to stop playback or recording.
21. REV E button (VCR)
• Press to stop the proceeding timer recording in DVD.
• Press to rewind the cassette tape, or to view the picture
11. VCR/DVD indicator
rapidly in reverse during playback (rewind search).
• Lights up when the VCR/DVD output mode is selected.
22. Power indicator
12. VCR/DVD button (DVD/VCR)
• This indicator lights up in green when the unit is active and
• Press to select the component you wish to operate.
turns off when the unit is in standby mode.
13. DUBBING button (DVD/VCR)
• Press to start VCR to DVD (DVD to VCR) duplication which
you set in the main menu.
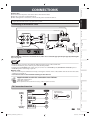
Connections
VCR
TRACKING
5
2
HDMI OUT
AUDIO
OUT
DVD/VCR
S-VIDEO COMPONENT
VIDEO OUT
S-VIDEO
L
OUT
COAXIAL
L
L
R
R
PR
/CR
3 9 8 7 6 54 3
Note
EN
E9PKAUD_DVR620KU_EN.indd 11
Others
• Do not touch the inner pins of the jacks on the rear
panel. Electrostatic discharge may cause permanent
damage to the unit.
Caution on using S-video, component, or HDMI
connection for VCR:
• Only the playback audio / video is available with
these connections.
VCR Function
8. COMPONENT VIDEO OUT jacks
• Use to connect a TV monitor with component video inputs
with a component video cable.
9. S-VIDEO OUT jack
• Use to connect the S-video input of a TV monitor, AV
receiver or other device with an S-video cable.
10. COAXIAL DIGITAL AUDIO OUT jack
• Use to connect an AV receiver, Dolby Digital decoder or
other device with a coaxial digital input jack with a digital
coaxial cable.
Function Setup
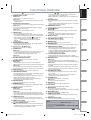
1. AC Power Cord
• Connect to a standard AC outlet to supply power to this unit.
• Unplug this cord from the AC outlet to completely shut
down the unit.
2. HDMI OUT jack
• Use an HDMI cable to connect to a display with an HDMI
compatible port.
3. AUDIO OUT jacks
• Use to connect a TV monitor, AV receiver or other device
with an RCA audio cable.
4. VIDEO OUT jack
• Use to connect a TV monitor, AV receiver or other device
with an RCA video cable.
5. VIDEO IN jack (L1)
• Use to connect external device with an RCA video cable.
6. AUDIO IN jacks (L1)
• Use to connect external device with an RCA audio cable.
7. S-VIDEO IN jack (L1)
• Use to connect the S-video output of external device with
an S-video cable.
IN
IN ---VIDEO --- OUT
R
10
IN --- AUDIO --- OUT
(L1)
Y
PB
/CB
Editing
DIGITAL
AUDIO OUT
11
3/25/2009 3:47:23 PM