1
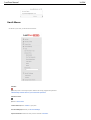
'Table of Content'
'1/224'
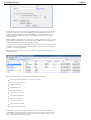
Table of Content
Table of Content
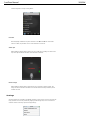
Help Center and FAQs
Having technical issues with LastPass?
Getting Started
Watch The Tutorial on LastPass Basics
1
13
13
13
13
Download LastPass
Importing Passwords
Importing using pre-established formats
Importing from a Generic CSV File
14
14
14
15
Instructions for importing Sites
Instructions for importing Secure Notes
Instructions for importing Server Login credential
15
15
15
Passive Imports
Introduction
15
16
What is LastPass?
16
Helping You Simplify & Secure Your Digital Life
LastPass Does The Work
Security & Privacy Is Our Priority
16
16
16
Wondering what the benefits are of using LastPass' Password Manager? 16
Easy Setup
It's free!
Save Time
17
17
17
Stop Forgetting
Stay Safe
17
17
Works Anywhere
Go Mobile
17
17
Having Technical Issues with LastPass?
How is LastPass Safe?
17
17
All sensitive data is encrypted locally
18
We use government-level encryption
Only you know the key to decrypt your data
You control your security settings
18
18
18
You can generate unique, strong passwords
No more using your browser's insecure password manager
18
18
Importing from RoboForm
Importing from RoboForm 7
18
19
'Table of Content'
'2/224'
How to import your passwords from RoboForm:
19
How to import your profiles from RoboForm 7:
20
Importing and Exporting Wi-Fi Passwords
Importing and Exporting Wi-Fi Passwords
21
21
Setup
Windows XP and Windows Server 2003
21
21
Windows Vista and Windows Server 2008
Importing
Exporting
22
22
22
Downloading and Installing LastPass
Creating your LastPass Account
Download
Installing LastPass
22
22
22
23
Windows
23
Mac
Using LastPass on Locked Computers
24
24
System Requirements
25
LastPass currently supports the following web browsers, operating systems and mobile
devices:
25
Operating Systems
Web Browsers
25
25
Tablets
25
Mobile Devices
26
Installing Binary Component
26
Features
Install
26
26
Limitations and Compatibility
27
LastPass Manager Basics
27
LastPass Manager Basics
Watch the Basic Introductory Tutorial
27
28
Your LastPass Icon
28
Your LastPass Icon
28
My LastPass Vault
28
Sites
29
Fill Forms�
Generate Secure Password�
29
29
Secure Notes�
29
Show Matching Sites
Recently Used
29
29
'Table of Content'
'3/224'
Tools
30
Preferences
Help
30
30
Enterprise Console
30
Log Off
30
Logging into LastPass
Logging into LastPass
30
30
Login Preferences
Cookies
31
31
Logging into the Online Vault
32
Autofilling With LastPass
Autofilling With LastPass
32
32
3 Ways to Autofill with LastPass
32
Editing an Existing Site Entry and Editing Form Fields
32
Editing an Existing Site Entry and Editing Form Fields
Automatically Saved Sites
32
32
Editing form fields
33
Manually Saved Sites
Editing in the Online Vault
34
34
Field Icons
Field Icons
35
35
Field Icons submenu
Filling and Saving
Field Highlighting
35
37
37
Field Highlighting
Your LastPass Vault
Your Local and Online�Vaults
37
38
38
Local Vault
Vault Menu
Online Vault
Offline Access to Your LastPass Vault
39
41
42
43
How to Utilize Offline Access in Your Browser Extension or Mobile
Application
LastPass Pocket
Testing Offline Access
43
43
44
'Table of Content'
'4/224'
Using Offline Access with Multi-Factor Authentication
Adding a Site
Adding a Site
44
44
44
Automatically Saving A Site
Watch the Tutorial for Adding a Site
Manually Saving a Site with Save All Entered Data
Watch a Tutorial on How To Save All Entered Data For a Site:
45
47
47
48
Basic Authentication Sites
Login Problems and Save All Entered Data
Login Problems and Save All Entered Data
Save All Entered Data
48
49
49
50
Watch a Tutorial on How To Save All Entered Data For a Site:
Right-Click Context Menu Options
Right-Click Menu Options
50
51
51
Multiple Logins
Multiple Logins
Grouping Sites with Folders
Grouping Sites with Folders
52
52
53
53
Adding a Folder
Editing A Folder
Your Favorites Folder
54
54
55
Grouping Sites In Sub-Folders
Password History
Tools Menu
Tools Menu via the LastPass Icon
55
56
57
57
Security Check
57
Identities
57
Open Favorites
58
About
58
Advanced Tools
Site Search
58
58
Recheck Page
58
Refresh Sites
58
Clear Local Cache
58
Check for Updates
58
My Account
58
'Table of Content'
'5/224'
Other Sessions
58
Export To
59
Import From
59
Print
59
Add Site
59
Save All Entered Data
Add Secure Note
59
59
Account Settings
59
Launching Account Settings
59
Account Settings Tabs
60
General Settings Tab
61
Changing Your Account Email & Master Password
Account Security Tab
62
63
Global Security Preferences
Equivalent Domains
Never URLs
63
64
64
Disable Using Field Icons
65
Account Mobile Devices
67
Account Trusted Computers
URL Rules
Local Extension Preferences
67
68
69
Launching Preferences
70
Other Preference Options
70
General Settings Tab
71
Security
71
General
72
Appearance
72
Form Fill
73
Notifications
HotKeys
Advanced Settings
73
74
75
Local & Global Security Options
76
Localized Security Options
Global Security Options
76
77
Additional Security Options
77
Multifactor Authentication Options
77
Duo Security
Get Duo Security
78
78
'Table of Content'
'6/224'
New Integration
78
Using SMS Passcodes�to Authenticate
79
Account History
Fingerprint Authentication
80
81
To enable fingerprint authentication:
81
**Important Note for Validity's WBF Drivers
82
Account Recovery
82
Using Account Recovery
82
Login OTPs vs Recovery OTPs
83
Watch the Tutorial for Account Recovery
83
Reverting Your Master Password
LastPass Sentry
How It Works
FAQs
Multifactor Authentication
84
85
85
86
86
Google Authenticator
87
Setting Up LastPass with Google Authenticator
87
Logging in Offline when Google Authenticator is Enabled
88
Grid Multifactor Authentication
Activate Grid
Logging In With Grid
88
89
90
Microsoft Authenticator App
One Time Passwords
Password Iterations (PBKDF2)
RSA SecurID
Protect your LastPass Enterprise Accounts with RSA SecurID
Agent Host Configuration
Configuring RSA SecurID within the LastPass Admin Console
90
92
92
93
93
94
94
End User Settings
RSA SecurID Login Screens
Enforcing the Use of RSA by Your Employees through LastPass Policies
Certification Test Checklist for RSA Authentication Manager
RSA SecurID Mandatory Functionality
Virtual Keyboard
Sesame: Multifactor Authentication with a USB Thumb Drive
95
95
96
97
97
97
99
Enabling Sesame
99
'Table of Content'
Watch the Tutorial for Using Sesame
'7/224'
100
Smart Card Authentication
Toopher Authentication
100
101
YubiKey Authentication
102
Adding Your YubiKey
Logging In with YubiKey
102
103
Using a VIP YubiKey with LastPass
103
Video Tutorial for Using LastPass with YubiKey
104
How to use LastPass with YubiKey NEO
105
YubiKey NEO with Windows Phone 8 App
105
Transakt Authentication
LastPass Features
Selective Form Fill
105
107
107
Auto-Password Change (BETA)
108
Welcome to the Public Beta
Is Auto-Password Change Secure?
Automatically Changing Passwords
Supported Sites
Changing an Old Password to a Generated One
108
108
108
109
110
Replacing Your Old Password
110
Generating Secure Passwords Screencast
112
Shared Family Folders
112
Shared Family Folders
112
Adding a Shared Family Folder
112
Adding Sites to a Shared Family Folder
115
Watch the Tutorial on Sharing Family Folders:
116
Bookmarklets
116
Installing Bookmarklets
116
Installing Bookmarklets in Safari on iOS Devices
117
Easily install Bookmarklets with the LastPass for Premium users App
117
Manually install Bookmarklets through iTunes
117
Using Bookmarklets
118
Limitations
118
Watch the Tutorial for Setting Up and Using Bookmarklets
118
Using LastPass Bookmarklets in Chrome Mobile (iOS and Android)
119
Attachments to Secure Notes
119
Storing an Attachment
119
Multiple Attachments
120
Attachment Storage Limits
120
Availability
120
'Table of Content'
'8/224'
Limitations
120
Exporting
Using Custom Fields
Favorites
Marking a Site as Favorite
Linked Sites
LastPass Command Line Application
Diving Into the Details
Fill Form Basics
120
121
122
123
124
124
124
125
Adding a Form Fill Profile�
125
Setting Your Default Fill Form Profile
127
Watch the Form Fill Tutorial
128
Identities
128
Add An Identity
128
Managing Your Identities
129
LastPass Credit Monitoring
131
Why use LastPass credit monitoring services?
131
What is LastPass free credit monitoring?
131
Enabling free credit monitoring
131
What is LastPass Premium credit monitoring?
133
Why upgrade to Premium credit monitoring?
133
Enabling Premium credit monitoring
What triggers a credit monitoring alert?
133
134
How will I be notified of changes to my credit report?
134
What do I do when I receive a credit monitoring alert?
134
Can I refresh my credit monitoring data?
134
Do I get a free credit report?
135
What information is used for the credit monitoring services, and is it safe?
135
Where is LastPass credit monitoring available?
135
Where do I direct further questions?
135
Password Generator
135
Generating a Password�
135
Watch the Basic Tutorial for Generating a Password
137
Printing
Secure Notes
137
138
Adding A Secure Note
138
Secure Note Formats
139
Managing Your Secure Notes�
140
Searching Secure Notes
141
'Table of Content'
'9/224'
Attachments
141
Watch the Secure Notes Tutorial
Secure Notes History
141
142
Share Feature
143
Important notes for Sharing:
143
Sharing a Site
143
Important Note Regarding Hidden Passwords:
144
Upgrading to Premium
144
Trialing LastPass�Premium
145
Purchasing Premium
145
Why a Subscription Fee vs One Time Purchase?
145
LastPass via USB
IE Anywhere
145
145
Downloading IE Anywhere
146
Using IE Anywhere
146
LastPass Pocket
148
Installing Pocket
148
Using Pocket
148
LastPass Portable
150
Downloading Portable Apps
150
Downloading LastPass Portable
150
LastPass for Applications
151
Benefits
151
Downloading & Running LastPass for Applications
151
Adding An Application
151
Autofill Prompt
154
Preferences Menu
154
Application Parameters
155
LastPass Mobile Premium Apps
Dolphin 11 Add-on
156
156
Installing LastPass for Dolphin
156
Using LastPass for Dolphin
157
Your LastPass Vault on Dolphin
161
Safari in iOS
163
Enable Autofill in Safari
163
Using LastPass in Safari
164
Autofill in Safari Video Tutorial
Android
166
166
Installing LastPass for Android
166
Fill�Android Apps and Sites in Chrome
166
'Table of Content'
'10/224'
App Fill Window
167
Fill Helper
168
Using Fill Helper in Chrome
Using Fill Helper in Apps
168
169
Your LastPass Vault on Android
169
Using the LastPass Android Browser
171
Preferences
172
Copy Notifications + Input Method
176
Fingerprint Scanner (on supported devices)
176
Advanced Sharing Feature - Shared Folders (Only Available �for Premium and Enterprise
Users Only)
177
Firefox Mobile Add-on
179
Your LastPass Vault
Browsing using LastPass in Firefox Mobile
180
180
Autofill and Fill Forms option
181
HP TouchPad
181
LastPass Tab
181
Logging into LastPass Tab
Tools
181
183
Using your Local Vault
183
LastPass Tab Settings
184
BlackBerry
185
Installing LastPass for BlackBerry
186
Using LastPass for BlackBerry
186
Windows Mobile
186
Installing LastPass for Windows Mobile
186
Using LastPass for Windows Mobile
186
Windows Phone 7
Using LastPass on Windows Phone 7
Kindle Fire and Nook Color
HP webOS
187
187
188
188
Installing for HP webOS
188
Using LastPass for HP webOS
188
LastPass Input Method
189
iOS
191
Installing LastPass for�iOS
Logging into LastPass
191
191
The LastPass Vault
192
Sites
192
Secure Notes
192
Form Fills
193
'Table of Content'
'11/224'
The LastPass Menu
Settings
194
194
Using the LastPass Browser on iOS device
196
Autofill in Safari
198
Autofill in Safari Video Tutorial
200
LastPass Limitations in iOS Devices
200
LastPass and iCab
201
LastPass Wallet
201
Getting Started
202
Wallet Features
202
Settings
203
Availability
204
Windows Phone
204
Installing LastPass for Windows Phone
205
Logging into LastPass
205
The LastPass Vault
Favorites Tab
205
207
Add New
207
Notes
208
Settings
210
Using the LastPass Browser on Windows Phone
211
Symbian S60
Installing for Symbian S60 Devices
Using the Symbian S60 App
Windows Surface
212
212
212
213
Installing LastPass for Surface
213
Logging into LastPass
The LastPass Vault
Favorites Tab
213
214
215
Add New Site, Add New Form Fill, Add New Secure Note
Search
215
216
Generate Password
Using the LastPass Browser on Surface device
217
217
LastPass App for Mac
Install the App
217
217
Launch the App
The LastPass App Vault
218
218
Vault Features:
Generate Password
Menu Bar Icon
Quick Search &�Hotkeys
219
219
220
220
'Table of Content'
'12/224'
Preferences
220
Logout and Quit
221
Windows 8
221
Tips for Using LastPass in Windows 8:
221
Known Limitations of the App:
Frequently Asked Questions
222
223
Uninstalling & Deleting
223
Uninstalling LastPass
223
Deleting Your LastPass Account
224
Site Map
224
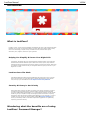
'LastPass Manual'
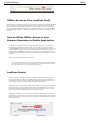
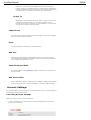
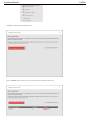
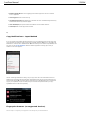
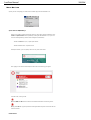
Help Center and FAQs
Having technical issues with LastPass?
Be sure to visit our Help Center and FAQs page for assistance.
Getting Started
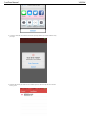
Downloading LastPass and creating your account is fast and simple.
We recommend that you download from the main download page,�where LastPass will
recommend the best plugin package based on your operating system. Click 'download' to initiate
the installation process.
Using the installer, you will be able to:
Create your LastPass account
Find insecure passwords currently on your system and import them into LastPass
Secure your system by deleting these insecure logins
Create a Form Fill profile
Install the LastPass Browser Plugin for browsers on your operating system
LastPass also packages a stand-alone Firefox add-on for Windows, Mac or Linux. This may also be
retrieved from our website. After installation, a wizard will allow you to create an account and
import your insecure logins stored in Firefox.
After installation, watch our screencasts describing the basics of how to use the LastPass
Password Manager, such as automatic form filling, generating secure passwords, and
multifactor authentication.
Need help creating a good Master Password? Check out our recommendations for securing your
LastPass account.
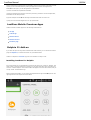
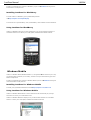
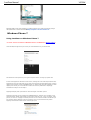
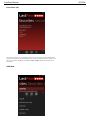
Watch The Tutorial on LastPass Basics
'13/224'
'LastPass Manual'
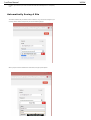
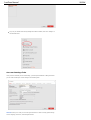
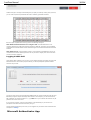
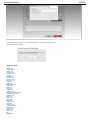
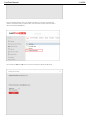
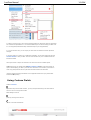
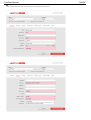
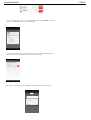
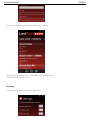
Download LastPass
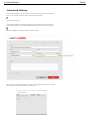
Importing Passwords
Once you have installed the LastPass plugin, you can import your stored login data from your
previous password manager.
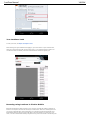
Importing using pre-established formats
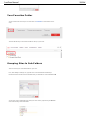
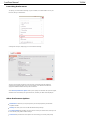
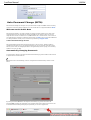
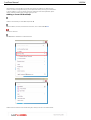
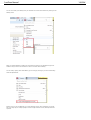
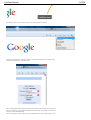
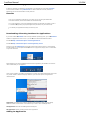
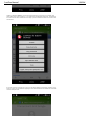
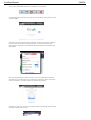
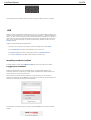
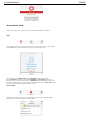
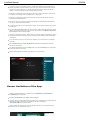
To begin, click on the LastPass Icon, click the Tools submenu....
and click Import From:
You will then be presented with a submenu for every password manager format that we support.
Since importing from each password manager is different, we have provided instructions for each.
Click on the password manager's name, and choose 'Instructions' to view them.
'14/224'
'LastPass Manual'
We continue to add formats, so check the version you are running if you do not see the format
you need.
After updating, if you would like to organize your sites into Groups or if you would like to delete
some of the imported sites, it is easiest to perform these group actions through the Online Vault
via�https://lastpass.com. You can then use the check boxes to select many sites at once and
perform an action on them.
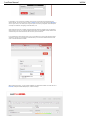
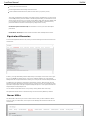
Importing from a Generic CSV File
If LastPass does not support importing from your current password manager, you may be
able to import using a Generic CSV file. Try seeing if your current password manager has an
option to export to a CSV file.
If you use your own spreadsheet instead,�it is important that the title of the columns
match those in the template!�The column titles can include any of the following: url,
username, password, extra, name, grouping, type, hostname.
Fill the columns with the values you'd like for each entry (leave blank if the value is not
relevant). Please note that 'extra' means either (1) the notes section of a site entry or (2) the
body of a secure note, and 'grouping' is the group (or folder) where you would like the item
to be stored in your vault.
**Note that on Mac computers, creating the import spreadsheet using Excel may cause
reformatting issues that will prevent a proper import. Make sure to edit your content in
TextEdit or another text editor.
Instructions for importing Sites
To import Site data you must define at least the following values: �url� (typically this will
be the login url), �username�, �password� and �name�. �Extra� and �Group� are
other fields that you might consider.�To import data from a csv file, we suggest you use our
Import Template found here:�Sample Import.
Instructions for importing Secure Notes
To import data Secure Note, enter the values as follows: �url� = http://sn, �extra� = the
contents of the note. Give the note a �name�, and then consider adding �group�. It is
important to leave the username and password columns blank. Please refer to the example
import formats found here: Sample Secure Note Import.
Instructions for importing Server Login credential
To import data as a Server Secure Note, enter the values as follows: �url� = http://sn,
�type� = server. You must also populate �hostname�, �username�, �password� and
�name�. In this case, you must enter the username and password in the actual username
and password columns of the template, rather than the 'extra' section. Consider adding
�group�.
Please click here to download our�Sample Import, which includes examples of all 3 of the
aforementioned data types.
Passive Imports
Certain password managers do not support export functions. In these cases you can still use
LastPass to pick up this data through a 'passive' import. This entails running both password
managers simultaneously, having your former password manager enter your login credentials
into a site, and then using LastPass to pick up the filled website entry.
'15/224'
'LastPass Manual'
Introduction
What is LastPass?
LastPass is easy, secure password and data management. Not only is the LastPass Password
Manager free, it saves you time while keeping you safe. While our minds struggle to keep
track of an increasingly complex variety of online accounts, LastPass allows you to
effortlessly save, organize, and access your login data.
Helping You Simplify & Secure Your Digital Life
At LastPass, we believe that your online experience should be easier, faster and safer.
We believe the Internet should be a place where we connect, explore, shop and learn
without the hassle of passwords, usernames, web forms and security threats. That's why
we created a simple and secure way to manage the data that gives you access to your
digital life - for free.
LastPass Does The Work
After downloading the LastPass Password Manager and creating an account, you'll be
able to securely store your login information, autofill and autologin to your favorite
sites, and sync your saved data across all major browsers and platforms.
Security & Privacy Is Our Priority
We've taken every step we can think of to ensure your security and privacy. Using an
evolved host-proof hosted solution, LastPass employs localized, government-level
encryption (256-bit AES implemented in C++ and JavaScript) and local one-way salted
hashes to give you complete security with the go-anywhere convenience of syncing
through the cloud. All encrypting and decrypting happens on your computer - no one at
LastPass can ever access your sensitive data. LastPass� Security Challenge also
allows you to identify weak account data and provides suggestions for significantly
improving your online security.
Wondering what the benefits are of using
LastPass' Password Manager?
'16/224'
'LastPass Manual'
Easy Setup
Download LastPass, create your account, then import your passwords, usernames, and
form fill profiles. Setup only takes five minutes and you'll be able to start autologging
into your favorite sites.
It's free!
LastPass is dedicated to changing the ease of use and security for Internet users
everywhere. That's why we rely on a freemium business model - all basic features of
the LastPass application are free, while advanced features like support for mobile
devices are part of LastPass Premium for $1/month. We're committed to staying free,
whether or not you purchase our Premium service.
Save Time
With LastPass, you can seamlessly log in to your favorite sites using autofill and oneclick login. You can also create profiles that allow you to automatically fill your
personal information on web forms accurately and safely.
Stop Forgetting
With LastPass, you create one Master Password, eliminating the need to ever remember
another username or password. LastPass makes it easier to have unique login data for
each of your online accounts without the hassle of remembering them or recovering
them when you forget.
Stay Safe
LastPass secures your data by encrypting it locally on your personal computer or mobile
device. Only your LastPass Master Password can unlock your data and only you have it.
You can also use LastPass to generate and automatically store a unique, secure
password for new sites.
Works Anywhere
Your data is securely synchronized across all of your browsers and devices, giving
you access to your information anytime from anywhere. And you can always securely
view your data from the LastPass website: https://lastpass.com.
Go Mobile
Our apps for mobile devices allow you to easily log in to your saved sites via your
smartphone. Currently a part of our Premium service for $1/month, our mobile apps let
you manage access to your digital life while you're on the go.
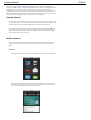
Having Technical Issues with LastPass?
Make sure to visit our Help Center and FAQs here
How is LastPass Safe?
'17/224'
'LastPass Manual'
Your security and privacy are our top priority - that's why we've taken every step possible to
ensure that your data is safely stored and synced in your LastPass account.
All sensitive data is encrypted locally
All encryption/decryption occurs on your computer, not on our servers. This means that your
sensitive data does not travel over the Internet and it never touches our servers, only the
encrypted data does.
We use government-level encryption
We use the same encryption algorithm that the United States Government uses for topsecret data. Your encrypted data is meaningless to us and to everyone else without the
decryption key (your email and Master Password combination).
Only you know the key to decrypt your data
Your encryption key is created from your email address and Master Password. Your Master
Password is never sent to LastPass, only a one-way hash of your password when
authenticating, which means that the components that make up your key remain local. This
is why it is very important to remember your LastPass Master Password; we do not know it
and without it your encrypted data is meaningless. LastPass also offers advanced security
options that let you add more layers of protection.
You control your security settings
We know that one size does not fit all when balancing security and ease of use. That's why
we allow you to decide which is more important by providing a full range of security
settings and options. We strongly encourage you to review your Extension Preferences
and Account Settings after downloading LastPass to customize your security level.
You can generate unique, strong passwords
No more using the same password for all of your sites. No more writing down passwords on
little pieces of paper. No more emailing yourself when you forget your password. Use our
password generator to create strong passwords for each site and automatically save them
to your vault. With LastPass, you will be safer than ever before without the hassle of
remembering unique passwords.
No more using your browser's insecure password manager
Were you surprised at how easily we retrieved all of your passwords from your browser when
you installed our software using the LastPass application? Unfortunately, any malicious
application can easily do the same. With LastPass, you're protecting �yourself from these
attacks!
Learn more about protecting yourself from phishing scams
Importing from RoboForm
'18/224'
'LastPass Manual'
Importing from RoboForm 7
Siber Systems has changed the export process in the newest version of RoboForm � version
7 does not include the option to export your logins with the full site URL. Although you will
still be able to export your passcards, they will not be imported to LastPass correctly.
Without the full URL of the site, LastPass doesn�t know where the login fields are, and
autofill will likely be dysfunctional. �You will have to add them manually.
Note: You can also use the�passive import�method
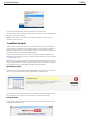
How to import your passwords from RoboForm:
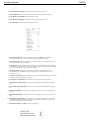
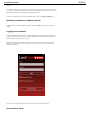
1. First, you will want to download RoboForm 6.9.92�(you will want to use a browser
other than Firefox, which does not support this older version)
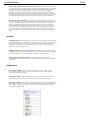
2. To export, find the RoboForm icon in your browser and go to Logins > Print List, which
will cause a new dialog box to appear:
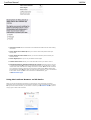
3. You will then want to check the "Full URL" option:
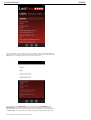
4. Click "Save" and then set the file type to .htm (html files) :
5. Open the RoboForm file with Notepad (Right-click > Open with > Notepad)
6. Click File > Save As and select "UTF-8" from the "Encoding" dropdown and save it:
'19/224'
'LastPass Manual'
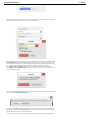
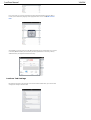
7. Open your browser and click your LastPass Icon > Tools > Import from > RoboForm >
Import and select the file:
If you receive the Error Message: �Found 0 items or could not parse data� when attempting
to import:
- Open your exported file in Notepad again
- Right-click > Select All > Copy on your data
-�Login to the online Vault at https://lastpass.com
- LastPass Vault > Tools > Import > Roboform, and paste the copied data into the box
and click 'Check Data for Sites'
This message can also mean that you were attempting to import non-English characters from
RoboForm to LastPass. Please switch back to UTF-16 in these instances (open the RoboForm
file with Notepad > File > Save As > Encoding: UTF-16). If you do not see the UTF-16 option,
try unicode or unicode big endian. If you continue to have problems, please submit a
Support Ticket and we will be happy to assist you further.
You can repeat these same steps to import your RoboForm Safenotes and Identities.
How to import your profiles from RoboForm 7:
1) In RoboForm, go to Options > User data and click on �Explore folder�.
2) Copy the selected folder onto your desktop.
3) Delete the content of the selected folder.
4) Copy and paste the content of the other RoboForm profile folders into the selected folder.
5) On the RoboForm toolbar, click on �Print list�� and save the passcards list.
6) Import the RoboForm html file into LastPass.
7) Delete the selected RoboForm folder and move the RoboForm folder from the desktop to
its original location.
'20/224'
'LastPass Manual'
Importing and Exporting Wi-Fi Passwords
Importing and Exporting Wi-Fi Passwords
On Windows and Mac OS X, LastPass has the ability to import Wi-Fi passwords stored within your
computer into LastPass as Secure Notes.� On Windows, LastPass also has the ability to export
Wi-Fi passwords stored as LastPass Secure Notes to your computer.
Please note that in order to use this functionality on Windows, you must allow
Windows to manage your Wi-Fi connections.� Third party Wi-Fi connection
managers such as the one provided by your Wi-Fi adapter's manufacturer (Intel,
etc.) are not supported.
Setup
In order to import and export Wi-Fi passwords, your computer must have a Wi-Fi adapter
installed.
If you would like to import and export from the LastPass browser extension on Windows, you
will need to re-run the LastPass Universal Installer.� This is due to the fact that we need to
install a utility that requires administrator privileges in order to import and export Wi-Fi
passwords.� You can re-run the LastPass Universal Installer from:
https://lastpass.com/installer/
You will also need to ensure you're running the binary version of the LastPass browser
extension.� If you're not, in Firefox and Chrome, go to:
https://lastpass.com/dl/
In Safari and Opera, please see:
https://helpdesk.lastpass.com/safaribinary/
Windows XP and Windows Server 2003
To import and export Wi-Fi passwords on these versions of Windows, you must be running
the latest service pack (Windows XP Service Pack 3 or Windows Server 2003 Service Pack 2).
These versions of Windows require the Wireless Zero Configuration service to be running in
order to import and export Wi-Fi passwords.� If it's not running, you may encounter an
erroneous "No Wi-Fi adapter was detected on this computer.� This feature requires a Wi-Fi
adapter." message.� Please see the following Microsoft article for instructions on starting it:
'21/224'
'LastPass Manual'
http://msdn.microsoft.com/enus/library/windows/desktop/ms706593%28v=vs.85%29.aspx
Windows Vista and Windows Server 2008
These versions of Windows require a third party utility named PsExec (part of Windows
Sysinternals and published by Microsoft) to decrypt Wi-Fi passwords.� PsExec's license
prohibits LastPass from embedding it, but you can download and install it yourself:
1) Go to http://technet.microsoft.com/en-us/sysinternals/bb897553
2) Click "Download PsTools"
3) PsTools.zip will download.� It contains a bunch of files, but the only file of
importance to LastPass is PsExec.exe.� You'll need to extract PsExec.exe and copy it
into the LastPass installation directory.� This directory is typically C:\Program
Files\LastPass\ on 32-bit Windows and C:\Program Files (x86)\LastPass\ on 64-bit
Windows, but you may have changed it when you ran the LastPass Universal Installer.
Importing
Importing is supported on Windows and Mac OS X.
-�Internet Explorer/Firefox: �LastPass Icon�-> Tools -> Import From -> Wi-Fi
Passwords.
- Chrome/Opera: �LastPass Icon -> Tools -> Import From -> Other, then select Wi-Fi
Passwords in the Source drop-down and click Import.
- Safari: �LastPass Icon -> Advanced -> Import, then select Wi-Fi Passwords in the
Source drop-down and click Import.
Exporting
Exporting is supported on Windows only.
-�Internet Explorer/Firefox/Chrome,/Opera: �LastPass Icon�-> Tools -> Export To ->
Wi-Fi Passwords
- Safari: �LastPass Icon -> Advanced -> Export, then click the Wi-Fi Passwords button.
Downloading and Installing LastPass
Creating your LastPass Account
After creating your new LastPass account, you never need to create another account - your
stored data is securely synced to our servers. So downloading the plugin/app to a new
browser/OS/device�allows you to easily access everything in your one LastPass account.
Download
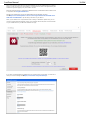
Begin by clicking 'Download Free' from our main page, where LastPass will recommend a
'22/224'
'LastPass Manual'
package to you based on your browser and operating system:
This will redirect you to the�downloads page�where LastPass will recommend the
appropriate installer for you. Click 'Download' to download LastPass.
Installing LastPass
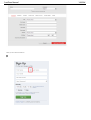
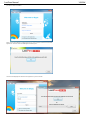
Windows
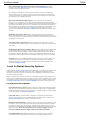
After downloading the recommended installer, a menu will present you with the
following dialog screen:
Click 'Install LastPass' to begin�installation. If needed, you can alter your installation by
clicking 'Advanced Options'. This provides you with the options below:
At the end of the installation process, you will be asked if you would like to import any
passwords located on your computer. Select 'Import' to import the items listed. If you
would rather do this later, click 'No Thanks'. To import later, please see our Import
page.
'23/224'
'LastPass Manual'
Once successfully installed, you will see a LastPass icon�in your browser toolbar.
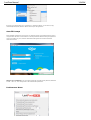
Mac
After downloading the recommended installer, a menu will present you with the
following dialog screen:
Choose which browsers you would like LastPass to be installed for and click Install
LastPass to begin. At the end of installation, you will be asked if you would like to
import passwords from you computer:
Click Import to import them. �If you would rather import items later, choose Not Right
Now. You can import them later as seen on the Import Page.�Once successfully
installed, you will see a LastPass icon�in your browser toolbar.
Using LastPass on Locked Computers
You may need to access your LastPass account on a computer that does not allow
installation of add-ons, or where you do not wish to leave any files behind. In our mission to
provide you with the most comprehensive access possible, we have developed the following
options:
'24/224'
'LastPass Manual'
Website access - You can always login to your LastPass account via https://lastpass.com to
securely access your decrypted data.
LastPass Pocket - Our Pocket application is a desktop version of your Vault that you can
download to a USB drive and use to access your stored login data.
LastPass Portable for Firefox and Chrome - Download the Firefox or Chrome portable
browsers and install the LastPass plugin. The portable browser can then be saved to a USB
drive and carried with you.
IE Anywhere - Part of our Premium offering, IE Anywhere is a portable plugin that you can
download to a USB drive. The plugin can then dynamically hook into Internet Explorer and
other IE-based browsers on Windows operating systems without leaving behind a file.
System Requirements
LastPass currently supports the following web browsers, operating
systems and mobile devices:
�
Operating Systems
Windows 2000, XP, Vista, 7, 8
Mac OS X 10.7+
Linux
Web Browsers
Internet Explorer 8+
Firefox 2+
Safari 3+
Google Chrome
Opera 11+
IE Tab in Firefox (using IE Anywhere)
Maxthon
**Users are strongly recommended to download and run the installer from our website on all
browsers that you regularly use.
Tablets
Apple iPad and iPad 2
HP TouchPad
Kindle Fire
Nook Tablet
Android based tablets*
* The LastPass app is available in the Google Play Store, as is an extension for Dolphin HD.
�An extension for Firefox Mobile is also available. �While these apps should work on most
Android based tablets, we cannot guarantee that they will be compatible on every tablet
'25/224'
'LastPass Manual'
available.� If you have any questions or problems, contact our support team and we can let
you know if your tablet will work with LastPass.
Mobile Devices
Android 2+
Blackberry OS 4.2.1+
HP webOS 1.4.5+
iPhone 3GS+ iOS4.3+
Symbian S60 3rd Edition and above
Windows Mobile 5+
Windows Phone 7.1+
�
Installing Binary Component
By manually installing a binary plugin version, the LastPass extensions in Chrome, Safari, Opera,
and Maxthon can add functionality. Firefox and Internet Explorer automatically hosts these
options by default.
Features
The Binary Component enables the following features:
Idle timeout
Copy Username/Password/Notes to clipboard (not supported on Linux)
Clear Clipboard after use (found in Advanced Preferences)
Faster encryption and decryption
Share login state between other browsers (not supported on Safari for Windows)
Fingerprint authentication (not supported on Mac OS X or Linux)
Smart card authentication
Import from a file
Export to a file
Import Wi-Fi passwords (not supported on Linux)
Export Wi-Fi passwords (not supported on Mac OS X or Linux)
Import from Safari and Opera Password Managers
Add attachments to secure notes
Install
To install, close Safari, Opera, and/or Maxthon, then run the LastPass Universal Installer.
This is not compatible with Chrome OS.
For Chrome, please choose 'Allow' when Google Chrome asks for additional permissions. A
download of the Universal Installer will automatically begin. Run the installer.
'26/224'
'LastPass Manual'
Limitations and Compatibility
Binary is not available for Chrome OS
Binary is not available for Opera 12 on Mac OS X. We believe this to be a bug in Opera 12
for Mac OS X
For Opera, the preference 'Enable plug-ins only on demand' must be disabled.
For Mac OS X 10.10 Yosemite, �the LastPass Menu Bar must be enabled. To enable the
LastPass Menu Bar go to Safari View > Show LastPass Menu Bar after installing.
If you are experiencing issues with the binary component disappearing in Safari, make sure
that 'Stop plug-ins to save power' is disabled by going to Safari Preferences > Advanced.
LastPass Manager Basics
LastPass Manager Basics
At its most basic, a "password manager" like LastPass is software that helps a user store
their usernames and passwords, usually implemented as a browser extension.
In addition to securely storing your login data, the LastPass Password Manager offers a
number of convenient features, including:
One-click login: Click on a site entry to launch the URL and have LastPass autolog you in.
Automatic form fill:
�Create profiles storing your address, phone number, email, and other details so that you
can fill registration forms and shopping details in a single click.
Secure Notes:
�Save non-login data in a digital notepad, such as bike lock codes, application passwords,
and more.
Sharing: �
�Securely share login details or a secure note with another LastPass user.
Import/Export options: Import or export your saved logins at any time using a number of
different options.
Password�generator: �
�Generate random, unique passwords for each of your sites to minimize security risks.
Virtual keyboard: On a public computer where keyloggers are a risk? Use the virtual
keyboard to keep your email and Master Password from being recorded.
One Time Passwords (OTPs): Create and store passwords that can be used once for
logging in on potentially insecure public computers.
Identities: Organize your data into different Identities that you can easily switch between,
such as 'work' and 'personal'.
Cross-browser, cross-platform support: Install LastPass
�on all your browsers and operating systems, not to mention take it on the go on your
smartphone or tablet.
'27/224'
'LastPass Manual'
Once you have installed LastPass and created an account, you can access your Vault and
start using the LastPass features by logging in.
Watch the Basic Introductory Tutorial
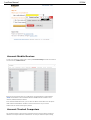
Your LastPass Icon
Your LastPass Icon
Once you have installed LastPass, an icon
�will appear in a corner of your browser menu. The LastPass icon makes your web browsing
experience faster and easier by giving you immediate access to all major features of
LastPass.
After logging in to the LastPass browser extension, clicking on the icon will drop down a
toolbar menu where you can use the following features:
My LastPass Vault
Launches your local LastPass Vault, where you can view, edit, group, delete or share
'28/224'
'LastPass Manual'
�your sites�in addition to accessing your Form Fill Profiles�
, Secure Notes�
, and more.
Sites
The 'Sites' menu allows you to view all of your sites stored in LastPass according to
their�Groups.
Fill Forms�
From the Fill Forms menu, you can either access a saved profile to fill out a web form or
you can add a new Fill Form Profile.�Read our�extended discussion�of the Form Fill
function to learn how to best use this feature.
Generate Secure Password�
Here you can manually generate a secure password. Read more about this feature here.
Secure Notes�
Access your stored data by clicking on a specific note� in the 'Secure Notes' submenu,
which launches a View/Edit dialog box.�You can also 'Add a Secure Note' using the option at
the bottom of the Secure Note menu.
Show Matching Sites
Click here to view a list of all matching logins saved in your LastPass Vault that match the
current page (URL ) that you are on. Clicking on the login will show the submenu options to
Autofill, Edit, Copy, and Delete.
Recently Used
View the ten most recent sites that you visited (or edited) while using LastPass. �If you
would like to change the number of sites that you view in the Recently Used list, go to your
Icon, launch�Preferences, select the�Advanced�tab from the left-hand menu, and adjust
the Recently Used list size.
Clicking on a site in the Recently Used submenu will cause it to open in a new tab or window,
where LastPass will autolog you in.
Right-clicking on a site in the Recently Used submenu presents you with another submenu,
where you can choose to Edit, Copy Username, Copy Password, Go to URL, or Delete the
entry:
'29/224'
'LastPass Manual'
Selecting 'Clear Recent' at the bottom clears all entries in the Recently Used submenu.
Tools
From the�Tools�menu, you can run a Security Check,�switch�Identities, Import�or
Export�your data, and�more.
Preferences
Clicking on 'Preferences' will launch the LastPass Control Panel dialog box, where you can
view or edit your�local security settings,�notification preferences,�hotkeys,
and�more.
Help
Click 'Help' to launch the LastPass User Guide and find the answers to your questions
about LastPass features.
Enterprise Console
If you use LastPass Enterprise and are an Administrator in your system, you can access the
Administrator Console via this icon.
Log Off
Selecting 'Logoff' will end your LastPass session and will automatically log you out of any
open�Vault�pages, as well as log off of the LastPass plugin on other browsers that share
their login state.
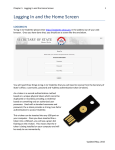
Logging into LastPass
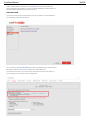
Logging into LastPass
By default, the LastPass icon turns red (dark gray in Safari) when you have logged in and will
turn gray when you have logged off:
To log in using the LastPass plugin, click on the icon and enter your Email and Master
Password in the dialog box. Note that the icon is grey here since it is logged out:
'30/224'
'LastPass Manual'
If you use more than one LastPass account, you will be presented with a dropdown menu to
select the account you would like to use to log in. If you wish to delete any saved email
addresses, click the 'X' next to the email field.
Login Preferences
When you are prompted to log in to LastPass, you are given the following options:
Remember email: If you are using a trusted computer, you can simplify your login process
by asking LastPass to automatically fill in your email every time you are prompted to log in.
LastPass selects this option by default. Uncheck the box if you are on a computer where you
do not wish for your email to be remembered.
Remember password: LastPass will save your Master Password if you check this setting.
By default, LastPass will not check this box, and we don't recommend doing so unless you
are on a trusted device.
I Forgot My Password, Help: If you go to log in and cannot remember your Master
Password, click on this link to enter your email and have your password hint sent to you. The
information that we email you is only what you entered as your password hint when you
registered your Master Password. We do not have access to your Master Password and
therefore cannot send you more than your password hint, so you may need to initiate the
Account Recovery process.
Screen Keyboard: If you are using an untrusted computer or are concerned that keyloggers
may have access to your device, you can choose the Virtual Keyboard option to log in. You
will be directed to the online login page, where you can click the characters for your email
and Master Password. Because keyloggers cannot record clicks, the screen keyboard protects
your login information.
Create an Account: If you are using LastPass for the first time or wish to create a new
account, this link will launch the account creation process. You will be directed to a
confirmation page, where you can choose to 'Create an Account'. In order to create an
account, you must enter a valid email address, a Master Password, and agree to the terms
and conditions. We recommend that you also enter a useful password reminder, although
you should not enter your actual Master Password as your password hint.
Cookies
Cookies need to be enabled in your browser in order for the LastPass plugin to stay logged in
and keep your browser session active, particularly if you want to be able to close your
browser and re-launch it with LastPass still logged in.
If you disabled cookies in your browser, you will be logged out when you exit the browser
and will be required to re-enter your Master Password to log in, unless you have the
"remember password" option checked.
If you have an extension or software that regularly wipes browser cookies, you will be logged
off of LastPass, or you will receive red notifications telling you that there's been an "Error
contacting the server", and asking you to log in again. Enabling 3rd party cookies, or setting
'31/224'
'LastPass Manual'
an exception for LastPass, will fix this.
To check if you're clearing cookies, please follow the steps at the top of our debug page:
https://lastpass.com/debug.php.
Logging into the Online Vault
If you are unable to login into the browser extension, or cannot install the extension, you can
log into the online Vault via the LastPass website - https://lastpass.com
Autofilling With LastPass
Autofilling With LastPass
When you are actively logged into LastPass, you should see a red LP Icon�
�in your browser tool bar. This means that LastPass is ready to use and autofill your saved date
for you.
3 Ways to Autofill with LastPass
1. Using the LP Icon��
� and Show Matching Sites
2. Using the Field Icons
3. Using the Right-Click Context Menu
Editing an Existing Site Entry and Editing
Form Fields
Editing an Existing Site Entry and Editing
Form Fields
At some point, you may find the need to edit an existing site entry in your Vault. While you
can do this from your Online Vault and the LastPass Icon dropdown menu, the easiest
way is through your Local Vault.
There are two ways to save a site: automatically saving a site, and manually saving a
site. Each will result in similar, but slightly different entries when you look to edit these
saved sites.
Automatically Saved Sites
When you go to Edit an automatically saved site entry in your Vault, the Edit dialog will look
like this:
'32/224'
'LastPass Manual'
The options you are presented include Sharing�
�the site, Deleting
�the site, tagging as a�Favorite, requiring a Master Password reprompt upon use or
editing, Never AutoFill, or having the site AutoLogin.� You can also view previously saved
usernames and passwords for this site in LastPass.� These links will take you to your
Online Vault to view the username and password histories.
Editing form fields
One additional option is to Edit Form Fields.� Clicking this option will take you to another
edit dialog:
'33/224'
'LastPass Manual'
Allows you to manipulate and change any fields and data that LastPass may have saved
when it automatically recorded the site login credentials.� Sometimes LastPass can
accidentally pick up an extra field on a site (like a Search field), which can complicate
logins.� Using Edit Form Fields, you can delete any extra data not relevant to the site
login.� This ability can be useful when you are having trouble autofilling or autologging into
a site entry using LastPass.
Manually Saved Sites
Editing a manually saved site entry is as easy as editing an automatically saved site entry.
The only difference with manually saved entries is that you will not see a separate 'Edit Form
Fields' button. The form fields appear directly in the site entry, along with username and
password controls. Manually saved entries look like this:
Manually saved entries will pick up ALL fields on a login page, so manually saving a site and
then deleting the extra fields can be another helpful tool for problematic logins by
eliminating any variable fields that might interfere with the AutoFill or AutoLogin functions.�
Additionally, manually saved entries are static entries and will never automatically try to
save an extra field like automatically saved entries sometimes can.� The information you
see in the Edit dialog is how the entry will always be unless you change it.
Editing in the Online Vault
To editing a saved entry from the Online Vault, click on the pencil
�in your Vault:
'34/224'
'LastPass Manual'
Field Icons
Field Icons
When visiting a login page, clickable field icons will appear:
These interactive icons will assist you in filling saved logins, creating new logins, and
generating passwords.
If you already have multiple saved logins for a site, you will see the field icons show the
number of matching sites found. Clicking on the icon will present you with a drop down menu
that will show you these matching sites:
You can scroll down if more logins are stored than shown. If you do not want to scroll to
search, you can begin typing in the username and LastPass will begin to sort through and find
matching results.
Clicking the desired login will then autofill the username and password selected.
Field Icons submenu
Within the field icons is a submenu that includes other available options:
Site
'35/224'
'LastPass Manual'
�- Shows all matching sites
Fill Form
�-�Shows the fill form menu
Generate
�- Brings up the password generator
Disable
�-�Brings up the disable site options
'36/224'
'LastPass Manual'
Filling and Saving
See this screencast on how to save sites and log into sites
Field Highlighting
Field Highlighting
If you have turned in field icons OFF by going to your Preferences, Field Highlighting will be
enabled.
When LastPass recognizes that you have stored data for the URL you have navigated to,
LastPass autofills the form fields with your saved data and adds the LastPass logo to inform
you that LastPass has securely entered this data:
If you have more than one set of login data for the page, LastPass will prompt you to autofill
with another one of the saved site entries:
'37/224'
'LastPass Manual'
You can also overwrite the pre-populated information with a different username/password
combination, which LastPass will ask to remember when you submit the form.
Your LastPass Vault
The LastPass Vault is a page that allows you to see all of your sites and applications:
It is a locally-hosted file so it is secure and fast.
Your Local and Online�Vaults
There are two ways to access your LastPass Vault.�The first is through the LastPass browser
Icon, and click on "My LastPass Vault":
'38/224'
'LastPass Manual'
The Local Vault that you launch through your browser plugin gives you access to all features
of LastPass, as well as�Preferences and Settings as they apply to the plugin.
We recommend that you access your stored data through your Local Vault via your LastPass
browser plugin. However, if you are not on a computer that has the LastPass plugin installed,
you can access an online version of your Vault by logging into�https://lastpass.com:
Accessing your Vault through the website allows you to view your online�LastPass account,
as well as control global Settings.
LastPass securely syncs the data stored in your account, so that the information you see
through your Local Vault and your Online Vault are the same.
Local Vault
Your sites are organized by Groups (folders) with your Favorites at the top for easy access. If
you click on the name of the site, LastPass will open the corresponding URL in a new tab (or
browser) and autologin using your stored username and password:
Each site entry in your Vault has the option to Edit
�, Share�
and Delete
. By clicking �Edit Icon (
) you will launch the 'Edit Site Information' dialog box, where you can view details for
the�specific site:
'39/224'
'LastPass Manual'
By clicking on the small column icon above the scroll bar on the right-hand corner of your
Vault, you can toggle which columns of site data you wish to show and hide:
You can also drag the separators of the column names to adjust the width of each column.
As you type in the search form above your sites, LastPass searches and filters your sites
shown below:
Several advanced features are available to help organize and administer your sites easily.
You may select multiple sites (by holding down your Ctrl key or Shift key when you click) and
then you may drag and drop your sites to new Groups. You also have the ability to right-click
while multiple sites are selected to perform various tasks on all sites at once:
From the Vault drop down menu�next to your email, you can�view your Account status
'40/224'
'LastPass Manual'
page or log out:
Vault Menu
On the left of your Vault, you will see the Vault menu:
Add Site:
�Manually create a site using this option. However we strongly suggest having LastPass
automatically save this data for you for the best experience.
Add Secure note:
�Create a secure note.
Create Folder:�Creates a folder to group sites.
Account Settings:�Launches your Account Settings.
Open Favorites:�Launches sites that you have marked as 'Favorites'.
'41/224'
'LastPass Manual'
Bookmarklets: Links to the�Bookmarklets�dialog where you can learn how to
install Bookmarklets and use the feature.
One Time Passwords (OTPs): Launches the�OTP�page, where you can view, print,
or delete your generated OTPs.
Show Deleted Sites:�Allows you to see any sites that you may have deleted. You can
easily undelete sites from the deleted sites page. Deleted sites only remain available
for 30 days, before they are purged automatically.
View History:
�Allows you to view your recent LastPass logins and events, as well as clear your
LastPass History.
Import: Import login data previously stored with another password manager or in a file.
Export: Decrypts your data and displays it in a printable format, allowing you to view
and print your data as a backup.
Select Identity:�Allows you to toggle between your Identities.
Security Challenge:�Run our security challenge� to see how�well you are keeping
your data secure.
User Manual:�Links to the LastPass User Manual�where you can search for more
information on LastPass features.
Tutorials:�Links to the LastPass Video�Screencasts page where you can view
video screencasts on using LastPass and its features.
Manage Shared Folders: Only available for Premium Family Shared Folders�and
Enterprise Shared Folders.
**Link Personal Account/Remove Personal Account: �For Enterprise Users only,
this button enables you to�Link your Personal Account�to
your�Enterprise�account as a Shared Folder available only to you. Once it is linked,
you can click the link to un-link the account.
Online Vault
Your Online Vault allows you to access your stored LastPass data on computers that do not
have the installed plugin(s). From the Online Vault you can control many of your global
LastPass settings, as well as view, edit, and delete your stored information, much the same
way you would on your Local Vault.
The Online Vault is organized similarly to the Local Vault, with your sites organized by Group
in a searchable interface:
'42/224'
'LastPass Manual'
Offline Access to Your LastPass Vault
Offline access to your LastPass Account can be an important component to using LastPass. �You
may find yourself in a situation where you need access to your secure information, but do not
have an internet connection readily available. You can gain offline access to your data using
almost any browser extension or application you would normally use to access LastPass.� We
also offer LastPass Pocket, a standalone app dedicated to providing secure offline access to
your data.
How to Utilize Offline Access in Your
Browser Extension or Mobile Application
The key to gaining offline access in your LastPass browser extension or mobile app is to
have logged into the extension or app at least one time while you have had an internet
connection.�� This ensures that your computer or device has cached a local version of your
encrypted data to the local drive. This is the data that LastPass loads when you login to
LastPass while offline.�� Any LastPass browser extension or mobile application can be
logged into without an internet connection, and will default to this mode when no connection
is present.
Please note these special options and conditions:
- In each browser extension, if you clear your LastPass Local Cache (LastPass Toolbar
Icon > Tools > Clear Local Cache), you will have to log in online once more to recreate
your cache before you can log in using offline mode again.
LastPass Pocket
LastPass Pocket is a stand-alone application (available for Windows, Mac OS X and Linux)
that can be installed on a USB memory device, allowing you to carry your LastPass data
around with you. Pocket essentially provides backup capability and offline access for your
Vault. LastPass Pocket can access your data through two main methods:
1 .� LastPass Pocket can access the locally cached version of your data from your LastPass
browser extension by choosing the appropriate path to the cached data. This is the same
data that the LastPass browser plugin uses for offline access. LastPass Pocket can access
this cache from Firefox, Internet Explorer, Chrome, Safari and Opera.
2. � LastPass Pocket can access your data from a LastPass Encrypted File that you have
exported from your LastPass Local Vault. You can export this file by going to your LastPass
Browser Extension Icon > Tools > Export to > LastPass Encrypted File.� You can then open
this file using Pocket:
'43/224'
'LastPass Manual'
For more information on LastPass Pocket, check out our LastPass Pocket page.
Testing Offline Access
You can test Offline Access to your LastPass Vault by disconnecting your computer or device
from its internet connection and logging in to LastPass or LastPass Pocket.
If you are using a computer, you can easily disconnect from the internet by unplugging the
Ethernet cable from your computer's Ethernet port. You will also want to temporarily disable
all wireless connections you use for Wi-Fi. After this, try logging in to your LastPass browser
extension or LastPass Pocket.
On your smartphone or tablet, disable all mobile data or Wi-Fi connections (setting your
phone or tablet to Airplane mode can accomplish this on most devices) and log in to the
LastPass app via your data in offline mode.
Using Offline Access with Multi-Factor
Authentication
If you are using any form of Multi-Factor Authentication, you need to make sure that you
have Enabled Offline Access in the settings for your particular authentication device.�
Without allowing offline access, you will not store a local cache for LastPass to access when
there is no connection present.
Multifactor authentication cannot�not be prompted in offline logins (with the exception of
Yubikey and Sesame).
Therefore, please note, if you Enable Offline Access while using a multifactor, you will be
able to log in without using your Authenticator code. And in cases of a connectivity issue,
LastPass may log in offline first, before establishing connectivity to your Online Vault and
prompting for your authenticator code.� This may cause LastPass to autofill any login
credentials you have saved in LastPass for the current page you are on, and then pop the
prompt.
Adding a Site
Adding a Site
Adding new sites to your LastPass account is both easy and secure. Since all sensitive data is
'44/224'
'LastPass Manual'
encrypted locally on your computer with a key that only you know before it is sent to
LastPass, you can store your most sensitive data with the knowledge that it is completely
safe.
Automatically Saving A Site
The easiest and best way to add new sites to LastPass is to go to the site and login as you
normally would. LastPass will present you with the following pop-up:
When you press the Save Password to Vault button, the pop-up will expand:
'45/224'
'LastPass Manual'
In this dialog, you can specify a friendly name for the account (we pre-populate with the
domain name). You can also type or select a Group for this account. By assigning Groups to
each of your sites, it will allow you to organize your accounts by categories. Some examples
of Groups are Financial, Shopping, Social Networks, etc.
After pressing 'Save Site', LastPass will automatically enter the site data into your LastPass
Vault and you can carry on using the website. With your encrypted data stored, LastPass will
automatically fill in this information the next time you visit the site.
If you would like to view the new entry, go to your LastPass Icon, launch 'My LastPass Vault',
and search among your stored sites to find the entry or click on the LastPass field icon and
click on the wrench and click 'Edit':
When viewing this entry, you can specify whether you would like LastPass to make the site a
Favorite, 'Require Password Reprompt', and/or 'Autologin.'
'46/224'
'LastPass Manual'
Please note that 'Autologin' can be dangerous, and may submit a form in the site you do not
intend it to submit.�� We do not recommend setting this option on any sites you do
important business with or sites you will be submitting information to beyond the login
information.
If you are logging into a site in which you have an existing account stored with LastPass, but
are now using a different password, you will also see an option to replace the existing site
with the new login information.
Watch the Tutorial for Adding a Site
Manually Saving a Site with Save All
Entered Data
An alternate way to save a site is to use the 'Save All Entered Data' option in the toolbar
after you have filled in the form but before you have submitted it:
After clicking 'Save All Entered Data', LastPass will launch an 'Edit Site' dialog box where you
can view all of the captured fields and specify your desired settings for the site:
'47/224'
'LastPass Manual'
If you find that LastPass does not automatically detect the login on a particular site, this
method may be used instead.
�
Watch a Tutorial on How To Save All
Entered Data For a Site:
Basic Authentication Sites
LastPass supports saving and filling basic authentication logins in most cases:
Internet Explorer: filling and saving
Firefox: filling and saving (on all platforms)
Chrome: filling and saving on Windows (with binary), filling on Mac (with binary), no saving
or filling on Linux
'48/224'
'LastPass Manual'
On other platforms and non-binary, we can intercept the dialog as long as the site is
launched from LastPass.
Basic authentication logins are not supported on Safari, Opera, and Maxthon.
Login Problems and Save All Entered Data
Login Problems and Save All Entered Data
If LastPass is experiencing a problem logging into a particular site*, �please try the
following:
*Flash and Silverlight based logins are not supported by LastPass
�
1) Open the 'My LastPass Vault' page from the Icon toolbar to view all of your sites:
2) Find the site and click on the
�Edit icon�to launch the Edit Site dialog box:
3) Verify that the username and password fields are filled and correct. If this site was
imported from your browser, there is a chance that the credentials were outdated or
incorrect. If you update the login information, try to login again via LastPass to see if
your problem has been fixed.
4) Manually copy/paste the username and password into the login form on the site and
verify that you can login using these credentials. If this does not work, then incorrect
information was likely stored in LastPass.
'49/224'
'LastPass Manual'
5) Advanced users may want to try the Edit Form Fields link in the Edit Site dialog at this
stage. Average users might want to delete the account and resave using the 'Save All
Entered Data' method (before you submit the login form).� You can read more about
Editing Form Fields at our Editing Page.
Save All Entered Data
If LastPass is still experiencing a problem logging into a particular site, or there is a site with
a multiple page login (username and password are on 2 different pages), �please use the
Save All Entered Data function (SAED).
In Chrome, Firefox, IE, Safari and Opera
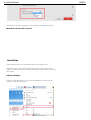
1. Load the page that you want to save
2. Enter your credentials, but do not submit
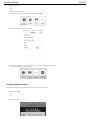
3. Click on your LastPass browser extension icon
4. Click on Tools (see image)
5. Click on Save All Entered Data
6. Then hit save to save the new entry to your vault.
�
Watch a Tutorial on How To Save All
Entered Data For a Site:
'50/224'
'LastPass Manual'
If you still experience problems with the 'Save All Entered Data' approach, please fill out a
feedback form to inform LastPass Support of the problem.
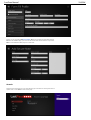
Right-Click Context Menu Options
In addition to accessing LastPass features from your browser plugin, you can also select some of
the more common functions from the right-click context menu.
Right-Click Menu Options
When you are on a site (and logged into LastPass), you can right-click on the page to trigger
the context menu:
Clicking 'LastPass' launches a submenu:
'51/224'
'LastPass Manual'
From the submenu you can:
- Autofill matching sites
- Copy Username/Password
- Copy URL
- Recheck Page (force LastPass to recheck page for fill fields)
- Generate Secure Password
- Fill Forms
Multiple Logins
Multiple Logins
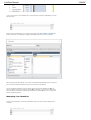
If you have several logins for a site that you would like to save in LastPass, log in to each
account as you normally would. LastPass will recognize when a new username/password
combination has been entered and will prompt you to save this new account.
The next time you visit the site, LastPass will show the number of logins saved for this site
at the toolbar icon and at the field icon. Clicking on the field icon will provide a dropdown
list of sites:
LastPass also autofills the login form with its best guess for which account to use. If you
would like to log in using a different username/password, click on the AutoFill or AutoLogin
button in the dropdown menu to get a list of all of your saved accounts for the site.�This list
contains the name that you gave this LastPass site and the username.�LastPass will autofill
or autologin when you choose an entry from either dropdown list.
You may find that LastPass is designed to offer logins from other parts of the site on a page,
even if only the domain is the same. You'll also find that the top-most listed sites are the
ones that best match the URL of the page you're currently on.
'52/224'
'LastPass Manual'
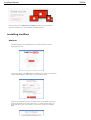
Grouping Sites with Folders
Grouping Sites with Folders
LastPass allows you to organize your sites in your Vault according to Folders. �For example,
you may want to organize your sites with names like 'Email' or 'Financial'':
When you open your Vault, your Folders may be partially or fully collapsed. Select the
Expand All folder (red outline) or the Collapse All folder (blue outline) �to simultaneously
expand or collapse all of your folders within your Vault to view all sites:
If you only wish to view one folder, click on the folder name to expand it:
If you would like LastPass to open all of your sites within a particular Folder and autolog you
in to all of them simultaneously, right click over the Folder name and select 'Open All':
'53/224'
'LastPass Manual'
LastPass will then open each site stored in the folder in a new window or tab and autolog you
in.
Adding a Folder
When creating a new folder, �you can click 'Create Folder' �from the Actions menu, enter in
the name of the folder and click 'OK':
Editing A Folder
There are several ways you can edit your Folders.
To move a single site entry to another Folder from your Local Vault, you can right-click on the
site, select 'Move to Folder', and type in the Folder name (Please note that you will need to
be signed into your Vault from your LastPass browser icon, not https://lastpass.com/)�:
You can also click 'Edit' in the right-click menu for a site, where you will see a dropdown
menu for selecting a Folder:
'54/224'
'LastPass Manual'
Your Favorites Folder
You can check those sites that you use most often as 'Favorites' from the bottom of the
entry:
This will add the entry to the Favorites Folder at the top of your Vault:
Grouping Sites In Sub-Folders
There are two ways to create Sub-Folders for your sites.
First, when adding or editing a site, type the name of the Parent Folder followed by a
backslash and then the name of the Sub-Folder that you would like to create underneath it�:
You can also create a Sub-Folder from within your Local Vault by right-clicking on a �Folder
name and selecting 'Create Sub-Folder':
'55/224'
'LastPass Manual'
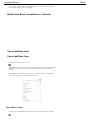
Password History
Once you have added a site to your LastPass account, an entry will be stored in your LastPass
Vault. You can view the saved site's details at any time by clicking the
'Edit' link next to the site.
If you decide to update your username or password for a particular site, LastPass will log the
change. The next time you launch the Edit dialog box from your Online Vault, you will see a
�'History' icon�next to the password and/or username fields:
This allows you to easily track changes to your accounts, especially for those which you should
make an effort to change the password on a regular basis:
'56/224'
'LastPass Manual'
*Note:� If you edit an existing entry in your Local Vault, you will see an option to view
username and password histories.� Clicking these links will take you to your Online Vault and
History dialogs.
Tools Menu
Tools Menu via the LastPass Icon
After clicking on your LastPass Icon and selecting the 'Tools' menu you will have access to
the following features:
Tools submenu is shown here:
Security Check
Launch the LastPass Security Challenge to see how secure your login data is! The
Security Challenge analyzes the information stored in your LastPass Vault, ranks your
security on a scale of 0 to 100, and compares you to other LastPass users who have
taken the challenge. LastPass will also suggest ways you can improve your security.
Identities
You can toggle between Identities here, �or add a new one.
'57/224'
'LastPass Manual'
Open Favorites
This quick link option will open all 'Favorites' entries in separate tabs in your browser.
About
Gives you information about the plugin you are currently logged into, including the
version and build date.
Advanced Tools
A submenu of advanced tools, that includes:
Site Search
Looking for a specific site or Secure Note? 'Site Search' lets you search among
all of your saved entries.
Recheck Page
Some sites, such as www.hulu.com, use Javascript or Ajax to dynamically show
the login form, in which case you may need to click 'Recheck Page' for
LastPass to properly fill in the saved login fields.
Refresh Sites
If you have edited site information or otherwise notice that LastPass is
delaying in processing a change, click 'Refresh Sites' to force LastPass to
process any changes. If your favicons �have defaulted to a blank page image,
or if your Group names appear as random characters, the 'Refresh Sites'
function may resolve these issues.
Clear Local Cache
If you are using the plugin to access your LastPass account, encrypted data is
stored on that computer. Select 'Clear Local Cache' to remove any files that
have been stored during your session. We recommend this when you're using a
public or friend's computer.
Check for Updates
Select 'Check for Updates' to see if a new version is available for your LastPass
plugin.
My Account
Brings you to https://lastpass.com/my.php, gives details on your account
and support requests.
Other Sessions
'58/224'
'LastPass Manual'
Allows you to view all devices and IP addresses where you accessed your
LastPass account. If you happened to leave an account open on another device
or are unsure whether you did so, you can go to 'Other Sessions' and select 'Kill
Checked Sessions' or 'Kill All But Current Session' to log yourself out.
Export To
Export options vary between browsers, but we offer a variety of ways for you
to backup and store your LastPass account data. For example, on some
browsers you can export as a CSV File, as an encrypted file, or you can transfer
your data to the browser's password manager.
Import From
If you were using a password manager prior to using LastPass, you can use the 'Import'
function to transfer the data to LastPass.
Print
You can print either your stored Sites or your Secure Notes.
Add Site
Although we recommend that you add a site by logging in as usual and saving the
entry when prompted by LastPass, the 'Add Site' function in the Tools menu also allows
you to manually store login data for a site.
Save All Entered Data
For sites that LastPass is having difficulty saving, use this function to force-save the
data on the fields.
Add Secure Note
A Secure Note can be added from the Tools menu, in addition to adding a Secure Note by
clicking on the LastPass Icon, selecting 'Secure Notes', and clicking 'Add Secure Note'.
Account Settings
Your 'Account Settings', which are found only in your Online Vault, allow you to view and edit your
global LastPass Settings and Preferences.
Launching Account Settings
There are two ways to launch your Account Settings:
Select your LastPass Icon, click Preferences, then Account Settings, and click the link to
launch your Online Vault:
'59/224'
'LastPass Manual'
Log in to your Online Vault directly through the LastPass website, then click 'Settings' on
the left-hand menu:
Account Settings Tabs
Once you have launched your Account Settings, you will be presented with a dialog box where
you can view and edit your current settings in the following tabs:
General: Allows you to view your account login information as well as modify global settings
such as language, time zone, and autologoff features.
'60/224'
'LastPass Manual'
Security: Specify the security level you would like for your account and enable such features as
Grid and Master Password reprompt.
Equivalent Domains: Enter a list of domains that you want LastPass to consider as the same.
Never URLs: Add URLs for which you do not want LastPass to complete a certain action, such as
form fill, autologin, add site, and more.
Multifactor Options: Configure your multifactor authentication device.
Mobile Devices: Enable or disable access to your LastPass account on mobile devices.
Trusted Computers: Shows those computers that you have marked as trusted when using
multifactor authentication.
URL Rules: By default, LastPass fills in the closest URL match for those domains where you have
multiple logins. Creating a URL Rule for a specific domain ensures that you will only be prompted
for exact host or path matches.
General Settings Tab
Found in the 'Account Settings' dialog box, the 'General' settings tab allows you to view your
account login information as well as modify global settings such as language, time zone, and
auto-logoff features:
To save any changes before exiting the Settings dialog box, simply click 'Update'. You will need
to enter your Master Password to confirm changes. If you want to only view your Settings or do
not want to save any changes, click 'Cancel' or the 'x' in the top-right corner to close out of the
dialog window.
Email: View the email address used to access your LastPass account.
New Master Password: If you would like to change your Master Password, simply type a
new one into the field. The color gradient below the field shows the security level of your
new Master Password. Simply click 'Update' to save the changes.
Password Reminder: When you create your LastPass account you can choose to enter a
phrase that will remind you of your Master Password. For security purposes, we recommend
that you do not type your actual Master Password. If at any time you wish to modify your
password hint, or if you choose to change your Master Password and therefore need a new
reminder, simply type in the new phrase and select 'Update'.
Time Zone: Indicate your time zone from the dropdown menu relative to GMT.
Language: You can change the default language selection of English to any of our other
supported languages. Once you have saved the language change by clicking 'Update', you
will need to log off and log back in to update your settings. Editing your language selection
from your Online Vault will only apply to viewing and using the Online Vault - language
settings for your browser plugins need to be changed in the Advanced tab of the
Preferences control panel.
'61/224'
'LastPass Manual'
Website autologoff timeout: This controls how long your session exists on the server,
allowing you to automatically log in when using the plugin. This assumes that your session
does not get destroyed by methods such as explicitly logging out or closing the browser
when �Logoff when browser is closed� is enabled in your Extension Preferences.
Bookmarklet autologoff timeout: Similar to �Website auto-logoff timeout� in that it
controls how long your session exists on the server, except it applies to the�Bookmarklets
feature.
Only allow login from select countries: Allows you to restrict login to IP addresses
originating only from the country that you select
Disallow logins from Tor network:�Blocks any login that originate from Tor (virtual
tunnel network).
Kill other sessions on login: Automatically logs you out of any other sessions when
logging in to your account. You must have polling enabled to use this feature, which is
unchecked by default.
Send anonymous error reporting data to help improve LastPass: Helps us work out
any potential bugs or compatibility issues.
Remove duplicate entries from your account: You may find that you want to delete any
duplicate entries for one or more sites stored in your vaults. By clicking on this link, LastPass
will determine if a site is 'unique' or not by comparing domain, username, and password.
After launching the 'deduplicator', you will be able to view the duplicate(s) and have the
option of deleting the duplicate entries.
Changing Your Account Email & Master
Password
It's easy to switch the email address attached to your LastPass account; no need to delete your
account and start over.
Launch your Account Settings dialog from the Actions menu in your Vault:
You can change your email or Master Password (you'll be prompted for your current Master
Password to do so):
'62/224'
'LastPass Manual'
LastPass cannot change your email or Master Password for you.
Account Security Tab
The 'Security' tab in your Account Settings controls your global LastPass security settings:
You will need to enter your Master Password to confirm any updates made to your Security
preferences.
LastPass is set to 'Normal' security level by default, but you can click on the 'Medium High' or
"High' options to increase your security level, or 'Custom' select your security options.
Global Security Preferences
After launching your Account Settings dialog, click the second tab from the left to view the
following options:
Prompt for LastPass Master Password when: Master Password reprompt is a global
setting that controls if the Master Password must be entered when performing tasks such as
logging into a site, editing a site, viewing passwords, editing a form fill profile, etc. Once you
check an action for which you wish to be reprompted, the setting will apply to every site,
Secure Note, or Form Fill Profile stored in your Vault. If you only want to require a Master
Password reprompt for a specific site or set of sites, use the 'Require Password Reprompt'
option when editing a specific site in your Vault or via your icon's dropdown menu. LastPass
is set to the 'Normal' security level by default, which only checks 'Prompt for Master
Password' when switching or editing Identities. �Please note that it is recommended you
protect your accounts by logging out of LastPass, as that is stronger than this setting.
Security Email: As an additional layer of security, you may wish to have an email address
separate from the one you use on a regular basis to receive important LastPass security
emails that require actions. �This email address would be used to receive your:
LastPass multifactor authentication disable email.
Password hint email.
'63/224'
'LastPass Manual'
Account recovery email.
History removal verification email.
Reverting Master Password change verification email.
Abuse / Blacklisted IP notifications (these are also sent to your primary email).
This email should therefore be held to much higher security standards than your usual email
account. �By entering an email address in the Security Email field, your notifications for the
above list will only be sent to your security email address rather than the email address tied
to your LastPass account. Having a separate security email address is optional and may
provide an additional solution for those requiring a high level of security.
Email Subscription Preferences:�Click this button to access your email subscription
preferences.
Enable Weak Alerts:�Click here to enable in-browser weak and duplicate site alerts.
Equivalent Domains
To access the Equivalent Domains tab, launch your Account Settings and click the third tab over
from the left:
At times, you might find adding a domain equivalency to be helpful, such as when a site's login
box is in an IFRAME on another domain. If you access multiple websites of a single provider,
adding these sites as equivalent domains allows you to use just one username and password set.
To add domains as equivalent, input domains separated by commas. Note that only top level
domains should be submitted. For example, lets say you have two sites you would like to make
equivalent: http://lastpass.example.com/path and http://sample.com. Your input should look like:
http://example.com,http://sample.com
You can delete an equivalent domain at any time by clicking 'Delete' next to the entry.
The equivalent domains shown in the above image are those stored by default by LastPass.
Never URLs
The 'Never URLs' tab allows you to view all those sites for which you have indicated a 'Never'
action. To view your 'Never URLs', launch your Account Settings and choose the fourth tab over
from the left:
'64/224'
'LastPass Manual'
You may encounter a site that you do not want LastPass to offer to save, generate a
password for, fill forms, autologin, or autofill.
You can either manually add the domain or site in your account settings menu, or you can
disable the site from the LastPass Field Icons.
If you want to manually save a 'Never' action for a page or domain, simply enter the URL in
the field, select the type of 'Never' action from the dropdown menu, then click 'Add'.
You can also delete a 'Never' action by clicking on the grey 'x' next to the site entry in your
Account Settings 'Never URLs' tab.
LastPass does not store any default Never URLs.
Disable Using Field Icons
Disable Field Icons for a page by clicking on the Field Icon:
'65/224'
'LastPass Manual'
Click on the more option:
Click on the disable option:
And confirm if you want to disable the site (domain) or that specific page:
'66/224'
'LastPass Manual'
Account Mobile Devices
To view your settings for mobile access, launch your Account Settings and select the sixth tab
over from the left, 'Mobile Devices':
Each time you successfully login via a mobile device, the mobile device's unique identifier
(UUID) will be added to a list on the Mobile Devices tab. �All devices listed here can be
renamed, enabled, disabled, or deleted.
From within the Mobile Devices tab, you can check the 'Restrict mobile devices to the specific
UUIDs listed as enabled below' checkbox to enforce the restriction on your account.
LastPass does not restrict mobile login by default.
Account Trusted Computers
The 'Trusted Computers' tab shows those computers which you have marked as trusted and
therefore do not require multifactor authentication. To view your Trusted Computer settings,
'67/224'
'LastPass Manual'
launch your Account Settings and click 'Trusted Computers':
When logging onto a computer for the first time using multifactor authentication, such as Grid or
Yubikey, LastPass will give you the option of marking the computer as 'trusted':
Doing so adds the computer to the 'Trusted Computers' list and ensures that you will not be
prompted to enter multifactor authentication the next time you log in. These steps must be
completed on every device that you want to mark as trusted.
You can disable a trusted computer at any time by clicking 'Toggle' next to the entry or delete the
entry entirely by selecting 'Delete'.
URL Rules
If you have multiple logins for a particular domain, LastPass fills in the closest URL match by
default but will show all sites from that domain in its matching list:
'68/224'
'LastPass Manual'
This behavior can be changed to only show sites that match particular hosts/paths by managing
your URL Rules. To manage your URL Rules, launch your Account Settings. In the menu that
opens, select the last 'URL Rules' tab:
If a URL Rule is created with exact host matching, then you will only be presented with logins that
match the exact host for that domain. For example, if you create a rule with
domain=facebook.com and specify exact host matching=yes, then when visiting
www.facebook.com, you will only see sites saved from www.facebook.com, but will not see sites
saved from login.facebook.com.
If you specify a URL Rule with a path, then only sites that match this path will be shown. For
example, LastPass created a default URL Rule for google apps with path=/a/. This causes you to
only see the appropriate logins when you visit google.com/a/aaa versus google.com/a/bbb.
You can delete a URL Rule at any time by clicking the grey 'x' next to the domain entry in the URL
Rules tab.
By default, LastPass stores a URL Rule for some sites for your convenience. Sites are added and
updated as we discover them.
Local Extension Preferences
LastPass is both an online service and an extension that runs locally in your browser to provide
service, even if online access to LastPass is unavailable. You'll want to set up your local
preferences in each browser you use with LastPass according to the level of security you feel is
necessary for that location (e.g. you may want to have a longer idle timeout at home than work).
You are strongly encouraged to review your LastPass settings after creating your account. We
recognize that different users have different requirements, so although the�default values are
chosen as a compromise between ease of use and security, we have made it as easy as possible
for users to change their security options and other settings.
LastPass does not synchronize these settings because you may want to have different
security profiles or notification preferences at different places (e.g. home versus work), so be
sure to specify your settings for every browser you use with the LastPass plugin. You will also
need to make these changes for every user who will be using LastPass (log in as each individual
user to adjust the settings).
Preference options within the Control Panel tabs will vary from browser to browser; not all of the
'69/224'
'LastPass Manual'
below-listed settings may be offered as options in your current browser(s).
Launching Preferences
To specify your local browser settings, log in to LastPass, click the LastPass Icon in your
browser, then go to Preferences:
A dialog box will open, displaying your current General settings:
The most crucial General settings control the way you handle going idle and being
automatically logged off when you close your browser. Your selection should be an
appropriate balance between security and convenience.
Other General preference options allow you to specify how LastPass will open new pages,
whether it will automatically fill login information, and how your data will be displayed.
Other Preference Options
Notifications tab allows you to specify when you will be prompted by the LastPass
dropdown toolbar:
HotKeys tab allow you to view or edit the default hotkey settings:
Account Settings tab provides you with a link to launch your Online Vault, where you can
view and edit your global LastPass settings:
Advanced tab provides even more options for customizing your security and prompt
'70/224'
'LastPass Manual'
settings:
Icons tab allows you to choose a customized pair of On/Off icons for your LastPass
plugin.� This preference section is currently only available in LastPass for Firefox:
General Settings Tab
To access the General settings tab, go to your LastPass Icon and launch Preferences:
The Control Panel dialog will open to automatically show your General settings (options will
vary based on browser):
General preference options will vary from browser to browser; not all of the below-listed
preferences may be offered as options in your current browser(s).
Security
'71/224'
'LastPass Manual'
Automatically Logoff when all browsers are closed: Specify when LastPass should log
out of your session upon closing the browser. This setting is disabled by default. If you would
like LastPass to log off immediately after each session, check the box and put the value '0'
for minutes; when you relaunch the browser, you will be asked to enter your Master
Password. If you would like to extend the time between ending your browser session and
logging out of LastPass, enter another value in the minutes field. If the specific amount of
time passes before you re-open the browser, you will be prompted for your Master Password.
If you wish for LastPass to stay logged in upon browser close, leave the box unchecked.
Automatically Logoff after idle: If you frequently minimize your browser or walk away
from your computer, you may want LastPass to log off after being idle for a specific amount
of time. For example, if more than one person shares a home computer, you may want
LastPass to timeout after 10 minutes of inactivity (no keyboard or mouse movements) so
that someone else sitting down to the computer will not have access to your Vault and
account information. After the specified amount of time, the icon will turn gray, indicated
that you are logged off. Click the icon to log in again. Leave this setting unchecked if you
wish for LastPass to stay logged in between browser sessions. This setting is unchecked by
default.
General
Open New Pages in: This dropdown menu allows you to choose whether you want LastPass
to open pages in new tabs, new windows, or within the tab you are using. For example, if you
click on your LastPass Icon, click on Sites, and select a site, LastPass will launch the URL
according to your specifications and proceed to autolog you in to the site. By default,
LastPass will open new pages in tabs.
Highlight Input boxes: Enable field highlighting, so that when you navigate to a site that
is stored in LastPass, the fields become outlined in red and populated with the LastPass logo
when your credentials are autofilled.� LastPass enables this setting by default.
Automatically Fill Login Information: This default setting instructs LastPass to
autopopulate any stored login fields (such as username and password) when you navigate to
a stored URL.
Appearance
Use Compact Toolbar: Compresses the LastPass toolbar into the small Icon on your
browser menu. In Internet Explorer, you can switch between toolbar modes: Compact
Toolbar, Command Bar, Full Toolbar.
Show Sites in Folders: Turn the Folder feature on or off with this setting. If you organize
your stored sites into Folders, we recommend leaving this default setting enabled.
Show Sites in Sidebar: This setting is unchecked by default and is only available in Firefox.
Rather than view your sites in the 'Sites' submenu after clicking on your Icon, enabling 'Show
Sites in Sidebar' allows you to click on 'Sites' from your Icon menu and launch a sidebar
listing out your LastPass sites:
'72/224'
'LastPass Manual'
Hide Context Menu Options: Disables the right-click LastPass menu options. This setting
is disabled by default.
Form Fill
Default Form Fill Profile: To specify your default form fill profile, select a saved profile
from the dropdown menu. No profile is selected by default, and is meant to be used in
conjunction with the form fill hotkey.
Do not overwrite fields that are already filled: If you wish to manually enter data in a
particular web form field, and do not want LastPass to overwrite the field with stored
information, enable this setting (disabled by default).
Notifications
Your Notifications settings can be found by clicking on the LastPass Icon, selecting Preferences,
and clicking the 'Notifications' tab on the left-hand menu:
The Notifications options control when LastPass prompts you to take action as you browse to a
stored URL, log in to a new site, or fill a web form. By selecting or unselecting certain notification
options, you can change how often you are prompted with the dropdown toolbar. By default, all
notification settings are checked to allow you maximum access to all LastPass features.
Notifications options will vary from browser to browser; not all of the below-listed notifications
may be offered as options in your current browser(s).
Show Notifications: Globally enables the notification bar. We do not recommend shutting off
the notification bar unless you want to manually complete all actions via your LastPass Icon.
LastPass enables this option by default.
Offer to Generate Secure Passwords: When LastPass recognizes that you are registering for
a new account that requires a password, this notification prompts you to use the Generate a
Secure Password feature. LastPass enables this option by default.
Show Form Fill Notifications: LastPass automatically detects web forms, such as billing
information, when checking out at an online shopping site. Enabling this notification ensures that
LastPass will prompt you to fill the detected web form with one of your saved Form Fill profiles.
If you have enabled the "Show certain notifications only after click" setting, you may need to
click within one of the web form fields to be prompted with the form fill notification. LastPass
enables this option by default.
Show Save Site Notifications: When enabled, LastPass will prompt you to save the login data
for an unsaved site after you have logged in the first time. LastPass enables this option by
default.
'73/224'
'LastPass Manual'
Show certain notifications only after click:�When enabled, this setting restricts how often
LastPass will prompt you for form fill and LastPass logins. For example, if you enable this setting,
LastPass will not prompt to fill a web form until you have clicked within one of the web form
fields. We have enabled this default setting to reduce the frequency with which LastPass prompts
you with the notification bar. LastPass enables this option by default.
Show Fill Notification Bar:� Enables the 2.0 style notification bar that offers to AutoLogin or
AutoFill your website credentials for you.
Show Save Site Notification Bar:�Enables the notification toolbar that offers to save a �new
site entry when LastPass detects that a new password has been entered for a site.
Show Change Password Notification Bar: Enables the dropdown toolbar when LastPass
detects a password that is different from the password stored for that site entry in your Vault.
LastPass enables this option by default.
Click Icons in Fields:�Enables the 3.0 style field icons that allow you to seamlessly AutoFill
your website credentials.
Show Matching Sites Count In Toolbar [Currently Chrome only]:� Shows the number of
matching site entries stored in your Vault for the current page your browser is on in the bottom of
the LastPass icon located in your browser toolbar.
HotKeys
HotKeys allow you to create keyboard shortcuts for a number of LastPass features.
To edit your hotkeys, go to your LastPass Icon, select Preferences, and click on HotKeys on the
left-hand menu:
Because hotkeys vary among operating systems and browsers, LastPass will select the default
hotkeys for the particular plugin you are using. It is important to verify that a change in one of
your LastPass hotkeys will not interfere with other default hotkeys for your computer.
You can currently customize the following hotkeys:
Generate Secure Password: If you are creating a new account, this hotkey allows you to bring
up the Generate a Password dialog box and copy the autogenerated password. The Generate
Secure Password hotkey is Alt+G by default.
Recheck Page: If the page has changed since it was loaded and LastPass hasn't filled in the
action, this hotkey allows you to quickly force LastPass to check the page again. Recheck Page
can also be accessed from the Tools menu in your LastPass icon. The Recheck Page hotkey is
Alt+I by default.
Site Search: Brings up the dialog box showing all of your stored sites with a search bar that
allows you to easily sort through your sites. You do not need to be in your LastPass Vault to open
the Site Search dialog using the hotkey. The Site Search hotkey is Alt+W by default.
Fill In Next Login (When Multiple): If you have multiple logins stored for the same domain or
URL, LastPass will autofill with one of your entries but will prompt for you to fill with one of your
other saved sets of login data. You can easily move to the next autofill options by using this
hotkey (Alt+Page Up by default).
Fill In Previous Login (When Multiple): If you have multiple logins stored for the same domain
or URL, LastPass will autofill with one of your entries but will prompt for you to fill with one of
your other saved sets of login data. You can easily move to the next autofill options by using this
hotkey (Alt+Page Down by default).
Submit Form: Automatically submits a login form or web form. The Submit Form hotkey is Alt+J
by default.
Open My LastPass Vault: Need quick access to your local Vault? This hotkey opens your local
Vault in a new tab or window, according to your General settings. The Open Vault hotkey is
'74/224'
'LastPass Manual'
Ctrl+Alt+H by default.
Save All Entered Data: The 'Save All Entered Data' method allows you to automatically
capture all login data for the page. LastPass shows you the captured data in a dialog box, where
you can edit the settings for the site before clicking save. There is no default Save All Entered
Data hotkey.
Logoff: Allows you to immediately end your LastPass session, and will autolog you out of any
open Vault pages as well as plugins that are sharing browser states. There is no default logoff
hotkey.
Fill In Default Form Fill Profile: Once you have set your default form fill profile, this hotkey
allows you to autofill a web form with a few keystrokes. There is no default Form Fill Profile
hotkey.
Advanced Settings
We select the default settings for your Advanced options that we feel will optimize your browsing
experience with LastPass. However, you may wish to change these settings according to your
security needs or personal preferences.
Advanced preference options will vary from browser to browser; not all of the below-listed
preferences may be offered as options in your current browser(s).
To access your Advanced preferences, go to your LastPass Icon, select Preferences, and click on
the Advanced tab in the left-hand menu:
Automatically login to sites if time since last login > (seconds): LastPass is set to
automatically log you back in to a site after 25 seconds if you have been logged off.
Warn before filling insecure forms: If you are concerned about security when filling out a
web form, you can enable LastPass to notify you of a possibly insecure form; this setting is
disabled by default. �This setting determines what an insecure form is by distinguishing
between GET and POST submission forms.
Respect AutoComplete=off: Allow websites to disable the Autofill feature. This option is
disabled by default.
Poll Server for account changes: By default, LastPass will poll the server every 15
minutes to check for changes to your LastPass account.
Clear Clipboard after use: LastPass is set to clear your clipboard after a default amount of
time. If you've been copy/pasting� your secure data into login fields or web forms, this
ensures that your data cannot be compromised by being left on the clipboard. You must have
the binary component installed for this option.
Recently Used Site List: LastPass automatically shows ten of your most recently visited
LastPass-stored sites under the 'Recently Used' submenu. However, this preference option
allows you to customize the number of recently used sites that appear in your 'Recently
Used' submenu. If you set the value to zero, the 'Recently Used' submenu will disappear
from your Icon menu.
Search within secure notes: By default, LastPass gives you the ability to search within
your Secure Notes.
Open Login dialog when start browser: LastPass does not enable this feature by default.
By enabling this option, you will be automatically prompted to log in to LastPass upon
opening your browser. We recommend this setting if you use LastPass every time you open
your browser and prefer not to have to click the icon to log in.
'75/224'
'LastPass Manual'
Save a disabled One Time Password locally for Account Recovery: By default,
LastPass stores a One Time Password to aid you in the Account Recovery process,
should you forget your Master Password.
It is important to note that if an attacker is able to obtain your locally stored OTP (and
decrypt it while on your pc) and gain access to your email account, they can compromise
your data if this option is turned on. We feel this threat is low enough that we recommend
the average user not to disable this setting.
Share login state between other browsers: If you frequently use more than one
browser, you can set LastPass to share login states between all browsers with the plugin
installed on your operating system. For example, if you use both Firefox and Chrome with the
shared login state enabled, you can log in to one browser and automatically be logged in to
the other. When you are done with your browsing session, logging out of one will also log you
out of the other. The shared login state is enabled by default to make your browsing
experience faster and easier. The binary component must be installed to make this option
available.
Enable New Login Screen: �Enables the new login screen in Chrome that pops out
directly from the LastPass icon in the browser toolbar. �De-selecting this option reverts to
the previous login process, where selecting Login from the icon launched a full tab in Chrome
and allows you to login there.
Clear Filled Fields on Logoff: �Enabling this preference will automatically clear any
fields that have been filled by LastPass on the current page your browser is on when you log
off LastPass.
Show Matching Sites in top Level Menu: �Selecting this option will show matching sites
for the current page your browser is on in the top level of the dropdown menu from the
LastPass browser toolbar icon. �This is where matching sites previously used to appear in
2.0 versions of LastPass. �In LastPass 3.0 versions, matching sites show under the "Show
Matching Sites" option on the top level of the dropdown menu, and are only one click away.
Language: Allows you to change the Default language setting for the browser plugin. This
change will only apply to the plugin whose settings you are editing, so you will need to
modify the selection on all LastPass browser extensions that you use in addition to the
Online Vault language setting.
Local & Global Security Options
LastPass provides a safer online experience that helps protect your identity by allowing you to
create unique, complex passwords for all of your sites, in addition to securely storing this
information using local encryption. You then only have to remember a single strong password,
your LastPass Master Password.
However, LastPass knows that one size does not fit all when balancing security and ease of use,
so we allow you to decide by providing a full range of security options. The default values chosen
will certainly not satisfy everyone and we strongly encourage you to review the settings in both
your Extension Preferences and your Account Settings shortly after creating your account.
Localized Security Options
Logoff when browser is closed: This option controls if LastPass will automatically logoff
when you close your browser. If selected, you will have to explicitly log in and provide your
LastPass Master Password after a browser restart. It is currently defaulted to unselected, but
can be managed via your Extension Preferences.
Logoff after idle: If you want LastPass to logoff after the computer has been idle (no
mouse or keyboard activity) after a predefined amount of time, select this option in your
Extension Preferences. This setting is unchecked by default.
Require Password Reprompt: If you want to protect a particular site, Secure Note, or Form
Fill Profile so that any access using the information stored in LastPass requires your Master
Password, you can click this checkbox after launching the Edit window for the entry. This
provides very specified control of individual sites, such as a bank login, where you may want
additional security. Please note reprompt is not as strong as logging off, we'd
recommend utilizing the above logoff options to fully protect your data
Clear Clipboard after use: When using LastPass's menu items to copy a username or
password, this option controls how long they will stay on the clipboard before being
'76/224'
'LastPass Manual'
automatically cleared. This option is defaulted to on in Firefox and IE only, in the Advanced
tab of your Extension Preferences.
Global Security Options
Website auto-logoff timeout: This option, which can be managed from your Account
Settings on the General tab, controls how long your session exists on the server, allowing
you to automatically log in when using the plugin. This assumes that your session does not
get destroyed by methods such as explicitly logging out or closing the browser when 'Logoff
when browser is closed' is set.
Bookmarklet auto-logoff timeout: Similar to 'Website auto-logoff timeout' except applies
to LastPass bookmarklets. This preference can also be managed from your�Account
Settings on the�General tab.
Prompt for Master Password when: Global setting that controls if Master Password must
be entered when performing tasks such as logging into a site, editing a site, viewing
passwords, editing a Form Fill Profile, etc. You can manage these preferences in the Security
tab of your Account Settings. Checking one of these boxes will apply the action to every
site, secure note, or form fill profile that you have. If you want more granular control, use the
Require Password Reprompt method described above.
Kill other sessions on login: If you leave your browser session open and polling is
enabled, you'll be logged out of the other session. If your browser session is closed, but you
leave yourself logged into LastPass, this can also be helpful (e.g., your browser is closed at
work, and you login from home with this setting enabled, you will be required to login the
next time you open up your browser at work). You can enable this setting in the General tab
of your Account Settings; the setting is disabled by default. You must have 'polling'
enabled in the plugins to be effective; you can verify that it is by going to the Advanced tab
of your�Extension Preferences.
Send password change emails: Alerts you via email if your LastPass account email
address or Master Password has been changed, or if any of your sites' usernames or
passwords have been changed in LastPass. You can manage these settings in the�Security
tab of your�Account Settings.
Additional Security Options
LastPass also provides additional features for further layers of authentication to protect
against keyloggers and other security threats, including:
Account History
One Time Passwords
Virtual Keyboard
Multifactor Authentication Options
Multifactor authentication refers to a device that can be enabled for use with your LastPass
account, and requires a second step before you can gain access to your account. Multifactor
authentication devices help protect your account from keyloggers and other threats - even if
your master password were captured, someone would be unable to gain access to your
account without this second form of authentication. LastPass offers several multifactor
options, including:
Google Authenticator�(Free)
Grid Multifactor Authentication�(Free)
Sesame Multifactor Authentication�(Premium)
'77/224'
'LastPass Manual'
Yubikey Multifactor Authentication�(Premium)
Fingerprint Authentication�(Premium)
Smart Card Authentication�(Premium)
RSA SecurID (Enterprise)
Duo Security
LastPass supports multifactor authentication with Duo Security. It is a secure, two-factor
authentication application offered for all leading smartphone platforms, including Android,
iPhone, Blackberry, and Windows Phone.
Get Duo Security
You can get Duo Security and register your account
here:�https://www.duosecurity.com/lastpass
New Integration
Once you have authenticated your Duo account, make sure to select 'LastPass' �from the
'Integration type' dropdown at the �'New Integration' login page:
�Once you have finished setting up your new integration, then you will need to log in to your
LastPass Vault and click Settings > Multifactor Options > Duo Security. Make sure that you have
your�integration key, security secret key,�and API hostname filled in the appropriate fields and
that the 'Duo Security Authentication' dropdown is set to 'Enabled':
'78/224'
'LastPass Manual'
After selecting 'Enabled' from the Duo Security dropdown, you will then want to select the 'Click
here to enroll your device with Duo Security' link. Then, click 'Start Setup':
You will then see another screen which will prompt you to choose which type of device you would
like to enroll to use for two-factor authentication. Please note that LastPass currently only
supports the enrolling of a single device:
Select the type of device that you would like to enroll and then click the "Continue" button. You
will then be given on-screen instructions on how to enroll each specific device.
Once you have enrolled the device(s) that you would like to use for Duo authentication, you can
then use it to authenticate you in the login process.
Using SMS Passcodes�to Authenticate
'79/224'
'LastPass Manual'
When being prompted from LastPass to authenticate your account, you can elect to send an SMS
Passcode to your registered mobile device. �By clicking the "Send SMS passcodes" link in the
Multifactor Authentication window.
Account History
The 'History' feature allows you to view all logins and events for your LastPass account, and the
IP addresses associated with them. History is particularly useful if you're concerned about
unauthorized access to your LastPass account.
To access History, you can go to your LastPass Icon > My LastPass Vault > in the left menu, click
Tools > View History:
After selecting History, a dialog box opens, displaying your account's login history:
'80/224'
'LastPass Manual'
You can then select a date range to filter your results - by default the current day's logins are
displayed. The records show the date the login was used, the name of the domain, an associated
Group name, the IP address from which the LastPass login was used, and the DNS. Selecting
'Events' for the view option allows you to view records of Form Fills, disabling and enabling of
multifactor authentication, changes to usernames or passwords in stored entries, and other
actions.
Note that LastPass only records logins and events completed from within your account. If a site
stored in LastPass is accessed without using LastPass to autofill or autologin, LastPass will not
record the event in History.
To remove the records in History, select 'Clear History'.
To disable the History feature, go to your Account Settings dialog (accessed via the LastPass
Icon > Preferences > Account Settings or by clicking on 'Settings' in the left-hand actions menu in
the Online Vault) and uncheck �the default option 'Keep track of login and form fill history'.
Fingerprint Authentication
LastPass has support for various fingerprint readers, including Windows Biometric Framework, as
a Premium feature. �Please note that you have to have Windows 7 or above for LastPass
fingerprint reader support to work on Windows.� You have to have Windows Biometric
Framework drivers installed, and WBF is only available in Windows 7+.
Windows fingerprint readers on computers running Windows 7+
and Internet Explorer, Firefox, or Chrome.� Safari and Opera can be
supported by installing an additional binary component.� For
UPEK fingerprint readers, make sure you have the latest drivers
and and support for Windows Biometric Framework.For PC based
UPEK readers: Please ensure you have Windows Biometric
Framework for UPEK installed.**PLEASE NOTE**: UPEK merged with
Authentec, Inc., which was acquired by Apple in 2012. There
currently is no direct download site for drivers and software for
these readers, please look to your computer manufacturer's
website for driver downloads.
For Mac based UPEK readers: You will need the latest version of
TrueSuite for MAC, and for Safari, Firefox, or Chrome. Please ensure
VtApi.framework is present on your system (typically in
/Library/Frameworks).�For Validity Fingerprint readers, download
WBF support at this page**.
NOTE: Windows 8 may require an additional component to be installed.� This
component is installed by the LastPass Universal Installer.� If you are having
problems swiping your finger in Windows 8, please try running the LastPass Universal
Installer from:
https://lastpass.com/installer/
To enable fingerprint authentication:
1. Open a supported browser with the latest LastPass extension installed
2. Login to LastPass as a premium user
3. Go to LastPass button -> My LastPass Vault
4. Click Account Settings
'81/224'
'LastPass Manual'
5. Click Security
6. Check the Fingerprint Reader Authentication checkbox (if this checkbox is disabled, please
ensure all applicable drivers and software are installed, and at least one finger is enrolled)
7. Enter your LastPass master password, then follow the rest of the prompts on the screen
8. Click Update
If we don't detect your reader in Account Settings, you should go to your computer's Control Panel
> Hardware and Sound > Biometric Devices.� If it doesn't list your fingerprint reader, you should
contact your laptop manufacturer or look on their support website for Windows Biometric
Framework compatible drivers.
**Important Note for Validity's WBF Drivers
Unfortunately, the driver used for HP ProtectTools can not be combined with this WBF driver for
LastPass integration. This is by design as the native drivers are secure drivers and �take
ownership� of the sensor, meaning no other application can use it. �To keep HP ProtectTools
and use the�fingerprint�features for Preboot Authentication, Full Volume Encryption, Windows
logins and website logins, then they must use the native Validity drivers ONLY. If you install the
WBF drivers it will interfere with the operation of the�fingerprint�feature in HP ProtectTools.
If that happens, you will need to uninstall the WBF package, and then Repair or uninstall and reinstall the Validity native drivers, called �Validity�Fingerprint�Sensor Drivers� in Programs
and Features.�Validity suggests that if a customer wants both HP ProtectTools and LastPass, is
by installing the WBF drivers and FMA from above and then installing �Lastpass in a Virtual
Machine.
It can be done the other way around, however, some of the high-security features HP ProtectTools
has will not work 100% from a Virtual Machine, such as Device Access Manager, Full Volume
Encryption, and Preboot Authentication. Validity hasn�t verified operation of HP ProtectTools and
the native Validity drivers in a Virtual Machine.
Account Recovery
Using Account Recovery
If you have forgotten your Master Password, we recommend following the below steps to attempt
to regain access to your account. Recovery for LastPass is not the same as other services you
may have previously used - due to our encryption technology, LastPass does not know your
Master Password, so we cannot look it up, send it to you, or reset it for you. This means your data
remains secure from threats, but also means that there are limited options when you forget your
'82/224'
'LastPass
Manual'
remains secure
from threats, but also means that there are limited options when you forget your
Master Password.
LastPass has added support for an optional way to store a disabled One Time Password (OTP)
locally on your computer in case you forget your Master Password. This feature makes account
recovery possible without revealing your password to LastPass.
If you are having difficulty logging into LastPass, please attempt the following steps:
1. Attempt to login through the LastPass website at www.lastpass.com�and through the
browser add-on in�any�browser on�any�computer available.�If you are able to login via the
website but not via the plugin, or are able to login on one computer but not another, this is likely
a problem with the LastPass browser add-on, in which case you should try clearing your browser
cache, and then�report the problem to us directly.
2. If you cannot login through the website, check your�password
hint�(https://lastpass.com/forgot.php) that you setup for yourself when you created your
LastPass account. The password hint is not your Master Password.
3. If the password hint doesn't help you, go to the Account Recovery
page�(https://lastpass.com/recover.php) to follow the steps to activate your local One Time
Password and recover your account. LastPass will send you an email with a link to launch in your
browser. If the first browser on which you attempt to use the link doesn't work, try the same
process on any other browser on any computer on which you have previously accessed your
LastPass account.
4. If all of these steps are unsuccessful and you've recently changed your Master
Password, you can try�reverting back to a previous version of your
Vault�(https://lastpass.com/revert.php).�This should be a last resort, as you will lose
whatever data you've changed or added�since the date of the backup.
5. If at this point you have failed to remember your password, your �hint didn't jog your memory,
and you've tried the password recovery on every machine you've logged into, your only
recourse is to�Delete Your Account�(https://lastpass.com/delete_account.php?np=1)
and start over.
You can choose not to save this disabled One Time Password by launching Preferences from the
LastPass Icon menu, and selecting the Advanced tab (LastPass Icon > Preferences > Advanced
tab). If you decide to disable the local OTP, your only recourse if your password hint doesn't help
is to delete your account and start over. If you disable the preference after creating one, it causes
the One Time Password to be deleted off LastPass' servers.
As with all One Time Passwords, LastPass cannot gain access to your account; you must be on a
PC where you've enabled the feature to recover your account, since the random number of a One
Time Password is stored on your computer and is unique to that computer.
Login OTPs vs Recovery OTPs
Login OTPs: Login OTPs can be generated on this page:�https://lastpass.com/otp.php�and
they are "one time passwords" that you can print off and carry with you. Each one time password
in that list can then be used to login to LastPass via�https://lastpass.com/otp.php�- the idea
is that if you are on an untrusted computer, and do not want to enter your Master Password
because of a threat of keyloggers, you can use the OTP. It expires after you use it, but allows you
to login without entering your Master Password. These are portable, and are not local to the
device where they are generated. The list can be accessed anywhere when you login
at�https://lastpass.com/otp.php�where you can generated and print more. They are not to
be used for Account Recovery.
Recovery OTPs: Users do not have direct access to OTPs. These are bits of data that are stored
automatically by the browser add-on. When you use the LastPass browser add-on, it generates
this OTP and stores it in the browser. It will stay there until you go through Account Recovery in
that specific browser where the OTP was generated and stored. If you do the recovery process
(https://lastpass.com/recover.php), it will try to "call up" that OTP, and allow you to
immediately reset your password if it detects that the OTP was stored in the browser. OTPs are
local to specific browsers, and one OTP should be generated for each browser, on each computer,
where you use LastPass. The Recovery OTPs are not portable, they are stored in the specific
browser's file, so recovery can only be done on a browser where you have used your LastPass
account before. Like Login OTPs, though, Recovery OTPs will expire after they have been used
once. When you next login to your account after you've reset your Master Password, new OTPs
are generated for the browser.
Watch the Tutorial for Account Recovery
'83/224'
'LastPass Manual'
'84/224'
Reverting Your Master Password
On occasion, you may encounter an error while changing your Master Password during the
reencryption process. There also may be times when you forget your new Master Password
immediately after changing it. LastPass creates an encrypted backup every time you change your
Master Password. If it's been some time since you've changed your Master Password
and you cannot access your account, you should try all the Account Recovery steps
first to mitigate the chance of data loss. To access the Revert feature, you must have
access to the email registered to your LastPass account or to a separate security email address. If
you're concerned about the security ramifications of being able to revert a password change, you
can disable the revert feature in your Account Settings.
The Revert Password Change Form
Navigate to the Revert Password Change page at�https://lastpass.com/revert.php , and follow
the instructions. Enter your LastPass email and submit the form. LastPass will email you within 15
minutes - inside the body of this email there is a time-sensitive link that must be accessed within
two hours to work -- otherwise you'll have to restart the entire process. Once you've received the
email, click the unique link inside, which will bring you to a page that allows you to choose the
date to revert to:
'LastPass Manual'
'85/224'
Choosing the Date to Revert
Important Notes:
Make sure to carefully choose the date to revert to, as any changes made since
then will be lost - your entire Vault will be overwritten with the backup data and
your Master Password will change back.
Also, please note that you can only revert to a date within 90 days of your last
Master Password change. If that 90 day period has passed, you will no longer be
able to use the Revert feature.�
Once you've reverted your account, try logging in again, with your previous
Master Password.
LastPass Sentry
In response to a number of high-profile breaches (including�LinkedIn,�Last.fm, and
the�Apple UDIDs), we've provided LastPass users with tools to check if their data is on the
leaked lists, and have notified users directly as we've discovered their compromised data. We
wanted to take this a step further, and partnered with a company dedicated to finding and
aggregating all leaks as they're occurring, to provide a much more comprehensive service.
We have partnered with�PwnedList�to offer LastPass Sentry, a new feature that will help
LastPass users be more proactive about their online security.
With LastPass Sentry, we use PwnedLists's comprehensive (and growing) database of 24 million
publicly leaked usernames and passwords to perform daily "checks" against LastPass account
email addresses to look for positive matches:
How It Works
1. Sentry performs daily checks, with the latest updates to the PwnedList database, to see if
LastPass account email addresses are on the list.
2. If a match is found, an email notification is sent to the LastPass user, notifying them of the
domain that was breached and the potential risk.
3. Users can then run the�LastPass Security Challenge�to verify if the password for the
breached site is used elsewhere.
4. We then recommend updating the password for the affected account, and any other
accounts using that password, using LastPass to generate a new, strong password.
'LastPass Manual'
This feature is available for all free and�Premium�users, as well as
corporate�Enterprise�users, and is currently opt-out via the email notifications. In the
case of Enterprise users, both the Enterprise administrator and the affected employee will
receive notifications that a match has been found.
We have plans to further integrate the service into the LastPass security challenge, so we
can check not only the email address that you use for your LastPass account itself, but
perform a local check of the entirety of your stored data. We also plan to increase the
frequency of our database checks to work towards real-time notifications.
FAQs
1. What data is sent to PwnedList.com? None, we pull the latest updates to the
PwnedList database and run a check against LastPass email addresses on our end. No data
is shared with PwnedList.
2. What information is LastPass checking for breaches? We currently check against all
emails saved within your LastPass Vault.
3. Does this mean my LastPass account has been hacked?�No, but if you used the
same email address and password combination for your LastPass account as you did for the
site that was breached, we strongly recommend you update your Master Password as soon
as possible. Otherwise, follow our instructions to update the password for the affected site,
and run the LastPass Security Challenge (in the LastPass add-on under the Tools menu) to
search for any other accounts using the same password.
Multifactor Authentication
Multifactor authentication refers to a device that can be enabled for use with your LastPass
account, and requires a second step before you can gain access to your account. Multifactor
authentication devices help protect your account from keyloggers and other threats - even if your
Master Password were captured, someone would be unable to gain access to your account
without this second form of authentication.
LastPass offers many�multifactor options, including:
Duo Security Authentication (Free)
Google Authenticator�(Free)
Grid Multifactor Authentication�(Free)
Microsoft Authenticator App�(Free)
Toopher Authentication�(Free)
Transakt Authentication�(Free)
Fingerprint Authentication�(Premium)
'86/224'
'LastPass Manual'
Sesame Multifactor Authentication (Premium)
Smart Card Authentication (Premium)
Yubikey Multifactor Authentication (Premium)
RSA SecurID (Enterprise)
Google Authenticator
LastPass now supports Google Authenticator as a multi-factor authentication option.
Setting Up LastPass with Google Authenticator
If you would like to use Google Authenticator, please first ensure you're using the latest LastPass
browser extensions and mobile clients everywhere.� You will also need a supported mobile
device, to run the Google Authenticator application.
Next, install the Google Authenticator application on your mobile device.� Google officially
supports Android, iOS (iPhone, iPod Touch, or iPad), and BlackBerry devices.� You can follow the
instructions here to install Google Authenticator onto these devices.
For other devices:
If you would like to run Google Authenticator on an Android device that doesn't have access to
Google Play Store, you can install from here.
If you would like to run Google Authenticator on your Windows Phone, Jamie Garside has
developed Authenticator.
If you would like to run Google Authenticator on your webOS device, Greg Stoll has developed
GAuth.
If you would like to run Google Authenticator on your Symbian device, or any device that supports
Java ME, Rafael Beck has developed lwuitgauthj2me.� Alternatively, Rodrigo A. Diaz Leven has
developed gauthj2me.
Once you have the Google Authenticator application running on your mobile device, go to
https://lastpass.com/?ac=1&opengoogleauth=1.� Follow the instructions there to finish
setting up Google Authenticator.
You will be prompted to use a Bar Code scanning app (Androids,� iPhones and supported devices
with cameras) to scan your unique bar code or you can manually enter the Google Authentication
Key found on that setup page.
'87/224'
'LastPass Manual'
After your LastPass account is registered within the Google Authenticator app, the next time you
login to LastPass on an untrusted device, you will receive the Google Authentication dialog:
Go to your Google Authenticator App and input the current authentication code you see in the app
into this dialog.� If the code expires before you have a chance to authenticate, simply use the
next code that appears in the app.
Logging in Offline when Google Authenticator is
Enabled
As with our other multifactor authentication options, you can choose whether to allow LastPass to
store an encrypted vault locally so you can log in without an internet connection. If you enable
offline access, you will be able to login without using your Google Authenticator code in case of a
connectivity issue.
With some internet configurations (typically wireless connections and waking from sleep),
LastPass may log in offline first before establishing connectivity to your online vault and
prompting for your authenticator code.� This may cause LastPass to AutoFill any login
credentials you have saved in LastPass for the current page you are on. � If you wish to disable
offline access, you may do so in your account settings.
Grid Multifactor Authentication
At LastPass, we strongly encourage our users to take advantage of our multifactor authentication
options. Multifactor authentication requires the user to present both username/password and
information from another, often physical, item. This means that if a hacker gets your password,
'88/224'
'LastPass
information Manual'
from another, often physical, item. This means that if a hacker gets your password,
they are still unable to access your LastPass account without this second factor.
LastPass offers multifactor authentication as a Premium feature, but we also believe that
everyone should be protected online, so we have created the Grid Multifactor Authentication as a
feature available to both Premium and non-Premium users.
Activate Grid
To activate Grid, launch your Account Settings by going to your LastPass Icon, then Preferences,
Accounts Settings, Launch Account Settings:
You can also launch your Account Settings dialog by directly logging into your Online Vault from
the LastPass website and clicking on the 'Settings' link in the left-hand menu.
In the dialog box that pops up, click on the Security tab (second over from the left), where you
will see the option to activate your Grid by checking the box:
'89/224'
'LastPass Manual'
LastPass will pop a message recommending that you print your Grid. By clicking 'Print your Grid',
you can view and print the spreadsheet-like Grid of randomly generated characters:
Be sure to press 'Update' before exiting your Account Settings dialog box.
Allow Mobile and Bookmarklet Access to Bypass Grid: As Grid Authentication is not
currently supported on mobile apps with the exception of Androids, this option controls whether
mobile devices and bookmarklets will be allowed to bypass Grid multifactor authentication when
enabled.
Allow Offline Access: Controls whether access to your Vault will be allowed when you are not
connected to the Internet. Allowing offline access to your Vault is slightly less secure since Grid
can not be actively validated.
Logging In With Grid
Once Grid has been activated, you can log in to your LastPass plugin by providing your email and
Master Password as usual. After you press Submit, you will be prompted to provide 4 random
values off of your Grid:
You look up each value on the grid and enter it.�Grid look-ups are performed much like the game
Battleship. Using the sample Grid image shown above as an example, if you were asked for U7,
M8, I5, AND K5, the answers would be 'd, n, p, q.'��Access to your LastPass Account will only be
granted if all 4 values are correct.
If you trust the computer, click the Trust checkbox on the Grid dialog so you will not be reprompted to enter Grid values the next time you log in.
Grid can be deactivated at any time once you are logged in to your Online Vault and uncheck the
Grid option in Settings.
Microsoft Authenticator App
'90/224'
'LastPass Manual'
Microsoft has released an authenticator app for Windows Phones, and third-party authenticator
apps can be used for other platforms. Microsoft Authenticator can be enabled with your LastPass
account, so that you enter your email address + master password, then a code generated by the
multifactor app when logging in to your LastPass account.
Microsoft authenticator app is supported on Windows Phone 7 and Windows Phone 8 devices and
is compatible with Google Authenticator.
The Microsoft authenticator app can be downloaded from the Windows app store
here:�http://www.windowsphone.com/en-us/store/app/authenticator/e7994dbc-23364950-91ba-ca22d653759b or by searching in the store on your device.
Then, in your LastPass Icon > My LastPass Vault > Settings > Multifactor Options tab, you can
click the "Google Authenticator/DUO" option, click to display the barcode, then scan the barcode
on your mobile device in your Microsoft authenticator app.
If you want to enable Multifactor authentication for your Microsoft account itself, you must do so
from your account settings here:�https://account.live.com/proofs/Manage
'91/224'
'LastPass Manual'
One Time Passwords
If you are using an untrusted public computer and need to access your LastPass data but are
hesitant to do so because of potential keyloggers, LastPass provides One Time Passwords (OTPs)
as one option for securely accessing your account.
While using a trusted computer, go to https://lastpass.com/otp.php to create a list of random
passwords that can be used only once to log into LastPass. You must be logged into the plugin to
manage your OTPs. From this page, you will be given the option to Add a New One Time
password, Clear All OTPs, or Print your OTPs:
Each time you generate a new OTP, it will be added to your list.�These passwords can be printed
or carried with you on a portable storage device. You can then revisit the above page to login
using this password and you can be certain that, even if captured, the password will not allow
access into your account in subsequent attempts because it expires after you login with it once.
You can even use OTPs with another form of multi-factor authentication (Yubikey, Google
Authenticator, Sesame or GRID), to be even more secure when you are not using a trusted
computer.
Watch the Tutorial for Setting Up and Using One Time
Passwords (OTPs)
Password Iterations (PBKDF2)
To increase the security of your master password, LastPass utilizes a stronger-than-typical
version of Password-Based Key Derivation Function�(PBKDF2). At its most basic, PBKDF2 is a
'92/224'
'LastPass Manual'
"password-strengthening algorithm" that makes it difficult for a computer to check that any one
password is the correct master password during a brute-force attack.
The standard implementation of PBKDF2 uses SHA-1, a secure hashing algorithm. SHA-1 is fast,
but its speed is a weakness in that brute-force attacks can be performed faster.
LastPass has opted to use SHA-256, a slower hashing algorithm that provides more protection
against brute-force attacks. LastPass utilizes the PBKDF2 function implemented with SHA-256 to
turn your master password into your encryption key. LastPass performs x number of rounds of the
function to create the encryption key, before a single additional round of PBKDF2 is done to
create your login hash.
The entire process is conducted client-side. The resulting login hash is what is communicated
with LastPass. LastPass uses the hash to verify that you are entering the correct master password
when logging in to your account.
LastPass also performs a large number of rounds of PBKDF2 server-side. This implementation of
PBKDF2 client-side and server-side ensures that the two pieces of your data- the part that's
stored offline locally and the part that's stored online on LastPass servers- are thoroughly
protected:
By default, the x number of rounds that LastPass uses is 5000. LastPass allows you to customize
the number of rounds performed during the client-side encryption process. If you log in to
LastPass, open your LastPass vault from the LastPass Icon, and launch�Account Settings, you
will see the "Password Iterations" field displaying the current number of rounds used for your
account. Although 5000 is currently the default number of rounds, your number may be lower if
your account is older.
5000 rounds provides a good balance between increased security and the inconvenience of longer
pauses when logging in to your account. While it's tempting to point to the number of rounds
when comparing implementations of PBKDF2 across services, this is essentially an apples to
oranges�comparison, as other services may be using SHA-1, which is less computationally
intense than SHA-256. In other words, SHA-256 is a more intensive process than SHA-1, so a
lower number of rounds can still be a higher level of security against brute-force attacks.
In terms of usability, the number of rounds used only affects the process of logging in to your
LastPass account. Once you gain access to your account, the implementation of these changes
will not affect your browsing experience.
Note: LastPass supports a diverse set of platforms which vary greatly in speed. In order to utilize
all of them, we recommend you do not exceed 10,000 rounds. A change from 5000 rounds to
10,000 rounds may not be perceptible to you on most platforms. However, while we permit users
to increase their rounds all the way to 200,000 rounds, you may start to notice problems when
logging in via certain browsers or platforms when you go above 5,000 rounds. For example,
Internet Explorer 7 will be very slow with such a higher number of rounds. Logging into
m.lastpass.com�on a smart phone (where the rounds are done in JavaScript only) may not
work at all.
RSA SecurID
Protect your LastPass Enterprise Accounts
with RSA SecurID
LastPass Enterprise supports RSA SecurID as a 2nd factor of authentication for user access to their
LastPass Enterprise account. A second factor of authentication can protect your LastPass vault
against replay-attacks, man-in-the-middle attacks, and a host of other threat vectors.
Once enabled, the user will be prompted first for his/her LastPass Master Username and
Password, and then for his/her RSA SecurID passcode. As with all of our multi-factor options, users
will have the option to �trust� certain devices to eliminate the 2nd factor prompt � striking the
perfect balance between security and convenience. If you prefer to disable the Trust option, this
can be done using the configurable LastPass Security Policies.
'93/224'
'LastPass Manual'
Agent Host Configuration
To facilitate communication between LastPass Enterprise and the RSA Authentication Manager /
RSA SecurID Appliance, an agent host record must be added to the RSA Authentication Manager
database. The agent host record identifies LastPass Enterprise and contains information about
communication and encryption.� Set the Agent Type to �Standard Agent� when adding the
authentication agent.
Since LastPass will be communicating with RSA Authentication Manager via RADIUS, a RADIUS
client that corresponds to the agent host record must be created in the RSA Authentication
Manager. RADIUS clients are managed using the RSA Security Console.
The following information is required to create a RADIUS client:
Hostname
IP Addresses for network interfaces
RADIUS Secret
Note: The RADIUS client�s hostname must resolve to the IP address specified.
LastPass Enterprise employs a distributed architecture which encompasses many similarly
configured servers.� As a result of this architecture, RSA Authentication Manager administrators
will need to configure agent host records and/or RADIUS clients for each LastPass Enterprise
server.� There are a few different methods for achieving this with varying amounts of
administrative effort.� These options are:
Configure an agent host record and corresponding RADIUS client for each LastPass
Enterprise server.
Configure an agent host record for each LastPass Enterprise server with a shared RADIUS
client.
Configure a shared RADIUS client that does not use an agent host record. (Global change)
Note: Refer to RSA Authentication Manager Administrators Guide for information on configuring
shared RADIUS clients.
Configuring RSA SecurID within the
LastPass Admin Console
This section provides instructions for configuring LastPass Enterprise with RSA SecurID
Authentication.� This document is not intended to suggest optimum installations or
configurations.
It is assumed that the reader has both working knowledge of all products involved, and the ability
to perform the tasks outlined in this section. Administrators should have access to the product
documentation for all products in order to install the required components.
All LastPass Enterprise components must be installed and working prior to the integration.�
Perform the necessary tests to confirm that this is true before proceeding.
Configure LastPass Enterprise for RSA SecurID Authentication
1. While logged into your LastPass Enterprise Admin Console, click on the �Setup� tab, then
'94/224'
'LastPass Manual'
click on �Other Enterprise Options�. You can also go directly to
https://lastpass.com/enterprise_policy.php
2. Click on �RSA SecurID� to see the RSA SecurID options.
3. Enter the IP addresses of the RADIUS servers used by your RSA SecurID implementation,
and enter the RADIUS shared secret as well.
4. Click �Update� to save the values to your LastPass Enterprise account.
5. Your users will now be able to enable RSA SecurID as a multifactor authentication option
within Account Settings.
End User Settings
Once the connection has been configured, your users can now enable RSA SecurID on their
accounts by clicking on the LastPass Plug-in -> Preferences -> Account Settings -> Multifactor
Options, and then selecting �RSA SecurID�. From this screen your employees can enable
SecurID on their LastPass account.
RSA SecurID Login Screens
Login screen:
'95/224'
'LastPass Manual'
User-defined New PIN:
System-generated New PIN:
Next Tokencode:
Enforcing the Use of RSA by Your
Employees through LastPass Policies
With LastPass Enterprise you can leave the 2nd factor decision up to your end users, or you can
'96/224'
'LastPass Manual'
mandate its use with our configurable Security Policies. To access these policies, click on the
LastPass Plug-in, select �Admin Console� - > Set-Up -> Policies. Here are some policies that
you might consider implementing relative to RSA SecurID:
Require use of RSA SecurID
Require use of RSA SecurID as a second factor of authentication when logging into LastPass. Click
the 'enabled' box to enable this policy. RSA SecurID must be configured by the user.
Require use of any multifactor option
Require use of any multifactor option as a second factor of authentication when logging into
LastPass. Click the 'enabled' box to enable this policy. YubiKey, LastPass Sesame, Google
Authenticator, Toopher, Duo Security, Transakt, Salesforce#, and RSA SecurID are the currently
available options.
Restrict Multifactor Trust
Restrict computers that can be trusted by IP address (learn more about 'trusted computers' here:
https://helpdesk.lastpass.com/account-settings/trusted-computers/. You can enable this policy to
allow users to skip second factor authentication from trusted locations (such as the office) but
still require it from remote locations.
Any of the aforementioned policies can be enabled across all users in the account, or based on
some sub-set thereof.
Certification Test Checklist for RSA
Authentication Manager
RSA SecurID Mandatory Functionality
Virtual Keyboard
A 'Virtual Keyboard' allows you to help avoid your keystrokes being captured by keyloggers,
'97/224'
'LastPass Manual'
since keyloggers can't capture mouse clicks. If you are using a public or insecure computer, the
Virtual Keyboard feature allows you to enter your email and Master Password without a single
keystroke.
The Virtual Keyboard can only be accessed via the LastPass website, which you can navigate to
directly at�https://lastpass.com or by launching after being prompted to login via the LastPass
plugin.
If you�navigate to the site, click on the link in the upper-right hand corner to Sign In:
Next, select 'Show Keyboard' among the options below the email and password fields.
A keyboard will be shown on the screen that you can use to type in your email address and
Master Password using your mouse:
If you want to use a non-English character set, you can modify the keyboard by selecting other
options in the 'Standard' and 'US' dropdown menus.
You can also launch the Virtual Keyboard when logging in using the LastPass browser plugin:
'98/224'
'LastPass Manual'
Sesame: Multifactor Authentication with a
USB Thumb Drive
LastPass Premium members can use an ordinary USB thumb drive as a second form of
authentication when logging into their LastPass account. Having a physical second form of
authentication will help further ensure that your account will remain safe because both your
Master Password and your USB thumb drive are required to log in.
Enabling Sesame
If you are already a Premium member, you can visit our�downloads page, click on
your�operating system and select the version of Sesame specific to your system. You can then
move the file (or download directly) onto your USB device and run the application.� You will see
the empty Sesame dialog:
On your first run, you will be prompted to activate the software by Adding your LastPass login to
the user list.� Then, you will be sent an e-mail asking you to confirm the registry of Sesame.
By default, the email link will expire after 10 minutes to protect your security. If you click on the
link and it says 'Link Expired', please re-send yourself the activation link and try again.
Once activated, Sesame will create secure One Time Passwords (OTP) that are subsequently
required to login. You have the choice to copy the OTP to the clipboard or launch the browser and
pass the value automatically.
Like all our multi-factor authentication options, you can elect to enable or disable Mobile and
Offline Access within the settings for your particular username in Sesame:
'99/224'
'LastPass Manual'
If you lose your USB device, you can disable Sesame authentication by logging in to LastPass
and using the link on the bottom of the Sesame screen.
To disable Sesame while you still have your device, Launch Sesame > select your username >
Edit > enter your Master Password > select 'No, disable Sesame' > OK.
Sesame is a cross platform application that is available for Windows, Mac and Linux.
Note for Linux users
The USB device is mounted noexec, which prevents running executables from the drive. To
fix, remount the device with the exec flag, for example by "sudo mount -o remount,exec
<device> <mountpoint>".
Watch the Tutorial for Using Sesame
Smart Card Authentication
'100/224'
'LastPass Manual'
LastPass has experimental support for smart card readers as a Premium feature.� Currently, only
computers running Windows, Mac OS X, or Linux, SafeSign middleware, and Internet Explorer,
Firefox, or Chrome support this feature.� Safari and Opera can be supported by installing an
additional binary component.
OpenSC is also supported as an alternative to SafeSign (currently only on Windows).� Please
note that since some browsers still run in 32-bit mode even on 64-bit versions of Windows, you
may need to install both the 64-bit and 32-bit versions of OpenSC.
For Windows, please ensure aetpkss1.dll or�opensc-pkcs11.dll is present on your system
(typically in C:\Windows\System32).
For Mac OS X, please ensure libaetpkss.dylib is present on your system (typically in /usr/local/lib).
For Linux, please ensure libaetpkss.so is present on your system (typically in /usr/lib).
Make sure a smart card is inserted into your card reader before attempting to enable smart card
authentication.� Also, make sure an RSA key is present on your smart card.� This RSA key must
be capable of encryption and decryption so that LastPass can verify your card's security.
To enable smart card authentication:
1. Open a supported browser with the latest LastPass extension installed.
2. Log in to LastPass as a Premium user.
3. Go to LastPass button -> My LastPass Vault.
4. Click Account Settings.
5. Click Security.
6. Check the Card Reader Authentication checkbox (if this checkbox is disabled, please ensure
all applicable drivers and software are installed).
7. Enter your LastPass master password, then follow the rest of the prompts on the screen.
8. Click Update.
Toopher Authentication
To install Toopher with LastPass please do the following:
1. Download the Toopher App to your smartphone ( iOS � Apple App Store or for Android from
the Google Play Store).
2. Login to your LastPass Vault.
3. Select� "Settings" (left sidebar).
4. Then select "Multifactor Options" (fourth tab from the left on top).
'101/224'
'LastPass Manual'
5. Here is where you will be able to switch over to Toopher by selecting the "Toopher" radio
button at the top of the page.
6. Once you have selected Toopher, you will be taken to a different screen. On the new screen
you will switch "Toopher Authentication" from "Disabled" to "Enabled", at this time you will
be prompted to enter a� 2-word �pairing phrase�. �This paring phrase will be generated
by the Toopher app on your mobile device (see next step).
7. Open the Toopher App on your mobile device and select the "+" button in the top-right of
the app screen. This will generate a 2-word pairing phrase. �Back on the computer
browser; Enter this 2 word pairing phrase into the�browser field and then select enter.
You will receive a push notification on your phone that will prompt you to select allow or deny.�
Select allow, pairing is complete and you have now enabled Toopher with Last Pass.
Now if you choose, the Toopher - LastPass, two factor authentication can be automated. That is if
you are on the same computer, in the same location logging into LastPass (the same site) you
can tell your mobile device to automatically log you in next time.� Simply slide� the
�automate when near here� slider to the right. Now Toopher will automatically enable two
factor authentication for you. This feature can be turned on or off when ever you wish.
YubiKey Authentication
A YubiKey is a key-sized device that you can plug into your computer's USB slot to provide
another layer of security when accessing your LastPass Account. YubiKeys are a secure, easy to
use, two-factor authentication device that are immune from replay-attacks, man-in-the-middle
attacks, and a host of other threat vectors.
YubiKey support is a�Premium feature, and the device must be purchased through Yubico.com
for $25.
Up to 5 YubiKeys* can be associated with one LastPass account.
Adding Your YubiKey
Once you have purchased and received your YubiKey, you can enable the device and manage
your preferences by launching your Account Settings and clicking on the 'YubiKeys' tab:
'102/224'
'LastPass Manual'
To add a new YubiKey to your LastPass account, enter the device in your USB port, click in the
first empty YubiKey field, and lightly press your YubiKey on the grooved circle. You will need to
enter your LastPass Master Password to save any updates you have made to your YubiKey
settings.
After the field is filled, you can specify your YubiKey preferences:
YubiKey Authentication: Enable or disable your YubiKey multifactor authentication. When
enabled, you will be prompted to enter the YubiKey data the next time you login to LastPass.
Permit Mobile Device Access: Controls whether mobile devices that do not possess USB ports,
such as a smartphone, will be allowed to bypass YubiKey multifactor authentication when
enabled.
Permit Offline Access: Controls whether access to your vault will be allowed when you are not
connected to the Internet. Allowing offline access to your vault is slightly less secure since
YubiKey OTPs can not be validated, and only the static portion of the key is validated.
To begin using your YubiKey, be sure that the 'YubiKey Authentication' field is marked as
'Enabled'.
To save changes to your YubiKey preferences, click 'Update' before exiting the Account Settings
dialog.
To�disassociate�a YubiKey device with your LastPass account, simply clear the entire input
field of all characters and click 'Update'.
Logging In with YubiKey
Now that you have enabled your YubiKey device, the next time you login to your LastPass
account, you will be prompted to enter your YubiKey code. Simply click your LastPass Icon to
login as normal, enter your email and Master Password, then submit. However, you will now be
asked by LastPass to press your YubiKey device to enter the code:
If you would like to leave YubiKey authentication enabled but do not want to enter it every time
you login to a particular device, simply check the trusted computer option before swiping your
YubiKey.
Using a VIP YubiKey with LastPass
The VIP enabled YubiKey (http://yubico.com/vip)�has two configuration slots. When the VIP
enabled YubiKey is shipped, it's�first configuration slot is factory programmed for Symantec VIP
credentials and the second�configuration slot programmed with a standard Yubico OTP is
dormant in the second identity slot and can be activated using the YubiKey Personalization Tool.
The two configuration slots of the YubiKey work independently and each can be independently
reconfigured into OTP or static password mode.
'103/224'
'LastPass Manual'
If you touch and hold the YubiKey button between 1-3 seconds before releasing, the first
configuration slot will emit the password (based on slot 1 configuration). And if you touch and
hold the YubiKey button about 4-5 seconds before releasing, the second configuration slot will
emit the password (based on slot 2 configuration). In case if you happen to touch and hold it
longer for more than 5 seconds, the touch button indicator will flash rapidly without emitting any
password.
As the second configuration slot of the YubiKey is left blank, you can program it to the YubiKey
OTP mode, upload the AES Key to the online validation server and configure it to work with
LastPass.
To program the second slot to work with the online Yubico OTP validation server, please follow
the steps below:
1. First, download and install the latest Cross Platform Personalization Tool for Windows from
the Yubico Website at: http://www.yubico.com/products/servicessoftware/personalizationtools/use/ under the section "Cross platform personalization
tools". There are a number of �different installers for various operating systems � pick the
installer for your operating system.
2. Once the Cross-Platform Personalization tool has been installed, insert your VIP YubiKey in
a�USB port on your computer and launch the YubiKey Personalization Tool.
3. In the Cross-Platform Personalization Menu, open the "Settings" menu by clicking on the
link �Update Settings� on the main page or the �Settings� option from the menu at the
top.
4. In the Settings menu, locate the Update Settings button in the lower right corner and click
on it.
5. The Update YubiKey Settings menu should be displayed. If this is not the case, confirm you
have a VIP YubiKey with a firmware version of 2.3.0 or above.
6. Locate the section labelled Configuration Slot and select Configuration Slot 2
7. Locate the checkbox labelled Dormant and ensure the box is not checked
8.
Locate the Configuration Protection section, and open the menu labelled �YubiKey(s)
unprotected � Keep it that way�. From this menu, select the option �YubiKey(s) protected
�
Keep it that way�.
9. This will activate the �Current Access Code� field in the Configuration Protection section.
Enter
your VIP YubiKey�s current access code, which will be five 0s followed by the YubiKey�s
serial
number in Decimal format, as reported by the Personalization tool.
For example:
If your Serial Number is �1234567�, then your Current Access Code will be �00 00 01 23
45 67�
10. Press the Button labelled �Update� to activate your VIP YubiKey�s second slot with the
Yubico�OTP configuration.
Yubico also has a video that describes the steps required for uploading the AES Key. For more
information, please visit the link below:
http://www.yubico.com/aes-key-upload
Video Tutorial for Using LastPass with YubiKey
'104/224'
'LastPass Manual'
How to use LastPass with YubiKey NEO
After you've registered the YubiKey with your LastPass account, ensure that mobile access is
"disallowed" in your LastPass Icon > My LastPass Vault > Account Settings link > YubiKey tab.
Now you can use the YubiKey NEO when logging in via the LastPass Android app or used as a
normal YubiKey on your desktop.
YubiKey NEO with Windows Phone 8 App
It is a known issue that Yubikey NEO does not work with LastPass Windows Phone app. �Yubico
has confirmed that it is due to the non-industry standard way NFC is implemented �on Windows
Mobile devices, there could be issues with them successfully reading the Yubikey NEO (due to the
fact the NEO emits both the NFC data as well as an RFID identifier, which causes issues with
Windows devices).
Transakt Authentication
Transakt is an app developed by Entersekt to bring banking-grade two-factor authentication to
your mobile device. Transakt works with LastPass to enable you to authenticate your login by
responding to a simple Accept or Reject prompt directly on your mobile phone or tablet.
Transakt protects you against threats such as phishing, man-in-the-middle, man-in�the-browser,
and replay attacks. It�s free to install and a snap to configure for use with LastPass.
After you have completed the LastPass installation, do the following:
1. � On your mobile phone or tablet, go to gettransakt.com.
2. � Install the Transakt app.
3. � On your computer, go to My LastPass Vault and log in using your email address and your
LastPass master password.
4. � From the Actions menu, click Settings.
'105/224'
'LastPass Manual'
5. � Click the Multifactor Options tab and select Transakt.
6. � From the Transakt Authentication list, select Enabled. A popup screen displays a unique
sign-up code:
7. � Open the Transakt app.
8. � In the Introduction screen, click Let�s begin.
9. � In the Transakt Signup screen, do either of the following:
Click Scan code and scan the code displayed on your computer screen.
Click Enter code and type in the eight-digit code.
10. �On your computer, click OK when you receive the message that Transakt authentication has
been successfully set up.
11. �On the Multifactor Options page, click Update.
12. �When prompted, enter your LastPass master password.
13. �Log out of LastPass.
The next time that you log in to LastPass, an authentication request will be sent to your Transakt
app:
'106/224'
'LastPass Manual'
Simply click Accept.
LastPass Features
LastPass has a plethora of features that are listed here.
Selective Form Fill
By default, all form fields on the page are filled. However, LastPass also supports selective form
filling.
To selectively fill forms, use your mouse to highlight only the form fields you would like to fill:
Then, use form fill
�as you normally would, and only the fields you selected will be filled in:
'107/224'
'LastPass Manual'
Auto-Password Change (BETA)
Auto-Password Change will change a site's password with a single-click. �This feature currently
supports 75 of the most popular websites. You can see the full list of supported websites below.
Welcome to the Public Beta
Auto-Password Change is currently available for Chrome and Safari in Beta. It only works with
supported sites and is not available for shared sites. �To try this feature, make sure you are
using the latest version of LastPass (3.1.7+). �Remember this is a beta feature, so be careful! If
you experience any problems or find bugs, please check our FAQs to see if it has been addressed
or is being worked on already. If not, let us know by submitting a support ticket.
Is Auto-Password Change Secure?
We implemented Auto-Password Change with security as its top priority. Though LastPass is
changing the password for you, the changes happen locally on your machine. Just like all other
data on your account, the changed password is encrypted locally before syncing, never allowing
LastPass to access your data.
Automatically Changing Passwords
To automatically change a password with Auto-Password Change, go the LastPass Vault and find
a supported site. Click the edit icon
�to edit the site. In the Edit dialog, click the 'Change Password Automatically' button as seen
below.
By clicking this button,�LastPass will begin to automatically log you into the site in the
background�(in another tab) and change your password. Make sure to NOT close out of this tab.
As the Auto-Password Change changes your password, you will see a progress bar.
'108/224'
'LastPass Manual'
Once completed, you will receive a notice that the password has been successfully changed on
the both the site and in LastPass!
Supported Sites
twitter.com
facebook.com
tumblr.com
amazon.com
amazon.co.uk
amazon.ca
amazon.in
pizzahut.com
pinterest.com
overstock.com
etsy.com
gggaz.com
homedepot.com
zappos.com
fitbit.com
chron.com
reddit.com
nordstrom.com
jobs.washingtonpost.com
washingtonpost.com
dailykos.com
ebay.com
yahoo.com
flickr.com
iheart.com
dropbox.com
mint.com
coinbase.com
ycombinator.com
llbean.com
slashdot.org
target.com
alexa.com
cbc.ca
budget.com
'109/224'
'LastPass Manual'
bild.de
secure.mypass.de
espn.go.com
google.com
gmail.com
wikipedia.org
linkedin.com
bestbuy.com
walmart.com
paypal.com
skype.com
kickstarter.com
newegg.com
craigslist.org
groupon.com
spotify.com
shutterfly.com
snapfish.com
github.com
box.com
last.fm
walgreens.com
yelp.com
battle.net
hulu.com
sourceforge.net
zerohedge.com
godaddy.com
weather.com
baidu.com
vk.com
travelocity.com
retailmenot.com
soulcycle.com
dawanda.com
xmarks.com
titlenine.com
rei.com
kohls.com
woot.com
bluenile.com
disqus.com
buzzfeed.com
sonyentertainmentnetwork.com
Changing an Old Password to a Generated
One
If you stored login details that you created before you began using LastPass, we recommend that
you run the LastPass Security Challenge to identify potentially weak passwords. Once
identified, you may want to change your old password to one randomly generated by LastPass.
You may also like to periodically update your passwords; LastPass tries to make this process as
simple as possible for sites that you have stored in your Vault.
Replacing Your Old Password
We'll use a demo Gmail account to show how to update a stored site with a new, generated
password from LastPass.
To begin, log in to the target site and access the account settings or preferences page where you
can change your password.
When you launch the change password page, you will usually be asked to enter your old
password, with a new password entered twice. �Click on the field icon in the current password
field, and select the login. LastPass will fill in the current password for the login you selected:
'110/224'
'LastPass Manual'
After autofilling the current password, you can then click the 'Generate' field icon in the 'New
Password' field to begin to create a random, unique password:
Select the options you wish, and if you accept the password that has been generated, click Use
Password�to�autofill both the 'New password' and 'Confirm new password' fields. This will
also create a backup copy of the generated password in your Vault called 'Generated password
for...'. You will then be asked to confirm if this is a password change or a new entry.
Choose�Yes, Use for this Site to overwrite your existing password with the new one.
Choose�No, Save as New Entry�to save this as a new entry in your Vault and not continue
with the password change.
Now click 'Save' to submit the changes to the website. After clicking Save, LastPass will prompt
you to either Confirm�or Save New Site:
By clicking on Confirm, you will tell LastPass to swap the old password for the entry with the
new, generated password. Save New Site creates an entirely new entry for the site with your
previous username and new, generated password.
The next time you log in to your site, LastPass will autofill with the new, generated password!
'111/224'
'LastPass Manual'
If LastPass does not recognize the change in password when you submit it, do the following:
Sign out of the site
Go to the login page for the site
Use LastPass to enter your username
Copy/paste the password from the 'Generated Password' entry that was stored when you
accepted the new password
Click login
You will then be prompted by LastPass to accept the changes to the site's entry, and now the new
password will be stored with the entry in your Vault.
Generating Secure Passwords Screencast
Shared Family Folders
Shared Family Folders
LastPass Premium users are now able to utilize one Shared Folder to manage and access joint
accounts.
A Shared Family Folder is a special folder that you can share with family and friends so that any
data added to the folder is synced between all the Vaults of those users added to the folder.
You can add up to 5 other LastPass users to the Shared Family Folder.
Only the creator of the Shared Family Folder must be a LastPass Premium user - any recipients
can be free or Premium users.
Adding a Shared Family Folder
First, select "Manage Shared Folders" from your LastPass Vault Actions menu:
'112/224'
'LastPass Manual'
Click �Create a New Shared Folder� and name it:
Next, click �Edit� under the "Actions" column next to the folder to add other LastPass users:
'113/224'
'LastPass Manual'
After you add other LastPass users to this folder it will appear in your Vault. Your Sharees will
receive a confirmation email to accept the share. Once it has been accepted, it will also show in
their Vault as Shared-(FolderName):
Give another user �Read-only� access if you do not want them to be able to edit entries:
'114/224'
'LastPass Manual'
You can also set their status to �Hide Passwords� so that they cannot view passwords (see note
at bottom of this page):
Adding Sites to a Shared Family Folder
In your Vault, drag and drop logins and Secure Notes to the Shared Family Folder. Anything you
add to the folder will automatically sync to other users who have been given access to it:
All sites and notes in a Shared Family Folder can be edited
�or deleted
'115/224'
'LastPass Manual'
�by those who have administrative access to the folder. Updates are then kept in sync across all
family members sharing the folder.
Important Note Regarding Hidden Passwords:
Savvy end users could potentially access the password if they capture it using advanced
techniques during the login process, but LastPass will never be able to access this data because it
has been encrypted using their public key. It is also possible to obtain shared passwords using
another password manager. LastPass recommends that you use a generated password specific to
the site that you're sharing and not share any passwords that you're uncomfortable with the
recipient obtaining.
Watch the Tutorial on Sharing Family Folders:
Bookmarklets
A 'Bookmarklet' is a special type of 'Favorite' or 'Bookmark' that executes code on the page
you're viewing.
If you are in the situation where you can't use a LastPass plugin, the LastPass Bookmarklets help
you access your data easily and securely. You may want to use the Bookmarklets if you have a
mobile browser, are traveling, or�are��using a browser other than Internet Explorer, Firefox,
Safari, or Google Chrome.
LastPass has three Bookmarklets: LastPass Login, LastPass Autofill, and LastPass Fill Forms.
Installing Bookmarklets
To begin, login to�https://lastpass.com/index.php?ac=1 and click on the Bookmarklets tab
within menu dropdown on the upper-right.
You can then install the Bookmarklets using the links provided in the dialog box. Follow the
instructions for your browser:
Opera: You must right-click the link and bookmark, then set to Show on Personal Bar which
is in Details. You may also have to check View -> Toolbars -> Personal Bar, if it isn't checked
already.
Konqueror: Bookmarklets are supported via Minitools. First, you'll need the konq-plugins
package, if you don't already have it installed. Next, right-click 'LastPass Login!' above, and
select 'Copy Link Address'. Then, go to Tools -> Minitools -> Edit Minitools. Click 'New
Bookmark', and select the newly created bookmark. Type 'LastPass Login!' in the Name
field, and paste the link you previously copied into the Location field (if http: is pre-populated
in the Location field, remove it first). LastPass will now be available via Tools -> Minitools
(you may have to restart Konqueror before you see it).
We don't recommend Bookmarklets in Internet Explorer, Firefox, Safari, or Google Chrome, as the
LastPass plugin is vastly superior. However, if you can't install the add-on somewhere or you are
traveling, you may want to use them:
Internet Explorer: Make sure Links or Favorites Bar is checked. You may also have to rightclick the link and 'Add to Favorites', then put it under 'Links' or 'Favorites Bar'.
Firefox: View -> Toolbars -> Bookmarks Toolbar to enable the toolbar.
'116/224'
'LastPass Manual'
Safari: You'll need to click 'View', then show the Bookmarks Bar. For the iPhone, store this
on your desktop browser and sync it to your iPhone. You may need to click on the device in
iTunes, then go to the Info tab and ensure Sync bookmarks with is selected to the browser
you saved the Bookmarklet on.
Chrome: Add the Bookmarklets either manually (directions below), or add them from the
LastPass App > Menu > Preferences > Install Bookmarklets. Please see the video here on
how to use them properly.
For mobile devices, the best option is typically to install the Bookmarklets on your desktop
browser and then sync your bookmarks over.
Installing Bookmarklets in Safari on iOS Devices
Easily install Bookmarklets with the LastPass for Premium users App
1. Download our iOS App from the App Store
2. Tap the LastPass Icon
> Tools > Preferences > Advanced Settings
3. Select LP Autofill. It will redirect you to a webpage in Safari and automatically copy the code
you need to paste into the Bookmark. Follow the steps on the page.
4. Do the same for LP AutoLogin and LP Form Fill
**If you would like to install bookmarklets in another browser, follow the same steps, but instead
of bookmarking a page and pasting the code into Safari, bookmark an empty page in your
preferred browser and paste.
Manually install Bookmarklets through iTunes
Part 1: Add Bookmarklets to your browser
1. Open up your desktop browser
2. Make sure your Bookmarks toolbar is enabled by going to Tools > Toolbars and ensuring that
"bookmarks toolbar" is
checked/visible/enabled.
3. Type https://lastpass.com into your browser address bar.
4. Click on "Sign in" in the upper-right corner.
5. Type your email and Master Password, and press "sign in".
6. Click on the down arrow next to Tools under Actions menu on the left of the Vault page and
select "Bookmarklets".
7. Once the box appears, you'll see three links: LastPass Login!, LastPass Fill!, LastPass Fill
Forms!
8. Drag and drop LastPass Login! to the bookmarks toolbar. It should now appear on the
bookmarks toolbar.
9. Repeat for the following two, Lastpass Fill! and LastPass Fill Forms!
10. Now that your bookmarks are in place, minimize the browser.
Part2: Sync with your iOS device
Syncing from Internet Explorer:
1. Ensure that iCloud sync is currently disabled.
2. Launch iTunes and connect your iOS device
3. Click on your device in the left-hand column.
'117/224'
'LastPass Manual'
4. Select the "Info" tab - the second over from the left.
5. Scroll down to the 'Other' section.
6. Click "Sync bookmarks with" and choose your browser.
7. Click "Apply".
8. Allowing syncing to the device to complete.
Syncing from Safari:
1. Open iCloud in System Preferences
2. Make sure that 'Safari' is checked (in older versions of Mac OS, it says 'Bookmarks')
3. On your iOS device go to Settings > iCloud
4. Make sure that Safari is toggled to 'On'
5. Allow it to sync
Part 3: Use Bookmarklets in Safari iOS
1.�Launch Safari on your iOS device.
2. You will now see your three LastPass Bookmarklets appear when you click on the Bookmarks
button.
3. Tap one of the Bookmarklets. It will prompt you to login.
4. Once logged in, you can browse the web. When you see a login, tap the bookmarklet to
activate LastPass to fill in your data.
Using Bookmarklets
Click on the Bookmarklet you want to use and the action will be done, or a menu will appear to
help you. If you're using the Bookmarklets on a computer that you don't control (Internet cafe or
friend's computer), you'll want to delete the Bookmarklets when you're done. You should log off
explicitly from the Bookmarklet if you do not want the computer to continue allowing logins.
Limitations
The Bookmarklets have a few unique limitations that aren't present in the Internet Explorer,
Firefox, Safari, and Google Chrome plugins: Frame and Iframe based pages where the frames are
in different JavaScript domain boundaries may not allow the Bookmarklet to fill in your data. You
may be able to find a different login page, or open the specific frame in a new window to allow
your login.
On your mobile device, the page displayed is often different than the non-mobile version, causing
LastPass Fill! to not immediately work. You can usually force the fill and save the new copy of
this page in LastPass.
The Bookmarklets require cookies; if you are seeing that you're logged in, you may need to
enable 3rd party cookies to LastPass.com.
For security reasons, LastPass Bookmarklets rely on your browser to send referrers, so this must
be enabled in your browser's settings (for most browsers, this is enabled by default).
If you change your LastPass Master Password, you will need to recreate your Bookmarklets.
Watch the Tutorial for Setting Up and Using
Bookmarklets
'118/224'
'LastPass Manual'
Using LastPass Bookmarklets in Chrome Mobile (iOS
and Android)
Attachments to Secure Notes
LastPass users can now add documents, PDF files, and images as attachments to Secure
Notes�
. If there are files that you want to keep that shouldn't be stored unencrypted on your machine or
that need to be portable, then LastPass is the place to back them up.
For example: Let's say you're traveling abroad. To prepare for the trip, store a photocopy of your
passport as an attachment in LastPass. If your passport is lost or stolen, you can locate a
computer, �install and log in to LastPass, open the attachment, and print it. You now have a
helpful resource for replacing your lost passport.
Storing an Attachment
Attachments can be added to new or existing Secure Notes by clicking the paperclip icon in the
Edit dialog (clicking on the edit icon
), and locating the file on the device. Your attachments are then synced to any location where you
log in to your account:
'119/224'
'LastPass Manual'
Like all stored data, attachments are locally encrypted and decrypted with a key that is never
sent to LastPass, providing a secure storage option with the convenience of universal access.
Multiple Attachments
More than one attachment can be added to a single Secure Note. A single attachment can be up
to 10MB.
Attachment Storage Limits
Currently, free users have up to 50 MB of encrypted file storage, and Premium users have up to
1GB encrypted file storage. The size limits are open to change.
Availability
Attachments are supported on all browser add-ons and platforms, as well as the Premium iOS
and Android mobile apps, and the free LastPass Wallet app on iOS.
For attachment support in Chrome, Safari and Opera, you will need an additional binary
component.
Limitations
Attachments cannot be opened from the Online Vault in a browser where LastPass is not installed.
Currently, LastPass must 'call' the extension to be able to open the attachment, if LastPass is not
installed you will see an error message indicating you should install the add-on.
Exporting
We want you to feel that you have control over your data at all times, so we have created several
options for backing up and storing your data. However, you will always have access to the data
stored in your local LastPass Vault, even in offline mode.
There are currently several ways to export your data, although your options will vary between
browsers.
In Firefox, for example, you have three export options from the 'Export To' submenu:
'120/224'
'LastPass Manual'
1. LastPass can export into a CSV (comma separated values) file, which will send your stored data
into an Excel-like spreadsheet. It is not recommended that you use this to backup your data since
it is not encrypted (and LastPass keeps external backups of your encrypted data).
2. If you are a Firefox user, you can export your sites back into the built-in browser password
manager.
3. One final option is to export to a 'LastPass Encrypted File'. You can then import this data into
LastPass Pocket to view your data. This file can be saved locally or on a USB Drive with the
Pocket executable.
Check your browser's 'Export To' submenu in the Tools menu to see available options.
4.�Exporting from your Online Vault at�https://lastpass.com/�will cause your browser to
open a tab and display your data in plain text. This information is not stored in your browser's
cache. Copy and paste this data to a plain text document and save the document.
**Please note that exporting attachments is not supported. Please back up any Secure Note
attachments�separately.
Using Custom Fields
LastPass Form Fill
�provides many built-in fields. However, you may find yourself wanting to fill other fields as
well. You can do so using Custom Fields.
When editing a Form Fill
profile by clicking on the edit icon
,�click on the Custom Fields tab:
'121/224'
'LastPass Manual'
Each row corresponds to a single Custom Field. Every Custom Field must have its Text and Value
boxes filled in.
Text to find�contains the descriptive text next to the field you wish to fill on a website. In case
there is no text on the website, it can also match the field's name or ID. Matches are caseinsensitive, and partial matches are allowed. For example, 'MSN' would match both 'MSN' and
'msn id'.
Value�to fill�contains the value you wish to fill into the field. It can be multi-line, but keep in
mind that multiple lines can only be filled into a multi-line text box on a website, not a single-line
text box.
�
Favorites
LastPass allows you to classify some sites as 'Favorites'. In addition to their normal grouping,
they will also be shown in the Favorites group which is at the top of your 'My LastPass Vault' page
for easy access:
You can also view your Favorites from your LastPass Icon menu, and clicking on 'Sites':
'122/224'
'LastPass Manual'
This is often helpful if you find yourself always checking email, opening your financial site and
logging into a social networking site first thing in the morning - all of this can be accomplished
with a single click of 'Open Favorites'.
A site that you mark as Favorite will show up in two places in your Vault - in your Favorites folder
and in its Group folder. This is not a duplicate entry, but rather the same site displayed in two
locations. If you delete the site in your Favorites, it will be deleted in its other location as well.
Marking a Site as Favorite
To make one of your sites a Favorite, you can click on the 'Make This a Favorite' checkbox when
you first add the site to LastPass:
'123/224'
'LastPass Manual'
Linked Sites
In some work environments, it is not unusual that you have many accounts tied to the same
password. If you were to change your password in one location, you would be required to
manually change each site saved, which is why we developed the Linked Sites feature.
When a password change is detected for a domain for which you have several saved sites,
LastPass will prompt you asking if you would also like to change the saved password for all of
your other LastPass sites for that domain:
LastPass Command Line Application
The LastPass command line application makes it easier for you to get to data stored in LastPass
on the terminal on Mac, Linux, and Windows under Cygwin. �And brings both better security and
convenience by allowing you to access, add, modify, and delete entries in your online LastPass
vault, all from the terminal. You can also generate passwords for every server you use and
securely store those passwords directly in LastPass. LastPass Enterprise features are
supported as well, including Shared Folders.
Diving Into the Details
Users who prefer the command line can access their data directly with �lpass ls� then using
�lpass show -c --password Sitename� to put the Sitename password on the copy buffer. You can
utilize �lpass show� to store passwords used in scripts, rather than putting passwords in the
scripts themselves. LastPass can also be used as you work within the command line to help you
login to servers. We�ve included some example scripts below.
LastPass users can also�use the command line to login to other machines as they work. There
are examples such as contrib/examples/change-ssh-password.sh which shows automated
password changing on a server. You could run it automatically on a nightly basis, regularly
changing the password on the server as a security measure.
The command line application is hosted on Github at:
https://github.com/LastPass/lastpass-cli
lpass, like git, is comprised of several subcommands:
lpass login [--trust] [--plaintext-key [--force, -f]] USERNAME
lpass logout [--force, -f]
lpass show [--sync=auto|now|no] [--clip, -c] [--all|--username|--password|--url|--notes|-field=FIELD|--id|--name] {UNIQUENAME|UNIQUEID}
lpass ls [--sync=auto|now|no] [GROUP]
lpass edit [--sync=auto|now|no] [--non-interactive] {--name|--username|--password|--url|--notes|-field=FIELD} {NAME|UNIQUEID}
lpass generate [--sync=auto|now|no] [--clip, -c] [--username=USERNAME] [--url=URL] [--nosymbols] {NAME|UNIQUEID} LENGTH
lpass duplicate [--sync=auto|now|no] {UNIQUENAME|UNIQUEID}
lpass rm [--sync=auto|now|no] {UNIQUENAME|UNIQUEID}
lpass sync [--background, -b]
You can view the full documentation in the manpage, 'man lpass' or view it online.
'124/224'
'LastPass Manual'
Fill Form Basics
Using LastPass to store the data you typically have to type into web forms is both easy and
secure. Your data is encrypted locally on your computer with the key that only you know before it
is sent to LastPass, so you can securely store your credit card, Social Security Number, phone
number, and other sensitive data you wish to easily access.
Adding a Form Fill Profile�
LastPass recommends you create different profiles �
�for each Name, Location, and Credit Card. To do this, click on the LastPass�Icon
and choose 'Form Fill'
�icon�and then 'Add Profile' or 'Add Credit Card':
LastPass will then launch a Form Fill edit dialog box, where you can fill in all relevant fields:
'125/224'
'LastPass Manual'
When you see a Form Fill field icon
:
'126/224'
'LastPass Manual'
You can click on this icon
�to bring up the Form Fills Profile menu:
Selecting the profile will then autofill the fields on the page matching with what is stored in your
profile.� This reduces shopping checkouts, vacation reservations, shipping, and site registrations
to just a few easy clicks.
Setting Your Default Fill Form Profile
To set your default fill form profile, click on your LastPass browser Icon
and select 'Preferences' to launch your LastPass Control Panel. In the last section on the
General tab, labeled 'Form Fill', you can select a default profile from the dropdown menu and
select 'OK':
'127/224'
'LastPass Manual'
The Default Form Fill profile is useful when you are using the Form Fill hotkey for web forms.
Watch the Form Fill Tutorial
Identities
LastPass Identities allows you to create different views of your LastPass account.
The Identities feature is most commonly used to hide some of your sites when you log in to
LastPass from a particular location. A common example might be that you create a 'Home' and a
'Work' Identity.
Add An Identity
To create a new LastPass Identity, you can click on the 'Add Identity' menu item from your
LastPass Icon under the Tools submenu:
'128/224'
'LastPass Manual'
Or you can click over to your Identities tab in your Online Vault and choose 'Add Identity' from the
left-hand menu:
After naming your new Identity, you can then assign which sites, Secure Notes, and Form Fill
profiles are visible for this Identity by dragging and dropping items from one list to another:
Before submitting the new Identity, you can also check 'Require Password Reprompt' if you would
like to enter your Master Password every time you switch over to the Identity.
You can also delete an Identity from your Online Vault by going to the Identities tab. �Do not
delete an Identity while you are currently using it!� If you do this, you can run into issues where
you may need to reinstall the LastPass plugin to default 'All' Identity.� This is not a hard process,
but best avoided if possible.
Managing Your Identities
To use a particular Identity, select from the Identities tab in your Vault and your Identity will be
switched:
'129/224'
'LastPass Manual'
You can also switch your Identity from your LastPass Icon in the Tools submenu by clicking on the
Identity name:
When you switch Identities, LastPass will remember this setting for all subsequent logins into
LastPass until you choose to switch back to All or to another custom Identity.
You can always quickly view which Identity you are using by clicking on your Icon and checking
within the parentheses:
Another way you can use Identities is to create separate ones for each member of your house.
This is an easy way for multiple people to share a single LastPass account, but keep their sites
separate.
'130/224'
'LastPass Manual'
LastPass Credit Monitoring
LastPass now offers free credit monitoring alerts for all users in the United States. The service
provides real-time protection, notifying users who enable the feature via pop-ups and email alerts
if their credit report suddenly changes. These alerts allow users to proactively monitor their credit
report and provides an early warning system for signs of identity theft.
The service features a free and a Premium version, the latter offering additional features for
$9.95 per month.
Why use LastPass credit monitoring services?
Unexpected changes to your credit report or errors in your records can serve to be a critical
warning sign that your identity may have been, or will soon be, compromised.
Proactive, regular, round-the-clock notifications of changes to your credit will help you
better protect your identity and your financial security against identity theft and credit
error.
LastPass will monitor your credit and provide timely notifications if we detect any changes
that could be a sign of trouble.
Keeping watch over your credit rating should now be part of your personal security
regimen. But keeping a vigilant, non-stop watch over one�s credit rating is expensive and
time-intensive, and only checking your�free annual credit report�(validated by
the�Federal Trade Commission, or�FTC),�makes it likely you won't catch
inconsistencies or fraud until�after it has become a much bigger problem.
Monitoring your credit with LastPass credit monitoring alerts is safe and does�NOT�affect
your credit score
There are no strings attached with the free credit monitoring alerts - you are not required to
upgrade to Premium credit monitoring at any time
LastPass does not ask for your credit card�information�unless you choose to upgrade to
the Premium version
LastPass' free credit monitoring alerts should be used as a way to determine when to get your
free annual credit report�(validated by the�FTC), or simply as a way to receive more free,
round-the-clock information than is normally available to end-consumers.
Identity theft, credit monitoring, and credit reports are complicated topics, and we are fully
committed to helping our users stay away from bad business practices in the industry. Our
free credit monitoring alerts are intended as a free, valuable resource to help our users more
proactively monitor and protect their data, identity, and finances.
What is LastPass free credit monitoring?
A credit monitoring alert indicates that an item on your credit report has recently been added,
removed, or changed. LastPass free credit monitoring alerts are designed to continuously monitor
your credit report to detect any possible errors or warning signs of identity theft. With the service
proactively monitoring your credit report, you can better safeguard your personal identity.
The LastPass credit monitoring alerts can be enabled for FREE in a Form Fill Profile�
Receive a notification, issued by TransUnion, when there have been additions, deletions, or
changes to your credit report
Cross-check the alert with your recent actions that would affect your credit report (did you
open a new credit card or take out a loan?)
If you cannot account for the change, use your free annual credit report, validated by
the Federal Trade Commission (FTC)
Your free credit alerts will contain limited information, so your free annual credit report
should help you understand what has been added or changed in your credit report. If you
want more timely information or help in resolution, consider LastPass Premium credit
monitoring
Enabling free credit monitoring
Once you have logged in to your LastPass account, an existing or new Form Fill Profile
'131/224'
'LastPass Manual'
can be used to enable free credit monitoring alerts by following the directions below:
'132/224'
'LastPass Manual'
If you have an existing Form Fill Profile, open the profile in your LastPass Icon, under the
Form Fill menu by clicking on the edit icon�
. A profile can also be opened from the Vault by clicking on the Form Fill tab along the top > the
wrench icon and selecting 'Edit" for the profile. In the Edit dialog, select "Enable free credit
monitoring" for that profile. Ensure that all fields for your personal �and address information are
filled in, including your name, address, social security number, phone number, and birth date.
Select 'OK' to save the changes to the profile and agree to the changes being made. Now that
free credit monitoring is enabled, you will receive a pop-up notification on your desktop and an
email alerting you to any changes that may affect your credit report.
If you do not have a Form Fill Profile, go to your LastPass Icon in your browser, select Fill
Form and choose to 'Add a Profile'. A profile can also be created from the Vault by clicking on the
Form Fill tab and selecting "Add Profile". Enter all personal data needed, including your name,
address, social security number, phone number and birth date. Once complete, check the "Enable
free credit monitoring" and save the profile, agreeing to changes made. Now that free credit
monitoring is enabled, you will receive a pop-up notification on your desktop and an email
alerting you to any changes that may affect your credit report.
Once enabled, �a Credit Monitoring tab will appear at the top of your vault. On this tab, you will
see notifications of any suspicious credit activity, as well as a link to upgrade your service to
premium.
What is LastPass Premium credit monitoring?
The Premium credit monitoring service offers more comprehensive protection for your identity.
While the free credit monitoring alerts you that changes have happened that could affect your
credit report, the LastPass Premium credit monitoring provides intricate details of why your credit
changed and how you may go about investigating and resolving unauthorized credit changes.
Suspicious issues are, with your approval, investigated, unauthorized activity stopped, and
records restored by a team of experts at no additional charge.
The Premium service costs $9.95 per month and can be purchased here. Note that the Premium
credit monitoring service is separate from LastPass Premium, which offers access to mobile
apps, additional security features, and other benefits for $12 per year.
Why upgrade to Premium credit monitoring?
Full access to your three credit reports from the three major credit bureaus (not just
TransUnion), including being able to see your credit scores
Regular monitoring of all three of your credit reports
Instant alerts to any changes that occur on any of your credit reports, with detailed
information on what changed and how to take action
Refresh reports displayed in the credit monitoring dashboard every 30 days
If you prefer not to go through the hassle of getting your free annual credit report, as
validated by the�FTC, or want more information on a timely basis throughout the year
Full-service resolution in the event that your credit information is corrupted as a result of
identity theft
Enabling Premium credit monitoring
'133/224'
'LastPass Manual'
If you have an existing Form Fill Profile, open the profile in your LastPass Icon, under the
Form Fill menu. A profile can also be opened from the Vault by clicking on the Form Fill tab and
then the edit icon
�for the profile. In the Edit dialog, select "Enable free credit monitoring" for that profile. Ensure
that all fields for your personal information are filled in, including your name, address, social
security number, phone number, and birth date. All information is securely sent to LastPass via
SSL encryption before being transferred to TransUnion. Select 'OK' to save the changes to the
profile and agree to the changes being made. Then, upgrade to the Premium-level service here.
If you do not have a Form Fill Profile, go to your LastPass Icon in your browser, select Fill
Form and choose to "Add a Profile". A profile can also be created from the Vault by clicking on the
Form Fill tab and selecting 'Add Profile'. Enter all personal data needed, including your name,
address, Social Security number, phone number and birth date. Once complete, check the "Enable
free credit monitoring" and save the profile, agreeing to changes made. Then, upgrade to the
Premium-level service here.
What triggers a credit monitoring alert?
A change in your personal information.�These types of changes are most commonly
caused by a change of address or a new address record in your name.
A change in information that could impact your credit score. These type of alerts
include new accounts opened in your name, over-limit credit cards, delinquent accounts,
bankruptcies and more.
LastPass credit monitoring protects you by continuously monitoring for any signs of potential
credit tampering or changes in the above information, including:
A change of address
A change of personal account information
Opening of a new account
Closing of an existing account
Reporting of a delinquent account (30 days late, 60 days late, 90 days late, 120 days late)
Your credit card limit is exceeded
Your credit card is reported lost or stolen
Notification of suspected fraud
Indications that your credit has been frozen
Credit inquiries
A judgment or suit
A new public record
A new collection notice
How will I be notified of changes to my credit report?
When LastPass detects a change that negatively impacts your credit rating, the LastPass browser
plugin will display a pop-up alert that you can click on to obtain more information. You will also
be sent an email notifying you of the change.
What do I do when I receive a credit monitoring alert?
When you receive an alert, you need to find out what type of activity triggered the alert,
determine whether or not that activity is fraudulent, and take action to remove any fraudulent
items from your report.
The free credit monitoring alerts only notify you of a change, so the user must investigate further
on their own. The Premium service provides more in-depth information on what changed in the
user's credit report, and how the user can investigate and resolve the change.
Can I refresh my credit monitoring data?
'134/224'
'LastPass Manual'
Subscribers to the Premium credit monitoring service can use the "Refresh Credit Reports" link in
the Overview page of their credit monitoring dashboard to re-pull their credit data every 30 days.
If it has been less than 30 days since the last refresh, the link will disappear. Once clicked, you
will see a message that the "Credit Report & Scores Refresh has been submitted. Your new credit
data will be available in 24 hours."
The feature is not available to users signed up for the free credit monitoring alerts.
Do I get a free credit report?
To receive your free annual credit report, as mandated by the FTC, we recommend you do so
via https://www.annualcreditreport.com , the service recommended by the FTC. LastPass free
credit monitoring only alerts you to the fact that a change has occurred, but does not provide indepth information on what changed and how to resolve the change, nor does it provide your free
annual credit report.
LastPass Premium credit monitoring does provide continual access to your credit scores, as well
as detailed information on changes that have been made to your credit report. If you prefer not to
request your free annual credit report, or want access to up-to-date information, you may
want to consider LastPass Premium credit monitoring.
What information is used for the credit monitoring
services, and is it safe?
In order to enable credit monitoring in your LastPass account, you must create a Form Fill Profile
with your first name, last name, full address, Social Security number, phone number and birth
date. The data is securely transferred via SSL to TransUnion� in the case of the free credit
monitoring alerts, and to all three credit bureaus in the case of Premium credit monitoring, to
monitor your personal information across thousands of databases, actively seeking evidence of
fraud or identity theft on your behalf.
Monitoring your credit with LastPass credit monitoring alerts is safe and does�NOT�affect your
credit score. There are no strings attached with the free credit monitoring alerts - you are not
required to upgrade to Premium credit monitoring at any time.�LastPass does not ask for your
credit card�information�unless you choose to upgrade to the Premium version.
The full Terms and Conditions for LastPass credit monitoring can be found here�and the Privacy
Agreement can be found here.
Where is LastPass credit monitoring available?
Credit monitoring is currently only available in the United States.
Where do I direct further questions?
For our US-based users who have general questions about LastPass credit monitoring, our
customer service representatives are available at�1-800-830-6680 to address your questions
and comments, Monday - Friday 8:00 am - 6:00 pm MST.
For billing questions regarding LastPass Premium credit monitoring, please open a support
ticket�and we will promptly respond to your inquiry.
For general LastPass support, please open a support ticket�and include any relevant
details for our team to investigate with you. The�above phone number is for credit monitoring
questions�only, it is not for general LastPass support.
Password Generator
Generating a Password�
LastPass gives you tools to generate secure, non-guessable passwords, helping you to have the
safest web experience possible. You can also use LastPass to replace old passwords with
unique, randomly generated ones.
When LastPass detects that you are entering a password for a site that is not already stored in
your LastPass Vault, or creating a new login on a new site, it will pop up the Generator
�icon�to assist you in creating a strong password when clicking on the password field:
'135/224'
'LastPass Manual'
If it does not auto pop up, you can select the Generator
�icon�manually by clicking on the gray field icon in the password field, and then clicking the
Generate
�icon�from the submenu:
In this dialog, you can specify the password length and characters that make up your new, secure
password. This password is random and non-guessable. The 'Show Advanced Options' allows you
to customize your generated password:
When you Accept the generated password, LastPass also securely��saves it in your account in
case you do not get a chance to add the new site. You can view the saved password in your Vault
at any time:
If LastPass does not prompt you to generate a new password, you can access the feature by
clicking on your LastPass Icon, and selecting 'Generate Secure Password' to launch the 'Generate
Secure Password' dialog box.
'136/224'
'LastPass Manual'
Watch the Basic Tutorial for Generating a Password
Printing
LastPass provides you several ways for you to back up or store your data, one of which is
printing.
Only the accounts in the current Identity will be printed, so you must be in the 'All' Identity to
print all stored data.
To begin, click on the LastPass Icon and then the Tools submenu, where you can select 'Print':
Under the Print menu, you can choose to print either your Sites or your Secure Notes.
After selecting either Sites or Secure Notes, LastPass will launch the Print window, where you can
sort by column in ascending and descending order by clicking the column header:
'137/224'
'LastPass Manual'
Secure Notes
LastPass Secure Notes
�allow you to store private information safely and securely. Think of it as a password-protected,
digital notepad that you can access from anywhere, at anytime.�Some examples of data that
you might save in a Secure Note include bank account numbers, Social Security numbers,
passport numbers, combinations to safes, etc.
Since all sensitive data is encrypted locally on your computer with the key that only you know
before it is sent to LastPass, you can store your most sensitive data with the knowledge that is it
is completely safe.
Just like all of your LastPass data, your Secure Notes will be available from any location with an
Internet connection via your LastPass Vault. They are grouped together in a Secure Notes folder:
You can also access this data using LastPass Pocket if you save your data on a storage device.
Adding A Secure Note
To add a Secure Note, click on the LastPass Icon, click on the Secure Notes menu item and choose
'Add Secure Note':
'138/224'
'LastPass Manual'
You can also add a Secure Note via your Vault by clicking on the 'Add Secure Note' button in the
'Actions' sidebar:
After they are added, all of your Secure Notes will be shown in a list under the Group of the same
name, though you can remove these notes from the 'Secure Note' Group later, and put them into
whatever folder you like.
Secure Note Formats
There are multiple types of Secure Notes available. These range from credit card formats, to
database login credentials, and many others.� You can select the Secure Note format you'd like
to use when you create the Note:
'139/224'
'LastPass Manual'
Be aware that once you create a Note in a certain format, you are unable to change the Secure
Note into another type, so choose wisely!
Managing Your Secure Notes�
You can also change your preferences to be prompted for your Master Password when viewing
your Secure Notes. Your Secure Notes can be password-protected one of two ways:
By selecting "Reprompt for Password" on an individual Secure Note in the Edit dialog box by
clicking on the edit icon
:
Or by globally applying the Master Password reprompt when opening any Secure Note by
checking the option in your LastPass Account Settings dialog:
'140/224'
'LastPass Manual'
Searching Secure Notes
If you wish to have the ability to search within your Secure Notes when searching for a term in
your Vault, you can check this option in the LastPass Icon > Preferences > Advanced tab and
select the 'Search within secure notes' option.
Note that this considerably slows down searching, due to the decryption process required.
Attachments
LastPass users can now add documents, PDF files, and images as attachments to Secure Notes.
If there are files that you want to keep that shouldn't be stored unencrypted on your machine or
that need to be portable, then LastPass is the place to back them up.
Attachments can be added to new or existing�notes�by clicking the paperclip icon in the Edit
dialog and locating the file on the device. Your attachments are then synced to any location
where you log in to your account:
Like all stored data, attachments are locally encrypted and decrypted with a key that is never
sent to LastPass, providing a secure storage option with the convenience of universal access.
Currently, free users have up to 50 MB of encrypted file storage, and Premium users have up to
1GB encrypted file storage. The size limits are open to change.
Attachments are supported on all�browser add-ons�and platforms, as well as
the�Premium�iOS and Android mobile apps, and the free�LastPass Wallet�app on iOS.
Watch the Secure Notes Tutorial
'141/224'
'LastPass Manual'
Secure Notes History
You can review changes made to your secure notes by utilizing the new History function. �To
access this, log on to the Online Vault >> select your Secure Notes group >> click edit icon
.
If any changes have been made to the Secure Note, you can then select �History� to review the
changes. Selecting �Show Note� will show the Secure Note as it had appeared prior to the saved
changes.
'142/224'
'LastPass Manual'
**Please note**: This is currently only accessible via the Online Vault. This feature is currently
not available via the Local Vault.
Share Feature
Sharing
�allows you to share login data for a particular site with another person without exposing the
password. The two most common uses for Sharing include:
Allowing a family member or friend access to a website
In a work situation where the company has a login to a 3rd party site
Important notes for Sharing:
If the sharer or sharee delete the shared site, the share will be revoked and will disappear
from the sharee's vault.
'Give' allows the password to be view-able by the Sharee, and should not be mistaken as
giving the data to another user. �As mentioned previously, if a share is deleted by the
Sharer, this will remove the share from the Sharee's Vault.
Sharing a Site
To share a site, open the local 'My LastPass Vault' page or log into your LastPass account on
https://lastpass.com. Click on the 'Share' icon
�next to the site you wish to share:
In the "Share Items" dialog box that pops up, enter the email of the person with whom you would
like to share this site:
'143/224'
'LastPass Manual'
Click 'Share' button when you are ready to send the shared site.
If the recipient already has a LastPass account, they will receive an email indicating they have
received a Share. The next time they log in to their Online Vault, they will see the shared site
listed under the (New Pending Share Offers) Group:
Clicking 'Accept' will launch the Accept Shares dialog, where you can send a response message
and accept the Share. Clicking 'Reject' will cancel the Share, in which case LastPass will notify the
sender that the recipient did not accept the Share.
You can also manage your Shares from your Online Vault under the 'Shares' tab:
If the user does not have a LastPass account, they will be given an opportunity to create an
account so they can receive the shared site login data.
After accepting the Share, you can log into that site the same way you log into all of your other
LastPass sites, but you will not be able to view the password (please see note at the bottom of
this page).
Any pending�changes that need to be accepted to the entry will produce a 'flag' icon next to the
entry.
Clicking on this flag, will �allow to view to accept/deny these changes. Note that this will only
appear in the Online Vault.
Important Note Regarding Hidden Passwords:
Savvy end users could potentially access the password if they capture it using advanced
techniques during the login process, but LastPass will never be able to access this data because it
has been encrypted using their public key. It is also possible to obtain shared passwords using
another password manager. LastPass recommends that you use a generated password specific to
the site that you're sharing and not share any passwords that you're uncomfortable with the
recipient obtaining.
Upgrading to Premium
'144/224'
'LastPass Manual'
LastPass offers a Premium service for $1/month that covers mobile support and advanced
multifactor authentication options, and�priority support with faster response times versus
LastPass Free users.
Trialing LastPass�Premium
All LastPass users can trial�Premium features�over a 14-day trial period.
To start a trial, download a Premium app (or LastPass for Applications), and login. Your trial
will automatically start and you will receive email alerts when your trial is about to expire.
**Please note that once your trial is over, if you choose not to upgrade, simply delete the app
from your device - No further action is required.�One trial per OS, per user.
Purchasing Premium
You can upgrade to a Premium subscription for $1/month ($12/year) at any time
using�a credit card or Paypal.
One Premium upgrade includes unlimited devices.
You can verify your Premium status by looking at the bottom of the Premium page,
although LastPass automatically upgrades your account when you log out and back in.
Why a Subscription Fee vs One Time Purchase?
Paying a recurring fee will allow you to continually benefit from our advances as we improve
LastPass and add new features. It forces us to innovate, work with you to meet your needs,
and continually improve the product in the best ways possible for our users. It also allows
you to try out the Premium service for a customizable length of time without the obligation
of committing to a large up-front one time fee.
LastPass via USB
When on the go, we recommend that you try out our Mobile Device and Tablet options. If you
are in a situation where you need the LastPass Plug-in and can't install it to a public or work
computer, you should try these extensions out via a USB Thumb Drive.
LastPass IE Anywhere�(Premium)
LastPass Pocket
LastPass Portable
IE Anywhere
The IE Anywhere application, one of our Premium portable offerings, allows LastPass
users complete access to their stored data and all regular features of the browser
plugin without the need to download or install software on a computer. As with all of
our Premium offerings, IE Anywhere can also be tested over a 14-day free trial.
After downloading the plugin to a USB drive*, users can access the new IE Anywhere
features, including:
Ability to run the LastPass extension on currently non-supported browsers such as IE Tab in
Firefox and Sleipnir
Ability to hook into IE on any computer without installing the plugin
'145/224'
'LastPass Manual'
Allows users who are not able to download and install software on their computer to access
and use their LastPass account (e.g. while at work or on a public computer)
Complete access to stored LastPass data without leaving any data on the computer � no
files created, with nothing stored in the computer registry
Downloading IE Anywhere
To download IE Anywhere, begin by clicking on the download link:
https://lastpass.com/misc_download.php?
noscroll=1&tab=windows&anchor=ieanywhere#windowsieanywhere
Locate the saved file on your computer and drag/drop the file onto a USB drive.
Now that IE Anywhere is saved to your USB drive, you can run it on browsers such as Internet
Explorer, IE Tab in Firefox, Sleipnir and others on any computer with a USB port.
Using IE Anywhere
To run IE Anywhere after inserting the USB drive into the port, simply open the USB drive folder
and double-click on the application. A LastPass icon will appear in your taskbar:
If the icon is grayed out, you are logged out of LastPass. To log in, click on the icon and select
Login, which will prompt you to enter your email and Master Password:
Next, launch your browser. A small LastPass icon will appear in the upper corner of the browser
page:
'146/224'
'LastPass Manual'
By clicking on the icon, you will have access to all normal features of LastPass:
Now you can navigate to a site where you have a stored account with LastPass, and the plugin
will autofill the information in the login fields:
The icon that appears within the browser page contains features that are relevant to the site you
may be navigating to, such as AutoFill, Generate Secure Password, Copy Username or Password,
Fill Form, or Save All Entered Data.
The icon that appears on the taskbar offers more global functions, such as launching your Local
'147/224'
'LastPass Manual'
LastPass Vault, Sites, Secure Notes, Preferences, Help, and Tools:
To log out of IE Anywhere, simply click on the taskbar icon and select Logoff.
Click Exit and then eject your USB drive. No data left on the computer, no files created, nothing in
the registry, and no plugin installed!
*Note: If you are unable to use a USB at your computer, IE Anywhere .exe file can also be
installed on and run from a CD.
LastPass Pocket
LastPass Pocket is a stand-alone application (available for Windows, Mac OS X and Linux) that
can be installed on your desktop as a non-browser option. Or can be installed on a USB memory
device, allowing you to carry your LastPass data around with you. Pocket provides backup
capability and offline access for your Vault. �If you would like a mobile version of LastPass that
has full functionality, we recommend LastPass Portable.
Since you can always access your LastPass data via the plugin or website, LastPass Pocket is
intended to be used when you do not have an Internet connection but need to access information
for a Secure Note or a Site.
Pocket allows you to access all your data from the locally cached and encrypted version of your
data on your local drive.� Using Pocket, you can also download all of your LastPass information
from the server and store it in a secure, encrypted file that can be saved. As always, this data can
only be unlocked using your email address and Master Password combination.
Installing Pocket
To install LastPass Pocket, navigate to the download page on the LastPass website, select the
tab for your corresponding operating system, and scroll down to LastPass Pocket:
Click 'Download' to install the application on your computer. You can then drag and drop the file
onto a USB memory stick, where it can be accessed on any computer with a USB port.
Using Pocket
To launch Pocket, double-click on the application file. You will be prompted to enter your email
and Master Password combination:
'148/224'
'LastPass Manual'
By default, LastPass will load your data via https://lastpass.com, but you also have the option of
accessing a stored file from your computer.� Pocket will already have the local path to your
cached data ready to be selected in the upload field.� You can also choose to upload your
LastPass Encrypted File. � Simply enter your email and Master Password, then click 'Open' to
begin using Pocket.
Please note,� your encrypted cache is present on your computer by default as soon as you log in
to the LastPass browser extension, and can be used with Pocket.� This is now supported using
Firefox, Internet Explorer, Chrome, Safari, and Opera browsers.
To specifically use a LastPass Encrypted File,� you have to manually export this file for use with
Pocket.� You can do this by going to your LastPass browser extension Icon > Tools > Advanced
> Export To > LastPass Encrypted File.
After logging in, Pocket decrypts your data and displays all of your Secure Notes and Sites in a
searchable interface:
The menu bar icons give you a range of options, including (from left to right):
Load encrypted data from LastPass.com account or local file
Reveal passwords in plain text
Show/hide Groups pane
Show/hide Notes pane
Show/hide Details pane
Copy username to clipboard
Copy password to clipboard
Copy URL to clipboard
Copy notes to clipboard
Copy site name to clipboard
Copy group name to clipboard
Double-clicking on a piece of data will automatically save it to the clipboard on Windows PCs,
allowing �you to then paste the login information on the site in the browser window. Although
you can copy/paste all login elements of your saved sites or Secure Notes, you cannot edit or
delete any data that has been synced to Pocket.
'149/224'
'LastPass
Manual'
delete any data
that has been synced to Pocket.
LastPass Portable
For users of Windows, Mac, and Linux (Firefox Portable-only), a version of LastPass that is
compatible with FireFox Portable (Firefox 2.0+) and Chrome Portable (Chrome 4+, Windows
and Linux only) can be installed on your USB thumb drive. If you frequently use public or
untrusted computers, the Portable option is an ideal way to securely access your LastPass Vault.
Downloading Portable Apps
To download the�Firefox Portable or Chrome Portable�browser(s), simply visit the
PortableApps.com site and download the application(s) for free.
After clicking the 'Download' button from the application's page, you can save the file onto your
computer and run the installer. Store the file somewhere memorable on your computer, such as
your Desktop.
Downloading LastPass Portable
Now that the portable application has been successfully downloaded and installed, open the file
and run the browser.
For Windows, you can use our Firefox version or Chrome version
For Mac, we also provide a Firefox option
Or, you can navigate to the LastPass Windows download page, select the OS tab you'll be using
(Windows, Mac, or Linux) where you can scroll to the corresponding LastPass Portable app:
Click the 'Download' button and follow the prompts to install the plugin on the portable browser.
After restarting the portable browser, the LastPass Icon should now appear in the toolbar menu,
as in any other desktop browser:
With the LastPass plugin installed, you can now drag and drop the portable browser file onto your
USB thumb drive. After the transfer is complete, you can eject the USB thumb drive and take
LastPass on the go! When you launch the portable browser on another computer, you can click to
log in to your plugin as usual, where you will be able to use all regular features of the LastPass
plugin with complete access to all of your securely synced data.
'150/224'
'LastPass Manual'
LastPass for Applications
A release of LastPass for Applications on Windows is now available for users with a Premium
account and to members of our prebuild team. As with all Premium services, LastPass for
Applications can also be tested with a 14-day free trial.
Benefits
Fills in your application login data for you; allows you to stop using the 'Remember
Password' function, which can oftentimes be saved insecurely.
As a tray application, it has some preferences that are now possible, like logout on lock or
screensaver �(exporting only exports Application passwords, not your entire Vault).
Can launch your applications directly from the tray icon.
Downloading & Running LastPass for Applications
If you have LastPass�Premium and are using a Windows operating system, you can�download
LastPass for Applications to test it out, or you can �use our direct download links below:
For 32bit:�https://download.lastpass.com/lastappinstall.exe
For 64bit:�https://download.lastpass.com/lastappinstall_x64.exe
Simply click on the download file and run the installer. After clicking 'Finish', a small LastPass
Icon will appear on your computer taskbar.�If the icon is greyed out, simply click on it and select
'Login' from the menu:
After submitting your email and Master Password in the Login dialog, the LastPass Icon will turn
red to indicate that you are logged in:
Once you are logged in to LastPass for Applications, you will notice that the dropdown menu looks
very similar to that of the browser plugin. However, you now have options for Applicationsrelated features:
Applications: The Applications submenu displays those applications that you have already
added to LastPass. At the bottom of the submenu you can also select 'Add Application.'
Add Application: Launches the Add Application dialog box.
Fill Application: Autofills stored login data for an application.
Adding An Application
'151/224'
'LastPass Manual'
Let's use Skype as an example for adding a new application.�First, launch the application that
you wish to store in LastPass:
Next, click on the LastPass for Applications icon on your computer taskbar and select Add
Application. This will launch the Add Application dialog box:
Click Find and highlight the window of the application you wish to add:
'152/224'
'LastPass Manual'
LastPass will then confirm the file location of the selected application. Click Next:
Now you will need to 'Train' LastPass to log in to the application. Clear out all data in the login
fields prior to initiating Train; you may want to have the username and password stored in a
Secure Note so that you can simply copy/paste the login data. When you are ready to record the
login, click the Train button:
Now click back over to the application you want to store, enter your login credentials, and hit
Login/Submit. When the application has successfully logged in, click back over to the LastPass
Add Application dialog and select 'Stop Training':
Now you should see an entry in your Applications submenu for the application that you just
added:
'153/224'
'LastPass Manual'
By going to your Applications Icon > Applications > Application Name, you can Launch, Copy
username/password, Edit, Delete or Retrain the entry for the application.
Autofill Prompt
Due to Windows applications using custom UI's that don't always use standard controls, autofill
for applications will often not be initiated or manually autofilled. When launching the application
from your LastPass tray icon, LastPass should detect the application and show the autofill
notification window:
Need to force autofill?�You can also initiate autofill by using the Hot Key Shortcut (defaulted
at CTRL + ALT + F) - this setting needs to be enabled under preferences.
Preferences Menu
'154/224'
'LastPass Manual'
The above screenshot displays the options selected and not selected by default. These
preferences allow you to modify when LastPass for Applications stays active, and how it interacts
with your browser.
Start LastPass for Applications when Windows starts: Controls whether LastPass for
Applications is launched automatically when you start your computer.
Automatically logofff when screensaver starts: When enabled, LastPass for
Applications will automatically end your session when your computer goes idle.
Automatically logoff when lock computer: When enabled, LastPass for Applications
will automatically end your session when you lock your computer.
Automatically logoff when shutdown or logoff computer: When enabled, LastPass for
Applications will automatically end your session when you log off as a user on your
computer, or turn it off.
Automatically logoff after idle (mins): When enabled, LastPass for Applications will
logoff after your computer is idle for 'X' minutes. �Idleness is determined by lack of
keyboard and mouse activity.
Preferred Browser (LastPass plugin is required): Allows you to choose a default
browser - Internet Explorer, Firefox, Chrome, or Opera. The LastPass plugin must be
installed in the browser (See the download page for a full list of options).
Show Fill Popup when known applications start: When enabled, LastPass will prompt
you to fill in the login credentials when you open up a program for which you have stored
data.
Automatically hide Popup (secs): Controls how long the login notification is visible.
Sort Fill List: Sorts the list of saved applications that can be filled.
Enable HotKey to Start Fill:� Set a hotkey to autofill application entries.
Show Icon in Injected Browser: Show the injected IEAnywhere browser icon to have
full IEAnywhere functionality.
Disable IEAnywhere functionality in LastPass for Applications: LastPass for
Applications enables IE Anywhere functionality by default to hook into Internet Explorer
without installing the browser addon.
Do not poll to inject IEAnywhere functionality into non-registering processes: This
option prevents LastApp from polling non-registering processes in AOL and Chrome browser
to see if it can inject itself to use IEAnywhere functionality. �Unless using Chrome or AOL
browsers, keep this option selected.
Language: Allows you to select the language displayed in the LastPass for Applications
menu.
Application Parameters
If you need to pass specific command-line parameters to an application, you can simply edit the
application and append the command-line parameters to the application's executable.� For
example, if the application's executable is:
c:\windows\notepad.exe
You can change it to:
c:\windows\notepad.exe c:\test.txt
to pass Notepad a parameter of "c:\test.txt".
'155/224'
'LastPass Manual'
You can also include the application's username, password, and field values as parameters, by
passing %username%, %password%, and %field#%, where # is the number of the field you'd like
to pass (you can see field numbers by editing the application and then clicking Edit Form
Fields).� For example, if you set the application's executable to:
c:\foo.exe %username% %password% %field2%
to pass the application the username as the first parameter, password as the second parameter,
and field #2 as the third parameter.
A popular example is PuTTY.� The following would tell PuTTY to SSH to foo.bar.com:
c:\putty.exe -ssh %username%@foo.bar.com -pw %password%
LastPass Mobile Premium Apps
LastPass Premium includes support for the following mobile devices:
iOS App
Android App
Windows Phone
Windows Surface
Blackberry App
Dolphin 11 Add-on
If you want the option of using other mobile browsers with LastPass, you can install the LastPass
plugin for Dolphin 11, a feature-rich browser for your Android device.
LastPass for Dolphin is a Premium app, but can be trialed for 14 days for free.
Installing LastPass for Dolphin
First, install Dolphin on your Android device. Open the "Play Store" app, search for "Dolphin", and
select "Install". Once the download is complete, you can open up the "Play Store" app again and
search for "LastPass Dolphin." The LastPass add-on will appear first in the search results, and you
can tap "Install" to download the app.
After it finishes downloading, you can launch the Dolphin Browser app and then�swipe from the
right edge of the screen to open the Control Panel:
'156/224'
'LastPass Manual'
Then, tap the LastPass addon to enable LastPass and bring up the sign in menu.
Using LastPass for Dolphin
Once installed, you can tap on the LastPass icon to launch the login dialog. You can have the app
remember your email and/or password, just like the desktop plugin. After entering your Master
Password and tapping "login", you can start browsing:
'157/224'
'LastPass Manual'
LastPass for Dolphin 11�offers much of the functionality that you find on your computer and
other LastPass apps. After logging in, if you swipe left to open Dolphin extensions, and tap the LP
Icon- which will be red to indicate an active login- you will be offered a number of actions to take
with LastPass:
If you have more than one login for a site, you can tap the LastPass icon and tap "autofill" to see
a full list of logins for that domain. Tapping on one of the listed entries will autofill the associated
username and password:
'158/224'
'LastPass Manual'
If you need to fill out a web form, such as a registration or checkout form, you can tap the
LastPass icon and tap "Fill Forms" to see a full list of your Form Fill profiles. Tapping on one of the
profiles will autofill the form:
'159/224'
'LastPass Manual'
Selecting Tools from the main action menu will offer you the options to Generate Password,
change Identities, Recheck Page, or Refresh Sites available in your Vault:
The password generator offers all of the same features and options available as the full password
generator in the LastPass browser plugin for desktops:
'160/224'
'LastPass Manual'
Your LastPass Vault on Dolphin
To view your LastPass Vault, select My LastPass Vault.� You'll be be able to view all your saved
entries that you normally see in your Vault on a computer or elsewhere. �From here, you can
launch your sites, edit them, and even Add Copy Notifications to login to other apps. You can
also Add Sites, Secure Notes, and Form Fills from your Vault, as well as switch Identities.� All
this is done by selecting the Menu button once inside the Vault:
'161/224'
'LastPass Manual'
Selecting the Preferences option allows you to change important LastPass settings:
1. Automatically Logoff when all browsers are closed: �This option enables you to
have LastPass Automatically log you out of your account when the Dolphin Browser is fully
closed.
2. Enable Fast Decryption:�Enables the app to use the fastest decryption possible. This
should only be disabled if the app is crashing.
3. Enable Icon:�Enables your site favicons to be viewed in your Vault.
4. Enable Logging:�Enables error logging by the LastPass app in the case of an internal
error or app crash.
5. Default Site Action:�Enables you to change the�default�actions taken when you tap a
site in your Vault. �The options are Edit Site, Launch Site, Add Copy Notifications.
6. Local Data Location:�Allows you to change the location of locally cached data from the
default location to your memory card.
Selecting the More Option (from the main vault screen), will show you additional options that are
available:
'162/224'
'LastPass Manual'
1. Refresh Sites:�This forces LastPass 'poll' the server for updates that may have been
made to your account. � This will always update the server of any changes you have made
on your Android. �By default, these updates only happen on the Android when you use
'Refresh Sites' or when you login to your account.
2. Never URLs: Allows you to view and edit your Never URLs.
3. Clear Local Cache: Clear's LastPass' locally cached data.
4. About: �Shows you the version number of the LastPass extension.
Safari in iOS
With LastPass iOS 8 and above, LastPass can autofill in Safari on iPhones and iPads with the
LastPass extension.
Enable Autofill in Safari
1. Disable Safari Autofill:
Go to iOS Settings
Find and tap on the Safari�icon
Under General, tap Passwords and Autofill
Toggle Names and Passwords off
2. Download the LastPass App from the App store and login.
3. Open Safari.
4. Browse to the page you want to login to.
'163/224'
'LastPass Manual'
5. Tap the Share Icon
to open the extensions menu.
6. Scroll the extensions to the right to reveal the 'More'�button.�
7. Tap 'More' and toggle LastPass on in the list.
8. LastPass will now appear in your list of extensions. You can tap and drag the LastPass icon
to move it anywhere on your extensions list.
Using LastPass in Safari
Now that you have LastPass enabled, browse to a site you would like to login into:
1. Tap the Share Icon�
.
2. Tap the LastPass Icon.
'164/224'
'LastPass Manual'
3. If you have Touch ID, PIN, or Master Password reprompt enabled, you will be asked to verify
your login.
4. LastPass will present you with a list of available logins for that site. Tap the site to autofill
and log you in.
'165/224'
'LastPass Manual'
Autofill in Safari Video Tutorial
Android
LastPass for Android (2.2+) is an application that will allow you to carry your LastPass data
around with you. As always, this data can only be unlocked using your email address and
password. As with all smartphone apps, LastPass for Android is part of our�Premium
offering and can be tested with a 14-day free trial. There are several ways that you can
use LastPass for Android:
1. You can use LastPass to fill Android apps and sites in Chrome (requires 4.1+ for
copy/paste buttons and 4.3+ for autofilling and Chrome)
2. Open your LastPass Vault on Android.
3. Look into our�Bookmarklets�option, which offers limited access to fundamental
LastPass features. In order to install Bookmarklets, go to the LastPass app, log in, tap the
menu button, tap 'more,' and then 'install bookmarklets.'
4. Use the�LastPass extension for the Dolphin HD browser.
5. We offer an extension for FireFox Mobile on Android, but functionality is limited in this, and
we recommend Dolphin HD, our LastPass app, or Bookmarklets instead.
**Known limitation - The LP browser is unable to render .PDF files. These will need to be opened
from another browser.
Installing LastPass for Android
To install, open Google Play Store on your phone and search for LastPass. Or you can click here:
�https://play.google.com/store/apps/details?id=com.lastpass.lpandroid If you would like
to attempt a manual installation, you can download:�https://lastpass.com/lpandroid.apk
Fill�Android Apps and Sites in Chrome
'166/224'
'LastPass Manual'
Download the latest version of LastPass from the Android store or tap to update it on your Android
(you need�4.1+ to fill apps and 4.3+ to fill Chrome). When you launch LastPass for Android, you
will be presented with the option to enable this feature:
�After tapping "Enable Fill into Apps", �you will want to note the instructions for enabling
LastPass and click OK to continue:
�Enable LastPass from your Accessibility menu as demonstrated:
App Fill Window
To fill an app, just tap on it to launch from your home screen and LastPass will offer to fill for you:
'167/224'
'LastPass Manual'
In Chrome, you will want to launch your Chrome browser from your home screen and then
navigate to a site (make sure to tap either the username or password field):
Fill Helper
After installing LastPass 3.3.10+, you will have the option to enable the Fill Helper. The Fill Helper
is great for pages and apps where the App Fill Window is�not allowed to pop up automatically.
Select the options and apps you would like the Fill Helper to appear on. You can also change
these settings later in Preferences > App Fill.
Using Fill Helper in Chrome
In Chrome, the Fill Helper will appear on every page when the page is launched. By default, the
Fill Helper will automatically hide after 15 seconds. To make it reappear switch tabs or tap the
address bar. �To change the hide timer, go to Preferences > Hide fill helper.
'168/224'
'LastPass Manual'
Tap the Fill Helper icon to open your available logins. Select the desired login to autofill your
credentials.
Using Fill Helper in Apps
By default, the Fill Helper will not appear in apps. Select apps you would like the Fill Helper to
appear in when you first download by selecting�
. If you would like to add an app later, do the following:
1. Go to the LastPass App Preferences
2. Under App Fill, tap Edit fill helper settings
3. Select apps by checking the box.
4. To select/deselect all, check/uncheck Show for all apps by default
When Fill Helper is enabled for an app, tap the Fill Helper icon to view your saved logins for the
app.
If Fill Helper and App Fill Window are both enabled, App Fill Window will take precedence.
Your LastPass Vault on Android
'169/224'
'LastPass Manual'
LastPass for Android features a�built-in browser that will automatically fill your login information
for each of your saved LastPass sites. Once you have installed the LastPass Android app, tap the
app icon to launch the login page. Tapping the 'Menu' button from this screen gives you access to
the 'About' page, the 'Exit' option, and login 'Preferences':
Upon logging in, you will be able to view your saved LastPass sites and Secure Notes, organized
according to their Groups, in a searchable interface:
Tapping on a site will launch it in the LastPass browser and autofill your login data, while tapping
on a folder name opens the Folder menu, which allows you to jump to a different folder. To launch
the Edit Site dialog, press down on a site entry and hold for two seconds. From the pop-up menu,
you will be able to Edit the site fields, Copy Username, Copy Password, Show Password, Copy
URL,�Add Copy Notifications, Add a Shortcut to your Home page for this site entry, or Delete
the Entry:
� The Edit Menu for a site looks very similar to the Edit menu you see on the full browser
extension. �You can change the name of the entry,�the folder it is under, URL, username,
password, Edit Form Fields, designate it a as a Favorite, add a Master Password reprompt, or
'170/224'
'LastPass Manual'
Never AutoFill:
Tapping the 'Menu' button on�the top right of your vault (three vertical squares)�gives you
access to the following menu options:
Add Site: Allows you to manually save login data for a site
Add Secure Note: Enter and store sensitive data in a Secure Note
Add Form Fill: Add a Form Fill Profile
Password Generator:�Generate a secure password using LastPass
Manage Shared Folders:�View and edit any shared folders you have with other users
Change Identity:�Change the current Identity you are using
Refresh Vault:�Refreshes your vault's connection with the server to sync new or updated
data
Security�Challenge: Allows you to run the Security Check from your device
Preferences:�Allows you to change your LastPass Android Preferences
About LastPass:�Shows information about the LastPass Application
Log Out: Log out your LastPass account
Using the LastPass Android Browser
The LastPass Android App has a fully functioning browser within the app. This browser can
automatically launch your sites, autofill your login credentials, and can even save new login
credentials when you login for the first time. When you launch a site from your Vault you will
'171/224'
'LastPass Manual'
automatically be taken to the that site in the LastPass browser. �You can also go directly to the
browser by tapping the LastPass icon in the top left corner of your Vault.
� Once in the browser and on a website, you can hit your Menu button and be�offered�a list of
options to help your browsing experience:
1. AutoFill:�AutoFill will automatically fill login credentials for the browser's current site
2. Fill Forms:� Will give you a selection of Fill Forms that you have saved in your account to
be used on the current page
3. Save Site:�Save a website username and password
4. Password Generator:�Open the LastPass password generator to generate a strong
password
5. Share Page:�Share the website link via another app on your Android
6. Find in Page:�Allows you to type in specific search terms to find in the page
7. Request�Desktop / Mobile Site:�Loads up the desktop or mobile version of the
website
8. View HTML:�Allows you to view the HTML code for the web page
9. Go to My Vault:�Takes you to your vault
10. Preferences: �Navigate to LastPass Preferences
11. About LastPass:�Shows information about the LastPass Application
12. Log Out:�Log out of your LastPass account
�
Preferences
'172/224'
'LastPass Manual'
There are many useful and important preferences available for the Android application.
Preferences are found under the Menu button > More > when in your Vault:
Security
1. Allow offline access:� This allows you to log into your locally cached data if you do not
have access to an Internet connection (requires to have logged into the server at least
once, and you have not disabled offline in your multifactor options).
2. Log out when app is idle:�Setting a time limit for this feature will ensure that your
LastPass app logs off after X minutes of LastPass being logged in, but in the background of
your device.� This is another good security feature to use when concerned about the loss
or theft of a mobile device
3. Check session when app is activated:�When the LastPass app is brought to the
foreground (after you've been using other apps), this option forces the app check to see if
the session has been killed on the server .. if so, LastPass will logoff.� This forces you to
login again, and forces an update from the server.� This is a very useful feature for users
who often kill their sessions via the server, or are concerned about losing their phone or
mobile device
4. Fully Clear Clipboard History:�Clears the history of what has been attached to the
clipboard after pasting (only available on some devices).
5. Allow screenshots of this app: Allows you to disable screenshots to be taken while
within the LastPass App.
Reprompt
1. Pin Code for�reprompt:�Replaces the Master Password reprompt with a 4 digit Pin
Code reprompt
2. Enable reprompt when app is activated: Enables LastPass to prompt for your Master
Password�every time that you enter the app.
3. Reprompt when app is idle:�Enables LastPass to prompt for your Master
Password�every time that you enter the app
4. Reprompt when screen is turned off:�Force master password reprompt�when screen
is turned off
5. Skip reprompt after log in:�This feature allows a user to log in to the LastPass
Application, and perform an action that requires Master Password Reprompt without reentering their Master Password.�*NOTE* This feature only works if the user does not have
his/her Master Password set to be remembered, and the maximum amount of time from log
in to performing an action that would require the Master Password to be re-entered is
currently 20 minutes.
**Please note, the default reprompt is the master password unless you have set up a 4 digit pin
code or fingerprint authentication. LastPass searches reprompt in this order: Fingerprint -> Pin ->
Master Password.
App Fill
1. Enable fill service:�Allows LastPass App to fill into other Android apps. If you wish to
enable this feature, be sure to turn LastPass on in Accessibility > Services (you should be
prompted when enabling the feature).
2. Enable fill service settings:�Allows you to choose which apps you want to show fill
window and /or fill helper for and add the Matching site URL.
3. Scan Apps for Passwords Fields: This option is enabled by default. �If this option is
disabled, you will need to manually tap into the password field on the app's login screen for
the Fill Window to appear as LastPass no longer automatically scans password fields.
4. Enable fill helper notification:�Allows notification of the fill helper.
5. Show fill helper bubble for browsers:�Allows the fill helper bubble to be on screen for
mobile browsers.
'173/224'
'LastPass Manual'
6. Show fill helper bubble for apps:�Allows the fill helper bubble to be on screen for
applications.
7. Hide fill helper:�Allows you to choose a time limit for when to hide the fill helper (i.e.,
after 15 seconds)
8. Edit fill helper settings:�Allows you to white list which apps and browsers the fill helper
can show on screen for.�
Vault
1. Allow web search from vault:�When the Vault is visible, allows text entered into the
Search/URL bar to be passed to Google as a search string, but only after the search has
been submitted (the user has hit Enter). Security-conscious users may want to disable this
feature to prevent Vault search terms from ever being passed outside of the LastPass
Application.
2. Search Within Secure Notes:�Clicking on the Search/URL bar while inside of the Vault
will allow you to search for a specific entry saved or for a secure note. Searches now
include the ability to search within the secure notes, instead of by title alone. Secure not
content is not pre-decrypted in memory, so those users with numerous secure notes may
see significant slow downs during their searches.
Browser
1. Launch to:�Enables you to change whether LastPass launches a site in the LastPass
browser or your default browser
2. Set default browser:�Set's the LastPass browser as your default browser on Android
3. Browser home page:�Set's the LastPass browser's home page
4. Warn before filling insecure forms:�Shows a warning notification before filling in log
in forms on insecure sites
5. Show suggestions from Google:�When entering text into the URL bar of the LastPass
Browser, you will be prompted with a list of suggested search terms - similar to the search
'174/224'
'LastPass Manual'
prediction feature used by Google.
6. Clear cookies on log-off:�Clears any stored site cookies on log off
7. Close tabs on log off:�Closes all open browser tabs on log off
8. Clear history on log-off:�Clears browser history on log off
9. Clear cookies on close:�Clears cookies when you close the app
10. Use mobile user agent:�Sets the browser to request mobile set rendering from the
server
11. Tabbed Appearance: Enabled by default, this setting allows launched entries to be
opened in new tabs.
12. Show zoom controls:�Show zoom buttons in the browser
13. Install bookmarklets:�Bookmarklets will automatically be installed
Notifications, LastPass Input Method, Storage, & Miscellaneous
1. Enable Logged in Notification:�Enables a LastPass icon in your notification bar to signal
an active login
2. Remove Notifications on Activate:�Removes logged in notifications after activating
LastPass
3. Enables LastPass Input Method: �Enables the LastPass Input Method
4. LastPass Data Center: Allows you to manually select which data center is used for log
in.�*NOTE* This does NOT migrate a user�s data between data centers, but will redirect
to the other data center if the user logs into the one where her/his data isn�t. This option is
ONLY enabled when the user is not logged into the Vault.
5. Local Data Location: �Allows you to change the location of locally cached data from the
default location
6. Local Attachment Locations:�Allows you to change the location of downloaded
attachments or files
7. Default Site Action: Allows you to charge the default action taken when tapping on a site
entry in the vault
Troubleshooting
'175/224'
'LastPass Manual'
1. Enable Logging:�Enables error logging by the LastPass app in the case of an internal
error or app crash
2. View Log:�Shows the current error log
3. Use Debug Server:�Sends debug logs to LastPass server for troubleshooting. Please only
enable when asked to by LastPass support.
4. User Manual:�Opens up the LastPass User Manual on the LastPass browser.
5. Version:�Shows current app version number
�
Copy Notifications + Input Method
If you are running an OS where the App Fill Feature is not yet supported, there are two ways ways
to use LastPass for Android to login to other apps and other browsers. �The first is the "Add Copy
Notifications" method, and is detailed below. �The second way is the LastPass Input Method, and
has it has its own set of directions. With the LastPass application running, tap an entry in
LastPass so the menu appears:
Choose: "Add Copy Notifications" Now go to your app. You'll see in the notifications bar we've
added a Copy Username and Copy Password. These buttons will help you put the username and
password into the app.� You simply need to select them from the Notifications bar, and they will
copy to your clipboard, and you can then paste your username and password into your app
login!� You'll have to do each separately:
Fingerprint Scanner (on supported devices)
The first step is to register your fingerprint in the settings on your Android device.
'176/224'
'LastPass Manual'
Please note that the Fingerprint scanner feature will NOT replace your master password for
logging into the app (since your master password is needed to decrypt your Vault). It can only be
used when being reprompted for your master password or pin to re-gain access to the already
logged in app.
To enable the feature in LastPass, go to:
LastPass App > Menu > Preferences > and enable 'Fingerprint Reprompt'
When will I see the fingerprint swipe option?
1. When you have enabled 'Reprompt for Master Password' (globally or specific entries).
2. When you have saved your master password in the App login page, and are returning back
to the app.�You must have�the option in:�LastPass App > Menu > Preferences,
'Password Reprompt on Activate', enabled.
3. You have a pin associated when returning to your app from the backround. You must
have�the option in:�LastPass App > Menu > Preferences, 'Pin Code for Reprompt',
enabled.
4. Company policy (if you are part of a LastPass Enterprise) requires reprompt to edit/view.
5. In the App Fill Window, if the re-prompt for master password setting is set.
Advanced Sharing Feature - Shared Folders (Only
Available �for Premium and Enterprise Users Only)
Our latest update to the app supports Shared Folders for both �LastPass Premium and
LastPass Enterprise�users. Universal access and real-time updates are a priority for us, and
these new features give you easier on-the-go access to data and the ability to change settings at
a moment�s notice.
You can open the �Manage Shared Folders� feature from the menu on the top right of the vault
(or your device�s menu button).
From there you can tap �Add� to instantly create a new Shared Folder.
'177/224'
'LastPass Manual'
You can also add or remove users from the Shared Folders. When you tap �Edit� for a Shared
Folder, you can �Add� a new user to the Shared folder.
To change user permissions on a specific shared folder, tap the shared folder �> Edit > Edit
button next to the user email address and select the new permissions.
�To remove a user from a shared folder,�tap a user�s email address and tap Unshare.
'178/224'
'LastPass Manual'
To add sites to the folder, simply tap a site in the vault and �Edit� the login, updating the
�Folder� field to the newly-created Shared Folder.
Shared Folders and the logins added to them will sync automatically to the vaults of any LastPass
users given access to the Folders.
Other general updates have been made, including changes to reduce the network and memory
usage of the app, to help you save even more battery life on your smartphone.
And in addition to our existing support for the fingerprint readers on Samsung phones and tablets,
we�ve also added support for the Synaptics fingerprint readers that other manufacturers are now
adding to their phones, like the new XOLO Q2100.
The update is now available in the app store! The LastPass Android app is part of our
Premium service for $12 per year and our Enterprise service for teams, with a free trial so
you can check out the features first or upgrade today to sync LastPass to all of your mobile
devices.
Android Update Notes As Of 10-01-2014
1. Shared Folder support for Premium Family Shared folder and Enterprise Shared Folder
2. Shared folder management, �adding / removing users to shared folders
creating shared folders.
3. Edit �folder� on edit site menu to assign to shared folder
4. Overall app improvements:
New: Folder sharing and management, including support for the Shared Family Folder and
LastPass Enterprise.
New: Option to reprompt immediately after screen lock.
New: Support Synaptics fingerprint readers on new phones.
New: Long-click an entry in the app fill window to show copy buttons. This will help in case it
can't auto-fill.
Updated: Reduced network data usage.
Updated: Reduced memory usage when app fill is enabled.
Updated: Improved error handling and notification.
Updated: Prompt before opening downloaded file.
Many other minor fixes and improvements.
Firefox Mobile Add-on
LastPass has an extension available for Firefox Mobile on Android OS devices. While it is
functional, we recommend using our Dolphin HD extension or LastPass app for use on the
Android rather than Firefox Mobile due to Firefox's limited integration. Bookmarklets�are also
another mobile option on Android devices. If you choose to use LastPass for Firefox Mobile, you
will see behavior very similar to what you see on computer-based versions of Firefox.
Once installed from our downloads page, https://lastpass.com/download.php, the Firefox
Mobile extension manager will be listed under the extensions/menu tab:
'179/224'
'LastPass Manual'
Your LastPass Vault
To view your Vault, visit https://m.lastpass.com/
After entering your login credentials and logging in, you'll have access to your LastPass Vault,
where you can use the search bar to search for an entry, or scroll down the page to find it. You
can then launch the site directly from here and LastPass will autofill the login for you:
Browsing using LastPass in Firefox Mobile
Browsing with LastPass in Firefox mobile is very similar to using the full LastPass extension for
Firefox on a computer. You have two main ways to browse sites. The first is launching sites from
your Vault, as directed above. The second option is to manually navigate to the website using
Firefox Mobile URL bar and typing in the URL. While a site will autofill if you launch from your
Vault, it will also autofill when manually navigated as long as the site matches a saved entry (the
'180/224'
'LastPass Manual'
same as the desktop version).
Autofill and Fill Forms option
If LastPass does not autofill for you, you can always manually fill as saved entry by going to your
extensions option > LastPass > Autofill:
You can also use this same menu to access your Fill Forms profile to autofill forms on a page.
HP TouchPad
We now support a functioning webOS 3.0 application tailored for the HP TouchPad.� This app has
all the same features and functionality found in our HP webOS app.
You can install the LastPass app directly on your TouchPad with this
link:�https://lastpass.com/lpwebos.ipk
Please note that in order to download and run the app, you need to have Preware installed on
your device:�http://preware.org/#/index/
LastPass Tab
***�This legacy product is no longer available through the iTunes Store. This article is
left up for the benefit of those users who previously installed LastPass Tab.
LastPass Tab for the iPad is a fully featured, tabbed browser supporting all the
rendering modes and plugins that mobile Safari does, with the addition of full
LastPass integration.
Accessing your Secure Notes, automatically filling forms, adding new sites, and most major
features of the desktop version are supported.
Although we recommend using LastPass Tab for enhanced functionality, you can also
install�Bookmarklets�on Safari.
Logging into LastPass Tab
'181/224'
'LastPass Manual'
Once you have downloaded LastPass Tab, it will appear in your iPad dock:
To open LastPass Tab, simply tap on the app icon as you would any other iPad app to launch
a browser window:
The browser will open to the last page you used before exiting. If you explicitly ended your
previous session, the LastPass Icon will be grayed out. You will need to log back in by
tapping the Icon, entering your email and Master Password using the screen keyboard, and
tapping Login:
Once you are logged into your LastPass account, you can use LastPass Tab to browse the
web and access your saved sites just as you would on your desktop or laptop. For example,
when you navigate to a stored site, LastPass will autofill the login fields:
The LastPass Icon gives you access to most regular features of the desktop plugin, including
the ability to launch your Local Vault:
'182/224'
'LastPass Manual'
Tools
In the dropdown menu of your LastPass Tab icon, you will find an option to view your Tools.
There, you'll see a shortened list of the Tools that you normally find in your LastPass
computer plugins' Tools menu:
Generate Password:�Allows you to generate a random password to be used for account
creation or updating an older site entry. �All the same option as the computer plugins
generator are available in this password generator.
Refresh Sites:��This forces your LastPass Tab browser to 'poll' the server for updates
that may have been made to your account. � This will always update the server of any
changes you have made on your iPad. �By default these updates only happen on the iPad
when you use 'Refresh Sites' or when you login to your account.
Security Check: �Takes you to the�LastPass Security Check. �The Security Check
allows you to analyze how secure your LastPass Account is.
Other Sessions:��This takes you to a page where you can view all your active LastPass
sessions on all devices. �You can remotely kill active sessions from this page as well.
Clear Local Cache:��Clears the LastPass Tab browser's cached data. �Do not clear this
cache if you plan to access your data in�Offline Mode.
About:�Tells you the version number and build date of your LastPass Tab app.
Using your Local Vault
Your Local Vault will open and show you a list of your sites in their expanded group structure:
'183/224'
'LastPass Manual'
From your Vault, you can Copy Username, Password, Show Password in plain text, Edit, or
Launch your stored sites by tapping on the appropriate link. You can also�Add a Secure
Note:
Clicking Edit on your site entry from this dialog will enable you to view the data as it's stored
in the entry. �This includes your username, password, preferences for the entry, and any
additional notes you might have stored in the entry:
LastPass Tab Settings
By tapping on the gear in the top right corner of the LastPass Tab browser, you can view and
change your settings in LastPass Tab:
'184/224'
'LastPass Manual'
Privacy
Clear Cache:�Clears the LastPass Tab browser's cached data. Do not clear this cache if
you plan to access your data in�Offline Mode.
Clear Cookies:�Clears LastPass Tab's stored cookies from visiting sites.
Disable Cache:�Prevents LastPass Tab from caching data locally and will prevent the use
of LastPass Tab in Offline Mode.
Browser Settings
User Agent:�Changing your user agent allows you to select what information LastPass
sends to a server when rendering sites. With the default Safari iPad user agent, the server
is more likely to direct you to render the mobile version of the site, while changing your
user agent to something like FireFox would be more likely to have the server direct you to
render the regular, non-mobile, version of the site.
Block Images:��Blocks LastPass Tab from loading images when it loads a site. �Can
optimize browsing speed and load times when a strong connection or bandwidth is
unavailable.
Open links to different domains in new tabs:��Opens links in new tabs rather than
in the current tab.
LastPass Settings
Logoff on close:��Enables LastPass to logoff on closing. �Please note that closing
means 'killing the app' and ensuring that it's no longer running in the background.
Never Logoff when idle�(Premium�only):��Allows you to set a time limit that will
log you out of LastPass Tab after 'X' minutes idle while LastPass is running in the
background.
Use Pin Code (Premium�only): �Allows you to set�a four digit Pin Code to be asked
for upon re-entry to the app after an initial login using your Master Password. �We highly
recommend you use this if you leave yourself logged into LastPass Tab when leaving the
app to multi-task.
Require pin after idle�(Premium�only):�Allows you to set a timer so you are
reprompted for your Pin Code after the app is idle for 'X' minutes.
Other
Feedback:�Takes you to our support page where you can submit a ticket for tech support
or submit feedback and suggestions.
Rate this app:��Allows you to rate the app out of 5 stars in the iTunes app store.
Getting Started Documentation:��Takes you to our LastPass for iPad getting started
pages for help on learning how to use the app.
About:�Tells you the version number and build date of your LastPass Tab app.
Note: Apple's iPad does not currently support sites in Java or Flash.
BlackBerry
LastPass for BlackBerry (4.2.1+) is an application that allows you to carry your LastPass data
around with you.�Its intended use is for when you do not have access to a computer, but need to
access stored information for a Secure Note or a Site.
LastPass for BlackBerry allows you to download all of your LastPass information from the server
and store it in a secure, encrypted file�that can be saved to your BlackBerry. As always, this data
can only be unlocked using your email address and password.
Starting with BlackBerry OS 5.0, LastPass for BlackBerry features a built-in browser that will
automatically fill your login information for each of your saved Sites.
'185/224'
'LastPass Manual'
As with all smartphone apps, LastPass for BlackBerry is part of our�Premium offering and can
be tested with a 14-day free trial.
Installing LastPass for BlackBerry
To install LastPass for BlackBerry, point your BlackBerry Browser
to:�http://lastpass.com/lastpassbb.php
To email this link to your BlackBerry, enter your BlackBerry's email address and click Send Email.
Using LastPass for BlackBerry
LastPass for BlackBerry decrypts your data and displays all of your Secure Notes and Sites in a
searchable interface. It also allows you to add, update, and delete Secure Notes and Sites:
Windows Mobile
LastPass for Windows Mobile (Windows Mobile 5+) is an application�that will allows you to carry
your LastPass data around with you. As always, this data can only be unlocked using your email
address and password.
As with all smartphone apps, LastPass for Windows Mobile is part of our�Premium offering and
can be tested with a 14-day free trial.
Installing LastPass for Windows Mobile
To install, point your Windows Mobile browser to:�https://lastpass.com/winmo.cab
Using LastPass for Windows Mobile
LastPass for Windows Mobile features a built-in browser that will automatically fill your login
information for each of your saved LastPass sites.
LastPass for Windows Mobile also displays all of your Secure Notes and Sites in a searchable
interface. It allows you to add, update, and delete Secure Notes and Sites:
'186/224'
'LastPass Manual'
Windows Mobile 5 users that experience a problem logging in may need to install this package
that updates their root SSL certificates:�https://lastpass.com/rootcertwm5.cab
Windows Phone 7
Using LastPass on Windows Phone 7
**A newer version of LastPass on Windows Phone is available here: Windows Phone**
Once installed, the app allows you to view your Vault and search for your saved sites:
The Search bar at the top allows you to type in and press 'search' to bring up a specific site.
A small menu appears at the bottom of the screen, showing two icons and an ellipsis (three dots).
Tapping the icon on the right allows you to select 'launch mode' (the little lightning bolt), in which
tapping a site launches it in the embedded browser, or 'details mode' (the little notepad), in which
tapping a site allows you to view the data saved in the site entry. Whichever is displaying
indicates the mode you are currently in.
Tapping the ellipsis pulls up the menu to reveal the 'logoff' and 'about' options.
Tapping the 'browser' IE icon launches the embedded browser, allowing you to navigate to your
sites and autofill. Another menu appears at the bottom with two icons - a key, for 'autofill', and a
person, for 'fill forms'. Tapping on 'autofill' presents a list of all entries stored for the domain you
are currently viewing. Tapping on 'fill forms' displays a list of your stored form fill profiles.
Tapping a second time on the icon will close the pop-up list:
'187/224'
'LastPass Manual'
There are some known limitations with the app; autofill will only work on sites that use
JavaScript, an issue which we hope Microsoft will address. The app is also currently read-only,
which means you can't add or change site data, although we will adjust this for future releases.
Kindle Fire and Nook Color
LastPass is now supported on the Kindle Fire and Nook Color!
Because these platforms use an Android-based operating system, the apps for both are the same
as our Android app. Please note that the LastPass input method for logging into apps is
unavailable on the Kindle Fire and Nook Color. �You can read more about these apps at our
Android app page. �Just like our Android app, these apps both require premium access.
You can download our Kindle Fire App from our page in the Kindle app store
You can download our Nook Color App from our page in the Nook app store
HP webOS
LastPass for HP webOS�(Palm Pre, Pixi, etc) allows you to carry your LastPass data around with
you. LastPass for HP webOS is a mobile browser that displays all of your Secure Notes and Sites
in a searchable interface. As always, this data can only be unlocked using your email address and
Master Password.
As with all smartphone apps, LastPass for HP webOS devices is part of our Premium offering and
can be tested with a 14-day free trial.
Installing for HP webOS
To install, point your webOS web browser to this
URL:�http://developer.palm.com/appredirect/?packageid=com.lastpass.lpwebos
Using LastPass for HP webOS
Once you have installed the LastPass application, you can scroll through and tap the icon to
launch the browser:
'188/224'
'LastPass Manual'
After submitting your email and Master Password, LastPass will launch your Vault.
Tapping 'Show' on the upper-left corner of the page allows you to switch between All Sites, Form
Fill Profiles, and Secure Notes. Tapping a Site name launches the site in a browser window; from
there you can choose to copy the username and passwords into the fields on the page.
Unfortunately due to webOS' very limited API, autologin is not available on webOS.
The LastPass dropdown menu on the upper-left corner of the application allows you to Edit,
Refresh LastPass Sites, Clear Local Cache, view the About page, view Preferences, or launch Help.
Browser integration is currently very limited due to the API, which we're attempting to resolve
with HP.
HP webOS �has limited speed due to being web-based, so we take a number of steps to avoid
using a lot of CPU time- we download and cache your data once, so each time you want updates,
you must initiate it explicitly using the top-left LastPass Menu.
Your data is saved with your account names (not usernames) and group names unencrypted on
the device, which we think is a good trade-off between security and speeding up the interaction.
LastPass Input Method
LastPass for Android has a custom input method that you can use to log in to apps on the Android!
For Android OS 4.1+ we suggest using the Android App Fill Window feature instead.
Things to note for using this feature:
Please note that sites that require a Master Password re-prompt�cannot currently be
selected for autofill within the input method.� This�will include all sites if you have
"Prompt for LastPass master password when: Log into a Site" checked in Account Settings.
This Input Method cannot "see" into other browsers. We suggest using the LastPass
browser within the Android App for the best experience for autofilling. But if you are using
this method to fill into a website in another mobile browser, please note that you will need
to "Switch to Groups" in most all cases as LastPass cannot match the URL to your Vault as
this information cannot be grabbed from the site through a 3rd party browser.
If the Input Method is unable to detect the login for your app and shows, "No
Matching Sites", �select the [Switch to Groups] option. This will show you the list of
the groups in your Vault where you can then navigate to the specific entry and select "Fill"
to autofill your username and repeat the steps to fill your password.
To use this feature, you'll first need to create a manual login to the app in LastPass if you don't
have an entry for it or a corresponding site. �In most cases, you'll just need the username and
password to be able to log in. �The next step is to Enable the LastPass Input Method via your
LastPass Preferences AND your Android Keyboard Settings:
After checking this option in your LastPass Preferences, you'll automatically be taken to your
Android Keyboard settings, where you can enable the LastPass Input Method:
'189/224'
'LastPass Manual'
Now, you're ready to log in to apps using LastPass. �Go to the app login screen that you'd like to
log in to. �Once there, tap into the text field. �You must�pull down the notifications menu
instead (where it has the "Wi-fi, bluetooth, etc). �There should be the option in that menu that
brings up the "Select input method" option where you can select the LastPass Input Method:
Go back to the Login Screen and you should now see the LastPass input method with the LP icon
in the keyboard options:
Hit the LastPass AutoFill button to see a list of your �logins:
Then, select the appropriate login, and hit the Fill button. You will have to do this in both the
username field and the password field to fill each:
'190/224'
'LastPass Manual'
Your app logins will be autofilled, and you'll be able to quickly and easily log in to your Apps!
iOS
LastPass for iOS is an application that will allow you to carry your LastPass data around with you
and easily login to websites from your iPhone, iPod Touch, and iPad. It is compatible with iPhone
(3GS, 4, 4S, and 5, 6, 6+) iPod Touch (3rd, 4th, and 5th generations) and iPad (1,2,3,4, and Mini). It
requires iOS 4.3 or later and is optimized for iPhone 5. As with all smartphone apps, LastPass for
iOS is part of our Premium offering. As with all smartphone apps, LastPass for iOS is part of our
Premium offering.
LastPass for iOS includes the following features:
1. Access to all of your sites, secure notes, and form fill profiles in the mobile Vault.
2. An in-app browser to quickly launch and login to any of your sites.
3. Touch ID integration for devices running iOS 8 or later on supported devices.
4. A LastPass extension for the Safari mobile browser for iOS 8 or later
Installing LastPass for�iOS
To install LastPass for iOS, open the�App Store�on your device and search for LastPass.
Logging into LastPass
LastPass for iOS decrypts your data and displays all of your Secure Notes and Sites in a
searchable interface. It also allows you to add, update, and delete Secure Notes and Sites and
launch a browser to easily log in to your sites.
After installing the LastPass browser application on your iOS device, you can launch the
application by tapping on the icon. �LastPass will then open up a browser. Tap the LastPass icon
at the top left to bring up the login page as shown below:
For iOS devices that support Touch ID, you will be prompted to�choose to login with Touch ID
instead:
'191/224'
'LastPass Manual'
The LastPass Vault
From the Vault page, you will have access to all major LastPass features and options.
Sites
The first thing you will see is your Sites tab and a list of all Sites that you have in your LastPass
account. �Tapping on any of these Sites will bring up your Site action menu:
This menu allows you to�Delete�the entry,�Launch�your Site in the LastPass
browser,�View�the Site entry and credentials,�Edit�the Site,�Copy�the Username or
Password from the entry to the iOS clipboard, or�Show�the Password. �Launching your site
from the Vault will AutoFill your login credentials for that particular Site. Look�below�for more
information on web browsing using the LastPass iOS app.
Secure Notes
The Notes tab is a separate listing of all the Secure Notes that you have stored in LastPass.
Tapping on a Note here will allow you to view the Note:
'192/224'
'LastPass Manual'
Clicking 'Edit' will allow you to edit the note as seen below. By clicking on the camera icon, you
can add an image to the note. By clicking on the microphone icon, you can add a voice recording
to your note.
Form Fills
By tapping on the Form Fill tab, it will bring you to a separate listing of all of your form fill
profiles. By selecting one, you will be able to view and edit its details:
'193/224'
'LastPass Manual'
The LastPass Menu
By clicking on the LastPass icon in the top right-hand corner of your Vault, you will be given a
number of options:
1. My LastPass Vault allows you to return to your Vault.
2. Sites takes you to your stored sites as well as gives you the option to save a site.
3. Form Fill Profiles displays your stored Form Fills and allows you to create a new Form Fill
Profile or Add a Credit Card Profile.
4. Secure Notes allows you view your current Secure Notes and Add a Secure Note.
5. Add New�allows you to add a new site, Secure Note or Profile.
6. Generate Password will open the password generator tool.
7. Settings opens further options for the app.
8. Security Check will allow you to check how secure the Passwords in your Vault are.
9. Tools will give you the option to change to an Identity or Refresh your Vault (Force
LastPass to sync updating any changes you have made) and access the About page, which
will provide the current version number you are using and when it was built.
10. Logoff will manually log you off.
Settings
'194/224'
'LastPass Manual'
1. Clear LastPass Cache:�Clears the local cache of the Vault in the app.
2. Clear Clipboard: Erases your clipboard so the last thing you copied will not paste.
3. Clear Browser Cookies:�Clears the LastPass cookies.
4. Clear Browser Cache:�Clears the local cache of the LastPass browser.
5. Close All Tabs: Closes all tabs in the LastPass browser.
1. Use Touch ID:�Enable Touch ID Verification to replace the�Master Password for
password reprompt. This is only available in devices running iOS 8 or above.
2. Use LastPass Pin: Set a pin number to log in after returning from the background. (This
will not activate if Touch ID is enabled).
3. Lock Options: Set the frequency of which LastPass ask for reauthentication with Touch ID
or PIN when accessing the app. You can ask LastPass to always prompt when accessing the
app, or to only prompt you every few minutes or hours.
4. Auto Logout:�Set how long you would like LastPass to remain logged in until it
automatically logs out. �You can set it to never log out of LastPass or after a certain
amount of time.
5. Log Out on Close:�Enable to have LastPass automatically logout whenever you close the
app (double tap the home button > swipe up).
6. Close Tabs on Logout:�Browser tabs will automatically close after logging out.
7. Clear History on Logout:�Browser history will automatically be deleted after logging
out.
8. Clear Cookies on Logout:�Browser cookies will automatically be deleted after logging
out.
9. Show List Index:�Allows your groups to appear in the Vault so you can search easily by
group.
10. Remember Email:�Automatically fill in your email address next time you log in to the
app.
11. Remember Password:�Automatically fill in your password next time you log in to the
app (Warning: this will significantly decrease the security of your LastPass account! This
will also disable Master Password reprompt).
12. Advanced Settings: Opens�more options and settings:
'195/224'
'LastPass Manual'
1. Username in Vault: Allows usernames to be listed below LastPass entries when viewing
in the Vault
2. Search within Secure Notes:�Allows you to search words and phrases within your
secure notes.
3. Search within Username Fields: Allows you to search words or phrases within your
username fields.
4. Search Engine:�Allows you to set your default search engine.
5. LastPass Data Center: Allows you to view which data center your data is store at.
6. Safari Bookmarklet/LP Autofill/LP Autologin/LP FormFill: provides directions on how
to install Bookmarklets.�By tapping on the first Bookmarklet, you will be taken to a page
in Safari that shows instructions on adding this feature to Safari. �Bookmarklets will allow
you to AutoFill, AutoLogin, and Form Fill in the Safari mobile browser. �The LastPass App
cannot AutoFill in Safari �(Safari does not allow 3rd party integration) - only in the LastPass
browser built into the app. �For more information on Bookmarklets, go to
our�Bookmarklet page.
Using the LastPass Browser on iOS device
While you can use the LastPass app solely as a repository for your passwords, for the best
experience we recommend that you use the built-in browser to view and AutoFill your site logins.
�To get to the LastPass browser, you can launch a site from your�LastPass Vault�or you can
simply type in a URL in the search bar.
'196/224'
'LastPass Manual'
When you launch a site from the LastPass Vault on your iOS device, it will automatically fill in
your login credentials. �If you choose to manually navigate to a site using the browser, you can
still AutoFill by selecting the grey LastPass asterisk within the login textboxes. �You will then be
presented with all of your existing entries for the current site you are on:
If you are at a webpage with a form to fill, clicking on the grey LastPass asterisks will give you fill
form options:
�If you click on the grey LastPass asterisks in a generate password field, you can use our
password generator as seen below:
Tapping Show Advanced Options will provide more options as seen below:
'197/224'
'LastPass Manual'
Autofill in Safari
With iOS 8 and above, use the LastPass extension to autofill in Safari.
Enable the LastPass Extension in Safari
1. Install LastPass for Premium Customers from the App Store.
2. Disable Safari Autofill:
Go to iOS Settings
Find and tap on Safari
Under General, tap Passwords and Autofill
Toggle Names and Passwords off
3. Open Safari.
4. Browse to the page you want to login to.
5. Tap the Share icon�to open the extensions menu.
6. On the bottom row, scroll the extensions to the right to reveal the 'More'�button.�
7. Tap 'More' and toggle LastPass on in the list.
8. LastPass will now appear in your list of extensions. You can tap and drag the LastPass icon
to move it anywhere on your extensions list.
'198/224'
'LastPass Manual'
Use LastPass in Safari
1. Login to the LastPass for Premium Customers app.
2. In Safari, browse a site you would like to login to.
3. Tap the Share icon.
4. Tap the LastPass Icon.
5. If you have Touch ID, PIN, or Master Password reprompt enabled, you will be asked to verify
your login.
'199/224'
'LastPass Manual'
6. LastPass will present you with a list of available logins for that site. Tap the site to autofill
and log you in.
Autofill in Safari Video Tutorial
LastPass Limitations in iOS Devices
Unfortunately with Apple strictly locking down the iOS environment, these
following limitations are known with no workarounds:
Logging into other Apps --�Apple's limitation on the types of
interactions/communication that takes place between iOS apps prevents us from being
able to auto fill passwords into other apps from the LastPass app. And while launching
'200/224'
'LastPass Manual'
some apps is possible, we do not support it because Apple's URL scheme-based system
cannot be generalized to work with all apps, and we cannot guarantee that the app
launched is the correct application, since multiple apps can register for the same URL
scheme.
Chrome Mobile and LastPass Bookmarklets -�After installing Bookmarklets,
please review this video on how to utilize them in Chrome mobile:
LastPass and iCab
We have joined with iCab, a leading mobile browser for iOS, to support LastPass. With iCab's
update to 7.2, LastPass Premium users can enjoy direct integration with the browser, with the
ability to save new sites, fill logins stored in LastPass, and fill forms with LastPass profiles.
When you launch the browser, you can log in and out of your LastPass account from iCab's
settings (the gear icon). The LastPass icon will then show in the iCab URL bar, which is actually a
clickable menu. From the menu, you can save a new site, fill a form with an existing profile, fill a
login saved in LastPass, or launch the LastPass.com site.
iCab is available for $1.99 on the App Store for iPhone, iPod touch, and iPad with iOS 5.1 or later.
Note that none of the multifactor authentication options are currently supported on iCab mobile
browser.
If you have multifactor authentication enabled for your LastPass account, and have restricted
mobile login, you�ll receive an error that the device is restricted.
You will need to go to your LastPass Icon > My LastPass Vault > Settings > Multifactor
Authentication, ensure that you have permitted mobile access with your multifactor
authentication method. Then in the "Mobile Devices" tab ensure that you uncheck the "restrict"
option, if it was previously checked, then log in again on the iCab mobile browser.
LastPass Wallet
LastPass Wallet is a free mobile app available for iOS devices (iPhone, iPod Touch, and iPad).
Wallet makes it easy to store your physical wallet on your smartphone, so you can securely
backup and sync your most valuable personal information:
'201/224'
'LastPass Manual'
Wallet is built around LastPass' 'Secure Notes'�feature, with templates for�credit cards,
passports, driver�s licenses, membership cards, bank accounts, and more. In addition to the data
filled out for the note, audio clips, photos, and large blocks of text can also be stored in a
Note.�Any card, piece of paper, or form of data that someone would keep on their person can be
stored in Wallet, where it is encrypted and automatically backed-up to the cloud with LastPass.
Not only does Wallet provide a secure archive of your most valuable personal information, it will
also help significantly with the process of replacing a lost physical wallet.
Getting Started
Existing LastPass users can simply install the app from the App Store on their iOS device and
login with their usual account information. Any existing Secure Notes will automatically sync
to Wallet, where they can be viewed, edited, and synced back to other locations.
New LastPass users can create an account via the app, then start creating Notes.��If new
users choose to explore LastPass features with the desktop browser add-on, they can login
with their newly-created account, and any data added via Wallet will be available in other
locations where they access the account.
Wallet Features
Once a user has created their account or logged in with an existing account, they can start
'digitizing' their physical wallet and take advantage of the features offered by LastPass
Wallet:
Add Notes
After logging in to Wallet, a user can tap the "Add New" tab to choose a Note template:
After choosing a Note type, enter the data for the Note and tap the "Save" button when
done. Notes can be created for credit cards, PINs, travel documents, insurance cards,
email accounts, memberships, bank accounts, and more:
'202/224'
'LastPass Manual'
Grouping
Create categories for easily locating Notes:
Favorites
Mark frequently used Notes for quick reference in the �Favorites� tab. In the 'Edit'
menu for a Note, tap the heart icon to mark the Note as a Favorite.
Audio clips
When adding or editing a Note, tap the mic icon to add voice recordings or other sound
clips. The clip will then be stored as an attachment in the Note.
Photo storage
When adding or editing a Note, tap the photo icon to upload or capture images. The
image can then be stored in the Note as an attachment and securely backed up to the
LastPass account.
Settings
Security features are available in the Wallet 'Settings' menu to restrict access to the app and
keep your data as secure as possible. By tapping on the Settings tab, a user can choose to
enable a number of security options and app settings:
'203/224'
'LastPass Manual'
1. Logoff:� Logs you out of your current account and takes you back to the app login screen.
2. Refresh: Refreshes the connection with the server, so you can immediately sync any new
data from LastPass Wallet to the server, and vice versa.
3. Clear Cache: Clears the locally stored cache; this includes data stored locally that makes
Offline Access possible.� This data is stored again upon your next successful online login.
4. About:� Tells you the version number and build date of the current app.
Settings:
1. Logout on Close: When enabled, this option will log you out of your account when the app
is closed. �Please note, closing the app means completely 'killing' the app or turning off
your iPhone.
2. Logoff on Idle: Setting a time limit for this option will log you out of your account when
the app has been idle for 'X' minutes. �In the screenshot above, the iPhone is set to Never
logoff when idle. �Setting some time limit for this, even if extremely high, is a good
security measure in the case your phone is lost or stolen.
3. Use Pin Code: Allows you to set�a four digit Pin Code to be asked for upon re-entry to
the app after an initial login using your Master Password. �We highly recommend you use
this if you leave yourself logged into LastPass Tab when leaving the app to multi-task.
4. Require pin after returning from background: Allows you to set a timer so you are
only reprompted for your Pin Code after 'X' minutes. �In the screenshot above, the app is
set to ask for the Pin Code after each time you leave the app and return to it from the
background.
Secure cloud sync
As always with LastPass apps and addons, all sensitive user data is encrypted and decrypted
locally before being synced to LastPass for safe, easy access everywhere.�A tab in the
LastPass Wallet app reminds new users that they can install LastPass on their personal
computer for free and login with the same account to start saving logins, generating new
passwords, and more. Any data stored in LastPass Wallet will be securely synced to LastPass
and made available on all browsers, computers, and mobile devices where the LastPass
account is used.
Availability
The LastPass Wallet app is available for free from the App Store on iPhone, iPod Touch, and
iPad or at�www.itunes.com/appstore.
Currently, Wallet users can utilize 50MBs of data storage space for free. We anticipate
offering 1GB of space for�Premium-level users. Premium users will continue to have the
added functionality of viewing, editing, and logging in to stored sites via the LastPass
mobile apps. Data allowance for Wallet users may change in the future if needed.
Windows Phone
LastPass for Windows Phone is an application that will allow you to carry your LastPass data
around with you and easily login to websites from your Windows Phone (7.5+).
LastPass for Windows Phone includes a built-in browser that will automatically fill your login
'204/224'
'LastPass Manual'
information for each of your stored LastPass sites while giving you access to most major
features.
The application allows you to download all of your LastPass information from the server and store
it in a secure, encrypted data-store that is saved to your Windows Phone. As always, this data can
only be unlocked using your email address and Master Password.
As with all smartphone apps, LastPass for Windows Phone is part of our�Premium�offering.
Installing LastPass for Windows Phone
To install LastPass for Windows Phone, open the Windows Store�on your device and search for
LastPass.
Logging into LastPass
LastPass for Windows Phone decrypts your data and displays all of your Secure Notes and Sites in
a searchable interface. It also allows you to add, update, and delete Secure Notes and Sites and
launch a browser to easily login to your sites.
After installing the LastPass browser application on your Windows Phone, you can launch the
application by tapping on the icon. LastPass will then prompt you to enter your LastPass email
and Master Password:
Once you submit your login credentials, LastPass will launch your searchable Vault:
The LastPass Vault
'205/224'
'LastPass Manual'
From the Vault page, you will have access to major LastPass features and options. �The first
thing you will see is your Sites tab and a list of all Sites that you have in your LastPass account.
�Tapping on any of these Sites will bring up your Site action menu:
This menu allows you to�Launch�your Site in the LastPass browser,�Edit�the Site,
�or�Copy�the Username or Password from the entry to the Windows Phone clipboard.
�Launching your site from the Vault will AutoFill your login credentials for that particular Site.
Look�below�for more information on web browsing using the LastPass Window Phone app.
The next option in your Vault is the Favorites tab:
'206/224'
'LastPass Manual'
Favorites Tab
This tab looks the same as your Sites tab, except only the sites and secure notes displayed are
specifically designated as Favorites. �Tapping on an entry will bring up the same options as the
tap menu in the Sites Tab. �You can designate a�Favorite�by editing the individual Site or
Secure Note.
Add New
'207/224'
'LastPass Manual'
While in your Vault, tapping on �three-dot menu�will open a new a LastPass menu which
includes add secure note, add site, refresh sites, browser, indentities, settings, and about.
Clicking the Add Site option or clicking the Add icon allows you to easily add new Site entries to
your Windows Phone. �Below is the creation dialog for a new Site:
Notes
The Add New�Secure Note�dialog can be seen below:
'208/224'
'LastPass Manual'
There are a number of Secure Note formats. �On the main Add Secure Note Page, you can scroll
and choose which Secure Note format you'd like. �Below is the Add Secure Note page for a
Credit Card:
'209/224'
'LastPass Manual'
The Notes tab is a listing of all the Secure Notes that you have stored in LastPass:
Tapping on a Note here will allow you to view the Note. �You can also select Edit and make
changes to existing Notes from here as well.
Settings
The Settings tab gives you access to a number of LastPass options:
'210/224'
'LastPass Manual'
To access setting, tap on the three-dot menu from the Vault.
Actions:
1. Password Reprompt on Activate:�Enables LastPass to prompt for your Master
Password�every time that you enter the app
2. Reprompt Bkgrnd Mins:��Allows you to set a time limit so you are not prompted for
your Pin Code for "X" minutes
3. Logoff Bkgrnd Mins:�Setting a time limit for this feature will ensure that your LastPass
app logs off after X minutes of LastPass being logged in, but in the background of your
device.� This is another good security feature to use when concerned about the loss or
theft of a mobile device
4. Set Pin Code:��Allows you to set�a four digit pin code to be prompted for upon re-entry
to the app after an initial login using your Master Password
Using the LastPass Browser on Windows Phone
While you can use the LastPass app solely as a repository for your passwords, for the best
experience we recommend that you use the built-in browser to view and AutoFill your site logins.
�To get to the LastPass browser, you can launch a site from your�LastPass Vault�or you can
launch the browser from three-dot menu from withing your Vault.
'211/224'
'LastPass Manual'
�You can use the key symbol in the circle to select a site login and have it autofill. �Hitting the
icon which looks like a person in a circle allows you to choose a form fill profile to fill for a
webform and clicking on the icon with arrows in a circle allows you to toggle to full screen mode.
When you launch a site from the LastPass Vault on your Windows Phone, it will automatically fill
in your login credentials. �If you choose to manually navigate to a site using the browser, you
can still AutoFill by selecting the LastPass key icon at the bottom of the app. �You will then be
presented with all of your existing entries for the current site you are on:
After tapping on an entry, it will AutoFill into the login fields. �Tapping on the Form Fill icon
(person in circle), will offer the same option with your Form Fill Profiles.
Symbian S60
LastPass for Symbian S60 (3rd Edition+) allows you to carry your LastPass data around with you.
As always, this data can only be unlocked using your email address and password.
As with all smartphone apps, LastPass for Symbian S60 is part of our Premium offering and can
be tested with a 14-day free trial.
Installing for Symbian S60 Devices
To install, point your Symbian S60 Browser to:�https://lastpass.com/lpsymbian.jar
Using the Symbian S60 App
'212/224'
'LastPass Manual'
LastPass for Symbian S60 displays all of your Secure Notes and Sites in a searchable interface. It
allows you to add, update, and delete Secure Notes and Sites:
When editing text (whether it be logging in with your LastPass master email address and
password, adding a site, or whatever else), we recommend using the T9 soft key to invoke your
phone's native editor. If the cursor is within a text field and the T9 soft key isn't present, try
tapping the left or right directional buttons to get it to appear.
Windows Surface
LastPass for Microsoft Surface is an application that will allow you to carry your LastPass data
around with you and easily login to websites from your Surface devices.
LastPass for�Microsoft Surface includes a built-in browser that will automatically fill your login
information for each of your stored LastPass sites while giving you access to most major
features.
The Windows application allows you to download all of your LastPass information from the server
and store it in a secure, encrypted data-store that is saved to your Surface device. As always, this
data can only be unlocked using your email address and Master Password.
As with all Surface apps, LastPass for Surface is part of our�Premium�offering.
Installing LastPass for Surface
To install LastPass for Surface, open the�App Store�on your device and search for LastPass.
Logging into LastPass
LastPass for Surface decrypts your data and displays all of your Sites and Secure Notes in a
searchable interface. It also allows you to add, update, and delete Secure Notes and Sites and
launch a browser to easily login to your sites.
After installing the LastPass application on your Surface device, you can launch the application by
tapping on the LastPass tile. LastPass will then prompt you to enter your LastPass email and
Master Password:
'213/224'
'LastPass Manual'
Once you submit your login credentials, LastPass will launch your Searchable Vault:
The LastPass Vault
From the Vault page, you will have access to all major LastPass features and options. �On the
left side of your Vault will be selections for your sites. secure notes, form fills and a search tool.
�Tapping on any of the sites from the Vault or swiping up from the bottom of the Surface device
will bring up your action menu:
This menu allows you to�Launch�your Site in the LastPass browser, Add a Site, Add a Note,
Add a Form Fill Profile,�View�and/or Edit Site entry and credentials,�Copy�the Username or
Password from the entry to the Surface clipboard, or Logoff. �Launching a site from the Vault
'214/224'
'LastPass Manual'
will AutoFill your login credentials for that particular Site. To Launch a site, tap on the site to
highlight the Site and tap the Browser from Site action menu.
Favorites Tab
Sites and secure notes that are specifically designated as favorites are categorized under the
Favorites header in the Vault. �Tapping on an entry will bring up the same options as the tap
menu in the Sites Tab. �You can designate a�Favorite�by editing the individual Site or Secure
Note.
Add New Site, Add New Form Fill, Add New Secure Note
The Add New options from the Action Menu allows you to easily add new Site entries,�Fill
Form�Profiles, and�Secure Notes�via your LastPass Surface App. �Below is the creation
dialog for a new Site:
The Add New�Fill Form�dialog can be seen below:
'215/224'
'LastPass Manual'
Finally, you can also add new�Secure Notes. �There are a number of Secure Note formats.
�On the main Add New page, you can scroll and choose which Secure Note format you'd like.
�Below is the Add Secure Note page for a Credit Card:
Search
Tapping on the Search tool from your Vault will bring up a search bar for scanning the Vault for
specific sites or notes. �Below is the search page:
'216/224'
'LastPass Manual'
Additional Vault Menu Actions:
1. View:�Allows the user to choose between All items in Vault, Sites only, Secure Notes only,
or Form Fills only.
2. Help:�Gives user quick way to access LastPass user manual.
3. Logoff:�Logs the current user out of the LastPass surface app.
Generate Password
When adding, editing, or browsing a site from within the LastPass Surface App or adding and
editing a Secure Note, users will have the option to generate passwords on the Surface with a
Password Generator. �Below is a login page where the Password Generator is available:
Using the LastPass Browser on Surface device
While you can use the LastPass app solely as a repository for your passwords, for the best
experience we recommend that you use the built-in browser to view and AutoFill your site logins.
�To get to the LastPass browser, you can launch a site from your�LastPass Vault�or you can
launch the browser from the browser icon located in the menu bar at the bottom of your Vault.
LastPass App for Mac
The LastPass App for Mac allows�you to view, edit, and manage your Vault. Launch sites into
your default browser to automatically login from the LastPass App.
Install the App
'217/224'
'LastPass Manual'
Find LastPass in the App Store�and click 'GET' to install the app.��The app will install�in
your Applications folder. Once installation is complete, 'GET' will be replaced with 'OPEN'.
Click on 'OPEN' to launch the app. You can keep the LastPass App in your Dock by second
clicking the LastPass App icon > Options > Keep in Dock.
Launch the App
Open LastPass by clicking on the LastPass App icon.
Once opened, the LastPass Menu Bar icon will appear in the Menu Bar.
Click the LastPass icon to �launch the app and login.
Once logged in, the Menu Bar icon will turn from gray to black.
The LastPass App Vault
The LastPass App Vault stores all of your Sites, Secure Notes, and Form Fills. �When an item
in the Vault is selected, the Details pane will appear on the right.
'218/224'
'LastPass Manual'
Vault Features:
Toggle between viewing Sites, Secure Notes, FormFills, or Favorites from the left menu.
�Add a new Site, Secure Note, or FormFill�by clicking '+ADD' at the top.
Click �the
�Star icon to mark an entry as a Favorite.
Click the
�Launch icon to launch the site in the default browser. (Icons will reflect your default
browser)
Click the�
�Copy icon to copy the item to the clipboard to paste it later. When an item is copied to
the clipboard, the Menu Bar icon will turn red�
.
Select Security Challenge to start the Security Challenge.
Generate Password
In the Details pane, you can generate a new password by clicking 'Generate
Password'. �Note that you will still have to change the password on the website.
'219/224'
'LastPass Manual'
Menu Bar Icon
Quickly access everything you need for the LastPass app from the Menu Bar icon.
Quick Search &�Hotkeys
Make your LastPass for Mac experience faster by using Quick Search and hotkeys. The
Vault and Quick Search can be opened by clicking on the Menu Bar icon, or you can
use the following hotkeys (these can be changed in Preferences):
- SHIFT+COMMAND+L (??L) - Open Quick Search
- Enable in Preferences - Open the Vault
With Quick Search, you can quickly search for any item in the Vault.
Start typing in the search field and Quick Search will start filtering your logins.
Like the Vault, clicking on the
�Launch��button�will launch the site in the default browser and clicking on the
�Copy button�will copy the password. Pressing the Enter key will also launch the site
into the browser.
Preferences
'220/224'
'LastPass Manual'
Open Preferences by clicking on the LastPass Menu Bar icon�and selecting
Preferences.�In Preferences, toggle your security preferences to control when the
LastPass for Mac app logs out and in. Change your hotkey preferences to new keys if
desired.
Logout and Quit
To logout, �choose Log Off��from within the Menu Bar icon.�Select Quit LastPass
to quit the app.
Windows 8
LastPass is officially ready for the new platform, with the LastPass Windows app now�available
in the Windows Store!
The LastPass app provides access to all of your stored data and the core functionality of the
password manager, but some features are more limited due to the nature of the platform.
Users must be running Windows 8 RTM to see the LastPass app in the Windows Store and run it on
their computer. You must be running the official Windows 8 release to see the LastPass app in the
Windows Store. If you're running the Release Preview or Consumer Preview versions, you'll need
to upgrade.
Tips for Using LastPass in Windows 8:
'221/224'
'LastPass Manual'
Launch the app and login to automatically sync your stored data.
If you have any items marked as Favorites, the Favorites folder will be displayed first by
default, followed by the other folders in your Vault. You can use semantic zoom (click the
button in the lower-right corner, or use the pinch gesture on touch screens) to view all
folders, or scroll horizontally through all folders and stored sites.
Right-click (or swipe up) on the lower part of the Vault to access the app bar, with options
for adding a site, adding a note, refreshing sites, or logging off.
Right-click (or drag down) a site name in the Vault to access the edit, delete, and copy
username & password functions.
Left-click or tap a site name to launch the login within the LastPass app, where LastPass
can fill your usernames and passwords.
If you have more than one matching login for a site, click or tap the LastPass icon to select
another entry.
In the LastPass embedded browser, the icon is always visible in the top-right corner, where
options are available to open the Vault, fill forms as you shop, use the�Save All Entered
Data function, and fill matching logins.
The app is integrated into search, which means you can start typing in the LastPass Vault to
intiate search or open the Charms menu to enter a keyword to quickly find matching login
information.
From the Charms menu, you can click or tap "Settings" to set a time limit for "autologoff
after idle".
Set up YubiKey, Grid, or Google Authenticator multifactor authentication for better
security of your account.
Use the password generator in the add/edit page, or in the embedded browser, to generate
secure passwords for your sites.
Please read the FAQ at the bottom of this page for more information.
Known Limitations of the App:
YubiKey, Google Authenticator, and Grid are the only�multifactor authentication
methods�currently supported.
Fill Form Profiles�cannot be added, edited, or deleted.
LastPass cannot hook into Internet Explorer unless you're in IE desktop, so copy-paste from
the LastPass Vault to the browser or elsewhere is the only workaround
(Bookmarklets�aren't an option either).
Global LastPass account settings aren't accessible in the app, so you'll need to use the
desktop version to manage your account.
'222/224'
'LastPass Manual'
Frequently Asked Questions
Is LastPass integrated with the modern Internet Explorer 10 (IE10)?�In the modern
Windows 8 environment, IE10 does not support plugins, so it is not possible for LastPass to
integrate with it like the desktop version. If this changes, we will add support for it.
Is Internet Explorer used as the embedded browser in LastPass?�No. While the browser
included as part of the Windows 8 software development kit (SDK) is very nice, it is not a fullfeatured IE browser, and only allows the host application a limited level of control over its
behavior. So while many or most sites will work correctly in the embedded browser, some sites
may have strict browser checks that will not allow the embedded browser to work properly.
How do I make LastPass work with other apps, and those sites that don't work with
the embedded browser?�LastPass includes Copy Username and Copy Password commands in
the app bar, that allow you to paste the information into Internet Explorer or other apps. If
Windows 8 is updated to allow LastPass to work more closely with other apps, we will support
that. In the meanwhile, LastPass supports snapped mode, so if you need to use IE or another app,
you can snap LastPass to the side and use the copy commands to access your credentials.
Why doesn't LastPass support the Share charm?�The Share charm is currently limited to
sharing things like URLs and snippets of text, but has no way to specify whether the data is a
username or password and should be handled appropriately or put into specific fields. If the Share
charm is updated to allow LastPass to securely share login credentials, we will support it.
I can't find a feature or a feature doesn't work, what do I do?�We will try to include as
many of top LastPass features in the Windows 8 version, but some features may simply not be
possible. Because applications in the modern Windows 8 environment are walled off from each
other, except for very specific communications mechanisms such as the Share charm, features
such as plugins are not supported. Finally, if something doesn't work properly, please contact us
and let us know! We want to know what problems you're having, so that you will have a good
experience with our Windows 8 app.
Can I install and run LastPass extensions into Windows Tablets (Surface/Surface Pro)?
�Not on�ARM-based Windows RT tablets (eg. Surface), but you can if it's an Intel-based tablet
running full Windows 8 (Surface Pro). �However on Windows RT, you can still use Bookmarklets
in the "desktop mode" for IE10.
How can I report bugs or questions to LastPass?�Please open a support ticket with the
team:�https://lastpass.com/supportticket.php�. The more details you can provide,
including screenshots and steps to reproduce where applicable, the better we can investigate and
resolve the problem you're reporting.
Uninstalling & Deleting
Before you complete the below steps to uninstall LastPass or delete your account, please contact
us at Support to see whether we can help you address your issue:
http://lastpass.com/support_helpcenter.php
If you find that you need to uninstall LastPass or delete your account, we ask that you leave us
feedback in the forms provided so that we can either help you resolve the problems you're
experiencing or use your comments to continue making improvements.
Uninstalling LastPass
Uninstalling LastPass for ONLY a specific browser:
'223/224'
'LastPass Manual'
Internet Explorer and Firefox extensions, go to�Start -> Program Files -> LastPass ->
Uninstall LastPass.
Google Chrome extension, go to Google Chrome -> Menu (3 bars) -> Tools -> Extensions
and click the Trash can symbol next to LastPass.
Firefox extension for Windows, go to Tools -> Add-ons -> Extensions -> Remove LastPass.
Firefox extension for Mac OS X, go to Tools -> Add-ons -> Extensions -> Remove LastPass.
Safari for Mac OS X extension, go to Safari -> Preferences -> Extensions -> LastPass ->
Uninstall
Safari for Windows extension, go to Safari -> Edit -> Preferences -> Extensions -> LastPass
-> Uninstall.
Opera extension, go to Opera -> Extensions ->�Click 'X' to Remove�from Opera.
Deleting Your LastPass Account
Go to the Delete Your Account page and follow the directions. As the web page mentions,
please be sure to export and save all of your data before deleting your account, as this operation
is not reversible. If you also can't remember your password, you'll have to use Delete account
no password, which will send you a confirmation email first.
If you choose to permanently delete your account, you should also uninstall the software from
every device you used with LastPass.
Site Map
[sitemap]
'224/224'