1
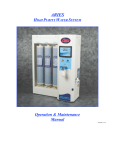
GEMINI
HIGH PURITY WATER SYSTEM
Operation & Maintenance
Manual
Ver 2.1
Thank you for purchasing the Gemini High Purity Water Dispensing System. For optimum performance and
safety please read and follow these instructions carefully.
You have a quality, world class water treatment system that will provide ultrapure water for many years of trouble
free operation. Years of engineering and practical experience went into manufacturing this appliance which will
dispense water exceeding every requirement for Type I water purity. To assure that you operate and maintain this
unit properly and safely please read this manual carefully.
In order that we may keep you informed regarding your unit, please take a moment to complete and mail the
owner registration card provided with this appliance.
If you have any questions concerning the operation of the unit, or need service, refer to section 11.0
"REQUESTING SERVICE". When requesting service you will need the model and serial number, as well as the
purchase date of your unit. For your convenience record this information below:
Model Number: __________________________ Date:
__________________________
Serial Number: ___________________________ Dealer: __________________________
Contact: _________________________________
Phone:
_________________________
Cartridge #1 _____________________________ Part Number ____________________
Cartridge #2 _____________________________ Part Number ____________________
Cartridge #3 _____________________________ Part Number ____________________
Options Installed: _______________________________________________________________
________________________________________________________________________________
________________________________________________________________________________
ARIES a division of ResinTech, Inc. * 160 Cooper Road * West Berlin, NJ 08091
Phone: (856) 768-9600 * Fax: (856) 768-9601 * www.arieswater.com
Table of Contents
Section
Description
1.0
Important Safeguards
2.0
Glossary of Terms
3.0
General Description
3.1
Principles of Purifying Water
4.0
Product Specifications
5.0
Setting up and Using Your GEMINI System
5.1
5.2
5.3
5.4
5.5
5.6
5.7
5.8
5.9
Setup
Installing the Water Purifying UV lamp
Installing the Water Purifying Cartridges
Applying Water Pressure and Bleeding Air
Applying Electrical Supply
Initial Polishing of new cartridges
Manual Dispensing of Water.
Programming and Dispensing a Batch of Water
Entering the SERVICE Mode
6.0
Display & Keypad Functions
7.0
Component Location & Identification
8.0
Maintenance
8.1
8.2
Replacing the UV lamp
Replacing the Resin & Filter Cartridges
9.0
Sanitization Procedure
10.0
Options and Accessories
11.0
Requesting Service
12.0
Charts and References
13.0
Warranty and Sales Contacts
ARIES a division of ResinTech, Inc. * 160 Cooper Road * West Berlin, NJ 08091
Phone: (856) 768-9600 * Fax: (856) 768-9601 * www.arieswater.com
1.0 Important Safeguards
When using this electrical appliance, basic safety precautions should always be followed including the
following:
•
READ ALL INSTRUCTIONS before use.
•
Follow all WARNINGS and INSTRUCTIONS marked on the product.
•
DO NOT immerse appliance in water or other liquid. Use a soft cloth and mild detergent when
cleaning the cabinet or inside of the basin.
•
DO NOT remove the top cover with unit power applied.
•
DO NOT remove the ultraviolet lamp cover with unit power applied.
•
DO NOT look directly at the ultraviolet lamp with unit power applied.
•
DO NOT operate any appliance with a damaged or frayed power cord. To disconnect the power
cord, grip the plug and pull it from the wall outlet, NEVER PULL ON CORD!.
•
DO NOT use this appliance outdoors. This appliance is intended for commercial, industrial,
institutional, and professional use. Use of this product in a manner other than recommended
herein, may void the warranty.
•
DO NOT operate this appliance without it being connected to an adequate water supply and purged of
air or damage to the pump may occur.
•
DO NOT allow the cord to hang over the edge of a counter top or to touch hot surfaces. NOTE: If
an extension cord is used, verify that the rating of the extension cord is equal to or greater than
the rating of the appliance.
•
Refer servicing of a defective or damaged unit to the factory or an authorized dealer.
•
The use of attachments not recommended by the manufacturer may adversely affect the water
purity or cause appliance damage and void its warranty.
•
Avoid contacting the dispensing outlets with any foreign materials or hands to prevent
contaminating them.
ARIES a division of ResinTech, Inc. * 160 Cooper Road * West Berlin, NJ 08091
Phone: (856) 768-9600 * Fax: (856) 768-9601 * www.arieswater.com
2.0
GLOSSARY of TERMS
The following terms are used throughout this text. Please take a few moments to familiarize yourself with them
so that the information and instructions within are clear.
TERM
DESCRIPTION
LED
Light Emitting Diode, is a semiconductor indicating device used for the status indicators
on the operator control panel of this unit.
LCD
Liquid Crystal Display, is a semiconductive display device used in the operator
control panel of this unit.
TOC
Total Organic Carbon. The identification of organic carbon in water is helpful to
assure successful water system operation. Trace organic chemicals can interfere
with highly sensitive reactions and alter biological processes.
TDS
Total Dissolved Solids conduct electricity. This conductivity allows you to measure the
concentration of salts directly in parts per million (ppm). Higher TDS increases the load on
the deionizing cartridges.
SDI
Silt Density Index, is a scale for determining the amount of suspended solids in water that
exceed 0.45 microns in size. A regulated flow is passed through a 0.45 membrane and
the flow, time, and pressures are plotted to arrive at the index number. Higher SDI
numbers result in premature fouling of resin and filters.
HPC
Heterotrophic Plate Count, formerly known as the standard plate count, is a
procedure for estimating the number of live heterotrophic bacteria in water and
measuring changes during water treatment and distribution.
ARIES a division of ResinTech, Inc. * 160 Cooper Road * West Berlin, NJ 08091
Phone: (856) 768-9600 * Fax: (856) 768-9601 * www.arieswater.com
3.0 GENERAL DESCRIPTION
This ultrapure water dispensing system has been
engineered to consistently produce ultrapure water
exceeding every requirement for ASTM Type I purity.
The system is user-friendly, requires minimal space
and maintenance, and harmonizes with existing
laboratory equipment, all at a low initial investment
and low operating cost.
A central dispensing station can supply the high
quality water needs of one lab bench or an entire
laboratory. The system may be wall mounted, set on
a bench, or free standing where bench space is of a
premium.
A unique feature of the Gemini is the Multi-Pass
UV-treatment system, in which water passes through
a special system of self-cleaning Teflon coils. While
in these coils the water is exposed to the appropriate
amount of ultraviolet wavelength to produce
biological control.
This patented technology,
eliminates the performance deterioration that has
been seen over time in other systems, and minimizes
the maintenance and operating costs compared to
other systems.
The influent water is treated by UV-irradiation
prior to entering the polishing cartridges phase,
thereby protecting the system's critical components
from bio-contamination, biofilm buildup, and eventual
spill over into the product water. The polished water
is again UV-irradiated before leaving the unit. The
Gemini delivers water of unsurpassed microbiological,
organic, and ionic purity through the dispensing
faucet which is continuously exposed to UV to
prevent contamination via airborne bacteria.
3.1 PRINCIPLES OF PURIFYING WATER
•
•
•
•
•
•
•
•
Multi-Pass Ultraviolet Irradiation is used for
organic reduction & bacterial reduction.
Low TOC Mixed Bed Resins are used for
polishing purity levels from pre-treated,
filtered, RO, distilled, or DI water to 18.2
megohms resistivity.
Microporous Resins are used, if necessary,
for removing colloids and silica from supply
water.
Absolute rated cartridges for critical
applications requiring particle retention of
0.05 through 0.45 micrometers.
Ultrafiltration for pyrogen reductions to below
0.05 units.
Dispenser outlet is continuously exposed to
UV light to prevent retrograde contamination
within the unit.
Microprocessor, controller, keypad and
display provide the user with a variety of
operating modes, system monitoring, and
flexibility for future enhancements.
A high resolution digital purity monitor
displays the ionic purity of the treated water
in Megohms to two decimal places. The user
never has to guess how pure the water is.
The built-in pump will recirculate the water for
the highest available purity.
A continuously cycling recirculation pump
polishes the water assuring the highest quality water
is always available, and a high resolution digital
monitor is built-in for continuous display of water
purity.
A microprocessor-based controller and operator
keypad provides the user with several dispensing
modes, while controlling the recirculation pump,
monitoring overall system performance and providing
system diagnostics. An easily accessible module
compartment makes cartridge replacements a simple
task. The built-in basin keeps any drips or spills
under control.
Optional pretreatment systems are available to
operate from tap water that does not meet feed
water specifications. They can be packaged into the
optional base cabinet. Reverse osmosis, distillation,
or deionizing pretreatment may be necessary
depending on the quality of your tap water for
optimum performance of .
ARIES a division of ResinTech, Inc. * 160 Cooper Road * West Berlin, NJ 08091
Phone: (856) 768-9600 * Fax: (856) 768-9601 * www.arieswater.com
4.0 PRODUCT SPECIFICATION
Design
•
•
•
•
•
Features:
Up to 3.7 lpm Continuous Flow On-Demand
Exceeds 18 Megohm Type I Water
Microprocessor Based Control
Touch Key Dispensing
4 – User Programmable Batch Dispense
Modes
• Digital Purity Monitor (standard)
• Automatic UV and DI filtration polishing
• Natural FEP, Kynar or Polypro Fittings
& Tubing to Prevent Contaminants &
Leaching.
• Silent Magnetic Drive Polishing Pump
• UV Protected Dispensing Nozzle
• Multi-Pass UV for Prevention
of Bacterial Growth
• Built-in Basin (standard)
• Easy Access Replaceable Cartridge
Compartment
• Provisions for up to (3) Cartridges in
Combinations of Deionizing Resins &
Filtration
Options & Accessories:
•
•
•
•
•
•
•
•
•
•
230 volt Operation power converter
Combination UV for Bacteria and TOC
Basin Drain Kit
Wall Mounting Kit
Base Cabinet and Waste Tank
Pre-treatment Packages in Base Cabinet
Teflon® Spray Gun with Recirculation
0.05 through 0.45 micron Final Filtration
Ultrafiltration
Sanitizing Kit
Typical Applications:
Media Prep
Tissue Culture
Glass Wash
DNA/NRA testing
Liquid & Ion Chromatography
Atomic Absorption
Physical Properties:
Dimensions (WxHxD):
50.8x55.3x47.6 cm
[20x21.75x18.75 in]
Shipping weight:
25 kg [55 lbs]
Power Requirements: 115vac, 60hz, 105 watts
[230 vac 50 hz available]
Feed Water Requirements:
Reverse osmosis, distillation, deionization or tap
water that meets the following:
Conductivity:
TOC:
Silt Density Index:
Pressure:
Connection:
Temperature:
< 150 uMhos
< 100 ppb
<2
20 - 50 psi [1.4-3.5 bar]
6' 3/8"OD pp tubing,
& 1/2" MPT ftg
< 80°F (< 27°C)
Treated Water:
Dispense flow:
Purity:
TOC reduction:
Temperature rise:
Microorganisms:
up to 3.7 lpm [1 gpm]
> 18 M_/cm
> 94 %
< 5°c [9°F]above feed
< 10 cfu / 1000ml
Teflon® and Kynar® are registered trademarks.
ARIES a division of ResinTech, Inc. * 160 Cooper Road * West Berlin, NJ 08091
Phone: (856) 768-9600 * Fax: (856) 768-9601 * www.arieswater.com
5.0 SETTING UP AND USING YOUR GEMINI SYSTEM
This section includes instructions for initial installation and start-up of the unit. Described herein are selection of
unit location, unit unpackaging, and connection of unit to the water and electrical supplies. Also described are
UV lamp installation, water treatment cartridge installation, purging of trapped air, and initial flush.
5.1 Setup
5.2
•
Select a location for the unit which is in close proximity to the water supply and electrical supply
connections. If the unit has been purchased with the BASIN DRAIN option, locate the unit near a sink
or waste connection. If the unit has been purchased with the WALL MOUNTING option, select a wall
which will support a 55 pound load on 16 inch stud centers or provide wall backing material.
•
If the water supply does not already have an isolation valve for servicing the Gemini, install one ahead of
the unit connection.
•
Carefully remove all of the packaging material and tape used for shipping purposes, and position the unit
in its operating location.
•
Using the water supply connection kit provided with the unit, connect the unit to the supply.
( DO NOT open the supply isolation valve at this time.)
Installing the Water Purifying UV Lamp
WARNING!!
Hold the UV lamp ONLY by the plastic ends. DO NOT touch the glass bulb. Finger prints
and oils from your hands will etch the glass and reduce UV life & performance.
If the lamp should become oily or dirty, clean it with a clean soft tissue or cloth wetted
with isopropyl alcohol.
.
•
•
Remove the top cover by removing the phillips head screws that attach it to the top platform. Gently
lift the top cover up and left, and set it aside. Carefully remove the UV bulb it from its protective
package. Holding the lamp by the plastic ends, slide the 4 - prong end of the lamp into the 3/4" hole
on the right side of the UV housing. Gently guide the lamp fully into the housing, up onto the lamp
guide (far side), and into the socket. Leave the top cover off until start-up is complete.
NOTE: The UV Bulb may have to be rotated so the 4 prongs align correctly with the bulb socket.
ARIES a division of ResinTech, Inc. * 160 Cooper Road * West Berlin, NJ 08091
Phone: (856) 768-9600 * Fax: (856) 768-9601 * www.arieswater.com
5.3
Installing the Water Purifying Cartridges
NOTE: For easy installation, the left and right hand cartridges must be installed first.
Install the center filter last.
•
Remove the stainless steel basin grill and set it aside. Remove the black front panel by pulling the
bottom forward and out (it is held in place with four (4) magnetic catches), and set it aside. This
accesses the water purifying cartridge compartment.
•
There are three (3) cartridge housings with removable bowls having top O-ring seals. The bowls have
right hand threads. Thread the bowl to the left to loosen and remove cartridges, and thread to the
right to close and seal. Remove the three bowls at this time and set aside being careful not to lose
the O-rings (store inside each bowl).
•
Locate the water purifying cartridges selected for your system. They must be installed in the correct
sequence to perform properly (water flows left to right). The left and center cartridge positions always
contain either AF-10-4010 or AF-10-4011, deionizer filters. The right position will contain either the
submicron filter or another DI filter, depending upon the system options and setup.
•
Drop the filter into the housing bowl. Check that the O-ring is on the upper seat inside the bowl (the
O-ring must be correctly in place or it may become pinched or cause the housing to leak). Align the
bowl and cartridge under the left (#1) position so that the cartridge top opening slips over the housing
center post. Gently thread the bowl to the right onto the housing. Use the filter wrench supplied with
the unit to gently snug the housing closed.
•
Install the right (#3) cartridge using the same care as above.
•
Install the middle (#2) cartridge using the same care as above.
5.4 Applying Water Pressure and Bleeding Air
•
•
•
Slowly turn on the water supply to the unit and correct any leaks at the supply connections. Water will fill
the left (#1) bowl, then the middle (#2 bowl) and the right (#3 bowl) in sequence. While the pressure on
the unit slowly increases to supply pressure inspect bowl seals for leaks. If a leak develops, turn off the
water supply, release the pressure from the system and then loosen the bowl to inspect the o-ring and
reseat, then repeat the steps above. If the leak persists or other leaks develop in the unit's plumbing,
please contact customer service (see section 11.0, Requesting Service).
For Ultrafilter option, it is necessary to bleed of the air in the in-line filter. Filter is located in the top portion
of the system. Remove the top cover and bleed air of ultrafilter as stated in section 5.6
If there are no leaks, re-install the black front panel (bent edge down and facing you), the stainless steel
basin grill, and the PVC top cover with the six (6) phillips head screws.
ARIES a division of ResinTech, Inc. * 160 Cooper Road * West Berlin, NJ 08091
Phone: (856) 768-9600 * Fax: (856) 768-9601 * www.arieswater.com
5.5 Applying Electrical Supply
•
The electrical outlet supplying the Gemini should be properly grounded and fused and not be able to be
switched off during facility vacancies.
•
Plug in the Gemini. The digital display will come on indicating purity, and the "A” and “B" LED will
alternate flashing.
5.6 "INITIAL POLISHING" of New Cartridges
NOTE: An initial rush of air will escape the system until the unit is completely filled with water.
Some splashing may occur.
•
Place a beaker or collection vessel on the grill directly below the dispensing nozzle. Press the "DISP"
function key to purge the trapped air and to rinse the cartridges and housings. Press the "DISP" function
key a second time to stop the flow of water once all the air has been purged from the system.
•
For Ultrafilter option, top cover should be removed. In-line ultrafilter should be visable with two side port
plugs. To bleed air in the ultrafilter, unit should be in the dispensing mode. With a towel present, slight
loosen the coarse screw plug to bleed off air. Air should come out of the port with a small amount of
water. Bleed until all air is removed and tighten plug. Note, avoid over-tightening plug as it is a coarse
thread. Remove power and clean up any water that is present. Re-install top cover and power up unit
and proceed.
•
Press the "MODE" function key. The ”A” LED will light continuously, the polishing pump, "R1" LED and
the UV light, "Fl" LED will come on. The unit is in the "INITIAL POLISHING" mode and the pump will run
for 2 hours. This will allow the system to polish and rinse the system components with high purity water.
After recirculating for two (2) hours, the system will automatically change to its "NORMAL" operating
mode.
•
During the "NORMAL" operating mode, the polishing pump and the "R1" LED will come on every 10
minutes and run for 2 minutes (minimum pump running time) to polish the water and keep it up to the
highest purity. Then the pump will shut off and relax until the next cycle.
•
In the "NORMAL" operating mode, pressing the "DISP" key will initiate the polishing cycle (the pump
comes out of the relaxed state) and the Gemini will dispense ultrapure water as indicated by the "DI" LED.
Press the ”DISP” key a second time to stop dispensing water.
•
We recommend a sample be collected in an appropriate sterile sample container and tested for water
purity. Periodic laboratory water testing to confirm the effectiveness of the treatment process is the
owners' responsibility.
ARIES a division of ResinTech, Inc. * 160 Cooper Road * West Berlin, NJ 08091
Phone: (856) 768-9600 * Fax: (856) 768-9601 * www.arieswater.com
5.7 Manual Dispensing of Water
•
Press the “DISP” to start and stop dispensing water.
•
Pressing the “1,2,3 or 4” batch buttons will automatically dispense the programmed amount of water
as set by the user. SEE SECTION 5.8 for BATCH PROGRAMMING INSTRUCTIONS.
5.8 Programming and Dispensing a Batch of Water
•
PROGRAMMING A BATCH
Press the “MODE” key once and the “C” LED will flash. This indicates that you are now in the batch
programming mode
•
Push any batch button to start the flow of water.
•
Dispense the desired amount of the batch.
•
Push the batch button a second time to stop the flow of water and lock in the batch.
•
All 4 batch buttons may be programmed in the PROGRAMMING mode.
•
Press the “MODE” key once to return to the NORMAL operating mode. The “A” LED will be light
continuously in the normal operating mode.
•
USING A BATCH
Press the desired batch to dispense, “1,2,3 or 4”
•
The GEMINI will automatically dispense the preprogrammed quantity of water.
5.9 Entering the SERVICE Mode
•
Push and hold MODE button for 5 seconds to enter maintenance mode.
•
LED “B” flashes indicating that the unit is in the Maintenance Mode.
•
All unit operations are off upon entering the maintenance mode.
•
The UV light, LED “FL” is off at all times in the maintenance mode.
•
DISP key toggles solenoid valve on and off
•
RECIRC key toggles pump on and off
ARIES a division of ResinTech, Inc. * 160 Cooper Road * West Berlin, NJ 08091
Phone: (856) 768-9600 * Fax: (856) 768-9601 * www.arieswater.com
6.0
DISPLAY AND KEYPAD FUNCTIONS
Be sure you understand the function of each key before using them.
•
Function Keys:
"DISP"
Single key "DISPENSING": In "NORMAL" operating mode, pressing this key will
start the polishing pump and "DISPENSE" ultrapure water
"RECIRC" Press to start/stop the "POLISHING" pump when the unit is in "MAINTENANCE
/ SERVICE" mode.
"1,2,3,&4" User programmable batch dispensing modes.
"FLUSH"
"MODE"
mode.
•
(For future enhancements).
Press to step through operating modes. Push and hold for 5 seconds to enter the “SERVICE”
LED Indicators:
"DI"
on when the "DISPENSING" solenoid valve is energized.
"R1"
on when the "POLISHING" pump is running.
"A,B,C "
indicates which MODE the unit is in.
LED
A and B
A
B
C
STATUS
ALTERNATING / FLASHING
ON
FLASHING
FLASHING
"FL"
on when the “UV lamp” in energized.
"R2"
on when in the “SERVICE” mode
MODE
INITIAL POWER UP / POWER LOSS
NORMAL OPERATING MODE
SERVICE / MAINTENANCE MODE
BATCH PROGRAMMING MODE
ARIES a division of ResinTech, Inc. * 160 Cooper Road * West Berlin, NJ 08091
Phone: (856) 768-9600 * Fax: (856) 768-9601 * www.arieswater.com
ARIES a division of ResinTech, Inc. * 160 Cooper Road * West Berlin, NJ 08091
Phone: (856) 768-9600 * Fax: (856) 768-9601 * www.arieswater.com
8.0 MAINTENANCE
This unit was designed and manufactured to have the ability to produce the purest water that can be obtained
for laboratory usage. It purifies water that meets or exceeds the specifications recommended by CAP, ASTM,
for Type I Reagent Grade Water when it is operated and maintained according to these instructions.
•
The ultraviolet lamp must be changed once each year.
•
The resin cartridges must be replaced when the purity meter indicates the water purity is below your
requirements.
•
The dispensing system must be sanitized if HPC tests indicate unacceptable bacteria counts or at
preventative maintenance intervals such as annually or semi-annually.
•
It is recommended to replace sub-micron filters and ultrafilters at scheduled intervals not to exceed
one year.
•
The basin area below the stainless steel grill should be cleaned regularly to prevent odors even if
the BASIN DRAIN KIT or BASE CABINET and WASTE TANK options are installed.
•
If the unit is equipped with the optional WASTE TANK, it must be emptied when full.
•
The exterior surfaces may be wiped clean with a mild detergent and a soft cloth to keep the unit
clean and new looking.
8.1 Changing the UV Lamp
WARNING!! ELECTRICAL SHOCK HAZARD
Before removing the top PVC cover, disconnect the power cord. FAILURE to do so could result in
electrical shock or personal injury.
Hold the UV lamp by the plastic ends ONLY. DO NOT touch the glass. Finger prints and oils from your
hands will etch the glass and reduce UV life & performance.
If the lamp should become oily or dirty, clean it with a clean soft tissue or cloth wetted with isopropyl
alcohol.
•
It is not necessary to turn off the water supply to replace the lamp.
•
For convenience, the UV lamp may be turned off by advancing the control to the "MAINTENANCE"
mode. However for safety, to prevent electrical shock it is advisable to unplug the unit when changing
the UV lamp.
•
Remove the top cover by removing the six (6) phillips head screws that attach it to the top platform.
Gently lift the top cover up and left, and set it aside.
•
Grasp the UV lamp by the plastic end on the right side of the UV chamber and pull the lamp to the
right until it is removed from the unit. It can then be discarded like any light bulb.
ARIES a division of ResinTech, Inc. * 160 Cooper Road * West Berlin, NJ 08091
Phone: (856) 768-9600 * Fax: (856) 768-9601 * www.arieswater.com
8.1
Changing the UV lamp (continued)
•
Using the plastic end as a handle, carefully remove the new UV lamp from its protective package.
Holding the lamp so that the 4 metal prongs are on the left, slide the lamp into the 3/4" hole on the
right side of the UV housing. Gently guide the lamp fully into the housing, up onto the lamp guide (far
side), and into the socket. The bulb may have to be rotated that the 4 prongs match up with the bulb
connector.
•
Replace the top cover.
•
Plug the unit in (or turn the UV on by advancing to the "NORMAL" mode) and confirm that the lamp is
lit by observing the dispensing spout for a blue-purple glow. If it is not lit, the lamp probably is not
seated into the socket. Repeat the steps above to assure correct seating.
8.2 Replacing the Resin and Filter Cartridges
The cartridges are expendable items which have a finite capacity to deionize and polish the water. When the
digital display indicates the purity is less than your minimum requirements, the DI resin cartridges have
exhausted their capacity to perform.
•
Disconnect or turn off the water supply and push the DISP key until water no longer dispenses to
relieve water pressure within the system.
•
Remove the stainless steel basin grill and set it aside. Remove the black front panel by pulling the
bottom out and up (it is held in place with four (4) magnetic catches), and set it aside. This accesses
the water purifying cartridge compartment.
•
Locate and replace the DI resin cartridges for your system (refer to sections 5.3 Installing the Water
Purifying Cartridges and 5.4 Applying Water Pressures and Bleeding Air) for procedure and
sequence to open, load, and purge air from the filter cartridge housings.
•
For Ultrafilter option, top cover must be removed to gain access to the filter. Remove in-line filter and
replace with new filter. Follow steps as stated in sections 5.4 and 5.6.
•
The used cartridges may be disposed of in the same manner as any water filter cartridge.
ARIES a division of ResinTech, Inc. * 160 Cooper Road * West Berlin, NJ 08091
Phone: (856) 768-9600 * Fax: (856) 768-9601 * www.arieswater.com
Section 9: SANITIZATION
CAUTION
Prior to sanitizing the GEMINI, it is important to become familiar with the owners manual
sections 5.0 & 8.0 for the correct method of cartridge removal and replacement and bleeding
air from cartridge housings. Always use protective gloves and eye wear when handling chemicals, and
carefully read labels and warnings on chemical packaging.
The GEMINI with its’ multi-pass UV protection is virtually bacteria free, however it is recommended that
periodic sample testing be performed to assure that the GEMINI components continue to control bacterial
levels. Filters and DI cartridges can be breeding grounds for bacteria, whether required or not these cartridges
and the UV lamp should be replaced at least once per year to prevent any bacterial growth from exceeding
the kill rate of the UV system.
Should the Gemini dispensing system require sanitizing as determined by unacceptable bacteria levels
in the dispensed water or to satisfy regular FDA requirements, a sanitization kit is available that allows the user
to introduce a sanitizing solution into the system while it recirculates to sanitize all wetted components.
KIT CONTENTS: sanitizing instructions, sanitant recirculation tank, sanitizing solution with MSDS sheet,
sanitant test strips and disposable gloves.
SANITIZATION PROCEDURE
1. FILL SANITIZING TANK: Prior to sanitization, use the GEMINI to fill the sanitization tank approximately
half way with DI water, and set the tank aside.
2. ENTER MAINTENANCE MODE: Press and hold the "MODE" KEY for five seconds to enter the
"MAINTENANCE" mode. In this mode, the UV lamp is disabled so that the UV lamp will not degrade
the sanitizing solution, and both the recirc pump and dispensing valve are set into a toggling (ON-OFF)
mode so each may be operated independently by pressing the corresponding "DISP" or "RECIRC"
KEYS.
3. DE-PRESSURIZATION & CARTRIDGE REMOVAL: Sanitizing solutions are not compatible with the DI
and final filter cartridges and therefore these filters must be removed during sanitization. Close the
supply water isolation valve and press the "DISP" KEY to relieve system pressure until no water
dispenses. Remove the basin grille and filter access door (held in place with magnetic catches, then
remove the cartridge bowls and cartridges (note the order of cartridges left to right). Though we
recommend cartridge replacement after sanitization, if the cartridges are not exhausted and will be reused, be sure to handle them with sterile gloves and store them in sterile plastic bags to prevent
contamination, and label each cartridge as it is removed (#1, #2, #3) for correct relocation.
4. RE-FILL & BLEED AIR: After removing the cartridges, replace the bowls. Open the feed water valve
and open the dispensing valve to purge air from the bowls.
ARIES a division of ResinTech, Inc. * 160 Cooper Road * West Berlin, NJ 08091
Phone: (856) 768-9600 * Fax: (856) 768-9601 * www.arieswater.com
Sanitization Procedure Continued
5. Replace the front panel and grill, and place the sanitizing tank on the grill directly below the dispensing
nozzle. The tank should be half-full from step one. Close the feedwater supply valve and disconnect
the female tubing quick-connector from the Gemini water supply. Connect the female Gemini supply
fitting to the male connector on the sanitizing tank.
6. Press the "RECIRC" KEY to start the pump and recirculate the water in the system. Then press the
"DISP" KEY to continuously dispense the recirculated water into the sanitizing tank and draw water
back through the unit.
7. While the system is recirculating the water measure 40 ml of sanitizing solution and pour it into the
wide mouth sanitizing tank. Allow the solution to circulate for two (2) hours, see step 10.
8. After 1 hour, use a sanitizer strip to check for sanitant. If sanitant is not present, return to step 6. If
santant is present, continue recirculating for an additional hour.
9. When sanitization is complete, press the "DISP" KEY to stop dispensing to the tank, and the
"RECIRC" KEY to stop the pump.
10. Disconnect the tubing from the tank. Remove the tank and dispose of the sanitizing solution.
11. Remove the three housing bowls and dispose of the sanitizing solution, then replace the bowls.
12. Connect the unit to the feed water supply. Open the feed water isolation valve slowly and allow the
system to fill. Press the "DISP" KEY to purge any air form the unit and dispense approximately 5 liters
of water to rinse the system of sanitizing solution.
13. Press the "RECIRC" KEY to start the pump and recirculate the rinse water through the system. Allow
the pump to run for 5 minutes. Press the "DISP" KEY to dispense another 5 liters of rinse water.
14. Use the sanitizer-residual test strips supplied with the kit to verify that no residual sanitizing solution is
being dispensed, and rinse if necessary.
15. After all traces of sanitizing solution are gone, stop the pump, close the supply valve, and press the
“DISP” Key to depressurize the system.
16. Remove the housings and re-install the cartridges. Refer to sections 5.3 and 5.4 for the proper
cartridge loading and purging air information.
17. Press the "MODE" KEY to advance to the "NORMAL" operating mode (the "A" LED is on & the "B"
LED is off).
ARIES a division of ResinTech, Inc. * 160 Cooper Road * West Berlin, NJ 08091
Phone: (856) 768-9600 * Fax: (856) 768-9601 * www.arieswater.com
10.0
OPTIONS & ACCESSORIES
The following options & accessories are supplied as kits and include detailed instructions for
assembly onto the basic design
The use of attachments or accessories not approved by this manufacturer may adversely
affect the water purity or cause appliance damage and void the warranty.
For questions regarding these and other options & accessories that may be available for
system specific needs, or for components to aid installation, please contact an authorized
dealer in your area or contact the factory.
HPA-001, Dispensing gun and tubing kit - Fully recirculating gun for remote dispensing with concentric coiled
tubing. Gun is equipped with a standard .2 micron final filter for bacterial removal. A .05 micron Pyrogen removal
filter is also available.
HPA-002, 185 nm UV combination for Bacterial and TOC reduction - Mounted external to the GEMINI unit a
stainless steel, electropolished UV chamber is plumbed into the recirculation loop. The 185 nm wavelength is
especially good at TOC destruction.
HPA-003, 185 nm Replacement bulb for the combination Bacterial and TOC reduction.
HPA-004, 254 nm Replacement bulb for the GEMINI Multi-Pass system.
HPA-005, Sanitization kit - Kit includes the recirculating sanitant tank, sanitant, test strips and rubber gloves.
HPA-009, Sanitization Refill Kit (sanitization refill and test strips)
HPA-006, Wall Mounting Bracket - Wall kit intended to be mounted on a wall capable of supporting a minimum of
55 pounds.
AFK-006, Cartridge kit with 2 - Low TOC high purity DI filters and 1 - .2 micron filter
AFK-008, Cartridge kit with 2 – Low TOC high purity DI filters and 1 - .05 hollow fiber filter
AFK-009, Cartridge kit with 3 – Low TOC high purity DI filters (for GEMINI-110U)
PF -00-6505, In-line Pyrogen Ultrafilter 0.05 micron (for GEMINI-110U)
1200103, Replacement Pump,110 VAC
HPL-RO, Reverse Osmosis Pretreatment system for the Gemini. 100 GPD with 14-Gallon Bladder Tank
AFK-005, Cartridge kit for HPL-RO – 5.0 Micron Prefilter / GAC / 1.0 Micron Post Filter
AM-12-7010, Membrane for HPL-RO, 100 GPD TFC
Many other options and customizations are available for the Gemini. Please consult with the Dealer or Factory
for additional options.
11.0 REQUESTING SERVICE
Before calling the factory to request service, search the troubleshooting guide below for symptoms which your unit
exhibits, and verify the cause and possible remedies listed. If your symptom is not listed, or the remedy does not
provide a cure, Contact:
160 Cooper Road
West Berlin, NJ 08091
Phone: (856) 768-9600
Fax:
(856) 768-9601
www.arieswater.com
Email: [email protected]
and ask for a customer service representative.
Be prepared to provide the representative with the model number, serial number, date of purchase and any
options that may have been purchased with or added to the unit after purchase (as recorded on page (1) of this
manual.
Next be prepared to describe to our service representative the symptoms that the unit exhibits.
TROUBLESHOOTING GUIDE
SYMPTOM
Display is off.
CAUSE
No power to the unit.
REMEDY
Check the unit is plugged into
a live outlet.
Check the unit's fuse - replace
it if it is blown.
Unit blows fuses.
An electrical short exists in the
unit.
Return the unit to the factory
for repairs.
Unit will not dispense water.
Supply water is not on.
Confirm that the supply water
is turned on.
The purity is below the set
point.
Allow the purity to rinse up to
above the set point or replace
DI cartridges.
A filter cartridge is loaded with
particles and plugged.
Replace the filter cartridge.
System is bound with air
Bleed off canister &utlrafilters
(continued next page)
11.0
TROUBLESHOOTING GUIDE (continued)
SYMPTOM
Display indicates water purity
is below set point.
CAUSE
REMEDY
The supply water is improperly
treated.
Test the supply water TDS
add additional treatment.
The resin cartridges are not
seated.
Open cartridge housing and
reseat cartridge.
Resin is exhausted.
Install fresh cartridges.
Resin cartridges exhaust
quickly.
The supply water is improperly
treated.
Test the supply water TDS.
Add additional pretreatment
to obtain higher quality.
Sub-micron filter plugs rapidly.
The supply water has colloids
and is improperly treated.
Perform a Silt Density Test. If
it is higher than 1 add
additional pretreatment.
Bacteria exceeds operating
specifications.
UV lamp is not working.
Confirm that the lamp is
seated in the socket.
Confirm that the lamp is not
burned out.
Confirm that the lamp has not
been in service for more than
one (1) year.
Replace the lamp with a new
one.
Bacteria exceeds operating
specifications.
The system is fouled with
contaminants.
Autoclave the sub-micron
cartridge.
The feed water supply is
grossly fouled.
Sanitize the feed water
supply.
Replace the resin cartridges
with fresh new ones.
Pyrogen levels are excessive
after the optional ultrafilter.
The ultrafilter is contaminated.
Sanitize the UF.
12.0 REAGENT GRADE WATER
CAP
ASTM
Type
I
Type
II
Type
III
NCCLS
Type
I
Type
II
Type
III
Type
IV
Type
I
Type
II
Type
III
Specific Conductance
(micromho/cm., max)
0.1
0.5
10
0.06
1.0
0.25
5.0
0.1
0.5
10
Specific Resistance
(megohms-cm, min)
10
2.0
0.1
18.0
1.0
4.0
0.2
10
2.0
0.1
pH @ 25_ C (*)
*
*
5.0
8.0
*
*
*
*
5.0
8.0
*
*
5.0
8.0
Silicate, Soluble
(Ig/L, max)
50
100
1000
3.0
3.0
500
N.L.
50
100
1000
Culture/Colony Count
cfu/mL (**)
10
10^3
**
**
**
**
10
10^3
Total Organic Carbon
(TOC), max, Ig/L
100
50
200
N.L.
Sodium, max, Ig/L
1.0
5.0
10
50
Chlorides, max, Ig/L
1.0
5.0
10
50
Note:
CAP
ASTM
NCCLS =
EU
N.L.
*
**
References
=
College of American Pathologists
=
American Society for Testing and Materials
National Committee for Clinical Laboratory Standards
=
Endotoxin Units
=
No Limit
:
The measurements of pH in Type I, Type II and Type III reagent water is meaningless and has been eliminated from the
procedure, since the electrodes used in this test contaminate the water.
:
When bacteria levels need to be controlled, reagent grade types should be further classified as follows:
Microbiological contamination: Max heterotrophic bacteria count Type-A 10/1000 mL, 0.03 EU, Type-B 10/100 mL, 0.25
EU, Type-C 100/10 mL.
:
CAP Reagent Water Specifications, 1985, pg 5, 11.
NCCLS Document C3-A2, Vol. 11, No. 13, Pg 8.
Annual Book of ASTM Standards, 1992, Vol. 11.01, D1193-91, Pg 45.
13.0 WARRANTY
Systems and options have a one-year
WARRANTY
warranty from the date of purchase. If
any component fails to function normally within the first year, return the unit to
the factory prepaid. If in the opinion of the factory, failure was due to defects in
materials or workmanship, repair or replacement will be made without charge. A
reasonable service charge will be made for diagnosis or repairs not covered by
this warranty. ARIES / ResinTech, Inc.assumes no other responsibility or liability.
This warranty does not cover any product which has been subject to misuse,
neglect, accident or used in violation of operating instructions nor does it extend
to any units altered or repaired for warranty defects by anyone other than ARIES
/ ResinTech, Inc.
IN NO EVENT SHALL ARIES / RESINTECH, INC. BE LIABLE FOR ANY
INCIDENTAL, CONSEQUENTIAL, SPECIAL, INDIRECT, PUNITIVE OR
EXEMPLARY DAMAGES OR LOST PROFITS FROM ANY BREACH OF THIS
WARRANTY OR OTHERWISE.
ARIES / ResinTech, Inc., reserves the right to make changes in design,
specifications and prices without notice.