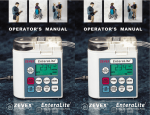
1
Operator’s Manual
This online version differs from the printed version.
Certain information that is not intended for patients has been removed.
CADD-MS™ 3 Ambulatory Infusion Pump
Model 7400
s
Updates to the manual
The following updates were made to this version
(40-5470-51C) of the User Manual. The specific pages
affected by the changes are shown.
For your safety, review the manual carefully, including
all warnings and cautions. If you don’t understand
something, contact your clinician, your pump provider,
or Smiths Medical.
Summary of updates
Pages
Warning regarding
tightening the battery cap
3, 10, 16, 62, 80
Inspecting the battery cap
17, 80
Added illustrations
9,17, 80
WEEE Warning
16, 81
WEEE Statement
81
This manual provides information on programming,
using and maintaining the CADD-MS™ 3 Ambulatory
Infusion Pump. This manual is intended for clinicians
only. DO NOT permit patients to have access to this
manual. DO NOT disclose the pump’s security pass
codes or any other information that would allow
inappropriate access to programming and operating
functions.
If you have comments,
questions, or problems...
The issue date of this manual is included on the back
cover. If your manual is a year or more old, contact
Smiths Medical MD, Inc. (or check the web site at
www.smiths-medical.com) to see if a newer manual is
available.
Our staff is available to help you 24 hours a day with
programming and operation of the pump.
If you have comments or questions about the pump,
please call the appropriate number given below. You will
be asked for the pump’s serial number, which you will
find on the back of the pump.
U.S. Distribution
Smiths Medical MD, Inc.
St. Paul, MN 55112 USA
1 800.426.2448 (USA)
1 651.633.2556
www.smiths-medical.com
@
Smiths Medical International Ltd.
WD24 4LG UK
+44 (0)1923 246434
i
ii
Table of contents
Important Information
Important safety information.............................................................1
Warnings........................................................................................1
Cautions.........................................................................................3
Explanation of symbols.......................................................................4
Introduction..........................................................................................6
Indications...............................................................................6
Contraindications...................................................................6
Delivery features...........................................................................6
Continuous Rate.....................................................................6
Doses........................................................................................6
Other features..........................................................................6
Glossary of Terms.................................................................................7
Programming the Pump
Pump illustrations................................................................................9
Description of features and buttons.................................................10
Battery cap with o-ring........................................................10
Display ..................................................................................10
Programming keys...............................................................10
and
keys...................................................................10
Demand Dose button . ........................................................10
Cartridge cap . ......................................................................10
Infrared (IR) windows.........................................................10
Features........................................................................................11
Vibration alert ......................................................................11
Occlusion (blockage) sensor ..............................................11
Cartridge sensor ..................................................................11
b
c
Watertight .............................................................................11
History ..................................................................................11
Description of pump display and menus........................................12
Screensaver and backlight.........................................................13
Menus.....................................................................................13
Editing values........................................................................13
Timeout feature.....................................................................13
Home screen example..........................................................14
Sample screens......................................................................14
Accessories..........................................................................................15
Cartridge................................................................................15
Infusion sets..........................................................................15
Before using the pump for the first time.........................................16
Insert a battery............................................................................16
Self Tests.......................................................................................18
Setup.....................................................................................................19
Opening the Setup Menu..........................................................20
Setup Menu - Time and Date....................................................21
Setup Menu - Local Formats . ..................................................22
Setup Menu - Alerts...................................................................23
Setup Menu - New Patient.........................................................25
Setup Menu - Delivery...............................................................26
Setup Menu - Security................................................................28
Delivery Program...............................................................................29
Using the Pump
Loading a cartridge............................................................................31
Supplies required..................................................................31
1. Filling the cartridge..........................................................31
Technical Information
2. Attaching an infusion or extension set
and loading a filled cartridge into the pump..................32
3. Fill the tubing....................................................................36
4. Fill cannula........................................................................37
5. Set site change reminder and restart delivery...............38
Stopping and starting the pump.......................................................39
Starting the pump.......................................................................40
Delivering a Demand Dose...............................................................41
Canceling doses..................................................................................42
Canceling a dose (Demand or Automatic)
while in progress.................................................................43
Canceling next Automatic Dose . ............................................43
History.................................................................................................44
Beep or Vibrate...................................................................................46
Continuous Rate Menu..............................................................47
Automatic Dose Menu...............................................................48
Demand Dose Menu..................................................................49
Pump development standards..........................................................63
Specifications......................................................................................69
General specifications (nominal).............................................69
Delivery specifications.......................................................................71
Main Menu............................................................................71
Setup.......................................................................................71
Delivery Program.................................................................72
Load . .....................................................................................72
History...................................................................................73
Accuracy test results...........................................................................74
Safety features and fault detection....................................................76
Hardware safety features............................................................76
Watchdog timer circuit..............................................................76
Motor drive/motor watchdog circuit ......................................76
Voltage detector circuit..............................................................77
Software safety features......................................................................77
Hardware-related software safety features..............................77
Program memory check............................................................77
RAM memory check............................................................77
Motor circuit check..............................................................78
Keypad encoder check.........................................................78
Data handling and software safety features.....................................78
Data stored in RAM...................................................................78
Data stored in NOVRAM..........................................................78
Data used in calculations...........................................................79
Timer data registers . .................................................................79
Inspecting the pump..........................................................................80
Help
About alarms (Beep/Vibrate settings).............................................51
Troubleshooting..................................................................................52
Alarms....................................................................................52
Alerts......................................................................................54
Other messages.....................................................................55
Cleaning the pump.............................................................................59
Servicing the pump............................................................................60
The pump and:....................................................................................61
Extreme temperatures . .............................................................61
Water............................................................................................61
If the pump is dropped or hit hard..................................................61
iii
iv
Collect Separately...............................................................................81
Limited Warranty ..............................................................................82
Index....................................................................................................84
Important safety information
WARNING: Read this entire manual before using the
CADD-MS™ 3 Ambulatory Infusion Pump. If you
do not understand something or have any questions,
contact Smiths Medical MD, Inc. Incorrect use of this
pump, failure to follow the instructions and important
information contained in this manual, or improper/
inadequate troubleshooting can lead to death or serious
injury. Warnings, cautions and other important safety
information can be found in this section, and in bullet form
throughout the manual (indicated by the symbol). The
Help section (starting on page 51) contains information on
troubleshooting the pump and other important information.
Warnings
This manual is designed for clinicians and contains all
of the information needed to fully program the pump.
Do not give this manual to patients as it would allow them
complete access to all programming information.
The CADD-MS™ 3 Ambulatory Infusion Pump is
designed for subcutaneous, intravenous, epidural and
intrathecal infusion of medication. DO NOT use with
blood or cellular blood products. Use the pump only as
instructed in this manual.
1
Important Information
This manual describes how to use and troubleshoot the
CADD-MS™ 3 pump. Smiths Medical MD, Inc. does not,
however, make any recommendations about any specific
programming related to any therapy. Whether certain
features are appropriate for an individual patient must be
determined before use. Before using the pump, the patient
must receive appropriate training in all its functions and in
troubleshooting problems.
To avoid a risk of explosion, do not use the pump in the
presence of flammable anesthetics or explosive gases.
System delivery inaccuracies may occur as a result of
backpressure or fluid resistance, which depends upon drug
viscosity, catheter size, and extension set tubing.
The CADD-MS™ 3 pump and accessories include small
component pieces that could pose a choking hazard to
small children.
Before going to bed, the patient should make sure the
cartridge contains enough medication to last through
the night. Do not use the Vibrate alarm at night. If the
patient is a very deep sleeper, they may want to set the audio
volume to High (the loudest setting) before going to bed.
There are potential health hazards associated with improper
disposal of batteries, electronics, and contaminated (used)
infusion sets and cartridges. Dispose of used batteries, infusion sets, cartridges, and other used accessories, or a pump that
has reached the end of its useful life, in an environmentally safe
manner, and according to any regulations that may apply.
2
Important Information
If there are any system problems during the self tests,
the pump will stop the tests and display an alarm screen
letting you know there is a problem. If this happens, do
not use the pump.
The cartridge cap, battery cap, and luer connections are
not childproof. Tampering with them can result in overor under-delivery of medication.
The time and date must be set correctly, since delivery
factors are time-based, and all history is stored based on
time and date. Occasionally the time will need to be reset,
for example, during daylight savings time or to adjust for a
different time zone.
Do not allow the patient to learn the pass code. The
pass code allows access to all delivery programming and
security settings.
If you choose not to require pass codes to access the Setup
and Delivery Program menus, the patient will have full
access to all programming and delivery functions.
Always use the pump’s Load feature when starting a new
cartridge. This will assure that the cartridge is properly
loaded and the infusion or extension set is filled with
medication.
Always use aseptic technique, particularly when working with the cartridge, infusion set, catheter and access
site to minimize the risk of infections.
The CADD-MS™ 3 pump and cartridge are not a secure
system. Patient must be assessed for appropriateness of
pump usage.
Always read the Instructions For Use provided with the
medication, cartridge, infusion set, and any other accessory used with the CADD-MS™ 3 pump.
To avoid accidentally infusing medication or causing backflow of blood from the access device (or site),
disconnect the tubing from the access device (or site)
before removing a used cartridge or replacing an infusion set. Never use the pump’s Load Cartridge or Fill
Tubing features while tubing is connected to the patient,
or an unintended dose of medication can be delivered.
If not properly tightened, medication could leak from
the cartridge and tubing connections and disrupt
delivery. Signs of leakage can also mean opportunity for
contamination leading to infection.
Never use Fill Tubing when the infusion set is connected
to the body, or an unintended dose could be delivered.
Always remove all air from the cartridge and infusion
set before starting medication delivery. Air bubbles in
the system can slow or stop medication delivery. Check
all connections carefully for leaks, as leakage can slow or
stop medication delivery to the body, and allow an opening for contamination leading to infection.
You should provide specific training on delivering a dose.
If the pump is dropped or hit against something hard,
always inspect it carefully to make sure it is still working
properly. Make sure the display is working correctly, and
the cartridge, cartridge cap, battery cap and infusion set are
connected correctly. If there is damage to the pump’s outer
shell (cracks, chips), the pump may no longer be watertight.
Make sure that the battery cap is fully tightened to avoid
an interruption in battery power which can cause the
pump to power down and stop the delivery of drug
therapy. A prolonged interruption in the delivery of drug
therapy can result in serious patient injury or death.
If the display has missing or incomplete characters, or
if the pump does not seem to be working correctly, stop
using the pump immediately. Contact Smiths Medical
MD, Inc. for information on servicing the pump.
Cautions
Avoid strong electromagnetic fields, like those present with
Magnetic Resonance Imaging (MRI) and direct x-ray, as
they can affect how the pump works. If you cannot avoid
them, the pump and pouch must be taken off.
Do not expose the pump directly to ultrasound.
Do not use the pump in a hyperbaric chamber as this
may affect how the pump works and may also cause damage to the pump.
3
Important Information
Do not use cell phones within six (6) inches (15 cm) of
the pump. Interference with the pump electronics by cell
phones can occur. If a cell phone interferes with the pump,
the pump will generate a System Fault alarm.
To avoid damage when storing the pump, first remove the
battery and cartridge. Place the pump in the original carton and keep it away from cold, heat, and dampness. After
30 days, any pump programming will be lost and you will
need to reprogram it.
The pump may experience problems if operated in conditions where temperatures are lower than 35.6°F (2°C) or
higher than 104°F (40°C), when relative humidity (noncondensing) exceeds 90%, and when atmospheric pressure
is lower than 10.2 psi (70 kPa) (10,000 feet above sea level)
or higher than 15.4 psi (106 kPa). If you experience problems, remove the pump from use.
The pump may be damaged if stored in environments
where temperatures are lower than –4°F (–20°C) or higher
than 140°F (60°C), when relative humidity (non-condensing) exceeds 90%, and when atmospheric pressure is lower
than 10.2 psi (70 kPa) (10,000 feet above sea level) or
higher than 15.4 psi (106 kPa).
Do not use NiCd, nickel metal hydride, carbon zinc (heavy
duty), lithium or any rechargeable batteries. They will not
power the pump properly, and the battery life indicator on
the home screen may not show the correct amount.
4
Important Information
Use only Smiths Medical MD, Inc. 3 ml Medication Car-
tridges; other manufacturers’ products will not work with
the CADD-MS™ 3 pump.
Never use abrasive cleaners, solvents, bleach, scouring
pads or sharp instruments when cleaning your pump, as
they can scratch, discolor or damage the pump’s outer
shell. If the display is scratched, it may be difficult to read
and you will need to have it replaced. If the outer shell is
chipped or cracked, it may no longer be watertight and
will require service.
Never use steam or very hot water (exceeding 120°F
[49°C]) in an attempt to sterilize the pump. Never
put your pump in the dishwasher. Exposing the pump
to these high temperatures could damage the pump’s
electronics and result in the need to service your pump.
Explanation of symbols
Below is a list of symbols you will see on the CADD-MS™ 3
pump, packaging, and accessories, as well as explanations of
what the symbols mean.
Serial number
Attention! See instructions for use
Type CF equipment (protection from electric shock)
IPX8
Watertight when submerged to 8 feet (2.4 meters)
for 30 minutes or to 12 feet (3.6 meters) for
3 minutes
D
Date of manufacture
Use by
W
On Pump Display: Wait
Caution: Federal (USA) law restricts this device
to sale by or on the order of a physician
Catalog number
that the product was designed and
B or A Indicates
manufactured in accordance with applicable
standards/guidelines and may be sold in the EU
(European Union)
Q
Appears in pump display, with a message, to indicate
a question you must answer before programming
can continue
Empty cartridge or low battery
Keep dry
!
Appears in pump display, along with a message, as
an indicator of an alarm condition.
Fragile, handle with care
Keep away from sunlight
Collect separately
Temperature limitation
Latex free
Important safety information, warnings and cautions
n
p
o
Press b or c keys to move through menu/settings
5
Dansk
.
Français
Top of menu; press c key to move through menu
/
Deutsch
0
Italiano
Bottom of menu; press b key to move through menu
8
Ελληνικά
3
Nederlands
1
6
Approximate volume of medication left in cartridge
-
English
6
Norsk
Approximate battery life remaining
1
Español
2
Português
7
Suomi
4
Svenska
A
A
A
A
CR
Continuous Rate home screen
AD
Automatic Dose home screen
DD
Demand Dose home screen
SR
Site Reminder home screen
5
Important Information
6
Important Information
Introduction
The CADD-MS™ 3 Ambulatory Infusion Pump provides
measured medication therapy to patients in hospital or outpatient settings. Any medication therapy must be overseen by
a physician or certified, licensed healthcare professional.
Indications
The CADD-MS™ 3 pump is a syringe-based ambulatory infusion pump designed for subcutaneous, intravenous, epidural
and intrathecal infusion of medication.
Contraindications
The pump is not indicated for anyone who cannot follow the
instructions for use or perform basic troubleshooting and
maintenance activities associated with ambulatory pump use.
Delivery features
The pump can be used to deliver medication in two ways, as a
continuous rate and as an added dose.
Continuous Rate
The pump can be programmed to deliver a steady flow of
medication called the Continuous Rate. You can program
up to 48 time/rate segments per 24 hour period to meet the
patient’s medication needs throughout the day and night.
Doses
The pump can deliver two types of doses, an Automatic Dose
(programmed to deliver a specific dose at a preprogrammed
time) as well as Demand Dose (delivered by the patient as
needed). You can also program lockout times so that you can
control the time between doses.
Other features
The pump has a large display (or screen) where all programming, operating and alarm information is displayed. Programming of the pump is menu-driven, like an ATM or cell
phone.
The pump is powered by one AAA (IEC LR03) alkaline battery, which is readily available at most grocery stores, hardware stores, drug stores, and electronic stores. The expected
battery life is approximately 2 weeks (battery low alert) at
0.124 ml/hr.
Caution: Do not use NiCd, nickel metal hydride, carbon
zinc (heavy duty), lithium or any rechargeable batteries.
They will not power the pump properly, and the battery
life indicator on the home screen may not show the correct
amount.
As long as the pump’s labels and outer shell are intact, the
pump is watertight to a depth of 8 feet (2.4 meters) for
30 minutes or 12 feet (3.6 meters) for 3 minutes.
Pump and delivery history is automatically tracked by the
pump, and can be viewed in the History menu (see page 44).
The pump has a Security feature which allows you to lock out
the Setup and Delivery Program menus. This feature helps
prevent tampering with the programming of the pump.
The pump requires the use of the Smiths Medical 3 ml Medication Cartridge and an infusion set (any manufacturers’
infusion set can be used, as long as it has a standard luer lock
to connect to the cartridge).
7
Important Information
Glossary of Terms
The following is a list of terms used throughout this manual:
Automatic Dose: Automatic Doses are programmed amounts
of medication delivered at specific times of the day.
Continuous Rate: The amount of medication delivered continuously over 24 hours a day, providing delivery of medication
at all times. The continuous rate is measured in milliliters per
hour (ml/hr).
Cannula: A small, soft tube or needle, inserted into the body,
through which medication is delivered.
Cartridge: The container that holds the medication. The
Smiths Medical 3 ml Medication Cartridge looks like a small
syringe.
Demand Dose: A Demand Dose is an extra programmed
amount of medication initiated by the patient as needed.
Dose: An extra amount of medication given at specified times
and or as needed.
Fluid path: The areas inside the cartridge and infusion set that
come into direct contact with the medication. These areas
include the inside of the tubing and connectors, the inside
and tip of the needle and cannula, and the inside and tip of
the cartridge. To help protect against infection, never touch
or blow directly on any part of the fluid path.
8
Important Information
Infusion pump: A small electromechanical medical device
designed specifically for delivering precise amounts of medication into the body. The CADD-MS™ 3 pump systems are
controlled by two microprocessors (computer chips) which
continuously monitor each other to make sure the systems
are working properly.
Occlusion: Blockage. Occlusions are associated with the infusion set and/or access site, and mean that medication delivery
is stopped. Blockage can be caused by a number of things,
including the tubing being pinched or kinked, the cannula or
needle being blocked, as well as other reasons.
Pushrod: On the CADD-MS™ 3 pump, the cartridge is attached
to the pushrod and, when the pump is started, the motor causes
the pushrod to move forward and push medication through
the infusion set into the body.
Pump illustrations
Figure 1
Figure 2
Battery cap
Cartridge
cap
O-ring
Cartridge
viewing
window
$"%%.4
Display
Up key
Demand
Dose
button
Left
program
key
Down key
(backlight)
9
Programming the Pump
Right program key
IR windows
(not used
on this
model
pump)
10
Programming the Pump
Description of features and
buttons
Battery cap with o-ring (Figure 1)
Holds the battery in place in the battery compartment.
The pump uses one AAA (IEC LR03) alkaline battery.
The approximate amount of battery life is displayed in
the home screen, and an alarm is given when battery
power is low. Keep extra batteries on hand.
Warning: Make sure that the battery cap is fully
tightened to avoid an interruption in battery power
which can cause the pump to power down and stop
the delivery of drug therapy. A prolonged interruption in the delivery of drug therapy can result in
serious patient injury or death.
Display (Figure 1)
The display (also referred to as the screen) shows all the
programming, operating and alarm/alert information
for the pump.
Programming keys (Figure 1)
There are two keys on the front of the pump right below
the display that do not have any names or symbols on
them. These are the programming keys. They have different functions, depending on where you are in a menu. In
the display right above each key is a short description of
what happens if you press it. (Always look to the display
above each key to see what the key is used for.)
b and c keys (Figure 1)
The b and c keys are used to move around in menus,
and to program amounts. Whenever you can use the up
and down keys, the symbol n is shown in the bottom,
middle part of the display. When you are at the top or
bottom of a menu, only one of the keys can be used, and
the symbol will change to p or o, respectively.
Demand Dose button (Figure 1)
If Demand Doses are allowed, the user can press the
Demand Dose button to initiate a dose.
Cartridge cap (Figure 1)
Once you load a filled cartridge into the compartment,
press and turn the cartridge cap over the top of it to hold
it firmly in place. You can look at the cartridge viewing
window (Figure 2) to make sure the cartridge is properly
loaded, and to periodically check the amount of medication left in the cartridge.
Infrared (IR) windows (Figure 2)
The IR windows allow the pump to communicate with
a PC or other IR accessory. There is no IR functional
capability available with this model pump.
Features
Vibration alert
If you don’t want the pump to beep during alarms and
alerts, you can program it to vibrate instead. This feature
can be used in meetings, classrooms, etc. If you choose
Vibrate, the “beep” that accompanies each key press is
also disabled. The battery is used much more quickly
when you use Vibrate.
Occlusion (blockage) sensor
The occlusion sensor continuously tests for blockage that
prevents medication from being delivered.
Cartridge sensor
There is a sensor in the cartridge chamber that has two
functions. It senses when a cartridge is correctly loaded in
the chamber. If the cartridge becomes loose or detached
during use, the sensor causes an alarm to occur. When
you load a new cartridge into the pump, the sensor also
measures how much medication is in the cartridge, and
displays this information in the upper left part of the
home screen.
11
Programming the Pump
Watertight
As long as the pump’s labels and outer shell are intact the
CADD-MS™ 3 pump is watertight to a depth of 8 feet
(2.4 meters) for 30 minutes or 12 feet (3.6 meters) for
3 minutes.
History
The pump has a History feature that displays a variety of
delivery history information.
12
Programming the Pump
Description of pump display
and menus
All programming, operating and alarm/alert information
is shown in the display. Programming of the pump is menu
driven, like a cell phone or ATM.
The Home screen shows various information relating to pump operation. If all
of the delivery types are turned off, the
home screen at right is shown. Depending
on which features you are using, one or
more of the following home screens will
be shown:
• The Continuous Rate (CR) home screen
shows the current continuous rate being
delivered. This home screen will only be
visible if Continuous Rate is set to Yes
(in use) in both the Setup and Delivery
Program menus. You can also access the
Continuous Rate menu from this home
screen (see page 47).
16
#A
2.988ml
10/02/05 04:30 PM
PUMP STOPPED
Menu>
• The Automatic Dose (AD) home screen 1
2.988ml 6
shows when the next automatic dose is
AD
#A
scheduled to be delivered. This home Next Auto Dose:
screen is only visible if Automatic Dose is 12:00 AM 0.05 ml
set to Yes (in use) in both the Setup and AD Menu Menu>
Delivery Program menus. You can also
access the Automatic Dose menu from this home screen
(see page 48). When an Automatic Dose is being delivered,
the screen will show, “Auto Dose Active”.
k
• The Demand Dose (DD) home screen 2.988ml
shows the amount, time, and date of the 1 6
DD
#A
last demand dose programmed. This home Last Demand Dose:
PM 10/02/05
screen is only visible if Demand Dose is set 03:02
0.03 ml
to Yes (in use) in both the Setup and Deliv- DD Menu Menu>
ery Program menus. You can also access the
Demand Dose menu from this home screen (see page 49).
When a Demand Dose is being delivered the screen will
show, “Demand Dose Active”.
k
16
#A
2.988ml
CR
Continuous Rate
0.242 ml/hr
CR Menu
k
Menu>
• The Site Reminder (SR) home screen
shows the date and time of your next programmed site reminder alert. This home
screen will only be visible if set to Yes (in
use) in the Setup / Alerts menu. If you
haven’t programmed another site reminder,
it shows when the previous one occurred.
16
#A
2.988ml
SR
Next Site Reminder
10/02/05 at
04:30 PM
<Stop
k
Menu>
A variety of symbols appear on the screen. For example,
any time you have to answer a question before proceeding, the question appears on the screen accompanied
by . Alarms and alerts are accompanied by . If the
pump is performing a task which takes a little time, you
will see W.
Q
!
Screensaver and backlight
The screensaver allows the pump to save on battery power.
When you are at the home screen and no
keys or buttons are pressed for 15 seconds, the screensaver display appears. The 10:10 AM RUNNING
screensaver shows the time and whether
the pump is running or stopped. Press
any key on the keypad to deactivate the
screensaver and return to the home screen.
Pressing the c key turns on the screen
backlight; the backlight automatically turns off when the
screensaver reactivates. You can only turn on the backlight
from screensaver. When the motor is running, the backlight
blinks.
Menus
To choose a menu item, press the b or c key to highlight the item you want, then press Select.
13
Programming the Pump
Editing values
Screens with a single field: press the b or c key to
change a value, then press the < or > key to save it or
continue editing or move to another screen.
Screens with more than one field: press the > key (Next)
to move to the field you want to change, and then press
the b or c key to change the value. On some screens
pressing the < key (Done) will save your changes and
move to another screen. On others, pressing the < key
(Back) will save the value in the field and move to the
previous field on the screen. There are two exceptions:
1) where your changes take effect only when you exit the
screen, and 2) the New Patient Screen and the Enable
Delivery Methods screen.
Warning: Because the method of saving values
varies by screen, it is essential that you review the
program before beginning delivery.
Timeout feature
If you change a value using the b or c key and
then decide you don’t want to change it after all, wait
45 seconds and the field will return to its original value.
Warning beeps or vibrations will let you know that this
is happening.
14
Programming the Pump
Medication remaining in the
cartridge (approximate)
Power remaining in the battery
(approximate)
1 7
#A
2.988 ml
Current status
of the pump
Press the left
programming
key to
accomplish
what is
indicated
(in this case,
you go to
Continuous
Rate menu)
{
CR
Pump Stopped
CR Menu
k
The home screen
name
Home screen example
Start Delivery
Setup
Delivery Programs
Load
History
Select>
<Home
m
Low Cartridge
Alert
Menu>
Press the b and/or c keys to move
through the home screen pages
Main Menu
Press
the right
programming
key to
accomplish
what is
indicated
(in this case,
you will go to
main menu)
0.2
<Back
ml
k
Next>
Time and Date
Time: 08 : 00 AM
Date: 06 / 28 / 05
<Done
k
In a menu, press b or c
to highlight the item you
want, then press Select
When at the top or bottom
of a menu, only the p or o
indicator is shown
If the value you are editing is highlighted,
press b or c to scroll through the
available values. When the value you
want appears, press Next to move
forward to the next screen, or press Back
to back up one screen. Any changes you
have made will be saved when you press
either Next or Back
In screens with multiple fields, you
will press b or c to change the
item, then press Next to move
to the next item (in this case,
minutes). Press Done to save the
changes and return to the menu
Next>
Sample screens
Accessories
Smiths Medical offers a variety of products for use with
your pump.
Cartridge
You must use the Smiths Medical 3 ml Medication
Cartridge (catalog number 21-7450) with the pump.
Smiths Medical cartridges are latex free.
Caution: Use only Smiths Medical 3 ml Medication
Cartridges. Other manufacturers’ products will not
work with the CADD-MS™ 3 pump.
Infusion sets
You can use any manufacturer’s infusion set as long
as it has a standard luer lock to connect to the Smiths
Medical 3 ml Medication Cartridge.
15
Programming the Pump
16
Programming the Pump
Before using the pump for the
first time
Inserting a battery, programming the regional settings (if
required), and setting the time and date are the first things you
need to do when you get the pump. The expected battery life is
approximately 2 weeks (battery low alert) at 0.124 ml/hr (the
Vibrate alert uses up battery power faster).
2. Insert one AAA (IEC LR03) alkaline
battery into the compartment, making
sure the + side goes in first (see
Figure 4); if you insert the battery
wrong, the pump will not start.
Warning: There are potential health
2002-09-16 D. Zurn
«cozmo-insert-AAA.e
Caution: Do not use NiCd, nickel
Insert a battery
1. Put the side of a smooth-edged coin into
the slot on the battery cap and turn it
counterclockwise (left) to open it (see
Figure 3). Remove the old battery (if
present). Discard used batteries according
to local laws and requirements.
D. Zurn, 2001-08-29
needle-attach.ai
2002-09-16 D. Zurn
«cozmo-turn-batt-cover.eps»
metal hydride, carbon zinc (heavy
duty), lithium or any rechargeable
batteries. They will not power the
pump properly, and the battery life
indicator on the home screen may not
show the correct amount.
Figure 4
3. Place the battery cap back over the compartment. Push
down and turn the cap clockwise (right). Again use a
smooth-edged coin to tighten the cap.
Figure 3
hazards associated with improper disposal of batteries,
electronics, and contaminated (used) infusion sets and
cartridges. Dispose of used batteries, infusion sets, cartridges, and other used accessories, or a pump that has
reached the end of its useful life, in an environmentally
safe manner, and according to any regulations that may
apply.
Warning: Make sure that the battery cap is fully tight-
ened to avoid an interruption in battery power which
can cause the pump to power down and stop the delivery of drug therapy. A prolonged interruption in the
delivery of drug therapy can result in serious patient
injury or death.
Make sure that the battery cap is fully
tightened. The battery cap is fully tightened when the battery cap o-ring is not
visible, the cap fits snug, and when you
press on the battery cap the pump does
not produce a “chirp” (see Figures 5
and 6). If the pump sounds a brief alert
(“chirp”), the cap is not fully tightened
and should be tightened further. If you
Figure 5
are unable to tighten the cap and eliminate this chirp, the pump should not be
used. Contact your pump provider or Smiths Medical.
Inspect the Pump’s battery cap. The battery cap should
be free of damage. If the cap shows signs of wear, such as
cracks, or if the slot becomes worn, the battery cap should
be replaced before the Pump is used. Contact your Pump
provider or Smiths Medical for a replacement battery cap.
If you insert a new battery and the pump doesn’t turn
on, check to make sure that the battery is in the correct
orientation (the + side goes in first. If it still doesn’t turn
on, try a new battery.
Once the battery is correctly inserted, the pump turns on
automatically and performs self tests to make sure all the
systems are working properly.
Figure 6
O-Ring
Battery
Cap
INCORRECT
17
Programming the Pump
CORRECT
18
Programming the Pump
Self Tests
During the self tests, the pump’s internal computer
performs tests on all the major hardware, computer, and
electronic systems.
Warning: If there are any system problems dur-
ing the self tests, the pump will stop the tests and
display an alarm screen letting you know there is a
problem. If this happens, do not use the pump.
After installing a new battery, watch the pump’s display
and verify the following:
• The internal computer’s software version appears, as well
as the pump serial number and last error code (if any).
• The entire display becomes a darker gray. Look for any
blank or incomplete areas, which indicates a broken
display. The display then briefly goes blank; if the entire
display is not blank, it indicates a broken display.
• The pump’s internal computer tests the major hardware, computer and electronic systems. If there is a
problem with any system, an alarm occurs and you
will not be able to start delivery.
When the self tests are complete, power up ends and the
pump beeps six times.
The first time you insert a battery and a new pump performs the self tests, you will see the following alert screens:
• A screen will appear that reads, “Program Defaulted Set
time and date”. Program the current time and date by pressing b and c to set the highlighted value, then pressing
Next to move through the sequence. When the time and
date are correct, press Done.
• Next you will see a screen that reads, “Program Defaulted
You must program the pump”. Press OK.
• After the pump beeps 6 times, a screen that reads,
“Cartridge removed Press OK to begin load process”
is displayed. Press OK; the pump goes to the Cartridge
menu. If you are ready to load a cartridge, follow the steps
indicated starting on page 31. If you aren’t ready to load a
cartridge yet, press Done.
NOTE: The pump has a built-in internal battery that powers the clock and allows the pump to store the programs
and history (see page 69) which is charged by the AAA
alkaline battery. If your internal battery has not been
charged for awhile, you may see a screen that reads, “Program Defaulted Setup of cartridge volume required, with
no cartridge present, press Next”. Make sure no cartridge
is loaded into the pump and press Next.
Setup
The Setup menu is where you perform certain setup
functions, such as determining which delivery types
should be available, setting the time and date, setting a
new patient marker, setting pump security, setting up
how the pump alarms for certain features and programming the local formats.
Warning: The time and date must be set correctly,
since delivery factors are time-based, and all history is stored based on time and date. Occasionally
you will need to reset the time, for example, during
daylight savings time or to adjust for a different time
zone.
The Setup menu looks different depending on whether
the pump is running or stopped. Any menu items associated with delivery will only appear in the menu when
the pump is stopped.
At the home screen, press Menu. Press c to choose
Setup, then press Select.
If security is set to Yes for the Setup menu, you will need
to enter a pass code. This is to prevent the patient from
having complete access to all pump programming.
19
Programming the Pump
Warning: Do not allow the patient to learn the pass
code. The pass code allows access to all delivery programming and security settings.
Once inside the menu, you can choose between the various items. Once you have entered a menu item, you can
either make a change to an item (use the b and c keys
until the setting you want is displayed, then press Next),
or press Next to accept the displayed value.
20
Programming the Pump
Opening the Setup Menu
Start at any
Home screen
(pump stopped*)
17
#A
2.988 ml
CR
PUMP STOPPED
CR Menu
k
Menu>
Choose Setup,
then press Select
Press
Menu
Press
Home
If setup security
is set to Yes: Enter
the Pass Code (- - - ),
then press Next**
Main Menu
Start Delivery
Setup
Delivery Program
Load
History
<Home
k
Select>
Choose the menu
item you want to
enter, then press
Select
Setup Pass
Code
0
<Back
k
Next>
Setup Menu
Delivery
Time and Date
New Patient
Security
Alerts
<Back
To exit Setup Menu,
press Back
p Select>
Press Back to return to the
main menu without entering
Setup
* If the pump is running when you enter the Setup menu
you will not have access to the full menu. Only the Security, Alerts and Local Formats menu items will appear.
** Once the Pass Code has been entered, it remains in
effect until the pump’s screensaver activates.
Setup Menu - Time and Date
Warning: The time and date must be set correctly,
since delivery factors are time-based, and all history is stored based on time and date. Occasionally
you will need to reset the time, for example, during
daylight savings time or to adjust for a different time
zone.
NOTE: If the pump is programmed to display a site reminder alert (see page 23), resetting the time may cause
that alert to occur sooner or later than expected (up to
24 hours), depending on how far forward or back you
set the time.
Time and Date is only available when pump is stopped.
Starting at
Setup Menu
screen
Setup Menu
Delivery
Time and Date
New Patient
Security
Alerts
<Back
n Select>
Choose Time
and Date, then
press Select
Time and Date
Time: 08 : 00 AM
Date: 06 / 28 / 04
<Done
k
Next>
Choose correct hour by
pressing the b and/or c key,
then press Next to move the
highlight to the next value (in
this case, minutes). Continue to
set values and press Next until
the time and date* are correct.
Press Done
Setup Menu
Delivery
Time and Date
New Patient
Security
Alerts
<Back
p Select>
Press Back
17
#A
Main Menu
2.988 ml
Start Delivery
Setup
Delivery Program
Load
History
<Home
m
CR
PUMP STOPPED
Select>
CR Menu
k
Menu>
Press Home
#Q
Invalid
Date
You must specify a
valid date
Check your entries
OK
* If you set an invalid date (such as
02/31/xx), this screen appears; press
OK and set the correct date
21
Programming the Pump
22
Programming the Pump
Setup Menu - Local Formats
Local Formats determine how certain things are
displayed on the pump.
• Time can be displayed as 12 hour (am and pm) or
24 hour.
• The date can be displayed as month/day/year (mm/
dd/yy) or day/month/year (dd/mm/yy).
• The decimal symbol can be displayed as either a
Period (xx.xx) or as a Comma (xx,xx).
Starting at Setup
Menu screen
Setup Menu
Time and Date
New Patient
Security
Alerts
Local Formats
<Back
o Select>
Choose
Local
Formats,
then press
Select
17
#A
2.988 ml
CR
PUMP STOPPED
k
Local Formats is available whether the pump is running
or stopped.
Choose 12 Hour (am and pm) or
24 Hour, then press Next
Time Format
Date Format
12 Hour
mm/dd/yy
<Back
k
Next>
Press Home
CR Menu
When the pump is built, the default settings are: Time
format: 12 Hour; Date format: mm/dd/yy; and decimal
symbol: Period. If these are correct for your location,
you can skip this section. If you use different settings,
follow the instructions below.
Menu>
Main Menu
Start Delivery
Setup
Delivery Program
Load
History
<Home
m
Select>
<Back
k
Next>
Press Back
Setup Menu
Delivery
Time and Date
New Patient
Security
Alerts
<Back
p Select>
Choose mm/dd/yy (month/
day/year) or dd/mm/yy (day/
month/year), then press Next
Decimal Symbol
Period
<Back
k
Next>
Choose Period or
Comma, then
press Next
Setup Menu - Alerts
The pump allows you to set up certain alerts associated
with treatment considerations, personal preference and
safety, and can be personalized uniquely for each user.
Alert for low cartridge: determines when the pump
alerts the patient to an almost empty cartridge. Decide
how much medication should be left when the alert
occurs (0.05 to 0.5 ml). It is factory preset to 0.2 ml.
(Choosing a higher amount will give more time between
the low cartridge alarm and the empty cartridge alarm.)
23
Programming the Pump
Display site reminder in menu: optional alert determines whether a screen is added to the Load menu to
set a reminder for when it is time to change the patient’s
infusion set and/or access site. It is factory preset to
No (reminder not in use). If set to Yes, a Site Reminder
home screen is added, which shows the time and date
for the next scheduled site change.
Alerts are available whether the pump is running or
stopped.
24
Programming the Pump
Choose when to
give alert (0.05
to 0.5 ml) then
press Next
Starting at
Setup Menu
screen
Setup Menu
Choose Alerts,
then press Select
Delivery
Time and Date
New Patient
Security
Alerts
<Back
Low Cartridge
Alert
In Menu
0.2
<Back
n Select>
k
ml
Next>
Press Home
17
#A
2.988 ml
CR
PUMP STOPPED
CR Menu
k
Menu>
Site Reminder
Alert
Main Menu
Start Delivery
Setup
Delivery Program
Load
History
<Home
m
Select>
<Back
k
No
Choose Yes or No
then press Next
Next>
Press Back
Setup Menu
Delivery
Time and Date
New Patient
Security
Alerts
<Back
p Select>
Setup Menu - New Patient
Choosing “yes” to mark New Patient will record an event
in the History Log and clear all entries from the daily
summary log.
Before beginning to program the delivery specifics, it
is recommended that you ready the pump for a new
patient. The New Patient feature allows you to set the
pump to its default values.
The New Patient feature is only available when the pump
is stopped.
Starting at
Setup Menu
screen
Choose Yes or No
then press Next
Setup Menu
New Patient
Marker
Mark New
Patient?
No
Clear
Delivery?
No
<Back
Next>
Choose New
Patient, then
press Select
Delivery
Time and Date
New Patient
Security
Alerts
<Back
Choosing “yes” to Clear Delivery will set all delivery
parameters to factory default settings.
k
n Select>
Press Home
17
#A
2.988 ml
CR
PUMP STOPPED
CR Menu
25
k
Menu>
Programming the Pump
Main Menu
Start Delivery
Setup
Delivery Program
Load
History
<Home
m
Select>
New Patient
Marker
Mark New
Patient?
Yes
Clear
Delivery?
No
<Back
Next>
k
Press Back
Setup Menu
Delivery
Time and Date
New Patient
Security
Alerts
<Back
p Select>
Choose Yes or No
then press Next
26
Programming the Pump
Setup Menu - Delivery
Before programming Delivery for a new patient it is
recommended that you first use the New Patient feature
(as shown on page 25).
In Delivery you will decide which of the three types of
delivery methods (Continuous Rate, Automatic Dose
and Demand Dose) will be used for the patient, and
program delivery Maximums, Dose Duration and Dose
Lockout Time.
Note: If the pump has already been programmed, you
will not be able to set pump values less than what is
already programmed.
Dose Duration is the time over which a dose (Automatic
and/or Demand) is delivered. You can choose to have
the dose delivered over 1 to 15 minutes (programmed in
1 minute increments). The default value is 12 minutes.
The Dose Lockout time is the minimum amount of
time that can pass between the start of one dose and the
start of the next dose. You can choose a lockout time
of 15 minutes to 24 hours (programmed in 15 minute
increments). The default value is 1 hour. Dose Lockout
time cannot be 0.
Delivery is only available when the pump is stopped.
Note: Dose Duration and Dose Lockout time cannot be
equal.
Starting at
Setup Menu
screen
Setup Menu
Delivery
Time and Date
New Patient
Security
Alerts
<Back
Choose Yes or
No then press
Next
Choose Delivery,
then press Select
o Select>
Choose Yes or
No then press
Next
Choose Yes or
No then press
Next
Enable Delivery
Methods
Continuous Rate: No
Automatic Dose: No
Demand Dose: No
Enable Delivery
Methods
Continuous Rate:: Yes
Automatic Dose: No
Demand Dose: No
Enable Delivery
Methods
Continuous Rate: Yes
Automatic Dose: Yes
Demand Dose: No
<Back
<Back
<Back
k
Next>
k
Next>
k
Choose 0 to
1 ml/hr then
press Next
Max Continuous
Rate
0.8
<Back
Next>
ml/hr
k
Max Automatic
or Demand Dose
Next>
1
ml
<Back
k
Choose 0 to 1 ml
then press Next
Next>
Dose Duration
17
#A
2.988 ml
CR
PUMP STOPPED
CR Menu
* You cannot program a Dose Lockout that will cause
one programmed Automatic Dose to lockout another.
k
Menu>
Main Menu
Setup Menu
Start Delivery
Setup
Delivery Program
Load
History
Delivery
Time and Date
New Patient
Security
Alerts
<Home
<Back
m
Select>
<Back
Press Back
p Select>
Dose Lockout
Time
01:00
<Back
k
Next>
Choose 00:15 minutes
to 24:00 hours then
hh:mm press Next *
k
Next>
Programming the Pump
Press Home
27
12
Choose 1 to
15 minutes
minute(s) then press Next
28
Programming the Pump
Setup Menu - Security
Security allows you to decide if you want to require pass
codes to access the Setup and Delivery Program menus.
Security can be accessed when the pump is running or
stopped.
Starting at
Setup Menu
screen
Choose Yes or
No then press
Next
Setup Menu
Choose Security,
then press Select
Delivery
Time and Date
New Patient
Security
Alerts
<Back
Security
<Back
n Select>
k
Next>
Press Home
17
#A
2.988 ml
CR
PUMP STOPPED
CR Menu
k
Menu>
Main Menu
Start Delivery
Setup
Delivery Program
Load
History
<Home
m
Select>
access the Setup and Delivery Program menus, the
patient will have full access to all programming and
delivery functions.
Choose Yes or
No then press
Next
Security
No
No
Program:
Setup:
Warning: If you choose not to require pass codes to
Program:
Setup:
<Back
k
No
No
Next>
Press Back
Setup Menu
Delivery
Time and Date
New Patient
Security
Alerts
<Back
p Select>
Delivery Program
In Delivery Program you program the delivery specifics
for your patient: Continuous Rate schedule, Automatic
Dose schedule and Demand Dose amount.
Delivery Program only appears in the main menu when
the pump is stopped.
29
Programming the Pump
Start at Home
screen (pump
must be stopped)
17
#A
2.988 ml
CR
PUMP STOPPED
CR Menu
k
Menu>
Choose Delivery
Program, then
press Select
Press
Menu
Main Menu
Start Delivery
Setup
Delivery Program
Load
History
<Home
k
Select>
If program
security is set
to Yes: Enter the
passcode (- -), then
press Next
Choose Yes or
No then press
Next
Program
Pass Code
Choose Yes or
No then press
Next
Choose Delivery
Methods
0
Continuous Rate No
Automatic Dose No
Demand Dose No
Choose Delivery
Methods
Continuous Rate Yes
Automatic Dose No
Demand Dose No
<Back
<Back
<Back
k
Next>
k
Next>
k
Next>
Choose Yes or
No then press
Next
Choose Delivery
Methods
Continuous Rate Yes
Automatic Dose Yes
Demand Dose No
<Back
k
Cont. Rate
Total 3.516 ml
Time
ml/hr
12:00AM
0.016
06:00AM
0.19
Press Home
Main Menu
OK
Start Delivery
Setup
Delivery Program
Load
History
<Home
m
Edit>
Edit Cont. Rate
Total 3.516 ml
Time
ml/hr
12:00AM
0.016
06:00AM
0.19
- - : - -
0
Edit Cont. Rate
Total 3.516 ml
Time
ml/hr
12:00AM
0.016
06:00AM
0.19
- - : - -
0
Edit Cont. Rate
Total ???? ml
Time
ml/hr
12:00AM
0.016
- - : - -
0.15
06:00AM
0.19
<Done
<Done
<Done
k
Next>
k
Next>
k
Next>
Select>
1
Programming the Pump
m
Press
Edit
Press Next to move
through segments. Press
b or c to make changes
to a highlighted segment.
Press OK
Edit Demand
Dose
30
Next>
To remove time/rate
segments: Press Next until
highlight is over time you
want to delete; press b or c
until “- - : - - “ is shown, then
press Next or Done
To add time/rate segments:
Press Next until “- - : - -”
appears in highlight;
choose new time then press
Next; choose new rate then
press Next or Done
OK
ml
Limited by Maximum
Dose. Press OK
k
Automatic Dose
Total 0.018 ml
Time
ml
04:00AM
0.018
Press OK
* You cannot program an Automatic Dose for a time that
would occur during another dose’s lockout time.
OK
l
Edit>
Press
Edit
Edit Auto Dose
Total 0.018 ml
Time
ml
04:00AM
0.018
--:--
0
k
Press Next to move
<Done
Next>
through segments. Press b
or c to make changes to a
highlighted segment. When
finished, press Done
Edit Auto Dose
Total 0.018 ml
Time
ml
04:00AM
0.018
- - : - -
0
k
To add another Auto Dose:
<Done
Next>
Press Next until “- - : - -”
appears in highlight; choose
new time then press Next;
choose new amount then
press Next or Done*
Edit Auto Dose
Total ???? ml
Time
ml
04:00AM
0.018
- - : - -
0.018
--:--
0
k
To remove an Auto Dose:
<Done
Next>
Press Next until highlight is
over time you want to delete;
press b or c until “- - : - - “
is shown, then press Next or
Done
Press
Done
Press
Done
Loading a cartridge
The Load feature in the pump menu takes you through
each step needed to load a filled cartridge in the pump
and start delivering medication.
Warning: Always use the pump’s Load feature when
starting a new cartridge. This will assure that the
cartridge is properly loaded and the infusion or extension set is filled with medication.
Warning: Always use aseptic technique, particularly when working with the cartridge, infusion set,
catheter and access site.
Warning: The CADD-MS™ 3 pump and cartridge
are not a secure system. Patient must be assessed for
appropriateness of pump usage.
Supplies required
In addition to the pump, you will need:
• One filled Smiths Medical 3 ml Medication Cartridge
• One infusion or extension set with standard female
luer connection (for connecting to cartridge)
31
Using the Pump
Warning: Always read the Instructions For Use
provided with the medication, cartridge, infusion set,
and any other accessory used with the CADD-MS™ 3
Ambulatory Infusion Pump.
1. Filling the cartridge
Use aseptic technique.
Fill the cartridge according to the Instructions for Use
supplied with the cartridge.
32
Using the Pump
2. Attaching an infusion or extension set and loading
a filled cartridge into the pump
Warning: To avoid accidentally infusing medication
or causing backflow of blood from the access device
(or site), disconnect the tubing from the access
device (or site) before removing a used cartridge or
replacing an infusion set. Never use the pump’s Load
Cartridge or Fill Tubing features while tubing is connected to the patient, or an unintended dose of medication can be delivered.
1. Turn the cartridge cap
counterclockwise (left)
approximately ¼ turn
and remove it from the
pump (see Figure 7).
If required, remove the
used cartridge (you
may get the Cartridge
Figure 7
Removed alert; press
OK). NOTE: turning the cartridge cap may also turn
the cartridge, so it may already be disconnected from
the pushrod when the cap is removed. If not, turn the
cartridge ¼ turn to the left to disconnect it from the
pushrod.
2. Thread the infusion set tubing through the cartridge cap;
remove the protective cap from
the luer end of the infusion
set and insert the luer through
the hole in the cap and firmly
tighten it onto the tip of the
filled cartridge (see Figure 8).
Figure 8
Warning: If not properly tightened, medication
could leak from the cartridge and tubing
connections and disrupt delivery. Signs of leakage
can also mean opportunity for contamination leading
to infection.
3. Insert the new cartridge into the
cartridge chamber (see Figure 9).
Gently turn the cartridge clockwise (right) about ¼ turn to fasten it onto the pushrod (you may
need to first turn the cartridge
until it drops onto the pushrod).
Figure 9
4. Choose Load from main menu and open the cartridge
menu.
NOTE: You will not be able to load a cartridge that
contains less than 0.2 ml (the sensor may have trouble
sensing the cartridge amount).
Start at any
Home screen
Choose Load, then
press Select
47
#A
0.025 ml
CR
Continuous Rate
0.106 ml/hr
CR Menu
k
Menu>
Press
Menu
Main Menu
Stop Delivery
Setup
Load
History
Beep/Vibrate
<Home
n Select>
With Load chosen,
press Select
Cartridge
Menu
Load
Fill Tubing
Fill Cannula
Reminder
<Done
m
Select>
Press Load*
Q
Detach Set
from body
Install filled
cartridge, then
press Load
W
<Back
Please wait...
Load
Loading
**
Cartridge
Menu
* See the next page for additional screens which may appear
when you press Load.
** See the next page for additional screens which may appear
after the “Loading” screen.
33
Using the Pump
Load
Fill Tubing
Fill Cannula
Reminder
<Done
k
Select>
34
Using the Pump
Q Not ready W
Pushrod must move
forward
Remove cartridge,
then press OK
<Back
!
Please wait
OK
No cartridge
detected
Cartridge missing or
overfilled
Install cartridge to
confirm sensor
Cancel
FastForward
Confirm
* In order for the pump to assure that the cartridge is correctly connected
to the pushrod, the pushrod must start in a forward position. If it is not
far enough forward when you press Load, or if you attempt to load a
cartridge that contains less than 0.2 ml, the screens shown at left will
appear. Remove the cartridge, then press OK (or press Back to return to
the previous screen). If you press OK, the pushrod moves forward, then
the screen reads, “Detach set from body, install filled cartridge, then press
Load”. If your cartridge contains less than 0.2 ml, you will need to start
with a new filled cartridge. With Load still chosen, press Select.
Q Sensor
W
confirmed
Now pushrod must
move forward
Remove cartridge
then press OK
OK
FastForward
Please wait
** If, during the loading process, you intentionally or accidentally remove
the cartridge, or if the cartridge is too full (more than 3 ml), the screens
shown at left will appear. The pump needs to check to make sure that the
cartridge sensor is working properly.
• If the cartridge is not installed, install it;
• If a cartridge is installed, make sure it is not too full (fill with no more
than 3 ml). With the tubing set attached, press down gently on the
cartridge (this will push excess medication into the tubing). Press
Confirm. The pump will confirm that the sensor is working properly. (If
the sensor is not working, you will get this message repeatedly and the
pump will need to be serviced.) If the sensor is confirmed, remove the
cartridge and press OK. The pushrod moves forward, then the screen
reads, “Detach set from body, install filled cartridge, then press Load”.
With Load still chosen, press Select.
5. Verify, by looking through the
cartridge viewing window,
that the cartridge is properly
attached to the pushrod. Fasten
the cartridge cap back onto the
pump. Make sure the rib on
the cap lines up with the rib on
the pump, indicating the cap is
secured (see Figure 10).
Align
Figure 10
35
Using the Pump
36
Using the Pump
3. Fill the tubing
Filling forces medication from the cartridge and pushes
air out of the tubing. Filling is complete when you see
medication come out of the end of the tubing and all
air is removed. The amount of medication used to fill
the tubing is not counted as medication delivered to the
patient.
Warning: Never use Fill Tubing when the infusion
set is connected to the body, or an unintended dose
could be delivered.
Press Select
Cartridge
Menu
Load
Fill Tubing
Fill Cannula
Reminder
<Done
k
Select>
Press Start
Tubing begins to fill. When tubing is filled,
press Stop or Done (filling automatically
stops at 0.3 ml)
Fill
Tubing
0
<Back
ml
Filling
Tubing
Start
0.09
<Done
ml
Stop
Press Back
Fill
Tubing
0.25
<Back
Choose Yes to continue
filling then press Select
Continue to fill
tubing?
No
<Back
k
Select>
ml
Start
- OR - Press Start
again to continue
filling
- OR - With No displayed press
Select if you do not want to
continue filling
NOTE: once the (√) symbol
appears next to Fill tubing,
you will not be able to re-enter
that step unless you first press
Done to return to the Main
Menu, then re-enter the Load
menu
Cartridge
Menu
Load
Fill Tubing
Fill Cannula
Reminder
<Done
k
Select>
4. Fill cannula
Filling the cannula is an important step if using an
infusion set that has a separate needle or cannula that
needs priming prior to use. If you do not fill the cannula,
there is a delay in medication delivery once the pump is
started.
Press Select
Cartridge
Menu
Load
Fill Tubing
Fill Cannula
Reminder
<Done
k
Select>
Choose amount needed to fill cannula (listed
in instructions supplied with infusion set), then
press Fill (once you enter an amount here, that
amount becomes the default, and will always be
shown in this screen)
Fill
Cannula
0
<Back
ml
k
Fill
Cartridge
Menu
Load
Fill Tubing
Fill Cannula
Reminder
<Done
37
Using the Pump
l
Select>
38
Using the Pump
5. Set site change reminder and restart delivery
The Site Change reminder screen appears here if turned
on in Setup / Alerts (see page 23). Setting the site
change reminder will cause the pump to beep (or vibrate) as a reminder that it is time to change the tubing
or access site.
Press Select
Cartridge
Menu
Load
Fill Tubing
Fill Cannula
Reminder
<Done
l
Select>
At reset, choose Yes*. Choose interval
between alerts, then press Next;
choose time, then press Next
Site Reminder
Reset:
Interval:
Time:
<Back
Yes
3 days
08:00 AM
k
Next>
Press Done
Cartridge
Menu
Load
Fill Tubing
Fill Cannula
Reminder
<Done
*When you choose Yes, the alert clock
is reset to zero, and will begin a new
countdown (in this example, in 3 days
at 08:00 am the pump will give the
alert). Choosing No allows the alert
clock to continue the countdown from
the last time it was reset.
l
Select>
Press Home
Main Menu
Stop Delivery
Setup
Load
History
Beep/Vibrate
<Home
p Select>
17
#A
2.988 ml
CR
Continuous Rate
0.106 ml/hr
CR Menu
k
Menu>
Stopping and starting the pump
You can stop and start the pump from any of the Home
screens or in the main menu. The Delivery Program and
certain items in the Setup Menu (those having an effect
on delivery) can only be accessed if the pump is stopped.
Shown below is how to stop from the CR home screen,
although stopping from any of the Home screens will
use the same procedure.
Start at any
Home screen
17
#A
2.988 ml
CR
Continuous
Rate Menu
Stop Delivery
Review Rates
<Home
Press
CR Menu
Continuous Rate
0.19 ml/hr
CR Menu
k
Menu>
Press
Menu
p Select>
<Home
Q
17
#A
2.988 ml
CR
Stop all delivery?
Press Yes
<No
Using the Pump
p Select>
Press Select
Press Select
39
Main Menu
Stop Delivery
Setup
Load
History
Beep/Vibrate
Yes>
PUMP STOPPED
CR Menu
k
Menu>
40
Using the Pump
Starting the pump
Start at any
Home screen
17
#A
2.988 ml
CR
Continuous
Rate Menu
Start Delivery
Review Rates
<Home
Press
CR Menu
PUMP STOPPED
CR Menu
k
Menu>
Press
Menu
Main Menu
Start Delivery
Setup
Delivery Program
Load
History
<Home
p Select>
m
Select>
Press Select
Press Select
Q Review
Program
Review the delivery
program settings?
<No
17
#A
2.988 ml
CR
Press No
Continuous Rate
0.19 ml/hr
Yes>
CR Menu
Press YES
Delivery
Methods
Continuous Rate Yes
Automatic Dose Yes
Demand Dose Yes
OK
View Cont. Rate
Total 3.516 ml
Time
ml/hr
12:00AM
0.016
06:00AM
0.19
Automatic Dose
Total 0.018 ml
Time
ml
04:00AM
0.018
p
o
OK
Demand Dose
Amount:
Duration:
OK
0.012 ml
12 min
OK
Press OK to move through the program review screens. Press b or c
to scroll through the continuous rate and automatic dose screens (if
needed). Continuous Rate, Automatic Dose and Demand Dose will only
appear here if set to Yes in both the Setup and Delivery Program menus.
k
Menu>
Delivering a Demand Dose
In order to deliver a Demand Dose, the pump must be
programmed to allow them in the Setup menu (where
you will need to program a Lockout time limit and dose
duration) as well as in the Delivery Program menu
(where you will program the amount).
A Demand Dose is initiated by pressing the Demand
Dose button on the side of the pump. A Demand Dose
can be given only when the pump is running.
If the patient tries to deliver a Demand Dose during the
lockout period, the display will show, “No dose allowed.”
If the pump is not programmed to allow Demand Doses,
pressing the button will have no effect.
Unlike Automatic Doses, the patient chooses whether
or not to deliver a Demand Dose. If the pump is programmed to allow demand doses, the patient can choose
to deliver a dose or not, as long as it is not prevented by
any Lockout time.
41
Using the Pump
Q
Demand
Dose
Administer demand
dose of 0.66 ml?
<Cancel
Press Demand Dose
button; Demand Dose
screen appears
Deliver>
To give the dose, press
Deliver. If you do not
want to give the dose,
press Cancel.
42
Using the Pump
Canceling doses
Doses can be canceled while in progress. The next
scheduled Automatic Dose can also be canceled.
NOTE: Instruct the patient under what circumstances
they can cancel a dose.
Stopping the pump will stop any dose in progress. Use
the procedures on the following pages to stop delivering
a dose without stopping the pump (and any continuous
rate delivery).
Canceling a dose (Demand or Automatic)
while in progress
Choose Cancel
Dose, then
press Select
Start at any
Home screen
16
#A
2.988ml
CR
Main Menu
Press
Menu
Stop Delivery
Cancel Dose
Setup
Load
History
Continuous Rate
0.242 ml/hr
CR Menu
k
<Home
Menu>
Press Yes
Q
Cancel
Dose?
Remaining
Amount:
<No
43
n Select>
Using the Pump
0.05 ml
Yes>
Canceling next Automatic Dose
Choose Cancel
Next Dose, then
press Select
Start at
Automatic Dose (AD)
Home screen
16
#A
2.988ml
AD
Press
AD Menu
Next Auto Dose:
12:00 AM 0.05 ml
AD Menu
k
Stop Delivery
Cancel Next Dose
Review Auto Doses
<Home
Menu>
Press Yes
Automatic Dose
Menu
n Select>
Q
Cancel next
Automatic Dose of
0.05 ml at
06:00 AM?
<No
Yes>
44
Using the Pump
History
The pump stores history in two ways:
• As events. The pump stores information for the previous 4000 events.
• By the delivery date. The pump stores delivery information for the previous 90 days.
History can be viewed directly on the pump display
from the History menu.
You can scroll through the history reports using the b
and c keys in History.
The history reports are:
Complete History: this includes delivery totals, alerts,
errors, battery changes, cartridge changes, changes to the
pump program, etc. Each event in the complete history
report includes the date and time of its occurrence. It
includes the last 4000 events.
Delivery Summary: this is a daily breakdown of medication delivery, and may include the Demand Doses,
Automatic Doses, and Continuous Rate delivered and
includes a total amount delivered for that day. Only
those delivery options that are active (set to Yes in the
Setup and Delivery Program menus) will appear in the
Delivery Summary.
Choose History,
then press Select
Start at any
Home screen
16
#A
2.988ml
CR
Press
Menu
Continuous Rate
0.242 ml/hr
CR Menu
k
Menu>
Main Menu
Stop Delivery
Setup
Load
History
Beep/Vibrate
<Home
n Select>
Press Home
Choose History,
then press Select
Start at any
Home screen
16
#A
2.988ml
CR
Continuous Rate
0.242 ml/hr
CR Menu
k
Menu>
Press
Menu
Main Menu
Stop Delivery
Setup
Load
History
Beep/Vibrate
<Home
n Select>
Press Home
45
Using the Pump
Choose Complete
History, then press
Select
History
Menu
Complete History
Delivery Summary
<Back
m
Select>
Complete History
10/05/05 01:41 PM
Continuous rate
changed to
0.5 ml/hour
<Back
k
A sample Complete History report
screen. You can press the b or c keys
to view other events in the report. Press
Back when you’re finished viewing.
Press Back
Choose Delivery
Summary, then
press Select
History
Menu
Complete History
Delivery Summary
<Back
l
Press Back
Select>
Delivery Summary
Today
Demand:
Auto.:
Cont.:
Total:
<Back
k
0 ml
0.092 ml
0.735 ml
0.827 ml
A sample Delivery Summary screen.
Press the b or c keys to change the
date and see delivery summaries from
previous dates. Press Back when you’re
finished viewing the report.
46
Using the Pump
Beep or Vibrate
Choose Beep or Vibrate* to signal alarms and alerts.
Then, if using Beep, decide how loud the beep is and
whether you want the pump to beep each time you press
Choose Beep/
Vibrate, then
press Select
Start at any
Home screen
17
#A
2.988 ml
CR
Continuous Rate
0.19 ml/hr
CR Menu
k
Menu>
Press
Menu
Press
Home
Choose Beep,
then press Next
17
#A
2.988 ml
Type:
Volume:
Key Beep:
Beep
High
Yes
<Home
<Back
Next>
Select>
k
CR
Continuous Rate
0.19 ml/hr
CR Menu
Alert
Type:
Volume:
Key Beep:
<Back
k
Beep
High
Yes
Next>
Type:
Volume:
Key Beep:
<Back
k
k
Menu>
Press
Menu
Press
Home
Main Menu
Stop Delivery
Setup
Load
History
Beep/Vibrate
<Home
k
Select>
Alert
Alert
Choose to have key
beeps turned on
(Yes) or off (No),
then press Next
Choose Beep/
Vibrate, then
press Select
Start at any
Home screen
Alert
Main Menu
Stop Delivery
Setup
Load
History
Beep/Vibrate
k
a key. Low is quietest and High is loudest. It is factory
preset to High.
Beep
High
Yes
Next>
Choose beep
volume (Low,
Medium or
High), then
press Next
Type:
Vibrate
Volume:
High
Key Beep:
Yes
<Back
k
Next>
Choose Vibrate,
then press Next
*Note that Vibrate uses up batteries much faster.
Continuous Rate Menu
If the pump is programmed with a continuous rate, a
Continuous Rate Home screen is added. A Continuous
Rate Menu is also added, where you can view (but not
change) the Continuous Rate schedule.
Start at
Continuous Rate
(CR)
Home screen
16
#A
2.988ml
CR
Continuous Rate
0.3 ml/hr
CR Menu
k
Menu>
Choose Review
Rates, then press
Select
Press
CR Menu
Press
Home
Continuous
Rate Menu
Stop Delivery
Review Rates
<Home
o Select>
(Press
OK)
(Press
Home)
Cont. Rate
Total 8.4 ml
Time
ml/hr
12:00AM
0.5
06:00AM
0.3
OK
47
Using the Pump
p Home>
Press the b or c keys to view the entire
Continuous Rate schedule (if needed).
Press Home to return directly to the
home screen or press OK to return to the
Continuous Rate Menu.
48
Using the Pump
Automatic Dose Menu
If the pump is programmed to deliver automatic doses,
an Automatic Dose Home screen is added. An Automatic
Dose Menu is also added, where you can view (but not
change) the dose schedule and cancel doses. Canceling
the next Auto Dose is discussed on page 43.
Choose Review
Auto Doses, then
press Select
Start at Automatic
Dose (AD)
Home screen
16
#A
2.988ml
AD
Next Auto Dose:
11:30 AM 0.05 ml
AD Menu
k
Menu>
Press
AD Menu
Press
Home
Automatic Dose
Menu
Stop Delivery
Cancel Next Dose
Review Auto Doses
<Home
o Select>
(Press
OK)
(Press
Home)
Automatic Dose
Total 0.1 ml
Time
ml
04:00AM
0.05
11:30AM
0.05
OK
nHome>
Press the b or c keys to view the entire
Auto Dose schedule (if needed). Press
Home to return directly to the home
screen or press OK to return to the
Automatic Dose Menu.
Demand Dose Menu
If the pump is programmed to allow demand doses,
a Demand Dose Home screen is added. A Demand
Dose Menu is also added, where you can view (but not
change) the dose amount and duration and cancel doses.
Start at Demand
Dose (DD)
Home screen
16
#A
2.988ml
DD
Last Demand Dose:
08:00 AM 0.012 ml
DD Menu
k
Menu>
Choose Review
Doses, then press
Select
Press
DD Menu
Press
Home
Demand Dose
Menu
Stop Delivery
Review Doses
<Home
o Select>
(Press
OK)
Demand Dose
(Press
Home)
Amount:
0.012 ml
Duration:
12min
<OK
49
Using the Pump
Home>
Press Home to return directly to the
home screen or press OK to return to the
Demand Dose Menu.
50
Using the Pump
About alarms (Beep/Vibrate
settings)
The pump can be set to Beep or Vibrate when an alert
or alarm occurs (see page 46). With Beep selected, you
can also choose whether the pump beeps when you press
a key. When Vibrate is selected, the pump will not beep
(or vibrate) when keys are pressed. (NOTE: the battery is
used much more quickly when Vibrate is programmed.)
There are several types of alarm tones/vibration patterns:
• Siren alarm: Indicates pump is not working correctly
and must be removed from use.
Beep: 2 alternating beeps repeated constantly. Remove
pump from use.
Vibrate: Disabled.
• Continuous alarm: Indicates a problem which may
have caused medication delivery to be stopped. See to
alarms immediately.
Beep: 4 double-beeps, repeating every 10 seconds
until you press the appropriate key to silence it.
Vibrate: 4 double-vibrations, repeated every 10 seconds until you press the appropriate key to silence it.
51
Help
• Attention alarm: Indicates a problem that you need
to see to, however it is not serious enough to have
stopped delivery. Examples include low cartridge
volume, low battery, etc.
Beep: 4 double-beeps, repeated once per minute.
Vibrate: 4 double-vibrations, repeated once per
minute.
• Single alarm: This is a notification alert.
Beep: pump beeps once.
Vibrate: pump vibrates once.
• Stopped alarm: Indicates the pump is stopped.
Beep: 3 beeps, repeated every 5 minutes.
Vibrate: 3 vibrations, repeated every 5 minutes.
You can set the volume of the Beep alarm to Low, Medium,
or High (see page 46). If a continuous alarm occurs that is
not cleared within 5 minutes, the pump will switch between
vibrating and beeping at the high setting in order to get
your attention.
The backlight automatically lights whenever an alarm or
alert occurs.
52
Help
Troubleshooting
Alarms
Message in display
!
Battery
depleted
Delivery stopped.
Insert a new battery.
!
Blockage
detected
No delivery.
Check tubing or site
for blockage.
!
!
What it means / Alarm
How to make it stop
Delivery stops. The battery does not You must change the battery immediately. Power
have enough power for the pump to may be so low that the display goes blank or the
work. Siren alarm.
pump continuously attempts to restart; always replace the battery whenever this occurs.
Delivery suspended. There is something preventing the medication
from being delivered. Continuous
alarm.
Alarm will recur unless blockage is cleared. Disconnect your infusion set from the access device until
the blockage is cleared. Check tubing, making sure it
is not kinked; make sure tubing is not trapped in the
patient’s clothing or pouch. Check cannula, making
sure cannula is properly inserted, if applicable. Press
OK.
Cartridge
empty
Insert filled cartridge
to continue delivery.
Delivery suspended. The cartridge is Press OK. You must load a new cartridge now.
empty. Continuous alarm.
Cartridge
removed
Press OK to begin
load process.
Delivery suspended. Pump detected Press OK. Disconnect the tubing from the patient.
that cartridge was removed or not
Correctly load a cartridge onto the pushrod and fill
properly installed. Continuous
the tubing (see page 32).
alarm.
Alarms - continued
Message in display
!
Cartridge
very low
!
Key
stuck
Release key or
remove battery.
!
System
fault
Call for service.
!
Battery
low
Change battery
soon.
53
Help
What it means / Alarm
How to make it stop
The cartridge is nearly empty. If
Continuous Rate delivery is active,
it will continue. If Automatic or
Demand Dose delivery is active, delivery of doses will not start or will
be suspended. Continuous alarm.
Press OK. There is enough medication to continue
delivering the continuous rate for a short time, but
not enough to start a dose, or complete a dose that is
in process (the dose may be completed when a new
cartridge is loaded). You must begin preparation to
load a new cartridge.
A key has been pressed continuously for 5 minutes, or a key was
pressed during the pump’s power
up. Continuous alarm.
If you are pressing a key, stop pressing it. If you are
not pressing a key, remove and reload the battery. If
the alarm persists, there may be a problem with the
keypad that requires service.
Delivery stops. The pump’s comput- Disconnect the tubing from the access device. Reer has detected a problem with the
move the battery to silence the alarm and contact
pump. Siren alarm.
Smiths Medical MD, Inc. to initiate pump service.
Do not use the pump.
This alert occurs only during
Press OK. Change the battery as soon as possible.
waking hours (6:00 am to 10:00 pm).
A series of 4 Attention alarms
given every 4 hours until battery is
depleted.
54
Help
Alerts
Message in display
!
What it means / Alarm
How to make it stop
The amount of medication left in
the cartridge is low. Alert repeats at
intervals until Cartridge Very Low
alarm occurs. Attention alarm.
Press OK. Replace the cartridge as soon as practical.
Edit not
saved
Editing was not saved
because an alarm
occurred.
An alarm or alert occurred while
you were programming/editing a
value. Single alarm.
Press OK. Reprogram the value.
!
Program
Defaulted
Setup of cartridge
volume required.
With no cartridge
present, press Next.
The cartridge volume needs to be
rechecked to make sure it will be
displayed correctly on the home
screen. Attention alarm.
Remove the cartridge (if present), then press Next.
!
Program
Defaulted
Set time and date:
XX:XX XX
XX/XX/XX
The time and date settings in the
Press the b or c key to choose the currently highprogram have been reset and must
lighted setting, then press Next to move highlight to
be reprogrammed. Attention alarm. next setting. When time and date are correct, press
Done.
Cartridge
Volume Low
Change cartridge
soon.
!
Alerts - continued
Message in display
!
Program
Defaulted
You must program
the pump.
Q
Site change
reminder
x days since site changed.
Time for new site?
Other messages
Message in display
!
What it means / Alarm
How to make it stop
All pump settings are reset to default
Press OK. Reprogram all pump settings.
values (usually seen with new pumps
or when internal battery is discharged).
Attention alarm.
It is time to change your infusion set
and access site. Attention alarm.
Press OK. Follow the instructions for Loading
the cartridge starting on page 31.
What it means / Alarm
How to make it stop
You have attempted to start the
pump and the Automatic Dose
amounts are programmed to zero.
Single alarm.
Press OK. If necessary, go to the Delivery Program
menu and program the amount(s) for the Automatic
Dose schedule.
All Continuous
Rates programmed
to zero.
You have attempted to start the
pump and all the rates in the
Continuous Rate schedule are
programmed to zero. Single alarm.
Press OK. If necessary, go to the Delivery Program
menu and program the rate(s) for the Continuous
Rate schedule.
Cancel Demand Dose
and stop all delivery?
You have tried to stop the pump
while a Demand Dose is delivering.
Single alarm.
To stop the pump and cancel the remainder of the
Demand Dose, press Yes. To leave the pump running
and continue delivering the Demand Dose press No.
All Automatic Doses
programmed to
zero.
!
Q
55
Help
56
Help
Other messages - continued
Message in display
!
What it means / Alarm
How to make it stop
Demand Dose
programmed to
zero.
You have attempted to start the
pump and the Demand Dose
amount is programmed to zero.
Single alarm.
Press OK. If necessary, go to the Delivery Program
menu and program the amount for the Demand
Dose.
Dose
Interrupted
Resuming dose .
Dose delivery was interrupted, and
will now resume. Single alarm.
Press OK.
Dose Not
Completed
Dose Duration
expired while
delivery was
suspended.
Dose delivery was interrupted and
the duration has since expired.
Single alarm.
Press OK. The dose will not be completed, and the
patient must wait for the dose lockout period to
expire before delivering another dose.
You have attempted to use the Load
portion of the load cartridge menu,
but no cartridge is detected. It may
also mean that you filled the
cartridge too full (more than 3 ml).
Single alarm.
If a cartridge is installed (and with the infusion set
attached to the cartridge) press down gently on the
cartridge to push excess medication into the tubing.
If a cartridge is not installed, install one. Press Confirm. If the cartridge sensor is not confirmed, you
will need to have the pump serviced.
!
!
!
No cartridge
detected
Cartridge missing or
overfilled.
Install cartridge to
confirm sensor.
Other messages - continued
Message in display
!
What it means / Alarm
How to make it stop
No dose
allowed
Demand dose is
currently locked
out.
You attempted to deliver a Demand
Dose during the lockout period.
Single alarm.
Press OK. The Demand Dose home screen displays
the time that the next dose will be available.
No dose
allowed
Dose in progress.
You attempted to deliver a Demand
Dose while a Demand Dose or Automatic Dose was being delivered.
Single alarm.
Press OK. The Demand Dose home screen displays
the time that the next dose will be available.
You attempted to deliver a dose,
but the cartridge volume is too low.
Single alarm.
Press OK. Load a new cartridge, then deliver the
dose.
Q
Programming
Required
You must completely
review the delivery
program.
You have chosen to use a delivery
method, but have not reviewed or
completed all required programming. Single alarm.
Press OK. Completely review the delivery program
and program the pump as required.
Q
You have tried to stop the pump.
Single alarm.
To stop the pump, press Yes. To leave the pump running, Press No.
!
!
No dose
allowed
Cartridge volume is
very low.
Stop all delivery?
57
Help
58
Help
Other messages - continued
Message in display
Q
This will result in a
Demand Dose
amount of 0 ml.
Q
This will result in an
Automatic Dose
amount of 0 ml.
Q
This will result in a
time period with
a Continuous Rate of
0 ml/hr.
What it means / Alarm
You have allowed Demand Doses,
but programmed the amount to
zero. Single alarm.
How to make it stop
If you want to leave the amount at zero, press
OK. If you want to reprogram the amount, press
Edit.
You have programmed an automatic If you want the schedule to run as programmed,
dose schedule where at least one
press OK. If you want to reprogram the schedule,
of the dose amounts is set to zero.
press Edit.
Single alarm.
You have programmed a continuous If you want the schedule to run as programmed,
rate where at least one of the rates is press OK. If you want to reprogram the schedule,
zero. Single alarm.
press Edit.
Cleaning the pump
Routinely clean the pump to prevent buildup of dirt or
dried fluids. Try to wipe spills off the pump right away to
avoid a sticky buildup, which will be harder to wipe off
later.
When cleaning the pump, ONLY use a sponge or soft
cloth with a solution of warm water and a mild soap,
such as liquid dish or hand soap.
Routinely clean the pump to keep it free of dirt, liquids,
and foreign objects.
Use any of the following solutions to clean the pump and
accessories:
•
•
•
•
Soap solution
Benzalkonium chloride concentrate (0.13%)
Glutaral concentrate, USP (2%)
10 percent solution of household bleach (one part
household bleach to 9 parts water)
• Alcohol, USP (93%)
• Isopropyl alcohol, USP (99%)
• Chlorohexidine (70%)
59
Help
• PDI — Super Sani-Cloth®
• Mada Medical — MadaCide
1. Dampen a soft, lint-free cloth with cleaning solution and wipe the exterior surface of the pump.
Do not allow the solution to soak into the pump.
2. Wipe the entire surface dry with another soft,
lint-free cloth. Allow the pump to dry completely
before use.
Make sure to clean inside the battery or cartridge compartment. Moisten one end of a cotton swab (such as a
Q-tip®) and gently clean inside the compartment. Use
the dry end of the swab to dry the compartment.
Caution: Never use abrasive cleaners, solvents,
bleach, scouring pads or sharp instruments when
cleaning your pump, as they can scratch, discolor
or damage the pump’s outer shell. If the display is
scratched, it may be difficult to read and you will
need to have it replaced. If the outer shell is chipped
or cracked, it may no longer be watertight and will
require service.
Caution: Never use steam or very hot water (exceeding 120°F [49°C]) in an attempt to sterilize the
pump. Never put your pump in the dishwasher.
60
Help
Exposing the pump to these high temperatures could
damage the pump’s electronics and result in the need
to service the pump.
Servicing the pump
If the pump becomes damaged or broken, or if it is not
working properly, you will need to call Smiths Medical
MD, Inc.
Before contacting Smiths Medical, please be sure that
you know the pump serial number (located on the back
of the pump), and are able to give a brief description of
the problem.
In the USA, contact Smiths Medical MD, Inc. Customer
Service at
1 800.426.2448
The pump and:
Extreme temperatures
If outside in very cold temperatures for any length of
time, instruct the patient to keep the pump next to their
body and covered by warm clothing.
Avoid leaving the pump in direct sunlight. Instruct the
patient to remove the pump before entering a hot tub,
Jacuzzi®, or sauna, as the temperatures may be too high
for the pump to operate properly. See Specifications in
the Technical Information chapter for appropriate storage and operation temperatures.
Water
As long as the pump’s labels and outer shell are intact
(no cracks or chips), the pump is watertight. The pump
does not need to be removed when showering or bathing. Instruct the patient to dry the pump with a clean
towel after it is exposed to water.
61
Help
If the pump is dropped or hit
hard
If the pump is dropped or hit against something hard, it will
need to be immediately looked over carefully to make sure
it is not damaged. Instruct the patient to disconnect their
infusion set from their body and stop delivery until they
have made sure the pump is working correctly. The patient
should remove the battery, then reinsert it. The pump will
perform the self-tests, and alarm if there is a problem.
The patient should make sure the pump display is working correctly. If there are missing or incomplete characters, the pump will need to be serviced.
The patient should look over the pump’s outer shell carefully, checking for cracks or chips. If there are cracks or
chips, the pump will no longer be watertight. The pump
will need to be serviced if there is any damage.
The patient should make sure the cartridge cap and
battery cap are in place and secure. Have them check
all connections on the cartridge and infusion set. If
moisture is present, they must tighten the connectors. If
the connectors appear damaged, they must replace the
cartridge and infusion set.
62
Help
Warning: If the pump is dropped or hit against
something hard, it must always be inspected carefully to make sure it is still working properly. Make
sure the display is working correctly, and the cartridge, cartridge cap, battery cap and infusion set are
connected correctly. If there is damage to the pump
outer shell (cracks, chips), the pump may no longer
be watertight.
Warning: If the display has missing or incomplete
characters, or if the pump does not seem to be
working correctly, stop using the pump immediately. Contact Smiths Medical MD, Inc. for information
on servicing the pump.
Warning: Make sure that the battery cap is fully
tightened to avoid an interruption in battery power
which can cause the pump to power down and stop
the delivery of drug therapy. A prolonged interruption in the delivery of drug therapy can result in
serious patient injury or death.
Pump development
standards
AAMI ID26: 1998 - Medical Electrical Equipment — Part 2:
Particular requirements for the safety of infusion pumps and
controllers.
ANSI/AAMI HE48: 1993 - Recommended Practice — Human
factors engineering guidelines and preferred practices for the
design of medical devices. (February 5, 1988 version) Design
guideline.
IEC 60601-1 (Second Edition, 1988) - Medical Electrical
Equipment, Part 1: General requirements for safety. Amendment 1 (1991), Amendment 2 (1995).
IEC 60601-1-1 (Second Edition, 1992) - Medical Electrical
Equipment, Part 1: General requirements for safety - 1. Collateral standard: Safety requirements for medical electrical systems.
Amendment 1 (1995).
IEC 60601-1-2 (2001) - General Requirements for Safety, Part 2
— Electromagnetic compatibility — Requirements and tests.
(European Harmonized Standard).
IEC 60601-1-4 (1996) - Medical Electrical Equipment, Part 1:
General requirements for safety — 4. Collateral standard: Programmable electrical medical systems.
63
Technical Information
IEC 60601-2-24 (1998-02) - Medical Electrical Equipment,
Part 2–24: Particular requirements for safety of infusion pumps
and controllers.
IEC 878 (First Edition, 1988) - Graphical symbols for electrical
equipment in medical practice.
IEC 61000-4-2 (1995) - Electromagnetic Compatibility (EMC),
Part 4: Testing and measurement techniques. Section 2: Electrostatic Discharge immunity test. Basic EMC Publication.
IEC 61000-4-3 (1995) - Electromagnetic Compatibility (EMC,
Part 4: Testing and measurement techniques. Section 3: Radiated, radio frequency, electromagnetic fields immunity test.
Basic EMC Publication. Amendment 1 (1998-06).
IEC 61000-4-8 (1993) - Electromagnetic Compatibility (EMC),
Part 4: Testing and measurement techniques, Section 8: Power
frequency magnetic field immunity test, 1993.
CISPR11 (1990) - Limits and methods of measurement of electromagnetic disturbance characteristics of industrial, scientific
and medical (ISM) radio frequency equipment. Amendment 1
(1996; Amendment 2 (1996).
CISPR14 (1993) - International Special Committee on Radio
Interference, limits and methods of measurement of radio
interference characteristics of household electrical appliances,
portable tools and similar electrical apparatus. Amendment 1
(1996).
64
Technical Information
IEC 529 - Degrees of protection provided by enclosures
(IP Code).
RTCA/DO-160D (7/97) - Environmental conditions and test
procedures for airborne equipment: SECT 21 — Emissions of
radio frequency energy (Radiated Emissions Only — Category M
Limit).
UL2601-1 (1998) - Medical Electrical Equipment, Part 1: General
requirements for safety.
NOTE: While the pump complies with the above
standards, there is no guarantee that interference will not
occur in any particular situation. If the pump malfunctions
due to interference with radio or cell phones: move the
antenna further from the pump and/or increase the
distance between the pump and the radio or cell phone.
Guidance and Manufacturer’s Declaration — Electromagnetic Emissions
The pump is intended for use in the electromagnetic environment specified below. The customer or the user of the pump should assure that it is
used in such an environment.
Emissions Test
Compliance
Electromagnetic Environment — Guidance
RF emissions, CISPR 11
Group 1
The pump uses RF energy only for its internal function. Therefore, its RF
emissions are very low and are not likely to cause any interference in
nearby electronic equipment.
RF emissions, CISPR 11
Class B
The pump is suitable for use in all establishments, including domestic
establishments and those directly connected to the public low-voltage
power supply network that supplies buildings used for domestic purposes.
Harmonic emissions, IEC 61000-3-2
Not applicable
Voltage fluctuations/flicker emissions, IEC 61000-3-3
Not applicable
Warning: Use of accessories other than those indicated or adjacent to other equipment may result in increased emissions or
decreased immunity of the pump. The user should verify normal operation of the pump in the configuration and environment
in which it is to be used.
65
Technical Information
66
Technical Information
Guidance and Manufacturer’s Declaration — Electromagnetic Immunity
The pump is intended for use in the electromagnetic environment specified below. The customer or the user of the pump should assure that it is
used in such an environment.
Immunity Test
IEC 60601 Test Level
Compliance Level
Electrostatic discharge (ESD)
± 8 kV contact
± 8 kV contact
IEC 61000-4-2
± 15 kV air
± 15 kV air
Electrical fast transient/burst
± 2 kV for power
Not applicable
IEC 61000-4-4
supply lines
± 1 kV for input/output
lines
Not applicable
Surge
± 1 kV differential mode
Not applicable
IEC 61000-4-5
± 2 kV common mode
Electromagnetic Environment — Guidance
Floors should be wood, concrete or ceramic tile. If floors
are covered with synthetic material, the relative humidity
should be at least 30 %.
Mains power quality should be that of a typical commercial
or hospital environment.
Mains power quality should be that of a typical commercial
or hospital environment.
Not applicable
Voltage dips, short interruptions
< 5 % UT (> 95 % dip in UT)
and voltage variations on power
for 0,5 cycle
supply input lines, IEC 61000-4-11 40 % UT (60 % dip in UT)
for 5 cycles
Power frequency (50/60 Hz)
Magnetic field IEC 61000-4-8
Not applicable
Not applicable
70 % UT (30 % dip in UT)
for 25 cycles
Not applicable
< 5 % UT (> 95 % dip in UT)
for 5 sec
Not applicable
3 A/m
400 A/m
(IEC 60601-2-24)
NOTE: UT is the a.c. mains voltage prior to application of the test level.
Mains power quality should be that of a typical commercial
or hospital environment. If the user of the Pump requires
continued operation during power mains interruptions, it is
recommended that the Pump be powered from an uninterruptible power supply or a battery.
Power frequency magnetic fields should be at levels
characteristic of a typical location in a typical commercial or
hospital environment.
Guidance and Manufacturer’s Declaration — Electromagnetic Immunity
The pump is intended for use in the electromagnetic environment specified below. The customer or the user of the pump should assure that it is used
in such an environment.
Immunity
Test
IEC 60601
Test Level
Compliance
Level
Electromagnetic Environment — Guidance
Portable and mobile RF communications equipment should be used no closer to any part of
the pump, including cables, than the recommended separation distance calculated from the
equation applicable to the frequency of the transmitter.
Conducted RF,
IEC 61000-4-6
3 Vrms
Not
150 kHz to 80 MHz applicable
Recommended separation distance
Radiated RF,
IEC 61000-4-3
3 V/m
80 MHz to 2,5 GHz
d=0.23*P½ 80MHz to 800MHz
15 V/m
d=[3,5/V1]*P½
d=0.47*P½ 800MHz to 2,5 GHz
where P is the maximum output power rating of the transmitter in watts (W) according to the
transmitter manufacturer and d is the recommended separation distance in meters (m).
Field strengths from fixed RF transmitters, as determined by an electromagnetic site surveya,
should be less than the compliance level in each frequency rangeb.
Interference may occur in the vicinity of equipment marked with the following symbol:
R
NOTE 1: At 80 MHz and 800 MHz, the higher frequency range applies.
NOTE 2: These guidelines may not apply in all situations. Electromagnetic propagation is affected by absorption and reflection from structures,
objects and people.
Field strengths from fixed transmitters, such as base stations for radio (cellular/cordless) telephones and land mobile radios, amateur radio, AM and
FM radio broadcast and TV broadcast cannot be predicted theoretically with accuracy. To assess the electromagnetic environment due to fixed RF
transmitters, an electromagnetic site survey should be considered. If the measured field strength in the location in which the pump is used exceeds
the applicable RF compliance level above, the pump should be observed to verify normal operation. If abnormal performance is observed, additional measures may be necessary, such as reorienting or relocating the pump.
a
(Not applicable) Over the frequency range 150 kHz to 80 MHz, field strengths should be less than [V₁] V/m.
b
67
Technical Information
68
Technical Information
Recommended Separation Distances Between Portable and Mobile RF Communications Equipment and the Pump
The pump is intended for use in an electromagnetic environment in which radiated RF disturbances are controlled. The customer or the user of the
pump can help prevent electromagnetic interference by maintaining a minimum distance between portable and mobile RF communications equipment (transmitters) and the pump as recommended below, according to the maximum output power of the communications equipment.
Separation Distance According to Frequency of Transmitter
m
Rated Maximum Output Power
of Transmitter
150 kHz to 80 MHz
80 MHz to 800 MHz
800 MHz to 2,5 GHz
d=[3,5/V₁]*P½
d=0.23*P½
d=0.47*P½
0.01
Not applicable
0.02
0.05
0.1
Not applicable
0.07
0.15
1
Not applicable
0.23
0.47
10
Not applicable
0.74
1.5
100
Not applicable
2.3
4.7
W
For transmitters rated at a maximum output power not listed above, the recommended separation distance d in meters (m) can be estimated using
the equation applicable to the frequency of the transmitter, where P is the maximum output power rating of the transmitter in watts (W) according
to the transmitter manufacturer.
NOTE 1: At 80 MHz and 800 MHz, the separation distance for the higher frequency range applies.
NOTE 2: These guidelines may not apply in all situations. Electromagnetic propagation is affected by absorption and reflection from structures,
objects and people.
Specifications
General specifications (nominal)
Minimum increment of resolution:
0.005 ml per activation
Size:
3.2 in × 1.8 in × 0.95 in (80 mm × 47 mm × 24 mm)
Weight:
Approximately 3.2 oz (90 g) including battery and
cartridge
Classification:
Type CF J (protection from electric shock)
Moisture protection:
IPX8 (watertight to a depth of 12 ft [3.64 m] for 3 min,
or 8 ft [2.4 m] for 30 min.
Pump alarms/alerts:
Pump stopped, blockage, low battery, dead battery, low
cartridge volume, empty cartridge, system fault
Optional alarms/alerts: site change
Maximum infusion pressure:
23 psi
69
Technical Information
Maximum time to blockage (occlusion) alarm:
Minimum Maximum
Intermediate rate: 0.124 ml/hr
12 min
15 min
Minimum rate: 0.002 ml/hr
9.5 hr
19 hr
Bolus volume at blockage (occlusion) release:
Minimum rate: approximately 0.04 ml
Intermediate rate: approximately 0.21 ml
Power source:
One AAA (IEC LR03) alkaline battery.
Caution: Do not use NiCd, nickel metal hydride,
carbon zinc (heavy duty), lithium or any rechargeable
batteries. They will not power the pump properly, and the
battery life indicator on the home screen may not show
the correct amount.
Battery life:
The expected battery life is approximately 2 weeks (battery low alert) at 0.124 ml/hr
Data storage time:
An internal battery powers the clock, and allows pump to
store program parameters and history. The internal battery
is charged by the AAA alkaline battery. Once fully charged
(approximately 40 hours after AAA battery installed), the
70
Technical Information
internal battery maintains pump programming and history for approximately 30 days. The life of the internal battery is 10 years minimum under normal use conditions.
Operating conditions:
Temperature: 2°C to 40°C (35.6°F to 104°F)
Humidity: 90% relative humidity (non-condensing)
maximum
Atmospheric pressure: 70 kPa (or 10,000 feet above sea
level) to 106 kPa (10.2 psi to 15.4 psi)
Caution: Do not use the pump in hyperbaric chambers
as they will affect how the pump works and may also cause
damage to the pump.
Transport and storage conditions:
Temperature: –20°C to 60°C (–4°F to 140°F)
Humidity: 90% relative humidity (non-condensing)
maximum
Atmospheric pressure: 70 kPa (or 10,000 feet above sea
level) to 106 kPa (10.2 psi to 15.4 psi)
System delivery accuracy (ml/hr):
± 3% (nominal). At low delivery rates, this accuracy
may not be achieved for short periods. During the total
delivery time, the accuracy averages out.
System definition:
CADD-MS™ 3 Ambulatory Infusion Pump with Smiths
Medical 3 ml Medication Cartridge and a Unomedical
Comfort™ Infusion Set
Blockage (occlusion) alert:
18 psi ± 5 psi
Dose accuracy at set value of 0.002 ml:
± 15% (measurement error ± 10%)
Dose accuracy at set value of 1.0 ml:
-0.12, -0.88%; Average - 0.53% (measurement error
± 0.0005%)
Maximum volume infused under single fault condition:
Less than 0.02 ml
Delivery rate during dose:
Approximately 0.0001 ml per second minimum,
0.016667 ml per second maximum (based on dose
amount and dose duration - dose duration configurable
from 1 to 15 minutes)
Delivery rate during Fill tubing/Fill cannula:
Approximately 0.01 ml per second
Continuous Rate Delivery Interval:
Every 3 minutes (approximately 1/20 continuous rate)
Delivery specifications
Main Menu
Setup
Delivery Methods:
Choose to have the following delivery methods available:
Continuous Rate: Yes or No
Default: No
Automatic Dose: Yes or No
Default: No
Demand Dose: Yes or No
Default: No
Maximum Continuous Rate: 0.000 ml/hr to
1.000 ml/hr in 0.002 ml increments
Default: 0.800 ml/hr
Maximum Auto or Demand Dose: 0.000 ml to
1.000 ml in 0.002 ml increments
Default: 1.000 ml
Dose Duration: 1 to 15 minutes in 1 minute
increments
Default: 12 minutes
71
Technical Information
Dose Lockout Time: 00:15 minutes to 24:00 hours
in 00:15 (15 minute) increments
Default: 01:00 (1 hour)
Time and Date:
Allows user to set time and date
New Patient:
Mark for new patient: Yes or No
Default: No
Clear Delivery: Yes or No
Default: No
Security:
Delivery Program Menu: Yes or No
Default: Yes
Setup Menu: Yes or No
Default: Yes
Alerts:
Low cartridge volume: Alert at 0.050 ml to
0.500 ml in 0.01 ml increments
Default: 0.2 ml
Display site reminder: Yes or No
Default: No
72
Technical Information
Regional Settings:
Time Format: 12-hour or 24-hour
Default: 12-hour
Date Format: mm/dd/yy or dd/mm/yy
Default: mm/dd/yy
Decimal Symbol: Decimal shown as Period or
Comma
Default: Period
Delivery Program
Delivery Methods: Choose to use the following delivery
methods:
Continuous Rate: Yes or No
Default: No
Automatic Dose: Yes or No
Default: No
Demand Dose: Yes or No
Default: No
Continuous Rate Schedule:
Programmable (with a possible 48 time/rate segments)
Time: 12:00 am to 11:30 pm in 00:30 increments or
00:00 to 23:30 in 00:30 increments
Default: --:--
Rate: 0.000 ml/hr to Continuous Rate Maximum
(up to 1.000 ml/hr) in 0.002 ml increments
Default: 0.000 ml/hr
Automatic Dose Schedule:
Programmable (with a possible 24 time/dose segments)
Time: 12:00 am to 11:30 pm in 00:30 increments or
00:00 to 23:30 in 00:30 increments
Default: --:-Dose: 0.000 ml to Maximum Dose (up to 1.000 ml)
in 0.002 ml increments
Default: 0.000 ml
Demand Dose: 0.000 ml to Maximum Dose (up to
1.000 ml) in 0.002 ml increments
Default: 0.000 ml
Load
User loads cartridge, fills tubing, fills cannula, and selects
site change alarm (if displayed)
Fill tubing: Fills in 0.01 ml increments until Stop or
Done is pressed (automatically stops at 0.3 ml).
Fill cannula: 0.000 ml to 0.012 ml in 0.001 ml
increments
Default: 0.000 ml initially, then last programmed
amount
Site change alert (if displayed - see Alert Specifications):
1 to 5 days in 1 day increments
Default: 3 days
12:30 am (00:30) to 11:30 pm (23:30) in 00:30 minute
increments
Default: 8:00 am
History
User selects displayed report for viewing
Complete History: last 4000 events, arranged from most
recent to oldest
Delivery Summary: last 90 days, arranged from most
recent to oldest
Beep/Vibrate
Beep/Vibrate: Beep or Vibrate
Default: Beep
If beep, choose volume: Low, Medium or High
Default: High
If beep, Key beeps (beep with each key press): Yes
or No
Default: Yes
73
Technical Information
74
Technical Information
Accuracy test results
The following graphs are designed to show flow accuracy
of a pump against given time periods. All graphs were
plotted using a Smiths Medical 3 ml Medication Cartridge
(21-7450) and Unomedical Comfort™ Infusion Set.
Flow rate from startup
Time interval:
Total time:
Programmed rate:
Flow rate error
Programmed rate:
Average flow rate:
Mean flow error:
10.0
7.5
5.0
2.5
% Error
of Flow 0.0
15 seconds
1455 minutes
0.1 ml/hr
-2.5
-5.0
-7.5
0.16
-10.0
CADD-MS3 Startup Curve
0.14
0.12
0.10
Flow
(ml/hr) 0.08
0.06
0.04
0.02
0.00
0
300
0.1 ml/hr
0.1000 ml/hr
– 0.01%
600
900
1200
1500
T (min)
Epmax
60
150 Epmin
T (min)
330
570
2005-Nov-28 D. Zurn
«Graph Trumpet MS3 100µl.eps»
930
Trumpet Curve
Flow rate from startup
Time interval:
Total time:
Programmed rate:
Flow rate error
Programmed rate:
Average flow rate:
Mean flow error:
15 minutes
1530 minutes
0.002 ml/hr
0.004
40
CADD-MS3 Startup Curve
30
0.003
Flow
(ml/hr)
0.002 ml/hr
0.0021 ml/hr
2.59%
20
Epmax
10
0.002
% Error
of Flow 0
0.001
-10
60
150
Epmin
T (min)
330
570
-20
0.000
75
0
300
600
900
Technical Information
1200
1500
T (min)
-30
-40
2005-Nov-28 D. Zurn
«Graph Trumpet MS3 2µl.eps»
930
Trumpet Curve
76
Technical Information
Safety features and fault
detection
Hardware safety features
Key hardware safety features include a watchdog timer
circuit, motor driver and motor watchdog circuits, and
a voltage detector circuit. Each safety circuit performs a
unique function to ensure the overall safety of the pump.
Watchdog timer circuit
The microprocessor must send an appropriate signal
to the watchdog circuit at least once per minute. If the
microprocessor does not send this signal, the circuit initiates a “time out” and shuts down the pump controller.
Watchdog timer circuitry is provided to monitor the status of the microprocessor, disable the motor, and cause
the pump to beep if the microprocessor malfunctions.
The microprocessor must strobe the watchdog circuit
at least once per minute in order to prevent the watchdog from performing its reset function. The microprocessor tests the watchdog circuit on every power up.
By setting a flag in the memory and not strobing the
watchdog, the microprocessor can force a watchdog time
out. After being reset, the microprocessor checks the
status flag to see if this was a time out test. If it was, the
microprocessor continues its normal power up routine.
If the reset occurred when the microprocessor was not
expecting it, the microprocessor traps the event, an
alarm is given (either beep or vibrate), and an error message appears in the display.
Motor drive/motor watchdog circuit
Motor drive circuitry is composed of a series of FET
transistors, passive components, two voltage comparators and the second microprocessor. The second microprocessor times how long the motor runs each time
it is turned on. If the motor runs for longer than the
primary microprocessor specifies, the circuit times out
and disables the motor. A unique feature of this circuit is
that control lines to and from the microprocessor circuit
allow the microprocessor to perform the complete functional test of the motor drive circuit without running
the motor. The microprocessor performs this test every
several minutes to assure its continued functionality. An
input from the watchdog circuit prevents motor operation if the watchdog timer expires. The software verifies
this function during the watchdog test described above.
Voltage detector circuit
Low voltage detection is performed by part of the watchdog circuit and by the microprocessor via software.
Three low voltage levels are detected. The first two levels
are detected by software and the third by hardware.
The first level to be reached is the Low Battery Warning
threshold, which occurs when the battery voltage decays
to a point where less than 10% operating time is available. An analog to digital converter (ADC) built into the
microprocessor allows the microprocessor, via software, to monitor the battery voltage. At the Low Battery
Warning threshold, the microprocessor enables an alarm
(either beep or vibrate) and displays the low battery alert
in the display. When the battery voltage drops to a point
where it is too low to guarantee proper motor operation,
the microprocessor via software stops delivery, generates
an alarm (either beep or vibrate), and a depleted battery
alarm message appears in the display. When the battery
voltage drops to a value where operation of the microprocessor cannot be guaranteed, a hardware reset circuit
is triggered which places the microprocessor in reset.
This prevents ambiguous microprocessor operation as
the battery voltage continues to decay. The hardware
reset continues until the battery is completely depleted
or it is removed. Once the pump controller goes into low
77
Technical Information
battery shutdown, only replacing the depleted battery
with a new battery will clear the condition.
Software safety features
Hardware-related software safety features
Program memory check
At power up and regular intervals thereafter, the program memory is tested by calculating a cyclic redundancy code (CRC) on the program and then comparing
it with the CRC stored with the program.
If the stored and calculated CRC do not match, the
software stops medication delivery, initiates an alarm
(either beep or vibrate) and a system fault alarm message
appears in the display.
RAM memory check
At power up, the random access memory (RAM) is
checked. A series of bit patterns is written to and read
from each address in the RAM. If the read data is different from the written data, the software stops medication
delivery, initiates an alarm (either beep or vibrate) and a
system fault alarm message appears in the display.
78
Technical Information
Motor circuit check
At power up and at regular intervals thereafter, the motor circuit is checked to ensure that no power is being
applied to the motor unless the motor is actually on. If
the software detects power being applied to the motor
at any other time, it initiates an alarm (either beep or
vibrate) and no longer attempts to deliver medication.
During every pump activation, the software checks to
see whether the motor completes one activation. If the
motor fails to turn, or fails to complete an activation, the
software stops medication delivery, initiates an alarm
(either beep or vibrate) and a system fault alarm message
appears in the display.
Keypad encoder check
Every time the software receives data from the keypad, it
is checked. If the data is not a valid keypress, the software disregards the keypress.
Data handling and
software safety features
Data stored in RAM
Before use, data associated with delivery and stored in
RAM is tested by calculating a CRC on the data and
then comparing it with CRC stored in the data. If the
stored and calculated data do not match, the software
stops medication delivery, initiates an alarm (either beep
or vibrate) and a system fault alarm message appears in
the display.
Data stored in NOVRAM
Before use, data associated with delivery and stored in
NOVRAM is tested by calculating a CRC on the data
and then comparing it with CRC stored in the data. If
the stored and calculated data do not match, the software stops medication delivery, initiates an alarm (either
beep or vibrate) and a system fault alarm message appears in the display.
Data used in calculations
Calculations on data used in some way to control delivery of medication are performed redundantly.
The two calculated values are then compared. If the
two values do not match, the software stops medication
delivery, initiates an alarm (either beep or vibrate) and a
system fault alarm message appears in the display.
Timer data registers
The data in the Real Time Clock is checked at regular
intervals. If the data is not reasonable, the software stops
medication delivery, initiates an alarm (either beep or
vibrate) and a system fault alarm message appears in the
display.
79
Technical Information
80
Technical Information
Inspecting the pump
Other than periodic visual inspection and cleaning of the
pump, no testing of the pump is required. The pump’s internal
software, hardware and dual microprocessors are constantly
checked while the pump is operating, and during the self tests
performed during power up.
• Visually inspect the pump for any damage to the pump’s outer
shell. Look for chips or cracks. If the outer shell is chipped
or cracked, the pump may no longer be watertight. Visually
inspect the cartridge and battery chambers to make sure they
are clean and free of foreign objects/materials.
• Visually inspect the display. If there are missing or incomplete
characters, or if the display is otherwise damaged, stop using
the pump immediately.
• Visually inspect the cartridge cap and battery cap. Make sure they
fit properly and tightly on their respective compartments.
fits snug, and when you press on the battery
cap the pump does not produce a “chirp” (see
Figures 11 and 12). If the pump sounds a brief
alert (“chirp”), the cap is not fully tightened
and should be tightened further. If you are
unable to tighten the cap and eliminate this
chirp, the pump should not be used. Contact
your pump provider or Smiths Medical.
• Inspect the Pump’s battery cap. The battery cap Figure 11
should be free of damage. If the cap shows signs
of wear, such as cracks, or if the slot becomes worn, the battery cap
should be replaced before the Pump is used. Contact your Pump
provider or Smiths Medical for a replacement battery cap.
Reference the Cleaning the pump and Servicing the pump sections
in the Help section of this manual if you need to clean or return a
pump for service.
Figure 12
Warning: Make sure that the battery cap is fully tightened to
avoid an interruption in battery power which can cause the
pump to power down and stop the delivery of drug therapy.
A prolonged interruption in the delivery of drug therapy can
result in serious patient injury or death.
• Make sure that the battery cap is fully tightened. The battery cap is
fully tightened when the battery cap o-ring is not visible, the cap
O-Ring
Battery
Cap
INCORRECT
CORRECT
Collect Separately
Z
This product contains electrical and electronic components
(including batteries) that may contain materials, which if
disposed of with general waste, could be damaging to the
environment.
In accordance with Directive 2002/96/EC Waste Electrical
and Electronic Equipment, residents of the European Union
must follow specific disposal or recycling instructions for this
product. Contact your local distributor, or visit the following
web site for specific instructions:
http://www.smiths-medical.com/recycle/index.html
Non-European union residents must dispose of or recycle this
product (including batteries) in accordance with the local laws
or regulations that apply.
Warning: There are potential health hazards associated with
improper disposal of batteries, electronics, and contaminated
(used) infusion sets and cartridges. Dispose of used batteries,
infusion sets, cartridges, and other used accessories, or a pump
that has reached the end of its useful life, in an environmentally
safe manner, and according to any regulations that may
apply.
81
Technical Information
82
Warranty
Limited Warranty
Smiths Medical MD, Inc. (the “Manufacturer”) warrants to the Original
Purchaser that the CADD-MS™ 3 Ambulatory Infusion Pump (the
“Pump”), excluding accessories, shall be free from defects in materials
and workmanship under normal use, if used in accordance with this
Operator’s Manual, for a period of one (1) year from the date of purchase by the Original Purchaser. This warranty does not cover normal
wear and tear or maintenance and specifically excludes all accessories,
including, but not limited to batteries, infusion sets, cartridges, apparel,
equipment, computers and printers used with the Pump.
Limitation of Remedies
The Manufacturer will repair or replace without charge (except for
postage and handling) any Pump (excluding all accessories) which is
determined by the Manufacturer to be defective during the one (1)
year warranty period. In the event the Pump is replaced or repaired,
the warranty period will not extend beyond the original warranty
period. THIS IS THE EXCLUSIVE REMEDY.
Parties Covered:
This Warranty extends only to the Original Purchaser of the Pump.
This Limited Warranty does not extend to subsequent purchasers. The
Original Purchaser may be a patient, medical personnel, a hospital, or
institution which purchases the Pump for treatment of patients. The
Original Purchaser should retain the invoice or sales receipt as proof
of the actual date of purchase.
Conditions of Warranty:
This warranty is valid only if the Pump is used in accordance with this
Operator’s Manual. The warranty will be void in the following cases:
1. The Pump has been altered, misused (misuse includes, but is not
limited to use not in accordance with this Operator’s Manual, used
with accessories not approved by the Manufacturer and/or used with
a computer program other than that licensed by the Manufacturer)
or damaged by neglect or accident;
2. The Pump has not been properly maintained or has been repaired by persons not authorized by the Manufacturer. The Pump
is a sealed unit, and the fact that the seal has been broken will be
considered conclusive evidence that the Pump has been altered or
misused.; or
3. The Pump serial number has been removed or damaged.
Exclusions:
All other warranties, express or implied, are excluded, including
but not limited to the warranties of merchantability and fitness for
a particular purpose or use. The remedies provided in this Warranty
are the exclusive remedies available to the Original Purchaser for any
breach of this Warranty and no person has the authority to bind the
Manufacturer to any representation, condition or warranty except
this Warranty.
The Pump can only be used under the supervision of medical personnel whose skill and judgment determine the suitability of the Pump
for a particular medical treatment and patient.
The Manufacturer, its distributors or suppliers shall not be responsible for any incidental, special or consequential damages of any kind
or nature caused by or arising out of a defect or malfunction of the
Pump.
All recommendations, information, and descriptive literature supplied
by the Manufacturer or its agents are believed to be accurate and reliable, but do not constitute warranties.
Warranty Procedure
Notice of the claimed warranty defect must be made in writing, fax
or by telephone to the Manufacturer as follows: Smiths Medical MD,
Inc., 1265 Grey Fox Road, St. Paul, MN 55112 U.S.A. Telephone:
1 800.426.2448, or if outside the USA contact your local distributor.
Original Purchaser must include date of purchase by the Original
Purchaser, model and serial number, and a description of the claimed
warranty defect in sufficient detail to allow the Manufacturer to determine and facilitate any repairs which may be necessary.
Authorization must be obtained prior to returning the Pump. If authorized, the Pump must be properly and carefully packaged and returned to the Manufacturer, postage prepaid. Any
loss or damage during shipment is at the risk of the sender.
This Warranty gives the Original Purchaser specific legal rights. The
Original Purchaser may have other legal rights which may vary from
state to state.
83
Warranty
84
Index
Index
A
Accuracy test results 74
Alarm 52
Beep 11, 46, 51
Vibrate 11, 46, 51
Alerts 23, 54, 71
Automatic Dose 6, 12, 26, 72
canceling 42
Menu 48
B
Backlight 13
Battery, alkaline AAA 6, 10,
52, 53, 69
inserting 16
Battery cap 3, 9, 10, 16, 17, 61,
62, 80
Beep 11, 46, 51
C
Canceling a dose 43
Cartridge 11, 15, 23, 52, 53, 54
Loading 31
sensor 11, 33
changing the battery 16
changing the cartridge 32
Cleaning your pump 59
Continuous Rate 6, 7, 12, 26,
72
Menu 47
D
Data handling and software
safety features 78
data stored in NOVRAM 78
data stored in RAM 78
data used in calculations 79
timer data registers 79
Delivery Methods 26, 71
Delivery Program 29, 72
Demand Dose 6, 12, 26, 72
canceling 42
delivering 41
Menu 49
Demand Dose button 10
Dose 7
Dose Duration 26, 71
Dose Lockout 26, 71
H
History 11, 44, 73
viewing 45
home screen 12
Automatic Dose 12
Automatic Dose Menu 48
Continuous Rate 12
Continuous Rate Menu 47
Demand Dose 12
Demand Dose Menu 49
screensaver 13
I
Infusion set 15, 32
Inspecting the pump 80
L
Load 31, 72
low cartridge volume 23
M
Menus
Beep/Vibrate 19
Delivery Program 29
History 44
Load 33
N
New Patient marker 25, 71
O
Occlusion 8, 11, 52
O-ring 9, 10, 17, 80
P
Pass Codes 28
Pump development standards
63
Pushrod 8, 34
R
Regional settings 72
S
Safety features and fault
detection 76
hardware 76
motor drive 76
voltage detection 77
watchdog 76
Screensaver 13
Security 28, 71
Self tests 18
Servicing your pump 60
Setup 71
Alerts 23, 71
Delivery Methods 26, 71
New Patient 25, 71
opening the menu 20
Regional settings 72
Security 28, 71
Time and Date 21, 71
Site Reminder 23, 38
Software safety features 77
hardware-related 77
keypad encoder check 78
motor circuit check 78
RAM memory check 77
85
Index
Specifications 69
Delivery 71
General 69
Stopping the pump 39
Symbols 4
System fault 53
T
Time and Date 21, 71
Troubleshooting 52
alarms 52
alerts 54
Messages 55
V
Vibrate 11, 46, 51
W
watertight 6, 11
Smiths Medical MD, Inc.
St. Paul, MN 55112 USA
1 800.426.2448 (USA)
1 651.633.2556
www.smiths-medical.com
@
Smiths Medical International Ltd.
WD24 4LG, UK
Tel. +44 (0)1923 246434
B
CADD-MS 3 and the CADD and Smiths Medical design marks are trademarks of the
Smiths Medical family of companies. The symbol ® indicates the trademark is registered
in the U.S. Patent and Trademark Office and certain other countries.
All other names and marks are trademarks, tradenames or service marks of their
respective owners.
The products described are covered by one or more of the following: U.S. Patent No.
7,033,338; 7,041,082; and 6,241,704. Other U.S. and foreign patents pending.
© 2008 Smiths Medical family of companies.
All rights reserved.
2008-02 40-5470-51C
s