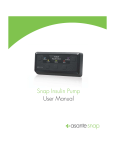
1
Copyright © 2013 Asante Solutions, Inc. All rights reserved. No part of this publication may be reproduced, transmitted, transcribed, stored in retrieval systems, or translated into any form, or by any means: electronic, mechanical, magnetic, optical, or otherwise, without the prior written permission of Asante Solutions, Inc, 352 East Java Dr, Sunnyvale, CA 94089, United States of America. Trademarks Glucagon Emergency Kit and Humalog are registered trademarks of Eli Lilly and Company. comfort and inset are trademarks of Unomedical, a ConvaTec Company. Disclaimer Asante Solutions, Inc. reserves the right to change its products and services at any time to incorporate the latest technological developments. This guide is subject to change without notice. Caution Federal (United States) law restricts this device to sale, by or on the order of a physician. Addresses Manufacturer: Asante Solutions, Inc. 352 East Java Dr. Sunnyvale, CA 94089 Telephone: (408) 716-5600 www.asantesolutions.com Authorized Representative: Emergo Europe Molenstraat 15 2513 BH, The Hague The Netherlands Telephone: +31 70 345 8570 0197 LBL-1052 Rev E February 2013 viii Asante Snap Insulin Pump User Manual Preface Welcome and Congratulations Thank you for choosing the Asante Snap Insulin Pump System. Your choice of pump therapy means that you are committed to maximizing your glycemic control. The Snap System has been specially designed to help you manage your diabetes using advanced technology and sophisticated safety systems. Your pump is used for insulin therapy to help maintain your blood glucose (BG) targets as recommended by your healthcare professional. It is important to remember that successful pump therapy is a partnership of advanced technology and responsible self-care. Even if you are an experienced pump user, it is important that you read and thoroughly understand this user manual and receive appropriate training from a qualified healthcare professional before attempting to use the Snap System. WARNING: Do not use the Snap System before you receive training from a qualified healthcare professional and you thoroughly understand the user manual. Be sure to follow all warnings and precautions. ix Troubleshooting If you have any problem with your Snap System that you cannot resolve using this manual, or you have questions about what you see on the pump screen, contact the Asante Help Line at (408) 716-5600. General Troubleshooting The screen appears distorted The screen may appear distorted if you are in bright sunlight, wearing polarized eye glasses, or in extreme high or low temperatures. If your screen appears distorted: • Move into the shade. • Make sure the pump is not exposed to heat or cold. • Avoid using glasses with polarized lenses. The screen is blank Extreme levels of electrostatic discharge (ESD), or static electricity, can cause insulin pumps to reset and/or sound an alarm. ESD typically occurs in low humidity. If you experience a blank screen after static shock, wait 10 seconds and press any button. If your pump system restores to the Time & Date screen, reset the date and time (see page 32) and check your settings. If the screen is still blank, disconnect the pump body from the controller, then reattach it. If you continue to get a blank screen, attach a new pump body to the controller, wait 30 seconds, then press any button. Troubleshooting 107 I dropped my pump WARNING: If you receive the alarm DISCONNECT INFUSION SET FROM YOUR BODY NOW and PUMP DAMAGED: DROPPED (each message is displayed on a separate screen; see page 115), immediately disconnect the infusion set tubing from the cannula. Dispose of the pump body and cartridge. Do not reconnect this pump body to your infusion cannula. Then, replace the pump body and cartridge following the steps to prepare a new pump body for use starting on page 28. 1 If you did not receive the alarm messages mentioned above, disconnect the infusion set tubing from the cannula. 2 Check the pump body and controller for cracks. 3 Perform a tubing prime as outlined in “Priming the Tubing” on page 32. Verify that insulin drops appear at the end of the infusion set. If drops do not appear, replace the pump, cartridge, and infusion set. Follow the steps to prepare a new pump for use starting on page 28. 4 Check the infusion set, including the tubing, for damage or loose adhesive tape. 5 Reconnect the tubing to the infusion cannula. 6 Check your BG several times over the next 3 hours. I submerged my pump in water Do not submerge your pump in water. Do not allow your pump to get wet during bathing, swimming, or other water activities. Always disconnect your pump before you get in the water and reconnect it when you get out. If you receive a PUMP DAMAGED: WET alarm, replace the pump body and cartridge. Follow the steps to prepare a new pump for use starting on page 28. 1 If you did not receive the alarm mentioned above, disconnect the infusion set tubing from the cannula. 2 Dry the outside of the pump system. Do not use hot air to dry your pump. This may damage the electronics. 3 Disconnect the pump body from the controller and dry each piece separately. 108 Asante Snap Insulin Pump User Manual 4 Reattach the pump body to the controller. 5 Prime 2 units of insulin through the tubing as outlined in “Priming the Tubing” on page 32. Verify that insulin drops form at the end of the infusion set. If drops do not appear, replace the pump body, cartridge, and infusion set. 6 Reconnect the tubing to the infusion cannula. 7 Check your BG several times over the next 3 hours. What if I need to replace my infusion set tubing? The infusion set tubing should last for the life of the pump body. When the insulin in the cartridge is finished, you can dispose of the pump body, the empty cartridge, and the tubing. However, if the tubing becomes damaged and you need to replace it, follow these instructions. 1 Disconnect the infusion set tubing from the cannula. 2 Turn the pump over and disconnect the pump body from the controller by pressing the latch on the pump body to release it. Slide the pump body from the controller. An alarm will indicate that the pump body was disconnected. Press OK. PUMP BODY DISCONNECTED OK 3 Gently push down and twist the tubing connector counter-clockwise to remove it from the pump body. Discard the used infusion set tubing. 4 Hold the pump body vertically and match the line on the tubing connector with the top of the arrow on the pump body. Press down on the tubing connector and turn slightly clockwise until you feel it click into place. The line on the tubing Troubleshooting 109 connector will now match up with the line on the pump body, and the edge of the tubing connector should align with the edge of the pump body, as shown. edges align 5 Connect the controller by aligning the pump body with the guide on the controller and sliding the pump body onto the controller. Squeeze the pump body and controller together until you hear and/or feel them click into place. 6 Press OK when the pump connected message appears. “click” PUMP BODY CONNECTED OK If basal insulin was missed, the pump displays the amount that was missed. Consult with your healthcare professional on the best way to handle missed insulin. Press OK. MISSED BASAL 0.10U OK 7 Make sure your infusion set tubing is not connected to the cannula. Perform a tubing prime as outlined in “Priming the Tubing” on page 32. You will need to perform a tubing prime to program additional insulin to fill the tubing (up to 20 units may be required). Continue to prime until drops appear at the end of the tubing. NOTE: If drops do not appear within 20 units of priming, replace the pump body, cartridge, and infusion set. 8 110 Connect the infusion set tubing to your infusion cannula. It is not necessary to prime the cannula unless a new one was inserted. Asante Snap Insulin Pump User Manual How do I restore my settings from a used pump body? Each pump body contains a Settings Vault that stores the settings while the pump body is attached to the controller. You can restore previous pump settings onto a new or replacement controller by attaching a used pump body to your controller. It is a good idea to save a recently used pump body. ▲ CAUTION: Perform this procedure only when you wish to load your pump settings onto a new or replacement controller. 1 Make sure the pump is not connected to your body. 2 Attach the used pump body (with the settings you wish to restore) to the controller. Be sure to use a pump body that has the correct settings. You will receive the following alarm. SETTINGS MISMATCH: USE PUMP BODY SETTINGS? YES 3 NO Press YES to restore the settings from the used pump body to the controller. NOTE: Press NO to use the settings from the controller. The used pump body will be updated to match the settings in the controller. 4 The PUMP CONNECTED message appears. Press OK. The controller now contains the settings from the pump body. 5 Verify that the settings are correct. 6 Disconnect the used pump body from the controller and attach a new pump body. You are now ready to continue. See “Preparing the Pump for Use” on page 27. How do I extend the battery life? If the battery is running out of power too soon, follow these tips to help extend the life. • Set the screen timeout to FAST (see page 106 for details). • Disable the flashlight or avoid using it. See “Disabling the Flashlight” on page 105 for information on disabling it. Troubleshooting 111 • Respond to alarms and alerts as soon as possible. The alarm and alert tones can drain the power significantly. A pump left unattended while alarming will exhaust the battery within a few hours. • After programming, use the EXIT button to reach the blank screen, rather than waiting for the pump to time out. Alarms Your pump continuously performs safety checks to monitor its function. If the pump detects a problem, it will stop delivering insulin and notify you with an alarm. An alarm is indicated by four repeating audible tones that play for 20 seconds, a message displayed on the screen, and the flashlight intermittently illuminating. The alarm will repeat every minute until you press OK to acknowledge it. If not acknowledged, the alarm tones will get louder and eventually be replaced with a sweeping tone. NOTE: Alarms override alerts. If both an alert and an alarm occur at the same time, the alarm will appear before the alert. Once you acknowledge the alarm, you will be presented with the alert. To verify your pump alarm is functional, disconnect your pump body from the controller. You should receive a PUMP BODY DISCONNECTED alarm. If you do not, contact the Asante Help Line at (408) 716-5600. What To Do When You Get an Alarm 1 Press OK to silence the tone. 2 Read the alarm message. When you understand the reason for the alarm, press OK to clear the message. 3 The startup screen will indicate that an alarm has occurred and whether the pump was stopped. View the status screen for information about the alarm. See “Status Screens” on page 18. 4 Refer to the following list of alarms for the appropriate action. Also included with the cause and action is the alarm message as it appears in the Alarm History screen in the Logbook. See “Alarm History” on page 93. 112 Asante Snap Insulin Pump User Manual Auto Off Alarm Message: AUTO OFF OK Cause: You have not pressed any buttons for the time period you set for the Auto Off setting in the Setup menu (see page 101). Action: Clear the alarm to restart your pump. Check your BG soon. Alarm History: AUTO-OFF ALARM Blocked Set Alarm Message: BLOCKED SET OK Cause: Insulin may not be flowing through the tubing and into your body. Action: 1. Gently massage the infusion site. 2. Reprogram any missed bolus as indicated by the pump system. If the alarm repeats within 30 minutes: 1. Disconnect the infusion tubing from the infusion cannula. 2. Remove the cannula from your body. 3. Insert a new infusion cannula, following the instructions provided with the infusion set. 4. Reconnect your infusion set tubing to the cannula and prime the cannula (see page 34). 5. Check your BG over the next few hours. NOTE: If the alarm repeats within 1 hour of replacing the cannula, replace the pump body, cartridge, and infusion set. NOTE: If these steps do not resolve the alarm, check the sensor on the controller for moisture, dirt, or scratches. See “Cleaning” on page 129 for details. Alarm History: BLOCKED SET ALARM Troubleshooting 113 Check Tubing Connector Alarm Message: CHECK TUBING CONNECTOR OK Cause: The Snap System has detected that the connection for the infusion set is either missing or out of position. Action: 1. Disconnect the infusion set tubing from the cannula. 2. Disconnect the pump body from the controller. 3. If the tubing connector is present, disconnect it from the pump body and carefully reconnect it as described in “Assembling the Pump System” on page 28. If no tubing connector was installed, connect an infusion set as described in “Assembling the Pump System” on page 28. 4. Reconnect the pump body to the controller. Be sure that the pump body is correctly aligned with the controller. 5. Reconnect the infusion set tubing to the cannula. Alarm History: CONNECTOR ERROR Delivery Limit Reached Alarm Message: DELIVERY LIMIT REACHED CHECK BG SOON! OK Cause: You have programmed more insulin within an hour than the amount set in the Hourly Delivery Limit setting in the Setup menu (see page 103). Action: Check your programming. Monitor your BG and be aware that low BG may occur if excess insulin is programmed. Discuss your pump settings and the Hourly Delivery Limit setting with your healthcare professional. Alarm History: DELIVERY LIMIT ALARM 114 Asante Snap Insulin Pump User Manual Detach and Reconnect Pump Body Alarm Message: DETACH AND RECONNECT PUMP BODY OK Cause: A connection issue was detected between the controller and the pump body, or an error signal was detected during priming. Action: Disconnect the pump body from the controller and reconnect (see page 36). If this does not resolve the issue, replace the pump body and cartridge. Alarm History: PUMP BODY CONNECTION ALARM Disconnect Infusion Set from Your Body, Pump Damaged: Dropped Alarm Message: DISCONNECT INFUSION SET FROM YOUR BODY NOW OK PUMP DAMAGED: DROPPED REPLACE PUMP BODY Press OK after silencing the alarm to display the second message. NOTE: This alarm immediately produces sweeping tones at maximum volume. OK Cause: The Snap System has detected an impact that may have caused internal damage to the system. The pump body must be replaced. Action: Disconnect the infusion set tubing from the cannula NOW, then replace the pump body and cartridge. Do not reconnect this pump body to your cannula. Check your BG over the next few hours. Alarm History: DAMAGED PUMP: DROP Empty Cartridge Alarm Message: EMPTY CARTRIDGE OK Cause: The insulin cartridge is empty. Action: Replace the pump body and insulin cartridge (see page 28). Alarm History: CARTRIDGE EMPTY ALARM Troubleshooting 115 Off – No Power Alarm Message: OFF – NO POWER OK NOTE: This alarm immediately produces sweeping tones at maximum volume. Cause: The battery in your pump body has run out of power. Action: Replace the pump body and insulin cartridge (see page 28). Alarm History: NO POWER ALARM Pump Body Disconnected Alarm Message: PUMP BODY DISCONNECTED OK Cause: The pump body was disconnected from the controller and is not delivering insulin. This message will repeat every hour for 24 hours, starting 1 hour after your last button press. Action: Reconnect the pump body to the controller. Alarm History: PUMP BODY DISCONNECT ALARM Pump Damaged: Wet Alarm Message: PUMP DAMAGED: WET REPLACE PUMP BODY OK Cause: The Snap System has detected water within the pump body. Action: Replace the pump body and cartridge. Alarm History: DAMAGED PUMP: WET 116 Asante Snap Insulin Pump User Manual Replace Pump Body, Pump Error Alarm Message: REPLACE PUMP BODY, PUMP ERROR OK Cause: The system detected a possible error in the drive system. Action: Disconnect the pump body from the controller and reconnect (see page 36). If this does not resolve the issue, replace the pump body and cartridge. Check your BG over the next few hours. Alarm History: PUMP DRIVE ERROR Set Time & Date Alarm Message: SET TIME & DATE OK Cause: You will get this alarm when you first start using the system. You may also get the alarm if the system has lost the time and date settings. This can happen after a system error or if the controller has not been used for an extended period. Action: Set the time and date (see page 95). Alarm History: TIME & DATE ALARM System Error Alarm Message: ERROR XX_XXXXXXXXXXXXXXXXXXXX.yyy Line #### RESET NOTE: Message text will vary, depending on what caused the error. Cause: The pump has encountered an internal error. The processor needs to be reset. Action: Press RESET to clear the alarm. You will need to reset the date and time (see page 95). If this alarm occurs often, contact customer service. Alarm History: Does not appear in Alarm History Troubleshooting 117 Setting Mismatch Alarm Message: SETTINGS MISMATCH: USE PUMP BODY SETTINGS? YES NO Cause: The system stores a copy of the settings in the pump body. When a pump body is connected to a controller that has different settings, you will be asked if you wish to use the settings in the pump body. Action: Choose the settings you wish to use (from the pump body or the controller). If you press YES, the settings from the pump body will be used and will replace those stored in the controller. If you press NO, the settings from the controller will be left as is. Alarm History: CHOOSE SETTINGS ALARM Version Mismatch Alarm Message: VERSION MISMATCH: REPLACE PUMP BODY YES NO Cause: The pump body was previously used with a controller that had a prior version of software. You cannot use this pump body with the new software in this controller. Action: Replace the pump body and insulin cartridge. Alarm History: VERSION MISMATCH ALARM 118 Asante Snap Insulin Pump User Manual Alerts Your pump will notify you of situations that require your attention. Alerts assist you with operating the pump. Some alerts are simple reminders, for example, a reminder to check your BG. Others may indicate a condition that requires an action soon. Alerts have lower priority than alarms. For example, you will get an alert when the insulin level in the cartridge is low, yet there is still plenty of time to change the pump body. When the cartridge is empty, you will get an alarm. An alert is indicated by three audible tones followed by a short pause. This tone pattern will play for 20 seconds while the alert message is shown on the screen. The alert will repeat every minute until you press OK to acknowledge it. What To Do When You Get an Alert 1 Press OK to silence the tone. 2 Read the alert message. When you understand the reason for the alert, press OK to clear the message. 3 The startup screen will indicate that an alert has occurred. After you acknowledge the alert, the startup screen will indicate alert conditions that are persistent. View the status screen for information about the alert. See “Status Screens” on page 18. 4 Refer to the following list of alerts for the appropriate action, if necessary. Also included with the cause and action is the alert message as it appears in the Alarm History screen in the Logbook. See “Alarm History” on page 93. Troubleshooting 119 Bolus Stopped Alert Message: BOLUS STOPPED OK Cause: The bolus was stopped because the pump body was disconnected from the controller. Action: Reconnect the pump body to the controller. After acknowledging the PUMP CONNECTED and MISSED BOLUS messages, reprogram the remaining bolus. Alarm History: BOLUS STOPPED Temp Basal Alert Message: TEMP BASAL: XX U/H ZZ% DONE IN: X H YY M Example: TEMP BASAL: 0.30U/H 35% DONE IN: 4H 15M OK Cause: A temp basal rate was set with a duration of 6 hours or more and a percentage of less than 50% or more than 150%. Action: Check your BG. Assess if the temp basal rate is still needed. Cancel the temp basal if it is not needed (see page 49). Alarm History: TEMP BASAL ALERT Key Alert Alert Message: KEY ALERT OK Cause: A button has been pressed for more than 60 seconds. Action: Check the position of your pump to ensure a button is not accidentally being pressed. If you cannot clear the alert, contact customer service. Alarm History: KEY ALERT 120 Asante Snap Insulin Pump User Manual Replace Pump Body, Dead Battery Alert Message: REPLACE PUMP BODY DEAD BATTERY OK Cause: The pump body you connected has no battery power. Action: Replace the pump body and insulin cartridge (see page 28). Alarm History: DEAD PUMP BODY BATTERY ALERT Very Low Cartridge Alert Message: VERY LOW CARTRIDGE OK Cause: The cartridge has 1.5 units of insulin left. Action: Replace the pump body and insulin cartridge (see page 28). Alarm History: VERY LOW CARTRIDGE Very Low Power Alert Message: VERY LOW POWER OK Cause: The Snap System battery has very low power remaining. Action: Replace the pump body and insulin cartridge (see page 28). Alarm History: VERY LOW POWER Troubleshooting 121 Low Cartridge Alert Message: LOW CARTRIDGE OK Cause: The cartridge has reached the level set in the Low Insulin setting in the Setup menu (see “Low Insulin Alert” on page 98). If you do not turn on the Low Insulin feature, you will not get this alert. Action: Get ready to replace your pump body and insulin cartridge. If you Alarm History: acknowledge the alert but do not change the pump body, you will get the VERY LOW CARTRIDGE alert and the EMPTY CARTRIDGE alarm, as the cartridge is emptied. LOW CARTRIDGE Daily Alert Alert Message: DAILY ALERT 6:00 PM OK Cause: This is the daily alert that you set (see page 100). If you do not set a Daily Reminder, you will not get this alert. Action: Alarm History: DAILY ALERT Reminder Check BG Alert Message: REMINDER CHECK BG OK Cause: This is the BG Prompt reminder that you set (see page 97). If you do not turn on the BG Prompt feature, you will not get this alert. Action: Check your BG soon. Alarm History: REMINDER, CHECK BG 122 Asante Snap Insulin Pump User Manual Bolus Reminder Alert Message: BOLUS REMINDER: DO YOU WISH TO START A BOLUS NOW? YES NO Cause: This is the Bolus Reminder that you set (see page 83). If you do not set a Bolus Reminder, you will not get this alert. Action: Program a bolus, if you wish. Alarm History: BOLUS REMINDER Notices Following is a list of messages that may appear on the controller screen. These messages do not appear in the Alarm History screen in the Logbook. Active Bolus Message: ACTIVE BOLUS: X.XX U XX MIN. PRESS ‘OK’ TO CONTINUE Cause: A Timed or Combo bolus is currently running and you tried to deliver a Now bolus. Action: Press OK to acknowledge. Notes: None Calculation is Above the Bolus Limit Message: NOTE: CALCULATION IS ABOVE THE BOLUS LIMIT Cause: The Smart bolus has calculated a bolus that exceeds the Bolus Limit. Or, Audio bolus programming exceeded the Bolus Limit. Action: Select OK to deliver the Smart bolus, as defined by the Bolus Limit. If programming an Audio bolus, the bolus is canceled without delivery. Program the Audio bolus again and do not exceed the Bolus Limit. Notes: None Troubleshooting 123 Carb Ratio Outside Normal Clinical Range Message: CARB RATIO OUTSIDE NORMAL CLINICAL RANGE. CONTINUE? Cause: The carb ratio you entered in the Smart bolus is acceptable but outside the normal clinical range. Action: Select YES to continue with the carb ratio value. Or, select NO to change the value. Notes: None Delivery Canceled Message: DELIVERY CANCELED Cause: A system reset alarm occurred during a bolus or temp basal delivery. Action: Reprogram the bolus or temp basal. Notes: None Delivery Complete Message: <DELIVERY TYPE> XX.XXU FINISHED INSULIN ON BOARD: XX.XXU Cause: A bolus or temp basal delivery is complete. Action: None Notes: Delivery type is Now, Combo, or Timed bolus, or temp basal. IOB appears only for a bolus delivery and only when the Smart bolus is enabled. Do Not Bolus. Check BG Soon! Message: DO NOT BOLUS. CHECK BG SOON! Cause: The Smart bolus had determined that you do not need a bolus. Action: Given the Smart bolus settings and your BG and carb intake, you do not need to bolus at this time. Check your BG. Notes: None 124 Asante Snap Insulin Pump User Manual Flashlight Limit Message: FLASHLIGHT LIMIT REACHED Cause: 240 seconds of flashlight time were used for the current pump body. The flashlight will work only during alarms and priming; not when you select LIGHT from the startup screen. Action: You can connect a new pump body that has flashlight time. Notes: None Insulin On Board Reset. Avoid Bolus Stacking Message: INSULIN ON BOARD RESET. AVOID BOLUS STACKING. Cause: The date and/or time setting was changed. The Smart bolus feature may not be able to accurately calculate your IOB for the period of time set for your IOB duration (see “Insulin on Board Duration” on page 64). Action: Consider your recent bolus deliveries when programming a bolus during your IOB duration. Notes: The Smart bolus feature will be able accurately calculate a bolus once the IOB duration period passes. Insulin Sensitivity Outside Normal Clinical Range Message: INS. SENS. OUTSIDE NORMAL CLINICAL RANGE. CONTINUE? Cause: The insulin sensitivity you entered in the Smart bolus is acceptable but outside the normal clinical range. Action: Select YES to continue with the insulin sensitivity value. Or, select NO to change the value. Notes: None Troubleshooting 125 Missed Basal Insulin Message: MISSED BASAL XX.XXU (if downtime is less than 12 hours) MISSED BASAL, X.X DAYS (if downtime is more than 12 hours) Cause: Basal insulin was missed because the pump was stopped. Action: Follow your healthcare professional’s advice for missed dose recovery. Notes: Delivery is available when the pump is restarted/reconnected and the notice is cleared. Missed Bolus Insulin Message: MISSED BOLUS XX.XXU (if downtime is less than 12 hours) MISSED BOLUS, X.X DAYS (if downtime is more than 12 hours) Cause: Bolus insulin was missed because the pump was stopped or a bolus was stopped. Action: Follow your healthcare professional’s advice for missed dose recovery. Notes: Delivery is available when the pump is restarted/reconnected and the notice is cleared. New Time is Prior to Last Known Time. Continue? Message: NEW TIME IS PRIOR TO LAST KNOWN TIME. CONTINUE? Cause: You entered a time and/or date that is prior to the last known time in the pump system. Action: Verify that the date and time you entered are correct. To change the date and time, select NO. Notes: None 126 Asante Snap Insulin Pump User Manual Pump Body Connected Message: PUMP BODY CONNECTED Cause: The pump body was connected to the controller. Action: None Notes: None Pump Stopped Message: PUMP STOPPED Cause: The pump was stopped. Action: Restart the pump. Notes: Repeats every 15 minutes. Notice is not cleared after pressing OK. Some Settings Were Not Updated Message: SOME SETTINGS WERE NOT UPDATED, CHECK SETTINGS Cause: A pump body with an older version of software was used to restore settings into a newer controller; not all settings were available for transfer. Action: Check all the settings in the controller and program additional settings as necessary. Notes: None Target BG Outside Normal Clinical Range Message: TARGET BG OUTSIDE NORMAL CLINICAL RANGE. CONTINUE? Cause: The target BG you entered in the Smart bolus is acceptable but outside the normal clinical range. Action: Select YES to continue with the target BG value. Or, select NO to change the value. Notes: None Troubleshooting 127 WARNING! Treat Low BG by Consuming Carbohydrates Message: WARNING! TREAT LOW BG BY CONSUMING CARBOHYDRATES Cause: You entered a BG below 70 mg/dL while programming a Smart bolus. Action: Your BG is low. Take action to increase your BG (for example, eat carbs), and monitor your BG closely. Notes: None 128 Asante Snap Insulin Pump User Manual This page intentionally left blank. 158 Asante Snap Insulin Pump User Manual Menu Map The menu map on the following page allows you to see the menu structure at a glance. From the Blank Screen • Press the upper-right button to program an Audio bolus or a Smart bolus, depending on how this bolus shortcut button is set. • Press any button to take you to the splash screen, if it is enabled. If the splash screen is not enabled, the startup screen (below) appears. GRAPH 3:43PM OCT 4, 2010 LIGHT MENU EXIT STATUS From the Startup Screen • Press STATUS to access the status screen. • Press MENU to access the main menu (shown on page 160 with associated submenus) Menu Map 159 160 Asante Snap Insulin Pump User Manual Splash screen Startup screen * Menu options circled in dark blue, may or may not appear depending on how the pump is programmed. Blank screen This page intentionally left blank. 166 Asante Snap Insulin Pump User Manual