1
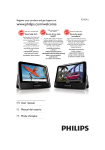
Register your product and get support at www.philips.com/welcome DS9800W User manual Contents 1 Important Safety Notice 2 Your Entertainment System Introduction What's in the box What else you need Overview of the wireless SoundSphere speakers Overview of the remote control Overview of the docking charger 3 Prepare Connect Prepare the remote control 4 Connect to your home Wi-Fi network for AirPlay Scenario 1: Connect to a WPS router Scenario 2: Connect to a non-WPS router 5 Play Stream audio from your iTunes music library to DS9800W Control play Use advanced sound settings Play from an external device 6 Charge your iPod/iPhone/iPad through the separate docking charger Compatible iPod/iPhone/iPad Load the iPod/iPhone/iPad 4 4 5 8SGDWHÀUPZDUH 7 7 7 7 8 Product information 'RZQORDGWKHXSGDWHÀOH 8SGDWHIURPWKHFRQÀJXUDWLRQSDJH 24 6SHFLÀFDWLRQV 26 9 Troubleshooting 27 8 8 9 10 10 11 12 12 13 19 19 21 21 21 22 22 22 EN 3 1 Important a Read these instructions. b Keep these instructions. c Heed all warnings. Safety Mains fuse This information applies only to products with a UK mains plug. 7KLVSURGXFWLVÀWWHGZLWKDQDSSURYHGPROGHG plug. If you replace the fuse, use one with: the ratings shown on the plug, a BS 1362 approval, and the ASTA approval mark. Contact your dealer if you are not sure about what type of fuse to use. Caution: To conform with the EMC directive (2004/108/EC), do not detach the plug from the power cord. Information for Europe: Know these safety symbols d Follow all instructions. e Do not use this product near water. f Clean only with dry cloth. g Do not block any ventilation openings. Install in accordance with the manufacturer's instructions. h Do not remove the casing of this product. i Only use this product indoors. Do not expose the product to dripping / splashing water, rain or high humidity. j Keep this product away from direct VXQOLJKWQDNHGÁDPHVRUKHDW k Do not install near any heat sources such as radiators, heat registers, stoves, or other electrical equipment (including DPSOLÀHUV l Do not place any other electrical equipment on the product. m Do not place any sources of danger on the product (e.g. objects containing OLTXLGVEXUQLQJFDQGOHV n This product may include batteries. Please refer to safety and disposal instructions for batteries in this user manual. The 'exclamation mark' calls attention to features for which you should carefully read the supplied literature to prevent operating and maintenance problems. The 'lightening bolt' symbol indicates uninsulated components within the product that can cause an electric @shock. 7RUHGXFHWKHULVNRIÀUHRUHOHFWULFVKRFNGR not expose the product to rain or moisture and GRQRWSODFHDQ\REMHFWVÀOOHGZLWKOLTXLGVVXFK as vases, on the product. 4 EN o Where the mains plug or an appliance coupler is used as the disconnect device, the disconnect device shall remain readily operable. Warning Never remove the casing of this apparatus. Never lubricate any part of this apparatus. Never place this apparatus on other electrical HTXLSPHQW Keep this apparatus away from direct sunlight, naked ÁDPHVRUKHDW Ensure that you always have easy access to the power cord, plug or adaptor to disconnect this apparatus from the power. Risk of overheating! Never install this apparatus LQDFRQÀQHGVSDFH$OZD\VOHDYHDVSDFHRI at least four inches around this apparatus for ventilation. Ensure curtains or other objects never cover the ventilation slots on this apparatus. The device can be operated in the EU without restrictions indoor, but cannot be operated outdoors in France in the whole of the band until further notice. 7KLVSURGXFWFRPSOLHVZLWKWKHUHTXLUHPHQWRI the 1999/5/EC directive. 0RGLÀFDWLRQV 0RGLÀFDWLRQVQRWDXWKRUL]HGE\WKH manufacturer may void user's authority to operate this product. Mains fuse This information applies only to products with a UK mains plug. 7KLVSURGXFWLVÀWWHGZLWKDQDSSURYHGPROGHG plug. If you replace the fuse, use one with: the ratings shown on the plug, a BS 1362 approval, and the ASTA approval mark. Contact your dealer if you are not sure about what type of fuse to use. Caution: To conform with the EMC directive (2004/108/EC), do not detach the plug from the power cord. Notice This product complies with the radio LQWHUIHUHQFHUHTXLUHPHQWVRIWKH(XURSHDQ Community. Your product is designed and manufactured ZLWKKLJKTXDOLW\PDWHULDOVDQGFRPSRQHQWV which can be recycled and reused. When this crossed-out wheeled bin symbol is attached to a product it means that the product is covered by the European Directive 2002/96/ EC. Please inform yourself about the local separate collection system for electrical and electronic products. Please act according to your local rules and do not dispose of your old products with your normal household waste. Correct disposal of your old product helps to prevent potential QHJDWLYHFRQVHTXHQFHVIRUWKHHQYLURQPHQWDQG human health. EN 5 Your product contains batteries covered by the European Directive 2006/66/EC, which cannot be disposed with normal household waste.Please inform yourself about the local rules on separate collection of batteries because correct disposal helps to prevent QHJDWLYHFRQVHTXHQFHVIRUWKHHQYLURQPHQWDO and human health. Information about the use of batteries: Caution 5LVNRIOHDNDJH2QO\XVHWKHVSHFLÀHGW\SHRIEDWWHULHV Do not mix new and used batteries. Do not mix different brands of batteries. Observe correct polarity. Remove batteries from products that are not in use for a longer period of time. Store batteries in a dry place. Risk of injury: Wear gloves when handling leaking batteries. Keep batteries out of reach of children and pets. Risk of explosion: Do not short circuit batteries. Do not expose batteries to excessive heat. Do not throw EDWWHULHVLQWRWKHÀUH'RQRWGDPDJHRUGLVDVVHPEOH batteries. Do not recharge non-rechargeable batteries. Environmental information All unnecessary packaging has been omitted. We have tried to make the packaging easy to separate into three materials: cardboard (box), polystyrene foam (buffer) and polyethylene (bags, protective foam sheet.) Your system consists of materials which can be recycled and reused if disassembled by DVSHFLDOL]HGFRPSDQ\3OHDVHREVHUYHWKH local regulations regarding the disposal of packaging materials, exhausted batteries and old HTXLSPHQW 6 EN “Made for iPod,” “Made for iPhone,” and “Made for iPad” mean that an electronic accessory KDVEHHQGHVLJQHGWRFRQQHFWVSHFLÀFDOO\WR iPod, iPhone, or iPad, respectively, and has EHHQFHUWLÀHGE\WKHGHYHORSHUWRPHHW Apple performance standards. Apple is not responsible for the operation of this device or its compliance with safety and regulatory standards. Please note that the use of this accessory with iPod, iPhone, or iPad may affect wireless performance. AirPlay, iPod, and iPhone are trademarks of Apple Inc., registered in the U.S. and other countries. iPad is a trademark of Apple Inc. Class II equipment symbol: CLASS II apparatus with double insulation, and no protective earth provided. Note The type plate is located on the bottom of the apparatus. 2 Your Entertainment System Congratulations on your purchase, and ZHOFRPHWR3KLOLSV7RIXOO\EHQHÀWIURPWKH support that Philips offers, register your product at www.philips.com/welcome. If you contact Philips, you will be asked for the model and serial number of this apparatus. The model number and serial number are on the bottom of the apparatus. Write the numbers here: Model No. __________________________ Serial No. ___________________________ Introduction Apple AirPlay technology enables you to play your iTunes music library, hosted on a Mac, PC, iPhone, iPod touch, or iPad on any AirPlayenabled device (for example, your DS9800W) connected to the Wi-Fi network. With an AirPlay-enabled device (for example, your DS9800W), you can: stream audio from your iTunes music library to any room in your house choose which AirPlay-enabled devices you want to play music on (if you have more than one such devices in your house) stream audio to multiple AirPlayenabled devices at the same time (from the iTunes music library on your PC/Mac only) With DS9800W, you can also: play music from other audio devices through the MP3-LINK socket. With the supplied separate docking charger, you can: charge your iPod/iPhone/iPad directly. What's in the box Check and identify the contents of your package: Main unit (2 x wireless SoundSphere speakers, with a built-in Wi-Fi module) 1 x speaker connection cable 1 x AC power cord (for the main unit) 1 x remote control with battery (for the main unit) 1 x MP3 link cable 1 x separate docking charger 1 x AC power adaptor (for the docking charger) User manual (in CD-ROM) Quick start guide What else you need To stream audio wirelessly by AirPlay, you need: $:L)LFHUWLÀHGURXWHU A host for your iTunes music library, for example, an iPod touch/iPhone/ iPad installed with iOS 4.3 (or later) or a Wi-Fi enabled PC/Mac installed with iTunes 10 (or later) Your DS9800W should be connected to the same local network as your iTunes host device through the Wi-Fi router. Tip Please visit www.philips.com/welcome for information about more Philips AirPlay-enabled devices. EN 7 List of compatible iTunes host devices for AirPlay In terms of AirPlay, DS9800W is compatible with: a Wi-Fi enabled PC/Mac installed with iTunes 10 (or later); and the following iPod/iPhone/iPad models installed with iOS 4.3 (or later): iPad 2 iPad iPhone 4 iPhone 3GS iPod touch (2nd, 3rd, and 4th generation) c ~ AC IN Connect the power cord. d 6SHDNHUFRQQHFWRUV Connect the two speakers through the supplied speaker cable. e WiFi SETUP Connect the unit to a Wi-Fi network. f LED indicator Show the current status of the unit. g IR sensor Detect signals from the remote control. Point the remote control directly at the sensor. f e b c d g 8 EN Turn the unit on/off. (Press and hold) reset the unit. b MP3-LINK Connect an external audio player through the supplied MP3 link cable. Overview of the wireless SoundSphere speakers a a Overview of the remote control Overview of the docking charger a b g c f a b e d c a ~ DC IN Connect the power adaptor. b ON/OFF Switch on or off the LED light around the docking charger. a Turn the unit on/off. c iPod/iPhone/iPad dock connector b Select the AirPlay device audio source. c +/ Adjust volume. d Mute or restore volume. e / Skip to the previous/next track. f Start or pause play. g Select the MP3 link audio source. EN 9 5 3 Prepare 6 Always follow the instructions in this chapter in VHTXHQFH Screw the left black (-) connector to secure the cable. Repeat steps 2-5 to insert the other speaker cable into the right connectors. Connect power Connect Caution Risk of product damage! Make sure that the power Connect speaker cables Note Insert the stripped portion of each speaker wire into supply voltage matches the voltage printed on the bottom of the unit. Risk of electric shock! When you unplug the AC cord, always pull the plug from the socket. Never pull the cord. Before you connect the AC cord, make sure that you have completed all the other connections. the socket completely. For optimal sound, use the supplied speakers only. 1 1 2 3 4 10 2 3 Unscrew the speaker connectors. Insert fully the end of a speaker cable with red mark into the left red (+) connector. Screw the left red (+) connector to secure the cable. Insert fully the end of a speaker cable without red mark into the left black (-) connector. EN Connect the AC power cord to the ~ AC IN socket on the back of the main speaker. the wall power socket. Turn DS9800W on To replace the remote control battery: After proper power connection, the unit switches on automatically. Wait for successful boot-up of the unit. » The boot-up takes about 35 seconds. » During boot-up, the LED indicator on the back of the unit blinks green TXLFNO\ » After boot-up, if no Wi-Fi connection has been set up for DS9800W, the LED indicator starts to blink green slowly. To switch the unit to standby mode, press . To switch the unit on from standby mode, press again. 1 2 3 Prepare the remote control Caution )RUÀUVWWLPHXVH 1 Insert one CR2032 battery with correct polarity (+/-) as indicated. Close the battery compartment. Note Before you press any function button on the remote Risk of explosion! Keep batteries away from heat, VXQVKLQHRUÀUH1HYHUGLVFDUGEDWWHULHVLQÀUH Open the battery compartment. FRQWUROÀUVWVHOHFWWKHFRUUHFWVRXUFHZLWKWKHUHPRWH control instead of the main unit. If you are not going to use the remote control for a long time, remove the battery. Point the remote control directly at the IR sensor on the front of the main speaker for better reception. Remove the protective tab to activate the remote control battery. EN 11 4 Connect to your home WiFi network for AirPlay 1 2 3 Make sure that your Wi-Fi router is powered on and working properly. Make sure that DS9800W has been powered on and booted up successfully (see 'Turn DS9800W on' on page 11). Identify the type of your Wi-Fi router (see the user manual of your Wi-Fi router for details). Scenario 1: Connect to a WPS router Note Before you press any button on DS9800W, make sure that DS9800W has been booted up successfully (see 'Turn DS9800W on' on page 11). 1 Press the WPS button on your home Wi-Fi router. WPS To connect DS9800W to your existing home Wi-Fi network, you need to apply your home Wi-Fi setting to DS9800W. You can do this in two ways (depending on which type of Wi-Fi router you use): Automatically - if your Wi-Fi router is WPS (Wi-Fi Protected Setup)-enabled and supports PBC (Push Button Connection) (see 'Scenario 1: Connect to a WPS router' on page 12) Manually - if your Wi-Fi router does not support WPS (see 'Scenario 2: Connect to a non-WPS router' on page 13) Once connected successfully, DS9800W will remember your home Wi-Fi settings. Then you can enjoy AirPlay whenever DS9800W is powered on and connected to your home WiFi network automatically. Before connection of DS9800W to you home Wi-Fi network, check the points below. 12 EN 2 Shortly after step 1, press Wi-Fi SETUP on the back of the main speaker. » The LED indicator blinks red, yellow and green alternately. » Within 2 minutes, the LED indicator stops blinking and stays green, and the unit beeps. » DS9800W is connected to your home Wi-Fi network successfully. The Wi-Fi enabled device can be an iPod touch/ iPhone/iPad or a Wi-Fi enabled PC/Mac. )ROORZWKHVHTXHQFHEHORZIRUFRQQHFWLRQRI DS9800W to a non-WPS Wi-Fi router. 1 WIFI SETUP Tip 2 3 For some Wi-Fi routers, you may need to hold the WPS button for Wi-Fi connection or enable the WPS 3%&IXQFWLRQIURPWKHURXWHUFRQÀJXUDWLRQSDJHV6HH WKHXVHUPDQXDOVRIWKHVSHFLÀFURXWHUVIRUGHWDLOV If the LED indicator on DS9800W blinks yellow, it means that the Wi-Fi connection has failed. Please wait for 2 minutes and try again. If the problem remains, try to set up the Wi-Fi connection manually (see 'Scenario 2: Connect to a non-WPS router' on page 13). If the Wi-Fi connection fails again, press and hold on the main speaker to reset it, and then try again. Scenario 2: Connect to a non-WPS router Note You can also follow the procedures below to connect 4 5 6 Collect settings of your home Wi-Fi router and write down on paper for use during DS9800W Wi-Fi setup (see 'Collect settings of your home Wi-Fi router' on page 14). Switch DS9800W to Assisted Wi-Fi Setup mode (see 'Switch DS9800W to Assisted Wi-Fi Setup mode' on page 14). » A new Wi-Fi network created by DS9800W will appear, with the network name (SSID) of Philips Fidelio AirPlay. Connect your Wi-Fi enabled device to the created new Wi-Fi network temporarily (see 'Connect your Wi-Fi enabled device to the newly created Wi-Fi network' on page 14). Open the built-in web page of DS9800W with the Internet Browser of your Wi-Fi enabled device (see 'Open the built-in web page of DS9800W' on page 16). Change the internal Wi-Fi settings of DS9800W based on the settings you wrote on paper at step 1 (see 'Change the internal Wi-Fi settings of DS9800W' on page 17). Restore your Wi-Fi enabled device back to your existing home Wi-Fi settings (see 'Restore your Wi-Fi enabled device back to your existing home Wi-Fi setting' on page 18). DS9800W to a WPS router manually. To connect DS9800W to a Wi-Fi router manually, you need access to DS9800W's EXLOWLQFRQÀJXUDWLRQZHESDJHIRUFKDQJHRI its internal Wi-Fi settings. To do so, you need a Wi-Fi enabled device with an Internet browser for temporary Wi-Fi connection to DS9800W. EN 13 Collect settings of your home Wi-Fi router Note $IWHU\RXÀQLVKPDQXDO:L)LVHWWLQJIRU'6:WKLV new Wi-Fi network disappears. Note Always consult the user manual of your home Wi-Fi router for detailed instructions. 1 2 3 4 Launch the Internet browser (for example, Apple Safari or Microsoft Internet Explorer) on your Wi-Fi enabled device. 2SHQWKHFRQÀJXUDWLRQSDJHRI\RXU home Wi-Fi router. Find the Wi-Fi settings tab and write down the following information on paper: A Network name (SSID) B Wi-Fi security mode (usually WEP, WPA or WPA2 if enabled) C Wi-Fi password (if Wi-Fi security is enabled) D DHCP mode (enabled or disabled) E Static IP address settings (if DHCP mode is disabled) After successful boot-up (see 'Turn DS9800W on' on page 11), press and hold Wi-Fi SETUP on the back of the main speaker for more than 5 seconds. » The LED indicator blinks green and yellow alternately. » A new Wi-Fi network of DS9800W itself is created, with the network name (SSID) of Philips Fidelio AirPlay. » It takes about 45 seconds for successful creation of this new Wi-Fi network. 14 Connect your Wi-Fi enabled device to your existing home Wi-Fi network. Switch DS9800W to Assisted Wi-Fi Setup mode If you fail to enter Assisted Wi-Fi Setup mode, power EN off DS9800W and power on it, then try again after successful boot-up. Make sure that there are no other Philips AirPlayenabled devices in Assisted Wi-Fi Setup mode at the same time. Multiple new Wi-Fi networks created this way may interfere with each other. Connect your Wi-Fi enabled device to the newly created Wi-Fi network The new Wi-Fi network created by DS9800W only allows access of one Wi-Fi enabled device.To avoid interference from any other Wi-Fi devices, you are recommended to temporarily disable the Wi-Fi function on your other Wi-Fi devices. Option 1: Use your iPod touch/iPhone/iPad 1 Select Settings -> Wi-Fi on your iPod touch/iPhone/iPad. 2 Select Philips Fidelio AirPlay from the list of available networks. 2 Scan the available Wi-Fi networks. Philips Fidelio AirPlay 3 3 Select Philips Fidelio AirPlay from the list of available networks. Wait until successful Wi-Fi connection on your iPod touch/iPhone/iPad. » is displayed at the upper left corner of your iPod touch/iPhone/iPad. Tip If Philips Fidelio AirPlay is not in the list, try to scan the available Wi-Fi networks again. 4 Wait until successful Wi-Fi connection on your PC/Mac. Option 2: Use your Wi-Fi enabled PC/Mac Note See the user manual of your PC/Mac for how to connect your PC/Mac to a Wi-Fi network. During Wi-Fi network connection, do not connect any network cable to your PC/Mac. 1 Open the Wi-Fi setup tool or control panel on your PC/Mac. EN 15 Tip If Philips Fidelio AirPlay is not in the list, try to scan the available Wi-Fi networks again. If you use Safari on your Wi-Fi enabled PC/ Mac, you can also select 'Philips_Fidelio XXX' from the Bonjour pull-down list to enter the '6:FRQÀJXUDWLRQZHESDJHGLUHFWO\ 1 Click -> Preferences. » The Bookmarks menu is displayed. Open the built-in web page of DS9800W 1 2 Launch Apple Safari browser or any other Internet browser on your Wi-Fi enabled device. Type in 192.168.1.1 at the browser DGGUHVVEDUDQGFRQÀUP » 7KH'6:FRQÀJXUDWLRQZHE page is displayed. 2 Tick Include Bonjour for Bookmarks bar. 192.168.1.1 3 16 EN Select 'Philips_Fidelio XXX' from the Bonjour pull-down list shown at the bookmarks bar. » 7KH'6:FRQÀJXUDWLRQZHE page is displayed. Change the internal Wi-Fi settings of DS9800W Note If the LED indicator on DS9800W does not stay 2QWKH'6:FRQÀJXUDWLRQZHESDJH you can change the internal Wi-Fi settings of DS9800W for connection of DS9800W to your existing home Wi-Fi network. Note green steadily, it means that the Wi-Fi connection has failed. Please power off both your Wi-Fi router and DS9800W and then power on them again to see whether DS9800W can be connected to your home Wi-Fi network. If the problem remains, try the above procedures again. $IWHU\RXÀQLVKWKHDERYHFKDQJHVRUSRZHURIIDQG power-on of DS9800W, the new Wi-Fi network created by DS9800W will disappear. 0DNHVXUHWKDWWKHVHWWLQJVRQWKHFRQÀJXUDWLRQZHE page match your home Wi-Fi network settings that you wrote on paper. Tip If you like, you can change the name of your DS9800W in Advanced settings -> AirPlay Device Name on the '6:FRQÀJXUDWLRQZHESDJH7KLVLVKHOSIXOZKHQ you have multiple Philips AirPlay-enabled devices in your house and you need to distinguish between them. If you want to enter the network name (SSID) manually (for example, if you want to hide your SSID), go to Advanced settings -> CONFIGURE MANUALLY on WKH'6:FRQÀJXUDWLRQZHESDJH Follow the on-screen instructions to FKDQJHDQGFRQÀUPWKHLQWHUQDO:L)L settings of DS9800W. » After a while, the indicator on the back of DS9800W stops blinking and stays green, and the unit beeps. » DS9800W is connected to your existing home Wi-Fi network successfully. EN 17 Restore your Wi-Fi enabled device back to your existing home Wi-Fi setting 2 Select your network name (SSID) from the list of available wireless networks. Note Make sure that the settings at steps 2 to 3 below match your home Wi-Fi network settings you wrote on paper. 1 Select Settings -> Wi-Fi on your iPod touch/iPhone/iPad. Or open the list of available Wi-Fi networks on your PC/Mac. 3 4 18 EN (QWHUWKHQHWZRUNNH\LIUHTXLUHG Wait until successful Wi-Fi connection to your home Wi-Fi network. 5 Play 3 Select Philips_Fidelio XXXX (or user FXVWRPL]HGQDPHIURPWKH$LU3OD\OLVW Stream audio from your iTunes music library to DS9800W Note Make sure that your iTunes host device is connected to the same Wi-Fi network as DS9800W. Your iTunes device can be an iPod touch/iPhone/iPad installed with iOS 4.3 (or later) or a Wi-Fi enabled PC/Mac installed with iTunes 10 (or later). Stream from your iPod touch/iPhone/ iPad 1 2 Launch the iPod/Music application on your iPod touch/iPhone/iPad. Tap on the AirPlay icon. EN 19 4 6HOHFWDPHGLDÀOHDQGVWDUWSOD\ » After a while, you will hear music from DS9800W. Stream from your PC/Mac 1 2 3 Launch iTunes 10 (or a later version) on your PC/Mac. Click the AirPlay icon on the window. Select Philips_Fidelio_AirPlay XXXX (or XVHUFXVWRPL]HGQDPHIURPWKH$LU3OD\ list. Note If you fail to hear music after successful setup, do one of the following on your iPod touch/iPhone/iPad: (1) Disconnect and then re-connect to the same Wi-Fi 20 router again; (2) Close all applications running at the background; (3) Power off and then power on your iPod touch/ iPhone/iPad again. EN 4 6HOHFWDPHGLDÀOHDQGVWDUWSOD\ » After a while, you will hear music from DS9800W. Tip When you stream audio from your iTunes music library on a PC/Mac, you can select more than one AirPlayenabled devices (if available) at step 3 to stream music to all of them at the same time. If you are using an earlier version of iTunes, the AirPlay icon may be instead of . If your iTunes host device is a Wi-Fi enabled PC/Mac: For advanced sound settings, you can use the HTXDOL]HUDYDLODEOHRQL7XQHVGLUHFWO\View -> Show Equalizer). Tip See the iTunes help documentation for more details. Control play You can select different play options from either your iTunes host device or DS9800W. Note Play from an external device You can also listen to an external audio player through DS9800W. The operations below are based on the supplied remote control of DS9800W. Make sure that you have successfully streamed audio from your iTunes music library to DS9800W. To start or pause play, press . To skip to the previous or next track, press / . To adjust volume, press +/- repeatedly. To mute or restore volume, press . To switch to the MP3 link audio source (if connected), press . To switch back to the AirPlay audio source, press . MP3-LINK Tip If you are streaming music from a PC/Mac, to control music play from AD7000W, launch iTunes and tick Allow iTunes audio control from remote speakers in Edit (for Windows) or iTunes (for Mac) -> Preferences... -> Devices. Use advanced sound settings 1 2 Connect the supplied MP3 link cable to: the MP3-LINK socket on the back of DS9800W. the headphone socket on an external audio player. Press to select the MP3 link source. If your iTunes host device is an iPod touch/ iPhone/iPad: For advanced sound settings and additional features, you can use your iPod touch/iPhone/ iPad to download the Philips Fidelio application from Apple App Store. It is a free application from Philips. EN 21 6 Charge your iPod/iPhone/ iPad through the separate docking charger Load the iPod/iPhone/iPad 1 Connect the AC power cord to the ~ DC IN socket on the docking charger. the wall power socket. UK You can charge your iPod/iPhone/iPad through the supplied separate docking charger. EUR Compatible iPod/iPhone/iPad The separate docking charger supports charge of the following iPod, iPhone, and iPad models. iPad 2 iPad iPhone 4 iPhone 3GS iPhone 3G iPhone iPod classic iPod 5G iPod 4G iPod nano (2nd, 3rd, 4th, 5th, and 6th generation) iPod touch (1st, 2nd, 3rd, and 4th generation) 22 EN ON/OFF 2 Place the iPod/iPhone/iPad in the docking charger. » The docked iPod/iPhone/iPad begins to charge as soon as the docking charger is connected to AC power. To remove the iPod/iPhone/iPad Pull the iPod/iPhone/iPad out of the docking charger. EN 23 7 Update firmware Update from the FRQÀJXUDWLRQSDJH Warning To improve the performance of DS9800W, 3KLOLSVPD\RIIHU\RXQHZÀUPZDUHIRUXSJUDGH of your DS9800W. Please register your product at www.philips. com/welcome for information about the latest ÀUPZDUH Always connect your DS9800W to AC power for ÀUPZDUHXSJUDGH1HYHUSRZHURII\RXU'6: GXULQJÀUPZDUHXSJUDGH Note To use an Internet browser other than Apple Safari on your PC/Mac, remember to go to the Wi-Fi router FRQÀJXUDWLRQSDJHDQGZULWHGRZQWKH,3DGGUHVVRI your DS9800W. See the user manual of your Wi-Fi URXWHUIRUKRZWRÀQGWKH,3DGGUHVVHVRIGHYLFHV connected to the Wi-Fi router. Note <RXFDQRQO\XSGDWHWKHÀUPZDUHIURPD3&0DF 'RZQORDGWKHXSGDWHÀOH 1 www.philips.com/support » After boot-up, you can hear a beep and the LED indicator turns to green steadily. DS9800W is connected to WKHODVWFRQÀJXUHG:L)LQHWZRUN automatically. XXXX 2 3 XXXX. zip 1 2 3 24 On your PC/Mac, go to www.philips.com/ support. (QWHUWKHPRGHOQXPEHUWRÀQGWKHODWHVW ÀUPZDUHXSJUDGHÀOHDYDLODEOH 6DYHWKHXSJUDGHÀOHWR\RXUKDUGGULYH EN Power on DS9800W (see 'Prepare' on page 10). » It takes about 35 seconds for the unit to boot up. During boot-up, the LED indicator on the back of the main VSHDNHUEOLQNVJUHHQTXLFNO\ Make sure that DS9800W and your PC/ Mac are connected to the same Wi-Fi router. Open Apple Safari on your PC/Mac, then select 'Philips_Fidelio XXX' from the Bonjour pull-down list. Or open another Internet browser on your PC/Mac, then type in the IP address of DS9800W (available on the :L)LURXWHUFRQÀJXUDWLRQSDJHDWWKH address bar. » 7KH'6:FRQÀJXUDWLRQZHE page is displayed. 4 Select the Firmware Update tab, then follow the on-screen instruction to FRPSOHWHWKHÀUPZDUHXSGDWH Note ,QFDVHWKHÀUPZDUHXSGDWHIDLOV\RXFDQWU\WKHDERYH procedures again. $IWHUVXFFHVVIXOÀUPZDUHXSGDWHLIWKHUHLVDQ\ problem with the Wi-Fi connection, press and hold on DS9800W for more than 5 seconds at the same time to reset the device, and then try to set up the WiFi network for DS9800W again (see 'Connect to your home Wi-Fi network for AirPlay' on page 12). EN 25 8 Product information General information AC power Note Product information is subject to change without prior notice. 6SHFLÀFDWLRQV $PSOLÀHU Rated Output Power )UHTXHQF\5HVSRQVH Signal to Noise Ratio Aux Input (MP3 link) 2X50 W RMS +]G% > 90 dB 1 V RMS 20 kohm Speakers Speaker Impedance Speaker Driver Sensitivity 8 ohm 130 mm woofer + 19 mm tweeter > 85 dB/m/W Wireless Wireless standard Wireless security )UHTXHQF\ range PBC (one button push) 26 EN 802.11b/g WEP (64 or 128 bit), WPA/WPA2 (8-63 characters) 0+]&+ CH11) (for /79, /37, /55, /97) 0+]&+ CH13) (for /12, /10, /05) Yes Operation Power Consumption Eco Standby Power Consumption Dimensions - Each speaker Weight - With Packing - Speakers Wireless SoundSphere speakers: 9a+] Separate docking charger: Model: ASSA28-050200 ,QSXW9a+] 0.45A Output: 5.0V 2000mA 22 W < 0.5 W 265 in diameter x 410 mm 14.5 kg 12 kg 9 Troubleshooting Warning Never remove the casing of this apparatus. To keep the warranty valid, never try to repair the system yourself. If you encounter problems when using this apparatus, check the following points before UHTXHVWLQJVHUYLFH,IWKHSUREOHPUHPDLQV unsolved, go to the Philips web site (www. philips.com/welcome). When you contact Philips, ensure that the apparatus is nearby and the model number and serial number are available. No power Make sure that the AC power plug of the device is connected properly. Make sure that there is power at the AC outlet. No sound Adjust the volume. Check the network connection. Set up the network again if needed (see 'Connect to your home Wi-Fi network for AirPlay' on page 12). Check if you have selected the correct audio source. No response from the unit Press and hold on DS9800W for more than 5 seconds to reset the device. Then set up the Wi-Fi network for DS9800W again (see 'Connect to your home Wi-Fi network for AirPlay' on page 12). Disconnect and reconnect the AC power plug, and then switch on the device again. Remote control does not work %HIRUH\RXSUHVVDQ\IXQFWLRQEXWWRQÀUVW select the correct source with the remote control instead of the main unit. Reduce the distance between the remote control and the unit. Insert the battery with its polarities (+/– signs) aligned as indicated. Replace the battery. Aim the remote control directly at the IR sensor on the front of the main speaker. Wi-Fi network connection failed Check if your Wi-Fi router is Wi-Fi 802.11b/g FHUWLÀHG7KLVGHYLFHLVRQO\FRPSDWLEOHZLWK :L)LEJFHUWLÀHGURXWHUV If your Wi-Fi router is Wi-Fi 802.11n FHUWLÀHGPDNHVXUHWRHQDEOHWKH 802.11b/g mode. DS9800W does not support connection to routers with 802.11n only. This device does not support the WPSPIN method. If your Wi-Fi router supports WPS and the WPS-PBC method but fails to connect to DS9800W, try the manual Wi-Fi setup method (see 'Scenario 2: Connect to a non-WPS router' on page 13). Enable SSID broadcast on the Wi-Fi router. Keep away from potential sources of interference which may affect Wi-Fi signal, such as microwave ovens. If you fail to use your PC for Wi-Fi network setup, check whether your PC is using a Wi-Fi network. You cannot use Ethernet connection for AirPlay network setup. Make sure that the SSID name of your home router consists of alphanumeric characters, with no space or special characters like %/#/* inserted. If you choose to rename the AirPlay device 'Philips_Fidelio XXXX' in the setting menu, do not use special characters or symbols. For some new types of Wi-Fi routers, a network name (SSID) may be created automatically when you use WPS for connection. Always change the default network name (SSID) to a simple one that consists of alphanumerical characters, and also change the Wi-Fi security mode to secure your network. EN 27 Occasional breaking of AirPlay music streaming Do one or all of the following: Move DS9800W closer to your Wi-Fi router. Remove any obstacles between DS9800W and your Wi-Fi router. Avoid using Wi-Fi channel which is overlapped by the nearby Wi-Fi network. Check if your network speed is fast enough (in cases where multiple devices share the same router, the AirPlay performance may be affected). Turn off the other devices connected to your home router. Enable the Quality of Service (QoS) option (if available on the Wi-Fi router). Turn off other Wi-Fi routers. No AirPlay icon on my iTunes host device Make sure that DS9800W is already connected to your home Wi-Fi network. Before you open iTunes, make sure that you have enabled Bonjour service in your PC. Take Windows XP for example: to enable the service, you can click Start->Control Panel, and double-click Administrative Tools-> Services->Bonjour Service, then click Start followed by OK on the pop-up menu. If the problem remains, try to restart DS9800W. AirPlay connection failed with Mac or PC 7HPSRUDULO\GLVDEOHWKHÀUHZDOODQG security software to see whether it blocks the ports that AirPlay uses to stream content. See the help documentation of \RXUÀUHZDOODQGVHFXULW\VRIWZDUHRQKRZ to unblock the ports used by AirPlay. When you use iPod Touch/iPhone/iPad/ Mac/PC for AirPlay, if the music play breaks or stops, try to restart your iPod Touch/ iPhone/iPad, iTunes or DS9800W. Video streaming or FTP downloads may overload your router and therefore may cause interruptions during AirPlay music play. Try to reduce the load of your router. 28 EN Specifications are subject to change without notice © 2011 Koninklijke Philips Electronics N.V. All rights reserved. DS9800W_10_UM_V1.0