1
5. Loosen the fastening bolts on the spit forks and slide them on to the spit, securing the food in
the most practical way (this varies for each item).
6. Tighten the fastening bolts on the forks being sure that you hit a flat surface on the spit and
not a corner.
Note: some food items like potatoes, will not need spit forks to secure it
Attaching the spit to the SpitJack and tripod stand
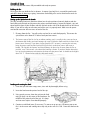
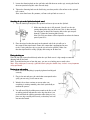
1. Take the loaded spit and place the squared end into a spit nut on the SpitJack.
2. Make sure that the spit is fully inserted. You will see the spit
coming through the top part of the nut if this is done correctly.
You may have to loosen the fastening bolt so the spit can pass
through. Tighten the fastening bolt securely.
Note: the level you choose will be dependent on where the hottest
part of your fire is.
3. Place the tripod so that the notch at the pointed end of the spit will rest in
the cutout of the tripod stand. Choose the cutout that is appropriate for your
needs. If using only one spit, try get the spit as level as possible. Make sure
that the tripod stand is steady, upright, and resting on all three feet.
Placing
Placing the drip pan
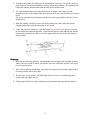
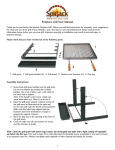
Place the drip pan centered and directly under the spit. Make sure it is big enough to catch the
dripping from all the food.
Note: If you did not buy one of our drip pans, you can use a baking pan or cookie sheet.
Note: Using a drip pan is not only a good idea for keeping the hearth clean, it also is a very important
safety precaution.
Turning it on and cooking
1. Make sure that everything is properly tightened and aligned
correctly.
2. Plug in the unit and press the switch that corresponds to the
spit(s) you are using. It will start to turn.
3. Watch it for at least a minute or two to make sure
everything is running smoothly, then check periodically to
monitor the process.
4. You will most likely be adding more wood to the fire as well
as making periodic adjustments to the logs but there is no
need to disturb the cooking operation when doing so. Just
place new logs carefully and securely so that they can’t roll
out onto the hearth.
3