1
2.
Starting the Importer
From the Midas Toolbar select the Importer icon:
3.
Project Management
Before Importing data, an existing Project must be selected or a new one created.
3.1. Creating a New Project
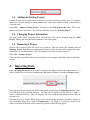
To create a project, select File -> New Project.
Fill in the required fields and select Add Project. This will create the project and also set it as the
Working Project to which new subject data will be added to.
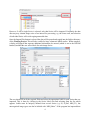
In addition to keeping a record of all Subjects contained under that project, the Project definition
includes the processing files used and an Atlas associated with that project, which must be defined
when the project is created. These are initially shown with default values, with the “Processing
Files” path set to a subdirectory under the project. However, you may wish to have a common set of
processing files for multiple projects, in which case the path can be changed using the Browse
button. An “Atlas” is provided with the MIDAS distribution, which consists of a reference MRI
(from Montreal Neurological Institute) that is mapped to a brain atlas with lobar-scale region
definition, and the path to these files appears by default. However, the path can be changed to use
other user-defined atlases.
When all fields are defined, select “Add Project”.
3.2. Selecting an Existing Project
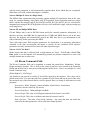
A previously created Project can be selected in the Working Project drop down, and then becomes
the current Project used for subsequent actions:
2