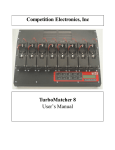
1
s DS2788K Evaluation Kit Standalone Fuel Gauge IC with LED Display Drivers www.maxim-ic.com FEATURES Demonstrates the capabilities of the DS2788 Standalone Fuel Gauge IC with LED Display Drivers, including: − Estimation of available capacity for Li+ cells − Voltage measurement − Voltage divider circuit − Current measurement − Current accumulation − Temperature measurement − Information storage − Identification − LED Display Interfaces to the USB Port of a PC running Windows XP or older INDEX Evaluation Kit Contents Equipment Needed Introduction Setup and Installation Board Connections Software Installation Selecting the COM Port Program Menus Menu Windows Status Register Program Tabs ORDING INFORMATION PART DS2788EVKIT+ TYPE EV Kit + Denotes lead(Pb)-free and RoHS compliant. EVALUATION KIT CONTENTS 1 pc. Evaluation Board 1 pc. DS9123O USB Adapter 1 pc. RJ-11 Cable EQUIPMENT NEEDED 1. A PC running Windows XP or older and an available USB port. 2. Cables with mini-grabber style clips or the ability to solder directly to connection pads. 3. A Lithium-Ion battery and a power supply and/or load circuit. Parameters Tab Memory Tab Log Data Tab Real Time Tab INTRODUCTION The DS2788 Evaluation Kit (EV Kit) makes performance evaluation, software development, and prototyping with the DS2788 Standalone Fuel Gauge IC with LED Display Drivers easy. The evaluation board interfaces to a PC through a DS9123O USB Adapter and RJ-11 cable connection. All related data sheets along with the evaluation software can be found on our website at www.maxim-ic.com. Page 1 of 13 091027 DS2788K The DS2788K evaluation software gives the user complete control of all functions of the DS2788. Separate control tabs allow the user access to all EEPROM and RAM memory locations, all control registers, and real-time updates of all monitored parameters. The software also incorporates a datalogging feature to monitor a cell over time. The evaluation board circuit is designed to provide the DS2788 with accurate parameter measurements. The initial evaluation board, PD033007, is configured with a 2 cell voltage divider with the circuitry to turn the voltage divider on and off using the VMA pin of the DS2788. Kit demonstration boards will vary as they are improved upon over time. For information on the demonstration board circuits refer to the individual board datasheets located on our website at www.maxim-ic.com. SETUP AND INSTALLATION BOARD CONNECTIONS Connections to the TSSOP demonstration board are best made either by soldering directly to the pads or by using cables with mini-grabber clips. Communication to the TSSOP board can be accomplished either through the RJ-11 jack by connecting the provided standard six conductor RJ-11 cord or by wiring directly to the DQ and P- pads. To utilize the demonstration software, the DQ and PAC- lines must be connected to the DS9123O communication brick using either of the two methods described. B+ RJ-11 B- P- Figure 1: Communication Connections Figures 2a and 2b show the recommended circuits to simulate charging and discharging. The Lithium-Ion cell is connected between the B+ and B- pads. The battery charger/power supply or circuit load is connected between the P+ and P- pads. The evaluation software can be run in either configuration as long as a cell is connected between the B+ and B- terminals providing a minimum of 2.5 volts to power the DS2788. + BATTERY B- - P- DS2788K EVALUATION BOARD DS2788K EVALUATION BOARD B+ Power Supply / Battery Charger B+ + LOAD BATTERY B- - P- Figure 2a: Charging Circuit Fig 2b: Discharging Circuit SOFTWARE INSTALLATION To install the DS2788K software, exit all programs currently running and download the DS2788K software from our website at www.maxim-ic.com. Unzip the compressed file and double click the SETUP.EXE icon to begin the installation process. Follow the prompts to complete the installation. The 2 of 13 DS2788K DS2788K software can be uninstalled in the Add/Remove Programs tool in the Control Panel. After the installation is complete, open the DS2788K folder and run DS2788K.EXE or select DS2788K from the program menu. A splash screen containing information about the evaluation kit appears as the program is being loaded. All relevant data sheets and application notes on the DS2788 and DS2788 EV Kit can be found on our website at www.maxim-ic.com. SELECTING THE COMMUNICATION PORT If the DS9123O is connected when the DS2788K software is launched, the program will start up automatically. If it is not connected, the Select Preferences window will open. In this window, select either serial port or USB communication and the port number; then hit OK. The DS2788K software saves this port selection and automatically uses the selection each time the program starts. To change the port later, click the Preferences option on the menu bar, select Edit Preferences, and then select the appropriate port. To attempt to automatically locate the DS9123O or DS9123, click the Poll Ports button. Warning - automatically polling for the DS9123 can disrupt other devices connected to your computer’s COM ports. PROGRAM MENUS Several pull down menu options have been provided to simplify use of the DS2788K software for the user. Their functions are individually detailed below. FILE MENU The File Menu allows the user to store and recall information to and from a file directly into the text boxes on the Parameters Tab. These functions do not directly write or read the DS2788. It is still necessary for the user to store or recall this information to or from the device by clicking on the Write & Copy or Recall & Read buttons on the Parameters Tab. 3 of 13 DS2788K REGISTERS MENU The Registers Menu gives immediate access to all four status and function registers of the DS2788. Selecting any of the registers will open an individual control window giving the user a description of each register bit and the ability to read or write it. See the status register window example. STATUS REGISTER The present state of all register bits are displayed immediately upon opening the register window. R/W locations contain a selection field or command button to allow the user to determine their state. Pressing the WRITE button will write the new value to the register and read the corresponding register inside the DS2788 to verify the correct value was written. The Control Register and Protection Threshold Register are stored in EEPROM, so when the WRITE command is issued, the value is written and copied to EEPROM without changing the values of the remainder of the Parameter EEPROM block. 1 WIRE SPEED MENU The 1 Wire Speed Menu allows the user to select the appropriate 1 Wire timing. The 1-Wire speed of the device is selected by sending the Set Overdrive or Clear Overdrive commands. In order to change the speed of the device, simply left-click on Regular Speed or Overdrive Speed from the 1 Wire Speed Menu. Selecting either option will send the Clear Overdrive or Set Overdrive command. The software will send the command in the current 1 Wire speed, and then begin communicating in the new 1 Wire speed. If the software and the DS2788 get out of sync, simply leftclick on the Detect Device Speed to match the software’s 1 Wire speed to the DS2788’s 1 Wire speed. 4 of 13 DS2788K PREFERENCES MENU The Preferences Menu allows the user to change COM port settings at any time. Edit Preferences opens the Select Preferences window. See Selecting the communication port above. HELP MENU Selecting the About topic from the Help Menu will open a window containing information about the current revision of this program and Dallas Semiconductor. PROGRAM TABS All functions of the program are divided under four tabs in the main program window. Left click on the appropriate tab to move to the desired function page. Located on the Real Time tab is all of the information measured and calculated by the DS2788. That data is divided between the Parametric Data Tab and Fuel Gauging Tab. The Parameters Tab gives the user access to the entire Parameter EEPROM memory block in terms of Application Units and Device Units. The Memory tab displays the contents of every register and memory location inside the DS2788 and allows the user to alter the data. The Data Log tab allows the user to store all real time information to a file and view the data in a graphical form. REAL TIME TAB The Real Time data is divided into three tabs: Parametric Data and Fuel Gauge Data. The Parametric Data Tab contains all of the real time measurements taken by the DS2788. The Fuel Gauge Data contains all of the Fuel Gauge values calculated by the DS2788. 5 of 13 DS2788K Parametric Data Tab The Parametric Data Sub Tab displays the latest real-time measurements of cell voltage, temperature, current and accumulated charge with both analog meter readouts and digital values. The sense resistor value used to calculate the current reading is shown in the temperature section. Go to the sense resistor value on the Parameters Tab to change this value. The present state of the PIO pin is shown in text. The Set/Clear PIO bit will set or clear the PIO bit in the Special Feature Register to toggle the state of the pin. Set Accumulated Current Register The user can bring up the Set Accumulated Current Register window by left clicking the Set ACR button. This window allows the user to enter a value for the Accumulated Current Register in mAH. 6 of 13 DS2788K Set Accumulation Bias Register The user can bring up the Set Accumulation Bias Register window by left clicking the Acc Bias button. This window allows the user to enter values for the Accumulation Bias Register in mA. Left-clicking on the Write button will write the Accumulation Bias Register and copy the value to EEPROM. The value entered here will be added to the Accumulated Current Register during each current conversion. The bias value will not affect the Current Register reading, but will be reflected in the Accumulated Current Register. Set Current Offset Bias Register The user can bring up the Set Current Offset Bias Register window by left clicking the Current Offset Bias button. This window allows the user to enter values for the Current Offset Bias Register in mA. Left-clicking on the Write button will write the Current Offset Bias Register and copy the value to EEPROM. The value entered here will be added to the Current Register during each current conversion. 7 of 13 DS2788K Fuel Gauge Data Tab The Fuel Gauge Data Sub Tab displays the latest fuel gauge calculations. The Full, Active Empty, and Standby Empty levels are calculated from the data input on the Parameters Tab. The Remaining Active Absolute Capacity (RAAC) and the Remaining Stand-by Absolute Capacity (RSAC) are displayed in terms of mAhrs. The Remaining Active Relative Capacity (RARC), Remaining Stand-by Relative Capacity (RSRC) are displayed in terms of percent of capacity remaining. The Analog Meter on the left displays the Remaining Active Absolute Capacity (RAAC). The flags found in the Status Register are displayed on the right side of the window. When the Under Voltage Flag or the Power-on-Reset Flag is set, a button will appear that will allow the user to clear those bits. Scalar Register The user can bring up the Set Age Scalar window by left clicking the Update button in the Scalar area. This window allows the user to read and write the Scalar value in terms of percent of the nominal capacity. 8 of 13 DS2788K PARAMETERS TAB The Parameters Tab gives the user access to the entire Parameter EEPROM memory block (block 1, addresses 60h-7Fh) in terms of Application Units and Device Units. The Application Units Tab displays the parameters in units like mA, mAhrs, and volts. The Device Units Tabs performs the calculations needed to get the application units into the units that are stored in the device like µV, µVhrs, and ppm as well as show the hexadecimal values that get written to the device. Application Units Tab The Application Units Sub Tab allows the user to read and write the Parameter EEPROM memory block. To change any of this information, simply click on the desired text field and enter the new value. Clicking on the Load Default Set Up button will enter example data into the information fields of the Application Units Sub Tab. Once all data is in the desired format, click on the Write & Copy button to copy it to the EEPROM of the DS2788. This information can also be stored to a file and recalled later using the Load/Save Set Up buttons or the Load/Save Parameters Set Up Menu Items. These functions do not directly write or read the DS2788. It is still necessary for the user to store or recall this information to or from the device by issuing a Write & Copy or Recall & Read buttons. 9 of 13 DS2788K Device Units Tab The Device Units Sub Tab is read-only. It displays the actual hexadecimal values read from the DS2788 and displays the units that are stored in the device. 10 of 13 DS2788K MEMORY TAB The Memory Tab gives the user access to all 32 bytes of SRAM and all 48 bytes of EEPROM inside the DS2788. They are separated into four sub-tabs for convenience. Any value can be modified by clicking in that address’ text box and typing a new value in hexadecimal format. The Write button will copy the entire block of data to the corresponding location inside the DS2788 (Scratchpad RAM on the EEPROM blocks). The Read button will update the entire block’s text boxes with data from the DS2788 (Scratchpad RAM on the EEPROM blocks). Sub-tabs displaying any EEPROM data will also have Copy and Recall buttons to allow the user to transfer the data between Scratchpad and EEPROM memory internal to the DS2788. The Permanently Lock Block 0/1 buttons will permanently store the data currently located in that block’s EEPROM. Warning – this data can never be changed once locked. Verify your data first by issuing a Recall and a Read. The Net Address Sub Tab allows the user to perform a Search Net Address to find all of the 1-Wire devices on the 1 Wire bus. All devices found on the bus will be listed in the Net Addresses field. To communicate to any device on the bus, click on its address inside the Net Addresses field to select it. The program will now use this Net Address for all operations until a different Net Address is chosen. 11 of 13 DS2788K LOG DATA TAB The Log Data tab allows the user to see the DS2788’s real time measurements graphed over time. There are separate sub-tabs for voltage, current, temperature, and accumulated charge. Each graph displays the last 500 data points collected by the DS2788K software. The sampling interval can be adjusted from as fast as possible to 15 minutes and can be adjusted from the Sampling Interval Menu at the bottom of the window. The Clear Graphs button will clear all data from all four graphs, but does not reset the log to file function. When the Fastest sampling interval is selected, the graphs will not be updated, only the data logging is enabled. The Log to File Sub Tab contains control information for storing all data to an ASCII file. The default filename is c:\DS2788K_datalog.txt, but can be modified in the filename text field. The Log Data button toggles data logging off and on. Data will be stored at the same interval selected for updating the graphs in the tab-delimited format of “Time<tab>Voltage<tab>Current<tab>AveCurrent<tab>Temperature<tab>ACR<tab>Full<tab> AE<tab>SE<tab>RAAC<tab>RARC<tab>RSAC<tab>RSRC<tab>Status<tab> Scalar” for easy import into a spreadsheet. The most recent 50 samples are displayed in the window for observation. Warning - The Log Data function overwrites previous file information. Data previously stored in the file will be lost. 12 of 13 DS2788K EV KIT BOARD SCHEMATIC 13 of 13