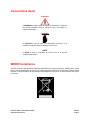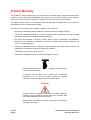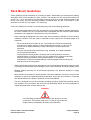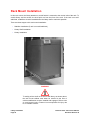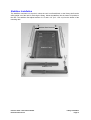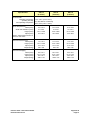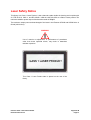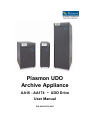
1
Plasmon UDO
Archive Appliance
AA16 - AA174 ~ UDO Drive
User Manual
P/N 800-101274-00 E
PREFACE
Copyright
Copyright 2007 by Plasmon®. All rights reserved. This item and the information contained herein are
the property of Plasmon. No part of this document may be reproduced, transmitted, transcribed, stored
in a retrieval system, or translated into any language or computer language in any form or by any
means, electronic, mechanical, magnetic, optical, chemical, manual, or otherwise, without the express
written permission of Plasmon.
United States Office
European Headquarters, UK
Plasmon
4425 ArrowsWest Drive
Colorado Springs, CO 80907-3489
Plasmon Data Limited
Whiting Way
Melbourn, Herts. SG8 6EN
Disclaimer
Plasmon makes no representation or warranties with respect to the contents of this document and
specifically disclaims any implied warranties of merchantability or fitness for any particular purpose.
Further, Plasmon reserves the right to revise this publication without obligation of Plasmon to notify any
person or organization of such revision or changes.
Trademark Notices
Plasmon is a U.S. registered trademark of Plasmon. All other product names are trademarks or
registered trademarks of their respective owners.
Plasmon AA16 - AA174 User Manual
Document Revision E
Preface
Page 1
Revision History
Revision
Date
Description
A
4/05
Initial release
B
8/05
Fixed model names
C
12/05
Added AA16 & AA174, new stabilizers
D
11/06
New AA controller, added VCCI to
Safety Agency, updated Specifications,
updated Repacking, new Rack Mount,
added Compliant Media, now RoHS
compliant, changed doc PN from
97707489 to 800-101274-00.
E
6/07
Updated Safety Agency, added UDO2,
added WEEE
NOTE
The most current information about this product is available on the
Plasmon web site (www.Plasmon.com).
Preface
Page 2
Plasmon AA16 - AA174 User Manual
Document Revision E
Conventions Used
WARNING
A WARNING is used to alert the reader to situations or conditions
that could potentially result in personal injury, fire hazard, or
equipment damage.
CAUTION
A CAUTION is used to warn of undesirable procedures, or of
situations in which equipment damage could result.
NOTE
A NOTE is used to emphasize an area of text or to provide
additional information.
WEEE Compliance
Plasmon products with the Waste Electrical and Electronic Equipment Directive (WEEE) label, shown
below, can be shipped back to Plasmon for proper disposal of hazardous components. Please contact
Plasmon Technical Support at the locations listed inside the back cover of this manual for the proper
procedure.
Plasmon AA16 - AA174 User Manual
Document Revision E
Preface
Page 3
Product Warranty
This Plasmon® library is warranted free from defects in materials, parts, and workmanship and to
conform to the current product specification upon delivery. For the specific details of your warranty,
refer to your sales contract or contact the company from which the library was purchased.
The Plasmon quality system is in compliance with and registered to ISO9001:2000. All products are
assembled from new or remanufactured parts.
The warranty for the library shall not apply to failures of any unit when:
•
The library is repaired by anyone other than Plasmon personnel or approved agent.
•
The library is physically abused or is used in a manner that is inconsistent with the operating
instructions or product specification defined by Plasmon.
•
The library fails because of accident, misuse, abuse, neglect, mishandling, misapplication,
alteration, faulty installation, modification, or service by anyone other than the factory service
center or its approved agent.
•
The library is repaired by anyone, including an approved agent, in a manner that is contrary to the
maintenance or installation instructions supplied by Plasmon.
•
The Plasmon serial number tag is removed.
•
The library is damaged because of improper packaging on return.
CAUTION
Returning the library in unauthorized packaging may damage the
unit and void the warranty.
If problems with the library occur, contact your maintenance
organization; do not void the product warranty by allowing
untrained or unauthorized personnel to attempt repairs.
WARNING
Untrained personnel operating the library may create dangerous
situations. This could lead to physical harm to the operator, data
loss, and/or disabling of the library system.
Please review and observe all safety statements concerning the
operation of the library.
Preface
Page 4
Plasmon AA16 - AA174 User Manual
Document Revision E
TABLE
OF
CONTENTS
PREFACE . . . . . . . . . . . . . . . . . . . . . . . . . . . . . . . . . . . . . . . . . . . . . . . . . 1
Copyright . . . . . . . . . . . . . . . . . . . . . . . . . . . . . . . . . . . . . . . . . . . . . . . . . . . . . . . . . . . . . .1
Disclaimer . . . . . . . . . . . . . . . . . . . . . . . . . . . . . . . . . . . . . . . . . . . . . . . . . . . . . . . . . . . . .1
Trademark Notices. . . . . . . . . . . . . . . . . . . . . . . . . . . . . . . . . . . . . . . . . . . . . . . . . . . . . . .1
Revision History . . . . . . . . . . . . . . . . . . . . . . . . . . . . . . . . . . . . . . . . . . . . . . . . . . . . . . . . .2
Conventions Used . . . . . . . . . . . . . . . . . . . . . . . . . . . . . . . . . . . . . . . . . . . . . . . . . . . . . . .3
WEEE Compliance . . . . . . . . . . . . . . . . . . . . . . . . . . . . . . . . . . . . . . . . . . . . . . . . . . . . . .3
Product Warranty . . . . . . . . . . . . . . . . . . . . . . . . . . . . . . . . . . . . . . . . . . . . . . . . . . . . . . . .4
TABLE OF CONTENTS . . . . . . . . . . . . . . . . . . . . . . . . . . . . . . . . . . . . . . . . 5
LIST OF FIGURES . . . . . . . . . . . . . . . . . . . . . . . . . . . . . . . . . . . . . . . . . . . 7
CHAPTER 1
PRODUCT OVERVIEW . . . . . . . . . . . . . . . . . . . . . . . . . . . . . . . . . . . . . . . . 9
General Information . . . . . . . . . . . . . . . . . . . . . . . . . . . . . . . . . . . . . . . . . . . . . . . . . . . . . .9
Library Models . . . . . . . . . . . . . . . . . . . . . . . . . . . . . . . . . . . . . . . . . . . . . . . . . . . . . . . . . . . . . 9
UDO Drive Type. . . . . . . . . . . . . . . . . . . . . . . . . . . . . . . . . . . . . . . . . . . . . . . . . . . . . . . .10
UDO30 Drive Cleaning Cartridge . . . . . . . . . . . . . . . . . . . . . . . . . . . . . . . . . . . . . . . . . . . . . . 10
UDO Media . . . . . . . . . . . . . . . . . . . . . . . . . . . . . . . . . . . . . . . . . . . . . . . . . . . . . . . . . . .11
Write Protecting UDO Media . . . . . . . . . . . . . . . . . . . . . . . . . . . . . . . . . . . . . . . . . . . . . . . . . 11
Plasmon UDO Media for Archive Appliance . . . . . . . . . . . . . . . . . . . . . . . . . . . . . . . . . . . . . . 12
Bar Code Label for UDO Media12
Media Care and Handling. . . . . . . . . . . . . . . . . . . . . . . . . . . . . . . . . . . . . . . . . . . . . . . . . . . . 13
Major Hardware Components . . . . . . . . . . . . . . . . . . . . . . . . . . . . . . . . . . . . . . . . . . . . .14
Front Panel Display . . . . . . . . . . . . . . . . . . . . . . . . . . . . . . . . . . . . . . . . . . . . . . . . . . . . . . . .
Mailslot . . . . . . . . . . . . . . . . . . . . . . . . . . . . . . . . . . . . . . . . . . . . . . . . . . . . . . . . . . . . . . . . . .
Drives . . . . . . . . . . . . . . . . . . . . . . . . . . . . . . . . . . . . . . . . . . . . . . . . . . . . . . . . . . . . . . . . . . .
Lift Lock Screw . . . . . . . . . . . . . . . . . . . . . . . . . . . . . . . . . . . . . . . . . . . . . . . . . . . . . . . . . . . .
Power Connector . . . . . . . . . . . . . . . . . . . . . . . . . . . . . . . . . . . . . . . . . . . . . . . . . . . . . . . . . .
Ethernet Connector . . . . . . . . . . . . . . . . . . . . . . . . . . . . . . . . . . . . . . . . . . . . . . . . . . . . . . . .
Media Store . . . . . . . . . . . . . . . . . . . . . . . . . . . . . . . . . . . . . . . . . . . . . . . . . . . . . . . . . . . . . .
Media Transport Element (MTE) . . . . . . . . . . . . . . . . . . . . . . . . . . . . . . . . . . . . . . . . . . . . . .
20
20
20
20
20
20
20
20
CHAPTER 2
LIBRARY INSTALLATION . . . . . . . . . . . . . . . . . . . . . . . . . . . . . . . . . . . . . 21
Getting Started. . . . . . . . . . . . . . . . . . . . . . . . . . . . . . . . . . . . . . . . . . . . . . . . . . . . . . . . .21
Unpacking the Library. . . . . . . . . . . . . . . . . . . . . . . . . . . . . . . . . . . . . . . . . . . . . . . . . . . . . . .
Library Position. . . . . . . . . . . . . . . . . . . . . . . . . . . . . . . . . . . . . . . . . . . . . . . . . . . . . . . . . . . .
Library Environment . . . . . . . . . . . . . . . . . . . . . . . . . . . . . . . . . . . . . . . . . . . . . . . . . . . . . . . .
External Power Requirements . . . . . . . . . . . . . . . . . . . . . . . . . . . . . . . . . . . . . . . . . . . . . . . .
21
21
21
21
Library Stabilizers . . . . . . . . . . . . . . . . . . . . . . . . . . . . . . . . . . . . . . . . . . . . . . . . . . . . . .22
Installing the AA16 - AA80 Stabilizers . . . . . . . . . . . . . . . . . . . . . . . . . . . . . . . . . . . . . . . . . . 22
Installing the AA174 Stabilizers . . . . . . . . . . . . . . . . . . . . . . . . . . . . . . . . . . . . . . . . . . . . . . . 23
Lift Lock Screw. . . . . . . . . . . . . . . . . . . . . . . . . . . . . . . . . . . . . . . . . . . . . . . . . . . . . . . . .24
Plasmon AA16 - AA174 User Manual
Document Revision E
Table of Contents
Page 5
Power Connection . . . . . . . . . . . . . . . . . . . . . . . . . . . . . . . . . . . . . . . . . . . . . . . . . . . . . .24
Power Cord Retainer . . . . . . . . . . . . . . . . . . . . . . . . . . . . . . . . . . . . . . . . . . . . . . . . . . . . . . . 25
Ethernet Connection . . . . . . . . . . . . . . . . . . . . . . . . . . . . . . . . . . . . . . . . . . . . . . . . . . . .27
Initial Power On . . . . . . . . . . . . . . . . . . . . . . . . . . . . . . . . . . . . . . . . . . . . . . . . . . . . . . . .27
Loading Media . . . . . . . . . . . . . . . . . . . . . . . . . . . . . . . . . . . . . . . . . . . . . . . . . . . . . . . . .27
Mailslot Media Loading. . . . . . . . . . . . . . . . . . . . . . . . . . . . . . . . . . . . . . . . . . . . . . . . . . . . . . 27
Bulk Loading Media . . . . . . . . . . . . . . . . . . . . . . . . . . . . . . . . . . . . . . . . . . . . . . . . . . . . . . . . 28
Identifying Storage Slots . . . . . . . . . . . . . . . . . . . . . . . . . . . . . . . . . . . . . . . . . . . . . . . . .29
Rack Mount Guidelines . . . . . . . . . . . . . . . . . . . . . . . . . . . . . . . . . . . . . . . . . . . . . . . . . .33
Required Tools . . . . . . . . . . . . . . . . . . . . . . . . . . . . . . . . . . . . . . . . . . . . . . . . . . . . . . . . . . . . 34
Rack Mount Kit . . . . . . . . . . . . . . . . . . . . . . . . . . . . . . . . . . . . . . . . . . . . . . . . . . . . . . . . . . . . 34
Rack Mount Installation . . . . . . . . . . . . . . . . . . . . . . . . . . . . . . . . . . . . . . . . . . . . . . . . . .36
Stabilizer Installation. . . . . . . . . . . . . . . . . . . . . . . . . . . . . . . . . . . . . . . . . . . . . . . . . . . . . . . . 37
Shelf Installation . . . . . . . . . . . . . . . . . . . . . . . . . . . . . . . . . . . . . . . . . . . . . . . . . . . . . . . . . . . 40
Library Installation . . . . . . . . . . . . . . . . . . . . . . . . . . . . . . . . . . . . . . . . . . . . . . . . . . . . . . . . . 44
Packing Instructions. . . . . . . . . . . . . . . . . . . . . . . . . . . . . . . . . . . . . . . . . . . . . . . . . . . . .50
APPENDIX A
SPECIFICATIONS . . . . . . . . . . . . . . . . . . . . . . . . . . . . . . . . . . . . . . . . . . . 55
Overall Library Specifications . . . . . . . . . . . . . . . . . . . . . . . . . . . . . . . . . . . . . . . . . . . . .55
APPENDIX B
SAFETY AGENCY STANDARDS . . . . . . . . . . . . . . . . . . . . . . . . . . . . . . . . . 59
FCC Notice . . . . . . . . . . . . . . . . . . . . . . . . . . . . . . . . . . . . . . . . . . . . . . . . . . . . . . . . . . .59
Industry Canada Notice per ICES-003. . . . . . . . . . . . . . . . . . . . . . . . . . . . . . . . . . . . . . .59
European Notice . . . . . . . . . . . . . . . . . . . . . . . . . . . . . . . . . . . . . . . . . . . . . . . . . . . . . . .59
Australia/New Zealand. . . . . . . . . . . . . . . . . . . . . . . . . . . . . . . . . . . . . . . . . . . . . . . . . . .60
Japan . . . . . . . . . . . . . . . . . . . . . . . . . . . . . . . . . . . . . . . . . . . . . . . . . . . . . . . . . . . . . . . .60
Product Safety Standards . . . . . . . . . . . . . . . . . . . . . . . . . . . . . . . . . . . . . . . . . . . . . . . .60
Laser Safety Notice . . . . . . . . . . . . . . . . . . . . . . . . . . . . . . . . . . . . . . . . . . . . . . . . . . . . .61
CDRH Regulations. . . . . . . . . . . . . . . . . . . . . . . . . . . . . . . . . . . . . . . . . . . . . . . . . . . . . .62
Power Cord Set Selection . . . . . . . . . . . . . . . . . . . . . . . . . . . . . . . . . . . . . . . . . . . . . . . .62
For the U.S. and Canada . . . . . . . . . . . . . . . . . . . . . . . . . . . . . . . . . . . . . . . . . . . . . . . . . . . . 62
For Germany and Continental Europe . . . . . . . . . . . . . . . . . . . . . . . . . . . . . . . . . . . . . . . . . . 62
Power Supply. . . . . . . . . . . . . . . . . . . . . . . . . . . . . . . . . . . . . . . . . . . . . . . . . . . . . . . . . .62
MOV Protection (all models) . . . . . . . . . . . . . . . . . . . . . . . . . . . . . . . . . . . . . . . . . . . . . .63
In Norway . . . . . . . . . . . . . . . . . . . . . . . . . . . . . . . . . . . . . . . . . . . . . . . . . . . . . . . . . . . . . . . . 63
In Sweden. . . . . . . . . . . . . . . . . . . . . . . . . . . . . . . . . . . . . . . . . . . . . . . . . . . . . . . . . . . . . . . . 63
In Finland . . . . . . . . . . . . . . . . . . . . . . . . . . . . . . . . . . . . . . . . . . . . . . . . . . . . . . . . . . . . . . . . 63
INDEX . . . . . . . . . . . . . . . . . . . . . . . . . . . . . . . . . . . . . . . . . . . . . . . . . . . 65
CONTACTING PLASMON . . . . . . . . . . . . . . . . . . . . . . . . . . . . . . . . . . . . . 67
Table of Contents
Page 6
Plasmon AA16 - AA174 User Manual
Document Revision E
L IST
OF
FIGURES
UDO Drive Types . . . . . . . . . . . . . . . . . . . . . . . . . . . . . . . . . . . . . . . . . . . . . . . . . . . . . . . . . . . . . . . .
UDO Media . . . . . . . . . . . . . . . . . . . . . . . . . . . . . . . . . . . . . . . . . . . . . . . . . . . . . . . . . . . . . . . . . . . . .
Write Protecting UDO Media . . . . . . . . . . . . . . . . . . . . . . . . . . . . . . . . . . . . . . . . . . . . . . . . . . . . . . . .
Type 2 Barcode Label Format and Placement . . . . . . . . . . . . . . . . . . . . . . . . . . . . . . . . . . . . . . . . . .
AA16 - AA32 Libraries, Front View . . . . . . . . . . . . . . . . . . . . . . . . . . . . . . . . . . . . . . . . . . . . . . . . . . .
AA16 - AA32 Libraries, Rear View . . . . . . . . . . . . . . . . . . . . . . . . . . . . . . . . . . . . . . . . . . . . . . . . . . .
AA16 - AA32 Libraries, Inside View. . . . . . . . . . . . . . . . . . . . . . . . . . . . . . . . . . . . . . . . . . . . . . . . . . .
AA80 - AA174 Libraries, Front View . . . . . . . . . . . . . . . . . . . . . . . . . . . . . . . . . . . . . . . . . . . . . . . . . .
AA80 - AA174 Libraries, Rear View . . . . . . . . . . . . . . . . . . . . . . . . . . . . . . . . . . . . . . . . . . . . . . . . . .
AA80 - AA174 Libraries, Inside View. . . . . . . . . . . . . . . . . . . . . . . . . . . . . . . . . . . . . . . . . . . . . . . . . .
AA16 - AA80 Side Stabilizers . . . . . . . . . . . . . . . . . . . . . . . . . . . . . . . . . . . . . . . . . . . . . . . . . . . . . . .
AA174 Front Stabilizer. . . . . . . . . . . . . . . . . . . . . . . . . . . . . . . . . . . . . . . . . . . . . . . . . . . . . . . . . . . . .
AA174 Side Stabilizers . . . . . . . . . . . . . . . . . . . . . . . . . . . . . . . . . . . . . . . . . . . . . . . . . . . . . . . . . . . .
Lift Lock and Cable Connectors for AA16 - AA174 Libraries. . . . . . . . . . . . . . . . . . . . . . . . . . . . . . . .
Installing the Power Cord Retainer (a) . . . . . . . . . . . . . . . . . . . . . . . . . . . . . . . . . . . . . . . . . . . . . . . .
Installing the Power Cord Retainer (b) . . . . . . . . . . . . . . . . . . . . . . . . . . . . . . . . . . . . . . . . . . . . . . . .
Installing the Power Cord Retainer (c). . . . . . . . . . . . . . . . . . . . . . . . . . . . . . . . . . . . . . . . . . . . . . . . .
Loading Media Using the Mailslot . . . . . . . . . . . . . . . . . . . . . . . . . . . . . . . . . . . . . . . . . . . . . . . . . . . .
AA16 Slot Diagram . . . . . . . . . . . . . . . . . . . . . . . . . . . . . . . . . . . . . . . . . . . . . . . . . . . . . . . . . . . . . . .
AA32 Slot Diagram . . . . . . . . . . . . . . . . . . . . . . . . . . . . . . . . . . . . . . . . . . . . . . . . . . . . . . . . . . . . . . .
AA80 Slot Diagram . . . . . . . . . . . . . . . . . . . . . . . . . . . . . . . . . . . . . . . . . . . . . . . . . . . . . . . . . . . . . . .
AA174 Slot Diagram . . . . . . . . . . . . . . . . . . . . . . . . . . . . . . . . . . . . . . . . . . . . . . . . . . . . . . . . . . . . . .
Packing the AA16 - AA174 Libraries (a) . . . . . . . . . . . . . . . . . . . . . . . . . . . . . . . . . . . . . . . . . . . . . . .
Packing the AA16 - AA174 Libraries (b) . . . . . . . . . . . . . . . . . . . . . . . . . . . . . . . . . . . . . . . . . . . . . . .
Packing the AA16 - AA174 Libraries (c) . . . . . . . . . . . . . . . . . . . . . . . . . . . . . . . . . . . . . . . . . . . . . . .
Packing the AA16 - AA174 Libraries (d) . . . . . . . . . . . . . . . . . . . . . . . . . . . . . . . . . . . . . . . . . . . . . . .
Packing the AA16 - AA174 Libraries (e) . . . . . . . . . . . . . . . . . . . . . . . . . . . . . . . . . . . . . . . . . . . . . . .
Packing the AA16 - AA174 Libraries (f). . . . . . . . . . . . . . . . . . . . . . . . . . . . . . . . . . . . . . . . . . . . . . . .
Packing the AA16 - AA174 Libraries (g) . . . . . . . . . . . . . . . . . . . . . . . . . . . . . . . . . . . . . . . . . . . . . . .
Packing the AA16 - AA174 Libraries (h) . . . . . . . . . . . . . . . . . . . . . . . . . . . . . . . . . . . . . . . . . . . . . . .
Plasmon A16 - A174 User Manual
Document Revision E
10
11
11
12
14
15
16
17
18
19
22
23
23
24
25
26
26
27
29
30
31
32
50
51
51
52
52
53
53
54
List of Figures
Page 7
List of Figures
Page 8
Plasmon AA16 - AA174 User Manual
Document Revision E
C HAPTER 1
P RODUCT OVERVIEW
General Information
The RoHS compliant Plasmon Archive ApplianceTM is a Network Attached Storage (NAS) device
providing long term secure storage for archived and fixed content data. It combines the performance
benefits of network attached RAID with the reliability and robustness of Plasmon UDO® (Ultra Density
Optical) optical storage. The Archive Appliance includes a SATA RAID cache, a Plasmon AA16 AA174 optical library with UDO drives and media, and an embedded server running enterprise class
storage management software.
The Plasmon AA16 - AA174 libraries make multiple UDO media available to computer systems for
reading or writing. These libraries have capacities ranging from 16 to 174 media, providing up to
10.44TB of data storage. Media may be quickly added or removed through an automated mailslot
located above the library’s front door. These libraries have a media transport element (MTE) with a
dual picker, which can move two media simultaneously, to make rapid media exchanges and provide
fast performance in a multi-user environment.
Library Models
This manual covers the following Plasmon libraries:
Table 1. AA16 - AA174 Library Models
Model
Maximum Media Capacity
MAX Drive
Capacity
AA16
16
2
AA32
32
2
AA80
72
4
AA80
80
2
AA174
158
6
AA174
166
4
AA174
174
2
These libraries are available configured for up to two drives, up to four drives, or up to six drives. When
drive capacity is increased, some media storage is removed.
Plasmon AA16 - AA174 User Manual
Document Revision E
Product Overview
Page 9
UDO Drive Type
The Plasmon Archive Appliance can have either UDO30 or UDO60, but not both drive types installed.
The drive type is indicated on the drive bezel, visible inside the library, as shown in the pictures below.
The drives are also labeled by type inside the front door of the libraries. UDO30 drives read and write
only 30GB media. UDO60 drives read and write 60GB media, and can read 30GB media.
UDO30GB
UDO60GB
Figure 1. UDO Drive Types
UDO30 Drive Cleaning Cartridge
A special Plasmon UDO30GB Drive Cleaning Cartridge is shipped with all Archive Appliances. This
cartridge should be used only as recommended by a Plasmon support technician, and never in a 60GB
UDO drive. It provides a dry, contact cleaning method. No liquid or cleaning solution of any kind should
be used with this cartridge.
The UDO60 drives are automatically self cleaning, and do not require a cleaning cartridge.
After each use, a check box must be marked on the appropriate side of the cartridge. When all check
boxes are marked, the cartridge must be retired.
There is a demonstration/presentation explaining how to use the Plasmon UDO drive cleaning
cartridge at http://www.plasmontech.com/customer/player.html/.
Product Overview
Page 10
Plasmon AA16 - AA174 User Manual
Document Revision E
UDO Media
The Plasmon AA16 - AA174 libraries use UDO media with either 30GB or 60GB capacity, depending
on drive types. These are available in true Write Once, Rewritable, and Compliant Write Once media
types. Compliant Write Once media provides for selective data destruction for security purposes.
UDO media is not compatible with MO drives, and MO media is not compatible with UDO drives. The
media transport element (MTE) in the library identifies the media type and does not try to insert
incorrect media into a drive.
Data is written to and read from a disk enclosed within a carrier cartridge. A barcode label on the
cartridge identifies it to the library system software.
Figure 2. UDO Media
Write Protecting UDO Media
To write protect one side of the media, slide the tab on that side in the direction of the protect arrow as
shown in the figure below. There is a write protect tab on each side of the disk. When a side is
protected, the Write Protect window is open.
Write Protect Tab
Write Protect Window
Figure 3. Write Protecting UDO Media
Plasmon AA16 - AA174 User Manual
Document Revision E
Product Overview
Page 11
Plasmon UDO Media for Archive Appliance
Plasmon supports UDO media purchased from Plasmon only. UDO media purchased from Plasmon
for Archive Appliance has a unique bar code label using seven characters.
Bar Code Label for UDO Media
The bar code scanner supports Code 39 bar code symbology and the Biased - Double Bar Code (Type
2) label format.
Never place a label anywhere on the media except in the specified “label area”, as this may interfere
with the proper handling of the media in the drive or the media transport element (MTE).
CAUTION
Do not write on, cover, or obscure the bar codes on a media.
Doing so may cause the system to malfunction.
Biased - Double Barcode (Type 2) is the only appropriate label format for UDO libraries.
The barcode must be approximately centered along the outside edge of the media so the
alphanumeric characters in the center read properly when the A side of the media is up. This barcode
configuration is done with two barcodes - one on each end of the label. The Label is 4.9" (12.5 cm)
long with seven characters.
Figure 4. Type 2 Barcode Label Format and Placement
Product Overview
Page 12
Plasmon AA16 - AA174 User Manual
Document Revision E
Media Care and Handling
To maintain maximum reliability, the operator should take the time to inspect each media used.
CAUTION
Always condition the media to the normal operating temperature
of the room before using.
Improper handling or an inappropriate environment can damage the media. To ensure continued
reliability:
•
When media is loaded into the library, or when handling media, ensure that the cartridge case is
clean. Dirty media cartridges can cause failures in loading or loss of data. If a cartridge case is
dirty, wipe with a lint free cloth.
•
Do not carry media loosely (for example, in a box or basket). Media should be carefully and
securely packed for transport.
•
Do not load damaged media into a drive or a library. Damaged media can interfere with read/write
reliability.
•
Never touch the disk. Opening the cartridge door and touching the disk may interfere with read/
write reliability.
•
Do not expose the media to moisture or direct sunlight.
Plasmon AA16 - AA174 User Manual
Document Revision E
Product Overview
Page 13
Major Hardware Components
The following figures show the locations of major library hardware components. In these figures the
protective panels and outer skin of the library are removed.
A brief description of these components appears at the end of this section.
Front Panel Display
Mailslot
UDO Drive Bays
Figure 5. AA16 - AA32 Libraries, Front View
Product Overview
Page 14
Plasmon AA16 - AA174 User Manual
Document Revision E
Ethernet Interface
Lift Lock Screw
Power Connector
Figure 6. AA16 - AA32 Libraries, Rear View
Plasmon AA16 - AA174 User Manual
Document Revision E
Product Overview
Page 15
Media Store
Media Transport
Element (MTE)
includes bar code
scanner
Figure 7. AA16 - AA32 Libraries, Inside View
Product Overview
Page 16
Plasmon AA16 - AA174 User Manual
Document Revision E
Front Panel Display
Mailslot
UDO Drive Bays
(configured for
two or four drives)
Figure 8. AA80 - AA174 Libraries, Front View
Plasmon AA16 - AA174 User Manual
Document Revision E
Product Overview
Page 17
Ethernet
Connector
Lift Lock Screw
Power
Connector
Figure 9. AA80 - AA174 Libraries, Rear View
Product Overview
Page 18
Plasmon AA16 - AA174 User Manual
Document Revision E
Media Store
Media Transport
Element (MTE)
includes bar code
scanner
Figure 10. AA80 - AA174 Libraries, Inside View
Plasmon AA16 - AA174 User Manual
Document Revision E
Product Overview
Page 19
Front Panel Display
The front panel display consists of the keypad and display window, which provide the operator
interface to the system. Also called the operator panel, it contains the library power on/off switch and is
used to interface with the library and to display user related status.
Mailslot
The automated mailslot is capable of importing and exporting single media while the library is on-line.
Drives
The drives used in the library allow reading and writing of data. They are fully tested to work with the
library. This appliance can use either UDO30 or UDO60 drives, but not both.
Lift Lock Screw
The lift lock screw secures the MTE during shipment or whenever moving the library.
Power Connector
The power connector is used to supply power to the library.
Ethernet Connector
The Ethernet connector is the network interface.
Media Store
The media store holds each media in place. It consists of vertically arranged plates with plastic
grooved guide panels that hold each media.
Media Transport Element (MTE)
The media transport element (MTE) moves media between storage locations and the drives or the
mailslot, and consists of the dual picker and flip assembly.
Product Overview
Page 20
Plasmon AA16 - AA174 User Manual
Document Revision E
C HAPTER 2
L IBRARY INSTALLATION
Getting Started
This chapter provides a guide to installing the Plasmon AA16 - AA174 libraries and the procedures
necessary to quickly get a library on-line.
Unpacking the Library
Save all packing material in case it is ever necessary to ship the library. Read the section in this
chapter describing the Lift Lock Screw before powering on the Library
Library Position
Position the library in a location that allows the front door to open completely without obstruction. Allow
a minimum three inch clearance at the back for ventilation. Unless the library is rack mounted, install
the stabilizers following instructions provided later in this chapter. The library functions properly when
sitting on a floor with no more than a 3/8” (0.9525cm) rise or fall over a 36" (91.44cm) run.
To mount the library in a standard 19" rack, refer to the Rack Mount Guidelines section later in this
chapter before proceeding. Skip the Library Stabilizers section as they are not required in a rack
mount.
Library Environment
To ensure long term reliability, operate the library only between 10° to 32°C (50° to 90°F) and 10% to
90% relative humidity. The media and drives require a clean environment. Excessive dust and dirt can
lead to data loss, and increase service calls.
External Power Requirements
The library requires an external power source with 100 to 240 VAC (the library power supply is autoranging), at 50 to 60 Hz, and 15 A branch circuit protection.
CAUTION
To prevent the possibility of robotic errors during a pick or put
operation with loss of AC power, a UPS is required.
Plasmon AA16 - AA174 User Manual
Document Revision E
Library Installation
Page 21
Library Stabilizers
The Plasmon AA16 - AA174 libraries ship with stabilizers for each unit. The stabilizers prevent the
library from tipping due to accidental force.
WARNING
In order to comply with UL60950, these stabilizers must be
installed.
Installing the AA16 - AA80 Stabilizers
Included in the stabilizer kit are:
•
Four side stabilizers
To install the four side stabilizers (two on each side):
1. Insert the stabilizers into the channels on the bottom of the library chassis as shown in the
picture below. Push them in until they snap into place.
Latch Release Buttons
Figure 11. AA16 - AA80 Side Stabilizers
2. To remove the stabilizers, depress the latch release buttons and pull outwards.
Library Installation
Page 22
Plasmon AA16 - AA174 User Manual
Document Revision E
Installing the AA174 Stabilizers
Included in the stabilizer kit are:
•
Four side stabilizers
•
One front stabilizer
•
Three 8-32 phillips head screws
To Install the front stabilizer:
1. Open the front door of the library.
2. Attach the front stabilizer to the bottom edge of the library chassis using the three 8-32
phillips head screws as shown in the picture below.
Figure 12. AA174 Front Stabilizer
To install the four side stabilizers (two on each side):
1. Insert the stabilizers into the channels on the bottom of the library chassis as shown in the
picture below. Push them in until they snap into place.
Latch Release Buttons
Figure 13. AA174 Side Stabilizers
2. To remove the stabilizers, depress the latch release buttons and pull outwards.
Plasmon AA16 - AA174 User Manual
Document Revision E
Library Installation
Page 23
Lift Lock Screw
The AA16 - AA174 libraries are shipped with the MTE locked in place by the lift lock screw. The lift lock
screw is located at the back of the library near the bottom. Leave the lift lock screw engaged until the
library is stable and in its final position. Always re-engage the lift lock screw to move the library.
CAUTION
Before applying power to the library the lift lock screw must be
turned counterclockwise all the way out (the screw remains in
place). Failure to do so may seriously damage the library.
SCSI
Lift Lock
Diagnostics
UPS
Power
Ethernet
(use right most
connector)
Figure 14. Lift Lock and Cable Connectors for AA16 - AA174 Libraries
Power Connection
Route the power cable to the power connector located at the lower right in the back of the library.
The power cable can be plugged into a standard 120 volt to 240 volt wall outlet. The library system
uses an auto-ranging power supply.
Do not use an extension cord. The unit must be located next to the AC outlet, and the outlet must be
easily accessible. In the event an emergency power cutoff is required, pull the plug from the AC socket.
Library Installation
Page 24
Plasmon AA16 - AA174 User Manual
Document Revision E
Power Cord Retainer
A power cord retainer is provided for installations where there is a chance the cord could be accidently
disconnected from the library. Follow these steps to install the retainer:
1. Remove the two 6-32 flat head phillips screws mounting the AC power receptacle at the
back of the library.
Mounting
Screws
Figure 15. Installing the Power Cord Retainer (a)
Plasmon AA16 - AA174 User Manual
Document Revision E
Library Installation
Page 25
2. Place the retainer as shown and attach with the two 6-32 pan head phillips screws
provided with the retainer. Do not tighten these two screws completely until the clamp is
adjusted to the plug.
Figure 16. Installing the Power Cord Retainer (b)
3. Insert the power cord into the AC receptacle. Secure the cord to the library by tightening
the retainer clamp with a 3/16" wrench. Now completely tighten the two mounting screws.
Figure 17. Installing the Power Cord Retainer (c)
Library Installation
Page 26
Plasmon AA16 - AA174 User Manual
Document Revision E
Ethernet Connection
The library communicates with a network through an Ethernet connector located above the lift lock
screw at the back of the library. Route the Ethernet cable to this connector. A CAT6 cable is required
for Gigabit networks.
For network setup, please refer to the Archive Appliance Quick Start Guide.
Initial Power On
Press the power switch located on the front panel display to turn the library on.
The library takes a few minutes to initialize. When the process is completed, the front panel display
indicates that the library is on-line and ready for operation.
After initial power on, the Archive Appliance software must be configured. Please refer to the software
Quick Start Guide on the provided Resource CD.
Loading Media
Use only Plasmon approved UDO media in the library.
Mailslot Media Loading
Plasmon recommends loading media into the library using library management software and the
automated mailslot. This method insures proper recognition of the media by the library.
Figure 18. Loading Media Using the Mailslot
Plasmon AA16 - AA174 User Manual
Document Revision E
Library Installation
Page 27
Bulk Loading Media
To bulk load media into the library, power down the library and unplug the power cord. Remove the
painted sheet metal side skin (left side, facing the front of the library) and manually insert media into
the storage slots. The media is recognized after Archive Appliance boots up and scans for new media.
When bulk loading media, refer to the slot diagrams on the following pages to ensure media is not
loaded into the Utility Slots. These two slots must be left empty for library operation.
Care must be taken while bulk loading to avoid damage to the library’s internal mechanisms, sensors,
and wiring.
WARNING
Turn off the library and unplug the power cord from the power
source before removing or replacing components. Failure to do so
may result in possible electrical shock and/or damage to the
library.
CAUTION
Plasmon libraries contain sensitive electrical components. To
avoid ESD related damage, ensure proper grounding and antistatic measures are in place (for example, wrist straps and antistatic mats).
Library Installation
Page 28
Plasmon AA16 - AA174 User Manual
Document Revision E
Identifying Storage Slots
Inside each library is a diagram of the slot numbering scheme for that particular model. The following
diagrams also show this information.
The Utility Slots are not for media storage. They are used by the MTE to manipulate media.
Mailslot
Utility Slot
Utility Slot
1
2
3
14
15
16
Drive 2
Drive 1
AA16 Slot Numbering
Figure 19. AA16 Slot Diagram
Plasmon AA16 - AA174 User Manual
Document Revision E
Library Installation
Page 29
Mailslot
Utility Slot
Utility Slot
1
2
3
-
30
31
32
Drive 2
Drive 1
AA32 Slot Numbering
Figure 20. AA32 Slot Diagram
Library Installation
Page 30
Plasmon AA16 - AA174 User Manual
Document Revision E
72
71
70
-
Mailslot
Utility Slot
Utility Slot
1
2
3
-
72
71
70
-
Drive 4
Drive 3
Drive 2
Drive 1
AA80 (4 drives) Slot Numbering
Utility Slot
Utility Slot
1
2
3
-
22
23
24
22
23
24
27
26
25
Mailslot
27
26
25
73
80
Drive 2
Drive 1
AA80 (2 drives) Slot Numbering
Figure 21. AA80 Slot Diagram
Plasmon AA16 - AA174 User Manual
Document Revision E
Library Installation
Page 31
158
157
156
-
Mailslot
Utility Slot
Utility Slot
1
2
3
-
158
157
156
-
59
61
62
Drive 6
Drive 5
65
64
63
Drive 4
Drive 3
Drive 2
Drive 1
AA174 (6 drives) Slot Map
65
64
63
Mailslot
158
157
156
-
Utility Slot
Utility Slot
1
2
3
-
59
61
62
159
166
Drive 4
Mailslot
Utility Slot
Utility Slot
1
2
3
-
59
61
62
159
65
64
63
Drive 3
Drive 2
Drive 1
AA174 (4 drives) Slot Map
174
Drive 2
Drive 1
AA174 (2 drives) Slot Map
Figure 22. AA174 Slot Diagram
Library Installation
Page 32
Plasmon AA16 - AA174 User Manual
Document Revision E
Rack Mount Guidelines
These guidelines provide information on mounting an AA32 - AA80 library into an Electronics Industry
Association (EAI 310-D) standard 19” (48.3 cm) rack. The standard 19" rack must have between 24"
and 40" (61 - 101.6 cm) between front and back mounting columns to provide sufficient depth for the
library. The library and rack mounting hardware combined takes up 19U of rack space. In this
document, one rack unit (1U) equals 1.75" (4.445 cm).
If the unit is installed in a closed or multi-rack assembly, refer to the following guidelines:
•
The operation temperature of the rack environment may be greater than the ambient temperature.
Be sure to install the unit in an environment that is compatible with the maximum rated ambient
temperature. See Appendix A Specifications in the User Manual.
•
When mounting the equipment in the rack, make sure mechanical installation is level to avoid a
hazardous condition. The rack must be specified to safely support the combined weight of all
equipment.
- Do not mount library more than 36" (91.4 cm) off the floor. Plasmon recommends
mounting in the lowest position. Libraries mounted no more than 14" (35.6 cm) off
the floor can be safely installed by a single Field Engineer as described in this
instruction.
- The rack must weigh at least 200 lbs (90.7 kg), unloaded, for a stable installation
into a non-anchored cabinet.
- In the pulled out service position, the library and mounting shelf is a maximum
weight of 250 lbs (113.4 kg) on a 24 in (61 cm) cantilever arm. Cabinets must either
be anchored per manufacturer recommended method, or an adequate
manufacturer or Plasmon installed stabilizer must be engaged before the library can
be pulled out into service position.
•
When connecting the equipment to the supply circuit, check equipment nameplate ratings to avoid
overloading circuits that may cause damage to over-current protection devices and supply wiring.
•
Maintain reliable grounding for rack-mounting equipment. Pay particular attention to supply
connections.
•
Allow sufficient air circulation or space between units when installed in a closed or multi-unit rack
assembly to ensure the operating ambient temperature of the rack environment is not greater
than that specified for the library in Appendix A in the User Manual.
•
The unit is designed to use a three pronged grounding type plug. Equipment grounding ensures
safe operation. Do not interfere with or remove the grounding means, and verify equipment is
reliably grounded when mounted within a rack.
WARNING
Use safe lifting procedures when installing the library on the rack
mount shelf. The libraries weigh up to 110 lbs (50 kg) empty and
stripped down for installation as shown in this instruction.
Plasmon AA16 - AA174 User Manual
Document Revision E
Library Installation
Page 33
Required Tools
The following tools are required to install the rack mount assembly:
•
#1 and #2 phillips head screwdrivers
•
7/16” wrench (box end preferred)
•
Pliers
Rack Mount Kit
Table 2. Rack Mount Kit Part Numbers/Descriptions
Part Number
Library Installation
Page 34
Description
920-101913-00
Combined Kit with Shelf and Stabilizer
920-101805-00
Rack Mount Shelf Kit only
310-101802-00
Shelf
490-101801-00
Shelf Slides (2)
310-101803-00
Front Mounting Brackets (2)
310-101804-00
Back Mounting Brackets (2)
400-101904-00
Clip-on Cage Nuts, 1/4-20 (4)
400-101905-00
Phillips Pan Head Screws, 1/4-20 x 5/8 (12)
400-101906-00
Phillips Pan Head Screws, 1/4-20 x 3/8 (6)
400-101686-00
Phillips Pan Head Screws, 10-32 x .500, LW (8)
400-101201-00
Phillips Pan Head Screws, 8-32 x 3/8 (10)
97707512-00
S-style Clip-on Nuts, 10-32 (4)
490-101928-00
Shelf Handle
920-101834-00
Rack Mount Stabilizer Kit only
370-101833-00
Stabilizer Frame
310-101831-00
Back Mounting Brackets (2)
370-101832-00
Stabilizer Legs (2)
400-101907-00
Leveling Feet (2)
400-101909-00
Carriage Bolts, 1/4-20 x 2 (4)
400-101908-00
Flange Nuts. 1/4-20 (4)
400-101686-00
Phillips Pan Head Screws, 10-32 x .500, LW (8)
97707512-00
S-style Clip-on Nuts, 10-32 (12)
Plasmon AA16 - AA174 User Manual
Document Revision E
Part Number
Description
920-101693-00
Filler Panel Kit (for Gx24 - Gx32 or AA32)
310-101681-00
Filler Panel
400-101686-00
Phillips Pan Head Screws, 10-32 x .500, LW (4)
400-101680-00
Screws, 6-32 x .250, undercut (2)
Plasmon AA16 - AA174 User Manual
Document Revision E
Library Installation
Page 35
Rack Mount Installation
In this rack mount, the library attaches to a shelf which is mounted to the vertical rails of the rack. To
enable library service access, the shelf pulls out from the front of the rack. If the rack is not selfstabilized, a stabilizer must be installed below the library shelf to make this possible.
There are three stages to this rack mount installation:
•
Stabilizer Installation (if rack is not self-stabilized)
•
Library Shelf Installation
•
Library Installation
WARNING
To safely pull the shelf out to service the library, as shown above,
the rack mount cabinet must either be secured to the floor or
cabinet stabilization must be installed and engaged. Failure to do
so could result in injury. Plasmon is not responsible for injury due
to an unstable cabinet.
Library Installation
Page 36
Plasmon AA16 - AA174 User Manual
Document Revision E
Stabilizer Installation
The stabilizer mechanism is required, unless the rack is self-stabilized, so the library shelf can be
safely pulled out of the rack for servicing the library. Mount the stabilizer into the lowest 1U position in
the rack. The stabilizer feet adjust between 3 1/2” and 6 1/4” (8.9 - 15.9 cm) from the bottom of the
mounting rails.
Stabilizer Back Brackets
Stabilizer Frame
Stabilizer Feet
Plasmon AA16 - AA174 User Manual
Document Revision E
Library Installation
Page 37
1. First, clip three 10-32 s-nuts into the lowest 1U position on all four rack rails.
10-32 S-Nuts
2. Mount the stabilizer back brackets (see rear view picture below) to the rack using three
10-32 x 1/2 phillips pan head screws with washers for each bracket as shown below.
10-32 x 1/2 Pan Head
Screws with Washers
Rear View
Library Installation
Page 38
Plasmon AA16 - AA174 User Manual
Document Revision E
3. Mount the stabilizer frame to the back brackets using two 1/4-20 x 2 carriage bolts and
two 1/4-20 flange nuts on each side. Don’t tighten the nuts until the front of the stabilizer
frame is secure. Secure the front of the stabilizer frame to the rack rails using three 10-32
x 1/2 phillips pan head screws with washers for each side. Then tighten the flange nuts on
the carriage bolts.
1/4-20 x 2 Carriage Bolts
10-32 x 1/2 Pan Head
Screws with Washers
Front View
Plasmon AA16 - AA174 User Manual
Document Revision E
Library Installation
Page 39
Shelf Installation
The library is mounted on a shelf with sliders, so it can be pulled out from the rack for servicing. The
shelf requires 2U for installation. Plasmon recommends mounting the shelf just above the stabilizer
frame to keep the weight at the bottom of the rack. Do not mount the shelf more than 36" (91.4 cm) off
the floor.
Shelf Back Brackets
Library Shelf
Library Installation
Page 40
Plasmon AA16 - AA174 User Manual
Document Revision E
1. Install two 10-32 s-nuts on each of the front rack rails. Position the s-nuts on the center
hole of each of the 2U spaces required for the shelf.
10-32 S-Nuts
Front View
2. Install the back brackets (see rear view picture below) using two 10-32 x 1/2 phillips pan
head screws with washers on each bracket.
10-32 x1/2
Pan Head Screws
with Washers
Rear View
Plasmon AA16 - AA174 User Manual
Document Revision E
Library Installation
Page 41
3. Insert the stabilizer feet into the stabilizer frame and adjust the feet to rest firmly on the
floor (unless the rack is self-stabilized). This helps support the shelf during installation.
4. Secure the shelf to the front rack rails using two 10-32 x 1/2 phillips pan head screws with
washers on each side.
10-32 x 1/2 Pan Head
Screws with Washers
5. Screw the sliders to the back bracket using two 1/4-20 x 5/8 phillips pan head screws for
each side. These screws go into 1/4-20 cage nuts which slide in a groove on the back
bracket to match up with the mounting holes in the slider.
1/4-20 x 5/8 Pan Head Screws
Library Installation
Page 42
1/4-20 Cage Nut
Slides to align with hole.
Plasmon AA16 - AA174 User Manual
Document Revision E
If the front to back distance between mounting rails is less than 34" (86.4 cm), the
mounting screw position falls behind the second section of the slider. A cut-out hole in
the slider is provided for this. To access the cut-out hole, pull the shelf all the way out
and pull back on the second slider section to line up the cut-out with the mounting
hole in the back bracket,
Second Slider Section
Plasmon AA16 - AA174 User Manual
Document Revision E
Cut-out Hole
Library Installation
Page 43
Library Installation
The library is mounted to the shelf. The casters, stabilizer channels, and any other hardware must be
removed from the bottom of the library for rack mounting. The bottom of the library must be flat.
1. Ensure the Lift Lock Screw at the lower back of the library is engaged, and remove the
front door, top skin, and both side skins from the library. Remove all media.
2. Place the heavy cardboard angle piece from the packaging on the floor as shown below
to protect the back of the library, and the LEDs on AA models. Lock the rear casters and
carefully tilt the library onto its back to expose and completely remove the four casters,
caster adapter plates if applicable, and the two frame channels..
Casters
Frame Channels
Heavy Cardboard
Angle Piece
3. Carefully tilt the library back to the upright position.
4. Insert the stabilizer feet into the stabilizer frame and adjust the feet to rest firmly on the
floor (unless the rack is self-stabilized).
Library Installation
Page 44
Plasmon AA16 - AA174 User Manual
Document Revision E
5. Pull the shelf fully out and clamp the rails on both sides behind the shelf, as shown below,
so it cannot slide.
6. Position the library about 16" (41 cm) in front of the shelf as shown in the picture below.
The bottom of the library should face the shelf. Use the heavy cardboard packing piece to
protect the back of the library.
Plasmon AA16 - AA174 User Manual
Document Revision E
Library Installation
Page 45
7. Carefully tilt the library over so the bottom makes contact with the shelf.
8. Using proper lifting posture, slid the library onto the shelf.
Library Installation
Page 46
Plasmon AA16 - AA174 User Manual
Document Revision E
9. Turn the library around so it faces out and place the library squarely on the shelf matching
up the empty caster mounting holes with the holes in the shelf.
10. To make it easier to line up the mounting holes, look through the holes on the right side
of the library from the top as shown below. Secure the library by placing 8-32 x 3/8 phillips
pan head screws through the shelf from the bottom into the two inside holes at all four
corners.
Plasmon AA16 - AA174 User Manual
Document Revision E
Library Installation
Page 47
11. Replace the top skin, both side skins, and the front door on the library.
12. Slide the library shelf back into the rack, and tighten the two locking thumb screws to
keep it in place. Remove and store the stabilizer feet under the shelf for future use.
Locking Thumb Screws
Store Stabilizer Feet
Library Installation
Page 48
Plasmon AA16 - AA174 User Manual
Document Revision E
13. The narrower library chassis should sit to the right side of the shelf. An optional filler
plate is available.
Plasmon AA16 - AA174 User Manual
Document Revision E
Library Installation
Page 49
Packing Instructions
This section is provided in case it is necessary to ship the library back to Plasmon. These procedures
must be followed.
CAUTION
Plasmon libraries must be shipped in the original packaging.
Shipping a unit in anything other than the manufacturers
packaging voids the warranty.
The library must be parked before packing the system (refer to the Archive Appliance Administrator
Guide). Remove all media before shipping the library. Media can fall out of the storage elements during
shipment.
The pictures in the following instructions show an AA32, but all models pack the same.
Follow these steps to pack the library for shipping:
1. When the library is powered off, the media transport element (MTE) moves to bottom of
library. Remove the power cable from the library.
2. Turn the lift lock screw, located at the lower left in back of the library, all the way in using
gentle pressure (do not force). This protects the MTE while moving the library
CAUTION
The lift lock screw, shown below, must be turned clockwise all the
way in using gentle pressure (do not force) before moving the
library. Failure to do so may seriously damage the library.
Lift Lock
Screw
Figure 23. Packing the AA16 - AA174 Libraries (a)
3. If library stabilizers are installed, remove them.
Library Installation
Page 50
Plasmon AA16 - AA174 User Manual
Document Revision E
4. Place skid ramp on floor in front of packaging skid. Connect the ramp to the packing skid.
Figure 24. Packing the AA16 - AA174 Libraries (b)
5. Insert original packing foam insert into the mailslot as shown below, and using two
people, roll library onto packing skid. Back of library goes onto skid first.
Figure 25. Packing the AA16 - AA174 Libraries (c)
Plasmon AA16 - AA174 User Manual
Document Revision E
Library Installation
Page 51
6. Place bubble wrap to cover top and front of library.
Figure 26. Packing the AA16 - AA174 Libraries (d)
7. Cover the library with the anti-static bag.
Figure 27. Packing the AA16 - AA174 Libraries (e)
Library Installation
Page 52
Plasmon AA16 - AA174 User Manual
Document Revision E
8. Remove ramp from skid and place upright in front of library with the foam side against the
library. Tape it in place.
Figure 28. Packing the AA16 - AA174 Libraries (f)
9. Fit top foam pieces over library, and place accessories box on top of foam.
Figure 29. Packing the AA16 - AA174 Libraries (g)
Plasmon AA16 - AA174 User Manual
Document Revision E
Library Installation
Page 53
10. Place cardboard sleeve and lid over the library.
Figure 30. Packing the AA16 - AA174 Libraries (h)
11. Finally, strap box to skid for shipping.
Library Installation
Page 54
Plasmon AA16 - AA174 User Manual
Document Revision E
APPENDIX A
SPECIFICATIONS
Overall Library Specifications
The following table provides information about the Plasmon AA16 - AA174 libraries. These
specifications are subject to change without notice.
Table 3. AA16 - AA174 Library Specifications
Specification
AA16
AA32
AA80
(4 drives)
AA80
(2 drives)
Library Capacity (UDO60)
960GB
1.92TB
4.32TB
4.8TB
Library Capacity (UDO30)
480GB
960GB
2.16TB
2.4TB
16
32
72
80
Up to 2
Up to 2
Up to 4
Up to 2
Drive Type Supported
UDO30 or
UDO60
UDO30 or
UDO60
UDO30 or
UDO60
UDO30 or
UDO60
Library Reliability (MSBF)
>2,000,000
>2,000,000
>2,000,000
>2,000,000
<7 sec.
<7 sec.
<7.3 sec.
<7.3 sec.
Dual
Dual
Dual
Dual
Single
Single
Single
Single
243 Watts
371 BTU/hr
243 Watts
371 BTU/hr
294 Watts
414 BTU/hr
257 Watts
380 BTU/hr
Number of Media Storage Slots
Number of Drives
Robotics Avg. Access Time
Picker Type
Automated Mailslot
Max Power Consumption
Max Power Dissipation
Library Interface
10/100 Gigabit Ethernet (copper)
Options
Windowed Side Panel
Power Requirements
Voltage 100 to 240 VAC (auto-ranging power supply)
Frequency 50/60 Hz
Environmental
Operating Temperature +10 to +32°C (+50 to +90°F)
Operating Humidity 10 to 90% RH non-condensing
Non-Operating Temperature -30 to +60°C (-22 to +140°F)
Plasmon AA16 - AA174 User Manual
Document Revision E
Appendix A
Page 55
Specification
AA16
AA32
AA80
(4 drives)
AA80
(2 drives)
15.1 / 38.4
21.4 / 54.4
30.5 / 77.5
34.2 / 86.9
15.1 / 38.4
21.4 / 54.4
30.5 / 77.5
34.2 / 86.9
21.5 / 54.6
27.8 / 70.6
30.5 / 77.5
34.2 / 86.9
21.5 / 54.6
27.8 / 70.6
30.5 / 77.5
34.2 / 86.9
Dimensions-Stand Alone
Width (in/cm)
Height (in/cm)
Depth (in/cm)
Weight (lbs/kg)
11.1 / 28.8
30.5 / 77.5
31.2 / 79.2
105 / 47.6
11.1 / 28.8
30.5 / 77.5
31.2 / 79.2
105 / 47.6
17.5 / 44.5
30.5 / 77.5
31.2 / 79.2
135 / 61.2
17.5 / 44.5
30.5 / 77.5
31.2 / 79.2
135 / 61.2
Dimensions-Shipping
Width (in/cm)
Height (in/cm)
Depth (in/cm)
Weight (lbs/kg)
23.5 / 59.7
41 / 104.1
36.5 / 92.7
150 / 68
23.5 / 59.7
41 / 104.1
36.5 / 92.7
150 / 68
23.5 / 59.7
41 / 104.1
36.5 / 92.7
185 / 84
23.5 / 59.7
41 / 104.1
36.5 / 92.7
185 / 84
Space Requirements
Width (in/cm)
Width with Stabilizers (in/cm)
Height (in/cm)
Depth (in/cm)
Allow 3" airflow behind unit and 2"
airflow on both sides
Table 4. AA174 Library Specifications
Specification
AA174
(6 drives)
AA174
(4 drives)
AA174
(2 drives)
Library Capacity (UDO60)
9.48TB
9.96TB
10.44TB
Library Capacity (UDO30)
4.74 TB
4.98TB
5.22TB
158
166
174
Up to 6
Up to 4
Up to 2
UDO30 or UDO60
UDO30 or UDO60
UDO30 or UDO60
Library Reliability (MSBF)
2,000,000
>2,000,000
>2,000,000
Robotics Avg. Access Time
<8.3 sec.
<8.3 sec.
<8.3 sec.
Dual
Dual
Dual
Single
Single
Single
333 Watts
446 BTU/hr
296 Watts
414 BTU/hr
260 Watts
387 BTU/hr
Number of Media Storage Slots
Number of Drives
Drive Types Supported
Picker Type
Automated Mailslot
Max Power Consumption
Max Power Dissipation
Library Interface
10/100 Gigabit Ethernet (copper)
Options
Windowed Side Panel
Power Requirements
Voltage 100 to 240 VAC (auto-ranging power supply)
Frequency 50/60 Hz
Appendix A
Page 56
Plasmon AA16 - AA174 User Manual
Document Revision E
Specification
AA174
(6 drives)
AA174
(4 drives)
AA174
(2 drives)
Environmental
Operating Temperature +10 to +32°C (+50 to +90°F)
Operating Humidity 10 to 90% RH non-condensing
Non-Operating Temperature -30 to +60°C (-22 to +140°F)
Space Requirements
Width (in/cm)
Width with Stabilizers (in/cm)
Height (in/cm)
Depth (in/cm)
Allow 3" airflow behind unit and 2"
airflow on both sides
21.5 / 54.6
31.1/79.0
54.6 / 138.8
34.2 / 86.9
21.5 / 54.6
31.1/79.0
54.6 / 138.8
34.2 / 86.9
21.5 / 54.6
31.1/79.0
54.6 / 138.8
34.2 / 86.9
Dimensions-Stand Alone
Width (in/cm)
Height (in/cm)
Depth (in/cm)
Weight (lbs/kg)
17.5 / 44.5
54.6 / 138.8
31.2 / 79.2
283 / 128
17.5 / 44.5
54.6 / 138.8
31.2 / 79.2
283 / 128
17.5 / 44.5
54.6 / 138.8
31.2 / 79.2
283 / 128
Dimensions-Shipping
Width (in/cm)
Height (in/cm)
Depth (in/cm)
Weight (lbs/kg)
23.5 / 59.7
67.9 / 172.5
36.5 / 92.7
338.5 / 154
23.5 / 59.7
67.9 / 172.5
36.5 / 92.7
338.5 / 154
23.5 / 59.7
67.9 / 172.5
36.5 / 92.7
338.5 / 154
Plasmon AA16 - AA174 User Manual
Document Revision E
Appendix A
Page 57
Appendix A
Page 58
Plasmon AA16 - AA174 User Manual
Document Revision E
S AFETY
APPENDIX B
A GENCY S TANDARDS
FCC Notice
The equipment to which this manual pertains has been tested and found to comply with the limits for a
Class A digital device, pursuant to part 15 of the FCC Rules. These limits are designed to provide
reasonable protection against harmful interference when the equipment is operated in a commercial
environment. This equipment generates, uses, and can radiate radio frequency energy and, if not
installed and used in accordance with this manual, may cause harmful interference to radio
communications. Operation of this equipment in a residential area is likely to cause harmful
interference in which case the user is required to correct the interference at his own expense:
Industry Canada Notice per ICES-003
English: This digital apparatus does not exceed the Class A limits for radio noise emissions from
digital apparatus set out in the interference-causing equipment standard entitled “Digital Apparatus,”
ICES-003 of the Industry Canada.
French: Cet appareil numérique respecte les limites de bruits radioélectriques applicables aux
appareils numériques de Classe A prescrites dans la norme sur le matériel brouilleur: “Appareils
Numériques”, NMB-003 édictée par l’Industrie Canada.
European Notice
This product is in conformity with the following directive.
•
EN 55022/CISPR 22, Class A
•
EN 55024
•
EN 61000-3-2
•
EN 61000-3-3
This library system is in conformity with the EMC directive and low-voltage directive.
Plasmon AA16 - AA174 User Manual
Document Revision E
Appendix B
Page 59
Australia/New Zealand
This equipment has been tested and complies with AS/NZS 3548.
Japan
This is a Class A product based on the standard of the Voluntary Control for Interference by
Information Technology Equipment (VCCI). If this equipment is used in a domestic environment, radio
disturbance may occur, in which case, the user may be required to take corrective actions.
Product Safety Standards
This library complies with the following domestic and international product safety standards:
•
UL Standard 60950-1, 1st Edition: 2003 Safety of Information Technology Equipment
•
CSA Standard C22.2 No. 60950-1-03, Safety of Information Technology Equipment
•
IEC 60950-1, 1st Edition: 2001
Appendix B
Page 60
Plasmon AA16 - AA174 User Manual
Document Revision E
Laser Safety Notice
This library is a Class 1 Laser Product. It has a barcode reader inside the housing and complies with
21 CFR 1010.10, 1040.11, and IEC 60825-1:1993+A1:1997+A2:2001 as a Class 1 Laser product. The
maximum radiation power output of the barcode reader is 500µW.
The maximum output power and wavelength of the laser in the Plasmon UDO30 and UDO60 drive is
65mW (403-413nm).
WARNING
Use of controls or adjustments, or performance of procedures
other than those specified herein, may result in hazardous
radiation exposure.
This Class 1 Laser Product label is placed on the rear of the
library.
Plasmon AA16 - AA174 User Manual
Document Revision E
Appendix B
Page 61
CDRH Regulations
The Center for Devices and Radiological Health (CDRH) of the U.S. Food and Drug Administration
implemented regulations for laser products on August 2, 1976. These regulations apply to laser
products manufactured from August 1, 1976. Compliance is mandatory for products marketed in the
United States.
Power Cord Set Selection
The voltage rating and the current rating of the power cord set shall be higher than the rated voltage
and current of this unit. The voltage of the power cord set shall be higher than the power source.
For the U.S. and Canada
Power cord must be UL listed and CSA labeled. Type SJT, SVT, ST, SJO or SO, 3-conductors, No. 18
AWG, rated 125v, 10A.
In the US the 120 VAC power cord shipped with Plasmon libraries meets these criteria:
•
The power cord must have a molded NEMA 5-15P male attachment plug on one end.
•
The power cord must have a molded IEC type CEE-22 female connector on the other end.
•
The power cord must be UL Listed and CSA Certified.
Outside the US contact Plasmon for country specific requirements.
For Germany and Continental Europe
STROMANFNAHME: 100-240 VAC, 50/60 Hz, 10A.
Für eine 230V-Anwendung, ist eine harmonisierte <HAR> konfektionierte Leitungsschnur, Typ
H05vvf3G1.00, die für 250V/10A oder die Gleichwertigkeit geeognet ist, zu benutzen.
Power Supply
The Gx libraries power supplies are certified for China Compulsory Product Certification (CCC).
Appendix B
Page 62
Plasmon AA16 - AA174 User Manual
Document Revision E
MOV Protection (all models)
CAUTION
A HiPOT test is applied to the library during manufacture. To avoid
damage to the MOVs, do not HiPOT the library again unless the
two fuses next to the external AC connector on the lower back of
the library are first removed to take the MOVs out of the circuit.
In Norway
Apparatet må tilkoples jordet stikkontakt.
In Sweden
Apparaten skall anslutas till jordat uttag.
In Finland
Laite on liitettävä suojamaadoituskoskettimilla varustettuun pistorasiaan.
Plasmon AA16 - AA174 User Manual
Document Revision E
Appendix B
Page 63
Appendix B
Page 64
Plasmon AA16 - AA174 User Manual
Document Revision E
INDEX
H
hardware components .................................
14
L
A
automated mailslot.................................
20, 27
B
bar code label..............................................
12
C
cable
power ............................................. 24, 62
capacity
drives ...................................................... 9
library ................................................... 55
media ..................................................... 9
cleaning cartridge, drive ............................... 10
connection
power ................................................... 24
connector
Ethernet .......................................... 20, 27
power ................................................... 20
customer support ......................................... 67
display
front panel ............................................. 20
drive
capacity .................................................. 9
cleaning ................................................ 10
location ................................................. 20
type ................................................ 20, 55
E
mailslot ................................................. 20, 27
max drive capacity ......................................... 9
media
care and handling .................................. 13
loading ................................................. 27
store ..................................................... 20
transport element (MTE) ........................ 20
write protecting ...................................... 11
models, library............................................... 9
O
20
55
P
packing instructions .....................................
position, library ............................................
power
connection ............................................
connector..............................................
consumption .........................................
cord ................................................ 24,
requirements .........................................
50
21
24
20
55
62
55
20, 27
R
F
front panel display .......................................
Plasmon AA16 - AA174 User Manual
Document Revision E
M
operator panel .............................................
options .......................................................
D
Ethernet connector ................................
library
hardware components ........................... 14
models ............................................. 9, 55
options ................................................. 55
position ................................................. 21
specifications ........................................ 55
stabilizers ............................................. 22
lift lock screw .................................. 20, 24, 50
loading media ............................................. 27
rack mount guidelines ..................................
33
20
Index
Page 65
S
safety agency standards ..............................
slots, storage ...............................................
specifications
library ...................................................
stabilizers ....................................................
storage slots................................................
support, technical ........................................
T
59
29
technical support .........................................
55
22
29
67
U
UDO drive cleaning cartridge .......................
UDO media bar code label ...........................
67
10
12
W
warranty .......................................................
Index
Page 66
4
Plasmon AA16 - AA174 User Manual
Document Revision E
C ONTACTING P LASMON
Technical Support in the United States
Plasmon Technical Support
+1-877-585-6793
+1-719-593-4192 (fax)
e-mail
[email protected]
Internet
www.plasmon.com
Technical Support in Europe, Middle East, and Africa
Plasmon Technical Support
+44 (0) 1763 262 963
+44 (0) 1763 264 407 (fax)
e-mail
[email protected]
Internet
www.plasmon.com
Technical Support in Asia/Pacific, South America, and Canada
International Calls
+1-719-593-4437
+1-719-593-4192 (fax)
Before Placing a Call to Plasmon
•
Run Self Test from the GUI
•
Verify system configuration
Placing a Call
Please have the following information available when calling:
•
Serial number
•
Description of failure
- Sequence of events leading to failure
- Actions taken so far to solve problem, and outcomes of actions
• System information
- Software and version number
- Logs pulled and ready to send