1
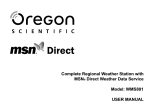
Complete Regional Weather Station with
MSN® Direct Weather Data Service
Model: WMS801
USER MANUAL
Dew Point ....................................................... 12
Wind Direction / Speed .................................... 12
Message Display .............................................. 12
LED Indicator ..................................................... 13
Moon Phase ....................................................... 13
Backlight ............................................................ 14
Reset System .................................................... 14
Complete Regional Weather Station
with MSN® Direct Weather Data Service
Model: WMS801
USER MANUAL
Precautions ....................................................... 14
Troubleshooting ............................................... 15
Specifications .................................................... 15
About Oregon Scientific ................................... 16
FCC Statement .................................................. 17
Declaration of Conformity .............................. 17
CONTENTS
Introduction ......................................................... 1
Product Overview ............................................... 2
Front View ........................................................ 2
Back View ........................................................ 2
LCD Display ..................................................... 3
Getting Started .................................................... 6
Power ............................................................... 6
About MSN® Direct Radio Signal ..................... 6
Change Display / Setting ................................. 7
Clock Reception .................................................. 8
Clock / Calendar ................................................. 8
Alarm .................................................................... 8
Weather Forecast ................................................ 9
UVI / Barometer / Rainfall ................................. 10
Temperature and Humidity ............................... 10
Temperature and Humidity Trend ................... 11
Comfort Zone ................................................. 11
Heat Index ...................................................... 11
INTRODUCTION
Thank you for selecting the Oregon Scientific™
Complete Regional Weather Station with MSN® Direct
Weather Data Service (WMS801). This product is
designed to receive an FM radio signal from MSN
Direct. The radio signal is decoded by the unit and
transforms the data into the weather information you
can view on the LCD screen. When the unit receives
the MSN Direct service, its clock and time zone are set
automatically for your convenience.
MSN Direct Weather Data Service covers North
American Metropolitan areas for the product through
2010. For coverage maps, see
www.msndirect.com/coverage.
1
3. MODE: Change settings / display
4. ALARM: View alarm status; set alarm
5. SNOOZE / LIGHT: Activate 8-minute snooze
or backlight
6. LED indicator: Color changes with
weather message status
7. SELECT: Switch Areas
8. IN / REG: Toggle indoor and
regional displays; activate auto-scan
9. UP / DOWN: Increase / decrease setting; enable
/ disable alarm
NOTE Indoor temperature and humidity are measured
by the product’s internal sensors.
NOTE The unit takes approximately 15 minutes to
receive the MSN Direct signal. However, if the radio
signal is weak, it can take up to 24 hours to get a valid
signal reception.
Keep this manual handy as you use your new product.
It contains practical step-by-step instructions, as well as
technical specifications and warnings you should know
about.
BACK VIEW
PRODUCT OVERVIEW
FRONT VIEW
1. MESSAGE: View different messages
2. MEMORY: View current and historical
readings; temperature, humidity, UV,
barometer and rainfall
2
Weather Message Area
1. AC adapter hole
2. °C / °F: Selects temperature unit
3. RESET: Resets unit to default settings
4. Battery compartment
5. mb / inHg: Selects barometric pressure unit
6. Antenna
1. Moon phase
2. Warning message is displayed
3. Weather message display
4. Main unit battery is low
5. AC adapter is disconnected
LCD DISPLAY
Clock / Alarm / Calendar Area
1. Selected area icon
2. Clock radio reception
3. Time / date / calendar
4. Alarm 1 or 2 is displayed
5. Alarm 1 or 2 is set
6. Offset time zone
1. Weather Message Area
2. Clock / Alarm / Calendar Area
3. UVI / Barometer / Rainfall Area
4. Today’s Weather and 3-Day Weather /
Temperature / Humidity Forecast Area
5. Temperature / Humidity / Comfort Level Area
6. Wind Direction / Speed Area
3
UVI / Barometer / Rainfall Area
Today’s Weather and 3-Day Weather / Temperature
and Humidity Forecast Area
1. Barometric pressure is showing
2. UV index is showing
3. UV index level
4. Barometric pressure (in inHg or mb/hPa) is displayed
5. UVI / barometric pressure
/ rainfall historical bar chart display
6. Rainfall is showing
7. Hour history for UVI / barometric pressure
/ rainfall reading
8. UVI reading is displayed
9. Rainfall reading (inches per hour) is displayed
1. Today’s weather forecast
2. Day of the week
3. Smoke / fog / haze / dust icon
4. Forecasted weather icon
5. Temperature or % chance of rain
6. High / low temperature reading
7. Temperature, humidity or rainfall forecast
4
Temperature / Humidity / Comfort Level Area
Wind Direction / Speed Area
1.
2.
3.
4.
1. Gust wind speed is showing
2. Gust wind / wind speed is showing
3. Wind speed is showing
4. Gust wind or wind speed reading
5. Wind speed level with description
6. Wind direction display
Heat index / wind chill level
Temperature trend
MAX / MIN temperature
Indoor or regional temperature
/ humidity is displayed
5. MAX / MIN humidity
6. Humidity trend
7. Temperature (°C / °F)
8. Dew point level
9. Humidity %
10. Dew point temperature (°C / °F)
11. Comfort levels
5
NOTE Do not use rechargeable batteries. It is
recommended that you use alkaline batteries with this
product for longer performance.
GETTING STARTED
POWER
shows when AC adapter is disconnected.
shows when batteries are low.
ABOUT MSN® DIRECT RADIO SIGNAL
The MSN® Direct service is delivered over the
Microsoft® DirectBand™ network, a wide-area network
based on FM radio technology. This radio signal
transmits to the unit most of the information that is
displayed i.e. weather, temperature, humidity, UV, wind
and local time with DST adjustment. For more
information on MSN Direct, please visit
www.msndirect.com.
Insert batteries matching the polarity + and -. Press
RESET after each battery change.
When you insert the AC adapter or batteries, the unit
will automatically start searching for the MSN Direct
radio signal. While the unit is searching for a signal
“Scanning” will appear in the Message Display Area.
Weather information shows when the signal has been
received. “Lost Link” shows when the signal has NOT
been received.
NOTE For longer lasting use, the AC adapter should
be the unit’s main source of power. The batteries are
for back-up use only.
6
If you cannot receive a signal:
• Place the unit in a different location.
• Make sure the unit has a clear view to the sky and
is away from metallic or electronic objects.
• Reposition the reception antenna.
• Force a signal search.
To force a search for the signal:
• Press and hold IN / REG. The unit will search for
a signal for 15 minutes. If the radio signal is weak,
it can take up to 24 hours to get a valid signal
reception.
CHANGE DISPLAY / SETTING
Use the SELECT button to navigate between different
Areas, with
appearing on the display in the Area
that is selected:
• Clock / Alarm / Calendar Area
• UVI / Barometer / Rainfall Area
• Temperature / Humidity / Comfort Level Area
NOTE Signals from household devices such as
doorbells, electronic garage doors, and home security
systems may cause temporary reception failure. This is
normal and does not affect general product
performance. The reception will resume once the
interference ends.
1. Press SELECT to switch between Areas.
indicates the selected Area.
Overlapping coverage
In areas of overlapping city data coverage, the unit will
automatically select data from the tower it gets the best
reception from.
You may be in an area where your Weather Station can
pick up signals from multiple cities. To scan for a
different city:
• Press and hold IN / REG.
• “Scanning” displays when the Weather Station
searches for an MSN Direct radio station.
2. Most Areas have alternate display options e.g.
Clock / Alarm or UVI / Barometer / Rainfall).
Press MODE to switch options, or ALARM to
switch between clock and alarm.
3. Press and hold MODE for 2 seconds to enter
setting mode.
4. Press UP or DOWN to change settings.
(Press and hold UP or DOWN to quickly scroll
through the values.)
5. Press MODE to confirm.
To see the city where the Weather Station is
receiving data from:
1. Press SELECT until
is shown in the Clock area.
2. Press and hold MODE.
7
• Calendar
CLOCK RECEPTION
This product is designed to synchronize its calendar
clock automatically when it receives the MSN Direct
service.
To manually set the clock:
(You only need to set the clock and calendar if you
have disabled the clock radio reception.)
Press SELECT to navigate to the Clock Area.
Reception signal status:
TIME IS
SYNCHRONIZED
1. Press SELECT to navigate to the Clock Area.
will show next to the Area.
2. Press and hold MODE for 2 seconds. The setting
will blink.
3. Use UP / DOWN to change the setting.
4. Press CLOCK to confirm.
5. Repeat steps 3 and 4 to set the time zone
offset hour (+ / -23 hours), 12 / 24 hour format,
hour, minute, year, date / month format, month
and day.
TIME IS NOT
SYNCHRONIZED
For best reception, the clock and antenna should be
placed on a flat, non-metallic surface near a window in
an upper floor of your home. The antenna should be
placed away from electrical appliances and not be
moved around when searching for a signal.
NOTE If you enter +1 in the time zone setting, this will
give you your regional time plus 1 hour.
To enable / disable the clock radio reception
(clock synchronization):
1. Navigate to the Clock / Calendar / Alarm Area.
will show next to the Area.
2. Press and hold UP / DOWN.
ALARM
The clock has 2 alarms that can be set to sound with a
beep or melody alarm (5 melodies available).
CLOCK / CALENDAR
To set an alarm:
1. Press SELECT to navigate to the Clock Area.
will show next to the Area.
2. Press ALARM to toggle between the alarm
displays and select either alarm 1 or 2, for setting.
3. Press and hold ALARM to enter alarm setting
mode. The alarm setting will blink.
To switch between clock displays:
1. Press SELECT to navigate to the Clock Area.
will show next to the Area.
2. Press MODE to toggle between;
• Clock with seconds
• Clock with day
8
4. Use UP / DOWN to change the following
settings: hour, minute, alarm beep or melody
sound, high / low volume.
5. Press ALARM to confirm.
DESCRIPTION
Clear
The alarm icon will appear on the display to show
which alarm has been set:
ICON
Partly Cloudy
MEANING
Cloudy
Alarm 1/2 is set
No icons
Rain
No alarm is set
Snow
To activate / deactivate an alarm:
1. Press ALARM to select alarm 1 and 2.
2. Press UP or DOWN to activate or deactivate it.
Thunder
To silence the alarm:
• Press SNOOZE / LIGHT to silence it for 8 minutes.
OR
• Press any key except SNOOZE / LIGHT to turn the
alarm off and activate it again after 24 hours.
Dust
Fog
Haze
WEATHER FORECAST
The large, animated weather display in the top part of
the screen shows the weather forecast for the next 1224 hours. The 3 smaller weather displays at the bottom
of the screen show the 3-day forecast and
automatically switch between displaying:
• High / Low temperature
• % Precipitation i.e. the % chance of rain
Smoke
Windy
Frigid
9
TODAY’S
WEATHER ICON
Day
Night
Day
Night
3-DAY FORCAST
ICON
NOTE The night time icon displays from 6PM to 6AM.
UVI / BAROMETER / RAINFALL
The UVI / Barometer / Rainfall Area displays current and
historical UV, barometric pressure and rainfall
measurements in a numerical and bar chart format.
Low
3-5
6-7
Moderate
High
8-10
11 and above
Very high
Extremely high
The rainfall displays as inches per hour (In/hr).
The following icons will appear to confirm which display
you are in:
BAROMETER
DANGER LEVEL
0-2
To select the barometer measurement unit:
• Press mb / inHg (in the battery compartment),
to your desired setting.
To view these displays:
1. Press SELECT to navigate to the UVI / Barometer /
Rainfall Area.
will show next to the Area.
2. Press MODE repeatedly to select your desired display.
UV INDEX
UV INDEX
TEMPERATURE AND HUMIDITY
The weather station displays indoor and regional:
1. Current, minimum and maximum temperatures
and relative humidity percentages.
2. Comfort level indicator and trend line
(rising, falling, or steady).
3. Heat index, wind chill and dew point level.
RAINFALL
To view the last 10 hours of the UV Index, or the last
24 hours of barometric or rainfall history:
• Press MEMORY repeatedly in the relevant display.
The number shown in the HR box indicates how long
ago each measurement was taken
(e.g. 2 hours ago, 3 hours ago, etc.).
To view these displays:
1. Press SELECT to navigate to the Temperature /
Humidity / Comfort Level Area.
will show next to
the Area.
2. Press IN / REG to select indoor
or regional
readings.
3. Press MODE repeatedly to toggle between the
displays.
10
Indoor:
• Temperature / humidity / trend level indicator
• Heat index / dew point
TEMPERATURE AND HUMIDITY TREND
TREND
RAISING
STEADY
FALLING
Temperature
Regional:
• Temperature / humidity / trend level indicator
• Heat index / dew point
• Wind chill factor
Humidity
COMFORT ZONE
The Comfort Zone indicates how comfortable the
climate is, based on current temperature and humidity
measurements:
NOTE The dew point advises at what temperature
condensation will form. The wind chill factor is based
on the combined effects of temperature and wind
speed.
To select the temperature measurement unit:
• Press °C / °F (inside the battery compartment),
to the setting you want.
ZONE
TEMPERATURE
Wet
Any
>70%
Com
20-25ºC
40-70%
HUMIDITY
(68-77ºF)
Dry
To view minimum and maximum temperature or
humidity:
• Press MEMORY repeatedly in the temperature
or humidity display.
Any
<40%
HEAT INDEX
The Heat Index advises 4 levels of warning if the
temperature is high.
To view the current day’s high and low temperature
and humidity forecast:
• Press UP.
To clear all records:
• Press and hold MEMORY for 2 seconds. A beep
will sound to confirm that the memory has
been cleared.
11
DANGER
CATEGORY
Extreme
TEMPERATURE
ºF
ºC
>54.5
>130
Intense heat:
Strong
possibility of
heat stroke
Danger
40.5-54.4
105-130
Very strong
heat: Heat
exhaustion
likely
Extreme
32.2-40.5
90-105
Strong heat:
Possibility of
dehydration
26.6-32.2
80-90
Possibility of
heat
exhaustion
danger
Caution
Caution
The wind speed and gust speed are displayed in miles
per hour (mph) only.
FALLING
The wind level is shown by a series of icons:
ICON
DESCRIPTION
< 2 mph (~ 3 kmh)
2-8 mph (~ 3-13 kmh)
9-25 mph (~ 3-13 kmh)
26-54mph (~ 42-87 kmh)
NOTE If the temperature is below 26°C / 80°F, or the
desired channel is not working, the Heat Index will
display “NA”.
< 55 mph (~ 88 kmh)
DEW POINT
When DEWPOINT is displayed on the screen, the
number below indicates the temperature at which water
vapor will condense and change to liquid form.
MESSAGE DISPLAY
The Message Display Area shows 4 general messages
that continuously scroll across the display:
• Sunrise time
• Sunset time
WIND DIRECTION / SPEED
To read the wind direction find the compass point the
is pointing to.
12
• Current visibility
• Air quality
MOON PHASE
The Calendar must be set for this feature to work (see
Clock / Calendar section). The display scrolls through
all the different moon phases, stops at the current
day’s moon phase and then flashes it for 5 seconds.
Additionally, if there is a specific weather message for
your region, a weather alert message will display:
• WARNING
• WATCH
• ADVISORY
New moon
Waxing crescent
To view an alert message, or to scroll through
existing general or alert messages:
• Press MESSAGE. To increase the scrolling speed,
press and hold MESSAGE.
First quarter
Waxing gibbous
Full moon
NOTE If the unit cannot receive MSN Direct
information a “Lost Link” message will appear.
To force a signal search, press and hold IN / REG.
Waning gibbous
Last quarter
LED INDICATOR
Waning crescent
The LED indicator lights up to show the following:
LED LIGHT
MEANING
Solid green light
The power is on and the weather
is normal
Solid red light
A WATCH or ADVISORY alert
has been received by the unit
Flashing red light
A WARNING alert has been
received by the unit
13
• Do not subject the unit to excessive force, shock,
dust, temperature or humidity, which may result
in malfunction, shorter electronic life span,
damaged battery and distorted parts.
• Do not tamper with the unit’s internal components.
Doing so will invalidate the warranty on the unit
and may cause unnecessary damage. The unit
contains no user-serviceable parts.
• Only use fresh batteries as specified in the
user’s instructions. Do not mix new and old batteries.
• Due to printing limitations, the displays shown in
this manual may differ from the actual display.
• The contents of this manual may not be reproduced
without the permission of the manufacturer.
BACKLIGHT
Press LIGHT to illuminate the backlight for 8 seconds.
Press and hold LIGHT to turn the sidelights ON / OFF.
RESET SYSTEM
Press RESET (in the battery compartment) to return
the unit to the default settings.
PRECAUTIONS
This product is engineered to give you years of
satisfactory service if you handle it carefully. Here
are a few precautions:
• Placement of this product on wood surfaces with
certain types of finishes, such as clear varnish,
may result in damage to the finish. Consult the
furniture manufacturer’s care instructions
for direction as to the types of objects that may
safely be placed on the wood surface.
Oregon Scientific shall not be responsible for
any damage to wood surfaces from contact with
this product.
• Do not immerse the unit in water. If you spill liquid
over it, dry it immediately with a soft, lint-free cloth.
• Do not clean the unit with abrasive or corrosive
materials.
NOTE The technical specification of this product
and contents of this user guide are subject to
change without notice. Images not drawn to scale.
14
SPECIFICATIONS
TROUBLESHOOTING
PROBLEM
SYMPTOM
REMEDY
Barometer
Strange readings
Set measurement unit
by pressing mb / inHg in
the battery compartment
Calendar
Strange date /
month
Change language (see
Clock / Calendar
section)
Clock
Cannot adjust clock
Disable clock signal
reception and set the
clock manually (see
Clock Reception section)
Cannot auto-synch
Unit dimensions
(L x W x H)
Weight without batteries
TEMPERATURE – °C or °F
Indoor range
Outdoor range
Resolution
Comfort range
2. Press RESET
3. Manually activate
clock signal reception
Shows “LL” or “HH”
The temperature is
outside the display
range of the unit
LCD screen
Displays unclearly
for a short time
once it has been
turned off
If the adapter is
plugged in and out in
quick succession, the
unit stores a small
amount of power for a
short period of time
-5°C to 50°C
(23°F to 122°F)
-62°C to 78°C
(-80°F to 173°F)
1°C (2°F)
20°C to 25°C
(68°F to 77°F)
Min / Max
Memory
RAINFALL – In/hr
Regional rainfall range
0-2.5 inches (0-63 mm)
WIND SPEED – Miles per hour or Kilometers per hour
Regional wind speed range
0-254 mph (0-409 kmh)
RELATIVE HUMIDITY – %
Indoor range
25% to 95%
Outdoor range
25% to 100%
Resolution
1%
Comfort range
40% to 70%
Memory
Min / max
BAROMETER – mb / hPa or inHg
Regional pressure range
0 to 1935 mb
Resolution
(0 to 655.34 inHg)
WEATHER
1 mb (0.03 inHg)
Display
Sunny (day / night), partly
cloudy (day / night), cloudy,
rainy, snowy, thunder, dust,
fog, haze, smoke, windy,
frigid
1. Adjust batteries
Temp
263 x 127 x 150 mm
(10.35 x 5.0 x 5.91 inches)
576 grams (1.27lbs)
15
ABOUT OREGON SCIENTIFIC
CLOCK
Synchronization
Clock display
Hour format
Calendar
Dual alarm
POWER
• Adapter
• Batteries (for back-up use only)
Visit our website (www.oregonscientific.com) to learn
more about Oregon Scientific products such as digital
cameras; MP3 players; children’s electronic learning
products and games; projection clocks; health and
fitness gear; weather stations; and digital and
conference phones. The website also includes contact
information for our Customer Care department in case
you need to reach us, as well as frequently asked
questions and customer downloads.
Auto or disabled
HH:MM:SS
12 / 24hr
DD/MM or MM/DD;
2-minute beep or melody
sound (5 melodies
available); high / low
volume and 8-minute
snooze
We hope you will find all the information you need on
our website, however if you’re in the US and would
like to contact the Oregon Scientific Customer Care
department directly, please visit:
www2.oregonscientific.com/service/support
OR call 1-800-853-8883.
6V AC adapter
4 x UM-3 (AA) 1.5V
NOTE It is recommended that you use alkaline
batteries with this product for longer performance.
For international inquiries, please visit:
www2.oregonscientific.com/about/international
16
• Reorient or relocate the receiving antenna.
• Increase the separation between the equipment
and receiver.
• Connect the equipment into an outlet on a
circuit different from that to which the receiver
is connected.
• Consult the dealer or an experienced
radio / TV technician for help.
FCC STATEMENT
This device complies with Part 15 of the FCC Rules.
Operation is subject to the following two conditions:
(1) This device may not cause harmful interference,
and (2) This device must accept any interference
received, including interference that may cause
undesired operation.
WARNING Changes or modifications not expressly
approved by the party responsible for compliance
could void the user’s authority to operate the
equipment.
DECLARATION OF CONFORMITY
The following information is not to be used as contact
for support or sales. Please call our customer service
number (listed on our website at www.oregonscientific.
com), or on the warranty card for this product) for all
inquiries instead.
NOTE This equipment has been tested and found
to comply with the limits for a Class B digital device,
pursuant to Part 15 of the FCC Rules. These limits
are designed to provide reasonable protection
against harmful interference in a residential
installation.
We
Name:
Address:
Telephone No.:
This equipment generates, uses and can radiate
radio frequency energy and, if not installed and used
in accordance with the instructions, may cause
harmful interference to radio communications.
However, there is no guarantee that interference will
not occur in a particular installation. If this equipment
does cause harmful interference to radio or television
reception, which can be determined by turning the
equipment off and on, the user is encouraged to try
to correct the interference by one or more of the
following measures:
Oregon Scientific, Inc.
19861 SW 95th Ave.,
Tualatin,Oregon 97062 USA
1-800-853-8883
declare that the product
Product No.:
WMS801
Product Name:
Complete Regional Weather
Station with MSN® Direct
Weather Data Service
17
Manufacturer:
Address:
IDT Technology Limited
Block C, 9/F, Kaiser Estate,
Phase 1,41 Man Yue St.,
Hung Hom,
Kowloon, Hong Kong
is in conformity with Part 15 of the FCC Rules.
Operation is subject to the following two conditions:
1) This device may not cause harmful interference.
2) This device must accept any interference
received, including interference that may cause
undesired operation.
Microsoft, MSN and the MSN logo are either
registered trademarks or trademarks of Microsoft
Corp. in the United States and/or other countries.
© 2005 Oregon Scientific. All rights reserved.
18
© 2005 Oregon Scientific. All rights reserved.
086L004192-011