Download exacqVision IP Camera Quickstart Guide
Transcript
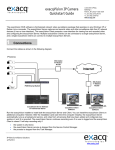
exacqVision IP Camera Quickstart Guide 7202 E. 87th Street Suite 115 Indianapolis, IN 46256-1200 USA +1.317.845.5710 phone +1.317.845.5720 fax www.exacq.com The exacqVision NVR software features a full-featured network video surveillance package that operates on any Windows XP or Debian Linux computer. The exacqVision Server captures and records video and other surveillance data from IP network devices; it has no user interface. The exacqVision Client presents a user interface for viewing live and recorded video and for configuring the exacqVision Server. Multiple exacqVision Clients can be connected to a single exacqVision Server, and a single exacqVision Client can connect to multiple exacqVision Servers. 1 Connections Connect the cables based on the diagram below. Run the exacqVision installer to install both the exacqVision Server and Client. Optionally, you may install the exacqVision Client on additional computers. After the installation, and each time the computer reboots, the exacqVision Server automatically starts as a background service. All cameras that have been added and configured (see sections 2 & 3) will be recorded. Once the exacqVision Server starts recording, it will continue, even if no user is logged in or no exacqVision Client is running. It will stop recording only if: The system is shut down The exacqVision Server service is stopped from the service control manager The process is stopped from the task manager IP Video Surveillance Solutions 1/23/2009 www.exacq.com 2 Add IP Cameras First, ensure that your IP cameras are powered and connected to same LAN as the exacqVision Server. Next, you’ll need to find the IP address of the cameras on your network, which can be done with the Exacq IP Camera Finder on the IP Cameras screen in the exacqVision Client. This will find cameras from any of the supported manufacturers which are on the same network subnet as the exacqVision Server. If an IP Camera is not found, it likely needs it’s IP address changed to match an available address on the same LAN subnet as the exacqVision server. If a camera’s IP address must be changed, this may be done with the camera manufacturer’s software. See the exacqVision IP Manufacturer Specific Addendum to this QuickStart guide for more information. Next, on the IP Cameras screen of the exacqVision Client, you will add the cameras to the list of IP Cameras that your exacqVision Server will connect to. Once IP cameras have been added to the IP Camera List, your exacqVision Client application will be able to configure the camera settings (see section 3) and view live and recorded video. To add an IP camera to your IP Camera List now that you have found the IP address of the camera, click the Camera in the finder panel. Enter the Username, Password, and Password Confirm, then click the Apply button. The new camera will appear in the IP Camera List. The camera type and IP address will be automatically populated. All cameras that have been added to the IP Camera List with the Connect box checked will now appear in the Configuration, Live and Search trees. You will only be able to simultaneously check “Connect” on as many IP devices as your license permits. Contact Exacq Technologies to increase the allowed number of IP devices. IP Video Surveillance Solutions 1/23/2009 www.exacq.com 3 IP Camera Setup By default, the exacqVision Server only records video in which motion has been detected. You must ensure that your page), or change the cameras have valid motion detection settings (which can be done from the IP Camera Setup recording schedule to Free Run (from the Schedule page). The camera’s default values will be used for image resolution and frame rate until they are set by the user. These values should be checked and updated if necessary (from the IP Camera Recording Setup page). If the default resolution is not 4:3 aspect ratio, the resolution is marked as “invalid”. This should be changed to a 4:3 resolution from the Resolutions dropdown menu for properly scaled video recording. For more detailed instructions, see the IP Camera Setup section of the exacqVision User Manual or the context sensitive online help file. 4 Network Configuration If you plan to have clients from outside your local network access your exacqVision Server, you will need to change your router settings to forward port 22609 to the exacqVision Server’s IP address. See your router manual or go to www.portforward.com /routers.htm for instructions. IP Video Surveillance Solutions 1/23/2009 www.exacq.com Manufacturer Specific Addendum Each IP camera manufacturer provides a utility to find and set the IP address of their cameras on your local network. This utility is typically available on the software CD which will have come with your camera, or from the camera manufacturer’s web site. Please refer to the documentation provided by your camera’s manufacturer if you have questions after reading this guide. While some IP camera manufacturers do support DHCP addressing, Exacq highly recommends assigning a static IP address to your IP cameras to keep unexpected network events from changing the IP address of the camera. If the camera’s IP address changes, the exacqVision Server will not be able to record from that camera until a user manually reassigns the cameras IP address or changes the address setting in the exacqVision Server to match the camera’s new address. NOTE: If you have Windows Firewall enabled on your computer, you will get the following dialog box when you run any of the camera manufacturer’s utilities. Be sure to press the Unblock button to allow the utility to work properly. Supported Manufacturers: 1. 2. 3. 4. 5. 6. 7. 8. 9. Axis IQinVision Sony Panasonic ACTi Vivotek Arecont ioimage Stardot IP Video Surveillance Solutions 1/23/2009 www.exacq.com 1 AXIS AXIS provides the AXIS Camera Management Utility to find IP cameras. Running the utility will display a window as seen below: This program will search for AXIS cameras on the network. Select the Camera you want to set the IP Address. Then right-click on a camera to view and select Enter Device Credentials… You then enter the user name and password for the device. IP Video Surveillance Solutions 1/23/2009 www.exacq.com Next right-click again and select Assign IP… Enter in the IP address, Subnet mask, and Default router. Press OK and the utility will set the IP address. NOTE: Factory default login for Axis IP cameras is: username: root password: pass You’ll need to enter this username and password when you add this camera to your exacqVision System. 2 IQinVision IQinVision provides the iqfinder utility to find IP cameras. Running the utility will display a window as seen below: Highlight the camera and press edit to change the camera IP properties. IP Video Surveillance Solutions 1/23/2009 www.exacq.com IQinVision cameras typically do not use DHCP by factory default. If you have a DHCP server (e.g. router) on the network, it can automatically assign your camera an IP address if you select the “Obtain an IP address …” radio button. You will need to manually assign the camera an IP address if you manually assigned the exacqVision Server’s IP address, there is no DHCP server on your local network, or you want to assign a static IP address to the IP camera to ensure that its IP address is not inadvertently changed. If so, enter an IP address which is not used by any other device on your local network, make sure that the first three numbers match the first three numbers of your exacqVision Server’s IP address. Set Subnet to 255.255.255.0 and press Apply. NOTE: Factory default login for IQinVision IP cameras is: username: root password: system You’ll need to enter this username and password when you add this camera to your exacqVision System. To get the IQinVision camera to factory defaults, hold the reset button in while powering on the camera. IP Video Surveillance Solutions 1/23/2009 www.exacq.com 3 Sony Sony provides the IP Setup utility to find IP cameras. Running the utility will display a window as seen below: Highlight the camera to edit the camera IP properties. Sony cameras typically do not use DHCP by factory default. If you have a DHCP server (e.g. router) on the network, it can automatically assign your camera an IP address if you select the “Obtain an IP address …” radio button. You will need to manually assign the camera an IP address if you manually assigned the exacqVision Server’s IP address, there is no DHCP server on your local network, or you want to assign a static IP address to the IP camera to ensure that its IP address is not inadvertently changed. If so, enter an IP address which is not used by any other device on your local network, make sure that the first three numbers match the first three numbers of your exacqVision Server’s IP address. Set Subnet to 255.255.255.0, leave the HTTP port at 80, enter the camera’s Administrator name and password, and press Apply. NOTE: Factory default login for Sony IP cameras is: username: admin password: admin You’ll need to enter this username and password when you add this camera to your exacqVision System. IP Video Surveillance Solutions 1/23/2009 www.exacq.com 4 Panasonic Panasonic provides the EasyIpSetup_Ipro utility to find IP cameras. Running the utility will display a window as seen below: click on a camera to highlight it, the click IP setting button to view and edit the camera IP properties. Panasonic cameras typically do not use DHCP by factory default. If you have a DHCP server (e.g. router) on the network, it can automatically assign your camera an IP address if you select the “DHCP On” radio button. You will need to manually assign the camera an IP address if you manually assigned the exacqVision Server’s IP address, there is no DHCP server on your local network, or you want to assign a static IP address to the IP camera to ensure that its IP address is not inadvertently changed. If so, enter an IP address which is not used by any other device on your local network, make sure that the first three numbers match the first three numbers of your exacqVision Server’s IP address. Set Subnet to 255.255.255.0, leave the HTTP port at 80, enter the camera’s Administrator name and password, and press Apply. NOTE: Panasonic cameras automatically disable their response to configuration queries twenty minutes after being reset. If your camera has been running for more than twenty minutes, you’ll need to reset or power cycle it before querying or configuring its IP address through either Exacq’s IP camera finder or Panasonic’s EasyIPSetup utility. NOTE: Factory default login for Panasonic IP cameras is: username: admin password: 12345 You’ll need to enter this username and password when you add this camera to your exacqVision System. IP Video Surveillance Solutions 1/23/2009 www.exacq.com 5 ACTi ACTi provides the ACTi IP Utility to find IP cameras. This is located on the installation CD in at D:\Professional\Utility\IP Utility.exe if D: was your CD drive. You may need to install the ACTi Streaming Activator Software from the CD to find the ACTi IP utility. Input the Account name and Password into the appropriate fields, and then press the Configure Camera Settings button which looks like a wheel and is on the far left side of the row. Modify the WAN IP address to an IP address that is not being used on your network. You can not turn on DHCP here, as it can only be done once you access the camera webpage. Once you have the IP Address and Subnet Mask entered, press the Apply and Save & Reboot button. NOTE: Factory default login for ACTi IP cameras is: username: Admin password: 123456 You’ll need to enter these or the new username and password created above when you add this camera to your exacqVision System. IP Video Surveillance Solutions 1/23/2009 www.exacq.com 6 Vivotek Vivotek provides an Installation Wizard utility to find IP cameras. This is provided on the CD included in the box with the camera. Running the utility will show the screen below: It should properly detect what type of network you have. Click the Next button to continue. It will then detect the Vivotek network cameras in your subnet. If the program does not detect the camera, please verify that the cameras are in your local subnet. Select the camera in the list you want to configure. Then double click on that camera. IP Video Surveillance Solutions 1/23/2009 www.exacq.com You will need to enter the root password for the Vivotek camera. If you have not set up the camera before, the default password is blank. Enter in the new root password and leave the Date/Time setup to the default. Click the Next button. Now enter the IP address, Subnet mask, Default Gateway, Primary DNS (optional), and Secondary DNS server (Optional). If the camera is going to be using DHCP, then select that check box instead. Click Next to continue. IP Video Surveillance Solutions 1/23/2009 www.exacq.com Leave the ports to their defaults. Do not enable DDNS, unless you are planning to put this camera on the internet. This is not recommended. Click next, and you camera is now configured! IP Video Surveillance Solutions 1/23/2009 www.exacq.com 7 Arecont Arecont provides a utility to find IP cameras. This is provided on the CD included in the box with the camera. Running the utility will show the screen below: By clicking on the Find Cameras, it will search for IP Cameras on the local subnet. If the program does not detect the camera, please verify that the cameras are in your local subnet. You then enter the IP Address in the New Camera IP field. IP Video Surveillance Solutions 1/23/2009 www.exacq.com For the last step, select the Set IP button. This will set the IP address for the camera. To set more information for the camera, go to the camera web page. 8 ioimage ioimage provides a utility to find IP cameras called the ioiWare Site-Configurator. This is provided on the CD included in the box with the camera. Running the utility will show the screen below: You must first change your own IP address so that you can reach the IP address 192.168.123.10. Then when you run the ioiWare Site-Configurator, it will detect the device. You then select the device, then select the Network tab. You should be able to set the device to be static, or have it obtain an IP address automatically. Once you have done this, select the Apply Network button. . IP Video Surveillance Solutions 1/23/2009 www.exacq.com You now enter the user name and password for the device. Once you press OK the IP address will be set and the device will reboot. NOTE: Factory default login for ioimage devices is: username: admin password: admin You’ll need to enter these or the new username and password created above when you add this camera to your exacqVision System 9 Stardot Stardot provides a utility to find IP cameras called the SD Tools. This is provided on the CD included in the box with the camera. Running the utility will show the screen below: The StarDot Tools utility will detect cameras that are on your network. To set the IP address, select the Camera and then press the Setup Wizard button. . IP Video Surveillance Solutions 1/23/2009 www.exacq.com Choose the method that you will be connecting to the camera, and then press Next. Select the IP Camera from the list, and press Next. It will then communicate with the camera and read the configuration. You will next select the primary method of communication, which is usually Network. You will then select either Static IP Address, or Server-Assigned IP Address (DHCP). If you select Static IP Address, you must fill in the IP Address, Subnet Mask, and Gateway. After this information is filled in, Select that you will Only serve images on request, no upload. Now Select Next, and then Next again. It will now save the configuration, and reboot to the new IP Address. IP Video Surveillance Solutions 1/23/2009 www.exacq.com


