1
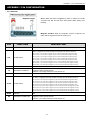
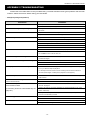
APPENDIX 1 PIN CONFIGURATION
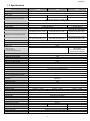
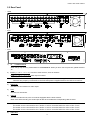
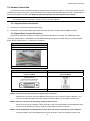
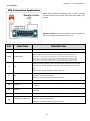
‧ For 8CH DVR
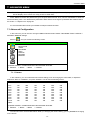
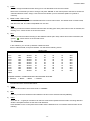
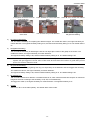
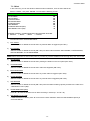
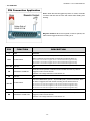
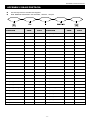
Siren: When the DVR is triggered by alarm or motion, the COM
connects with NO and the siren with strobe starts wailing and
flashing.
Magnetic Contact: When the magnetic contact is opened, the
alarm will be triggered and the recording is on.
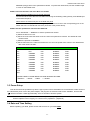
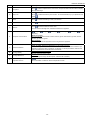
PIN
1
FUNCTION
GND
DESCRIPTION
GROUND
Connect ALARM INPUT (PIN 2 – 5) and GND (PIN 1) connector with wires. Once an
2~5
6 ~ 12
alarm is triggered, the DVR will start recording and the buzzer will be on.
ALARM INPUT
PIN OFF
PIN 2 is Alarm 1. Once the alarm is triggered, the CH1 of the DVR will start alarm-triggered recording.
PIN 3 is Alarm 3. Once the alarm is triggered, the CH3 of the DVR will start alarm-triggered recording.
PIN 4 is Alarm 5. Once the alarm is triggered, the CH5 of the DVR will start alarm-triggered recording.
PIN 5 is Alarm 7. Once the alarm is triggered, the CH7 of the DVR will start alarm-triggered recording.
NA
Under the normal operation, COM disconnects with NO. But when any alarm is
13
EXTERNAL ALARM NO.
triggered, COM connects with NO.
Attention: The voltage restriction is under DC24V 1A.
14
PIN OFF
NA
Connect ALARM INPUT (PIN 15 – 18) and GND (PIN 1) connector with wires. Once
an alarm is triggered, the DVR will start recording and the buzzer will be on.
15~18
ALARM INPUT
19~24
PIN OFF
PIN 15 is Alarm 2. Once the alarm is triggered, the CH2 of the DVR will start alarm-triggered recording.
PIN 16 is Alarm 4. Once the alarm is triggered, the CH4 of the DVR will start alarm-triggered recording.
PIN 17 is Alarm 6. Once the alarm is triggered, the CH6 of the DVR will start alarm-triggered recording.
PIN 18 is Alarm 8. Once the alarm is triggered, the CH8 of the DVR will start alarm-triggered recording.
NA
Under the normal operation, COM disconnects with NO. But when any alarm is
25
EXTERNAL ALARM COM
triggered, COM connects with NO.
Attention: The voltage restriction is under DC24V 1A.
~65~