1
Demonstration board
Electrical installations
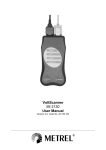
MI 2166
User Manual
Version 1.3, Code No. 20 750 750
Distributor:
Manufacturer:
METREL d.d.
Ljubljanska cesta 77
1354 Horjul
Slovenia
web site: http://www.metrel.si
e-mail: [email protected]
Mark on your equipment certifies that this equipment meets the requirements of the EU
(European Union) concerning safety and interference causing equipment regulations
© 2009 METREL
No part of this publication may be reproduced or utilized in any form or by any means
without permission in writing from METREL.
2
MI 2166 Demonstration board
Table of contents
1. Introduction............................................................................................................... 4
1.1. General Description ............................................................................................. 4
1.2. General warnings ................................................................................................. 4
1.3. Meaning of warning/information symbols on front panel ...................................... 4
1.4. List of measurements that can be demonstrated ................................................. 5
2. Before connecting demonstration board to mains supply ................................... 5
3. Front panel description............................................................................................ 6
4. Faults simulation ...................................................................................................... 6
5. Measurements........................................................................................................... 7
5.1. Continuity of protective conductor ........................................................................ 7
5.2. Insulation Resistance ........................................................................................... 8
5.3. Earth resistance ................................................................................................... 9
5.4. Earth resistance using two-clamp method.......................................................... 11
5.5. Specific earth resistance .................................................................................... 12
5.6. Line impedance.................................................................................................. 12
5.7. Loop impedance................................................................................................. 13
5.8. Contact voltage and trip-out time / Current of RCD1 protection device.............. 14
5.9. Current measurement using clamps .................................................................. 14
6. Technical data......................................................................................................... 16
7. Maintenance ............................................................................................................ 16
7.1. Cleaning ............................................................................................................. 16
7.2. Service ............................................................................................................... 16
8. Standard set ............................................................................................................ 17
3
MI 2166 Demonstration board
Electrical installations
1. Introduction
1.1. General Description
Demonstration board simulates common electrical installation usually met in individual
house or apartment. This board is to be used preferably by sales personnel when
demonstrating operation of electrical installation test equipment. It is placed into a
practical plastic carrying case. Various test methods supported by different test
instruments can be presented. Acceptable or faulty parameters can be preset by five
»fault« switches. Some real elements of electrical installation are placed on the front
panel like RCD protection device, ON/OFF switch with lamp, mains test outlet and
connection terminals. Other elements are improvised.
Demonstration board is constructed according to European safety standard EN 61010-1.
1.2. General warnings
•
•
•
•
•
•
If the equipment is not used in a manner specified by manufacturer, the
protection provided by equipment may be impared.
Use Demonstration board on TN/TT supply systems only.
Only qualified personnel who are familiar with the board and the
measurement instrument may use Demonstration board!
Use of Demonstration board in a way not specified in this User Manual could
damage the board.
Do not use Demonstration board in case of any damage noticed!
Only an authorised person may carry out servicing of Demonstration board!
1.3. Meaning of warning/information symbols on front panel
Take care Demonstration board is connected only to
mains voltage according to the description under the
mains socket! In the opposite case the board can be
damaged!
230 V / 50 Hz / 10 W
OK
Use outlets with grounded protection terminal only!
There is a protection circuit inside the board.The board
will not turn on if connected to outlet without grounded
protection terminal.
The lamp will be ON if mains plug is inserted correctly.
Otherwise swap L and N terminals!
4
MI 2166 Demonstration board
Electrical installations
Protection circuit inside Demonstration board cuts mains
voltage at input stage of the board if phase line is not
applied to appropriate terminal or a voltage difference
between neutral line and protective conductor is higher
than 30 V.
Use the test outlet on front panel for measurement
purposes only!
Do not connect any load, otherwise board may be
damaged and the operator exposed to hazardous voltage!
Do not connect external voltage – possible hazardous
voltage on accessible parts of board.
PE collector (and all accessible conductive parts) are NOT
connected to mains PE but to neutral line.
Note!
If lamp is blinking and you hear noise from relays inside board, disconnect mains plug
and check supply socket.
1.4. List of measurements that can be demonstrated
-
Continuity of protective conductor,
Insulation resistance,
Earth resistance using standard four-lead method,
Earth resistance using two-clamp method,
Specific earth resistance at three ground levels,
Line impedance between the L and N terminals,
Loop impedance in TT grounding system,
Loop impedance in TN grounding system,
Contact voltage without using auxiliary test probe,
Contact voltage and earth resistance using auxiliary test probe,
RCD trip-out current,
RCD trip-out time,
Current using clamps,
Other measurements.
2. Before connecting demonstration board to
mains supply
Before connecting Demonstration board to mains voltage the operator has to verify:
• Wall mains outlet has to be equipped with PE terminal and there are no mechanical
damages noticed on the outlet!
• There are no damages on Demonstration board and on mains cord!
• Mains outlet has to be protected with RCD protection device IΔN = 30 mA
(recommended).
5
MI 2166 Demonstration board
Electrical installations
3. Front panel description
MI 2166
DEMONSTRATION BOARD
Electrical Installations
1
0
C 10A
230V / 50Hz / 10W
JUMP
OK
Input protection circuit
Not intended for demonstration
purposes!
AUX
230 V / 3A
TN
4W
3W
H
H
S
S+d
ES
S0
E
S-d
TT
TP2
E/ES
TP1
PE
TP3
Do not connect external voltage!
For measurement purposes only!
a
RE1=4.7 Ω
RE =95 Ω / 2000 Ω
RE2 =6.8 Ω
GAS
Fault
a
2 m / 100 Ω m
5 m / 470 Ω m
8 m / 2000 Ω m
RE/ZLOOP
RCD
ZLINE
RPE
RISO
OK
4. Faults simulation
The following faults on electrical installation can be simulated:
Switch
Parameter
Earth resistance RE
RCD trip-out
Line impedance between L and
ZLINE
N terminals of mains socket
Resistance of protective
RPE
conductor between PE collector
and boiler’s PE terminal
Insulation resistance between L
RISO
terminal of mains socket and PE
collector
*Input impedance (at wall socket)
RE/ZLOOP
RCD1
6
Approx.
Approx. parameter
parameter value
value without fault
with fault
RE = 95 W
RE = 2000 W
tΔ < 300 ms
No trip-out
ZLINE = Zx* + 0.2 Ω
ZLINE = Zx* + 2.4 Ω
RPE = 0.0 Ω
RPE = 4.7 Ω
RISO > 200 MΩ
RISO = 0.44 MΩ
MI 2166 Demonstration board
Electrical installations
5. Measurements
5.1. Continuity of protective conductor
Warning:
Disconnect mains plug and switch off the RCD1 (protection device)!
Start conditions:
• All »fault« switches in OK position!
Measurement location
PE collector – PE terminal of mains outlet
PE collector – PE terminal of boiler housing (TP1) (RPE switch in OK position)
PE collector – PE terminal of boiler housing (TP1) (RPE switch in fault position)
PE collector – internal gas installation (TP2)
7
Nominal value
0.1 Ω
0.1 Ω
4.7 Ω
0.4 Ω
MI 2166 Demonstration board
Electrical installations
5.2. Insulation Resistance
Warning:
Disconnect mains plug and switch off the RCD1 (protection device)!
Start conditions:
• Switch off the lamp!
• All »fault« switches in OK position!
N
L
Measurement location
L terminal of mains outlet – N terminal of mains outlet
L terminal of mains outlet – PE collector (RISO switch in OK position)
L terminal of mains outlet – PE collector (RISO switch in fault position)
N terminal of mains outlet – PE collector
PE collector – external gas installation (TP3)
8
Nominal value
> 200 MΩ
> 200 MΩ
0.44 MΩ
> 200 MΩ
0.68 MΩ
MI 2166 Demonstration board
Electrical installations
5.3. Earth resistance
Warning:
Disconnect mains plug and switch off the RCD1 (protection device)!
Start conditions:
• All »fault« switches in OK position!
Measurement location
H terminal – S0 / S+d / S-d+ – E/ES
(jumper TN/TT/AUX in TT position, jumper JUMP inserted)
H terminal – S0 / S+d / S-d – E/ES
(jumper TN/TT/AUX removed, jumper JUMP inserted)
H terminal – S0 / S+d / S-d – E/ES
(jumper TN/TT/AUX removed, jumper JUMP removed)
9
Nominal value
2.7 Ω
2.8 Ω
4.7 Ω
MI 2166 Demonstration board
Electrical installations
Measurement location
PE collector – S0 / S+d / S-d – E/ES
(jumper TN/TT/AUX removed, RE/ZLOOP switch in OK position)
PE collector – S0 / S+d / S-d – E/ES
(jumper TN/TT/AUX removed, RE/ZLOOP switch in fault position)
Nominal value
95.2 Ω
2000 Ω
Notes!
3W – 3-wire measurement: E and ES leads are connected together.
In 3-wire measurement the instrument should show the same earth resistance value regardless
of connection point (S0, S+d, S-d).
10
MI 2166 Demonstration board
Electrical installations
5.4. Earth resistance using two-clamp method
Warning:
Disconnect mains plug and switch off the RCD1 (protection device)!
Start conditions:
• All »fault« switches in OK position!
RE1 + RE2
Measurement location
Earth Current loop (jumper TN/TT/AUX removed, Jumper JUMP inserted)
Nominal value
11.5 Ω
≈ RE2 (RE1 is practically shorted with low external earth resistance of power transformer)
Measurement location
Earth Current loop (jumper TN/TT/AUX in AUX position, jumper JUMP
inserted)
11
Nominal value
7.1 Ω
MI 2166 Demonstration board
Electrical installations
5.5. Specific earth resistance
Warning:
Disconnect mains plug and switch off the RCD1 (protection device)!
Measurement location
E – ES – S – H (“a” switch in 2 m position)
E – ES – S – H (“a” switch in 5 m position)
E – ES – S – H (“a” switch in 8 m position)
Nominal value
103 Ωm
471 Ωm
1960 Ωm
Note!
Take care the same distance »a« is selected on measurement instrument as on Demonstration
board.
5.6. Line impedance
Start conditions:
• Connect mains plug and switch on the RCD1 (protection device)!
• All »fault« switches in OK position!
Measurement location
Line impedance at mains outlet (ZLINE switch in OK position)
Line impedance at mains outlet (ZLINE switch in fault position)
Zx = line impedance at the input, i.e. wall outlet.
12
Nominal value
Zx + 0.2 Ω
Zx + 2.4 Ω
MI 2166 Demonstration board
Electrical installations
5.7. Loop impedance
Start conditions:
• Connect mains plug and switch on the RCD1 (protection device)!
• All »fault« switches in OK position!
TT position
TN position
Note!
The measurement of loop resistance will cause the RCD1 on front panel to trip if test current is
higher or equal than declared nominal one, i.e. 30 mA.
Check test instrument User manual for selection of the best measurement method in order to
reach as good test results as possible!
Loop impedance (L - PE) in TT grounding system
Measurement location
Mains outlet (RE/ZLOOP switch in OK position, ZLINE switch in OK position,
jumper TN/TT/AUX removed)
Mains outlet (RE/ZLOOP switch in fault position, ZLINE switch in OK position,
jumper TN/TT/AUX removed)
Mains outlet (RE/ZLOOP switch in OK position, ZLINE switch in OK position,
jumper TN/TT/AUX in TT position, jumper JUMP inserted)
Zx = Line impedance at the input i.e. wall outlet.
Nominal value
Zx + 95.2 Ω
Zx + 2000 Ω
Zx + 2.7 Ω
Loop impedance (L – PE) in TN grounding system
Measurement location
Nominal value
RLOOP at mains outlet (RE/ZLOOP switch in fault position, ZLINE switch in OK Zx + 0.34 Ω
position, jumper TN/TT/AUX in TN position)
Zx = Line impedance at the input i.e. wall outlet.
13
MI 2166 Demonstration board
Electrical installations
5.8. Contact voltage and trip-out time / Current of RCD1
protection device
Start conditions:
• Connect mains plug and switch on the RCD1 (protection device)!
• All »fault« switches in OK position!
Contact voltage
IΔN = 30 mA
Measurement location
Nominal value
Mains outlet (RE/ZLOOP switch in OK position, jumper TN/TT/AUX removed) 2.86 V
Mains outlet (RE/ZLOOP switch in fault position, jumper TN/TT/AUX removed) 60 V
Trip-out time
IΔN = 30 mA
Measurement location
Mains outlet (RCD1 switch in OK position)
Mains outlet (RCD1 switch in fault position)
Nominal value
< 300 ms
No trip
Trip-out current
IΔN = 30 mA
Measurement location
Mains outlet (RCD1 switch in OK position)
Mains outlet (RCD1 switch in fault position)
Nominal value
15 mA ÷ 30 mA
No trip
Note!
Nominal values in the table are valid for RCD1 measurements type AC.
5.9. Current measurement using clamps
Start conditions:
• Connect mains plug and switch on the RCD1 (protection device)!
14
MI 2166 Demonstration board
Electrical installations
Measurement location
Current Loop (RCD1 switch in OK position)
Nominal value
~3A
15
MI 2166 Demonstration board
Electrical installations
6. Technical data
Nominal mains voltage .............................. 230 V / 50 Hz
Power consuption ...................................... 10 W
Mains cord………………………………….. single-phase
Dimensions (width × length × height)......... 450 × 330 × 110 mm
Weight ....................................................... 3.56 kg
Protection class ......................................... I (protective earth conductor)
Over current category ................................ CAT II 300 V
Pollution degree......................................... 2
RCD (protection device) ............................ 30 mA/type A
Reference conditions
Reference temperature range.................... 10 °C ÷ 30 °C
Reference humidity range.......................... 40 %RH ÷ 70 %RH
Operation conditions
Working temperature range……………….. 0 °C ÷ 40 °C
Maximum relative humidity ........................ 95 %RH (0 °C ÷ 40 °C), non-condensing
7. Maintenance
7.1. Cleaning
Use a soft cloth slightly moistened with soapy water or alcohol to clean the surface of
the board and then leave the board to dry totally before use.
Do not use liquids based on petrol!
Do not spill liquids over the board!
7.2. Service
In case of unusual response of Demonstration board or if there is any damage noticed,
the product has to be taken to an authorised service. Consult the producer or your
dealer for further information.
The product has no internal user serviceable parts (fuses, etc).
Producer's address:
METREL d.d.
Ljubljanska 77
1354 Horjul
Slovenia
Tel.: +386 (0)1 7558 200
Fax.: +386 (0)1 7549 095 or +386 (0)1 7549 226
16
MI 2166 Demonstration board
Electrical installations
8. Standard set
Upon receipt of Demonstration board it is advisable to check the content of the delivery.
The following items have to be included:
•
•
•
•
Demonstration board.
Two jumpers.
Mains cable.
Instruction manual.
17