1
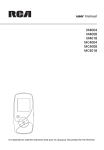
user manual
MC5102
MC5104
It is important to read this instruction book prior to using your new product for the first time.
Table of Contents
Important Information ............................................................................................................................... 4
End User License Agreement ..................................................................................................................... 6
Before You Begin ........................................................................................................................................ 8
Unpacking your player ..................................................................................................................... 8
Things to consider before you get started... .................................................................................. 9
Computer system requirements ............................................................................................ 9
Secure music download requirements ................................................................................. 9
Warning .................................................................................................................................. 9
Caution ................................................................................................................................... 9
Caution while driving .......................................................................................................... 10
Back up your data ................................................................................................................ 10
Software Setup ......................................................................................................................................... 11
Inserting the included CD-ROM into CD-ROM drive .................................................................... 11
Connecting to the Computer ................................................................................................................... 12
Connecting to the computer ......................................................................................................... 12
Charging the battery ..................................................................................................................... 13
Important battery information ........................................................................................... 13
Caution ................................................................................................................................. 13
Transferring Files to the Player ................................................................................................................ 14
Transferring files via Yahoo! MusicTM Jukebox (Windows XP or higher only) ............................ 15
Transferring files via Windows Explorer (drag-and-drop) ........................................................... 16
Disconnecting your player from the computer ............................................................................ 17
General Controls ....................................................................................................................................... 18
Before you begin ............................................................................................................................ 18
Overview of the general controls ................................................................................................. 19
Navigation display .......................................................................................................................... 21
Navigation menus .......................................................................................................................... 22
Selecting what you want to play .................................................................................................. 22
Listening, Viewing and Recording .......................................................................................................... 24
Music/audiobooks playback ........................................................................................................... 24
Music/audiobooks playback display .............................................................................................. 25
Picture viewing ............................................................................................................................... 26
Video viewing ................................................................................................................................. 27
Video converter .............................................................................................................................. 28
Radio (switching on) ...................................................................................................................... 30
Radio (switching off) ...................................................................................................................... 30
Radio operations ............................................................................................................................ 31
Automatic station search .................................................................................................... 31
Saving preset stations .......................................................................................................... 31
Selecting preset stations ...................................................................................................... 31
Clearing preset stations ....................................................................................................... 31
Suppressing stereo signal .................................................................................................... 31
2
Table of Contents
Radio recording .............................................................................................................................. 32
Record duration ................................................................................................................... 32
Listening to radio recording ............................................................................................... 32
Deleting radio recording ..................................................................................................... 32
Voice recording .............................................................................................................................. 33
Record duration ................................................................................................................... 34
Listening to voice recording ................................................................................................ 34
Deleting voice recording ..................................................................................................... 34
Line-in recording ............................................................................................................................ 35
Record duration ................................................................................................................... 36
Listening to line-in recording .............................................................................................. 36
Deleting line-in recording ................................................................................................... 36
Playlists ..................................................................................................................................................... 37
My Selections .................................................................................................................................. 37
Clearing My Selections ................................................................................................................... 37
Playlists from your computer ......................................................................................................... 38
Deleting playlists ............................................................................................................................ 38
Player’s Menus .......................................................................................................................................... 39
Accessing the player’s menus ........................................................................................................ 39
Navigation and selections .............................................................................................................. 39
Go to ..................................................................................................................................... 39
Shuffle .................................................................................................................................. 39
Repeat .................................................................................................................................. 40
DSP ........................................................................................................................................ 40
Slideshow ............................................................................................................................. 40
Settings ................................................................................................................................. 40
System info ........................................................................................................................... 40
Additional Information ............................................................................................................................ 41
Tips and troubleshooting ............................................................................................................... 41
Specifications .................................................................................................................................. 43
Hardware .............................................................................................................................. 43
Mass storage drive ............................................................................................................... 43
Software ............................................................................................................................... 43
Miscellaneous specifications ............................................................................................... 43
Check for updates .......................................................................................................................... 43
Limited warranty ............................................................................................................................ 44
3
Important Information
WARNING
To reduce the
risk of fire or
electric shock,
do not expose
this product to
rain or
moisture.
CAUTION
RISK OF ELECTRIC SHOCK
DO NOT OPEN
To reduce the risk of electric shock, do not
remove cover (or back). No user serviceable
parts inside. Refer servicing to qualified
service personnel.
This symbol indicates
"dangerous voltage" inside
the product that presents a
risk of electric shock or
personal injury.
This symbol indicates
important instructions
accompanying the
product.
To reduce risk of injury, charge only rechargeable batteries recommended by the manufacturer
for this player. Other types of batteries may burst causing damage and personal injury.
Technical specification
Product: Lyra player
Brand: Lyra
Model: MC5102 / MC5104
Electrical rating
DC : 3.7 V Li-polymer battery (built-in)
Lyra
MC5102
Equipment tested for
compliance as a
complete unit
Lyra
MC5104
Equipment tested for
compliance as a
complete unit
4
Important Information
FCC Regulations state that unauthorized
changes or modifications to this equipment
may void the user’s authority to operate it.
FEDERAL COMMUNICATIONS COMMISSION
INFORMATION
This device complies with Part 15 of the FCC
Rules. Operation is subject to the following two
conditions: (1) This device may not cause
harmful interference, and (2) this device must
accept any interference received, including
interference that may cause undesired
operation. In accordance with FCC
requirements, changes or modifications not
expressly approved by Thomson Inc. could void
the user’s authority to operate this product.
This equipment has been tested and found to
comply with the limits for a Class B digital
device, pursuant to Part 15 of FCC Rules. These
limits are designed to provide reasonable
protection against harmful interference in a
residential installation. This equipment
generates, uses, and can radiate radio
frequency energy and, if not installed and used
in accordance with the instructions, may cause
harmful interference to radio communications.
However, there is no guarantee that
interference will not occur in a particular
installation. If this equipment does cause
harmful interference to radio or television
reception, which can be determined by turning
the equipment off and on, the user is
encouraged to try to correct the interference
by one or more of the following measures
• Reorient or relocate the receiving antenna.
• Increase the separation between the
equipment and receiver.
• Connect the equipment into an outlet on a
circuit different from that to which the
receiver is connected.
• Consult the dealer or an experienced radio/
TV technician for help.
Also, the Federal Communications Commission
has prepared a helpful booklet, “How To
Identify and Resolve Radio TV Interference
Problems.” This booklet is available from the
U.S. Government Printing Office, Washington,
DC 20402. Please specify stock number 004-00000345-4 when ordering copies.
This Class B digital apparatus complies with
Canadian ICES-003.
Cet appareil numérique de la class B est
conforme à la norme du NMB-003 du Canada
5
End User License Agreement
IMPORTANT: READ CAREFULLY BEFORE DOWNLOADING
OR INSTALLING THIS SOFTWARE!
THIS END USER LICENSE AGREEMENT (THIS “EULA”) IS A LEGAL
AGREEMENT BETWEEN YOU AND THOMSON INC., OR ANY
THOMSON GROUP ENTITY, AS DEFINED BELOW (COLLECTIVELY
“THOMSON ENTITY”), FOR THE RCA OR THOMSON BRANDED
PORTABLE DIGITAL AUDIO/VIDEO DEVICE APPLICATION/DRIVER
SOFTWARE PROGRAM AND ASSOCIATED DOCUMENTATION, IF
ANY (COLLECTIVELY, THE “PROGRAM”). THIS EULA CONTAINS
IMPORTANT LEGAL LIMITATIONS, RESTRICTIONS AND
DISCLAIMERS, AND ALSO SPECIFIES THE DURATION OF YOUR
LICENSE.
BY INSTALLING THE PROGRAM OR CLICKING ON THE
ACCEPTANCE BUTTON OF THE PROGRAM, COPYING OR
OTHERWISE USING THE PROGRAM, YOU ACKNOWLEDGE AND
AGREE THAT YOU HAVE READ THIS EULA, UNDERSTAND IT,
AND AGREE TO BE BOUND BY ITS TERMS AND CONDITIONS.
YOU MAY USE THE PROGRAM ONLY IN ACCORDANCE WITH
THIS EULA, AND ANY SUCH USE IS HEREBY UNDERSTOOD TO
BE CONDITIONAL UPON YOUR SPECIFIC AGREEMENT TO THE
UNMODIFIED TERMS SET FORTH HEREIN. IF YOU DO NOT
AGREE WITH ALL OF THE TERMS OF THIS EULA, CLICK ON THE
REJECTION BUTTON AND/OR DO NOT INSTALL THE PROGRAM
AND/OR DO NOT USE THE PROGRAM.
1. LICENSE
(a) Under this EULA, you are granted a license (i) to use the
Program on a single workstation, and (ii) to make one (1) copy
of the Program into any machine-readable form for backup of
the Program, provided the copy contains all of the original
Program's proprietary notices.
(b) You may transfer the Program and license to another party
only as a part of the Thomson/RCA branded Portable Digital
Audio/Video Device (“A/V Device”), and only if the other party
agrees to accept the terms and conditions of this EULA. If you
transfer the Program, you must at the same time either
transfer all copies to the same party or destroy any copies not
transferred.
(c) The terms of this EULA will govern any software upgrades
or updates provided by THOMSON Entity that replace and/or
supplement the original Program, unless such upgrade or
update is accompanied by separate license terms and
conditions in which case the terms of that separate license will
govern. You acknowledge and agree that THOMSON Entity
may automatically download upgrades or updates to the
Program software to your computer in order to update,
enhance, and/or further develop the Program.
2. LICENSE RESTRICTIONS
(a) Except for the licenses expressly granted to you in this
EULA, no other licenses or rights are granted or implied.
(b) You may not (i) make the Program available over a network
where it could be used by multiple computers at the same
time; (ii) modify, translate, reverse engineer, decompile,
disassemble (except to the extent that this restriction is
expressly prohibited by law), or create derivative works based
upon the Program; or (iii) copy the Program, except as
expressly permitted herein. You agree that you shall only use
the Program in a manner that complies with all applicable laws
in the jurisdictions in which you use the Program, including,
but not limited to, applicable restrictions concerning copyright
and other intellectual property rights.
(c) The Program may contain pre-release code that does not
perform at the level of a final code release. In such case, the
6
Program may not operate properly. Updated versions of the
Program may be downloaded from www.rcaaudiovideo.com/
digitalaudiosupport.
(d) THOMSON Entity is not obligated to provide support
services for the Program.
(e) The Program is provided with “RESTRICTED RIGHTS”. Use,
duplication, or disclosure by the U.S. Government is subject to
restrictions as set forth in subparagraph (c)(1)(ii) of DFARS
252.227-7013, or FAR 52.227-19, or in FAR 52.227-14 Alt. III, as
applicable.
3. TERM AND TERMINATION
(a) Your license is effective on the date you accept this EULA
and remains in effect until this EULA is terminated by either
party.
(b) You may terminate this EULA and the associated license,
without any notice or delay, by destroying or permanently
erasing the Program and all copies thereof.
(c) If you fail to comply with any of the terms of this EULA, in
whole or part, your license will automatically terminate
without notice from THOMSON Entity.
(d) Upon termination of this EULA and your associated license,
you shall cease all use of the Program and destroy or
permanently erase the Program and all full or partial copies
thereof.
4. WARRANTY DISCLAIMER
THE PROGRAM IS PROVIDED “AS IS” WITHOUT WARRANTY OF
ANY KIND, EITHER EXPRESSED OR IMPLIED, INCLUDING, BUT
NOT LIMITED TO THE IMPLIED WARRANTIES OF
MERCHANTABILITY, FITNESS FOR A PARTICULAR PURPOSE,
TITLE OR NON-INFRINGEMENT. THE ENTIRE RISK AS TO THE
QUALITY AND PERFORMANCE OF THE PROGRAM IS WITH YOU.
SHOULD THE PROGRAM PROVE DEFECTIVE, YOU (AND NOT
THOMSON ENTITY, ITS SUPPLIERS, OR ITS DEALERS) ASSUME
THE ENTIRE COST FOR ALL NECESSARY REPAIR OR
CORRECTION.
This exclusion of warranty may not be allowed under some
applicable laws. As a result, the above exclusion may not apply
to you, and you may have other rights depending on the law
that applies to you.
5. OWNERSHIP RIGHTS
All title and intellectual property rights in and to the Program
and any copies thereof are owned by THOMSON Entity or its
suppliers. All title and intellectual property rights in and to the
content which may be accessed through use of the Program is
the property of the respective content owner and may be
protected by applicable copyright or other intellectual property
laws and treaties. This license grants you no rights to use such
content.
6. LIMITATION OF LIABILITY
(a) TO THE MAXIMUM EXTENT PERMITTED BY APPLICABLE
LAW, IN NO EVENT SHALL THOMSON ENTITY, OR ITS DEALERS
BE LIABLE FOR ANY SPECIAL, INCIDENTAL, INDIRECT, OR
CONSEQUENTIAL DAMAGES WHATSOEVER (INCLUDING,
WITHOUT LIMITATION, DAMAGES FOR LOSS OF PROFITS,
BUSINESS INTERRUPTION, CORRUPTION OF FILES, LOSS OF
BUSINESS INFORMATION, OR ANY OTHER PECUNIARY LOSS)
REGARDLESS OF CAUSE OR FORM OF ACTION, INCLUDING
CONTRACT, TORT, OR NEGLIGENCE, ARISING OUT OF YOUR USE
OF OR INABILITY TO USE THE PROGRAM, EVEN IF THOMSON
ENTITY HAS BEEN ADVISED OF THE POSSIBILITY OF SUCH
DAMAGES. BECAUSE SOME STATES AND JURISDICTIONS DO
End User License Agreement
NOT ALLOW THE EXCLUSION OR LIMITATION OF LIABILITY OF
CONSEQUENTIAL OR INCIDENTAL DAMAGES, THE ABOVE
LIMITATION MAY NOT APPLY TO YOU.
(b) YOU ASSUME RESPONSIBILITY FOR THE SELECTION OF THE
APPROPRIATE PROGRAM TO ACHIEVE YOUR INTENDED
RESULTS, AND FOR THE INSTALLATION, USE, AND RESULTS
OBTAINED.
7. WINDOWS MEDIA
The software embedded within your A/V Device (the “Device
Firmware”) contains software licensed from Microsoft that
enables you to play Windows Media Audio (WMA) files (“WMA
Software”). The WMA Software is licensed to you for use with
your A/V Device under the following conditions. By installing
and using this version of the Device Firmware, you are
agreeing to these conditions. IF YOU DO NOT AGREE TO THE
END USER CONDITIONS OF THIS SECTION 7, DO NOT INSTALL
OR USE THIS VERSION OF THE DEVICE FIRMWARE.
The WMA Software is protected by copyright and other
intellectual property laws. This protection also extends to
documentation for the WMA Software, whether in written or
electronic form.
GRANT OF LICENSE. The WMA Software is only licensed to you
as follows:
You may use this version of the Device Firmware containing
the WMA Software only as such use relates to your A/V Device.
You may not reverse engineer, decompile, or disassemble the
WMA Software, except and only to the extent that such
activity is expressly permitted by applicable law.
You may transfer your right to use the Device Firmware only as
part of a sale or transfer of your A/V Device, on the condition
that the recipient agrees to the conditions set forth herein. If
the version of the Device Firmware that you are transferring is
an upgrade, you must also transfer all prior versions of the
Device Firmware that you have which include the WMA
Software.
MICROSOFT IS NOT PROVIDING ANY WARRANTY OF ANY KIND
TO YOU FOR THE WMA SOFTWARE, AND MICROSOFT MAKES
NO REPRESENTATION CONCERNING THE OPERABILITY OF THE
WMA SOFTWARE.
The WMA Software is of U.S. origin. Any export of this version
of the Device Firmware must comply with all applicable
international and national laws, including the U.S. Export
Administration Regulations, that apply to the WMA Software
incorporated in the Device Firmware.
Content providers are using the digital rights management
technology for Windows Media contained in your A/V Device
(“WM-DRM”) to protect the integrity of their content (“Secure
Content”) so that their intellectual property, including
copyrights, in such content is not misappropriated. Your A/V
Device uses WM-DRM software to play Secure Content (“WMDRM Software”). If the security of the WM-DRM Software in
your A/V Device has been compromised, owners of Secure
Content (“Secure Content Owners”) may request that
Microsoft revoke the WM-DRM Software’s right to acquire new
licenses to copy, display, and/or play Secure Content.
Revocation does not alter the WM-DRM Software's ability to
play unprotected content. A list of revoked WM-DRM
Software is sent to your A/V Device whenever you download a
license for Secure Content from the Internet or from a
computer. Microsoft may, in conjunction with such license, also
download revocation lists onto your A/V Device on behalf of
Secure Content Owners.
8. THIRD PARTY SOFTWARE
ANY THIRD PARTY SOFTWARE THAT MAY BE PROVIDED WITH
THE PROGRAM IS INCLUDED FOR USE AT YOUR OPTION. IF
YOU CHOOSE TO USE SUCH THIRD PARTY SOFTWARE, THEN
SUCH USE SHALL BE GOVERNED BY SUCH THIRD PARTY'S
LICENSE AGREEMENT, AN ELECTRONIC COPY OF WHICH WILL
BE INSTALLED IN THE APPROPRIATE FOLDER ON YOUR
COMPUTER UPON INSTALLATION OF THE SOFTWARE.
THOMSON ENTITY IS NOT RESPONSIBLE FOR ANY THIRD
PARTY’S SOFTWARE AND SHALL HAVE NO LIABILITY FOR
YOUR USE OF THIRD PARTY SOFTWARE.
9. GOVERNING LAW
If you acquired this A/V Device in the United States, this EULA
shall be governed and construed in accordance with the laws
of the State of Indiana, U.S.A. without regard to its conflict of
laws principles. If you acquired this A/V Device outside the
United States or the European Union, then local law may
apply.
10. GENERAL TERMS
This EULA can only be modified by a written agreement signed
by you and THOMSON Entity, and changes from the terms and
conditions of this EULA made in any other manner will be of
no effect. If any portion of this EULA shall be held invalid,
illegal, or unenforceable, the validity, legality, and
enforceability of the remainder of the Agreement shall not in
any way be affected or impaired thereby. This EULA is the
complete and exclusive statement of the agreement between
you and THOMSON Entity, which supersedes all proposals or
prior agreements, oral or written, and all other
communications between you and THOMSON Entity, relating
to the subject matter of this hereof. “THOMSON Group
Entity” when used in this EULA shall mean any person,
corporation, or other organization, domestic or foreign,
including but not limited to subsidiaries, that is directly or
indirectly controlled by Thomson S.A. For purposes of this
definition only, the term “control” means the possession of
the power to direct or cause the direction of the management
and policies of an entity, whether by ownership of voting stock
or partnership interest, by contract, or otherwise, including
direct or indirect ownership of more than fifty percent (50%)
of the voting interest in the entity in question.
7
Before You Begin
Dear RCA Customer,
Thank you for purchasing the RCA Player. This player will play open mp3 and Windows Media™
audio (WMA) content as well as content purchased from most online music download services.
After purchasing and downloading music to your PC, you are now ready to move content to your
player. To transfer the music to your player, you may use Yahoo! Music™ Jukebox or the
application recommended by the online music download service.
(Note: Services and applications must be Windows Media audio-compliant and support Digital
Rights Management. Windows XP (SP1 or higher) required.)
Unpacking your player
Your player came with everything you need to make music portable — all of the items shown
below should have been packed in the box with your player.
RCA Player
Music Management CD
Contains software applications
Mini USB cable
Plug the small end into the USB on your player, and plug the other end
into your computer’s USB port.
Earphones
Line-in cable
Carrying pouch
Explore a world of accessories! Jump on the Internet and go to www.rcaaudiovideo.com to
discover the additional accessories that are available for your player.
Illustrations contained within this publication are for representation only and subject to change.
8
Before You Begin
Things to consider before you get started...
Computer system requirements
•
•
•
•
•
•
•
•
•
•
Pentium III 500MHz or higher recommended
Windows XP SP1 (SP= Service Pack) or higher.
Internet Explorer 6.0 or higher
Internet access (broadband recommended)
250MB free hard disk space for the software
128MB RAM (256MB recommended)
CD drive capable of digital audio extraction
USB port (2.0 recommended)
Sound card
16- bit color video card
Secure music download requirements
• Windows XP SP1 or higher (SP=Service Pack)
• Internt Explorer 6.0 or higher
• Windows Media Player 10 or higher
Warning
Use of this player is for your personal use only. Unauthorized recording or duplication of
copyrighted material may infringe upon the rights of third parties and may be contrary to
copyright laws.
Caution
• Keep player out of direct sunlight. Exposure to direct sunlight or extreme heat (such as inside a
parked car) may cause damage or malfunction.
• Do not expose to rain or moisture.
9
Before You Begin
Caution while driving
Use of headphones while operating an automobile or moving vehicle is not recommended and is
unlawful in some states and areas. Be careful and attentive on the road. Stop operation of the
player if you find it disruptive or distracting while driving.
Back up your data
As with any portable player that has a hard drive, you must back up the drive regularly. RCA and
Thomson are not responsible for lost data.
10
Software Setup
The Music Management CD that comes with your player contains all of the necessary software
components you need to make your player work properly.
These components do the following:
• enable you to transfer files from your computer to your player,
• convert video files and/or automatically update the player (if included on the CD).
Inserting the included CD into CD drive
1. Turn on your computer and place the Music Management CD that came with your player into
your computer.
2. If the setup screen does not appear, double-click My Computer, double click your CD drive icon,
and double click Install to run the installer.
IMPORTANT: Don’t connect the USB cable to the PC or the player before or during the
CD installation.
Note: The Music Management CD also contains Yahoo! MusicTM Jukebox that can help
transfer music content to your player. Please refer to the section on your installed software for
detailed operations.
Yahoo! MusicTM Jukebox is supported only in Windows XP or higher operating system.
11
Connecting to the Computer
Connecting the player to the computer
Connect the player to your computer with the mini USB cable provided. The player will turn on
automatically. The player will appear as a Windows portable device (Windows XP) using the Media
Transfer Protocol (MTP).
The Player
USB port
of your
computer
USB cable
• It might take several seconds for the player to be detected. Click Refresh in My
Computer or Windows Explorer to make sure the player has been detected.
• The player is capable of transferring files at USB 2.0. If a USB 2.0 port is available on your
computer, use it to connect to your player. The player is still backward compatible with the
older USB 1.1 ports. However, you will not be able to take full advantage of the potential
speed increase.
Note: Windows XP requires Service Pack 1 or higher.
12
Connecting to the Computer
Charging the battery
Your player is charged through the USB connection when it is connected to your computer. To fully
charge the player, make sure your computer is on and the player is connected for at least 3 hours.
Important battery information
• Charge the player for at least 3 hours before first use.
• Charge the player for at least 3 hours after putting away the player for a long time.
• Battery replacement should only be made by trained technicians. Refer to Limited
Warranty for details.
• Do not attempt to open the player. No user serviceable parts inside.
• To reduce risk of injury, charge only rechargeable batteries recommended by the manufacturer
for this player. Other types of batteries may burst causing damage and personal injury.
Caution
• The battery used in this player may present a risk of fire, explosion, or chemical
burn if mistreated. Do not separately recharge, disassemble, or expose to high
temperatures. Examples of high temperatures that may damage your product
include leaving it in a locked car in the summer, or putting it on top of other heat
generating electronic devices (such as power amplifiers and computer monitors).
• Do not place the battery under direct sunlight or in excessively hot places over 45ºC
(113ºF) such as the dashboard of car.
• Dispose of used battery properly. Keep away from children. Do not disassemble and
do not dispose of in fire.
Caution
• Risk of explosion if battery is replaced by an incorrect type.
• Dispose of used batteries according to the instructions.
13
Transferring Files to the Player
Transferring files to the player
You may select one of the following methods to transfer music contents to your player: 1) Yahoo!
MusicTM Jukebox, 2) drag-and-drop via Windows Explorer. For method 1, you first need to have
successfully installed the software packages included in the Music Management CD (refer to
“Inserting the included CD into CD drive).
• Transferring Files via Yahoo! MusicTM Jukebox - refer to page 15
• Transferring files via Windows Explorer (drag-and-drop) - refer to page 16
Note: Yahoo! Music Jukebox is supported only in Windows XP or higher operating
system.
Caution: Secure music download files must be transferred to your player through the Yahoo
MusicTM Jukebox or the application recommended by your online music download service
(Note: Services and applications must be Windows Media audio-compliant and support Digital
Rights Management.) (Apple iTunesTM music content is not supported).
14
Transferring Files to the Player
Transferring files via Yahoo! MusicTM Jukebox (Windows XP or
higher only)
Yahoo! MusicTM Jukebox lets you manage your music easily and organize like a pro. Create your
own playlists: music for work, the gym, or even dinner. You can also buy download music and
transfer to your player in seconds. Just drag and drop and you’re done. For more information on
the installation and operations, please visit: http://music.yahoo.com
Do not disconnect the USB cable during music download. Doing so may corrupt system
files or the files being downloaded.
1. Launch the Yahoo! Music Jukebox.
2. Attach the player to your computer. The player’s name should appear after a few seconds in
the left navigation pane.
3. In the Yahoo! MusicTM Jukebox, click My Music or click on a playlist on the left navigation pane.
4. Simply drag the playlist you want to the name of your player in the left navigation pane (you
can also drag tracks, artists and albums directly from My Music).
5. The Yahoo! MusicTM Jukebox will check to see if there is sufficient storage space on the player
to copy the songs. If not, you will have to reduce the number of songs you are transferring.
• Yahoo! MusicTM Jukebox is supported only in Windows XP or higher operating system
and Internet Explorer 6 or above for installation.
• Required updates to Yahoo! MusicTM Jukebox may be available from Yahoo! after
installation. Please refer to the Yahoo! MusicTM Jukebox Help for more information about
these updates.
15
Transferring Files to the Player
Transferring files via Windows Explorer (drag-and-drop)
(Windows XP only)
In Windows Explorer, when the RCA player is opened in MTP mode, and Windows Media Player 10
is installed, the “Data” and “Media” views will be displayed for the player.
The Data folder is used to manage data content on the player, such as text files. The Media folder
is used to manage media content supported by the player for playback, such as mp3 and wma.
You can copy / delete files from the player through Windows Explorer, but you cannot open or
edit the files directly from the player. If you want to edit the files, you will need to copy the files
from the player to another location (drive) in the system.
Note:
• Picture files should be copied to the “Media” folder for
viewing. Video files cannot be drag and copied to the
“Media” folder. They must be converted and transferred
to the player via RCA Video Converter for playback
(refer to page 28).
• If your computer has installed Windows Media Player 11,
“Internal Storage” shows instead of the folders
mentioned above. Copy files inside “Internal Storage”.
Caution: Secure music download files must be transferred to your player through one of the
provided Jukebox software packages or any applications recommended by the online music
download service. Please visit the online music download service’s website where you
purchased your content from for more details on transferring secure music to your player.
Note: Windows XP requires Service Pack 1 or higher.
16
Transferring Files to the Player
Disconnecting your player from the computer
Do not disconnect the USB connection during file download. Doing so may corrupt
system files or the files being downloaded.
For Windows XP users, your player is connected in MTP (Media Transfer Protocal) mode to your
computer by default, you may disconnect the USB cable directly when file download is completed.
17
General Controls
Before you begin
The following example illustrates what you should do before operating your player.
1. These instructions presume you’ve already done the followings:
• Installed all necessary applications.
• Transferred music from your computer to the player.
• Allowed your player to charge for at least 3 hours while connected to the computer.
2. If you haven’t unplugged the player from your computer, detach the USB cable from the
player.
3. Connect the earphones to your player.
4. If your player isn’t already on, turn it on by sliding the power button downwards and hold it
until the player turns on. The main navigation menu appears.
18
General Controls
Overview
Top view
2
Left view
Front view
Right view
Back view
8
1
3
4
6
5
7
1. Key lock - slide the key upwards to prevent accidental key activation. To unlock, slide
the key to the middle position.
Power on/off - slide the key downwards and hold it until the player turns on/off.
Stop playback - slide the key downwards during music, picture or video playback and
then release to stop the playback.
2. Microphone
3. The display
4. M - Enters or exits the player’s menu. (During playback, touch once to access the previous
navigation screen before playback, touch twice to access player’s menu. Touch three times to
go back to the playback screen.)
19
General Controls
5. Touch sensitive keypad - touch or move your finger along the surface for operations.
Scrolls up during menu navigation
Scrolls down during menu navigation
Skips backward, goes back a level during menu
navigation
Skips forward, advances a level during menu
navigation
Starts/ pauses playback, makes selections
Moving your finger clockwise along the control pad as
seen in the circular arrow will increase the volume. To
decrease the volume, just move you finger counterclockwise.
6. USB connector – Attach the small end (Type mini-B) of the mini-USB cable here. Attach the
large end (Type A) to your computer’s USB port. The player will enter USB mode automatically,
and you can transfer files to and from the computer.
The player’s battery will also be charged when connected to the computer.
7. Earphones jack – Insert the earphone plug here.
8. Reset button – If the player locks up, press the reset button with a non-metal pointed object
(e.g. toothpick) to reset it.
20
General Controls
Navigation display
Indicates the mode currently selected
1
2
3
4
5
Indicates the item currently selected
1.
2.
3.
4.
5.
Indicates whether the player is playing or paused.
Indicates if the shuffle mode is on or off.
Indicates what repeat mode is activated or off.
Indicates that the key lock function is activated.
Indicates the battery level of the player. When charging, the icon will animate.
21
General Controls
Navigation menus
The files are sorted according to their file types. Music files are further sorted according to several
parameters for quickly searching your favourite music. Once your player is turned on, the
following file menu parameters can be seen as below:
Home
Music
Audiobooks
Radio Recs
Voice Recs
Line-in Recs
Playlists
Pictures
Video
Artists
Albums
Titles
Genres
Years
Selecting what you want to play
The following example illustrates the steps to select and play songs in the Artists category.
1. Select “Music” by touching
advance.
or
. Then touch
to
Music
22
Music
Artists
Albums
Tiltes
Geners
Years
2. Highlight “Artists” by touching
Artists
Artist 1
Artist 2
Artist 3
Artist 4
Artist 5
Artist 6
3. The Artists menu appears with the artists listed in
alphabetical order.
• Scroll up and down the “Artists” menu by touching
or
.
or
. Then touch
to advance.
• Return to the previous menu by touching
.
• View the albums from the artist highlighted by
touching
(the albums of that artist appear in
alphabetical order).
General Controls
Artist 3
All Songs
Album 1
Album 2
Album 3
Album 4
Album 5
4. Scroll up and down the “Albums” menu by touching
or
.
• View the songs from the album highlighted by touching
Album 4
All Songs
Song 1
Song 2
Song 3
Song 4
Song 5
5. Highlight the desired song by touching
(the songs of that album appear in track order).
or
.
• To play the song, touch
or
. The song’s information
will show on the display during playback.
• To pause playback, touch
.
Note:
• The information provided in the playback screen depends upon the metadata fields
that have been set up for the song.
• To show the player’s menu at any stage of navigation, touch M.
• The item that you can select for playback does not limit to a single file, you may select an
artist, an album and then touch
to start playback of all files within your selected item.
23
Listening, Viewing and Recording
Music/Audiobooks playback
Shows Album Art of digital music*
Shows Album Art of digital music*
Skips to the previous file**, touch and hold to scan
backward within a file.
Skips to the next file, touch and hold to scan
forward within a file.
Starts/ pauses playback, touch and hold to add the
current file (music only) in MySelections.
Increase or decrease the volume. Moving your finger
clockwise along the control pad as seen in the
circular arrow will increase the volume. To decrease
the volume, just move you finger counter-clockwise.
Slide downwards and release to stop playback.
For multi-section audiobook files, touch and hold
“skipping by file’”and “skipping by section”.
Skipping by file - Touch
Skipping by section - Touch
file.
or
during playback to select between
to go to the previous or next audiobook file.
or
to go to the previous** or next section of the current
* Showing Album Art of digital music - Depending on the format of the music file, album art
and the application software used for transferring files to the player, not all different formats
of the album art might be supported. For music files with displayed album art, you can select
displaying either the album art or the track information by using the up/down button.
** Touch
within the beginning 4 seconds of the current music or sectioned audible file to
skip to previous file/section. Otherwise, you will return to the beginning of the current file/
section.
24
Listening, Viewing and Recording
Music/Audiobooks playback display
Read page 21 for details
1
2
3
4
5
6
7
8
9
1. Current file number / total number of files (for audiobooks in “Skipping by Section” mode
(refer to the previous page), “Sect” shows before current section number / total number of
section)
2. Song name (or title of audiobook)
3. Artist name (or author of audiobook)
4. Album name (or provider of audiobook)
5. Genre type (or category of audiobook)
6. Elapsed playback time
7. Year of the file
8. Playback progress bar
9. File total time
•
• The information provided in the playback screen depends upon the metadata fields
that have been set up for the song/audiobook.
If ablum art is available with a music file, touch
or
to show or hide it.
25
Listening, Viewing and Recording
Picture viewing
Scrolls up during file navigation.
Scrolls down during file navigation.
Skips backward.
Skips forward.
Starts/ pauses slideshow.
Increase or decrease the volume. Moving your
finger clockwise along the control pad as seen in
the circular arrow will increase the volume. To
decrease the volume, just move you finger
counter-clockwise.
M
Touch during playback to pause and return to file
navigation.
Slide downwards and release to stop playback
and return to file navigation.
Picture files should be copied to the “Media” folder of the player for viewing if your
computer has Windows Media Player 10 installed.
26
Listening, Viewing and Recording
Video viewing
Scrolls up during file navigation.
Scrolls down during file navigation.
Skips backward*. Touch and hold to scan backwards
within a file.
* Touch
within the beginning 4 seconds of the
current file to skip to previous file. Otherwise, you
will return to the beginning of the current file.
Skips forward. Touch and hold to scan forward
within a file.
Starts/ pauses playback.
Increase or decrease the volume. Moving your finger
clockwise along the control pad as seen in the
circular arrow will increase the volume. To decrease
the volume, just move you finger counter-clockwise.
M
Touch during playback to return to file navigation.
Slide downwards and release to stop playback and
return to file navigation.
Video files must be converted and transferred by the Video Converter installed from the
included CD. Please refer to the following pages for details.
27
Listening, Viewing and Recording
Video converter
Before transferring any video files to your player, they must be converted to a compatible format
for optimal playback. To do so, you need to install the RCA Video Converter in your computer. The
video converter only works on Windows XP or higher.
1. Load the music management CD included with this
player in your computer. Installation will start
automactically. Follow the on screen instructions to
properly install the RCA Video Converter.
2. After installation is complete, launch the RCA video
converter and connect the player to the computer.
3. Drag-and-drop the selected video files from Windows
Explorer onto the Video Converter’s list control.
Drag-and-drop here
Select the
target folder
Select the
player type
• If the video file is already compatible with the player,
“Ready to be downloaded” shows under “Status”.
4. Select the target folder you wish to save the converted
video file too by clicking "Browse" under the list
control.
• If you want to transfer the video output file to the
player automatically after the conversion is complete,
check the box underneath to allow transfer to player
when conversion is complete.
5. Select the type of player from the pull-down menu
under “Player”. For this player, select “M51 series” in
the pull-down menu. Once the type of player is
selected, optimum settings for file conversion will be
made automatically.
6. To edit the name of the output video, click on the box
that is just to the right of the Destination box at the
lower right corner of the Video Converter application.
28
Listening, Viewing and Recording
7. If you prefer to convert only a portion of the video file,
select the start and end time for conversion by increasing
or decreasing the box to the right of Start and End at the
lower right corner of the Video Converter application.
8. To rotate the output file by 90O after conversion, select
“Yes” from the pull-down menu to the right of "Rotate"
at the lower right corner of the Video Converter
application.
9. Once all selections and changes above have been made,
click “Convert” to start the file conversion.
• If all the video files are ready to be downloaded without
conversion, the “Convert” button will change to
“Download”. Click “Download” to start the file transfer.
Tip: For operation details of the video converter, please open the help file by pressing
the ‘F1’ key on your computer.
Note: If Windows Media Player 10 is installed, picture
files should be copied to the“Media” folder for
viewing. Video files cannot be dragged and dropped to
the “Media” folder. They must be converted and
transferred to the player via RCA Video Converter for
playback. Alternatively, converted video files can also
be transferred via Windows Media Player in the same
way as you transfer music files to the player. Please
refer to the instructions of Windows Media Player for
operation details.
This video converter software relies on the video codecs already installed in your
computer. Make sure the video file you wish to convert plays on your computer before using
the video converter software. Note that some video files that play on your computer may rely
on specialized video playback applications that are not compatible with the video converter
software.
The video converter can only convert files that play on your PC. If a file cannot play on your
PC, then it will be necessary for you to download the appropriate PC media player for that file
format from the Internet. Enter the file type or file format into a common Internet search
engine to find links where the PC media player can be downloaded and installed to your PC.
29
Listening, Viewing and Recording
Radio (switching on)
1. To switch on the radio, touch M in any mode to
access the player’s menu (during playback M has to
be touched twice).
Menu
Go to
Shuffle
Repeat
DSP
Slideshow
Settings
2. While “Go to” is highlighted, touch
.
Off
Off
Flat
Off
Go to
Radio
Voice Recording
Line-in Recording
3. While “Radio” is highlighted, touch
the radio.
to switch on
Radio (switching off)
1. To switch off the radio, touch M in the radio mode.
Menu
Go to
Save to Preset
Clear Preset
Mode
Stereo
RecDur
Max
Settings
Go to
Library
Voice Recording
Line-in Recording
2. While “Go to” is highlighted, touch
.
3. Select one of the modes to switch to and then touch
.
You may also slide the power key downwards and hold it until the player powers
off to turn off the radio.
30
Listening, Viewing and Recording
Radio operations
Selecting Radio Frequency
Touch
or
to select frequency.
Tip: touch and hold
or
to search the frequency at a faster rate.
Automatic station search
Touch and hold
or
in the radio mode until “Searching...” shows on the display. The search
will stop when the next available radio station is found.
Saving preset stations
1. Select a radio frequency.
2. Touch M and then touch
or
to highlight “Save to Preset”.
3. Touch
or
to make the selection.
4. The next available preset station number will show, touch
or
to select another number if
so desired.
5. Touch
to save the frequency as the assigned preset station number.
Selecting preset stations
Touch
or
in the radio mode to select a preset station.
Clearing preset stations
1. Touch
or in the radio mode to select an unwanted preset station.
2. Touch M and then touch
or
to highlight “Clear Preset”.
3. Touch
or
to delete the unwanted preset station.
Suppressing stereo signal
If FM stereo reception is weak, select mono sound to reduce the noise.
1. While listening to the radio, touch M and then touch
or
to highlight “Mode”.
2. Touch
or
to select between “Mono” and “Stereo” sound.
3. Touch M to exit the player’s menu.
31
Listening, Viewing and Recording
Radio recording
1. Touch and hold
at any time while listening to the radio to start radio recording.
2. Touch
to pause record. Touch
again to resume recording.
3. Touch and hold
to stop recording. OR Slide the power button downwards and release
to stop recording.
Record duration
You may select the maximum record duration.
1. While listening to the radio, touch M and then touch
or
to highlight “RecDur”.
2. Touch
or
to select 5m, 30m, 1h or max (5 min, 30 min, 1 hour and maximum).
3. Touch M to exit the player’s menu.
Listening to radio recording
1. In the navigation menu, select “Radio Recs” to show the archive of radio recordings.
2. Select one of the recorded files for listening (refer to page 22 for details).
Deleting radio recording
1. In the navigation menu, select “Radio Recs” to show the archive of radio recordings. Select an
unwanted recorded file from the archive (refer to page 22 for details).
or
to highlight “Delete file”.
2. Touch M and then touch
3. Touch
32
or
to delete the unwanted file.
Listening, Viewing and Recording
Voice recording
1. To start voice recording, touch M in any mode to access
the player’s menu (during playback M has to be
touched twice).
Menu
Go to
Shuffle
Repeat
DSP
Slideshow
Settings
2. While “Go to” is highlighted, touch
.
Off
Off
Flat
Off
Go to
Radio
Voice Recording
Line-in Recording
3. Touch
Voice Rec
4. Touch and hold
when the display shows “Ready” to
start voice recording.
touch
or
to highlight “Voice Recording”. Then
to access voice recording mode.
Ready
5. Touch
to pause record. Touch
recording.
again to resume
6. Touch and hold
to stop recording. OR Slide the
power button downwards and release to stop
recording.
33
Listening, Viewing and Recording
Record duration
You may select the maximum record duration.
1. In the voice recording mode, touch M and then touch
or
to highlight “RecDur”.
2. Touch
or
to select 5m, 30m, 1h or max (5 min, 30 min, 1 hour and maximum).
3. Touch M to exit the player’s menu.
Listening to voice recording
1. In the navigation menu, select “Voice Recs” to show the archive of voice recordings.
2. Select one of the recorded files for listening (refer to page 22 for details).
Deleting voice recording
1. In the navigation menu, select “Voice Recs” to show the archive of voice recordings. Select an
unwanted recorded file from the archive (refer to page 22 for details).
2. Touch M and then touch
or
to highlight “Delete file”.
3. Touch
34
or
to delete the unwanted file.
Listening, Viewing and Recording
Line-in recording
1. To start line-in recording, touch M in any mode to
access the player’s menu (during playback M has to
be touched twice).
Menu
Go to
Shuffle
Repeat
DSP
Slideshow
Settings
2. While “Go to” is highlighted, touch
Off
Off
Flat
Off
Go to
Radio
Voice Recording
Line-in Recording
Line-in Rec
.
3. Touch
or
Then touch
to highlight “Line-in Recording”.
to access the line-in recording mode.
4. Touch and hold
when the display shows “Ready”
to start line-in recording.
Ready
5. Touch
to pause record. Touch
recording.
again to resume
6. Touch and hold
to stop recording. OR Slide the
power button downwards and release to stop
recording.
Adjust the volume level of the source audio device in order to achieve the optimum
recording quality. The source output varies from model to model. You might want to
experiment with a few recordings to determine the proper volume output of the source to get
optimum recording quality from the player. Recommend starting the source at around room
volume level.
35
Listening, Viewing and Recording
Record duration
You may select the maximum record duration.
1. In the line-in recording mode, touch M and then touch
or
to highlight “RecDur”.
2. Touch
or
to select 5m, 30m, 1h or max (5 min, 30 min, 1 hour and maximum).
3. Touch M to exit the player’s menu.
Listening to line-in recording
1. In the navigation menu, select “Line-in Recs” to show the archive of line-in recordings.
2. Select one of the recorded files for listening (refer to page 22 for details).
Deleting line-in recording
1. In the navigation menu, select “Line-in Recs” to show the archive of line-in recordings. Select
an unwanted recorded file from the archive (refer to page 22 for details).
2. Touch M and then touch
or
to highlight “Delete file”.
3. Touch
36
or
to delete the unwanted file.
Playlists
My Selections
My Selections is a playlist containing your favorite songs, albums, artists from the player.
Audiobook and recorded files cannot be selected as My Selections.
Album 4
Song 1
Song 2
Song 3
Added to My Sel
Song 4
Song 5
Song 6
1 Highlight the desired song, artist, album etc. and then
touch and hold
until “Added to My Sel” shows on
the display. Repeat this step for selecting more items.
• You may select an item as My Selections as many times
as you want, even if it has already been selected. If
your selected item is an artist, an album etc., all files
within will be selected as My Selection.
2. In the home menu, select “Playlists” by touching
. Then touch
Playlists
Playlists
My Selections
Playlist 1
or
to enter the Playlists menu.
3. “My Selections” is already selected, touch
to start
playback of the songs in the My Selection playlist.
Clearing My Selections
1. In the home menu, select “Playlists” by touching
. Then touch
or
to enter the Playlists menu.
2. “My Selections” is already selected, touch M to to show
the player’s menu.
Menu
Go to
Clear Playlist
Shuffle
Repeat
DSP
3. Highlight “Clear Playlist” by touching
then touch
.
and
Off
Off
Flat
4. Highlight “Yes” by touching
to confirm clearing.
?
YES
or
or
and then touch
NO
37
Playlists
Playlists from your computer
The created playlists from major music management softwares on your computer (e.g. Yahoo!
MusicTM Jukebox, Windows Media Player) can be transferred to the player while you transfer music
files via these softwares. Follow the steps below to play them.
1. In the home menu, select “Playlists” by touching
or
. Then touch
to enter the Playlists menu.
Playlists
2. Highlight a playlist by touching
or
. Touch
to start playback of the selected playlist.
Playlists
My Selections
Playlist 1
Playlist 2
Playlist 3
Deleting playlists
1. In the home menu, select “Playlists” by touching
or
. Then touch
to enter the Playlists menu.
Playlists
2. Highlight an unwanted playlist by touching
or
and then touch M to show the player’s menu.
Playlists
My Selections
Playlist 1
Playlist 2
Playlist 3
Menu
Go to
Delete Playlist
Shuffle
Repeat
DSP
Slideshow
3. Highlight “Delete Playlist” by touching
or
touch
to confirm deletion of the selected
playlist.
Off
Off
Flat
Off
4. Highlight “Yes” by touching
touch
to confirm deletion.
?
YES
38
NO
or
and then
,
Player’s Menus
Accessing player’s menus
Touch M in any mode to access the player’s menu.
During playback M has to be touched twice to display the player’s menu.
Player’s menus
Library
Radio
Voice Recording
Line-in Recording
Go to
Shuffle
Repeat
DSP
Slideshow
Settings
System Info
Customize Menu
Brightness
Screensaver
Power Save
Sleep
FreqStep
Language
Restore Defaults
Navigation and selection
Player’s Menu
items
Menu
Go to
Shuffle
Repeat
DSP
Slideshow
Settings
Off
Off
Flat
Off
1. To scroll up or down to highlight items on the screen, touch
2. To enter and view the submenu, touch
or
3. To go back to the previous menu level, touch
Currently selected option
or
.
.
.
Go to
Touch
or
to switch among the library, radio, voice and line-in recording modes.
Shuffle
Touch
or
to select shuffle on or off. Files will be played randomly when shuffle is activated.
This item is only available when you are listening to a music (mp3 or wma) file.
39
Player’s Menus
Repeat
Touch
or
to select a repeat mode. This item is only available when you are listening to a
music (mp3 or wma) file.
• Repeat One
- Repeat the current item
• Repeat All
- Repeat all items.
• Repeat Off - Repeat is Off.
Repeat and shuffle will work differently if you have highlighted a song or a set (albums,
genres, etc.). You can select your desired combination of Shuffle and Repeat to suit you.
DSP (Digital Signal Processor)
Touch
(touch
Touch
or
to select a DSP mode. Options available: flat, Bass, Pop, Rock, Jazz and Graphic
to enter graphic mode). In graphic mode, you can customize the 5 band equalizer.
or
to select a band and then touch
or
to adjust the band level.
Slideshow
The item defines the viewing time for each picture during a slideshow. Touch
among: off, 3, 5, 10 and 15 seconds.
or
to select
Settings
Touch
or
to enter the Settings menu and then touch
the player for options available within each item.
•
•
•
•
•
•
•
•
or
to select an item. Refer to
Customize Menu: to customize the music menu to show and hide certain menu items.
Brightness: to adjust the display light brightness.
Screensaver: to adjust the duration before the screensaver activates.
Power Save: to adjust the duration for automatic shut down when the player is idle.
Sleep: to adjust the duration of playback before automatic shut down.
FreqStep (Frequency Step): to select between the US and Europe frequency mode.
Language: to select the menu’s language.
Restore Defaults: to reset all menus to factory defaults.
System info
Touch
40
or
to show the amount of free space available and the firmware version.
Additional Information
Tips and troubleshooting
• Problem: Player repeats same tracks or all tracks.
– Repeat play is turned on. Touch the MENU button (M) to change the play mode.
• Problem: Audio distorted at high volume.
– Select another DSP setting.
– Turn down the volume.
• Problem: The audio tracks on my player keep skipping or popping.
– You’ll need to re-record the audio track – make sure you close all other applications on your PC
when you record.
– Try recording with Error Correction setting turned on.
• Problem: Player turns itself off.
– Your player turns itself off if you leave it in pause mode or navigation mode for the duration
specified in PowerSave setting.
•
–
–
–
Problem: The player cannot be turned on.
Reset the player by pressing the RESET button.
If the player still cannot be turned on after resetting, perform a firmware upgrade to restore it.
Please go to http://www.rcaaudiovideo.com for more details.
• Problem: Player does not respond to key presses.
– The key lock may be active. Unlock by sliding the power key to the middle position.
– If your player stops responding to key presses, you can reset it by pressing the RESET button
with a non-metal pointed object (e.g. toothpick). Most of your settings will be preserved; only
the settings that you have changed after your last power off will be lost.
– This player may temporarily cease to function if subjected to electrostatic disturbance.
To resume normal operation, it may be necessary to cycle the power off and back on or you can
reset it by pressing the RESET button with a non-metal pointed object (e.g. toothpick).
• Problem: Player cannot play WMA songs.
– Secure music download files must be transferred to your player through the Yahoo! MusicTM
Jukebox or the application recommended by your online music download service (Note:
Services and applications must be Windows Media audio-compliant and support Digital Rights
Management.) (Apple iTunesTM music content is not supported).
• Problem: The player takes a long time to read files in a folder.
– File reading may take longer if too many files are put in a single folder. Re-organize your files
into a number of folders.
• Problem: Why song information is not showing correctly?
– Song information may not match your current player’s language setting. Change the language
setting.
41
Additional Information
• Why can I not view picture files on my player?
– The player only supports .jpg extension file, and does not support other formats like .bmp,
.tiff, .jpeg.
– All picture files need to be put in the \Media folder of the player (if Windows Media Player 10
installed).
• Why does my player not play the video files that were transferred from the
computer?
– All video files must be converted by the video converter which comes with the player (please
refer to the CD). Other video file formats are not supported.
• Why does my player report that it is full?
– You have filled the capacity of the player’s memory.
– You have exceeded the maximum number of items that this player supports. Your player can
only support up to 2000 files and folders on the player.
• Problem: Contents transferred to my player doesn’t show up on other computers.
– For Windows XP users with Windows Media Player 10 installed, your player is connected in
MTP mode to PC by default, those contents transferred in MTP mode can only be seen on a PC
with Windows XP and connected in MTP mode.
• Problem: Cannot playback tracks on the player.
– Make sure audio tracks are encoded in the mp3 or Windows Media formats at supported
bitrates.
Bitrates support by the player:
mp3 – 32 to 320 kbps
wma – 48 to 192 kbps
– WMA files may be DRM protected and you don’t have the proper rights (license) to play the
files.
– Check the website and/or application help system of the music download service provider from
where the content was purchased from for license acquisition details. For more information on
how license acquisition works, go to www.microsoft.com/windowsmedia/drm.
• What is MTP mode?
– MTP (Media Transfer Protocol) mode is essential if you want to transfer DRM content to
your player. In MTP mode your player will no longer show up as a drive letter. So programs
that were designed to work with a player that shows up as a drive letter will not be able to
work directly with the player.
42
Additional Information
Specifications
Hardware
• Dimensions: 91 mm H, 40.7 mm W, 7.5 mm D
• Unit Weight: 55 g
• Stereo Headphones Jack
• Mini USB Connection Jack
• Battery Operated: Rechargeable lithium polymer battery.
Mass storage drive
• External mass storage drive: When connected to a computer via USB, the player is capable of
storing any file type allowing the user a fast, convenient method of storing, retrieving, and
transferring files. This includes word processing files, presentations, spreadsheets and any other
computer files.
• Capacity: MC5102 - 2 GB, MC5104 - 4GB
• Connection: USB 2.0, Hi-speed capable
Software
• Includes the player applications and media management software.
Miscellaneous specifications
• Signal to Noise Ratio (>85dB) A-weighted
• THD (<1.0%)
Check for updates
Visit http://www.rcaaudiovideo.com for the latest news and firmware upgrades for our digital
media player.
1GB = 1 x 10⁹
43
Additional Information
Limited warranty (Canada)
Thomson multimedia Ltd. warrants to the purchaser or gift recipient that if any manufacturing
defect becomes apparent in this product within 1 year from the original date of purchase, it will
be replaced free of charge, including return transportation.
This warranty does not include damage to the product resulting from accidents, misuse or leaking
batteries.
Should your product not perform properly during the warranty period, either:
1. Return it to the selling dealer with proof of purchase for replacement,
OR
2. Remove the batteries (where applicable), and pack product complete with accessories in the
original carton (or equivalent). Mail prepaid (with proof of purchase) and insured to:
Thomson multimedia Ltd.
6200 Edwards Blvd.,
Mississauga, Ontario L5T 2V7
Canada
The provisions of this written warranty are in addition to and not a modification of or subtraction
from the statutory warranties and other rights and remedies contained in any applicable
legislation, and to the extent that any such provisions purport to disclaim, exclude or limit any
such statutory warranties and other rights and remedies, such provisions shall be deemed to be
amended to the extent necessary to comply therewith.
If you are unable to find a qualified servicer for out of warranty service, you may write to:
Thomson Inc.
P.O. Box 0944
Indianapolis, Indiana, U.S.A., 46206-0944
Attach your sales receipt to this booklet for future reference. This information is required if service
is needed during the warranty period.
PURCHASE DATE
NAME OF STORE
44
visit us at www.rcaaudiovideo.com
Please do not send any products to the Indianapolis address listed in this manual or on the carton.
This will only add delays in service for your product.
EXPORTER
Thomson Inc.
P.O. Box 1976
Indianapolis, IN 46206-1976
©2007 Thomson Inc.
Trademark(s)® Registered
Marque(s)® Deposée(s)
Marca(s)® Registrada(s)
www.rcaaudiovideo.com
v2.0
45