1
Digital Video Camera
Chipset: SQ
User Manual
Foreword
Thanks for choosing our DV. Please read this manual carefully before using
the unit, and keep the manual well.
Standard Accessories:
Note:
1. Do not use of this equipment under the heat, cold, damp or dusty environment
2. Avoid prolonged sunshine on this device, which may damage the equipment
3. Avoid hit with hard objects, this will damaged the equipment
4. After switch off the DV, please take out the SD card
5. When the display signal of battery is empty, or the system automatically shuts down, battery needs to
be charged
6. In order to avoid static interference, do not use of the equipment under special dry environment
7. Please do not unplug the cable half-way or turn off the power when uploading or downloading files, this
may damage the equipment
8 Please pay attention to keeping the lens clean.
English
User Manual
INDEX
1.
2.
3.
4.
5.
6.
7.
8.
Main Function Introduction………………………………………………....3
Recording Video
…………………………………………………………..3
Video Playback
…………………………………………………………….3
Taking Photos ……………………………………………………………...4
Shortcut Keys ………...…………………………………………………….6
Photo Playback Mode ………………………………………………………7
PC Connection ……………………………………………………………….8
Specification ……………………………………………………………...8
2
English
User Manual
1. MAIN FUNCTION INTRODUCTION
According to different models, some functions may not be available, please operate
as per actual function.
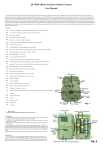
1) LEFT: Previous photo or video
2) RIGHT: NEXT photo or video
3) UP key to make far when taking photo or recording video
4) OK key: confirm function; start to take photos or videos
5) DOWN key to make near when taking photo or recording video
6) ESC key to change Model
6) MENU key to show menu list on every function
7) Reverse: Upside down function
8) Power: Power ON/OFF
9) Flash Light: light compensation
10) AV Out: Connect to TV
11) USB: Connect to computer
12) DC: Charge battery
2. Recording Video
After power on, directly go into recording video mode, click OK button to begin to record, Re-click OK key
to stop recording video. On recording video interface, click MENU button, there will be two options: white
balance and resolution.
White balance:
Press MENU key to enter white balance mode, there are five options: Automatic
Cloudy
, Incandescent
, Fluorescent lamp
, Day
,
. Select corresponding mode, it will display
accordingly. It is defaulted to Automatic mode.
Resolution:Press MENU key to enter resolution mode, there are two options:
VGA: 640X480;
QVGA: 320X240; Select corresponding mode, it will be changed accordingly.
3. Video Playback
Click ESC switch to video playback on panel, enter video playback, Click OK button to play video. Under
current video-stopped state, click MENU button, there will be display interface: Protect, Delete.
3
English
User Manual
Protect:Click MENU key to enter, then press RIGHT key to switch to video protection mode, there are
two options: lock or unlock.
Under current locked video, there will be a lock symbol
at the bottom right corner of screen.
Locked video can not be removed; they can not be deleted until they are unlocked.
Delete:Click MENU key to enter, press RIGHT key to switch to DELETE mode, there are two modes:
delete one, delete all.
AV-OUT:
Note: Locked video can not be removed unless they are unlocked.
Press MENU Key to enter,Totally there are two modes: NTSC, PAL. The defaulted is
NTSC.
4. Taking Photos
Click ESC button to switch to camera mode, Press OK button for taking photos; On current mode, press
MENU key, there will be nine modes of Scene Selection
Night Scene
sensitivity
; Portrait
; landscape
; movement
: Automatic
; party
; Night Portrait
; beaches
;
; high
. Press up and down keys for selecting appropriate mode, and then press OK for
4
English
User Manual
confirmation, the photo will be changed accordingly.
1) Under camera mode, press MENU key, there will be scene selection
, click RIGHT key, change
to
; There are four resolution options: 5M 2592X1944; 3M 2048X1536; 1M
1280X1024; VGA 640X480; select the corresponding resolution, which will be displayed on screen; the
size of photo will be changed accordingly.
2) Under camera mode, press MENU key, there will be scene selection; click RIGHT key, change to
" mode, there are two options: open
or off
; select appropriate mode, there
anti-shake
will be corresponding display on screen, if select OPEN, the anti-shake icon will be green; if select OFF,
the anti-shake icon will be orange.
3) Under camera mode, press MENU key, there will be scene selection, press RIGHT key, change
totally 12 settings, press up and down button to select: exposure, sensitivity, white
Setting
balance, sharp degree, image quality, date setting, automatic shutdown, language, frequency, formatting,
TV OUT, Default setting .
:Click MENU key to enter the exposure mode, totally six options: +2, +1,0 -1,
Exposure mode
-2, -3 Select appropriate mode, then screen will changed(brighter or darker) depending on the chosen
mode.
:
Sensitivity mode
Click the MENU key to enter the sensitivity mode, totally four options: Auto,
100, 200, 400, defaulted to automatic mode, select appropriate mode, which will be changes accordingly.
:Click the MENU key to enter the white balance, totally five options: Auto, day,
White balance
cloudy, tungsten lamp, fluorescent lamp, defaulted to automatic mode. Select appropriate mode, which
will be changed accordingly.
Sharpness
:Click MENU key to enter sharp degree, totally options: Normal, sharp, soft,
defaulted to Normal mode. Select appropriate mode, which will be changed accordingly.
Image quality
:Click the MENU key to enter image quality, totally three options: super, fine, normal,
defaulted to normal mode, select appropriate mode which will be changed accordingly.
Date setting
:Click
the MENU key to enter, totally three options: On / off, date setting. After
selecting Date setting, click OK key to enter, then press up / down / left / right for setting year / month /
day; click up / down key for switching year / month / day, and press OK for confirmation.
Automatic Shutdown
:Click MENU key to enter, totally four options: 1 minute, 2 minutes, three
minutes, off, defaulted to 1 minute mode; when you choose 1 minute mode, it will be automatically shut
down within 1 minute if no any operation; when you select OFF, it will not be off if no any operation.
5
English
User Manual
:Click MENU key to enter, there are two kinds of language options: English and
Language
French; defaulted is French.
:Click MENU key to enter, there are two kinds of frequency options: 50HZ, 60HZ;
Frequency
defaulted to 50HZ.
:Click MENU key to enter formatting mode, after formatting, the information in SD
Formatting
card can not be restored.
AV OUT
:Click MENU key to enter, there are two kinds of AV OUT options: NTSC, PAL; defaulted
to NTSC.
Default setting
:Click MENU key to enter default settings, after choose defaulted settings, it will
come to factory settings.
4) Upside down: Click Reverse key under any state for inverse screen.
5) Far focus/Near focus: Under taking photo mode and video recording mode, it can be far-focus and
near focus. Under photo playback mode, W/T KEY is to zoom in and out.
6) Self-photo taking: Under camera mode, click Next button to enter self-photo taking mode
re-click Next button to enter self-photo taking
,
.
5. Shortcut keys
1) Under camera mode, click LEFT key for scene selection shortcut key
2) Under camera mode, click UP key for image quality shortcut key
6
.
; when browsing pictures, from
English
User Manual
shortcut key to deleting function.
3) Under camera mode, click DOWN button for setting self-photo taking; when browsing pictures, press
DOWN key for thumbnails.
4) Press Right key, it is ON/OFF for flash light.
6. Photo playback mode
Click ESC key on panel to switch to photo playback, after entering, it will show current picture, press
LEFT/RIGHT key for changing photos; click UP button to quickly delete current photo; click DOWN key
for thumbnails browsing. On current photo, click MENU button, four options will appear: photo rotation,
Protection, delete, crop image.
Picture rotation
:Click MENU
key to enter picture rotation mode, there are totally three
modes: 90 ° rotation, 180 ° rotation, 270 ° rotation; select corresponding mode, it will be changed
accordingly.
Protection:Click MENU key to enter, press RIGHT key to switch to pictures protection mode, there
are two options: lock or unlock. Under current locked picture, there will be a lock symbol
at the
bottom right corner of screen. Locked picture can not be removed; they can not be deleted until they are
unlocked.
Delete:
Press RIGHT key to switch to DELETE mode, there are two deleting modes: delete one,
delete all. Note: Locked picture can not be removed unless they are unlocked.
Crop image:
Press RIGHT key to switch to CROP IMAGE mode; Re-click MENU key for
cropping, up/down/left/right keys are for moving, OK key is for confirmation. ESC key is for exit.
7
English
User Manual
Crop-imaged pictures will be displayed as XGA format.
7. PC connection
Connecting USB cable with USB port on device, a portable disk shows on Computer
*note: PC connected; there is MSDC on display.
8. Specification
Size
115X75X25mm
Weight
120g (including battery)
Screen
2.4 inches TFT LCD Screen
USB
USB 2.0
Power
Lithium Battery
Voltage
3.7 V
Memory card
128M/256M/512M/1GB/2GB/4GB/8GB
Video format
AVI
Photo format
JPG
NTSC-30fps
AV-OUT
PAL-25fps
Temperature
0---40°C
Menu language
English/ French
IDCOM – 79 RN7 – 69570 DARDILLY – FRANCE
THE DISPOSAL OF ELECTRICAL AND ELECTRONIC EQUIPMENT WASTE PRODUCTS ON THE
PART OF FINAL USERS IN THE EUROPEAN UNION
This symbol on the product or on the container indicates that this product cannot be eliminated with the
general waste. The user is responsible for eliminating this kind of waste by throwing them away at a
“recycling point” specifically for electrical and electronic waste. Selective collection and electrical
equipment recycling contribute to preserve natural resources and warrant waste recycling to protect
environment and health. In order to receive further information about electrical and electronic waste
collecting and recycling, contact your Local Council, the service of household waste or the establishment
where the product was acquired.
8