1
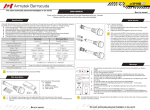
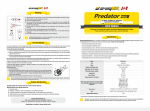
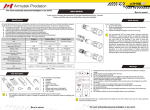
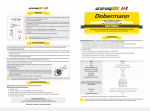
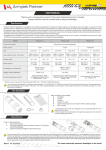
Armytek Viking PRO The most technically advanced flashlights in the world. www.armytek.com QUICK GUIDE Born to exceed Thank you for choosing the products of Armytek Optoelectronics Inc., Canada. Please read this manual carefully before using the flashlight. Operation Armytek Viking PRO flashlight can be turned on in two ways: persistent and tactical. Full pressing of the button to the click provides the persistent turning on. The flashlight will deliver light till you turn it off with second full pressing. Tactical turning on is performed by holding the button half pressed. The flashlight will provide light till the button is released. Care and Storage In case the rubber button is damaged, it should be replaced. Replacement order: 1. Unscrew the tailcap. 2. Unscrew the thread ring gage, which holds the rubber button in the cap. To do so you should use needle-nose pliers (round-nose pliers or another tool: most suitable will be expansion pliers). Use the tool as it is shown at the picture. 2. 1. Do not disassemble the flashlight except for unscrewing the thread ring gage and replacing the rubber button. There are no other parts in the flashlight that can be replaced by the user. Armytek Viking PRO has two mode lines. First Line is accessible when the head of the flashlight is tightly screwed to the body (it touches the contact ring). To switch to the Second Line, loosen the head on 1/8 of a circle and wait for 1-2 seconds. To switch to the First Line again tighten the head and wait for 1-2 seconds. The modes in each mode line are switched cyclically in the order they are set in the flashlight memory. To switch modes in the First Line quickly (within 1 second) turn the body of the flashlight on 1/8 of a circle counterclockwise, and then turn the body clockwise to the maximum. To switch modes in the Second Line quickly (within 1 second) turn the body of the flashlight on 1/8 of a circle clockwise to the maximum, and then bring it to the initial position. It is recommended to clean the threads and O-ring off dirt and old grease. Remember that secure protection from water and dust cannot be provided by worn out sealing and fouling as well as lack of lubricant cause fast wear-out of threads and sealing rings. To clean the thread do the following: 1. Unscrew the tailcap and remove the sealing ring carefully with a toothpick (do not use sharp metal things as it can damage the ring). 2. Wipe the sealing ring thoroughly with a soft cloth (or tissue). Do not use solvents. If the sealing ring is worn out or damaged replace it by a new one. 3. Clean the metal threads with a brush using ethanol. Be careful not to allow applied liquid to get inside the flashlight or tailcap as it can cause fails in functionality of the flashlight. After cleaning lubricate the thread and the sealing ring with polyalphaolefin-based silica grease, e.g. Nyogel 760G. The application of automotive and other improper grease can cause swelling and damage of the sealing rings. In case of active operation and application in dusty environments it is recommended to perform cleaning and lubricating of the parts as often as required, even if it is more than twice a year. Service and Warranty Armytek provides free warranty repair for 10 years from the purchase. Warranty doesn't cover damage caused by: 1. Improper usage. 2. Attempts to modify or repair the flashlight by nonqualified specialists. 3. Longtime application in chlorinated or polluted water, or other liquids (other than water). 4. High temperatures and chemicals' exposure, including the liquid from defected batteries. 5. Usage of low-quality batteries. On default the following modes are available: in the First Line: 850 lm, 6 lm, 200 lm in the Second Line: Strobe (15 Hz), Firefly 1.5 lm Armytek Optoelectronics Inc. Web: www.armytek.com Email: [email protected] Address: 67 Vandervoort Dr, Richmond Hill, Ontario, L4E 0C7, Canada Specifications are subject to change without notice. Born to exceed The most technically advanced flashlights in the world.