Download VOIIS V3 / V3g User Manual
Transcript
VOIIS V3 / V3g User Manual 3. Connect the USB charger to the handset. Charge the phone at least 6 hours before first use. English Rev. 1.1
I.
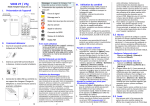
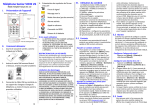
Device Overview SOS Button III. Handset Operation ‐
‐
Flash Light On/OFF Power On/Off ‐
Signal strength Getting Started 1. Open the back cover as indicated by Silent mode (No ringer) Alarm on Missed call the arrow. Battery power Please Read Before Proceeding -
-
2. Insert the SIM card as illustrated below. Insert the battery afterwards. THE BATTERY IS NOT CHARGED WHEN YOU TAKE IT OUT OF THE BOX. DO NOT REMOVE THE BATTERY PACK WHEN THE PHONE IS CHARGING. YOUR WARRANTY IS INVALIDATED IF YOU DISASSEMBLE OR ATTEMPT TO DISASSEMBLE THE DEVICE. Limitation of Damages ‐
4. Symbol Overview on Home Screen USB Port Flash Light II.
NONPERFORMANCE OF OBLIGATIONS, OR USE OF THE WEATHER INFORMATION, DATA OR DOCUMENTATION HEREUNDER REGARDLESS OF THE FORESEEABILITY THEREOF. The VOIIS Senior Phone offers 4 major functions on the menu: [1] Call Log [2] Contacts: keep your contact information in a phonebook. [3] Alarm: set up wake‐up calls for reminder/notification purpose. [4] Settings: configure basic settings including phone profile, volume, vibration, time and date and server info. 3.1 Notes before Use 1. When the phone is powered on for use the first time, you’ll be prompted to select its display language. 2. You’ll be asked to enter a PIN code if it comes with your SIM card. PIN code verification is only required at the first time, and no further prompts at power‐on will be needed once it’s been verified. Note: You will be prompted for PIN code verification at power‐on if the SIM card has been changed. In this case, the phone will then only allow 2 more PIN code changes. Be careful with what you’re entering to avoid losing your chance of correct PIN code entry. TO THE MAXIMUM EXTENT PERMITTED BY APPLICABLE LAW, IN NO EVENT SHALL MOBILE ACTION OR ITS PROVIDERS BE LIABLE TO USER OR ANY THIRD PARTY FOR 3.2 Contacts ANY INDIRECT, SPECIAL, CONSEQUENTIAL, ‐ Add / Edit a Photo Contact ‐ INCIDENTAL OR PUNITIVE DAMAGES OF 1. To add or edit a photo contact, you ANY KIND, IN CONTRACT OR TORT, have to first login to VOIIS server INCLUDING, BUT NOT LIMITED TO, INJURY, (www.voiis.com), edit the contact’s LOSS OF REVENUE, LOSS OF GOODWILL, name/phone number/photo there, LOSS OF BUSINESS OPPORTUNITY, LOSS OF and import all the contact DATA, AND/OR LOSS OF PROFITS ARISING information back to the phone (up to OUT OF, OR RELATED TO, IN ANY MANNER, 30 photo contacts) from your OR THE DELIVERY, PERFORMANCE OR 2.
computer, in order for contact information to be shown on the phone. (See 3.8 for more details about how to login to server) To make a quick‐dial call, you can press the up (︿) and down (﹀) arrow keys on the main screen to scroll through the photos listed, and select a contact make a quick call. ‐ Specify a Contact’s Ringtone ‐ 1. To assign a specific ringtone for a contact, press [Menu] > [Contacts], scroll through contacts with the up (︿) and down (﹀) arrow keys to select one, and press [View] > [Ringtone] to further choose a ringtone for the selected contact. 2. A personalized vocal ringtone can be added to the ringtone (e.g. the contact’s name or nickname) for better identification when receiving the call. To do so, press [Menu] > [Contacts], scroll through contacts with the up (︿) and down (﹀) arrow keys to select one, and press [View] > [Vocal ringtone] to proceed with recording. 3.3 Alarm Alarm allows you to set up 1 wake‐up alarm and 3 additional alarms (Alarm 1‐3) for general purposes. ‐ Set up Wake‐up Alarm ‐ Press [Menu] > [Alarm], and select [Wake‐up alarm]. ‐ Set up Alarm 1‐3 ‐ 1. Press [Menu] > [Alarm], and select [Alarm 1], [Alarm 2] or [Alarm 3]. 2. Each of Alarm 1‐3 allows you to specify alarm time, repeating method and alarm tone. 3. When the alarm goes off, you may press the green answering key to stop it from ringing. 3.4 SOS Emergency 1 SAVE THE TREES, SAVE THE EARTH EN 2 3 4 The built‐in SOS button can be used in case of emergency. Once pushed, the phone will automatically send out a position text message and make calls to at most 5 emergency contacts. (This function and emergency contact information can only be set up on VOIIS server. See more details about Login to VOIIS Server in section 3.8.) 3.5 Remote Pick‐up In case of emergency, any of the emergency contacts can send out a text message including only PICKUP (capitalized or not) to the phone, to temporarily enable the Remote Pick‐up function on the phone. Within 30 minutes after the message is received by the phone, the emergency contact person can make a call to the phone, and it will be picked up remotely, in order for the caller to get some idea about what might be going on around the phone user. (This function can only be set up on VOIIS server. See more details about Login to VOIIS Server in section 3.8.) ‐ Sound ‐ 1. Press [Menu], and select [Settings] > [Sound]. 2. Here you may configure the volume for conversation, incoming call, alarm tone, keypad tone, and etc. ‐ Vibration ‐ Press [Menu], and select [Settings] > [Vibration] to enabled/disabled vibration. ‐ Time and Date – Press [Menu], and select [Settings] > [Time and date] to update time and date as needed. ‐ Server Info – Press [Menu], and select [Settings] > [Server info.] to find out information of the server’s website where the phone has logged in to, account name and password. 3.8 Login to VOIIS Server 1.
2.
3.6 Position Query Any of the emergency contacts can send out a text message including only FIND (capitalized or not) to the phone, to check on the current position of where the phone user is. (This function can only be set up on VOIIS server. See more details about Login to VOIIS Server in section 3.8.) Note on environmental protection: After the implementation of the European Directive 2002/96/EU in the national legal system, the following applies: Electrical and electronic devices may not be disposed of with domestic waste. Consumers are obliged by law to return electrical and electronic devices at the end of their service lives to the public collecting points set up for this purpose or point of sale. Details to this are defined by the national law of the respective country. This symbol on the product, the instruction manual or the package indicates that a product is subject to these regulations. By recycling, reusing the materials or other forms of utilizing old devices, you are making an important contribution to protecting our environment. SAR Information 3.7 Settings ‐ Phone Profile ‐ 1. Press [Menu], and select [Settings] > [Phone profile]. 2. Select either Normal or Silent as needed. Login to www.voiis.com with your IMEI/name and password (which can be found in your phone: [Settings] > [Server info.]). When logged in, click Help from the main menu for more details on instructions of how to edit contact information, add photo to contact, set up SOS recipients, upload ringtone and upload data to phone. WEEE Band Position GSM 900 Head Body(1.5cm Gap) Head Body(1.5cm Gap) GSM 1800 SAR 10g (W/kg) 0.641 0.299 0.358 0.172 5 6 7


