1
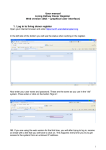
User manual
Deceased donor registration/update
(13aug2015)
Contents
1.
2.
3.
4.
Find the menu ‘Deceased donor’ ......................................................... 1
Find an existing donor in the database ................................................. 2
Register a new donor – Basic information ............................................. 4
Register and/or update of donor information ......................................... 5
4.1. Infection serology .................................................................... 5
4.2. Organ Procurement .................................................................. 5
4.2.1. Organs procured used for other purposes ............................... 8
4.2.2. Organs procured but not transplanted .................................... 8
4.2.3. Cause of no procurment ...................................................... 9
4.3. Laboratory test, clinical information and medication ...................... 9
4.4. HLA typing ............................................................................ 10
1. Find the menu ‘Deceased donor’
Donor -> Deceased donors
1
2. Find an existing donor in the database
When you enter the menu ‘Deceased donor’ you get a variety of possibilities
for entering search parameters. You can search on one parameter or combine
more parameters to limited the number of recipients.
Example of a search based on a combination of parameters:
You are able to see all donors from own country and donors from which you
have received organs. Donors from other countries, from whom you have not
received organs, can only be seen within 14 days after donation realized date.
2
At the bottom of the page the total number of donors fulfilling the search
parameters are displayed (No. 1).
Furthermore, the order of the list is displayed (No. 2), if you wish to change
the order click on the column headers (No. 3).
Below is an example of changed sorting, if you wish to go back to the default
sorting click on the ‘Order by:’ button.
3
3. Register a new donor – Basic information
Click on ‘Add new’
Start entering information.
Mandatory data to fill in before getting a donor number is; Date of birth/age,
procuring center, original donor hospital, sex, AB0 blood group, Donation after
circ. Death, cause of death and donation realized.
The Nordic person numbers will be validated according to the registered
nationality and national rules. Furthermore, it will be checked if the donor has
been registered previously in the database.
Donation realized can initially be set to ‘Potential’ and later changed to Yes or
No. To register organ procurement this field must be set to Yes.
Age in years at donation is automatically calculated based on person number
and donation date.
4
4. Register and/or update of donor information
4.1.
Infection serology
To register donor virology and bacteriology results enter -/+/? or select form
list of values.
4.2.
Organ Procurement
To start with, all the organs are listed as not procured, to procure an organ
please click on the ‘Procure an organ’ button.
5
If you see the text ‘Donation not realized. Please change value in Basic tab.’,
you need to go to the basic tab and change the value
6
Chose the organ type which you wish to procure and enter other relevant
information.
When you have saved information, you will be able to procure the next organ
by click on the ‘procure next’ button
If you do not know whether the organ has been transplanted or not, you can
leave the ‘Graft transplanted’ empty.
If you later on connect the organ with a recipient, the field ‘Graft transplanted’
will automatically be filled in with yes.
7
4.2.1.
Organs procured used for other purposes
If the organ has been procured but used for other purposes, it need to be
registered here.
4.2.2.
Organs procured but not transplanted
Also if the organ has been procured but not been transplanted
If you go back you get an overview of procured and not procured organs
8
4.2.3.
Cause of no procurment
Registration of cause of why organs has not been procured. Please chose cause
from list of value.
4.3.
Laboratory test, clinical information and medication´
Fill in all available data
9
4.4.
HLA typing
Enter the HLA type or select between HLA types by pressing the drop down
menu. To select a specific type on the list, click on it.
If you start typing, the list will narrow down
10
Bw4 and Bw6 is automatically calculated from the association to the HLA type,
but not automatically counted as part of the donor HLA.
To use the calculated Bw4 and Bw6 you have to enter them into the HLA
registration fields.
11