1
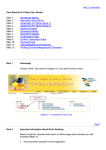
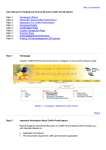
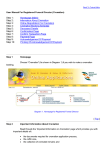
Back To Tutorial Main
User Manual For Registered Funeral Director (Coffin Permit Transhipment)
Step 1 :
Step 2 :
Step 3 :
Step 4 :
Step 5 :
Step 6 :
Step 7 :
Step 8 :
Step 9 :
Homepage (Menu)
Information About Coffin Permit Transhipment
Application For Coffin Permit Transhipment
Deceased Details
Confirmation Page
Confirm Transaction Page
Payment Page
Acknowledgement Of Payment
Printing Of Acknowledgement Of Payment
Step 1
Homepage
Choose “Coffin Permit For Transhipment” (As shown in Diagram 1) if you wish to apply
for a transhipment permit.
Diagram 1. Homepage for Registered Funeral Director
[ Top ]
Step 2
Important Information About Coffin Permit Transhipment
Read through the ‘Important Information on Coffin Permit (Transhipment)’ which provides
you with important details on:
·
·
Application procedures
The documents required for coffin permit (transhipment) application
Diagram 2. The Important Information On Coffin Permit (Transhipment) Page
·
Click “I Agree” if you agree with the conditions.
[ Top ]
Step 3
Application For Coffin Permit Transhipment
Fill in the details in the application as shown in Diagram 3. Fields marked with asterisk
(*) are mandatory.
Diagram 3. Application For Coffin Permit Transhipment Page
·
Select the religion of the deceased.
·
Enter the current location of the coffin.
·
Attach supporting documents like the death certificate, embalming certificate, sealing
certificate, export permit, air waybill (air consignment note) etc. Click on the “Browse”
button to select the file and click on the “Attach” button. Only documents with file
extensions .jpg, .bmp, .tif will be accepted. You can upload up to 10 supporting
documents in all.
·
Click on the “Next” button to continue.
[ Top ]
Step 4
Deceased Details
Fill in the deceased details as shown in Diagram 4. Fields marked with asterisk (*) are
mandatory.
Diagram 4. The Deceased Details Page
·
Only valid Singapore NRIC numbers should be entered in the NRIC No. field. The
NRIC number should be in S9999999X format.
·
The Birth Date and Death Date should be entered in DD/MM/YYYY format.
Alternatively, click on the calendar icon next to the field to open the calendar and
select a date.
·
The description field for cause of death is a required entry. Please enter description
as shown in the Death Certificate.
·
Click on the “Next” button to continue.
[ Top ]
Step 5
Confirmation Page
A confirmation page will display as shown in diagram 5. Verify all the details and click
“Confirm” to proceed. For amendments, please click “Previous” to amend.
Diagram 5. Application Confirmation For Coffin Permit Transhipment Page
·
Verify the Payment details, Type of Application, Coffin Location and deceased details
on the page.
[ Top ]
Step 6
Confirm Transaction Page
Once application has been confirmed, you will have to now select the payment mode
(Refer to Diagram 6).
Diagram 6. Confirm Transaction Items Page.
·
Presently, eNets(Credit Card, Debit Card and Internet Banking) is the mode of
payment available, and it is selected by default.
·
After verifying all details and are ready to make payment, click on the “Compute
Payment” button.
[ Top ]
Step 7
Payment Page
Verify the payment mode.
Diagram 7. Confirm Payment Page.
·
Click on the “Pay Now” button to make payment. This will bring you to the payment
gateway where the payment is made using the bank interface. The payment is made
for the total amount shown. Partial payment or different modes of payments are not
allowed.
[ Top ]
Step 8
Acknowledgement Of Payment
Once payment has been successfully made, the “Acknowledgement of Payment” page
will be displayed. Refer to Diagram 8.
Diagram 8. Acknowledgement of Payment Page.
·
When you see this page, it means that the payment and booking/application has
been successful.
·
The receipt number is shown on this page together with the rest of the important
application details.
·
Quote the “Registration No” shown on the first line to refer to the booking/application
when you approach the counter at Port Health Office.
·
Use the “Transaction No” shown at the top of the “Acknowledgement of Payment” to
check the status of your application through the “Coffin Permit Application Status
Enquiry” function.
·
Click on the “Print Acknowledgement of Payment” button to open a printable version
of the acknowledgement of payment. Print the page for future reference.
·
To start a new booking/application, click on the “New Transaction” button.
[ Top ]
Step 9
Printing Of Acknowledgement Of Payment
Diagram 9. Acknowledgement of Payment.
·
Click “Print” button to print the Acknowledgement of Payment.
·
Click “Close” button to close the pop-out browser window.
[ Top ]
Back To Tutorial Main