1
Posture Scale Analyzer
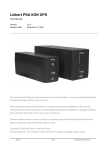
QPS-200
The posture Scale Analyzer is part of the
Posture Analyzer system that include:
1.
2.
3.
4.
5.
6.
Posture Scale Analyzer
Posture Vision
Posture Screen
PSA Board
(optional)
PSA Cushion (Optional)
PSA Cart
(Optional)
Posture Scale Analyzer
The Posture Scale Analyzer consist of the following
components:
1. Quadruple section force plate.
2. CD with PSA + PV software and user manual
3. Operation Manuals PSA + PV (hard copy)
4. Power Supply
5. Serial communication cable to PC.
Note: For some of new Laptop models that have no serial
port, USB to serial adaptor is required.
Posture Scale Analyzer
INTRODUCTION
The Posture Scale Analyzer system consists of four
electronic weighing plates, connected to a standard
desk PC or laptop.
The system requirements:
1. Operating system - Windows 98 (or up)
2. Processor - Pentium II (or up)
3. Memory - at list 64Mb
Posture Scale Analyzer
PSA – Installation Instructions:
1. Place the scale on a leveled and stable surface.
2. Connect the power supply to a socket on the scale
3. Connect the serial port cable to connector on the scale.
4. Connect the other end of the serial port cable to the
computer’s serial port.
5. Plug the power supply into the electricity socket.
Make sure the red LED by the power supply socket is on
Make sure the power supply cable and the
communication cable do not touch the scale’s surface.
Posture Scale Analyzer
SOFTWARE - Installation Instructions:
1. Insert the CD into the driver.
2. Enter the ‘My Computer’ icon and then into the
CD driver.
3. Double click Setup and complete the setup
process according to the instructions.
4. Click ‘Start’ and then click ‘All Programs’; click
the ‘Posture Scale Analyzer’ icon and drag it
to your desktop and create a shortcut.
Getting to know the PSA software
Starting – Double click the icon
[PostureScaleAnalyzer] on your computer’s desktop.
The screen with 0.00 or
any x.xx digits in “Total
weight” indicates the PSA
is properly operating.
Then:
Skip to screen No. # 9
Otherwise:
continue to the next
screen.
Communication Failure
The screen with “----------” in “Total weight” indicates
there is no communication with scale.
The red LED next
to cord plug should
lit. If not, check the
connection of the
adapter to the
mains and to the
scale.
Check the
communication
cable is firmly
connected on both
sides.
For further
troubleshooting:
continue to the
next screen.
Communication Setting
1. Click on [Parameter] from the main menu on the top.
2. Scroll down to [Communication]- an additional menu will open
3. Choose [Port]- you will see a list of optional port numbers
4. Click on [Auto]- the software will look for the appropriate port number.
5. Wait for the software to scroll through the different numbers, and then close the
software.
6. Reopen the
softwarecommunication
Should be now
established.
7. If not, close
software, switch OFF
and ON the scale and
open the software
again.
8. If still no
communication,
contact MIDOT for
technical support.
Warning: Do not
perform Calibration .
Add New Patient
To add a new patient to the data base click
[Patient], then click
[Add New Patient].
The new screen show blank patient card.
1. To add new patient, fill in at
least the ID, First Name and Last
Name, and click [Exit].
2. For statistical analysis it is
recommended to add Height,
Gender, Birth date and Criteria.
4. Criteria – You specify up to 6
criteria to classify patient for
statistical analysis.
6. You can add a comments of up to
255 characters.
Edit Patient Details
To edit details of existing patient click
[Patient], then click
[Edit Patient Details].
The new screen show the first patient in the patient’s list.
1. Retrieve the patient card, choose
from list, patient's ID number, or
first name or a last name,
Or choose from the list.
2. Edit patient’s details
3. To Delete a Patient’s Card retrieve
the patient’s card and click
[Delete].
4. To save the changes click
[Close/Save].
Testing Patient
1. Choose a patient name either by ID, first name or Last name, at the left top of the screen.
If the patient is new, follow the instruction in the previous section.
2. Click the [Reset] button at the bottom of the display to clear all previous data.
3. Zero the Scale – If the weight value at Total Weight is not zero, key [Zero].
4. [Check Time] – choose the test time (5-60 Sec.), 15-20 sec is recommended.
1
2
6
4
3
5. Ask the patient to mount
the scale according to the
following instructions:
5.1 The patient should
place the feet or shoes
according to the
drawing on the
weighing plates –
centered in the
appropriate size. Only
forward – backward
position is important.
5.2 The patient should
stand naturally, hands
beside the body, and
look straight forward to
point in the level of
eyes.
6. Click [Start] to begin
test.
Test Analysis – Weight distribution – Average Weight
1. Patient Name - Verify the name of the patient under test.
2. Comments – Add comments specifically to this test.
3. Save – To save the test to patient record click [Save].
4. Average Weight – indicates the total weight of the patient (Kg or Lbs) and:
4.1 Total weight distributed between Left & Right in weight units and % of body mass.
4.2 Total weight distributed between A & P in weight units and % of body mass
1
4
3
2
Test Analysis – Weight distribution- Differences
1. Differences – Indicates the differences in weight distribution.
2. Legs – Indicates the lateral weight distribution between left and right in Kg (Lbs) and in %.
3. A&P – Indicates the A&P weight distribution between Anterior and Posterior in Kg (Lbs) and in %.
4. The Graph indicates the weight distribution between left and right in Kg (Lbs).
5. The Graph indicates the weight distribution between Anterior and Posterior in Kg (Lbs).
Left & Right Graph
4
1
2
A / P Graph
5
3
Test Analysis – Weight distribution- All Weights
1. All weights – Indicates the weight distribution of the four sections of he platform.
in Kg (Lbs) and in % of the body mass: Left Anterior, Left Posterior, Right Posterior, Right Anterior.
2-3. Graphs 2 and 3 show graphically the weight distribution of the four sections of he platform.
All weights Graph
2
1
4 Sections Graph
3
Test Analysis – Graphical and Numerical presentation
1. Center of pressure – Analyze the sampling of center of pressure and indicate the weight distribution,
the amplitude and rate of sway and the stability of patient. To see COP key [Full Screen review].
2. Show graphically the sway and the weight distribution of Left-Right and A-P during the test.
To see this screen key [Right + Left / A + P] and then [ Full Screen] to enlarge the screen.
3. Show graphically the sway and the weight distribution of the four quads during the test.
To see this screen key [All weights] and then [ Full Screen] to enlarge the screen.
4. Show the numerical test results of the following:
4.1 Plan SD - The dispersion of the COP on the X-Y plane. Combines the L-R SD and the A-P SD
into one figure.
4.2 R Average - The distance of the average point from the center of the platform
4.3 Sway rate - The average speed of movement of the center of pressure
1
2
3
4
Test Analysis – Left + Right / A + P Graph
The Graph show the sway and the weight distribution of the total weight during the test proceeding
from left to right. The sampling rate is about 2 samples/sec. The X axis show samples and Y axis
show weight in Kg (Lbs).
The Red and Green lines indicate Right and Left respectively.
The Yellow and Blue lines indicates the Anterior and Posterior respectively.
The black line is the Even line. The distance of the various lines from this line indicates the imbalance
level.
The curvature of the lines indicates the Sway level and stability of the patient.
Test Analysis – All Weights Graph
The Graph show the sway and the weight distribution of the total weight during the test proceeding
from left to right. The sampling rate is about 2 samples/sec. The X axis show samples and Y axis
show weight in Kg (Lbs). The four lines show the weight of the four section (quads).
The Yellow shows Left Anterior.
The Blue shows Left Posterior.
The Red shows Right Posterior.
The Green shows Right Anterior.
The black line is the Even line. The distance of the various lines from this line indicates the imbalance
level.
The curvature of the lines indicates the Sway level and stability of the patient.
Test Analysis – Center of Pressure
1.
Zoom In / Zoom Out – For enlargement of the screen to show clearly the sampling
of the Center of Pressure of Pressure (COP) dispersion during the test. The value
in % indicates the scale up of the screen. To zoom in key the [Zoom In] and press
ENTER on the keyboard.
1
Center of Pressure - Rerun Test
1.
2.
3.
4.
Clear – key [Clear] to clear the screen.
Start – Choose rerun mode – Auto or Manual.
When [Auto] is depressed the test will run automatically from beginning to end. You can set
the speed of the rerun by changing the value under Delay (milliseconds) and key [Start].
When [Manual] is depressed the test can be rerun manually – each dot at a time.
[Forward] for the next dot, or [backward] to go one step
5. Average Point – The blue
point indicates the
average point of all
COP points sampled
during the test.
X Average - The position of
the average point on
the X axis in mm.
5
5
2
Y Average - The position of
the average point on
the Y axis in mm.
3
4
1
3
4
R Average - The distance of
the average point from
the center of the
platform in mm.
Center of Pressure – The Ellipse
1.
2.
3.
4.
Ellipse – Presents the dispersion of the COP samples on the X-Y plane. The ellipse is created
by the values of the lateral SD and the perpendicular SD.
Degree – the long axis of the ellipse indicates the main direction of the sway.
Lateral SD - The dispersion of the center of pressure between left and right
Perpendicular SD - The dispersion of the COP between the anterior and the posterior.
5. Plane SD – The
dispersion of the
COP on the X-Y
plane. Combines
the lateral SD and
the perpendicular
SD into one
figure.
3
4
5
6. Total Sway Rate –
The average speed of
movement of the
center of
pressure
6
1
2
The size and the shape
of the ellipse
indicates the
stability of the
patient.
Printing – Test results
1.
2.
3.
Print – key [Print] to start the procedure of printing test results.
Screen “Print in Black and White” – Choose [yes] for printing in black and white
and [No] for printing in color .
Screen “Print preview ?” - Choose [yes] to see the results and [No] for printing
the results.
2
3
1
6
1
Printout – Test results
2
1.
2.
3.
4.
3
5.
6.
4
5
Zoom – Determines the size of
the printout on the screen.
Choose “fit” to see full page.
Data column – Show name of
patient, test time and all
numerical test results.
Center of pressure graph.
Sway and weight distribution
graph (left & right and A & P).
Sway and weight distribution
graph:
(left A, left P, right A, right P).
Print – Key on printer icon to
print test results.
Retrieve – Test results
1
1.
2.
3.
key [Patient] in the
main menu to start
retrieving test results.
Key [Patient record].
Key [Posture record].
(continue to the next slide)
1
2
3
Retrieve – Test results (continuation)
sort the list of
patients by their ID
numbers, first names
or last names.
(last name is
recommended).
Two ways for choosing the
name of the patient by
his ID, first name or last
name.
Use mouse and cursor
•
Key on the arrow next to
ID, first name or last
name and scroll down to
the desired name.
•
Place the cursor in the
ID, first name or last
name and key the first
digit or letter and scroll
down to the desired
name.
Retrieve – Test results (continuation)
Each test is saved and identified by the date and the time of the test
•
Choose the test to retrieve by marking it with the cursor.
•
Press [Load] to load the test. (the test results appears the same as by end of test).
1
2
Retrieve – Comparison of two test results
1.
Choose first test to retrieve by marking it with the cursor and then press [Check 1].
2.
Choose second test to retrieve by marking it with the cursor and then press [Check 2].
3.
Press [Print Left + Right leg] to preview or print left to right comparison.
4.
Press [Print A / P] to preview or print anterior to posterior comparison.
1
2
1
2
3
4
Retrieve – Sequence Posture Record
1. Press [Patient], then press [Patient record],
then press [Sequence posture records].
1
2. Choose the name of the patient..
3. Choose the tests to retrieve one by one (max. 10 tests),
either by double click on the test line or by mark the
test line and click on [Add]. To remove a test from
the list, mark the test and press [Remove].
4. Press [Print], to preview press [Yes] or to print press
[No].
5. The report appears on the screen, with table that show
the date and time and tests results of each test, and
graphs that illustrate the test results.
5
3
Training Mode – Main Screen
1. Press [Training mode] in the menu in the main Screen to start training..
2. Max Dot – choose the number of dots on the screen {1 (recommended) to 10 max}.
3. Dot Size – Choose the size of the dots {1=small 2=medium 3= large (recommended)}.
4. Press [Start] to activate the training mode. The dots on screen, indicates the COP of the patient.
5. Press [List] and choose the name of the patient from list.
6
1
7
9
8
6. Press (Mode) and
choose one of 7 different
patterns for training.
7. Press (Resize) and set
the dimensions of the
pattern for the level of
difficulty of training.
8. Press (Setting) and set
the optional Line and
Circle parameters.
9. Press (Stable Results)
and view the results of
training of Stable mode.
2
3
4
5
Training Mode – Resize Screen
1. Press [Resize] in the main Screen of Training Mode.
2. Use Up & Down Arrows for setting the path width and/or the diameter of the circle.
3. Use Up & Down and Left & Right Arrows for setting the width and height of the frame.
4. Use Up & Down and Left & Right Arrows for setting the position of the frame on screen.
1
2
3
3
2
4
Training Mode – Setting Screen
1. Press [Setting] in the main Screen of Training Mode. (Example – TARGET Pattern)
2. Mark Line box for adding the limit line (purple line). To determine the limit of movement of COP.
3. Use Left & Right Arrows for locating the purple line.
4. Mark Circle box for adding the circle that lead the patient COP.
5. Click [Speed] arrow and determine the Circle speed (1=slow, 10=fast).
1
5
4
3
2
Training Mode – Setting Screen (continue)
1. Press [Clockwise] to rotate the purple line clockwise direction.
2. Press [Counterclockwise] to rotate the purple line counterclockwise direction.
3. Press [Uni-Direction] for movement of the Circle between the center and purple line.
4. Press [Change Direction] to fix the position of the purple line.
1
2
3
4
Training Mode – Setting Screen and start training
1. Click [Training Time] arrow and determine the time for the training in Seconds (max 480 sec).
2. Patient should bring the COP into the circle, then Press [Start] to start the training session.
3. Press [Stop] to stop the training session.
4. Press [Reset] to return to last setting.
1
2
3
4