1
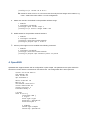
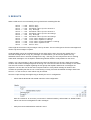
3 CISCO CONFIGURATION This chapter will explain how to enable OSPFv2 and OSPFv3 usage in Cisco routers. Some remarks: - Depending on Cisco router version, interface is choisen either with ‘FastEthernet’ or ‘Ethernet’ command. OSPFv2 examples will use ‘FastEthernet6/0’ and OSPFv3 ‘Ethernet0/0’. This option really depends on the Cisco router version – before configuration, please check which one to use. Also note that the interface numbers ‘6/0’ and ‘0/0’ in following chapters are examples, please check your active Cisco settings for what numbers should be used, or define your own if they are blank. - OSPF process-id range is 1-65535, examples use value 1 and OSPF area ID has range 04294967295, examples use value 0. - Active router configuration can be checked with ‘show running-config’ command. If OSPF is active, configuration should look something like this: … interface FastEthernet6/0 ip address 10.10.10.20 255.255.0.0 ip ospf 1 area 0 … router ospf 1 router-id 172.20.10.10 network 10.10.0.0 0.0.255.255 area 0 … - OSPF changes shouldn’t require restarting but if router doesn’t start sending hello messages or doesn’t respond to the suite, use the ‘reload’ command to restart the router. Remember to save the changes at the corresponding router prompt. 3.1 OSPFv2 Cisco configuration 1. Set IP address: > enable # configure terminal (config)# interface FastEthernet6/0 (config-if)# ip address 10.10.10.10 255.255.0.0 2. Enable OSPF by defining the OSPF number and the network in which the router belongs to: > enable # configure terminal (config)#router ospf 1 (config-router)#network 10.10.0.0 0.0.255.255 area 0 The router should start sending OSFP Hello messages. Wireshark or other packet capturing tools can be used to verify that the router is really sending Hello messages. 3. By default, the router uses its IP address as the router-id. It can be changed if needed: > enable # configure terminal (config)# router ospf 1 (config-router)# router-id 172.20.10.10 Router-id needs to be in a.b.c.d format.