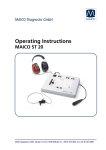
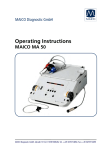
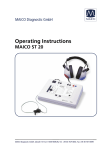
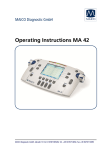
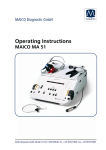
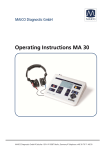
Download Operating Instructions MA 53
Transcript
MAICO Diagnostic GmbH Operating Instructions MAICO MA 53 MAICO Diagnostic GmbH, Salzufer 13/14, D 10587 BERLIN, Tel. ++49 30/70714650, Fax ++49 30/70714699 Operating Instructions MA 53 Table of Contents Page 1 Introduction............................................................................................... 4 2 Description ................................................................................................ 5 3 Getting started .......................................................................................... 7 3.1 Unpacking your instrument ..................................................................... 7 3.2 Preparing the MA 53 for use ................................................................... 8 3.3 Getting familiar with the MA 53 ............................................................. 9 3.3.1 Using the keyboard of the MA 53 ...................................................10 3.3.2 The display of the MA 53 ................................................................12 4 Pure tone audiometry ...............................................................................13 4.1 Air Conduction (AC) Testing ..................................................................13 4.2 Uncomfortable Hearing Level (UCL) Testing............................................14 4.3 Bone Conduction (BC) Testing ...............................................................15 4.4 Masking of the opposite ear ................................................................16 4.4.1 Crossover: .......................................................................................16 4.4.2 Masking theory: ..............................................................................16 4.4.3 Manual masking: ............................................................................16 4.4.4 Automatic masking: ........................................................................17 4.5 Diagnostic tests .....................................................................................18 4.5.1 Suprathreshold tests ........................................................................18 4.5.2 The Stenger Test .............................................................................22 4.5.3 The Threshold Decay (Carhart) Test .................................................22 4.6 Dual Frequency Mode ............................................................................23 4.7 Free tunable frequencies in 1 Hz Steps (FTF) ...........................................24 4.8 High Frequency Audiometry (optional) ...................................................24 5 Speech audiometry ...................................................................................25 Geba_MA53_Fe_11a.doc 1 851 430/3 11/11 Operating Instructions MA 53 5.1 Connecting the speech source ...............................................................25 5.1.1 Connecting a CD-player ..................................................................25 5.1.2 Connecting a Microphone ...............................................................25 5.2 Speech calibration .................................................................................26 5.2.1 Calibration of the CD with speech test material ...............................26 5.2.2 Calibration of the microphone for live speech test ...........................26 5.3 Connection and calibration of the monitor phone ..................................27 5.3.1 Connection of the monitor phone ...................................................27 5.3.2 Adjustment of the monitor phone ...................................................27 5.4 Speech Audiometry ...............................................................................28 5.6 Masking ................................................................................................29 6 Quick reference guide ...............................................................................30 6.1 Startup settings .....................................................................................30 6.2 Receiver selection ..................................................................................30 6.3 Signal selection ......................................................................................30 6.4 Select tone or speech audiometry mode.................................................30 6.5 Frequency selection ...............................................................................31 6.6 Warble tone (FM) ...................................................................................31 6.7 Pulse tone..............................................................................................31 6.8 Suprathreshold tests ..............................................................................31 6.8.1 SISI Test ..........................................................................................31 6.8.2 Decay test (Carhart) ........................................................................32 6.9 Swap function .......................................................................................32 6.10 Tracking function .................................................................................32 6.11 STIM Mode selection ...........................................................................32 6.12 Interlock function ................................................................................33 6.13 Talk over microphone ..........................................................................33 Geba_MA53_Fe_11a.doc 2 851 430/3 11/11 Operating Instructions MA 53 6.14 Talkback microphone and Monitor volume control...............................33 6.15 Speech audiometry ..............................................................................33 6.16 Speech calibration ...............................................................................33 6.17 User menu ...........................................................................................34 7 Advanced features ....................................................................................36 7.1 Complex mixing.....................................................................................36 7.2 Advanced Noise Selection ......................................................................37 7.3 Talk-back microphone ...........................................................................37 7.3.1 Connection of the talk-back microphone.........................................37 7.3.2 Adjustment of the talk-back microphone.........................................37 7.4 Assistant phone .................................................................................38 7.4.1 Connection of the assistant phone ..................................................38 7.4.2 Adjustment of the assistant phone .................................................38 8 Recommended literature ...........................................................................39 9 Computer interface ..................................................................................40 10 Care and maintenance of the instrument ................................................41 11 Trouble shooting ....................................................................................42 12 Technical Data ........................................................................................43 13 Warranty, Maintenance and After-Sales Service ......................................51 14 Safety Regulations ..................................................................................52 14.2 Measuring security: ..............................................................................52 14.3 Device control:.....................................................................................52 14.4 Operation: ...........................................................................................52 14.5 Patient Safety: .....................................................................................52 Geba_MA53_Fe_11a.doc 3 851 430/3 11/11 Operating Instructions MA 53 1 Introduction Thank you very much for purchasing a quality product from the MAICO family. This MA 53 audiometer is manufactured to meet all quality and safety requirements, and has been certified with the CE-symbol according to Medical Directive 93/42/EEC. In designing the MA 53 we placed particular importance in making it a userfriendly device, meaning its operation is simple and easy to understand. All built-in test signals are generated by a digital signal processor (DSP) which allows implementing new test signals just with a software upgrade. And because MA 53 functions are software controlled, upgrading later to new, extended measurement functions will be simple and inexpensive. That means that you have invested in a device that will adjust to your future needs. This user manual should make it as easy as possible for you to become familiar with the functions of the MA 53. Please open out the flap of illustrations on the last page. The description of the position (e.g. ➄) of controls, displays and connections, found again in the text, will make it easier for you to learn how to operate the MA 53. If you have problems or have ideas for further improvements, please get in touch with us. Simply call. Your MAICO-team Geba_MA53_Fe_11a.doc 4 851 430/3 11/11 Operating Instructions MA 53 2 Description The MA 53 is a two-channel audiometer for pure tone and speech audiometric tests. It can be used for ENT diagnostics and hearing aid fittings in the office, and for mobile audiometry in clinics, homes and abroad. Tests can be performed using the DD45 headphones (AC), the optional high frequency headphones HDA 200, B 71 bone conduction receiver (BC) or optional insert phones and loudspeakers (FF). Built-in test signals are pure tone, pulse tone, warble tone, narrow band and broadband noise. The MA 53 has stereophonic microphone inputs for live speech audiometry, an input for an optional tape/CD player with speech test material and an additional input for a second tape/CD player (i.e. for external masking signals). The MA 53 audiometer with the standard DD 45 delivers 11 air conduction (AC) test frequencies from 125 Hz to 8 kHz, with levels from -10 dBHL to 120 dBHL. With the optional high frequency HDA 200 it delivers 17 air conduction (ACHF) test frequencies from 125 Hz to 16 kHz, with levels from -20 dBHL to 120 dBHL. Bone conduction (BC) can be tested with 11 test frequencies from 125 Hz to 8 kHz with levels from -10 dBHL to 70 dB HL (with the standard bone conductor B 71 the frequency range is limited from 250 Hz to 6 kHz). The optional insert phones EAR 3A submit levels from -10 dBHL to 120 dBHL with 11 test frequencies from 125 Hz to 8 kHz. Optional loudspeakers are available for free sound field measurements (FF). The new, portable loudspeakers MAICO SBC have a dynamic range from -10 dBHL to 80 dBHL at 1m distance, for nine test frequencies from 500 Hz to 8 kHz. The frequency range for speech is 500 Hz to 8 kHz with levels up to 80 dBSPL. The Canton loudspeakers (not available in the USA), deliver levels up to 90 dBHL at 1m distance over the entire frequency range from 125 Hz to 8 kHz. The MA 53 has also separate line level outputs for an external amplifier. The hearing level is controlled independently for each channel by two detented dials on the left and right of the instrument which can be operated from the side or the top. The level steps are 5 dB and can be changed to 2 dB or 1 dB. The signal STIM bar and the frequency up/down keys are just beside the level control knobs for easy one handed control of level, frequency and signal presentation. Geba_MA53_Fe_11a.doc 5 851 430/3 11/11 Operating Instructions MA 53 The large backlighted LCD-display shows level, frequency, transducer, signal and other information for each channel. As a result of modern microprocessor technology, the MA 53 is easy to use and is extremely reliable. The audiometer is designed to be extremely service friendly. Automatic test programs make trouble shooting and the yearly calibration as easy as possible. PC-Interface: A serial RS 232C interface for data transfer to a connected computer is built in. The optional MAICO-audiometry module for NOAH enables the automatic data transfer of all test results of the MA 53, like speech audiogram and ABLB, DLI, SISI, tone decay etc. For more information see chapter 9. Geba_MA53_Fe_11a.doc 6 851 430/3 11/11 Operating Instructions MA 53 3 Getting started 3.1 Unpacking your instrument Your MA 53 was carefully inspected and packed for shipping. However, it is a good practice to thoroughly inspect the outside of the shipping box for signs of damage. If any damage is noted, please notify the carrier immediately. Carefully remove the instrument from the shipping box. Remove the plastic bag from the instrument and inspect the case for any damage. Notify the carrier immediately if any mechanical damage is noted. This will assure that a proper claim is made. Save all packing material so the claim adjuster can inspect it as well. Notify your dealer or MAICO when the adjuster has completed the inspection. SAVE ALL THE ORIGINAL PACKING MATERIAL AND THE SHIPPING CONTAINER SO THE INSTRUMENT CAN BE PROPERLY PACKED IF IT NEEDS TO BE RETURNED FOR SERVICE OR CALIBRATION. All accessories are already packaged in the compartment connected with the MA 53. Please check that all accessories listed below are received in good condition. If any accessories are missing or damaged, immediately notify your dealer or MAICO. Standard accessories: 1 Headphone DD 45 1 Bone conduction receiver B 71 with headband 1 Patient response switch 1 power cable 1 microphone with stand (only for export outside USA) 1 audiogram form (50 sheets) 1 monitor headset with microphone (USA only) 5 sound room cords (USA only) Calibration of the device: The instrument, headphones, bone conduction receiver as well as the optional insert phone and loudspeaker match one another and have the same serial number (e.g. 6631520). Because they have been calibrated with this particular instrument, use of other transducers is not allowed. If one of the acoustic transducers is replaced, the instrument must be recalibrated. The use of non-calibrated measurements! Geba_MA53_Fe_11a.doc audiometers 7 leads to incorrect 851 430/3 11/11 Operating Instructions MA 53 3.2 Preparing the MA 53 for use The MA 53 with its integrated compartment for the accessories is perfect for portable use. The rugged housing, light weight and the comfortable handle make it easy and convenient to transport the instrument. Carry it, as shown, with the bottom away from the leg. That helps protect the front cover from damage, and due to the asymmetrical handle position it provides more space for your leg. To get started first move the handle under the housing. Unlatch the cover by pressing in the two black locks located on the left and right sides near the front of the instrument. Open the front cover and rest it on the back cover of the accessory compartment. To open the compartment, press the two black locks in the upper middle of the instrument. Open the compartment cover as seen in picture 2. Take the headphone, the bone conduction receiver, the patient response switch and the microphone out of the compartment and connect the power cable to power. The MA 53 operates with voltages from 100 to 240 V~ AC, 50/60 Hz. To avoid pinching the cables when closing the cover, lay the cables in the slots provided. Close the back cover and latch it with slight pressure. You can place the microphone or a tape or CDplayer on top of the cover (see picture 3). Picture 1 Transport of MA 53 Picture 2 MA 53 with open cover The MA 53 should be operated in a quiet room, so that the audiometric examinations are not influenced by outside noises. For use in noisier environments headphones with optional sound insulation muffs are available. Electro-medical instruments, which emit strong Picture 3 MA 53 in operation electromagnetic fields (e.g. microwaves radiotherapy devices), can influence the function of the audiometer. Therefore the use of these instruments is not allowed in close proximity to the audiometer. Geba_MA53_Fe_11a.doc 8 851 430/3 11/11 Operating Instructions MA 53 The test room must be at normal temperature, usually 15̊ C / 59̊ F to 35̊ C / 95̊ F, and the instrument should be switched on about 10 minutes before the first measurement to guarantee precise measuring results. If the device has been cooled down (e.g. during transport), please wait until it has warmed up to room temperature. 3.3 Getting familiar with the MA 53 Turn on the instrument with the power switch Ü which is located at the right side of the MA 53. The device performs its initial test and autocalibration. If an error is detected the test is stopped and a description of the error is shown on the LCD-display Ô. In this case please contact your local dealer or service. If the test is passed, the instrument is setup to air conduction and pure tone. The corresponding LED́s above the receiver selectors Ê and Ó and the signal selectors Ì and Ò are lighted. The frequency is set to 1 kHz and the level to 30 dBHL for the left channel, Picture 4 MA 53 power switch, display and selection buttons for left and right channel -10 dBHL noise for the right. All these settings are also shown on the display Ô (see picture 5). The hearing level can be easily adjusted independently for each channel with a knob Ä and Ú↕ on each side of the instrument. For optimal convenience these level control knobs are usable from the top or the side of the instrument. They are detented in 5 dB steps (adjustable to 2 dB or 1 dB). The signal STIM bars Å and Ù↔ are located beside the level control knobs Ä, Ú↕. The signal LED́s à and Û light up when the signal is presented. You can change from presenter to interrupter function with the STIM MODE button Ï. The corresponding LED lights when the interrupter is Geba_MA53_Fe_11a.doc 9 Picture 5 MA 53 display with initial settings Picture 6 MA 53 level and frequency control 851 430/3 11/11 Operating Instructions MA 53 selected. The frequency is changed with up Æ, Ø→ and down Ç, × buttons for both channels together. The design of the MA 53 makes it easy to control level, signal presentation and frequency with one hand. 3.3.1 Using the keyboard of the MA 53 All main functions of the MA 53 are directly accessable by pressing a single button. Not frequently used procedures like the calibration of the speech source or the level step selection are hidden as a “second level function”. To select this function just press the addressed button more than two seconds. A user menu for the customization of the MA 53 is available for advanced users (see chapter 8). Following is the description of the main Picture 7 MA 53 keyboard and second level functions of each button: Æ left (blue) channel frequency up: change to next higher frequency Ç left (blue) channel frequency down: change to next lower frequency È left (blue) talk over microphone: switches on the talk over microphone as long as the button is pressed. The level can be adjusted with the knobs Å or Ú↕. The actual value is displayed in dBHL at the lower center of the LCD-display Ô. Ê left (blue) channel receiver selector: changes the receiver from AC to BC or FF or INSERT (if option assembled). The lighted LED above shows the current selection. Ë Ì Í Ï 2nd level: selects test mode HL, UCL, MCL for selected receiver FM - modulation (warble tone): changes test signal from pure tone to warble tone. 2nd. Level: to enter the user menu press button during power on. left (blue) channel signal selector: changes the test signal from pure tone to tape/CD or microphone or noise or switches the channel off. 2nd. Level: Calibration of tape/CD or live voice microphone pulse tone: enables pulsing of pure tone or warble tone. 2nd. Level: enter pulse tone menu: ABLB, DLI and SISI Test stim mode: changes the signal presentation from presenter to interrupter mode. 2nd. Level: enables interlock function. Pressing left Å or right Ù↔ signal presentation bar affects both channels. Geba_MA53_Fe_11a.doc 10 851 430/3 11/11 Operating Instructions MA 53 Ð Ñ Ò Ó Ö × Ø swap function: exchanges the outputs for both ears (i.e. the right controls now affect the left ear). tracking function: enables the automatic tracking (see chapter 4.4 masking). 2nd. Level: enters level step selection menu. The actual level step is displayed at the lower center of the LCDdisplay Ô. Choose the level steps with the frequency up/down buttons ×and Ø right (red) channel signal selector key: changes the test signal from pure tone to tape/CD or microphone or noise or switches the channel off. Picture 8 MA 53 keyboard 2nd. Level: adjustment of talkback microphone and monitor phone right (red) channel receiver selector: changes the receiver from AC to BC or FF or INSERT (if option assembled). The lighted LED above shows the current selection. 2nd level: selects test mode HL, UCL, MCL for selected receiver right (red) channel talk over microphone: switches on talk over microphone as long as the button is pressed. The level can be adjusted with the knobs Å or Ú↕. The actual value is displayed in dBHL at the lower center of the LCD-display Ô. right (red) frequency down: change to next lower frequency right (red) frequency up: change to next higher frequency Geba_MA53_Fe_11a.doc 11 851 430/3 11/11 Operating Instructions MA 53 3.3.2 The display of the MA 53 The large backlighted graphical LCDDisplay Ô of the MA 53 shows all actual settings and test results. The display area is split with a line into an upper or main area and a lower or advanced area (see picture Picture 9 MA 53 display for BC-test 9). The main area shows the individual settings for the left channel on the left and the right channel on the right. General settings which affect both channels are displayed in the middle. The example picture 9 shows a typical setting for a BC- threshold test. The left channel is bone conduction with 70 dBHL , tone and tracking function enabled. The right channel is set to 90 dBHL narrow band noise with air conduction for masking. The test frequency is 1500 Hz and the test signal is a warble tone. The lower section of the display shows that the talk over microphone button È or Ö is pressed and the audiologist talks to the patient with 70 dBHL. The HL in the upper row before 1500 Hz indicates that the current measurement is stored as Hearing Level (threshold) test. Picture 10 shows the display for a speech test with speech test material from tape or CD of the left ear and masking of the opposite ear. The left part of the LCDdisplay Ô shows the settings for the left channel: Picture 10 MA 53 display for speech - test level = 60 dBHL, receiver = AC, signal = tape/CD. The middle of the LCD-display Ô shows the actual test and the result: MS stands for multi syllable speech test, speech discrimination = 60%, correct words = 6, wrong words = 4. The right part of the LCD-display Ôshows the setting for the right channel: level = 60 dBHL, receiver = AC, signal = speech-noise (masking). The LCD-display Ô has an energy saver function: the backlight of the display is automatically switched out after approximately three minutes. Any action with the MA 53 such as pressing a button or turning the knobs switches the backlight immediately on again. Geba_MA53_Fe_11a.doc 12 851 430/3 11/11 Operating Instructions MA 53 4 Pure tone audiometry 4.1 Air Conduction (AC) Testing In the hearing threshold test, the hearing threshold of the patient is measured in comparison with the normal hearing threshold for air conduction. The test is started on the ear with better hearing. The patient should sit at a distance of at least 1 m from the device. Eliminate any obstructions which will interfere with the placement of the earphone cushions on the ear (i.e. hair, eyeglasses). Picture 11 Headphone Ensure the headphones are put on correctly: Red side on the right, blue side on the left. Adjust the headband of the headphones so that the receivers are at the correct height (the sound output grid exactly facing the ear canal). Start with the “better” indicated ear at 1 kHz. (After switching on, the frequency is automatically set to 1 kHz.) In the following example we assume that the left is the “better” ear. Set the receiver selector Ê to AC and the signal selector Ì to TONE. Set the left level control knob Ä to a value just below expected hearing loss. Explain to the patient that he should press the button of the patient response switch if he just hears the test tone. Press the STIM bar Å for a certain time to present the test tone. The STIM LED à should light on. If the patient hears the test tone, the patient response display lights red. In this case decrease the level with the level control knob Ä. Proceed with presenting the test signal as described before. If the patient doesn’t hear the test tone, increase the level with the level control knob Ä. Proceed with presenting the test signal as described before. Geba_MA53_Fe_11a.doc Picture 12 MA 53 controls and display for air conduction threshold test of the left ear 13 851 430/3 11/11 Operating Instructions MA 53 When you find a stable threshold value, note the level and frequency. If the MA 53 is connected to a PC, the value was stored with your last STIM presentation. Test through the frequencies. Starting at 1 kHz set the higher frequencies first then the lower frequencies. Use the frequency up key Æ or Ø→ to select the higher frequencies and use the frequency down Ç or × to select the lower frequencies. Select the next frequency, increase the level again and proceed with presenting the test signal as described before. Once all frequencies are tested choose the poorer ear and repeat the hearing threshold test. You can do this with the corresponding controls on the other side or just by pressing the SWAP button Ð. The SWAP function enabled means that you measure the right ear using the controls on the left side. The ouput to the left and right earphones are changed. Picture 13 MA 53 display for AC-test with Also, the left and right display text is enabled SWAP function, Pulse and Warble tone changed (see picture 13). The correct marks in an audiogram are: O (red) = right and X (blue) = left Pulse tone: If required, the test can also be performed with a pulsed tone. Press the PULSE button Í and the pure tone will be switched 0.25s on and 0.25s off. Warble tone: If required, the test can also be performed with a warble tone. Press the FM button Ë and the pure tone will frequency modulate. The warble tone can also be pulsed as described before. For hygienic reasons it is important to clean the ear cushions of the headphone (see chapter 11). 4.2 Uncomfortable Hearing Level (UCL) Testing Testing of UCL can be measured using pure tone stimuli or speech (live voice or tape/CD). The purpose is to determine the dB level at which the stimuli becomes uncomfortable to the patient. This information is valuable for determining the patient́s upper dynamic range limit for proper hearing aid fittings and for determining symptoms of recruitment. Warning! Because this test uses high sound pressure levels, it is extremly important to perform this test using the utmost caution to avoid damaging the ear. To prevent the possibility of extreme Geba_MA53_Fe_11a.doc 14 851 430/3 11/11 Operating Instructions MA 53 discomfort by the patient, it is important to start the test with levels near the patient́s MCL (Most Comfortable Level). The UCL level is described as the level between very loud and loud perception of the test signal. Press the receiver selector button Ê or Ó longer than 2 seconds. The LCDdisplay in the upper row changes from HL to UL (see picture 14). Start as described in chapter 4.1 with a test level of 60 dBHL. Picture 14 MA 53 display for UCL-test left Present the tone briefly (max. 1s) If the signal was recognized by the patient as not uncomfortable increase the level and proceed as described before. If the signal was uncomfortable for the patient note the values. Proceed accordingly with other test frequencies. For hygienic reasons it is important to clean the ear cushions of the headphone (see chapter 10). 4.3 Bone Conduction (BC) Testing Bone conduction, i.e. the transmission of sound waves through the skull directly to the inner ear conways information about the function of the inner ear. For a neural hearing loss the values of air conduction (chapter 4.1) and bone conduction are the same. In this case a hearing loss of the middle ear can be eliminated. Place the bone conduction receiver so that the flat, circular side of the transducer Y is placed on the mastoid, at the noticeable ledge of the cranial bone behind the auricle). The other side of the headband is placed in front of the opposite ear. Set the receiver selector Ê or Ó to BC and the signal selector Ì or Ò to TONE. Perform the test the same way as for air conduction (see 4.1). Enter the measurements for all frequencies on the form, connect all points with dotted lines marked on the audiogram form as follows: > = right and < = left For hygienic reasons it is important to clean the bone conductor (see chapter 10). Geba_MA53_Fe_11a.doc 15 851 430/3 11/11 Operating Instructions MA 53 4.4 Masking of the opposite ear The basics of masking are explained below. To begin testing immediately, please go directly to 4.4.3 Manual masking. 4.4.1 Crossover: When measuring a pure tone audiogram you assume that the measured hearing threshold is correct. But if you recognize that sound is also transmitted through bone conduction over the entire skull it is probable that the opposite ear has also received sound. This is called “crossover”. Crossover can also occur when measuring air conduction because a small amount of air conducted sound is received by the skull and transmitted by bone. Whether the crossover signal can heard by the opposite ear depends on its inner ear function. Relevant to crossover is the sound level which is received by the opposite ear. The difference between the original test signal at the test ear and the received signal at the opposite ear is called “interaural attenuation”. For bone conduction measurement the interaural attenuation is 0 to 15 dB. Bone conduction crossover is therefore possible even with a slight difference in hearing loss between ears. Important: Please advise the patient to tell you in which ear he hears the test signal. It is thereby easier to detect crossover. 4.4.2 Masking theory: To ensure that the patient will not experience crossover you must mask the opposite ear. Masking increases the hearing threshold of the opposite ear. The masking is done with a noise signal which is transmitted by the headphone. For pure tone audiometry a narrowband noise is used. This noise changes its center frequency according to the frequency of the test signal. 4.4.3 Manual masking: If you have to mask use the common masking rules. See chapter 7 for recommend literature. Masking is an important part of practical audiometry. It is necessary to be familiar with this topic to avoid errors which would lead to a wrong diagnosis. For the opposite ear set the receiver selector Ê or Ó to AC and the signal selector Ì or Ò to NOISE. Adjust the required masking level with the level control knob Ä or Ú↕. Geba_MA53_Fe_11a.doc 16 851 430/3 11/11 Operating Instructions MA 53 Notice that the masking sound is continuously presented for effective masking. You can interrupt the masking signal by pressing the corresponding interrupter key Å or Ù↔. To mask when performing bone conduction testing, place the headphone on the opposite ear so that the receiver is at the correct height (the sound output grid  exactly faces the ear canal). Adjust the headband of the headphones. The receiver on the side where the bone conductor is placed should sit directly on the cheek bone. The marking for air conduction with masking should be done with the symbols v = the right side and q■ = the left side on the audiogram form. The marking for bone conduction with masking should be done with the symbols [ = the right side and ] = the left side on the audiogram form. 4.4.4 Automatic masking: With the manual masking, as described before, you have to readjust the masking level every time you change the test signal level. The MA 53 has a tracking feature for easy masking. Adjust for the test signal using the level control knobÄ or Ú↕, then with the opposite level control knob Ú or Ä adjust for the corresponding masking level. Now press the TRACK button Ñ. The masking level is automatically changed if you adjust the test signal level. (e.g. if the test level was 30 dB and the masking level 50 dB and you change the test level to 45 dB the masking level is automatically adjusted to 65 dB). Geba_MA53_Fe_11a.doc 17 Picture 15 MA 53 display for bone conduction with masking and enabled tracking function 851 430/3 11/11 Operating Instructions MA 53 4.5 Diagnostic tests 4.5.1 Suprathreshold tests The MA 53 offers additional suprathreshold tests which can offer more information about the kind of the hearing loss. To access suprathreshold tests press the PULSE button Í longer than two seconds. The suprathreshold test menu is now displayed on the lower part of the LCDPicture 16 MA 53 display with display Ô (see picture 16). The actual suprathreshold menu choice is displayed inversely. You can toggle through the different options by briefly pressing the PULSE button Í. Start the chosen option by pressing the STIM bar Å or Ù↔.To exit the Supratreshold test menu briefly press the FM button Ë. 4.5.1.1 The ABLB (Fowler) Test The Alternate Binaural Loudness Balance test is a recruitment test which uses the presentation of alternating tones between the two ears with headphones. The intensity of the tone in the hearing-impaired ear is varied until the loudness of the tone is judged by the patient to be equivalent to a tone at a constant intensity in the normal ear. This is called loudness balance. The test is done for various intensity levels in the normal ear. To start the test select 0.5 sec. or 1 sec. modulation time in the suprathreshold menu (as described before under 4.5) and press the STIM bar Å or Ù ↔. On the LCD-display Ô is ABL with the chosen modulation time shown (see picture 17). Adjust the desired hearing levels for both the normal ear and the impaired ear using the level control knobs Ä and Ú↕. Press the STIM MODE button Ï to present the signal continuously. Picture 17 MA 53 display with ABLB test Now change the level for the hearing-impaired ear with the level control knob Ú↕ or Ä until the patient indicates that the loudness in both ears is equal. Note the levels and proceed with other levels and frequencies as required. To exit the test, briefly press the PULSE button Í. Geba_MA53_Fe_11a.doc 18 851 430/3 11/11 Operating Instructions MA 53 4.5.1.2 The DLI (Lüscher) Test The Intensity Difference LImen for loudness test (or Just Noticeable Difference, JND) is another recruitment test. A pure tone is amplitude modulated at a rate of 2/second. The patient has to determine whether this signal was steady or undulating (beating). To start the test select a modulation amplitude from 0.5 dB to 4.0 dB in the suprathreshold menu (as decribed before under 4.5.1) and press the STIM bar Å or Ù↔. Picture 18 MA 53 display with DLI test The LCD-display Ô shows DLI, along with the chosen modulation amplitude (see picture 18). Now adjust the required test level with the level control knob Ä or Ú↕ and present the test signal by pressing the STIM bar Å or Ù↔. To exit the test press the PULSE buttom Í longer than 2 seconds. The suprathreshold tests menu is now displayed. To exit the suprathreshold test menu briefly press the FM button Ë. Geba_MA53_Fe_11a.doc 19 851 430/3 11/11 Operating Instructions MA 53 4.5.1.3 The SISI Test The SISI (Short Increment Sensitivity Index) is guided by the principle that patients with cochlear impairment are hypersensitive to small intensity increments. The continuous test tone is increased by 1 dB for a period of 0.2 seconds every 4.8 seconds. Whenever the patient hears the increment, he/she presses the patient response switch. The SISI test information and the test score are shown on the LCD-display Ô. The test will end automatically after 20 presented increments. The score is expressed as a percentage of ratio of the increments heard to the delivered increments (all increments heard = 100% - no increments heard = 0%). A high score indicates a cochlear impairment. A low score is related to normal hearing or conductive or retrocochlear pathology. 4.5.1.3.1 Preparation of the SISI Test To start the test select SISI in the suprathreshold menu (as decribed before under 4.5) and press the STIM bar Å or Ù↔. The display Ô changes to the SISI conditioning screen (as shown in picture 19). Picture 19 MA 53 display with SISI conditioning 5dB Select the test frequency with the frequency keys Æ/Ç or ×/Ø. For the test you should choose the frequency where the maximum bone conduction hearing loss is measured as described in chapter 4.3. Adjust test level with the level control knob Ä or Ú↕. The level should be set to a value 20 dB above the individual hearing threshold (measured under chapter 4.1). It must reach at least 60 dBHL. Recognize that in the SISI mode the test signal is presented continuously. You can interrupt the test by pressing the STIM bar Å or Ù↔ for however long you hold it down. The patient must be instructed: "You will now hear a continuous tone. Every time it becomes louder, immediately push the switch”. 4.5.1.3.2 Training of the Patient Only with careful training during the following conditioning phase can a valid test result be achieved. The training starts with a modulation level of 5 dB. That means a continuous tone, e.g. 65 dBHL, is briefly increased every 4.8 seconds for 0.2 seconds by 5 dB, e.g. to 70 dBHL. During the increment time the text “Tone Now” is shown Geba_MA53_Fe_11a.doc 20 851 430/3 11/11 Operating Instructions MA 53 on the lower area of the LCD display Ô (see picture 20). The text “Answer now” appears for approx. 1.5 seconds. During this period the patient may respond. If he/she answers too early or too late the answer will not be accepted by the MA 53. The number of detected increments is counted and shown on lower right area of the display. Furthermore, the number of presented increments is shown (see picture 20). Picture 20 MA 53 display with SISI conditioning 5dB and presented increment When you are sure that the patient has understood the object of the test, press the PULSE button Í. The modulation level will be changed to 3 dB. If the patient has understood this part of the test also, press the PULSE button Í again. The modulation level will be reduced to 2 dB. 4.5.1.3.3 SISI Test If the patient has understood the test up to here, press the PULSE button Í again to start the SISI test. The LCD-display indicates SISI test (see picture 21) and the modulation level is adjusted to 1 dB. Now 20 increments will be presented to the patient. Picture 21 MA 53 display with SISI test You can delay the test for the time you press STIM bar Å or Ù↔. This could be helpful in determining if the patient malingers. The test will end automatically after 20 presented increments. The number of detected increments is counted and indicated as percentage of the presented increments (see picture 22). If you are sure that the result of the test is consistent you can abort the test at any time by pressing the PULSE button Í. The result is then indicated accordingly (picture 23). Picture 22 MA 53 display with SISI result Picture 23 test MA 53 display with aborted SISI Retrocochlear hearing impairment is represented by low scores (< 25 %), cochlear defects by high scores (> 70 %). Press any button leave the SISI test. Geba_MA53_Fe_11a.doc 21 851 430/3 11/11 Operating Instructions MA 53 4.5.2 The Stenger Test The Stenger test is conducted as a malingering test in cases of alleged hearing loss or unilateral deafness. It is based on the premise that when two tones of the same frequency are presented simultaneously into both ears, only the louder tone will be perceived. The patient with a feigned hearing loss will not be able to hear the quiet tone, but will also not admit being able to hear the loud tone. Select the desired frequency with the frequency keys Æ/Ç or ×/Ø and adjust the sound intensities with the level control knobs Ä and Ú↕. Present the tone with the STIM bars Å and Ù↔. The easiest procedure is to present the desired frequency into the better ear at a level of 10 dB above the threshold. At the same time present the signal into the poorer ear (the one with the possible feigned loss) at a level 10 dB below the admitted threshold. If the loss in the poorer ear is real, the patient will be unaware of the signal in that ear and will respond only to the tone in the good ear. If the patient does not respond at all it is likely the admitted threshold is incorrect and you have a “positive” Stenger. 4.5.3 The Threshold Decay (Carhart) Test This examination is conducted as a fatigue test in cases of sensitivity loss. Select the desired frequency with the frequency keys Æ/Ç or ×/Ø. Adjust the sound level to a value about 5 dB above their hearing threshold with the level control knob Ä or Ú↕. Instruct the patient to start pressing the patient response switch when he hears a tone and to release the switch when he doesn’t hear the tone anymore. Enter continuous tone presentation by pressing the STIM MODE button Ï to present the test signal or press the corresponding STIM bar Å or Ù↔. The PAT response LED Î lights and after two seconds a bar stop watch with a scale from 0 to 60 seconds appears on the lower area of the LCD-display Ô (see picture 24). Geba_MA53_Fe_11a.doc 22 Picture 24 MA 53 display with initial tone decay test 851 430/3 11/11 Operating Instructions MA 53 When the patient releases the switch the bar of the stop watch stops and you can see the time the patient heard the tone (see example picture 25). If the time was less than 60 seconds increase the level with the level control knob Ä or Ú↕ by 5 dB. Picture 25 MA 53 display with example tone decay test Press any button to erase the stop watch on the display Ô and start the test again. Continue this procedure until the patient can hear the tone at least for 60 seconds. The threshold shift can be entered on the tone audiogram pad by drawing wavy line under the selected frequency. a 4.6 Dual Frequency Mode The MA 53 offers the dual frequency mode to the right and the left ear with different frequencies. This “true two channel” feature can be used to detect frequency disorders. To enable the dual frequency mode press the left frequency up key Æ and frequency down key Ç simultaneously. The LCD-display Ô shows the test frequency of the left channel on the left (1000 Hz) and the test frequency of the right channel on the right (2000 Hz) of the center. (Picture 26) Picture 26 MA 53 display with dual frequency mode Use the frequency up key Æ to select the higher frequencies and the frequency down key Ç to select the lower frequencies for the left channel. The frequencies of the right channel could be selected independent from the left with the frequency up key Ø→ and the frequency down key ×. To exit the dual frequency mode press the left frequency up key Æ and frequency down key Ç simultaneously again. The LCD-display Ô now shows the test frequency (example 1500 Hz) for both channels in the center (picture 27). Picture 27 MA 53 display with single frequency mode Geba_MA53_Fe_11a.doc 23 851 430/3 11/11 Operating Instructions MA 53 4.7 Free tunable frequencies in 1 Hz Steps (FTF) This feature is activated by pressing the right frequency button simultaneously. This feature is just a gimmick to show the possibilities of the instruments. 4.8 High Frequency Audiometry (optional) The optional High Frequency Audiometry offers tone audiometry with the additional test frequencies 9000 Hz, 10000 Hz, 11200 Hz, 12500 Hz, 14000 Hz and 16000 Hz. Tests using this advanced frequencies give additional information of the individual hearing performance. They are especially useful for the early detection of hearing damages of younger persons. The headphone Sennheiser HDA 200 is designed for high frequency audiometry. The HDA 200 works over the full frequency range from 125 Hz to 16000 Hz. Picture 28 MA 53 display for high frequency audiometry It is possible to use the HDA 200 as standard AC receivers for all AC tests or to use two AC-receivers with the MA 53. In this case the normal AC receiver (DD45) goes up to 8000 Hz. The HDA 200 is selected with the receiver selector key Ê or Ó as “insert phone”. The tests with high frequencies are done as described before in chapter 4. The minimum hearing level starts for frequencies from 9000 Hz to 16000 Hz at -20 dBHL. Geba_MA53_Fe_11a.doc 24 851 430/3 11/11 Operating Instructions MA 53 5 Speech audiometry 5.1 Connecting the speech source 5.1.1 Connecting a CD-player To conduct speech tests using speech test material you can connect a CD-player to the MA 53. Use a standard phono plug cable to connect the right and left outputs of the device with the corresponding inputs · and ¶ on the rear panel of the MA 53. To avoid pinching the cables when closing the cover, lay the cables in the slots provided. Picture 29 MA 53 rear panel If you are using a small portable CD-player with TAPE/CD input or tape you can place it on top of the cover of the MA 53. This saves space and makes the usage of the CD-player or tape very convenient. Caution: If you are using a CD- or tape-player powered by electrical current, the player must meet electrical safety requirements, such as IEC 601-1 or UL. This is to avoid electrical shock of either the patient or you. If you are not sure if your player meets these requirements it is safer to use battery power. 5.1.2 Connecting a Microphone Connect the microphone to the SPEECH MIC connector ¿ on the rear panel of the MA 53 (see picture 30). To avoid pinching the cables when closing the cover, lay the cables in the slots provided. Place the microphone on top of the cover of the MA 53. The microphone can be used for live speech audiometry and communication with the patient. If your instrument is supplied with a monitor/mic headset, connect the phone plug labeled M with the SPEECH MIC connector ¿. Geba_MA53_Fe_11a.doc 25 Picture 30 MA 53 rear panel with SPEECH MIC input 851 430/3 11/11 Operating Instructions MA 53 5.2 Speech calibration 5.2.1 Calibration of the CD with speech test material The MA 53 must be calibrated to the particular speech test material in use to ensure valid test levels. That means every time you change the CD or tape you must recalibrate the instrument. To calibrate the Tape/CD speech input select TAPE/CD with the left SIGNAL selector key Ì. Press the left SIGNAL key Ì longer than 2 seconds. In the lower area of the display Ô the text Calibration appears. You also see the actual settings in % of the maximum calibration for both channels (see picture 32). On every CD or tape with speech test material you have a reference signal, such as a reference tone or speech simulating noise. Picture 31 MA 53 controls and displays for speech calibration Picture 32 MA 53 display with speech calibration of CD-player or tape Perform the reference signal with CD. Use the left knob Ä for the left channel and the right knob Ú↕ for the right channel and adjust the levels until both VU-meters É and Ô show all yellow and one green light. If one or more red lights are on, reduce the level using the corresponding knobs Ä or Ú↕. Store the calibration by pressing the STIM bar Å or Ù↔. 5.2.2 Calibration of the microphone for live speech test To calibrate the SPEECH MIC input select MIC with the left SIGNAL selector key Ì. Press the left SIGNAL key Ì longer than 2 seconds. In the lower area of the display Ô the text Calibration appears. You also see the actual Geba_MA53_Fe_11a.doc 26 Picture 33 MA 53 display with speech calibration of the microphone 851 430/3 11/11 Operating Instructions MA 53 settings in % of the maximum calibration for both channels. Position yourself the customary distance from the microphone and speak test words. Use the left knob Ä to adjust the level until both VU-meters É and Ô show all yellow and one green light. If one or more red lights are on, reduce the level using the knob Ä. Store the calibration by pressing the STIM bar Å or Ù↔. 5.3 Connection and calibration of the monitor phone 5.3.1 Connection of the monitor phone Connect the monitor phone plug E to the MONITOR connector ¹ at the rear panel of the MA 53 (see picture 34).To avoid pinching the cables when closing the cover, lay the cables in the slots provided. The monitor phone allows you and the patient to hear the speech test material simultaneously. This helps in determining if the test word was understood by the patient. If the talk back option of the MA 53 is installed, the communication from the patient to audiologist will be heard with the monitor phone. Picture 34 MA 53 rear panel with MONITOR phone output 5.3.2 Adjustment of the monitor phone To adjust the output level of the monitor phone press the right SIGNAL key Ò longer than 2 seconds. In the lower right area of the display Ô the text Monitor appears. Below that you see the actual settings in % of the maximum output level (see picture 35). Picture 35 MA 53 display with adjustment of the monitor phone Perform a test signal with Tape, CD or the talk back microphone (if installed). Use the right knob Ú↕ and adjust the output level that is comfortable for you. Store the adjustment by pressing the STIM bar Å or Ù↔. Geba_MA53_Fe_11a.doc 27 851 430/3 11/11 Operating Instructions MA 53 5.4 Speech Audiometry The speech-recognition threshold SRT is the hearing threshold for speech. It is the lowest level at which the patient correctly recognizes the stimuli 50% of the time. Usually, recognition is indicated by repetition of the speech-stimulus item. The speech test can be done with recorded speech test material from CD or tape or with the microphone and live voice using standardized word lists. Different methods for speech tests are standardized worldwide such as the ASHA guidelines for determining the threshold level for speech (Asha 21, page 353-356). Explain to the patient that he should repeat each word he hears. The patient should sit at a distance of at least 1 m from the device. Eliminate any obstructions which will interfere with the placement of the earphone cushions on the ear (i.e. hair, eyeglasses). Ensure the headphones are put on correctly: Red side on the right, blue side on the left. Adjust the headband of the headphones so that the receivers are at the correct height (the sound output grid exactly facing the ear canal) Set the receiver selectors Ê and Ó to AC and the signal selectors Ì and Ò both to TAPE/CD (if you are using recorded speech test material) or to MIC (if you wish to perform a speech test with live speech). On the LCD-display Ô the initial setting for speech audiometry (see picture 36) appears. The percent speech discrimination score is displayed in the middle. Below this, the number of correct and incorrect words is shown. Picture 36 MA 53 display with initial settings for speech audiometry If you are using CD or tape, put the monitor phone on to hear the test words. Depending on your test method, use the level control knob Ä or Ù↔ to set the start level. Perform the test words. Tally the correct words by pressing the frequency up key Æ or Ø→. Tally the incorrect words by pressing the frequency down key Ç or ×. When you finish a word list, note the percentage of the speech discrimination score. Geba_MA53_Fe_11a.doc 28 Picture 37 MA 53 display with typical result for speech audiometry 851 430/3 11/11 Operating Instructions MA 53 If you are working online with a PC press the STIM bar Å or ↔Ù to transfer the test result to the PC (see also chapter 9). To clear the counter for the next test, press the FM key Ë. It is also possible to perform the speech test with loudspeakers (e.g. for the verification of hearing aid fitting) or bone conduction. Select the required transducer with the RECEIVER selection button Ê or Ó and proceed as described before. 5.6 Masking Speech audiometry has similar masking rules to those described in chapter 4.4 for pure tone audiometry. When TAPE/CD or MIC is selected on one channel, and NOISE masking on the opposite channel, the MA 53 automatically performs speech masking noise. Geba_MA53_Fe_11a.doc 29 851 430/3 11/11 Operating Instructions MA 53 6 Quick reference guide 6.1 Startup settings Air conduction on both channels Pure tone on both channels 30dBHL on both channels Presenter mode 6.2 Receiver selection Press either the right Ó or left Ê RECEIVER key to select the receiver (AC, BC, FF, INSERT). The display Ô shows the selected receiver below the levels. Not available receivers will be skipped. It is not possible to select bone on both channels simultaneously. After a new selection the level will be reset to 30dBHL. 6.3 Signal selection Press either the right Ò or left Ì SIGNAL key to select the signal. The kind of NOISE signal depends on the signal of the opposite channel. Speech masking noise is used if on the opposite channel the speech signal is selected. (see 6.4 below). The display Ô shows the selected signal below the receiver text. The 5. Position is signal off. The light at the signal key Ì or Ò and the STIM LED à or Û is off and the level in the display Ô is erased. 6.4 Select tone or speech audiometry mode Tone audiometry: shows level and frequency on the display Ô Speech audiometry: shows level, correct and incorrect words and speech discrimination in percentage on the display Signal left Signal right Mode Tone Tone Tone Tone Noise (NBN) Tone Tone Tape/CD or LV Tone Noise (NBN) Tone Tone Tape/CD or LV Tone Tone Tape/CD or LV Tape/CD or LV Speech Tape/CD or LV Noise (Speech) Speech Noise (Speech) Tape/CD or LV Speech Geba_MA53_Fe_11a.doc 30 851 430/3 11/11 Operating Instructions MA 53 6.5 Frequency selection Use one of the two sets of frequency keys Æ/Ç or ×/Ø to select the frequency. The maximum and minimum frequency depends on the receiver you have selected. 6.6 Warble tone (FM) Press the FM key Ë to activate the warble tone. Warble is shown in the display Ô. Press the FM key Ë again to switch back to pure tone. 6.7 Pulse tone Press the PULSE key Í to activate the pulse tone. Pulse is shown in the display Ô and the light above the PULSE key Í is on. Press the PULSE key Ô again to deactivate pulsing. 6.8 Suprathreshold tests Press the PULSE key Ô longer than 2 seconds. In the lower area of the display Ô the parameters of the ABLB, DLI and SISI test are shown. Using the PULSE keyÍ, select the test and parameter. Press one of the STIM bars Å or Ù↔ to select your choice. The lower area of the display Ô is cleared and the selected test is shown on the display Ô. The light above the PULSE key Í is on. To change to another parameter press the PULSE key Í again and hold longer than 2 seconds. To end the selected test, press the PULSE key Í briefly. 6.8.1 SISI Test Once SISI is selected, the test begins immediately by conditioning in 5dB increments. Press the PULSE key again to enter the next levels of SISI conditioning (3 dB, then 2 dB) and to start the SISI test (1dB). During the test the display Ô shows the increment level, the number of presented increments and the number of correct answers given by the patient. In addition, “Tone Now“is displayed when an increment is presented and “Answer Now“is displayed during the answer acceptance time. During SISI-conditioning it is possible to clear the counters by pressing the FM key Ë. Geba_MA53_Fe_11a.doc 31 851 430/3 11/11 Operating Instructions MA 53 To cancel the conditioning and the SISI test and to return to standard operation press the SWAP key Ð. After 20 increments the SISI test is finished. The text SISI Result with the result in percentage is shown. You can stop the SISI test with the PULSE key Í. The text SISI aborted and the actual result in percentage is shown. Press the PULSE key Í to quit the SISI test. 6.8.2 Decay test (Carhart) If the patient presses the patient response switch longer than 3 seconds, in the lower area of the display Ô a decay bar appears and shows the counted time until the patient releases the patient response switch. To clear the display Ô and reset the decay function press one of the STIM bars Å or Ù↔. 6.9 Swap function Press the SWAP key Ð to exchange the left and right channel. The big letters R and L will be swapped in the display Ô and the light above the SWAP key Ð is on. Press the SWAP key Ð again to deactivate swapping. 6.10 Tracking function Press the TRACK key Ñ to activate tracking. Both the left and right sides of the display Ô will say TRACKED, meaning that both channels are tracking each other. If NOISE is selected on one channel, the text TRACKED is erased, because a noise channel is not allowed to track a signal channel. Press the TRACK key Ñ again to deactivate tracking. 6.11 STIM Mode selection Press STIM MODE Ï key to switch between continuous presentation and presentation by pressing the STIM bar Å or Ù↔. When in continuous presentation mode the STIM bars Åand Ù↔ function as interrupters. The light above the STIM MODE key Ï is on if continuous presentation is selected. Speech and noise are always in continuous presentation, except when both channels are selected as noise. Press the STIM MODE key Ï again to deactivate continuous presentation. Geba_MA53_Fe_11a.doc 32 851 430/3 11/11 Operating Instructions MA 53 6.12 Interlock function Press the STIM MODE key Ï longer than 2 seconds to activate the interlock function. The display Ô shows the text Interlock. Interlock works only if both channels have the same kind of signal (Speech, tone or noise). In modes where no interlock is available the display Ô shows No Interlock. Press the STIM MODE key Ï longer than 2 seconds to deactivate the interlock function. 6.13 Talk over microphone Press one of the TALK OVER keys È and Ö. In the lower area of the display Ô the volume level of the talk over microphone is shown. Adjust the talk forward volume with the left Ä or right Ú↕ knob. Release the TALK OVER key È or Ö if you have finished talking to the patient. 6.14 Talkback microphone and Monitor volume control Press the right SIGNAL key Ò longer than 2 seconds and the volume control bars for TB and monitor are shown. Adjust the monitor volume with the right knob Ú↕. Adjust the talkback microphone volume with the left knob Ä. To store the actual settings press one of the STIM bars Å or Ù↔. 6.15 Speech audiometry To select speech audiometry switch both channels to TAPE/CD or MIC by using the SIGNAL selector keys Ê and Ò. In speech mode the display Ô shows the percentage of correct repeated words. Below this percentage the number of correct and wrong receipted words is shown. To count the correct words press one of the frequency up keys Æ or Ø→. To count the wrong words press one of the frequency down keys Ç or ×. To clear the counter press the FM key Ë. 6.16 Speech calibration To calibrate the speech inputs Tape/CD or MIC select the signal you’d like to calibrate with the left SIGNAL selector key Ì. Press the left SIGNAL key Ì longer than 2 seconds. In the lower area of the display Ô the text Calibration appears. Perform the reference signal with Tape, CD or microphone. Use the left knob Ä for the left channel and the Geba_MA53_Fe_11a.doc 33 851 430/3 11/11 Operating Instructions MA 53 right knob Ú↕ for the right channel and adjust the levels until both VU-meters É and Ô show all yellow and one green light. If one or more red lights are on, reduce the level using the corresponding knobs Ä or Ú↕. Store the calibration by pressing the STIM bar Å or Ù↔. 6.17 User menu To enter the User Menu you have to press the FM key Ì during instrument switch-on. To choose an item from the menu use the FREQUENCY keys Æ/Ç or ×/Ø. To select the chosen item press one of the STIM bars Å or Ù↔. Change the actual setting with the FREQUENCY keys Æ/Ç or ×/Ø. To confirm the changed setting press one of the STIM bars Å or Ù↔. To return without change press the FM key Ì. To return to the standard operation press the FM key Ì at the user menu. Following menu items are available: FF Set 1/2* Select the calibration for the first or the second loudspeaker set Bin Monaural Select the signal source channel for CD/TAPE (Bin/Left/Right) User Setup Setup of special functions User Preference Customization of the instrument * = only accessable if option is purchased The User Setup Menu has the following selections: Frequence Roll Setting of frequency control function (stop at highest and lowest frequency or continuous change) Default Levelset Initial level (signal or receiver change) is 30 dBHL or not altered Return to 1 kHz After the transducer has been changed the test frequency of 1 kHz is automatically selected Monitor with STIM Monitor phone active only with speech or presentation of actual test signal SRT Test Enable/disable Speech Reception Threshhold test Adv. Noise Select. Enable/disable additional masking / test signals ( NBnoise, speech-noise, white noise) el. Output FF Electric output off or active when FF selected Decay Enable/disable decay test Geba_MA53_Fe_11a.doc 34 851 430/3 11/11 Operating Instructions MA 53 The User Preference Menu has the following selections: Off Signal Enable/disable switch off position of signal selector key Ì and Ò Start with IP* Default setting of INSERT instead of AC Start Tone / NBN Initial masking setting of right channel on/off Language Select Submenu to select language Presenter 1.5s The signal will only 1.5 s presented when the STIM bar is pressed Invers Dials Changes direction of level control dials Ä and Ú↕ Interru./Present Default setting of STIM MODE (Presenter or Interrupter) Bone-Mask-System* Activates the special MAICO Bone Masking headset (not available in the USA) * = only accessible if option is purchased Geba_MA53_Fe_11a.doc 35 851 430/3 11/11 Operating Instructions MA 53 7 Advanced features 7.1 Complex mixing The complex mixing feature of the MA 53 allows the operator to route two different test signals to the same ear. The test signals and the test levels are independently adjustable but will be presented to one ear (ipsilateral). This feature could be used to test with speech in noise, competing message tests, tone on noise or several other combinations. - To enter the complex mixing press the swap key Ð longer than 2 seconds. - The LCD-display Ô shows the mixing selections (see picture 38). Picture 38 MA 53 display with mixing selection screen - Use the left frequency up key Æ to switch on the mixing for the left ear and the right frequency up key Ø→ for the right ear. - Picture 39 shows i.e. the LCD-display for enabled mixing on the left ear. - Store the selection by pressing the STIM bar Å or Ù↔. - The LCD-display Ô now shows the actual setting for mixing. In the example picture 40 is a pure tone with a level of 30 dBHL and a narrow band noise with a level of 30 dBHL, both with a frequency of 1000 Hz, presented to the left ear. Picture 39 MA 53 display with mixing selection for the left ear Adjust hearing level and the test signal Picture 40 MA 53 display with independently for both channels. Both selected mixing for the left ear signals will be mixed and presented to the left ear. You can also select other receivers like BC, FF or insert phone for the left ear with the left receiver selector key Ê. Other possible selections are mixing with presentation to the right ear or to both ears. To exit the complex mixing press the swap key Ð longer than 2 seconds and switch the mixing for the left and the right ear to the off position. Geba_MA53_Fe_11a.doc 36 851 430/3 11/11 Operating Instructions MA 53 7.2 Advanced Noise Selection The MA 53 offers for advanced masking or testing the selection of narrow band noise, speech masking noise and white noise as test signal. Enable this feature from the user setup menu The additional signals are now available as test signals. Select the required signal by pressing the signal selector key Ì for the left channel and key Ò for the right channel. If the noise-LED is illuminated, you can choose between NB-Noise, SpeechNoise and White Noise by pressing the signal selector key. 7.3 Talk-back microphone The optional talk-back microphone allows the patient to speak to the operator. This feature is used if the patient sits in a sound excluding booth. The communication from the patient to the operator will be heard with the monitor phone. 7.3.1 Connection of the talk-back microphone Connect the talk-back microphone plug to the TB MIC connector » at the rear panel of the MA 53 (see picture 41).To avoid pinching the cables when closing the cover; lays the cables in the slots provided. 7.3.2 Adjustment of the talk-back microphone To adjust the level of the talk-back microphone press the right SIGNAL key Ò longer than 2 seconds. In the lower left area of the display Ô the text Talk Back Level appears. Below that you see the actual settings in % of the maximum output level (see picture 42). Picture 41 MA 53 rear panel : TALK-BACK MICROPHONE and ASSISTANT-PHONE connector Picture 42 MA 53 display with adjustment of the talk-back microphone Let the patient say some test words with the talk-back microphone. Use the right knob Ú↕ and adjust the output level that is comfortable for you. Store the adjustment by pressing the STIM bar Å or Ù. Geba_MA53_Fe_11a.doc 37 851 430/3 11/11 Operating Instructions MA 53 7.4 Assistant phone The optional assistant phone allows the operator to speak directly to an assistant person in the sound excluding booth. This could be a parent when measuring children. The operator speaks to the assistant person via the talk forward microphone and the assistant phone. This communication cannot be heard by the patient. To talk to the patient press the left TALK OVER button È. To talk to the assistant person press the right TALK OVER button Ö. 7.4.1 Connection of the assistant phone Connect the assistant phone with the attached connecting cable together with the talk-back microphone to the TB MIC connector » at the rear panel of the MA 53 (see picture 43).To avoid pinching the cables when closing the cover, lay the cables in the slots provided. Picture 43 MA 53 rear panelwith TALKBACK MICROPHONE and ASSISTANT-PHONE connector 7.4.2 Adjustment of the assistant phone Press the right TALK OVER key Ö. In the lower area of the display Ô the volume level of the assistant phone is shown (see picture 44). Adjust the assistant volume with the left Ä or right Ú knob. Release the TALK OVER key Ö if you have finished talking to the patient. Geba_MA53_Fe_11a.doc 38 Picture 44 MA 53 display with adjustment of the assistant phone 851 430/3 11/11 Operating Instructions MA 53 8 Recommended literature Audiometric Interpretation: A Manual of Basic Audiometry Lloyd, Lyle L., and Harriet Kaplan Baltimore: University Park Press, 1980 Auditory Disorders: A Manual for Clinical Evaluation Jerger, Susan, and James Jerger Boston: College Hill Press, 1981 Handbook of Clinical Audiology Katz, Jack Baltimore: William & Wilkins, 1994 Roeseŕs Audiology Desk Reference Roeser, Ross J. New York / Stuttgart: Thieme, 1996 Auditory Diagnosis Silam, Shlomo and Carol A. Silvermann San Diego / London: Singular Publishing Group, 1997 Geba_MA53_Fe_11a.doc 39 851 430/3 11/11 Operating Instructions MA 53 9 Computer interface The MA 53 has a built-in serial RS 232 PC-interface for data transfer to a connected PC. The serial cable to connect the MA 53 with the PC should be a normal, non twisted 9-pin extension cable. It has a male and a female connector and all wires are direct 1:1 connected. It is also sold as monitor extension cable. Caution: The computer you are using must meet electrical safety requirements, such as IEC 601-1 or UL. This is to avoid electrical shock of either the patient or you. All test results are online transferred to the PC and stored in the database. In pure tone audiometry initially all measured data is transferred as hearing threshold data. You can see the letters HL meaning threshold measurement in the upper middle of the LCD-display Ô (see picture 45). Picture 45 MA 53 display with pure tone threshold setting To test the uncomfortable level (UCL) press the receiver selector button Ê or Ó longer than 2 seconds and the LCD-display Ô in the upper row changes from HL to UL. All measured data is now transferred as UCL data. To test the most comfortable level (MCL) press the receiver selector button Ê or Ó longer than 2 seconds and the LCD-display Ô in the upper row changes from UL to ML. All measured data is now transferred as MCL data. In speech audiometry initially all measured data is transferred as multisyllable test data. You can see the indication MS in the upper middle of the LCD-display Ô (see picture 46). Picture 46 MA 53 display with speech setting To test with single syllables press the receiver selector button Ê or Ó longer than 2 seconds and the LCD-display Ô in the upper row changes from MS to SS. All measured data is now transferred as single syllable test data. To test the uncomfortable level (UCL) for speech press the receiver selector button Ê or Ó longer than 2 seconds and the LCD-display Ô in the upper row changes from SS to UL. All measured data is now transferred as UCL speech data. Geba_MA53_Fe_11a.doc 40 851 430/3 11/11 Operating Instructions MA 53 10 Care and maintenance of the instrument Disconnect the power plug before cleaning! To clean the instrument, headphones, bone conduction receiver, loudspeaker and other accessories use a soft cloth dampened with a little warm soapy water or washing-up liquid; no alcohol or spirits should be used. The ear cushions of the headphone can be detached for cleaning. To remove the ear cushion pull it gently from the earphone. To assemble the cleaned or changed ear cushion press it on the earphone and make sure that it sits properly. The sound outlet hole must be exactly in the middle of the earphone. During cleaning, please ensure that no liquid runs into the switches, level control, headphone capsules or loudspeaker openings. Geba_MA53_Fe_11a.doc 41 851 430/3 11/11 Operating Instructions MA 53 11 Trouble shooting If you should find that your instrument is no longer working properly during a test run, please check the following points: Diodes in the buttons do not light up and there is nothing to see on the LCD-display Ô: Is the power cord plugged in correctly? Check the power fuses ¬♦. Disconnect the power plug, unscrew the fuses ¬ alongside the power cord socket and check the fuses. If the wire in the glass vial is broken, please insert new fuses (1 A slow blow). Picture 47 power socket and fuses Diodes light up, but test tone is absent: Green STIM LED à or Û does not glow: Press STIM bar Å or Ù (When the diode illuminate and the tone is available, the device works in presenter mode). - Green STIM LED à or Û does glow: Is level control Ä or Ú↕ set to an audible level position? Are the acoustic receivers connected to the correct socket? Is the required receiver with button Ê or Ó selected - is the correct LED illuminated? Is the lead connecting the headphones, bone conductor or loudspeaker loose or defective? If your instrument still does not work properly after this short check, please consult your dealer or service center. Geba_MA53_Fe_11a.doc 42 851 430/3 11/11 Operating Instructions MA 53 12 Technical Data The MA 53 audiometer is an active, diagnostic medical product according to the class IIa of the EU medical directive 93/42/EEC. IEC 601-1class II, protection class BF Standards: IEC 645-1/ EN 60 645-1: Type 2 IEC 645-2: Type A ANSI S3.6-1996: Type 1 HF A 125 Hz, 250 Hz, 500 Hz, 750 Hz, 1 kHz, 1.5 Test-Frequencies: (individual selectable for kHz, 2 kHz, 3 kHz, 4 kHz, 6 kHz, 8 kHz, 9 kHz*, 10kHz*, 11.2 kHz*, 12.5 kHz*, 14 each channel) kHz*, 16 kHz* *= with optional HDA 200 Level step: 5 dB, 2 dB or 1 dB level steps (user selectable) Sound Pressure Level: AC with earphone DD45 BC with bone conduction receiver Radioear B 71: - 10 dBHL ... 120 dBHL (500 Hz, 4 kHz -10 dBHL ... 115 dBHL) (250 Hz, 8 kHz -10 dBHL ... 100 dBHL) (6 kHz -10 dBHL ... 110 dBHL) (125 Hz -10 dBHL ... 80 dBHL) - 10 dBHL ... 80 dBHL (1000 Hz: –10 dBHL.... 75 dBHL) (500 Hz, 750 Hz) (4 kHz, 6 kHz: -10 dBHL ... 60 dBHL) (250 Hz: -10 dBHL ... 45 dBHL) (125 Hz, 8 kHz no output) (speech: -10 dBHL ... 80 dBHL) Insert earphone optional EAR 3A: with - 10 dBHL ... 115 dBHL ( 500 Hz, 4 kHz -10 dBHL ... 110 dBHL) ( 250 Hz -10 dBHL ... 105 dBHL) ( 6 kHz -10 dBHL ... 95 dBHL) ( 125 Hz -10 dBHL ... 90 dBHL) ( 8 kHz -10 dBHL ... 85 dBHL) Geba_MA53_Fe_11a.doc 43 851 430/3 11/11 Operating Instructions MA 53 FF with optional loudspeaker type Canton: - 10 dBHL... 90 dBHL (measurement in 1m distance) ( 1 kHz, 1.5 kHz -10 dBHL ... 85 dBHL) ( 500 Hz, 750 Hz -10 dBHL ... 80 dBHL) ( 250 Hz, 6 kHz, 8 kHz -10 dBHL ... 75 dBHL) ( 125 Hz -10 dBHL ... 60 dBHL) ( speech -10 dBHL ... 85 dBHL) FF with optional portable loudspeaker MAICO SBC: Test Signal: Modulation: Tests: Functions: Warm up time: Mode of operation: Geba_MA53_Fe_11a.doc - 10 dBHL... 85 dBHL (measurement in 1m distance) ( 750 Hz, 2 kHz, 8 kHz -10 dBHL ... 80 dBHL) ( 500 Hz, 6 kHz -10 dBHL ... 75 dBHL) (125 Hz, 250 Hz no output ) (2 kHz, 6 kHz -10 dBHL ... 90 dBHL) (3 kHz, 4 kHz -10 dBHL ... 100 dBHL) Pure tone, pulse tone, warble tone, narrowband noise, broadband noise (speech masking noise) Pulse tone: 0.5 s on/off triangular, freq. deviation Warble tone: 5%, repetition rate 5 Hz ABLB (Fowler): 0.5 s and 1 s 4; 3; 2; 1.5; 1 and 0.5 dB DLI (Lüscher): SISI test: 5 dB, 3 dB, 2 dB conditioning; 1 dB test; Modulation time 4.8/0.2s Carhart decay test (built-in stop watch) Stenger test Tone presenter / interrupter Interlock (tone presentation of both channels simultaneously) Channel swap Tracking (fixed level difference between both channels) Mixing (ipsilateral presentation of both channels) Talk forward, Talk back, Monitor phone, Assistant phone less than 10 min after power on Continuous 44 851 430/3 11/11 Operating Instructions MA 53 Environment conditions: Dimensions: Weight: Power Supply: Power Consumption: Device Fuses: Geba_MA53_Fe_11a.doc + 15 ... + 35 ̊C / + 59 ... + 95 °F (operation) + 5 ... + 50 ̊C / + 41 ... + 122 °F (storage) Maximum humidity 90 % (storage and operation) According to water: ordinary equipment not applicable According to sterilization: W x D x H: 36 x 46 x 15 cm / 14.2” x 18.1” x 5.9” 4.6 kg / 10.1 lbs (with accessories 5.8 kg / 12.8 lbs) 100 - 240 V~ 50/60 Hz ±10 % app. 25 VA 2x 1A slow blow 45 851 430/3 11/11 Operating Instructions MA 53 Connection plugs: Connection Specification A power socket left/right=power, middle=prot.GND (100 ... 240 V~ 50/60 Hz) B power fuses C serial PC-interface D patient response switch E signal output right F signal output left G Loudspeaker FF right channel H tape/CD input right channel I Loudspeaker FF left channel J tape/CD input left channel K masking phone for BC (option) L tape/CD input right channel M tape/CD input left channel N BC (bone conduction receiver) O monitor phone P insert phone right channel Q talkback microphone R insert phone left channel S right live voice microphone T AC (headphone) right channel U live voice microphone V AC (headphone) left channel 1=GND, 2=RX, 3=TX, 5= GND, 6=DTR sleeve=GND, tip=in sleeve=GND, tip=out sleeve=GND, tip=out sleeve=GND, tip=out sleeve=GND, tip=in sleeve=GND, tip=out sleeve=GND, tip=in sleeve=GND, tip=out sleeve=GND, tip=in sleeve=GND, tip=in sleeve=GND, tip=out sleeve=GND, tip=out sleeve=GND, tip=out sleeve=GND, tip=in sleeve=GND, tip=out sleeve=GND, tip=in sleeve=GND, tip=out sleeve=GND, tip=in sleeve=GND, tip=out 1 A slow blow RS 232 C RI= 500 ZA= 47 k , UA= 8 Veff ZA= 47 k , UA= 8 Veff ZA= 4 , UA= 8 Veff ZI= 47 k , UI= 0.04 - 5 Veff ZA= 4 , UA= 8 Veff ZI= 47 k , UI= 0.04 - 5 Veff ZA=10 , UA=1 Veff ZI= 47 k , UI= 0.04 - 5 Veff ZI= 47 k , UI= 0.04 - 5 Veff ZZA= 4 , UA= 8 Veff ZA= 250 , UA= 8 Veff ZA=10 , UA=1 Veff ZI= 1 k , UI= 0.38 - 500 mVeff ZA=10 , UA=1 Veff ZI= 1 k , UI= 0.38 - 500 mVeff ZA=10 , UA=1 Veff ZI= 1 k , UI= 0.38 - 500 mVeff ZA=10 , UA=1 Veff Picture 55 rear of MA 53 with connection plugs Geba_MA53_Fe_11a.doc 46 851 430/3 11/11 Operating Instructions MA 53 Calibration values: Frequency [Hz] 125 250 500 750 1000 1500 2000 3000 4000 6000 8000 Calibration values: Frequency [Hz] 250 500 750 1000 1500 2000 3000 4000 6000 Geba_MA53_Fe_11a.doc AC-Receiver DD 45 Reference equivalent threshold sound pressure level Force: 4 ... 5 N sound damping ISO 389 - 1 with Coupler IEC 318-2 ANSI S3.6-1 with Coupler NBS 9A [dB] (re 20 :Pa) [dB] (re 20 :Pa) [dB] 47.5 27.0 13.0 6.5 6.0 8.0 8.0 7.5 9.5 20.5 12.0 47.5 27.0 13.0 6.5 6.0 8.0 8.0 7.5 9.5 20.5 12.0 3 5 7 15 26 32 24 BC-Receiver Radioear B 71 Force: 4.9 ... 5.9 N Reference equivalent threshold force level air radiation ISO 389 - 3 ANSI S3.6-1996 [dB] (re 1:N) [dB] (re 1:N) mean / maximum 67 58 48.5 42.5 36.5 31 30 35.5 40 67 58 48.5 42.5 36.5 31 30 35.5 - 47 [dB] 4 / 18 10.5 / 31 851 430/3 11/11 Operating Instructions MA 53 Calibration values: Frequency [Hz] 125 250 500 750 1000 1500 2000 3000 4000 6000 8000 9000 10000 11200 12500 14000 16000 Geba_MA53_Fe_11a.doc AC-High Frequency Receiver Sennheiser HDA 200 Force: 9 ... 10N Reference equivalent threshold sound pressure level Sound damping ISO 389 - 5 with Coupler IEC 318 and Type 1 Adapter ANSI S3.6-1 with Coupler IEC 318 and Type 1 Adapter [dB] (re 20 :Pa) [dB] (re 20 :Pa) [dB] 17.0 18.0 22.0 22.5 27.5 36.0 58.0 29.5 18.0 9.5 6.5 6.5 5.5 3.0 3.0 8.5 9.5 16.0 17.0 21.5 21.0 27.5 37.5 58.0 14.5 16.0 22.5 28.5 32.0 45.5 44.0 - 48 851 430/3 11/11 Operating Instructions MA 53 Calibration values: Frequency [Hz] FF : Free sound field (0 degree incidence) Reference equivalent threshold sound pressure level ISO 389 - 7 ANSI S3.6-1996 [dB] (re 20 :Pa) 125 250 500 750 1000 1500 2000 3000 4000 6000 8000 Calibration values: Frequency [Hz] 125 250 500 750 1000 1500 2000 3000 4000 6000 8000 Geba_MA53_Fe_11a.doc [dB] (re 20 :Pa) 22 11 4 2 2 0.5 -1.5 -6 - 6.5 2.5 11.5 22 11 4 2 2 0.5 -1.5 -6 - 6.5 2.5 11.5 Insert phone Eartone 3A Reference equivalent threshold sound pressure level sound damping ISO 389 - 2 with Coupler IEC 126 ANSI S3.6-1 with Coupler HA-2 [dB] (re 20 :Pa) [dB] (re 20 :Pa) [dB] 26 14 5.5 2 0 2 3 3.5 5.5 2 0 26 14 5.5 2 0 2 3 3.5 5.5 2 0 32.5 36 37.5 36.5 33 39.5 42.5 49 851 430/3 11/11 Operating Instructions MA 53 Standard accessories: 1 air conduction receiver DD 45 1 bone conduction receiver Radio Ear B 71 1 microphone (for live speech) 1 patient response switch 1 power cord 1 pad of audiogram paper (50 sheets) Optional accessories: Loudspeaker Canton (single unit) Portable Loudspeaker SBC (pair) (not available in the USA) Insert phone Talk back microphone Monitor phone Audiogram paper (50 sheets) Options: Geba_MA53_Fe_11a.doc Part No. 801165 Part No. 802092 Part No. 4790 Part No. 6619 Part No. 705209 Part No. 1162-417 High Frequency Audiometry with HDA 200 Headphone Part No. 801110-1 50 851 430/3 11/11 Operating Instructions MA 53 13 Warranty, Maintenance and After-Sales Service The MAICO MA 53 is guaranteed for 1 year. This warranty is extended to the original purchaser of the instrument by MAICO through the distributor from whom it was purchased and covers defects in material and workmanship for a period of one year from date of delivery of the instrument to the original purchaser. The MA 53 may be repaired and serviced only by your dealer or by a service center recommended by your dealer. We urgently advise you against attempting to rectify any faults yourself or commissioning non-experts to do so. In the event of repair during the guarantee period, please enclose evidence of purchase with the instrument. In order to ensure that your instrument works properly, the MA 53 should be checked and calibrated at least once a year. This check has to be carried out by your dealer. When returning the instrument for repairs it is essential to send the headphones, as well. Send the device to your dealer or to a service center authorized by your dealer. Please include a detailed description of faults. In order to prevent damage in transit, please use the original packing if possible when returning the instrument. Within the European Union it is illegal to dispose electric and electronic waste as unsorted municipal waste. According to this, all MAICO products sold after August 13, 2005, are marked with a crossed-out wheeled bin. Within the limits of Article (9) of DIRECTIVE 2002/96/EC on waste electrical and electronic equipment (WEEE), MAICO has changed their sales policy. To avoid additional distribution costs we assign the responsibility for the proper collection and treatment according legal regulations to our customers. Geba_MA53_Fe_11a.doc 51 851 430/3 11/11 Operating Instructions MA 53 14 Safety Regulations 14.1 Electrical Safety: The MA 52 audiometer is constructed to comply with protection class II of the international standard IEC 601-1 (EN 60601-1). Protection from an electric shock is ensured even without the system earth connection. The instruments are not intended for operation in areas with an explosion hazard. 14.2 Measuring security: To guarantee that the audiometer works properly, the instrument has to be checked and calibrated at least once a year. The service and calibration must be performed by an authorized service center. In accordance with the regulations of the EU medical directive we will drop our liability if these checks are not done. The use of non-calibrated audiometers is not allowed. 14.3 Device control: The user of the instrument should perform a subjective instrument check once a week. This check can be done following the list for subjective instrument check (see next page). For your own security, you should copy the enclosed list, fill it in once a week and store it in your files. 14.4 Operation: Only skilled personnel (Audiologists, ENT professionals or other with equivalent knowledge) should operate the instrument. 14.5 Patient Safety: Please note that if connection is made to standard equipment like printers and network, special precautions must be taken in order to maintain medical safety. Connecting this device to other devices in order to make a system may cause the safety specifications to be invalid. It is therefore recommended to insert a galvanic separation between the device and the host computer, unless the computer is battery operated or supplied by a medical approved power supply. Galvanic separation must fulfill the EN 60 601-1. Geba_MA53_Fe_11a.doc 52 851 430/3 11/11 Operating Instructions MA 53 Checklist for Subjective Audiometer Testing - Clean the ear and head cushion! - Untangle all lines when necessary - Are the headphone cushions in good condition? If not Æ replace - Are plugs and leads in good condition / undamaged? - Are all controls working properly? - Is the Patient Response Key working properly (if available)? - Check batteries and renew if necessary? Instrument:........................................ Manufacturer:…................................ Serial No.:......................................... Examiner:........................................ Test Signal Quality All the test frequencies in the below table indicate typical hearing level and can be changed when necessary: Test these frequencies and enter the following abbreviations, if necessary: “B” for Buzz tone, “G” for Noise, “V” for signal distortion, “S” for switching masking noise. Right Ear kHz 0.25 0.5 1 Level 2 3 4 6 8 Left Ear 0.25 0.5 1 2 3 4 6 8 kHz 30dB HL 50dB HL 70dB HL 30dB HL 50dB HL AC BC * When noise “B”, “G”, “V” or “S” has been checked, please inform your service center! * If conduction test signals are also audible in the non-test ear, please inform your service center! Air Conduction Audiogram with test person kHz Right Ear 0,25 0,5 Level 1 2 3 4 6 8 Left Ear 0,25 0,5 1 2 3 4 6 8 kHz Target dBHL* Left Earpiece Actual dBHL ** Is dBHL ** Right Earpiece Left Earpiece Right Earpiece * Target value is the value measured in the last audiogram of the test person **Repeat the measurement with headphones the wrong way around If the difference between target and actual value at a particular frequency or between right and left headphones is more than 10 dB, please inform your service center! Bone Conduction Audiogram Right Ear kHz 0,25 0,5 1 Level 2 3 4 6 8 Left Ear 0,25 0,5 1 2 3 4 6 8 kHz Target dBHL* Is dBHL If the difference between target and actual value at a particular frequency or between right and left headphones is more than 10 dB, please inform your service center! Tested............................................................................................. Date:............................................................................................... Geba_MA53_Fe_11a.doc 53 851 430/3 11/11 Operating Instructions MA 53 Specifications are subject to change MAICO Diagnostic GmbH Salzufer 13/14 1058 Berlin Telefon +49 3070 71 46 50 Telefax +49 30 70 71 46 99 Email: [email protected] Internet: www.maico.biz Geba_MA53_Fe_11a.doc 54 851 430/3 11/11


