1
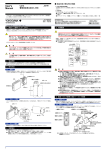
2 5.2 DIN Rail Mounting IMPORTANT Locate the VJHK so that the DIN rail fits into the upper part of the DIN-rail groove at the rear of the socket, and fasten the socket using the slide lock at the lower part of the socket. ● Use of the product ignoring the specifications may cause overheating or damage. Before turning on the power, ensure the following: (a) Power supply voltage and input signal value applied to the product should meet the required specifications. (b) The external wiring to the terminals and wiring to ground are as specifications. ● Do not operate the product in the presence of flammable or explosive gases or vapors. To do so is highly dangerous. ● The product is sensitive to static electricity; exercise care in operating it. Before you operate the product, touch a nearby metal part to discharge static electricity. ● If an inductance (L) load such as auxiliary relays or solenoid valves is used, always insert a spark killer for diminishing sparks, such as a CR filter or a diode in parallel with the inductance load. Otherwise a malfunction or relay failure may occur. Refer to the following guidelines for a capacitor and resistor: Capacitor : 0.5 to 1 F with respect to a contact current of 1 A Resistor: 0.5 to 1 Ω with respect to a contact voltage of 1 V ● The power line and input/output signal lines should be installed away from noisegenerating sources. Otherwise accuracy cannot be guaranteed. ● The grounding resistance must be 100 Ω (JIS Class D grounding). The length and thickness of the grounding cable should be as short and thick as possible. Directly connect the lead from the ground terminal (terminal no. 8) of the product to the ground. Do not carry out daisychained inter-ground terminal wiring. Fit into here DIN rail DIN rail (Rear of the socket) Push DIN rail Slide lock Fig. 5.2 5.3 Using a Duct Wiring duct should be installed at least 30 mm away from the top and bottom faces of the main unit. 6. INSTALLATION LOCATIONS • • Avoid the following environments for installation locations: Areas with vibrations, corrosive gases, dust, water, oil, solvents, direct sunlight, radiation, a strong electric field and/or a strong magnetic field. If there is any risk of a surge being induced into the power line and/or signal lines due to lightning or other factors, a dedicated lightning arrester should be used as protection for both the product and a field-installed device. 7. EXTERNAL WIRING WARNING To avoid the risk of an electric shock, turn off the power supply and use a tester or similar device to ensure that no power is supplied to a cable to be connected, before carring out wiring work. Wiring should be connected to the terminals on the socket of the VJHK. The terminals for external connections are of M3 screws. Use crimp-on lugs for connections to the terminals. • It is recommended that signal wires have a nominal cross-sectional area of 0.5 mm2 or thicker, while the power cable has a nominal cross-sectional area of 1.25 mm2 or thicker. Shunt resistor (Externally connected for current input) R – 1 3 6 2 1 5 4 R : 100Ω 5 (Externally connected for current input) L+ N– GND 10 Front Panel The communications connector on the front panel is used for setting up parameters using a PC (VJ77 PC-based Parameters Setting Tool) or the Handy Terminal (JHT200). The alarm indicator lamps for alarm 1 and alarm 2 light up if an alarm occurs. Alarm-2 output 2 3 Power supply 8.1 Communication connector Input signal + 8. DESCRIPTION OF FRONT PANEL AND CONNECTION OF SETTING TOOLS 9 8 ALM2(NO) COM Alarm indicator lamp (for alarm 1) ALM1 ALM2 Alarm indicator lamp (for alarm 2) 7 11 10 Alarm-1 output 7 11 9 8 ALM1(NO) Fig. 8.1 Front Panel COM Fig. 7.1 All Rights Reserved. Copyright © 1999, Yokogawa M&C Corporation IM 77J01H21-01E 3rd Edition : 2006.08.15-00