1
ADVANCED OPERATION
5. ADVANCED OPERATION
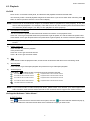
5.1. QUICK SEARCH
You can search any specific events by time and directly play the file you find from the DVR.
Move to “QUICK SEARCH”, and press “ENTER”. You will see the following submenu items:
1)
DATE
Select the specific time period (YEAR / MONTH / DAY / HOUR / MIN) that you want to search.
2)
SEARCH HDD
Change to the HDD you want if there are more than 1 HDD in your DVR.
3)
START
Move to “START” and press “ENTER” button to search and directly playback the recorded files.
5.2. RECORD
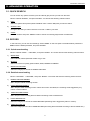
In this menu list, you can set record settings. Press “MENU” on the front panel. The default admin password is
0000. Enter the default password, and press “ENTER”.
5.2.1. Quick record setting
Move to “QUICK START” J “RECORD”, and press ”ENTER”. The screen will show the following submenu items:
1)
IMAGE SIZE
Select FRAME, FIELD (Selected models only) or CIF.
2)
QUALITY
Select one of the four quality options: BEST, HIGH, NORMAL and BASIC.
3)
IMAGE PER SECOND
Select the images per second for MANUAL RECORD.
5.2.2. Detailed record setting
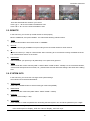
Move to “ADVANCE” J “RECORD”, and press ”ENTER”. The screen will show the following submenu items:
1)
MANUAL RECORD ENABLE
Start / stop the manual recording function.
2)
EVENT RECORD ENABLE
Start / stop the event recording function. When this function is enabled, the recording will be triggered by any
motion or external alarm.
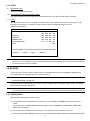
3)
TIMER RECORD ENABLE
Start / stop the timer recording that is activated according to the scheduled time
4)
EVENT RECORD IPS
Select the images per second for EVENT RECORD (Recording that is triggered by alarm or motion).
5)
TIMER RECORD IPS
Select the images per second for TIMER RECORD (Recording that is activated according to the scheduled time.).
11