1
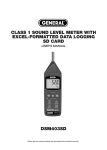
3. Press the SET button on the DSM402SD (callout 1-7 of Fig. 1), which has the term
“Fast/slow” stenciled below it. Press either the ▼ or ▲ button until the word “FAST”
appears on the display. Press the REC/ENTER button to select and store this setting as
the temporary default.
4. Press the ▲ button on the DSM402SD (which has the term “A/C” stenciled above it).
Press either the ▼ or ▲ button until the display shows the term “A. Fast. Manual”. Then
press the REC/ENTER button to select and store this setting as the temporary default.
5. To calibrate the DSM402, set the output of the sound calibrator to 94 dB and carefully
turn the calibration screw on the right side of the meter (callout 1-11 of Fig. 1) until the
display shows the following: “94 +/ 0.2 dB”.
NORMAL OPERATION
To prepare to make sound level measurements, power on the DSM402SD and make sure
an SD card is firmly seated in the socket on the bottom of the meter. The meter’s default
settings are auto ranging on (enabling measurements from 30 to 130 dB), “A” frequency
weighting and fast time weighting. Accordingly, when the meter is powered on the display
will show the following: “A. Fast Auto “. Following are procedures for changing each of
these parameters to suit the application.
If you already know that the volume of the machinery or environment you are measuring is
within a limited range, you may want to exit autoranging mode (the meter’s default setting)
and manually enter and use a specific measurement range.
1. To use a specific measurement range, press the ▲ button (which has the word
“Range” stenciled above it) once. The display will then show the first of the three range
options: “30 – 80” (representing a full-scale range of 30 to 80 dB). Press the ▲ button
again and the display will show the second option: “50 – 100”. Press the ▲ button again
and the display will show the third option: “80 – 130”. Press the REC/ENTER button to
select and store this range.
The shape of the “A” frequency weighting curve simulates the response of the human ear,
and is therefore the better choice for measuring the sound level of an environment. By
comparison, the “C” weighting curve is flatter, and is therefore better for measuring the
sound level of a piece of machinery.
2. To switch from “A” frequency weighting (the meter’s default setting) to “C”
weighting, press the ▲ button (which has the term “A/C” stenciled above it). Then press
either the ▼ or ▲ button until the display shows the term “C. Fast. Manual” or “C. Fast.
Auto”. Finally, press the REC/ENTER button to select and store “C” weighting as the
temporary default.
The third sound measurement parameter you can change is the meter’s response time.
Fast time weighting, with a response time of 200 ms, simulates the response time of the
human ear and is better for measuring the volume of singular events. Slow weighting, with
a response time of 500 ms, is a better choice when you wish to measure the average
sound level that an ongoing process (such as the vibration of a machine) produces over
time.
7