1
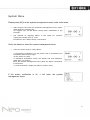
Featuree 1 FEATURE • USA A TI 300MHz z high spee ed processo or • USA A BioNano core fingerprint algorith hm of high speed and stability • New w generation n fully seale ed, waterprroof and dustproof fing gerprint sen nsor • Userr name disp play and hu uman voice prompt • Realltime data ttransfer and d WEB onlin ne tracking • Stan ndard USB, USB pen drive d and TC CP/IP • Iden ntification method: m FP,, ID+FP, ID D+PW, • Fingerprint cap pacity: 2000 0 • ord capacity y: 50000 Reco • Iden ntification speed: <0.5 5 second • Size e: 200mm(w w)*140mm(h)*38mm(d) 2 C Conteni ido SAFETY PRECAUTIO ONS ....................................................................................................................................... 4 Glossary ...................................................................................................................................................................... 5 Illustration for placiing fingerp print .................................................................................................................. 6 Appearance .............................................................................................................................................................. 7 M ........................................................................................................................................................... 9 System Menu User—Enrroll (Fingerrprint) ................................................................................................................................ 11 User—Enrroll (Psssw word) ................................................................................................................................... 12 User Enro oll (Card) ................................................................................................................................................ 13 User Dele ete ............................................................................................................................................................. 14 User—Verrify Mode ............................................................................................................................................... 15 User—Adm min Setup ............................................................................................................................................ 16 User Adm min Clear ................................................................................................................................................. 17 Setup Sys stem ........................................................................................................................................................ 19 Setup—Sy ystem—Ne et ......................................................................................................................................... 21 Setup -- L Log Setup .................... . ......................................................................................................................... 22 Setup Harrdware Test ......................................................................................................................................... 23 USB Flash h—Record Backup ............................................................................................................................. 24 USB Flash h—User Ba ackup/Reco overy .............................................................................................................. 25 System In nfo ............................................................................................................................................................ 26 3 SAFETY Y PREC CAUTIONS Precauttions • Plea ase read it carefully firrst of all; • Don n’t install th he terminal under direct light, humid, dusty or sooty en nvironmentt; • Don n’t install th he terminal near the m magnetic fie eld; • Don n’t install th he terminal near the ca alefaction device; d • Don n’t sprinkle the liquid ((water, drin nk, chemisttry) on the tterminal; • Alw ways keep th he surface of the term minal clean; • Clea ar the term minal by tow wel when there is wate er on the su urface; • Don n’t break th he terminal;; • Don n’t press tw wo keys at the t same tim me; • Don n’t take dow wn, repair or o change the terminal without au uthorization n; • Don n’t allow children to to ouch the terrminal; • This s terminal iis only used d for fingerp print verific cation, don't use it for other purposes; • If in n doubt, ple ease contac ct the local distributor;; 4 Glossary Administrrator • It is s a special user who has the authorizations of setting g the terminal system m settings a and use er information. e admin can n add or de elete the us sers, and th he admin allso can cha ange the system settin ngs The of the terminal. 1:1 Identiification • If itt is 1:1 ide entification mode, the e user has to input the t user ID D firstly, th hen verify tthe fing gerprint or enter e the password to make iden ntification. gerprint tem mplate will identify wiith the one of In tthis mode,tthe fingerprrint sensor on the fing the special use er ID. 1:N Identtification • Und der 1:N mo ode,the userr need not enter any u user ID. Jus st need place the finge erprint on tthe fing gerprint sen nsor . The e terminal w will automa atically iden ntify this fin ngerprint with the one es of all use ers registerred in in nside datab base. nt Enrollm ment Fingerprin • It is s the proce ess to capture the fingerprint im mage featurres got from m the finge erprint sens sor and d save the inside mem mory into the e terminal. 5 Illustra ation fo or placin ng finge erprint Correct meth hod: Straigh hten finger and place itt flatly on the t sensor, and make the fingerp print maxim mally cover the sen nsor. er in the cen nter of the sensor. Place finge e finger flattly and smo oothly on th he sensor. Place Inccorrect me ethod: M Move finger b before the b backlight of se ensor is off. T Take off fingerr during the process of fiingerprint verification P Place finger a away from tthe center of the t sensor Use fingerrtip Tilt sensor Slide fing ger during the e process of fingerp print verificatio on 6 Appearrance Front Back 7 For Adminisstrator‐ Basicc Functions 8 System m Menu u Please prress [M] to o enter sysstem man nagement menu und der initial sstate. Sinc ce anyone can enter the t termina al's manage ement men nu under initial state by y pressing [M], e admin shortly after installation n of the we suggest you set the minal. term The e method of registing admin is the same for common c employees. Ple ease refer tto "User Enrrollment" an nd "Admin Setup" S instructions. e admin to o enter the e system m manageme ent menu.. Verify the ere are thre ee ways to v verify admin: The 1. F Fingerprint verification n: Let the p person who o is expecte ed to be the admin plac ce his/her finger f on the t sensor to verify. 2. Password v verification: Enter the e admin's ID and pa assword, pres ss [OK] to confirm. Enter the system manage ement men nu after the e admin verrification is successful. 3. Card C verifica ation: Swip pe the admiin’s card to verify. If the a admin verification is ok, it will en nter the system managem ment menu u. 9 System m Menu u Menu list: er: for exam mple: [Enro oll], [Delete], [Verify Mode], M Use [Ad dmin Setu up], [Adm min Clea ar]. Settup: [Sys stem], [L Log Settup] and [Hardware Tes st]. [System m] includ des: systtem time, la anguage, network parame eter, fingerprrint verifica ation precision, system m voice v volume, do ormancy time and so on. S inc cludes: clo ock [Log Setup] in/out records r storage alarm and finge erprint repeat clock in n/out time period p [Hardw ware Testt] includes: keypad d, LCD, voic ce, fingerp print sensorr, flash test. USB B Flash: Us se the U d disk for communica ations. e: [New R Rec. Backu up], include [All Rec. Backup], Backup] and d [User Rec covery]. [User B Sys stem Info: S Show existiing users am mount, fingerp prints amount, records amount, fiirmware version. Press [IN/←] o or [OUT/→] to select a corresponding subme enu and pre ess [OK] to o confirm. u, press [IN N/←] or [OU UT/→] to se elect differe ent options for setup. Enter submenu • After setup, press s [C] turn to save su ubmenu. Prress [OK] to t save, or press [C] to cancel, and eitherr of the operation will rreturn to th he previous menu. xit the system manage ement men nu. Press [C] to ex • To ensure safety, the system ma anagementt menu will automatica ally return to the defa ault s in a certaiin period. menu if no operations 10 User—Enroll ((Fingerprint) • Enter th he system management menu. Select [Us ser]-[Enroll]. Press [OK] to enter the e enroll menu u. Enter em mployee's ID D and press s [OK] to registerr employee.. ss [OUT/→ →] to selectt [FP 1] orr [FP 2]. P Press [OK] to start • Pres fingerprrint enrollm ment. Press s [OK] to s save and return to th he enroll menu. Place finger on th he sensor correctly. Please P refe er to <The e way to enroll a fingerprintt>. u need to en nroll one fin ngerprint tw wice. Please e enroll fing gerprints You according to LCD prompt. he second ffingerprint enrolled is different from the first one, or If th the way you place finge er is incorre ect, it will prompt "Please try aga ain". If the fingerprrint is existe ed, it will p prompt "Fin ngerprint re epeated". Plea ase enroll a another fing gerprint. n continue to enroll e employees one by on ne. Or pres ss [C] to You can exit. 11 User—Enroll ((Passwo ord) Enter [Men nu], select [User] and press [OK]] to [Enroll]] interface. Input employee's ID and a press [OK] [ to register emplo oyee. Press [OUT/→] to select [Password], and press s [OK] to en nroll. Input passworrd(1 to 6 nu umbers) and press [OK K] to confirm. Input passworrd again,and d press [OK K] to confirm m. Press [OK] to save passw word. ess [C] to exit e to [Enro oll] interfac ce to contin nue, or pres ss [C] to ba ack to • Pre defult interfac ce. 12 User Enroll (C Card) • Enter [Men nu], select [User] and press [OK]] to [Enroll]] interface. Input employee's ID and a press [OK] [ to register emplo oyee. • • d press [OK K] to enroll. Press [OUT/→] to select [Card], and • Swiipe the emp ployee’s carrd, and the system will get card number n and d enter save e interface. • word. Press [OK] to save passw Enroll] interrface to con ntinue, or press [C] to back to Press [C] tto exit to [E defult interrface. Enroll (Carrd) 13 User D Delete • When emp ployees resign, we nee ed delete th he employee e’s information in the terminal. Enter th he managem ment menu. Select [Use er]-[Delete] press [OK K]. • Enter the employee’s ID a and press [[OK], the sy ystem will p prompt ete, press [OK] again to t confirm d delete the again whetther to dele employee information n. ntinue to de elete other employees after deleting success sfully, or • Con press [C] tto back to the t default interface. • ease caution n with the a action. All d deleted info ormation inc cluding Notice: Ple employee's s fingerprin nt, password d, attendan nce records can not be e recovered. mistake, ple ease connec ct with the PC and upload the • If deleted by m n which has s been back kuped beforre to recove er the employee information n. employee information 14 User—Verify M Mode Enter the e management menu. Select [Use er]-[Verify Mode] pres ss [OK] to enter th he setting in nterface. UT/→] to se elect emplo oyee or pres ss [OK] to iinput user IID. • Press [OU • Press [OK K] to enter setting inte erface. • Set employee’s veriffy mode through [OUT T/→], there e are three modes: [ANY], [P PW+FP] and d [ID+FP]. • Then pres ss [OK] to save this se etting. 15 User—Admin Setup In the ma anagement interface, select [Use er]-[Admin Setup] pres ss [OK]. Press [O OK] to ente er the admin n user ID and press [O OK] to confirm, the system w will prompt w whether to set user as s admin. Prress [OK] to o confirm a and press [C C] to cance el. min verificattion before entering th he system It asks ffor the adm managem ment menu if you set a admin in tthe termina al. 16 User A Admin C Clear In the ma anagement interface, select [Use er]-[Admin Clear] pres ss [OK]. • t admin ID I press [O OK] to confirm. Press [OUT/→] to select the • e admin ID will be show wed on the e LCD press s [OK] to co onfirm. The • The e system prrompt whetther delete the admin. Press [OK]] to con nfirm deletio on. • Press [C] to ca ancel. n the admin n delete intterface, pre ess [OK] to enter the u user ID Notice: In interface directly, th hen enter th he ID to delete admin.. 17 For Admin nistrator—Advanced Functions s 18 Setup System m In tthe manage ement interrface, selectt [Setup]-[System], th hen press [OK K] to enter the sub-me enu. Dev ID Terrminal’s serial number. Time • • • • me, time forrmat displa ays as "YY-M MM-DD H:M M". Sett system tim Sele ect [Time], then press s [OK]. Press [OK] to change the e date and ttime one by y one. Press [C] to en nter save in nterface and d press [OK K] to confirm. Lenguaje • • • Sett language. Sele ect [Langua age], then press [OK]. Press [IN//←] or [OUT T/→] to sele ect the lang guage, then n press [OK K]. Press [C] to en nter save in nterface and d press [OK K] to confirm. Precision • • • • comparison precision. Sett terminal fingerprint c 0-[L Low],1-[No ormal], 2-[H High]. Sele ect [Precision], then p press [OK]. Press [IN/← ←] or [OUT T/→] to set the precision v value and press p [OK]. nter save in nterface and d press [OK K] to confirm. Press [C] to en 19 Volumen • • • Sett the termin nal voice vo olume. 0-[m mute], 5-[Max]. Sele ect [Volume e], then pre ess [OK]. P Press [IN/ ] or [OUT/ ] to set the volume e value and d press [OK K] to confirm m. Press [C] to en nter save in nterface and d press [OK K] to confirm. Auto off • • • • Sett the time d duration from the last o operation to the dormant statte. No--[Not Off], 2 Time]. 250-[Max T Sele ect [Auto O Off], then prress [OK]. Press [IN/ ] or [OUT// ] to set [NO] or a auto off tim me and press [OK] to c confirm. Press [C] to en nter save in nterface and d press [OK K] to confirm. Auto updatte • • • Autto update m means the p previous low wer quality fingerprint tem mplate will be b automatically replac ced by the new higherr quality one e during fing gerprint verification. Sele ect [Auto U Update], the en press [O OK]. Press [IN/ ] or [O OUT/ ] to s select [Yes] or [NO] a and press [O OK] to conffirm. Press [C] to en nter save in nterface and d press [OK K] to confirm. 20 Setup— —System—Nett Enter the e system ma anagementt menu, Sellect [Setup]]-[System]-[Net]. Press [OK K] to enter the sub-me enu. This function main inc cludes [IP A Address], [S Subnet Mas sk], [MAC A Address] and [Gatew way IP] setttings. s] or [Subnet Mask] orr [MAC Press [OUT/→] to select [IP Address dress] or [G Gateway IP]]. Add Press [OK] to enter modify interface e. parameters s, and press s [IN/←] orr Press [OK] to select the p UT/→] or nu umber key to modify [OU Press [C] to en nter save in nterface d return to the [Net] m menu. Press [OK] to confirm and 21 Setup -- Log Setup In tthe manage ement interrface, selectt [Setup]-[Log Setup], then pres ss [OK] to e enter the su ub-menu. Log Alert • • • • e terminal w will alarm w when the me emory capa acity is less s than The the [Log Alert]] value. o]-Not alarm m, Max. value 5,000. [No Sele ect [Log Ale ert], then p press[OK]. Press [IN/ ] or [OUT// ] to set [NO] or inp put the warning re ecords value e and press s [OK] to co onfirm. Press [C] to en nter save in nterface and d press [OK K] to confirm. Re‐Verify • • • • Sett a period during which h time the s system only y save the ffirst suc ccessful reco ords and do o not save the t repeate ed records. o]: Disable the function n; Max. vallue is 250 m min. [No Sele ect [Re-Verrify], then p press [OK]. Press [IN// ] or [OUT T/ ] to set [NO] or en nter the value and pres ss [OK] to confirm. c nter save in nterface and d press [OK K] to confirm. Press [C] to en 22 Setup Hardwa are Tes st nagement interface, se elect [Setup p]-[Hardwa are Test] an nd press In the man [OK] to tes st Keypad, LCD, Voice, Sensor an nd Flash. Keypad • • • st the keypa ad. Tes Sele ect [Keypad d] and pres ss [OK]. Press any key on the key ypad. If LCD D shows the e same, the e key ypad is good d. LCD • • st the LCD. Tes Sele ect [LCD] a and press [O OK]. • Press [OK] to start test. Voice • • • Tes st the terminal voice. Sele ect [Voice] and press [OK]. Terrminal auto tests 1-17 voices. Sensor • • • st the senso or’s luminan nce. Tes s [OK] . Sele ect [Sensorr] and press The e luminance e value will be changed d according g to the env vironment. Flash • • • • st the terminal flash m memory. Tes Sele ect [Flash] and press [OK] . Nottice: This te est will dele ete all the data d in the fflash memo ory and then check it. Plea ase backup the data before b this o operation. 23 USB Flash—R Record B Backup Con nntected U disk to term minal, press s [M] to entter the manageme ent menu, s select [USB B Flash] and d press [OK K]. New Rec B Backup • • • • wnload new w T&A recorrds to U pan n drive. Dow Press [OUT/ ] to select [New Rec. Backup], press [OK] to dow wnload the new record ds. Afte er back up process bar shows 100%, press [C] to exit and bac ck to upper menu. New w record file e is BAK.KQ Q located in n G:\000000 001. ‘G’ is the disk name on PC C of U pen drive. ‘00000001’ is T T&A mac chine seriial number.. All Rec Bac ckup • • • • • Dow wnload all T&A T records s to U pan d drive. Press [OUT/ ] to select [All Rec. Ba ackup], press [OK] to wnload all records. dow Afte er back up process bar shows 100%, press [C] to exit and bac ck to upper menu. The e record file e is BAK.KQ Q located in G:\000000 001. Prompt: if you u backup ne ew records firstly, reco ommend to save w record file e to local pc c. Else it wiill be replac ced with all new reco ords file. 24 USB Flash—U User Bac ckup/Recovery y User Backup p • • • • Dow wnload emp ployee’s rec cords saved d in device tto U pen drrive. Press [OUT/ ] to select [User Backup], press [OK] to dow wnload the employee information. er backup p process barr shows 100 0%, press [C] to exit and a back Afte to upp per menu. The e backup file e is BAK.YG G and BAK.Z ZW located in G:\0000 00001. User Recoveery • • • • Upload employ yee’s inform mation save ed in U pen drive to terminal. ere are two ways to re ecover emplloyee inform mation: The 1. C Copy BAK.Y YG and BAK K.ZW to root directory,, then plug U pen driv ve into time e attendanc ce machine and start u user recovery. 2. E Export emp ployee inform mation to U pen drive through U flash management software, s th hen repeat step 1. ecovery all very], press [OK] to re Press [OUT/ ] to select [User Recov ords. reco Afte er recovery y process ba ar shows 10 00%, press [C] to exitt and back to u upper menu u. 25 System m Info anagement interface, select [Sys stem Info] a and press [OK] to In the ma check the e terminal information. User • gistered use er number. Maximum 2,000 userrs. Reg • • gistered fing gerprint number. Maxiimum 2,000 0 fingerprin nts. Reg Press [OK] to view the nu umber of us sers who re egistered a ssword. pas • e time atten ndance logs s. Maximum m 50,000 re ecords. The FP Log Firm Ver • e firmware v version. The Press [C] back to the managem ment interfa ace. 26