Transcript
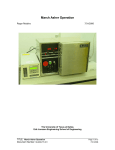
UNIVERSAL LASER SYSTEMS M25 Standard Operating Procedure
13 May 2014
1. Power up the LASER engraver.
a. The power switch is on the right side of the instrument, near the back.
b. After initialization, the LCD screen will display READY.
c. For the most reproducible results, allow the engraver to warm up for one hour.
2. Open CorelDRAW.
a. At the Get Started welcome screen, select New From Template.
i. At the popup, select My Templates from the left sidebar.
ii. Select the template Universal LASER M25.
3. Draw, open or import a drawing.
a. For vector engraving or cutting, all objects must be drawn with
“Hairline” line widths. All other line widths will result in raster
engraving or cutting, which is more time-consuming and can
result in jagged features or edges.
b. The LASER etcher allows for eight line color-defined power, speed and PPI settings per
drawing. One must use the colors in the color palette on the right side of the screen to apply
these different settings. See the user manual for the required CMYK color values (p.40).
4. Send your drawing to the LASER engraver.
a. Press Control + P or select File → Print from the tool bar.
i. The default printer should be the LASER cutter, labeled M CLASS. If not, select this from
the dropdown.
ii. Select Preferences.
1. From the Laser Settings tab, set (or Load) the Power, Speed and PPI for the line
color(s) you used, if necessary. To apply the settings, you must click the big Set button.
a. Maximum power is 25 Watts.
b. Maximum speed is 40 in./sec. (1.016 m/s).
c. PPI = pulses per inch.
d. You may Save your settings for later use if they differ from the default settings.
2. From the Engraving Field tab, verify that the field units are Metric and that the page
size is 609.6 mm wide and 304.8 mm high. If not, select the Maximum Page Size
button.
3. Select OK.
iii. Select Apply.
iv.Select OK to send the drawing data to the LASER cutter.
5. If you have not positioned your stock in the laser cutter, do it now and close the lid.
6. Start the LASER cutter.
a. Verify that your print job is queued in the laser cutter. The Power and Speed settings for your
line color will be displayed on the screen.
b. Verify that the lid is closed and press the green Start button.
c. Press the Pause button to stop the program in mid-run.
You should not have to change settings on the LASER itself. If you need to, contact Ryan or Nate.
