1
Connecting to the Home Broadband Network
The eMonitor is designed to transmit data in near-real time over the Internet to the eMonitor
Servers where data is analyzed and presented on the eMonitor Dashboard (described in the
eMonitor User Manual which is accessible on-line via the Support link of the eMonitor
Dashboard, or at http://docs.emonitor.us).
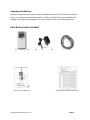
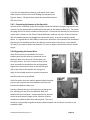
The current version of the eMonitor requires an Ethernet connection. Connect the included
green, 5-ft. Ethernet cable to the eMonitor Ethernet port on the bottom of the eMonitor Base
Unit and to your home network via an Ethernet jack located near the eMonitor, or directly to a
vacant port on your network router or switch.
If there is no nearby access to the home network, there are several choices. First, it is possible
to run a longer Ethernet cable (not included) to attach your router or switch.
Second, your Authorized Dealer can provide a WiFi or Powerline Ethernet Bridge. A Powerline
Bridge works as follows.
1. Use the Ethernet cable to connect the eMonitor Base Unit to the Ethernet port on one
end of the Bridge (i.e. one of two provided Ethernet Bridge units), and plug that Bridge
into the wall.
2. Connect an Ethernet cable between the Ethernet port on the second end of the Bridge
(i.e. the second unit provided) and your router or switch, and plug that unit into a power
outlet. The data will flow over the home power line between the two ends of the
Bridge. This should work out of the box with no further set-up required.
Refer to the manual that comes with the Ethernet Bridge if there are any issues. It is possible,
but not likely, that another electronic system in the home could conflict with the Ethernet
Bridge. NOTE: Avoid plugging a Powerline Ethernet Bridge into a power strip; particularly one
© 2010 Powerhouse Dynamics, Inc.
Page 21