1
90HJRKPPHWHU
0RGHO1
(6'&RQGXFWLYLW\7HVW.LW
0RGHO1
USER MANUAL
20
10
50
100
5
200
10
2
2
5
1
20
1
0.2
300
10
00
0.1
400
M
Ω
500
100
Ω
200
G
50
60
0
10
x
kΩ Ω
0
10
50
0
0.5
V
Bat.
5
MEGOHMMETER
OFF
ON
V
MODEL 1000N
TURN TO
LOCK
!
V
250
Ω
50 V
A
10 m
1
Ω
ax
k
m
Ω
m
50
- LINE
MΩ
A
Ω
G
V
0V
100V
MΩ GΩ
100V
2
MΩ GΩ M 5
0V 1000V
100
V
GΩ
MΩ
kΩ
50
Ω
+ EARTH
Ω
500V
GΩ MΩ G
0V
0V
12
0
- GUARD
/LPLWHG:DUUDQW\
The Megohmmeter Models 1000N and 1100N are warranted to the
owner for a period of 1 year from the date of original purchase against
®
defects in manufacture. This limited warranty is given by AEMC
Instruments, not by the distributor from whom it was purchased. This
warranty is void if the unit has been tampered with, abused or if the
®
defect is related to service not performed by AEMC Instruments.
®
What AEMC Instruments Will Do: If a malfunction occurs within the 1
year period, you may return the instrument to us for repair or
replacement free of charge, provided we have your REGISTRATION
®
CARD on file. AEMC Instruments will, at its option, repair or replace the
faulty material.
Note: If a registration card is not on file, we will require a dated
proof of purchase as well as your REGISTRATION CARD
accompanied by the defective material.
REGISTER ON LINE AT:
www.aemc.com
What You Must Do: First request a return authorization form by phone
®
or by fax from AEMC Instruments, then return the instrument along with
the signed authorization repair form. Return material, postage pre-paid
to:
®
Chauvin Arnoux , Inc.
®
d.b.a. AEMC Instruments
Service Department
15 Faraday Drive
Dover, NH 03820 USA
Tel:
(800) 945-2362 (X360)
(603) 749-6434 (X360)
Fax:
(603) 742-2346
Caution: To protect against in-transit loss, we recommend you insure
your returned material.
For full warranty coverage, please read the Warranty Card which is
affixed to the Warranty Registration Card. Please keep the Warranty
Card with your records.
-1-
Table of Contents
Warning ........................................................................................... 4
International Electrical Symbols ...................................................... 4
Megohmmeter Model 1000N ......................................................... 5
Receiving Your Shipment ......................................................... 5
Packaging ................................................................................. 5
Accessories and Replacement Parts ........................................ 5
Description ................................................................................ 6
Specifications ............................................................................ 7
Control and Connector Identification......................................... 9
Battery Replacement .............................................................. 10
AC Supply Module .................................................................. 10
Operation...................................................................................... 11
The Analog Scale.................................................................... 11
Preliminary Check ................................................................... 12
How to use the Push-to-Measure Button ................................ 12
Utilizing the Guard Terminal ................................................... 13
Voltage Measurements (Safety Check) .................................. 14
Audible Signal ......................................................................... 15
Precautions When Making DC Insulation Tests ..................... 15
Insulation Measurement - Connections .................................. 16
Insulation Resistance Measurements on Motors.................... 19
Understanding Insulation Testing ............................................. 21
Types of Tests......................................................................... 22
Spot Reading Test............................................................ 22
Ratio Testing .................................................................... 22
Dielectric Absorption Test................................................. 23
Step Voltage Test ............................................................. 24
Effects of Temperature ........................................................... 25
Interpreting the Results ........................................................... 26
-2-
ESD Conductivity Test Kit Megohmmeter Model 1100N ......... 27
Receiving Your Shipment ...................................................... 27
Packaging .............................................................................. 27
Accessories and Replacement Parts ...................................... 27
Description ............................................................................. 28
Specifications ......................................................................... 29
Battery Replacement ............................................................. 31
AC Supply Module ................................................................. 31
Resistance Testing of Conductive Flooring ........................... 32
Measurement Results ............................................................ 34
Maintenance ................................................................................... 35
Cleaning ................................................................................... 35
Repair and Calibration .................................................................. 36
Technical Assistance .................................................................... 36
-3-
Megohmmeter Model 1000N/1100N
:DUQLQJ
These safety warnings are provided to ensure the safety of
personnel and proper operation of the instrument.
WARNING: HIGH VOLTAGE PRESENT
• Do not attempt to perform any tests with these instruments
until you have read the instruction manual.
• Safety is the responsibility of the operator!
• Tests are to be carried out only on non-energized circuits!
Check for live circuits before making resistance
measurements (safety check).
• The Megohmmeters Models 1000N and 1100N are sources
of high voltage, as is the sample connected to them. All
persons performing or assisting in the tests must employ all
safety precautions to prevent electrical shock to themselves
and to others.
• AEMC considers the use of rubber gloves to be an excellent
safety practice even if the equipment is properly operated and
correctly grounded.
®
• When testing capacitance samples, make sure that they have
been properly discharged and that they are safe to touch.
Dielectric insulation samples should be short-circuited for at
least five times the amount of time they were energized.
• Megohmmeters should never be used in an explosive
environment.
• Use the leads supplied with the megohmmeters. If they are
defective or worn, replace before testing.
,QWHUQDWLRQDO(OHFWULFDO6\PEROV
This symbol signifies that the instrument is protected by double
or reinforced insulation. Use only specified replacement parts
when servicing the instrument.
This symbol signifies CAUTION! and requests that the user refer
to the user manual before using the instrument.
Risk of electric shock. The voltage at the parts marked with this
symbol may be dangerous.
-4-
Megohmmeter Model 1000N/1100N
0(*2+00(7(502'(/1
5HFHLYLQJ<RXU6KLSPHQW
Upon receiving your shipment, make sure that the contents are
consistent with the packing list. Notify your distributor of any missing
items. If the equipment appears to be damaged, file a claim immediately
with the carrier and notify your distributor at once, giving a detailed
description of any damage.
3DFNDJLQJ
The Megohmmeter Model 1000N (Cat. #185.100) is shipped with eight
1.5V “AA” batteries, two color-coded safety leads with insulated alligator
clips, a separate shielded lead, a separate insulated alligator clip, test
probe, one spare fuse, carrying case and instruction manual.
$FFHVVRULHVDQG5HSODFHPHQW3DUWV
AC power supply module with line cord and plug for
switch-selectable 110/220VAC at 47 to 400Hz .....................Cat. #100.142
Protective rubber case with handle ......................................Cat. #2980.02
Rugged plastic carrying case, 19 x 14 x 7" ..........................Cat. #2118.07
Fuse, set of five, 0.1A slow-blow for AC supply module ......Cat. #100.438
Fuse, set of one, 0.3A, for Model 1000 ................................Cat. #100.429
One test probe and one insulated alligator clip ....................Cat. #100.404
Replacement leads for Models 1000N/1100N/5000N..........Cat. #1017.23
7-pin shielded lead, 10 ft, for Models 1000N/5000N/5100 ...Cat. #2950.10
Replacement Leads for Model 1000
Coaxial shielded lead ...........................................................Cat. #100.439
Set of leads: one coaxial shielded lead, pair of
safety leads, alligator clip, and test probe ............................Cat. #100.482
-5-
Megohmmeter Model 1000N/1100N
'HVFULSWLRQ
®
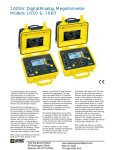
The AEMC Model 1000N (Cat. #185.100) is a portable, multi-range,
high-sensitivity megohmmeter capable of measuring a wide range of
insulation resistances from 1 kilohm to 1000 gigohms. The Model 1000N
has five test voltages of 50, 100, 250, 500 and 1000V. Each test voltage
setting has two resistance ranges: 1 to 1000MΩ and 1 to 1000GΩ.
In addition, the Model 1000N has a unique low insulation test range of 1
to 1000kΩ with a constant current of 1mA (maximum voltage of
1200VDC), which is useful for testing old or flooded installations. A
voltmeter (safety check) with a range of 0 to 600V is standard.
The Model 1000N may be powered by either AC or DC. DC power is
supplied by eight 1.5V alkaline “AA” batteries. As an option, an AC line
supply module and cord for 110/220VAC at 47 to 400Hz can be inserted
in the battery compartment.
An audible signal consisting of approximately ten beeps per minute is
present when the megohmmeter is ON, and serves as a time base for
tests of long duration. A green LED, when ON, indicates that the
batteries are good when the PUSH-TO-TEST button is depressed. It also
serves as a warning light when the instrument is in use, indicating that
the selected test voltage is present at the terminals.
-6-
Megohmmeter Model 1000N/1100N
6SHFLILFDWLRQV
INSULATION TESTS
DC Test Voltages:
50, 100, 250, 500, 1000V
Megohm Ranges:
For each test voltage two direct reading ranges:
1 to 1000MΩ
1 to 1000GΩ
Short Circuit Current: 5mA (max)
Accuracy: 5% of reading typical
15% of reading between 100 and 1000GΩ on the 50V range
Charging Time:
1000 MΩ range: 0.3 seconds/µF
1000 GΩ range: 4 seconds/µF
Discharging Time:
Automatic discharge when test button is released; 0.1 seconds/µF
Scale:
Two large overlapping scales: 4.7" (119 mm) for each range
Test Voltage Generation:
Solid state circuitry generating rated test voltage across the full range
RESISTANCE TESTS
Test Current: Constant 1mA DC
Kilohm Range: 1 to 1000kΩ (1MΩ)
Maximum Test Voltage: 1200VDC
Accuracy: 5% of reading typical
CONTINUITY TESTS
Resistance Range:
0.1 to 100Ω; 3Ω mid-scale
Accuracy: 6% of reading
Audible Tone: Continuous for continuity resistances under 200Ω
Fuse: High interrupting capacity (0.315A)
-7-
Megohmmeter Model 1000N/1100N
VOLTAGE TESTS (SAFETY CHECK)
Voltage Range: 0 to 600VAC/DC
Accuracy: 3% of full scale
GENERAL SPECIFICATIONS
Audible Test Signal:
Ten beeps per minute (constant tone for continuity resistance under
200Ω)
Power Supply:
Eight 1.5V “AA” alkaline batteries (NEDA 15A). Typical battery life: 350
one-minute tests; power consumed only when test button is depressed;
built-in battery check by green LED.
Option:
110/220V selectable, 47 to 400Hz AC supply module
Dielectric Test: 4000VAC, 50/60Hz, 1 minute
Fuse Protection:
0.3A high interrupting capacity fuse between line and guard terminals
Meter Movement: Rugged taut band suspension
Dimensions: 7.7 x 5.2 x 3.75" (196 x 132 x 95mm)
Weight: 2.2 lbs (1 kg)
Temperature Range: 23° to 122°F (-5° to +50°C)
Case: High impact gray polycarbonate
Terminals:
Color-coded safety terminals; guard terminal eliminates surface leakage
errors
-8-
Megohmmeter Model 1000N/1100N
&RQWURO&RQQHFWRU,GHQWLILFDWLRQ
20
10
50
100
5
2
1
20
2
300
200
100
1
200
1
50
0
0.5
400
0.2
10
00
0.1
Ω
G Ω
M
50
500
60
0
V
10
x
kΩ Ω
0
10
5
10
2
Bat.
5
MEGOHMMETER
OFF
ON
TURN TO
LOCK
3
!
100V
- LINE
k
A
Ω
Ω
A
10 m
1
Ω
ax
MΩ
50 V
m
50
V
m
MΩ GΩ M 25
100V
1000V
Ω
G
6
4
MΩ GΩ
V
GΩ
MΩ
kΩ
0V
100
+ EARTH
Ω
500V
5
GΩ MΩ G 0
Ω
7
V
250
0V
0V
0V
8
MODEL 1000N
V
12
0
5
- GUARD
1. Analog Measurement Scale
2. Battery Power Indicator:
Green lamp ON indicates batteries are good when PUSH-TO-TEST
button is depressed. Audible “beep” is also emitted approximately
every 6 seconds.
3. Mechanical Zero Adjust
4. Selection Switch
5. GUARD terminal (blue):
Used to minimize the effect of leakage current.
Also used for the 10Ω range.
6. LINE terminal (black):
Connects to the equipment to be tested.
7. EARTH terminal (green):
Connects to ground for insulation testing.
8. PUSH-TO-TEST button
Lock “ON” by turning button a quarter turn to the right.
OFF Position: Voltmeter position
ON Position: Test position with voltage present at outputs
-9-
Megohmmeter Model 1000N/1100N
%DWWHU\5HSODFHPHQW
The Model 1000N is powered by eight 1.5V “AA” batteries. To replace
the batteries, disconnect the instrument from any circuits, verify the
PUSH-TO-TEST button is in the OFF position and proceed as follows.
Access panel
screws
• Unscrew the four standard
screws on the four corners of
the battery pack and remove
the battery pack.
Access panel
• Replace the batteries, observing
the proper polarities.
• Replace the battery case, taking
care
not
to
pinch
the
connecting wire, and tighten
the four screws.
$&6XSSO\0RGXOH
The optional AC supply module (Cat. #100.142) provides power to the
Model 1000N at 110 or 220VAC. The AC power supply module is
designed to plug into the back portion of the instrument, directly
replacing the batteries. The module is protected by a 0.1A slow-blow
fuse.
Note: Cat. #100.142 is supplied with 110V US plug.
• Unscrew the four screws on the corners of the back panel battery
pack.
• Disconnect and remove the battery pack.
• Connect the AC supply module to the power supply connector.
• Place the AC supply module into the back of the instrument and
tighten the four corner screws, making sure not to pinch the wires of
the power supply connector.
• With the tip of a screwdriver, select the proper voltage with the
110/220 supply switch on the back panel of the AC supply module
• Plug AC supply cord into the appropriate voltage receptacle.
- 10 -
Megohmmeter Model 1000N/1100N
23(5$7,21
7KH$QDORJ6FDOH
Before taking any measurements, verify that the pointer is zeroed
correctly (AC scale "0"). If it is not, adjust with the mechanical zero
adjust screw.
The analog scale serves two functions. First, it indicates the actual
resistance of the insulating material under test (black scales). The top
scale is used for measurement on the MΩ and GΩ ranges. The bottom
half (MΩ) covers the range of 1MΩ to 1000MΩ, reading from left to right
The upper portion of the scale (GΩ) covers the range of 1GΩ to 1000GΩ
and reads left to right.
The center scale is used for the low insulation test range of 1kΩ to
1000kΩ, reading from right to left.
The bottom arc is an AC/DC voltmeter which is divided into 10-volt
increments. The voltmeter function is operable any time the PUSH-TOTEST button is out. The voltmeter detects the presence of voltage on the
equipment to be tested. (If voltage is detected, do not proceed with
the insulation test.)
The voltmeter function also indicates if, after completing insulation
testing, the sample under test has stored a dangerous capacitive charge.
The instrument discharges this capacitance internally and the needle will
drop accordingly. Disconnect the meter when the sample is discharged.
Warning:
Electrical equipment and cables may have sufficient capacitance to store
a dangerous charge from the instrument test current. For proper
discharge to occur the PUSH-TO-TEST button must be in the OFF
position with the sample connected between the EARTH and LINE
terminals.
On prolonged tests, the PUSH-TO-TEST button may be locked in the ON
position; care should be taken in this mode that no damage is done if the
instrument is left unattended.
- 11 -
Megohmmeter Model 1000N/1100N
3UHOLPLQDU\&KHFN
When the PUSH-TO-TEST button is in the OFF position, the pointer
should be on zero of the voltmeter scale, and on three of the GΩ scale. If
it is not, use the mechanical zero adjust on the front of the instrument.
• Detach the leads from the instrument.
• Press the PUSH-TO-TEST button into the ON position. The pointer
should deflect completely to the far right of the scale. The green neon
“Bat.” lamp should light up.
Note: Ensure that the “Bat.” light (green) does not go out at any point
during the testing. If the light does not illuminate, stop the test and
change the batteries before continuing.
Verify that NO VOLTAGE is present on the circuit to be tested.
+RZWR8VHWKH386+727(67%XWWRQ
OFF: PUSH-TO-TEST button is in the raised position. This is for
measurement of AC or DC voltages (safety check).
Note: Do not depress the PUSH-TO-TEST button if voltage is present.
ON: PUSH-TO-TEST button is depressed and held down for the duration
of the test. This is for insulation resistance tests.
LOCK-IN: PUSH-TO-TEST button is depressed and turned clockwise
90° to lock into position. This is for insulation resistance tests of long
duration such as the Time Resistance or Absorption Test.
- 12 -
Megohmmeter Model 1000N/1100N
Utilizing the Guard Terminal
Guard terminals are useful when measuring high resistance values and
for stabilizing readings.
When testing the insulation at the end of a cable, it is necessary to
eliminate the error from surface leakage which occurs, particularly at
high resistance values. The guard terminal provides a third terminal
within the path of the surface leakage “E”. Connect the instrument as
shown in Figure 3.
A
B
C
D
The guard terminal
is useful when
measureing very
high resistance
values.
Exposed
Surface
Conductor
to
Line (-)
Terminal
Insulation
to
Guard
Terminal
Shield
to
Earth (+)
Terminal
Figure 3
If there is no shield at “B”, use a copper wire wound several times around
the exposed surface “B”. (Note: If a shield is not available and you do not
make up a shield around
No Connection to
Guard Terminal
“B” and connect to the
guard terminal (-), the
B
i1
measurement will be
erroneous and lead to
confusion as to the
cable’s condition.)
Ry
If the guard terminal is
not connected at “B”, the
instrument measures the
current “I” flowing through
the insulation and a
surface leakage current
“i1”. See Figure 4.
Rz
To EARTH
Terminal
Rx
A
C
i
Figure 4
- 13 -
To LINE
Terminal
Megohmmeter Model 1000N/1100N
When the guard terminal is connected at “B”, the instrument measures
1
the current “I” and not the surface leakage current “i ”, which is not
included in the measurement. See Figure 5. This type of measurement
To Guard
will give the true value of
Terminal
the
resistance
“Rx”,
i1
B
providing the “Ry” and
“Rz” are not too low.
Ry
Rz
To EARTH
Terminal
Rx
A
C
To LINE
Terminal
i
Figure 5
9ROWDJH0HDVXUHPHQWV6DIHW\&KHFN
Insulation resistance tests are to be carried out on non-energized circuits
only. Voltage measurements are made as a safety precaution. If any
voltage is present do not proceed with insulation resistance testing. This
instrument can measure both AC or DC voltages. For voltage
measurements, proceed as follows:
• The PUSH-TO-TEST button should be in the OFF position.
• Connect the instrument with the voltage leads connected between the
Line (-) and Earth (+) terminals on the unit.
• Read the voltage directly on the voltage scale.
- LINE
+ EARTH
MEGOHMMETER
Figure 6
- 14 -
Megohmmeter Model 1000N/1100N
$XGLEOH6LJQDO
When the PUSH-TO-TEST button is in the ON or LOCK-IN position, an
audible signal will result. This signal consists of approximately one beep
every six seconds (ten beeps per minute). The signal can be used as a
time base for monitoring the duration of the test. On the MΩ and GΩ
ranges, the signal indicates that the instrument is in operation and that
the selected DC test voltage may be present on the terminals of the
instrument.
3UHFDXWLRQVZKHQ0DNLQJ'&,QVXODWLRQ7HVWV
• The equipment should be taken off the line sufficiently in advance to
permit it to cool to ambient temperature.
• When you are testing windings, they should be clean and dry; let
solvents and cleaners evaporate. Should foreign matter or wet
surfaces be present, erroneous readings may result. (A clean, dry
sample’s resistance may rise for 5 to 15 minutes, whereas a wet, dirty
one will stabilize quickly).
• Make sure that the equipment tested is properly discharged and
grounded before testing.
• When testing individual windings, connect all other windings (not
under test) together and ground to motor frame.
• When testing phases, be sure they are open to test each individually.
• After applying a test voltage, allow sufficient discharge time. As a rule,
discharge twice as long as tested.
Note: The instrument voltmeter will indicate the discharge voltage at the
terminals.
- 15 -
Megohmmeter Model 1000N/1100N
,QVXODWLRQ0HDVXUHPHQW&RQQHFWLRQV
Figure 7 shows the connections to measure the
insulation of one conductor
to the other conductors.
The cable should be
disconnected at both ends
to avoid leakage through
switchboards and panels.
Conductor under test
- LINE
GUARD
+ EARTH
MEGOHMMETER
Figure 7
Figures 8 and 9 show the connection for testing insulation from a supply
conductor to a ground (motor frame). The connection to the guard
terminal is used to eliminate the effects of surface leakage across
exposed insulation at one end of the cable. Refer to the section “Utilizing
the Guard Terminal.” The cable should be disconnected at both ends to
avoid leakage through switchboards and panels.
Conductor under test
- LINE
GUARD
+ EARTH
MEGOHMMETER
Figure 8
- 16 -
Megohmmeter Model 1000N/1100N
Conductor under test
GUARD
- LINE
+ EARTH
MEGOHMMETER
Figure 9
Figure 10 shows the connections to a transformer. Make sure that the
switches and/or circuit breakers on both sides are open. Check the high
voltage winding to ground, low voltage to ground, and the resistance
between them with no winding grounded.
Winding under test
Transformer
grounding lug
- LINE
GUARD
+ EARTH
MEGOHMMETER
Figure 10
- 17 -
Megohmmeter Model 1000N/1100N
Figure 11 shows the connections for measuring the insulation of a threephase line to ground by connecting the jumpers between phases. This
gives a reading of all conductors at once. If a load such as a motor,
heater, etc., is attached to the other end of the line, it will read the load
resistance to ground at the same time. By removing the jumpers,
readings can be made between the individual conductors and ground.
A
Jumper
B
Jumper
C
- LINE
GUARD
+ EARTH
MEGOHMMETER
Figure 11
- 18 -
Megohmmeter Model 1000N/1100N
,QVXODWLRQ5HVLVWDQFH0HDVXUHPHQWVRQ0RWRUV
Figure 12 shows reading the
resistance to ground of a threephase motor winding. Since the
three-phase motors are internally
connected, it is only necessary to
connect one lead to the motor lead
and the other lead to the motor
frame as shown.
- LINE
GUARD
+ EARTH
MEGOHMMETER
Figure 13 shows the
windings of a three-phase
motor separated. Sometimes this can be done at
the lead terminals while
other times the end bells
must be removed to get at
the lead wires of the coils.
By connecting the megohmmeter as shown, the phase
insulation resistance value
can now be determined.
Read between phases “A”
and “B”, then “B” and “C”,
then “C” and “A”.
Figure 12
C
A
B
- LINE
GUARD
+ EARTH
MEGOHMMETER
Figure 13
- 19 -
Megohmmeter Model 1000N/1100N
Figure 14 shows connections for testing insulation from a supply
conductor in a switchbox to ground (motor frame). An identical test may
be carried out from the motor starter.
Connect to one leg on
the motor side of the switch
Starter in
Grounded
motor frame
- LINE
GUARD
+ EARTH
MEGOHMMETER
Figure 14
- 20 -
Megohmmeter Model 1000N/1100N
8QGHUVWDQGLQJ,QVXODWLRQ7HVWLQJ
Insulation is the material between two points of different potential which,
through high resistivity, prevents the flow of current between those
points. Insulation failure is one of the most common problems associated
with electrical equipment breakdown.
A megohmmeter is an insulation resistance tester which is essentially a
high resistance ohmmeter (MΩ or greater) providing a high DC potential
(up to 5000V). This high potential causes low amounts of current to flow
through and over the insulation which is under test.
Many factors can cause insulation to fail: mechanical damage, moisture,
heat, foreign debris, corrosion, etc. As time passes, these factors
combine to permit excessive current to flow through insulation at points
where it would normally be blocked by the insulation resistance. Usually,
the resistance on degrading insulation will drop gradually, providing
plenty of warning. Other times it will drop suddenly, as when it is
immersed. With periodic resistance tests and good record keeping, it is
possible to get an accurate picture of the insulation condition. Insulation
resistance testing is intended to indicate not only if equipment is bad, but
also whether it is becoming bad.
Resistance of many types of insulation can vary greatly with
temperature. The resistance data obtained should be corrected to the
standard temperature for the class of equipment under test.
Please note that although we present information on test procedures,
values and recommended frequency of testing, the manufacturer of your
particular piece of equipment is the definitive source for testing
parameters and procedures. While we refer to commonly applied rules
and practices, every test will not be practical to each piece of electrical
equipment in your facility.
- 21 -
Megohmmeter Model 1000N/1100N
7\SHVRI7HVWV
SPOT READING TEST
Method
For this test, the megohmmeter is connected across the insulation of the
windings of the machine being tested. A test voltage is applied for a fixed
period of time, usually 60 seconds, and a reading is taken. The spot
reading test should only be carried out when the winding temperature is
1
above the dewpoint . The operator should note the winding temperature
so that the reading may be corrected to a base temperature of 20°C
(68°F).
Test Duration
To obtain comparable results, tests must be of the same duration.
Usually the reading is taken after 60 seconds.
Interpreting the Results
Proper interpretation of spot reading tests requires access to records of
results from previous spot reading tests. For conclusive results, only use
results from tests performed at the same test voltage for the same
amount of time under similar temperature and humidity conditions. These
readings are used to plot a curve of the history of insulation resistance. A
curve showing a downward trend usually indicates a loss of insulation
resistance due to unfavorable conditions such as humidity, dust
accumulation, etc. A very sharp drop indicates an insulation failure.
RATIO TESTING
In time resistance reading (dielectric absorption ratio), readings are taken
at 30 seconds and 60 seconds to obtain the dielectric absorption ratio.
Insulation resistance @ 60s
Insulation resistance @ 30s
= Dielectric Absorption Ratio (DAR)
This test is useful for increasing the accuracy of spot testing. In general,
a ratio of 1.25 to 2 or better should be required. (Below 1.1 is dangerous;
1.1 to 1.25 is questionable; 1.25 to 1.4 is fair; and 1.4 to 2 and above is
good.) A ratio below this indicates that repair is probably needed.
1
Dewpoint temperature is the temperature at which the moisture vapor in the air condenses as a liquid.
- 22 -
Megohmmeter Model 1000N/1100N
Remember that a DC insulation test may be used for acceptance testing,
but is more commonly used to check the gradual deterioration of
equipment over its lifetime. Consult your equipment manufacturer for
specific test or test voltage if not known.
Insulation resistance decreases with moisture, temperature and age, and
should be recorded over time at a given temperature and corrected.
DIELECTRIC ABSORPTION TEST
Method
This test is based on the comparison of absorption characteristics of
good insulation vs. the absorption characteristics of humid or otherwise
contaminated insulation. During the test, a test voltage is applied for an
extended period, usually 10 minutes. The operator takes a reading every
10 seconds for the first minute, and then every minute up to 10 minutes.
A curve is drawn showing the insulation resistance value versus time.
Test Duration
10 minutes
Interpreting the Results
If the results were plotted on a graph, the slope of the curve would
indicate the condition of the insulation under test. A good insulation will
show a continual increase in resistance for typically 10 to 15 minutes.
Contaminated, moist, or cracked insulation will produce a relatively flat
curve.
A ratio known as the polarization index can be obtained by dividing the
value from the 10-minute reading by the value from the one-minute
reading. This polarization index is indicative of the slope of the curve.
A low polarization index usually indicates excessive moisture and
contamination. On large motors or generators, values as high as 10 are
commonly expected.
Polarization index =
10-minute reading
1-minute reading
2
The IEEE Std 43-1974 lists the following minimum values for the
polarization index for AC and DC rotating machines:
Class A: 1.5
2
Class B: 2.0
Class C: 2.0
IEEE Std. 43-1974, - Recommended Practice for Testing Insulation Resistance of Rotating Machinery
- 23 -
Megohmmeter Model 1000N/1100N
STEP VOLTAGE TEST
Method
In this test, the operator applies two or more test voltages in steps. The
recommended ratio for the test voltage steps is 1 to 5. At each step, test
voltage should be applied for the same length of time, usually 60
seconds. The application of increased voltage creates electrical stresses
on internal insulation cracks. This can reveal aging and physical damage
even in relatively dry and clean insulation which would not have been
apparent at lower voltages.
Test Duration
A series of “steps,” each step lasting 60 seconds.
Interpreting the Results
Compare the readings taken at different voltage levels, looking for any
excessive reduction in insulation resistance values at the higher voltage
levels. Insulation that is thoroughly dry, clean, and without physical
damage should provide roughly the same resistance values despite
changes in test voltage levels. If resistance values decrease substantially
when tested at higher voltage levels, this should serve as a warning that
insulation quality may be deteriorating due to dirt, moisture, cracking,
aging, etc.
- 24 -
Megohmmeter Model 1000N/1100N
7KH(IIHFWVRI7HPSHUDWXUH
Insulation resistance measurements are changed by variations in
temperature of the insulation material. Typically, when the temperature
goes up, the insulation resistance will go down. Inversely, when the
temperature drops the insulation resistance will increase in value.
The best way to obtain consistent measurement results is to test the
insulation at a standard temperature, typically 68°F (20°C). If the
temperature of the material you are testing is either higher or lower than
68°F (20°C), refer to the temperature correction chart (see table). As a
general rule the insulation resistance value may be corrected by:
• Halving the resistance measurement value for every 10°C above the
base temperature of 68°F (20°C), or
• Doubling the resistance value for every 10°C below 68°F (20°C)
°C
°F
Multiplication
Factor
0
32
0.25
5
41
0.36
10
50
0.50
15
59
0.75
20
68
1.00
25
77
1.40
30
86
1.98
35
95
2.80
40
104
3.95
45
113
5.60
50
122
7.85
55
131
11.20
60
140
15.85
65
149
22.40
70
158
31.75
75
167
44.70
80
176
63.50
- 25 -
Megohmmeter Model 1000N/1100N
,QWHUSUHWLQJWKH5HVXOWV
Insulation resistance values are a function of the type of insulating
material. The actual value you read may vary greatly and is not as
important as the trends of the values over time. This is why the
resistance measurement must be taken in a greater context. Some other
factors to consider are:
Previous Testing Results
These are very important, since they will indicate the decline in the
insulation resistance over time. All new equipment should be tested and
documented to serve as a benchmark for future testing.
Careful Visual Inspection
By taking a very close look at the equipment you are testing it may be
possible to see cracks, excessive moisture, burn marks, etc., which may,
over time, cause catastrophic equipment failure.
Manufacturers’ Recommendations for Specific Equipment
The definitive source for information on a specific piece of equipment is
its manufacturer. Most manufacturers will provide basic information
about the insulation resistance which may be encountered during testing.
Comparisons with Similar Equipment
Similar equipment should provide similar insulation resistance values.
This would also remain true when testing cables. For three-phase
systems, it would be very useful to compare resistive values between the
phases.
By performing insulation resistance tests regularly and recording the test
results, it may be possible to predict failure by detecting a downward
trend in the resistance. Careful notations should be made as to
time/date, temperature, applications, etc.
The information contained in this manual is intended only as a guide to
acceptable procedure; it is not intended to be used as a test specification
for specific electrical equipment.
- 26 -
Megohmmeter Model 1000N/1100N
(6'&21'8&7,9,7<7(67.,70(*2+00(7(5
0RGHO1
5HFHLYLQJ<RXU6KLSPHQW
Upon receiving your shipment, check that the contents agree with the
packing slip. Notify your distributor at once of any shortages. If the
equipment appears to be damaged, file a claim immediately with your
carrier, and notify your distributor at once, giving a detailed description of
the damages. Save the damaged packing container to substantiate your
claims.
3DFNDJLQJ
ESD Conductivity Test Kit Megohmmeter Model 1100N (Cat. #2110.03)
®
is shipped with the AEMC Model 1000N megohmmeter, two floor
weights, 25-foot shielded lead, two safety leads, an alligator clip, test
probe, batteries, carrying case and instruction manual.
$FFHVVRULHV5HSODFHPHQWVIRU0RGHO1
1000V Megohmmeter ...........................................................Cat. #2110.02
Fuse, set of one, 0.3A ..........................................................Cat. #100.429
Floor weights, set of two.......................................................Cat. #2118.05
Carrying case........................................................................Cat. #2118.07
Set of 3 leads for 1100N.......................................................Cat. #2118.42
7-Pin shielded lead, 25-ft, for 1100N/5100...........................Cat. #2118.26
AC power supply module with line cord and plug for
switch-selectable 110/220VAC at 47 to 400Hz .....................Cat. #100.142
Fuse, set of five, 0.1A slow-blow for AC supply module ......Cat. #100.438
Replacement Leads for Model 1100
Set of leads: 25-ft shielded lead, two safety leads,
alligator clip and test probe...................................................Cat. #2118.06
- 27 -
Megohmmeter Model 1000N/1100N
'HVFULSWLRQ
ESD Conductivity Test Kit Megohmmeter Model 1100N Kit (Cat.
#2110.03) is designed specifically for floor resistance testing in areas
where electrostatic discharge is a problem, such as computer rooms,
electronic assembly rooms, hospitals, etc. The kit includes a 1000V
7
megohmmeter which features excellent resolution in the critical 10 to
9
12
10 Ω ranges, and fine resolution up to 10 Ω; 25-foot shielded lead; and
two floor weights - NFPA probes for consistent and repeatable contact
with the surface under test. The Model 1100N is useful for testing
effectiveness of conductive carpets, mats, tables, chairs, etc.
The Model 1000N is especially suited for this type of measurement, due
to high accuracy and resolution in the megohm and gigohm ranges.
Conductivity testers are important in any operation where the presence
of electrostatic discharge charges poses a danger to personnel or the
operation of electronic equipment.
There are several standards in the industry which may be referenced
when performing ESD testing of conductive flooring or tiles.
Standard 99
Reduction in Electrostatic Hazard
National Fire Protection Association
Batterymarch Park
Quincy, MA 02269
Standard F 150-72
Electrical Resistance of Conductive Resilient Flooring
American Society for Testing and Materials
1916 Race St.
Philadelphia, PA 19103
Standard #4 EOS/ESD
Standard for Protection of Electrostatic Discharge Susceptible Items
EOS/ESD Association inc.
201 Mill St.
Rome, NY 13440
Additional standards and specific recommendations for your application
may be obtained from equipment and flooring manufacturers.
- 28 -
Megohmmeter Model 1000N/1100N
6SHFLILFDWLRQV
INSULATION TESTS
DC Test Voltages:
50, 100, 250, 500, 1000V
Megohm Ranges:
For each test voltage two direct reading ranges:
6
9
1 to 1000MΩ (10 to 10 Ω)
9
12
1 to 1000GΩ (10 to 10 Ω)
Short Circuit Current: 5mA (max)
Accuracy: 5% of reading typical
Charging Time:
MΩ range: 0.3 seconds/µF
GΩ range: 4 seconds/µF
Discharging Time:
Automatic discharge when test button is released; 0.1 seconds/µF
Scale:
Two large overlapping scales: 4.7" (119mm) for each range
Test Voltage Generation:
Solid state circuitry generating rated test voltage across the full range
RESISTANCE TESTS
Test Current: Constant 1mA DC
Kilohm Range: 1 to 1000kΩ (1MΩ)
Maximum Test Voltage: 1200VDC
Accuracy: 5% of reading typical
CONTINUITY TESTS
Resistance Range: 0.1 to 100Ω; 3Ω mid-scale
Accuracy: 6% of reading
Audible Tone:
Continuous for continuity resistances under 200Ω
Fuse: High interrupting capacity (0.315A)
- 29 -
Megohmmeter Model 1000N/1100N
VOLTAGE TESTS (SAFETY CHECK)
Voltage Range: 0 to 600VAC/DC
Accuracy: 3% of full scale
GENERAL SPECIFICATIONS
Audible Test Signal:
Ten beeps per minute
(constant tone for continuity resistance under 200Ω)
Power Supply:
Eight 1.5V “AA” alkaline batteries (NEDA 15A). Typical battery life: 350
one-minute tests; power consumed only when test button is depressed;
built-in battery check by green LED
Option:
110/220V selectable, 47 to 400Hz AC supply module
Dielectric Test: 4000VAC, 50/60 Hz, 1 minute
Fuse Protection:
0.3A high interrupting capacity fuse between line and guard terminals
Meter Movement: Rugged taut band suspension
Dimensions: 7.7 x 5.2 x 3.75" (196 x 132 x 95mm)
Weight: 2.2 lbs (1 kg)
Temperature Range: 23° to 122°F (-5° to +50°C)
Case: High impact gray polycarbonate
Terminals:
Color-coded safety terminals; guard terminal eliminates surface leakage
errors
- 30 -
Megohmmeter Model 1000N/1100N
%DWWHU\5HSODFHPHQW
The Model 1100N is powered by eight 1.5V “AA” batteries. To replace
the batteries, disconnect the instrument from any circuits, verify the
PUSH-TO-TEST button is in the OFF position and proceed as follows:
• Unscrew the four standard screws on the four corners of the battery
pack and remove the battery pack.
• Replace the batteries, observing the proper polarities.
• Replace the battery case, taking care not to pinch the connecting wire,
and tighten the four screws.
Access panel
screws
Access panel
$&6XSSO\0RGXOH
The optional AC supply module (Cat. #100.142) provides power to the
Model 1100N at 110 or 220VAC. The AC power supply module is
designed to plug into the back portion of the instrument, directly
replacing the batteries. The module is protected by a 0.1A slow blow
fuse. Note: Cat. #100.142 is supplied with 110V US plug.
• Unscrew the four screws on the corners of the back panel battery
pack.
• Disconnect and remove the battery pack.
• Connect the AC supply module to the power supply connector.
• Place the AC supply module into the back of the instrument and
tighten the four corner screws, making sure not to pinch the wires of
the power supply connector.
• With the tip of a screwdriver, select the proper voltage with the
110/220 supply switch on the back panel of the AC supply module
• Plug AC supply cord into the appropriate voltage receptacle.
- 31 -
Megohmmeter Model 1000N/1100N
5HVLVWDQFH7HVWLQJRI&RQGXFWLYH)ORRULQJ
Background
There are numerous standards currently being developed for measuring
conductive flooring resistance under 100V and 500V. Actual resistance
4
10
values vary from specification to specification, but 10 to 10 Ω are
typical values. The following simplified procedure is an extrapolation from
the ASTM standard F 150-72. You may also refer to other sources, such
as the NFPA or EOS/ESD for alternate procedures.
General Notes
The floor sample should consist of a section covering 48 x 48 inches
(1.22 x 1.22 meters) in area.
When the sample is to be tested after installation, the test area
dimensions should not exceed a section of floor 20 x 20 feet (6 x 6
meters).
Conditioning
Whenever possible, condition the test area at least twenty-four hours at
73.4°F ±1.8°F (23°C ±1°C) and 50% ±5% RH and test under the same
conditions.
Test Procedure
1. For uninstalled panels: Place the dry specimen as described in
General Notes #1 on a nonconductive surface and lightly wipe with a
lint-free cloth to remove any foreign material prior to the placing of
the weights. Place the weights 2" (50.8 mm) in from an edge of the
sample and 36" (914.4 mm) apart. Apply 500 volts and take a
reading five seconds after application of the voltage.
2. For installed panels: Place the weights 36" (914.4 mm) apart and at
least 36" (914.4 mm) from any ground connections or grounded
object resting on the floor sample described in General Notes #2.
Apply 500 volts and take a reading five seconds after application of
the voltage.
3. Unless otherwise specified, make five measurements on each floor
section with the weights at different locations for each measurement
and record the value of two significant figures (see Figure 16).
- 32 -
Megohmmeter Model 1000N/1100N
4. Repeat the above procedure with the megohmmeter connected
between one weight and a known electrical ground (see Figure 17).
In the case of an uninstalled floor sample as in step #1, the ground
should be part of the sample panel. In the case of an installed floor
sample as in step #2, the ground should be a water pipe or known
electrical ground. Interchange the leads at the megohmmeter for
each measurement and report the average value obtained as the
value for that measurement.
5. When finished, turn off the megohmmeter and return it to the case.
Note: If the resistance changes with time during a measurement, the
value observed after about 5 seconds shall be considered to be the
measured value.
Table Top
Electrodes
36 "
- LINE
GUARD
+ EARTH
MEGOHMMETER
Figure 16
- 33 -
Megohmmeter Model 1000N/1100N
Table Top
Electrode
Groundable Points
GUARD
- LINE
+ EARTH
MEGOHMMETER
Figure 17
0HDVXUHPHQW5HVXOWV
Specific measurement results for each individual application of the Model
1100N are difficult to determine. The definitive information on which
voltage level to apply, as well as which measurement values will indicate
a proper resistivity, should be determined by the manufacturer of the
conductive flooring or tiles.
The following values (based on EOS/ESD, S4.1-1990) may serve as a
minimum resistivity level which has been proven to provide an
appropriate level of protection in the manufacturing environment.
Resistance from test electrode to a groundable point (Figure 17):
Measured value: ≤ 10,000 megohms (10 gigohms)
Resistance from electrode to electrode (Figure 16):
Measured value: ≥ 1 megohm
- 34 -
Megohmmeter Model 1000N/1100N
0DLQWHQDQFH
Warning:
• For maintenance use only original factory replacement parts.
• To avoid electrical shock, do not attempt to perform any servicing
unless you are qualified to do so.
• Do not perform any service while the Megohmmeter Model
1000N/1100N is on any circuit.
• To avoid electrical shock and/or damage to the instrument, do not let
water or other foreign agents into the electronic module.
Cleaning:
The megohmmeter may be gently cleaned with a soft cloth, soap and
water. Dry immediately after cleaning. Avoid water penetration into the
electronic module.
Make sure the megohmmeter and all leads are dry before further use.
- 35 -
Megohmmeter Model 1000N/1100N
5HSDLUDQG&DOLEUDWLRQ
To guarantee that your instrument complies with the factory
specifications, we recommend that the megohmmeter be submitted to
our factory service center at one-year intervals for recalibration, or as
required by other standards.
For instrument repair and calibration:
Call (800) 945-2362 (X360) • (603) 749-6434 • Fax: (603) 742-2346
®
Chauvin Arnoux , Inc.
®
d.b.a. AEMC Instruments
15 Faraday Drive
Dover, NH 03820 USA
(Or contact your authorized distributor.)
Costs for repair, standard calibration, and calibration traceable to N.I.S.T.
are available.
Note: All customers must call for a CSA# before returning any
instrument.
7HFKQLFDODQG6DOHV$VVLVWDQFH
If you are experiencing any technical problems, or require any assistance
with the proper use or application of this instrument, please call our
technical hotline:
®
Chauvin Arnoux , Inc.
®
d.b.a. AEMC Instruments
Phone: (800) 343-1391
(508) 698-2115
Fax:
(508) 698-2118
www.aemc.com
- 36 -
®
®
Chauvin Arnoux , Inc. d.b.a AEMC Instruments
15 Faraday Drive • Dover, NH 03820, USA
www.aemc.com
99-MAN 100020 v7 01/02