1
dCS Vivaldi Clock User Manual
USING THE dCS VIVALDI CLOCK
Software Issue 1.2x
April 2015
FOR THE FIRST TIME
Congratulations on purchasing your dCS Vivaldi Clock.
Before using your unit, please read this section and the Step by Step Guide. This will enable you to
set the unit up quickly and safely with your hi-fi system.
From time to time, dCS will release updated software on CD that you can install yourself using the
Update feature. Please check our web-site occasionally to see if new Vivaldi software is available, or
consult your dealer.
What’s in the box?
Check that the box contains the following items:
•
•
•
•
•
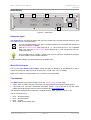
dCS Vivaldi Clock
Manual and Menu / Setup Guide
Power cable
2x BNC cables
Spare fuses
Notify your dealer as soon as possible if anything is missing or damaged. We suggest that you retain
the original packaging for possible future use. If this is not possible, replacement packaging can be
ordered from dCS or our distributors. Details can be found on our web site at www.dcsltd.co.uk.
A dCS Premium remote control is supplied with the Vivaldi DAC.
Positioning the unit
For best sound quality, the units in the Vivaldi range are designed to be mounted on separate shelves
of a rack, although they may be stacked directly on top of each other if this is absolutely necessary.
Place each unit on a firm, vibration free base, allowing convenient connection to the other parts of
your system. To prevent overheating, we recommend that you leave some free space around the unit
to allow for ventilation.
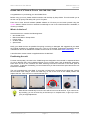
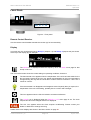
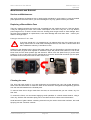
The unit is supplied with 4 feet fitted. If you prefer a 3-feet layout, unscrew the two back feet, remove
the two black cores using a 2.5mm A/F Allen key, fit one of the cores in the middle position and
replace the foot. Take care not to cross-thread the foot!
With all feet screwed fully home, the unit will sit level on a flat surface. If you need to do
any levelling, you can unscrew any of the feet up to 3 complete turns, to give up to 3mm
(1/8”) of height adjustment.
Vivaldi Clock Manual v1_2x
Page 4
English version